
If you love comfortable and stylish clothing, then a knit romper is the perfect addition to your wardrobe. A romper is a one-piece garment that combines the comfort of a casual dress with the convenience of a jumpsuit. Whether you want to lounge around the house or head out for a day of adventure, a knit romper is the go-to choice for both style and comfort.
Creating your own knit romper allows you to customize the fit, fabric, and design to suit your personal style. With a sewing pattern, you can easily make a romper that is tailored to your specific measurements. Plus, sewing your own romper gives you the opportunity to choose from a wide range of fabrics, from cozy jersey knits to lightweight cotton blends. The possibilities are endless!
Not only is sewing a knit romper a fun and rewarding project, but it also allows you to save money compared to buying a ready-made romper. By purchasing a sewing pattern and sourcing your own fabric, you can create a high-quality garment at a fraction of the cost. Whether you’re a sewing enthusiast or a beginner looking to enhance your skills, a knit romper sewing project is a great way to unleash your creativity and add a versatile piece to your wardrobe.
What is a knit romper?
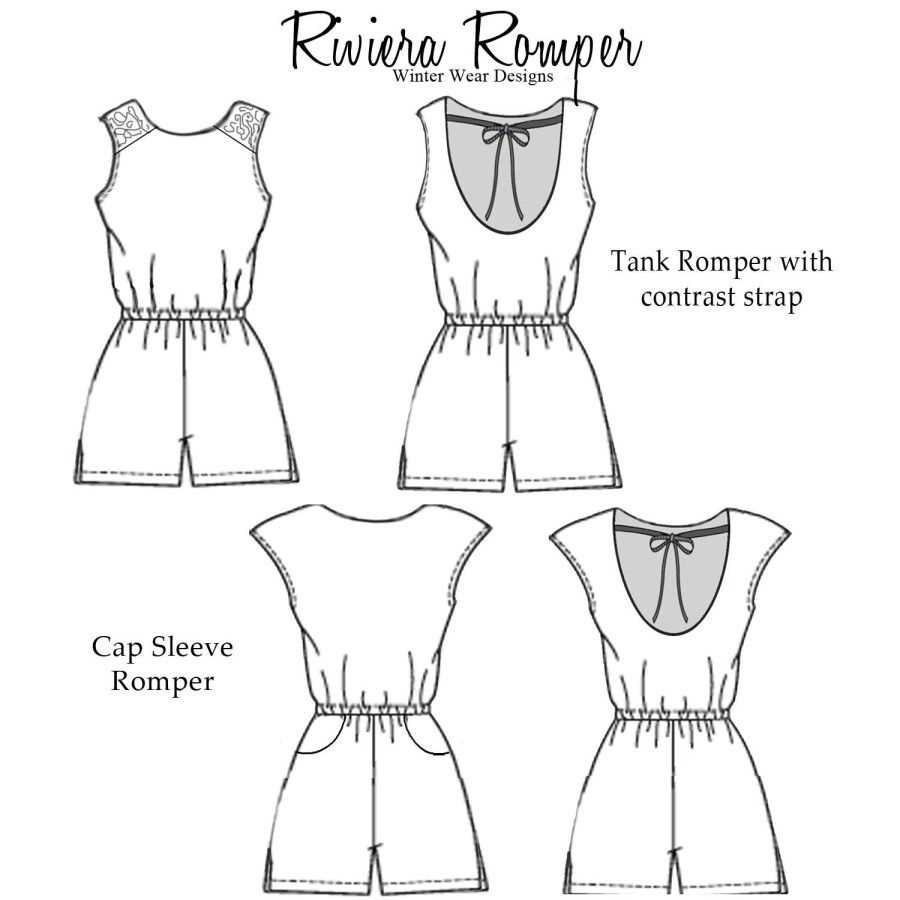
A knit romper is a one-piece garment that combines a top and shorts into a single piece. It is typically made from a stretchy knit fabric, which allows for a comfortable and flexible fit. Rompers are popular in casual and summer wear, as they offer a stylish and easy-to-wear option for women and children.
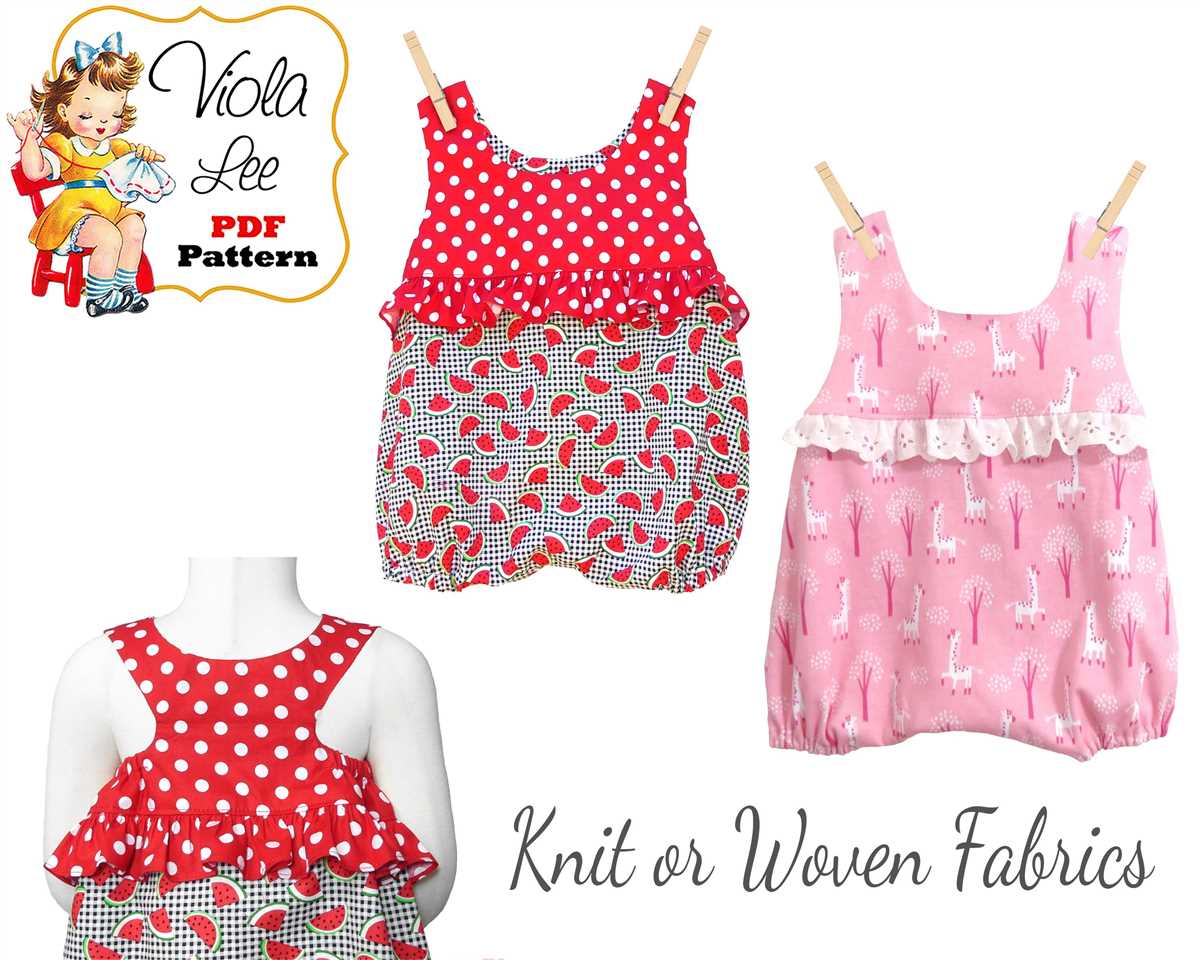
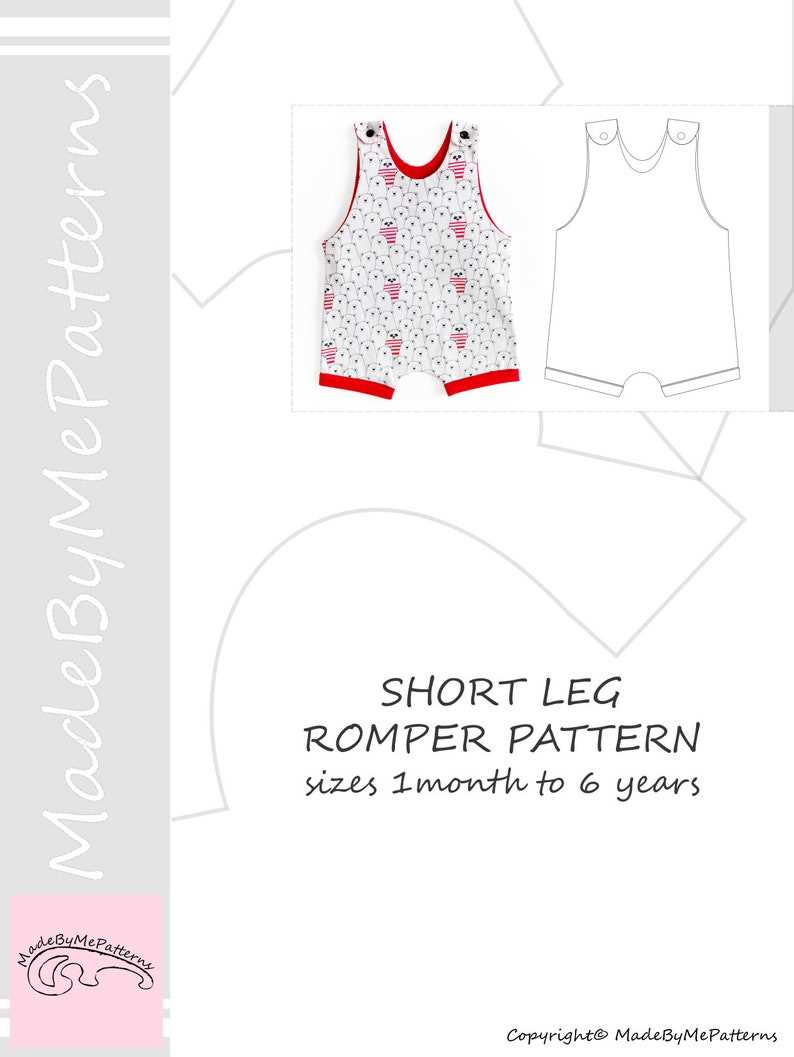
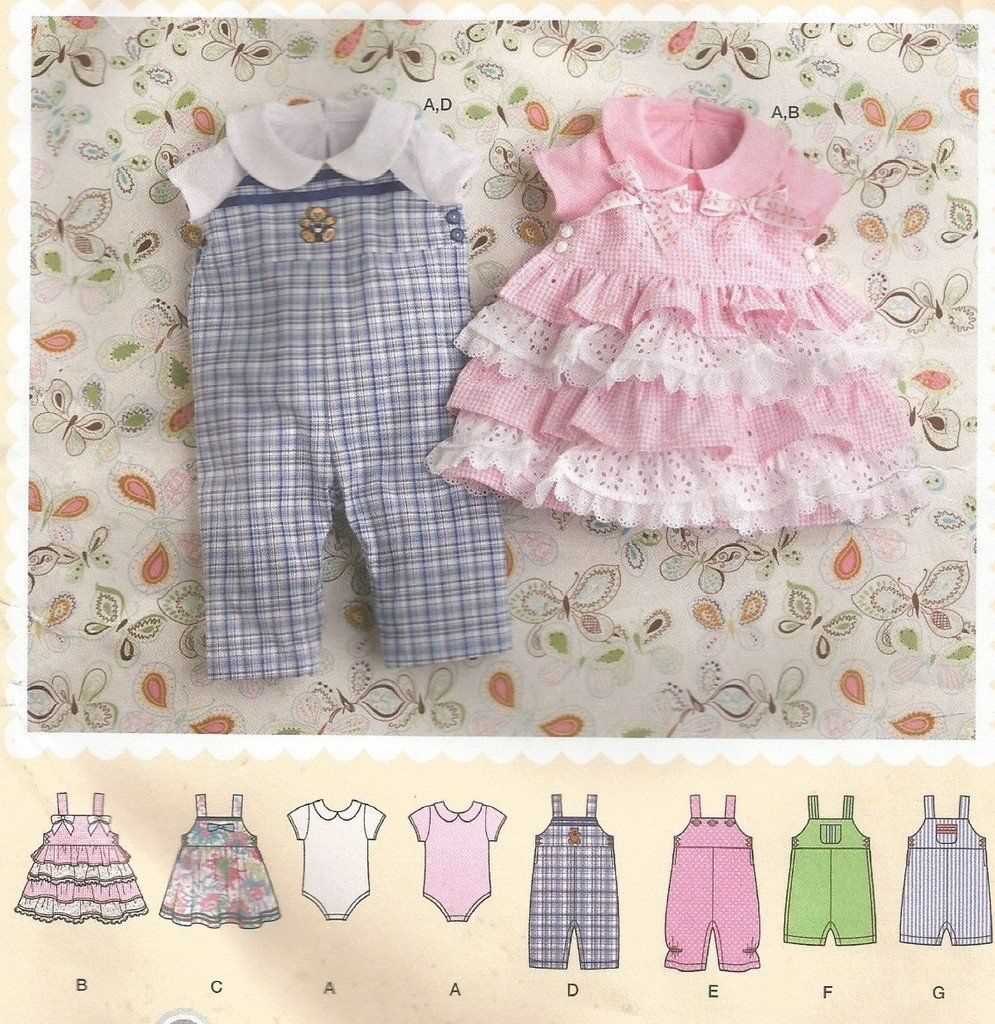
Knit rompers often feature a fitted bodice that extends down to the waist, where it meets the attached shorts. The shorts portion can vary in length, ranging from very short to just above the knee, and they can be loose or fitted. The overall design of a knit romper can also vary, with options such as straps or sleeves, a V-neck or round neck, and different types of closures like buttons or snaps.
One of the advantages of a knit romper is its versatility. It can be dressed up or down, depending on the occasion and the accessories chosen. For a casual look, it can be paired with sneakers or sandals, while for a more dressed-up look, it can be styled with heels and statement jewelry. Additionally, because of their stretchy nature, knit rompers are comfortable to wear and allow for ease of movement, making them ideal for active lifestyles.
Knit rompers are also popular sewing projects, as they are relatively simple to make and can be customized to fit individual preferences. There are numerous knit romper sewing patterns available, ranging from beginner-friendly options to more advanced designs. These patterns usually include step-by-step instructions and cutting layouts, making it easier for sewers to create their own unique garments.
Why should you sew your own romper?
Sewing your own romper can be a great way to express your personal style and create a unique garment that fits you perfectly. When you sew your own romper, you have the freedom to choose the fabric, color, and design that you love, ensuring that you will have a one-of-a-kind piece that stands out.
Another reason to sew your own romper is the satisfaction of creating something with your own hands. Sewing can be a rewarding and fulfilling hobby, and being able to wear something that you made yourself can give you a sense of pride and accomplishment.
Additionally, sewing your own romper allows you to control the quality of the garment. You can select high-quality materials and pay attention to the construction details, ensuring that your romper will be durable and long-lasting. This can be especially important when it comes to complicated or delicate fabrics, as you can take the time and care to handle them properly.
Furthermore, sewing your own romper can be a more budget-friendly option compared to buying one from a store. While the initial investment in sewing supplies and equipment may seem costly, in the long run, you can save money by making your own clothes. Additionally, you can make multiple rompers for the cost of one store-bought piece, allowing you to expand your wardrobe without breaking the bank.
In conclusion, sewing your own romper offers a multitude of advantages, including the ability to express your personal style, the satisfaction of creating something yourself, control over the quality of the garment, and potential cost savings. If you enjoy sewing or want to try your hand at a new hobby, sewing your own romper can be a fun and rewarding project.
Choosing the right knit fabric
When it comes to sewing a knit romper, choosing the right fabric is crucial for achieving the desired fit and comfort. Knit fabrics are known for their stretchiness and ability to conform to the body, which makes them ideal for creating a garment like a romper that requires ease of movement. However, not all knit fabrics are created equal, and it’s important to consider a few key factors when selecting the fabric for your project.
Stretch and recovery
One of the first things to consider when choosing a knit fabric for your romper is its stretch and recovery. The fabric should have enough stretch to allow for comfortable movement, but it should also have good recovery so that it doesn’t lose its shape over time. A knit fabric with poor recovery may become stretched out and saggy, resulting in an ill-fitting garment. Consider fabrics with a good amount of stretch and high spandex content for optimal recovery.
Weight and drape
The weight and drape of the knit fabric are also important factors to consider. A lightweight knit fabric with a drapey hand will create a flowy and effortless look for your romper. On the other hand, a heavier knit fabric with more structure can give your romper a more structured and polished appearance. Consider the desired style and silhouette of your romper when choosing the weight and drape of the fabric.
Fiber content
Another factor to consider is the fiber content of the knit fabric. Different fibers have different properties and characteristics that can affect the overall quality and feel of your romper. Natural fibers like cotton and bamboo are breathable and soft, making them great choices for a comfortable summer romper. Synthetic fibers like polyester and nylon, on the other hand, are more durable and resistant to wrinkles, which can be beneficial for a romper that gets a lot of wear and needs to maintain its shape. Consider the desired properties and care requirements of the fabric when choosing the fiber content.
Prints and patterns
Lastly, consider the prints and patterns available in knit fabrics. Knits come in a wide range of prints and patterns, from classic stripes to bold florals, allowing you to express your personal style and create a unique romper. Keep in mind that the scale of the print or pattern should be proportionate to the size of the garment and the desired effect you want to achieve. Consider the print or pattern that will complement your design and add interest to your romper.
In conclusion, choosing the right knit fabric for your romper sewing project involves considering factors such as stretch and recovery, weight and drape, fiber content, and prints and patterns. Taking these factors into account will help you select a fabric that not only looks great but also provides the comfort and functionality you desire in a knit romper. Happy sewing!
Tools and materials you will need
Before you start sewing your knit romper, make sure you have all the necessary tools and materials. Here is a list of what you will need:
Tools

- Sewing machine
- Sewing needles
- Pins
- Scissors
- Tape measure
- Iron and ironing board
- Marking tools (such as tailor’s chalk or fabric markers)
- Ruler or straight edge
- Seam ripper
Materials
- Knit fabric (amount will depend on the size of the romper and the fabric width)
- Elastic (for the waistband and leg openings)
- Thread (in a matching or contrasting color)
- Snap fasteners or buttons (for the closure)
- Optional: decorative trim or embellishments
Having these tools and materials ready will ensure that you have a smooth sewing process and result in a well-made and professional-looking knit romper.
Printing and preparing the pattern
Before you can start sewing your knit romper, you need to print and prepare the pattern. Here are the steps you should follow:
Step 1: Check your printer settings
Make sure your printer is set to print at actual size or 100% scale. This is important to ensure that the pattern pieces will be the correct size when you cut them out.
Step 2: Print the pattern
Print the pattern files onto the appropriate paper. The pattern files are usually provided in PDF format, which can be easily opened and printed using Adobe Acrobat Reader or any other PDF viewer.
Step 3: Assemble the pattern
Once you have printed all the pattern files, you will need to carefully cut them along the indicated lines and then tape or glue them together. The pattern will typically include detailed instructions on how to assemble the pieces.
Step 4: Cut out the pattern pieces
After you have assembled the pattern, you can now trace or cut out the individual pattern pieces onto your fabric. Make sure to follow the cutting lines and markings provided on the pattern.
By following these steps, you will have successfully printed and prepared the pattern for your knit romper sewing project. Now you can move on to the exciting part of sewing the romper together!
Cutting out the fabric
When sewing a knit romper, one of the first steps is to cut out the fabric. This is an important step as it determines the shape and fit of the final garment. It is important to follow the pattern instructions and use the correct size for the romper you are making.
Take the fabric and lay it out on a flat surface. Smooth out any wrinkles or creases to ensure accurate cutting. It is recommended to use fabric scissors for cutting knit fabric, as they are sharp and will not snag or pull the fabric. Position the pattern pieces on the fabric according to the layout guide provided in the pattern instructions.
Use pins to secure the pattern pieces in place, making sure they are aligned properly. Carefully cut along the edges of the pattern pieces, following the cutting lines precisely. Take your time and be careful not to cut into the seam allowance.
If there are any notches or markings on the pattern pieces, transfer them onto the fabric using tailor’s chalk or a fabric marker. This will help with the assembly process later on. Once all the pieces are cut, remove the pins and double-check that you have cut all the pieces needed for the romper, including any facings or linings.
Now that the fabric pieces are cut, you are ready to start sewing the knit romper according to the pattern instructions. Make sure to keep the fabric pieces organized and labeled for easy identification during the sewing process. Taking the time to cut the fabric accurately will result in a well-fitting and professionally finished knit romper.
Sewing the main body of the romper

When sewing a knit romper, the first step is to gather all the necessary materials and tools. This includes the sewing machine, thread, sewing needles, scissors, and the chosen knit fabric. Once everything is prepared, it’s time to start sewing the main body of the romper.
The first thing to do is to lay out the fabric and cut out the pattern pieces according to the chosen size. This will include the front and back pieces, as well as any additional pieces needed for pockets, closures, or design details. It is important to cut accurately and follow the pattern instructions closely to ensure proper fitting and alignment of the pieces.
1. Sewing the shoulder seams
With the pattern pieces cut out, the next step is to sew the shoulder seams together. Place the front and back pieces right sides together, aligning the shoulder seams, and pin them in place. Using a stretch stitch or a narrow zigzag stitch, sew the shoulder seams together, making sure to reinforce the stitching at the beginning and end for added durability.
2. Attaching the sleeves (if applicable)
If the romper has sleeves, this is the time to attach them. Lay the sleeves right sides together with the corresponding armholes, aligning the raw edges. Pin in place and sew using a stretch stitch or a narrow zigzag stitch. Remember to reinforce the stitching at the beginning and end.
3. Sewing the side seams

With the shoulder seams and sleeves (if applicable) attached, it’s time to sew the side seams. Lay the front and back pieces right sides together, aligning the side seams, and pin them in place. Sew the side seams using a stretch stitch or a narrow zigzag stitch, reinforcing the stitching at the beginning and end.
These are the basic steps for sewing the main body of a knit romper. The specific instructions may vary depending on the pattern chosen, so it is important to refer to the pattern instructions for detailed guidance and any additional steps or modifications required.
Creating the straps
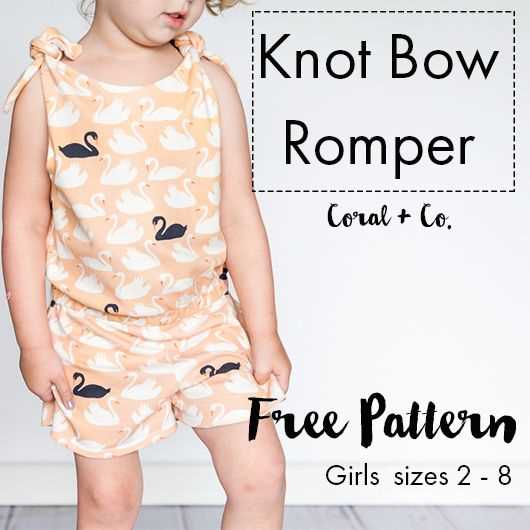
When making a knit romper, one important step is creating the straps. The straps are essential for holding the romper in place and providing support. There are several methods for creating the straps, depending on the desired style and level of difficulty.
One common method for creating the straps is to use self-fabric strips. This involves cutting strips of the same fabric as the romper and folding them in half lengthwise. The folded strip is then stitched along the long edge, creating a tube. Once the tube is turned right-side out, it can be pressed flat and topstitched for a finished look. The length of the fabric strip will depend on the desired strap length and the wearer’s preference.
Another option is to use pre-made elastic straps. These can be found in various widths and colors at fabric stores or online. The elastic straps are typically sewn into the garment by folding the raw edge of the strap under and stitching it in place. This method provides stretch and flexibility, making it a popular choice for comfortable and adjustable straps.
If you prefer a more decorative look, you can also embellish the straps with lace, ribbon, or trim. This can be done by attaching the decorative element to the fabric strip before sewing it into a tube. The added embellishment can give the romper a unique and personalized touch.
When creating the straps, it is important to consider the weight and stretch of the fabric. Knit fabric is known for its stretch, so it is important to account for this when cutting and sewing the straps. The straps should be comfortable to wear and provide enough support to hold the romper in place without being too tight or restrictive.
Attaching the straps to the main body
When sewing a knit romper, attaching the straps to the main body is an important step that ensures a proper fit and comfort for the wearer. The straps not only provide support, but also help to keep the romper in place.
To attach the straps, start by determining the desired length. Measure and mark the appropriate length on the main body of the romper. Then, fold the strap in half lengthwise and align one end with the marked point on the romper. Pin the strap in place, making sure it is centered and straight.
Next, sew the strap to the romper using a stretch stitch or a zigzag stitch. Sew along the folded edge of the strap, making sure to backstitch at the beginning and end to secure the stitching. Repeat this process for the other end of the strap, ensuring that it is placed symmetrically on the opposite side of the romper.
After attaching the straps, it is important to test their length and adjust if necessary. If the straps are too loose or too tight, they can be easily loosened or tightened by unpicking the stitching at one end and repositioning it as needed. Once the desired length is achieved, sew the strap in place again to secure the adjustment.
When attaching the straps to a knit romper, it is important to use a stretch stitch or a zigzag stitch to allow for the natural stretch and movement of the fabric. This will ensure that the straps stay in place and provide a comfortable fit for the wearer.
Adding the finishing touches
Once you have finished sewing your knit romper, it’s time to add those final details that will really make it stand out. These finishing touches can include things like topstitching, buttonholes, and adding any necessary closures.
Topstitching: To give your romper a professional finish, consider adding topstitching along the seams. This will not only add strength to the garment but also provide a decorative element. Choose a thread color that complements your fabric and use a straight stitch or a decorative stitch to sew along the edges of the seams.
Buttonholes: If your romper has buttons as closures, you’ll need to create buttonholes. To do this, mark the position of the buttonholes on the fabric and use a buttonhole foot on your sewing machine to sew the buttonhole. Make sure to test the buttonhole first on a scrap piece of fabric to ensure the size and length are correct.
Closures: Depending on the style of your romper, you may need to add additional closures such as snaps or hooks. These can be sewn onto the fabric using a needle and thread, or you can use a sewing machine if desired. Make sure the closures are securely attached to ensure the romper stays in place when worn.
Final Pressing: Before your knit romper is ready to wear, give it a final press with an iron. This will help smooth out any wrinkles and ensure the garment looks polished and well-made.
By adding these finishing touches, you can take your knit romper from homemade to professional-looking. Don’t rush through this step, as it can make a big difference in the final result of your sewing project!
Tips for a Professional Finish

When sewing a knit romper, there are a few tips and tricks that can help you achieve a professional finish. These tips will ensure that your finished garment looks polished and well-made.
1. Use the right fabric: Choosing the right fabric is crucial when it comes to sewing a knit romper. Look for a fabric with a good amount of stretch and recovery, such as a jersey or interlock knit. This will ensure that your romper has the right amount of drape and will retain its shape after wearing and washing.
2. Invest in quality sewing tools: Having the right tools can make a big difference in the quality of your finished garment. Invest in good quality sewing machine needles designed for knit fabrics, as well as a walking foot or a ballpoint needle for your machine. These tools will help prevent skipped stitches and ensure smooth sewing.
3. Use a stretch stitch: When sewing a knit romper, it’s important to use a stretch stitch to allow for the natural stretch of the fabric. A zigzag stitch or a stretch stitch on your machine will work well for this purpose. Be sure to test the stitch on a scrap of fabric to ensure that it provides enough stretch and doesn’t cause any puckering.
4. Finish the raw edges: To give your romper a professional look, be sure to finish the raw edges of the fabric. You can use a serger to serge the edges, or use a zigzag stitch along the edge of the fabric to prevent fraying. Alternatively, you can use a binding or facing to finish the edges, depending on the design of your romper.
5. Press as you go: Pressing your seams as you sew can make a big difference in the final result. Use a steam iron and press your seams flat to ensure that they lay nice and flat. This will give your romper a clean, professional finish.
6. Pay attention to fit: Lastly, paying attention to fit is key to achieving a professional finish. Take the time to make any necessary adjustments to the pattern before cutting your fabric, and make fitting adjustments as you sew. This will ensure that your romper fits well and looks well-made.
Final Thoughts and Variations
In conclusion, a knit romper can be a versatile and comfortable outfit for babies and toddlers. With the right sewing pattern and fabric choice, you can create a stylish and practical garment that will keep your little one cozy and cute.
When choosing a sewing pattern, consider the level of difficulty and your skill level to ensure successful results. Beginners may want to start with a simple and straightforward pattern, while more experienced sewers can experiment with more intricate designs.
Remember to select a fabric that is suitable for knit garments, such as jersey or interlock, to ensure proper stretch and recovery. You can also play around with different colors and prints to customize the romper to your liking.
Additionally, you can modify the pattern to create different variations. For example, you can add ruffles or lace trim to the neckline or sleeves for a feminine touch. You can also experiment with different closure options, such as snaps or buttons, to make the romper easier to put on and take off.
Finally, don’t forget to take accurate measurements of your child and adjust the pattern accordingly for the best fit. Babies and toddlers grow quickly, so it’s important to regularly update the size of the romper to ensure a comfortable and well-fitting garment.
- Key takeaways:
- Choose a suitable sewing pattern and fabric for knit rompers.
- Consider your skill level and the level of difficulty of the pattern.
- Experiment with different variations, such as adding ruffles or changing closures.
- Take accurate measurements and adjust the pattern for the best fit.
Q&A:
What is a knit romper sewing pattern?
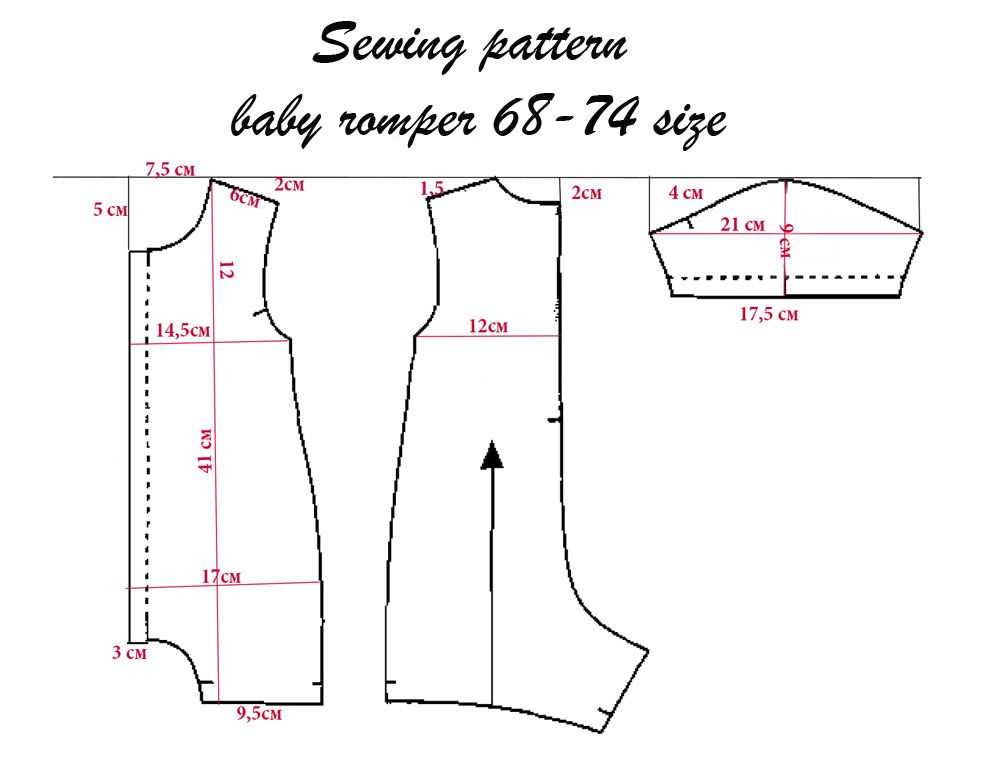
A knit romper sewing pattern is a set of instructions and templates that guide you on how to create a romper using knit fabric. It includes measurements, cutting layouts, and step-by-step instructions for assembling the romper.
Where can I find a knit romper sewing pattern?
You can find knit romper sewing patterns at fabric stores, online sewing pattern websites, and sewing magazines. You can also find free or paid patterns on websites and blogs dedicated to sewing and crafting.
Can I use any type of knit fabric for a romper?
While you can technically use any type of knit fabric for a romper, it is recommended to choose fabrics with good stretch and recovery. Fabrics like jersey, interlock, French terry, and ponte knit are commonly used for rompers as they provide both comfort and durability.
Are knit rompers suitable for beginners?
Knit rompers can be a bit more challenging for beginners due to the stretchiness of the fabric. However, with proper guidance and practice, beginners can successfully sew knit rompers. It is advisable to start with simpler patterns and work your way up to more complex ones as you gain more experience.
Are there any special techniques for sewing knit rompers?
When sewing knit rompers, it is important to use a stretch stitch or a zigzag stitch to allow the seams to stretch with the fabric. It is also recommended to use a walking foot or a stretch needle to prevent skipped stitches. Additionally, using a serger or an overlock machine can help achieve professional-looking finishes on the seams.