
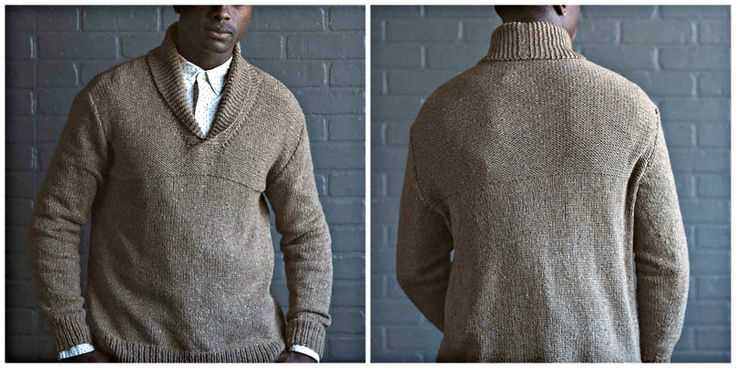
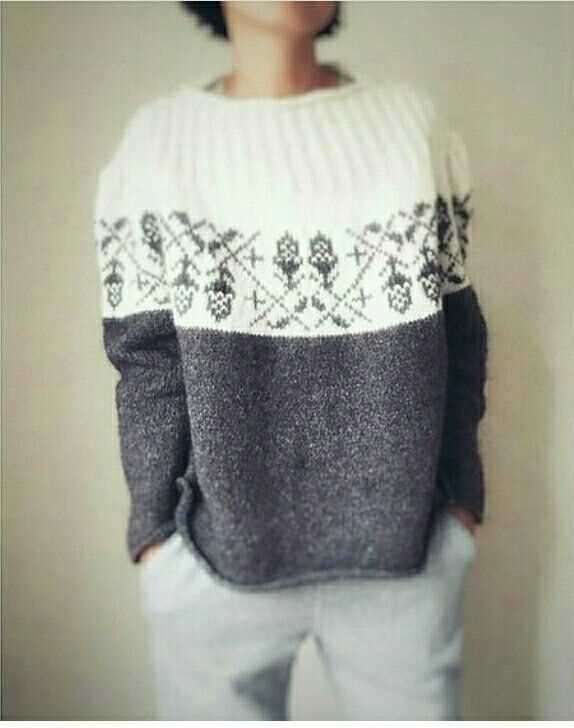
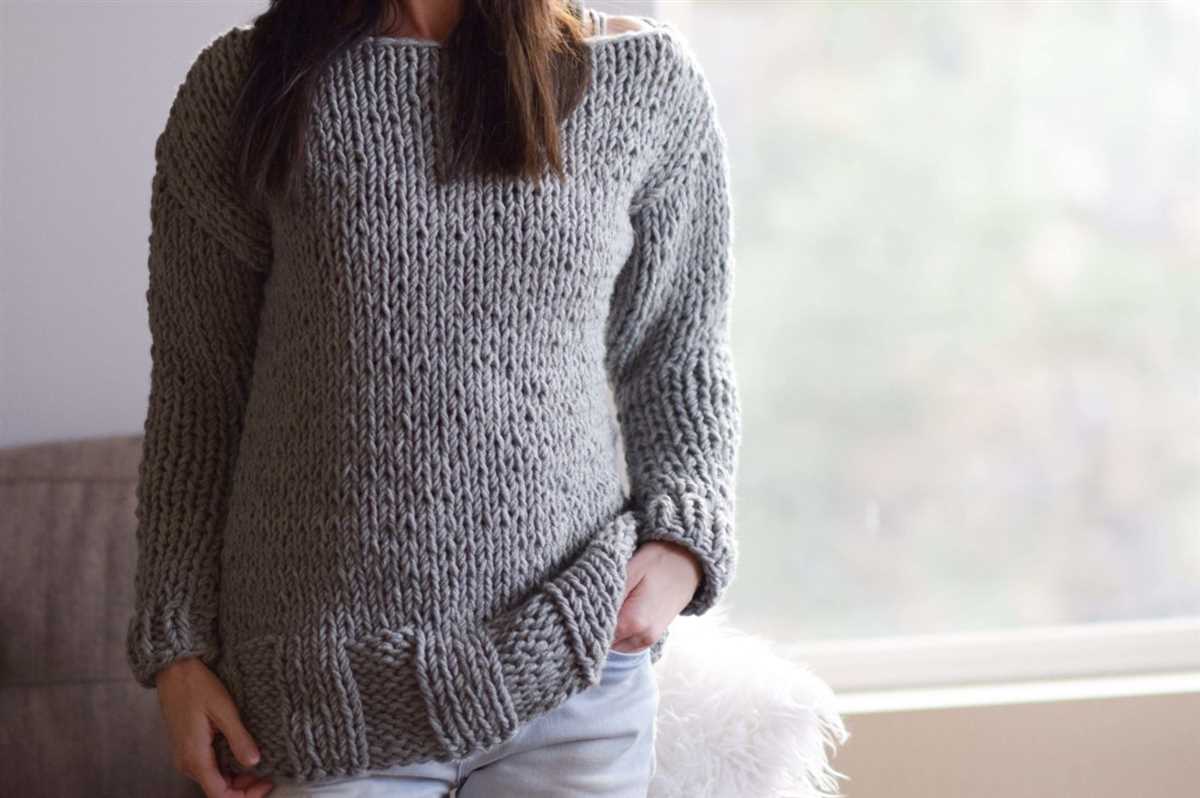
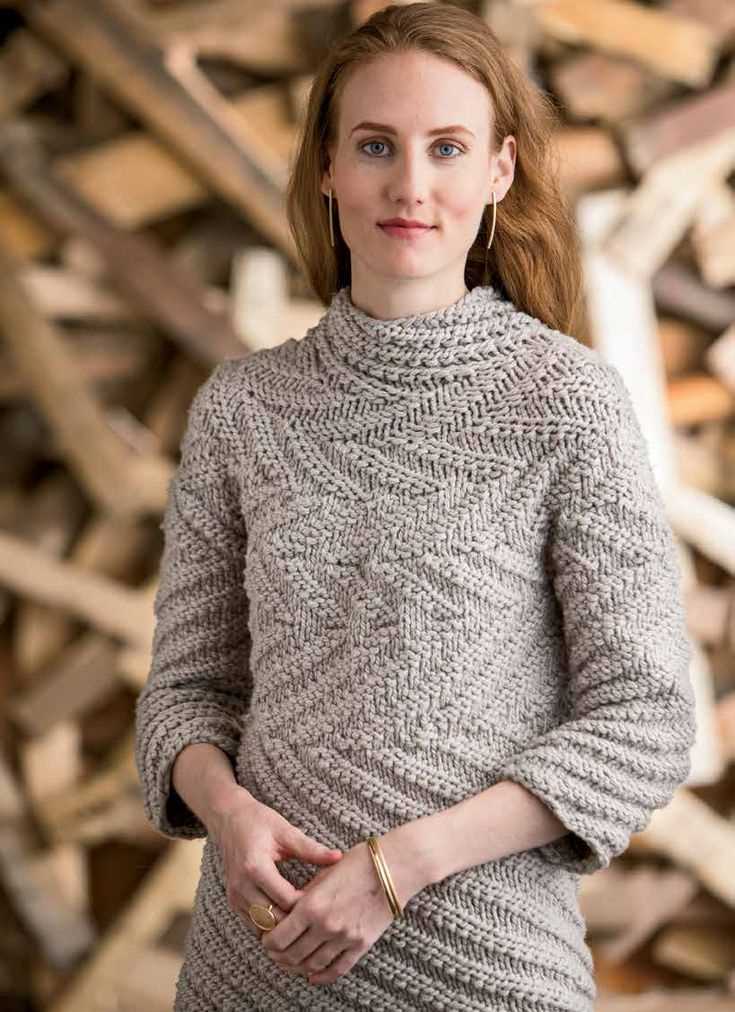
Are you looking for a classic and versatile knitting project? Look no further than a plain sweater knitting pattern! A plain sweater is a wardrobe staple that can be dressed up or down, and it’s a great way to show off your knitting skills. Whether you’re a beginner or an experienced knitter, this pattern is sure to be a rewarding and enjoyable project. Plus, you’ll end up with a cozy and stylish sweater that you’ll love wearing.
When it comes to choosing a yarn for your plain sweater, the options are endless. Whether you prefer a soft and luxurious merino wool, a budget-friendly acrylic yarn, or a rustic and versatile cotton, there’s a yarn out there that’s perfect for your project. Consider the texture, color, and weight of the yarn when making your choice, as these factors can greatly impact the final look and feel of your sweater.
Before you dive into the pattern, make sure you have all the necessary materials and tools. You’ll need knitting needles in the appropriate size for your chosen yarn, stitch markers, a tape measure, and a yarn needle for seaming. It’s also helpful to have a set of stitch holders or spare yarn to hold stitches for shaping the sleeves.
Once you have everything you need, it’s time to cast on and get knitting! The plain sweater knitting pattern will guide you through the process step by step, from casting on and knitting the body to shaping the neckline and sleeves. Don’t worry if you’re unfamiliar with some of the techniques – the pattern will explain everything in detail, making it easy for you to follow along and create a beautiful sweater.
Plain Sweater Knitting Pattern
Knitting your own plain sweater is a fulfilling and rewarding project. With a plain sweater knitting pattern, you can create a timeless and classic piece that will never go out of style. Whether you are a beginner or an experienced knitter, this pattern is suitable for all skill levels.
To start knitting your plain sweater, you will need to gather the necessary materials. Make sure you have a set of knitting needles in the appropriate size, along with your chosen yarn. It’s recommended to use a medium-weight yarn for a cozy and comfortable sweater.
Next, follow the instructions of the pattern carefully. Begin by casting on the required number of stitches and then work the body of the sweater in the desired stitch pattern. You may choose to knit it in stockinette stitch for a smooth and even look, or try a textured stitch pattern for added interest.
As you progress, you will reach the armholes. Here, you will need to divide your work and create separate panels for the front and back. To do this, you will need to follow the pattern’s instructions for shaping the armholes and neckline.
After completing the front and back panels, you will move on to knitting the sleeves. Again, follow the pattern’s instructions for shaping the sleeves and creating the desired length. Once the sleeves are finished, you can sew them onto the body of the sweater.
To finish off your plain sweater, you will need to add ribbing to the edges of the body, sleeves, and neckline. This will give your sweater a polished and professional look. Once the ribbing is complete, weave in any loose ends and block your sweater to shape and size.
Knitting your own plain sweater allows you to create a unique and personalized garment. With the right pattern and a bit of patience, you can knit a stylish and cozy sweater that will keep you warm and fashionable for years to come.
Getting Started
When it comes to knitting a plain sweater, it’s important to start off on the right foot. Before diving into the pattern, gather all the necessary materials and tools. This includes knitting needles in the appropriate size, yarn in the desired color, stitch markers, and a measuring tape. Make sure to choose a yarn that is suitable for sweaters, such as a soft and durable worsted weight yarn.
Choosing the right size
Next, determine the size of the sweater you want to knit. Take accurate measurements of the intended wearer, including their bust/chest circumference, arm length, and overall height. These measurements will help you choose the appropriate size from the pattern. It’s also a good idea to check the pattern’s sizing chart for any additional measurements you may need.
Gauge swatch
Before starting on the actual sweater, it’s crucial to knit a gauge swatch. The gauge is the number of stitches and rows per inch that you achieve with your chosen needles and yarn. By knitting a small swatch and measuring it, you can determine if your gauge matches the pattern’s gauge. If it doesn’t, you may need to adjust your needle size to achieve the correct gauge. This step is essential to ensure that your sweater turns out the right size and fits as intended.
Pattern reading
Once you’ve gathered your materials and determined the size and gauge, it’s time to start reading the pattern. Take some time to familiarize yourself with the instructions and any abbreviations used. Make use of any stitch markers or highlighters to mark important sections or repeats in the pattern. It can also be helpful to create a checklist or row counter to keep track of your progress. By thoroughly understanding the pattern before you begin, you’ll be able to knit with confidence and avoid any mistakes along the way.
Choosing the Right Yarn

When it comes to knitting a plain sweater, choosing the right yarn is crucial. The yarn you use will not only determine the look and feel of your finished garment, but also affect how it holds up over time. Here are some factors to consider when selecting yarn for your sweater:
Fiber Content
The first thing to consider is the fiber content of the yarn. The most common fibers used for sweaters are wool, cotton, and acrylic. Wool is warm and breathable, making it an excellent choice for winter sweaters. Cotton is lightweight and breathable, making it ideal for spring and summer sweaters. Acrylic is affordable and easy to care for, but may not be as soft or breathable as natural fibers.
Weight
The weight of the yarn will also affect the look and feel of your sweater. Yarns are categorized into different weights, such as lace, fingering, sport, worsted, and bulky. Lace and fingering weight yarns are delicate and lightweight, while bulky weight yarns are thick and heavy. The weight of the yarn you choose will depend on the desired drape and warmth of your sweater.
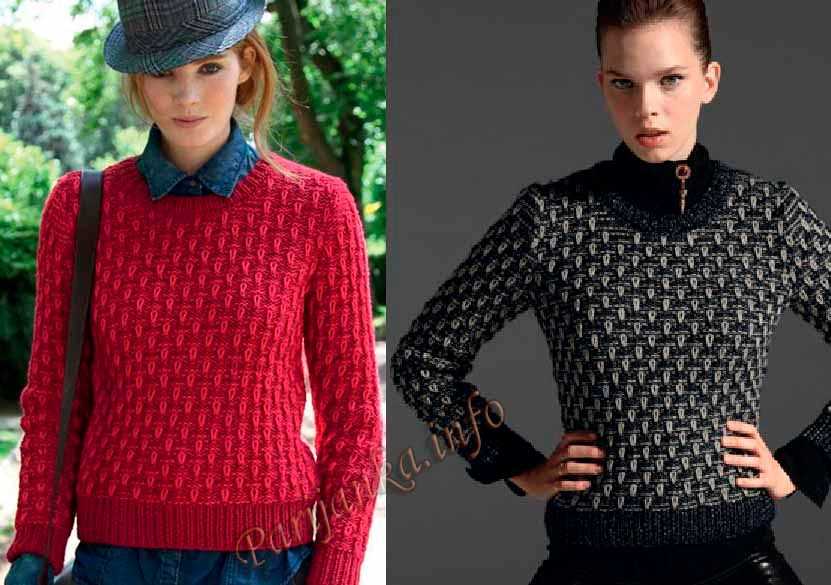
Texture
The texture of the yarn can add interest and dimension to your sweater. Some yarns have a smooth and uniform texture, while others have a fuzzy or bouclé texture. Consider the pattern and design of your sweater when choosing a textured yarn. A plain sweater with a simple stitch pattern may benefit from a smooth and sleek yarn, while a more intricate pattern may stand out with a textured or variegated yarn.
Color
Lastly, consider the color of the yarn. Neutral and solid colors are versatile and can be paired with a variety of outfits. However, a pop of color or a bold pattern can make a statement and add personality to your sweater. Consider your personal style and the occasion for which you’ll be wearing the sweater when selecting the color.
By considering these factors – fiber content, weight, texture, and color – you can choose the right yarn for your plain sweater knitting project, ensuring a garment that not only looks great but also suits your needs and preferences.
Selecting Needles and Gauge
When knitting a plain sweater, selecting the right needles and achieving the correct gauge are crucial steps in ensuring a successful outcome. The gauge refers to the number of stitches and rows per inch in the knitted fabric and is essential for achieving the correct size and fit of the sweater.
To determine the appropriate gauge for your plain sweater, it is recommended to knit a gauge swatch. A gauge swatch is a small square of knitted fabric that allows you to measure the number of stitches and rows per inch. It is advisable to use the yarn and needles you plan to use for the sweater when knitting the gauge swatch, as different yarns and needle sizes can yield different gauges.
When selecting needles for your plain sweater, it is important to consider the recommended needle size for the yarn you are using. The recommended needle size is typically indicated on the yarn label, and it is essential to follow these recommendations to obtain the desired gauge. Using a needle size that is too large can result in a looser fabric with a bigger gauge, while using a needle size that is too small can result in a tighter fabric with a smaller gauge.
Once you have determined the correct gauge for your plain sweater, it is important to check your gauge periodically while knitting to ensure consistency. If your gauge is off, you may need to adjust your needle size accordingly. Remember to measure your gauge on a washed and blocked swatch to ensure accurate measurements.
Taking Measurements
When knitting a plain sweater, one of the most important steps is taking accurate measurements. This ensures that the finished sweater will fit properly and look flattering when worn. There are several key measurements that need to be taken, including the bust, waist, hips, sleeve length, and overall length of the sweater.
To measure the bust, wrap a measuring tape around the fullest part of the chest, ensuring that it is parallel to the floor. Take note of the measurement in inches. For the waist measurement, wrap the tape around the smallest part of the waist, again parallel to the floor. The hip measurement is taken around the widest part of the hips.
For the sleeve length, start at the shoulder and measure down to the desired length. This can be done by flexing the arm slightly and placing the measuring tape at the outer edge of the shoulder, then measuring down to the wrist bone. The overall length of the sweater is measured from the base of the neck to the desired length, typically at the hip or mid-thigh.
It’s important to take these measurements accurately, as they will determine the size of the sweater and how it will fit. By following these steps, you can ensure that your plain sweater will be the perfect fit and keep you warm and stylish throughout the colder months.
Introduction to Casting On in Sweater Knitting
Knitting a sweater is an enjoyable project that allows you to create a warm and stylish garment. One of the first steps in sweater knitting is casting on, which lays the foundation for your stitches. Casting on is the process of creating the initial row of stitches on your knitting needle, and it determines the size and stretchiness of your sweater’s edge.
Casting on methods:
There are several different methods for casting on in sweater knitting, and each method creates a different edge. The most common methods include the long-tail cast on, the knit cast on, the cable cast on, and the provisional cast on. Each method has its own advantages and may be chosen based on personal preference or the desired outcome of the sweater.
Long-tail cast on:
The long-tail cast on is a versatile method that creates an elastic and sturdy edge. It requires a long tail of yarn, which is used to create both the stitches and the edge. This method is popular for its stretchiness and professional finish.
Knit cast on:
The knit cast on is a simple and quick method that creates a firm and non-stretchy edge. It involves knitting the stitches onto the needle one by one, which gives the edge a neat and uniform appearance. This method is suitable for sweaters that require a more structured edge.
Cable cast on:
The cable cast on is a method that creates a flexible and decorative edge. It involves creating a loop from the working yarn and then knitting it onto the needle. This cast on method is often used when the edge of the sweater needs to match a cable stitch pattern.
Provisional cast on:
The provisional cast on is a technique that creates a temporary edge, which can later be undone or joined to another piece of knitting. It is often used when knitting sweater sleeves, allowing the sleeves to be added seamlessly to the body of the sweater. This method requires the use of scrap yarn and a crochet hook.
Overall, the casting on process in sweater knitting is crucial for creating a strong and well-finished edge. The choice of casting on method will depend on the desired outcome and design of the sweater. So, take your time to master the techniques and experiment with different methods to find the one that works best for you.
Knitting the Body

When knitting a plain sweater, the body is one of the largest parts to work on. It sets the foundation for the overall fit and shape of the sweater. The body is typically worked from the bottom up, starting with the cast-on stitches. It is important to carefully follow the knitting pattern and make sure to work the recommended number of stitches for your size.
Once the ribbing or hem is completed, the body is worked in stockinette stitch. This means that every knit row is followed by a purl row, creating a smooth and even fabric. It is important to maintain an even tension throughout the body to ensure consistent stitch size and gauge. Using stitch markers to mark the sides and any shaping points can be helpful in keeping track of your progress.
As you continue to knit the body, it is important to periodically check the length and compare it to the pattern instructions. This will help you achieve the desired fit and length for your sweater. Some patterns may include shaping instructions for the waist or hips, which can be accomplished through decreases or increases. Following these instructions will help create a flattering fit.
Once the desired length is reached, the body is typically bound off. Depending on the pattern, a stretchy bind off may be recommended to ensure a comfortable fit at the bottom edge. Some patterns may also include instructions for a split hem or side seam shaping.
Overall, knitting the body of a plain sweater requires careful attention to detail and following the pattern instructions. Maintaining an even tension and checking the length as you go will help ensure a well-fitted and beautifully finished sweater.
Creating the Sleeves
After completing the body of your plain sweater, it’s time to move on to the sleeves. The sleeves of the sweater are an essential part of the overall design, providing warmth and style to the finished product. Here are the steps to create the sleeves for your plain sweater:
1. Cast on stitches
To begin, you’ll need to cast on the required number of stitches for your sleeve. Depending on the size of your sweater and the desired fit, this number can vary. Use the knitting needles and the yarn you’ve chosen for your sweater to cast on the stitches, following the pattern instructions.
2. Knit the ribbing
After casting on, you’ll typically start the sleeve with a ribbing pattern. The ribbing adds elasticity and helps the sleeve stay in place. Follow the pattern instructions to knit the desired number of rows in the ribbing pattern. This is usually done in a combination of knit and purl stitches.
3. Switch to the main stitch pattern
Once the ribbing is complete, it’s time to switch to the main stitch pattern for the body of the sleeve. This could be a simple stockinette stitch, a cable pattern, or any other design you’ve chosen for your sweater. Follow the pattern instructions to continue knitting in the main stitch pattern for the required length of your sleeve.
4. Shaping the sleeve
Depending on the style and fit you’re aiming for, you may need to shape the sleeve as you go. This can be done through increases or decreases in the number of stitches. The pattern instructions will specify when and how to shape the sleeve to achieve the desired look.
5. Finishing the sleeve
Once you’ve reached the desired sleeve length and completed any necessary shaping, it’s time to finish the sleeve. This usually involves knitting a few rows in the ribbing pattern to match the cuff of the sweater. Follow the pattern instructions to finish the sleeve, and then repeat the process for the second sleeve.
With the sleeves complete, you’re one step closer to finishing your plain sweater. The sleeves add the final touch to the overall design and are essential for both style and functionality. Make sure to follow the pattern instructions carefully to create sleeves that fit seamlessly into your plain sweater.
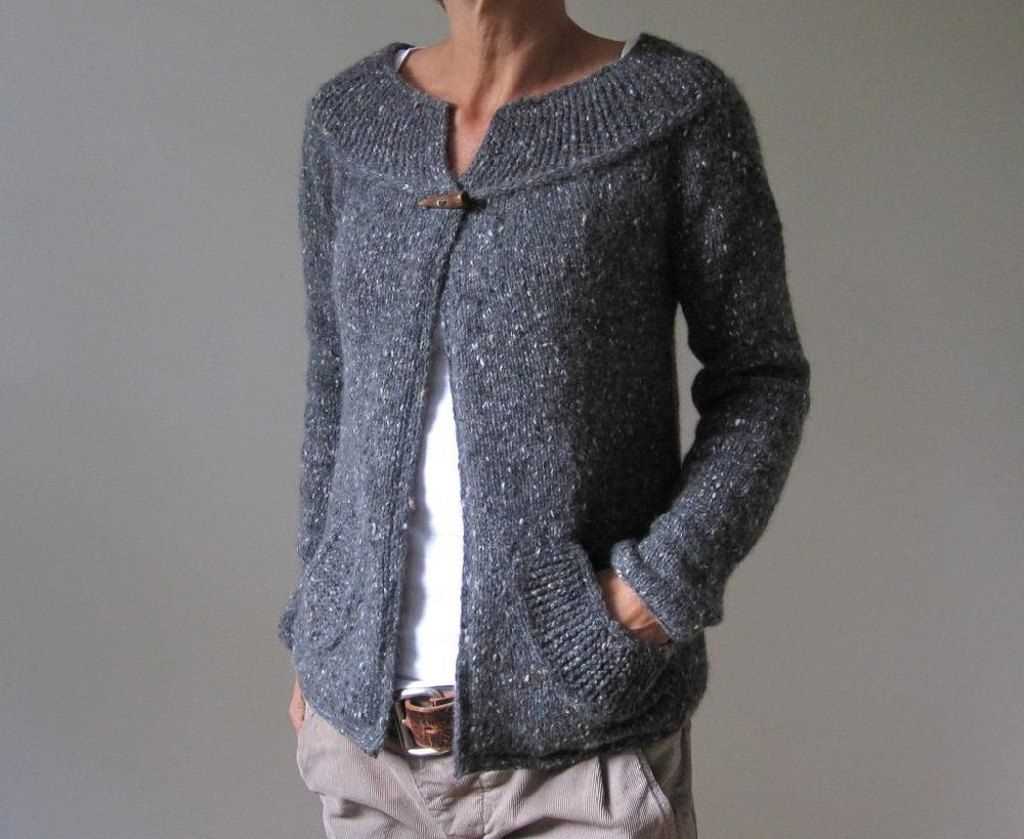
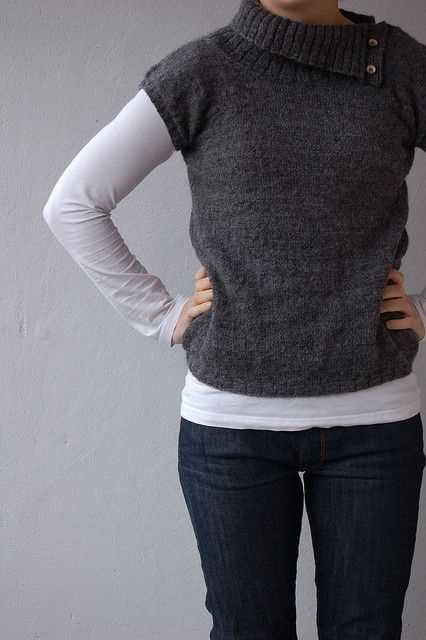
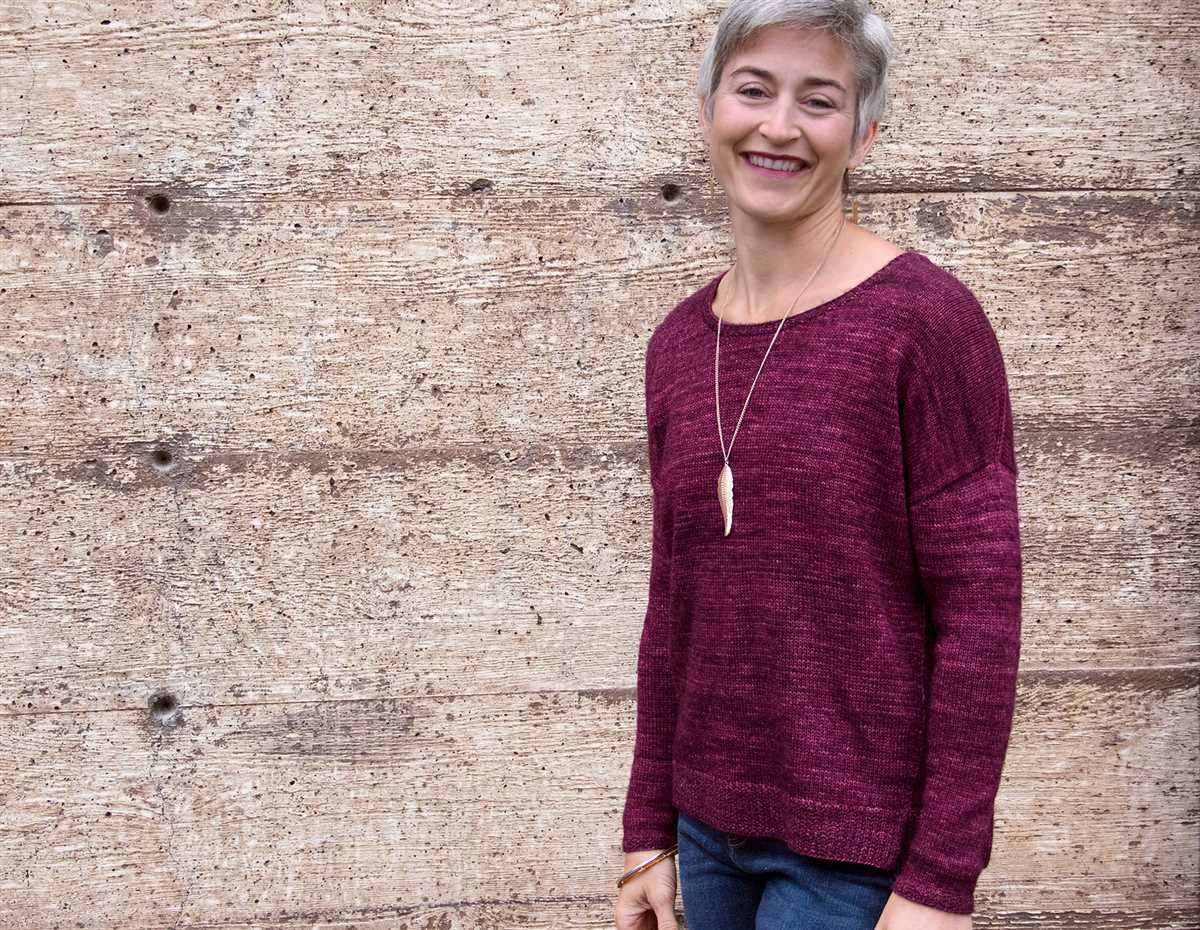
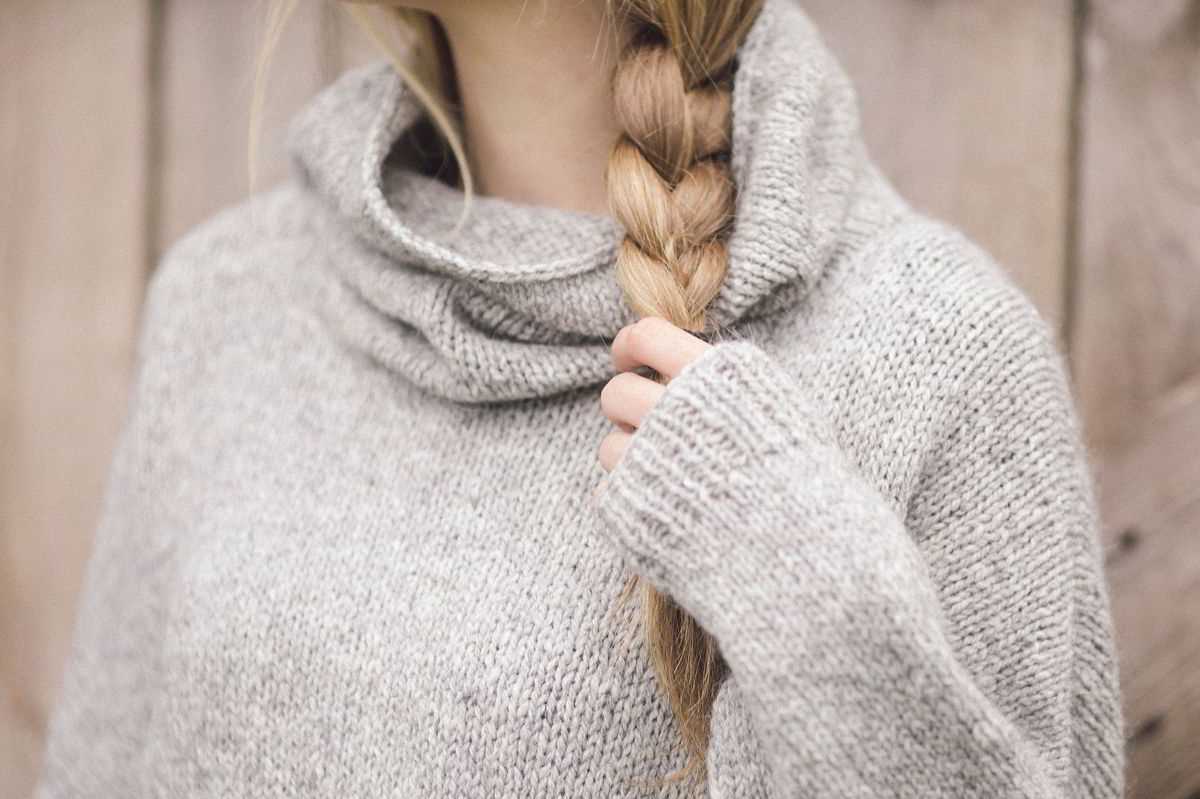
Shaping the Neckline
When knitting a plain sweater, one of the key areas to consider is the neckline. The neckline is not only a functional element but can also greatly impact the overall look and style of the sweater. There are several different ways to shape the neckline, depending on the desired outcome.
1. Crew Neck
The crew neck is a classic and versatile option for shaping the neckline of a plain sweater. To create a crew neck, simply continue knitting the front and back pieces straight up until reaching the desired length. Then, bind off the necessary stitches at the center front and back, leaving a small opening for the head.
2. V-Neck
If you prefer a more flattering and feminine neckline, a V-neck is a great choice. To shape a V-neck, start by knitting the front piece straight up until reaching the desired point of the V. Then, decrease stitches gradually on each side of the neckline to create a V-shape. This can be done by working decreases on either side of a center stitch or by evenly distributing decreases along the neckline.
3. Boat Neck
The boat neck is another popular option for shaping the neckline of a plain sweater. To create a boat neck, start by knitting the front and back pieces straight up until reaching the desired length. Then, bind off a larger number of stitches at the center front and back to create a wider opening. This will create a neckline that sits wider on the shoulders and has a more relaxed, casual look.
Ultimately, the choice of neckline shaping depends on the desired style and fit of the sweater. Experimenting with different shaping techniques can help create a unique and personalized garment.
Finishing Touches
Once you’ve completed knitting your plain sweater using the provided pattern, it’s time to add the finishing touches to make it truly special. These small details can elevate your sweater from ordinary to extraordinary.
First, consider the neckline of your sweater. You have several options to choose from, depending on your personal style and preference. You can opt for a classic crew neck, a flattering v-neck, or a trendy boat neck. Each neckline requires a different finishing technique, so be sure to follow the instructions carefully.
Next, it’s time to focus on the hem and cuffs of your sweater. You can choose to add ribbing or a decorative stitch pattern for a more polished look. Ribbing helps to create a snug fit and adds elasticity to the edges, ensuring that your sweater doesn’t lose its shape over time. Alternatively, you can experiment with different stitch patterns to add texture and visual interest.
Another finishing touch you can add is a personalized label or tag. This small detail adds a professional touch to your handmade sweater and can also serve as a reminder of your hard work. You can either purchase ready-made labels or create your own by embroidering or printing your name or initials on a small piece of fabric.
Lastly, don’t forget to block your sweater before wearing it. Blocking is an essential step to even out the stitches, smooth the fabric, and give your sweater a professional finish. Follow the blocking instructions provided in your pattern or consult a knitting resource for guidance.
With these finishing touches, your plain sweater will be transformed into a unique and stylish garment that you can proudly wear or gift to someone special.
Blocking and Seaming
Once you have finished knitting your plain sweater, it is important to block your pieces. Blocking helps to even out the stitches and give your sweater a more polished look. To block your sweater, you will need to wet the pieces and lay them flat to dry. Be sure to follow the specific instructions for your yarn and pattern.
After blocking, it is time to seam your sweater together. Seaming is the process of joining the various pieces of your sweater to create the finished garment. It is important to take your time and make sure your seams are neat and secure. You can use a tapestry needle and matching yarn to sew the seams. Follow the instructions in your pattern for the specific seaming technique, such as mattress stitch or whipstitch.
Blocking Tips:
- Always check the care instructions for your yarn before blocking.
- Use blocking mats or a clean towel to lay your pieces flat.
- Pin your pieces into the desired shape using rust-proof pins.
- Avoid stretching the fabric too much while blocking.
- Allow your pieces to dry completely before removing the pins.
Seaming Tips:
- Use a yarn needle that is the appropriate size for your yarn.
- Start seaming from the bottom and work your way up.
- Make sure your stitches are even and secure.
- Leave no gaps or holes in your seams.
- Take breaks if needed to avoid strain on your hands and eyes.
With careful blocking and seaming, your plain sweater will be transformed into a beautifully finished garment that is ready to wear.
Tips and Troubleshooting
In the process of knitting a plain sweater, there are a few tips and common issues that you may encounter. Here are some helpful tips to ensure a successful knitting project:
- Take accurate measurements: Before you start knitting, make sure to take accurate measurements of the intended wearer’s chest circumference, sleeve length, and desired length of the sweater. This will help you determine the correct size to knit.
- Choose the right yarn: Selecting the right yarn for your sweater is important. Make sure to choose a yarn that is suitable for the pattern and provides the desired look and drape. Consider factors such as fiber content, weight, and texture.
- Swatch before starting: Swatching is essential to ensure that you achieve the correct gauge. Knit a swatch using the same needles and stitch pattern as your sweater to determine if any adjustments need to be made. Adjusting the needle size can help you achieve the correct gauge.
- Read the pattern carefully: Before starting your sweater, read through the entire pattern carefully to familiarize yourself with the instructions and techniques involved. Highlight any important details or sections that you may need to reference later.
- Check your progress: As you knit, periodically check your progress against the measurements and the pattern. This will help you identify any mistakes or inconsistencies early on, allowing you to make corrections before they become more difficult to fix.
- Fix minor mistakes: If you notice a small mistake in your knitting, such as a dropped stitch or a misaligned decrease, you can fix it with a crochet hook or a stitch marker. Refer to online tutorials or knitting resources for guidance on how to fix common knitting mistakes.
Despite your best efforts, you may still encounter some challenges while knitting your plain sweater. Here are some common troubleshooting tips:
- Uneven stitches: If your stitches appear uneven or lumpy, try adjusting your tension. You may be knitting too tightly or too loosely. Experiment with different tension techniques, such as wrapping the yarn more tightly around your finger or using a different knitting style.
- Twisted stitches: Twisted stitches can occur when you accidentally twist the stitches while knitting in the round or during certain stitch patterns. To fix twisted stitches, carefully unravel the affected rows and reknit them correctly.
- Uneven edges: If the edges of your sweater are turning out uneven or wavy, it may be due to inconsistent tension or a lack of attention to the edges. Make sure to maintain an even tension throughout your knitting and consider using techniques such as slipping the first stitch of each row or using a different edge stitch pattern to create a neater edge.
- Incorrect fit: If your finished sweater does not fit as desired, you may need to make adjustments to the measurements or modify the pattern. Consider adding or subtracting stitches, adjusting the shaping, or adapting the length to achieve the desired fit.
By following these tips and troubleshooting techniques, you can overcome common challenges and create a beautiful plain sweater that fits perfectly. Remember to take your time, be patient with yourself, and enjoy the process of knitting!