
Wearing a cozy hat is the perfect way to stay warm during the cold winter months. And what better way to enjoy the season than by knitting your own hat? With a knitting machine, you can create a beautiful hat in no time. Whether you’re a beginner or an experienced knitter, using a knitting machine can make the process quick, easy, and fun. This article will provide you with a pattern for a knitting machine hat, so you can create your own stylish and warm headwear.
Why use a knitting machine?
Knitting machines are a great tool for those who want to create beautiful hand-knit items but don’t have the time or patience for traditional knitting techniques. With a knitting machine, you can create intricate patterns and designs with ease, and produce finished items much faster than by hand. Whether you’re knitting for yourself or as a gift, using a knitting machine can help you create professional-looking results.
Knitting Machine Hat Pattern
The knitting machine hat pattern is a set of instructions that guide you through creating a hat using a knitting machine. With the help of this pattern, you can easily create hats in various styles, sizes, and designs. Whether you are a beginner or an experienced knitter, this pattern is a great tool to have in your collection.
To start knitting the hat, you will need to gather the necessary materials, including a knitting machine, yarn, and any additional accessories you may want to add, such as pom-poms or buttons. Once you have all your materials ready, you can follow the step-by-step instructions provided in the pattern.
The pattern will guide you through setting up your knitting machine, casting on the stitches, and knitting the hat in the desired stitch pattern. It will also provide instructions on shaping the crown of the hat and finishing off the edges. The pattern may include variations and options for customizing the hat, such as adding ribbing or a folded brim.
Using a knitting machine for hat making can save you a lot of time and effort compared to knitting by hand. It allows you to quickly create multiple hats with consistent tension and stitch quality. The knitting machine hat pattern provides a foundation for your creativity, allowing you to experiment with different yarns, colors, and stitch patterns to create unique and personalized hats.
Whether you want to create hats for yourself, your family, or as gifts, the knitting machine hat pattern is a valuable resource. It offers the convenience and efficiency of using a knitting machine while still allowing you to unleash your creativity and produce beautiful handmade hats.
Overview
The knitting machine hat pattern is a set of instructions and guidelines for creating hats using a knitting machine. Knitting machines are mechanical devices that automate the process of knitting, allowing for faster and more consistent results. This pattern is specifically designed for use with knitting machines, so it may not be suitable for hand knitting.
Instructions
The pattern usually includes step-by-step instructions for setting up the knitting machine, selecting the appropriate yarn, and adjusting the tension. It also provides guidance on how to cast on and bind off stitches, as well as how to use different stitch patterns and techniques to create different textures and designs.
Materials
To create a hat using a knitting machine, you will typically need a knitting machine with the appropriate gauge, a selection of yarn in different colors and textures, and any additional tools or accessories required for the specific pattern. These may include stitch markers, a row counter, and a tapestry needle for finishing.
Notes and Tips
Some knitting machine hat patterns may include additional notes and tips to help you achieve the best results. These may include suggestions for adjusting the pattern for different sizes, tips for troubleshooting common issues, and recommendations for blocking and finishing the hat.
Examples
There are many different knitting machine hat patterns available, ranging from simple and basic designs to more intricate and decorative styles. Some patterns may incorporate colorwork or Fair Isle techniques, while others may focus on texture and stitch patterns.
Customization
One of the advantages of using a knitting machine is the ease with which you can customize your projects. With the knitting machine hat pattern as a starting point, you can experiment with different yarns, stitch patterns, and techniques to create unique and personalized hats.
Conclusion
The knitting machine hat pattern is a valuable resource for anyone looking to create hats using a knitting machine. Whether you are a beginner or an experienced knitter, following a pattern can help ensure consistent and professional-looking results. So, gather your materials and start knitting your own hats with the help of a knitting machine hat pattern.
Choosing the Right Knitting Machine
When it comes to knitting, having the right tool for the job can make all the difference. For those who want to take their knitting to the next level, investing in a knitting machine is a great option. With a knitting machine, you can create intricate and complex designs with ease. However, with so many options available on the market, it can be overwhelming to choose the right one for your needs.
Type of Machine: One of the first things to consider when choosing a knitting machine is the type you want. There are two main types: manual and electronic. Manual machines are operated by hand and require you to manually move the carriage back and forth. They are usually more affordable and great for beginners. Electronic machines, on the other hand, are more advanced and have motorized carriages that move automatically. They allow for greater control and precision but can be more expensive.
Features and Functionality: Another important factor to consider is the features and functionality of the knitting machine. Look for machines that offer different stitch patterns, adjustable stitch length, and a variety of yarn capabilities. Some machines also have additional features such as automatic tension adjustment, built-in patterns, and programmable options. Think about the type of projects you want to create and choose a machine that can accommodate your needs.
Size and Portability: The size and portability of the machine are also important considerations. If you have limited space, you may want to opt for a smaller, more compact machine that can be easily stored when not in use. On the other hand, if you plan to bring your knitting machine to classes or workshops, portability is key. Look for machines that are lightweight and easy to transport.
Price Range: Lastly, consider your budget when choosing a knitting machine. Prices can vary greatly depending on the brand, features, and functionality. Set a budget and stick to it, but also keep in mind that investing in a high-quality machine can yield better results and last longer in the long run.
List of factors to consider when choosing a knitting machine:
- Type of Machine
- Features and Functionality
- Size and Portability
- Price Range
Selecting the Yarn
When it comes to knitting machine hat patterns, selecting the right yarn is crucial. The choice of yarn can greatly affect the final look and feel of the hat, as well as its durability and ease of maintenance. Here are some key factors to consider when choosing the yarn for your knitting machine hat project.
Fiber Content
The first thing to consider is the fiber content of the yarn. Different fibers have different characteristics and properties that can impact the hat’s performance. For example, wool is a popular choice for its warmth and elasticity, making it a great option for winter hats. Cotton, on the other hand, is known for its breathability and softness, making it ideal for lightweight and comfortable hats. Acrylic yarns are often chosen for their affordability and easy care. Other natural fibers like alpaca, silk, and cashmere can also be used depending on the desired qualities of the hat.
Weight and Gauge
The weight of the yarn refers to its thickness, which can vary from thin lace weight to bulky weight. It’s important to match the weight of the yarn to the recommended gauge of the knitting machine hat pattern. Using a yarn of a different weight can result in a hat that is too small or too large. The gauge is the number of stitches and rows per inch that should be achieved for the pattern to turn out correctly. Pay attention to the recommended gauge and choose a yarn that will allow you to achieve it with your knitting machine.
Color and Texture
Lastly, consider the color and texture of the yarn. The color can greatly affect the overall look of the hat, so choose a color that complements your personal style or matches your outfit. Additionally, the texture of the yarn can add visual interest to the hat. Options range from smooth and shiny to fuzzy and textured. Consider the desired texture of your hat and choose a yarn that will create the effect you desire.
By carefully selecting the right yarn for your knitting machine hat project, you can ensure that the final result meets your expectations in terms of look, feel, and performance.
Understanding the Gauge
When it comes to knitting machine patterns, understanding the gauge is crucial. The gauge refers to the number of stitches and rows per inch in a knitted swatch. It determines the size and fit of the final knitted piece.
Why is gauge important? Each knitting machine has its own unique gauge, which is determined by the tension and the size of the needles used. When a pattern specifies a gauge, it means that the designer has knit a swatch using a specific machine and needles, and the pattern is created based on that gauge. Deviating from the specified gauge can result in a finished piece that is too big or too small.
Measuring gauge
Measuring gauge on a knitting machine can be done by knitting a swatch with the chosen yarn and machine settings. Using a ruler or a gauge tool, count the number of stitches and rows within a 1-inch square. The gauge should be measured after the swatch is washed and blocked, as the yarn may stretch or shrink. Compare the measured gauge with the gauge specified in the pattern to ensure accuracy.
Creating the correct gauge on a knitting machine is achieved by adjusting the tension dial and using the appropriate size of needles. Tightening or loosening the tension can affect both the stitch width and height. Changing the needle size can also impact the gauge, with larger needles creating a looser gauge and smaller needles creating a tighter gauge.
Importance of gauge swatches
Before starting a knitting machine project, it is recommended to knit a gauge swatch. This small sample helps to ensure that the gauge meets the requirements of the pattern. If the gauge is too loose, the resulting fabric may be too large and lack structure. If the gauge is too tight, the fabric may be too small and rigid. By knitting a swatch and comparing it to the pattern’s gauge, adjustments can be made to achieve the desired fit and size.
In conclusion, understanding and achieving the correct gauge is essential for successful knitting machine projects. Taking the time to knit and measure gauge swatches can save time and frustration in the long run, resulting in beautifully fitting and well-proportioned knitted pieces.
Setting up the Knitting Machine
Before you can start knitting with a machine, you need to properly set it up. This involves several steps to ensure that everything is in place and ready to go. Here’s a guide on how to set up your knitting machine:
1. Assemble the machine
Begin by unpacking all the components of the knitting machine, such as the main frame, carriage, yarn mast, and tension unit. Connect the different parts together following the manufacturer’s instructions. Make sure everything fits securely and there are no loose parts.
2. Thread the yarn
Next, thread the yarn through the tension unit and into the carriage. Follow the threading path indicated by the machine’s manual, making sure to pass the yarn through any necessary guides or hooks. Ensure that the yarn is properly tensioned and can move freely without getting stuck or tangled.
3. Set the stitch size

Most knitting machines have a dial or lever that allows you to adjust the stitch size. This determines the width of each stitch and can be adjusted according to the desired fabric thickness. Consult the machine’s manual for the recommended stitch size settings and make the necessary adjustments.
4. Install the needles
Check the needle bed of the knitting machine to ensure that all the needles are in place and none are missing or bent. If any needles need to be replaced, follow the manufacturer’s instructions for installation. Make sure that all the needles are properly aligned and move smoothly.
5. Test the machine
Before starting your knitting project, it’s important to test the machine to ensure that it is functioning correctly. Try knitting a few rows using a scrap piece of yarn to check the tension, stitch size, and needle movement. Make any necessary adjustments before proceeding with your actual project.
By following these steps, you can successfully set up your knitting machine and be ready to start knitting. It’s important to refer to the machine’s manual for specific instructions and guidelines, as different machines may have varying setup processes.
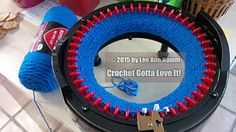
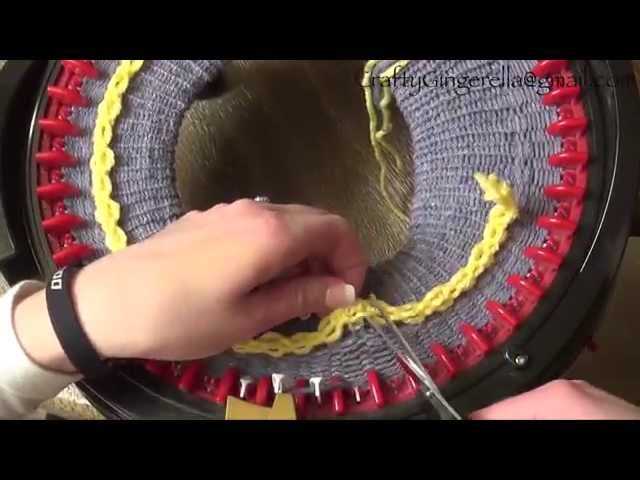
Casting On
When starting a knitting project on a machine, the first step is to cast on. Casting on is the process of creating the first row of stitches on the machine. This is done by placing the yarn on the machine and securing it in place. There are several methods of casting on, depending on the type of machine and the desired outcome.
One common method of casting on is the e-wrap cast on. To do this, the yarn is wrapped around each needle in a clockwise direction, creating a loop. This loop is then transferred to the adjacent needle, and the process is repeated until all the needles are looped. The e-wrap cast on creates an elastic edge, which is great for hats and other garments that require stretch.
Another method of casting on is the latch tool cast on. This method is done by using a latch tool to place the yarn on the machine needles. The latch tool is inserted into a loop of yarn, and then the loop is pulled through a needle hook. This creates a new stitch on the needle. The latch tool cast on is a bit slower than the e-wrap cast on, but it creates a neater edge that is easier to work with.
Regardless of the casting on method chosen, it is important to ensure that the tension is even. Tension refers to the tightness of the stitches, and it can greatly impact the final result of the project. Taking the time to practice and adjust the tension will help to create a beautifully finished knitted piece.
In conclusion, casting on is a crucial step in starting a knitting project on a machine. Whether using the e-wrap cast on or the latch tool cast on, it is important to pay attention to tension and practice to achieve the desired outcome. With a bit of practice and patience, anyone can create beautiful knitted garments using a machine.
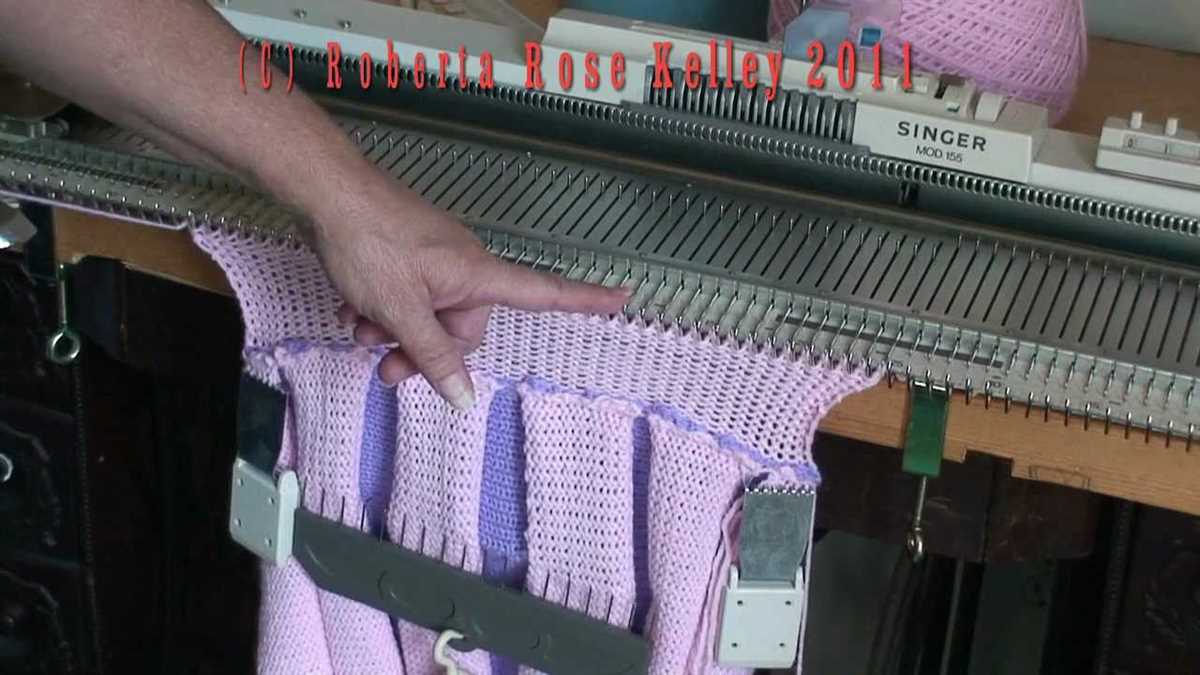
Knitting the Body of the Hat
Once you have finished knitting the brim of the hat, it’s time to move on to the body. The body of the hat is where you can get creative and customize the design to your liking. Whether you prefer a simple ribbed pattern or a more intricate Fair Isle design, the choice is yours!
Before you start knitting the body, make sure to count the number of stitches on your knitting machine. This will help you determine the number of stitches you need to cast on for the body. You can also use a stitch marker to mark the beginning of each round, making it easier to keep track of your progress.
For a basic stockinette stitch body, simply continue knitting in the round until the hat reaches your desired length. Remember to periodically check the fit of the hat on your head to ensure it’s coming out the way you want it to. If you want to add some texture or pattern to your hat, you can experiment with different stitch patterns like cables or lace.
If you’re feeling adventurous, you can also try incorporating colorwork into your hat. This can be done using a technique called stranded knitting, where you work with two or more colors of yarn at the same time to create a pattern. Alternatively, you can use a technique called intarsia to create color blocks or motifs on your hat.
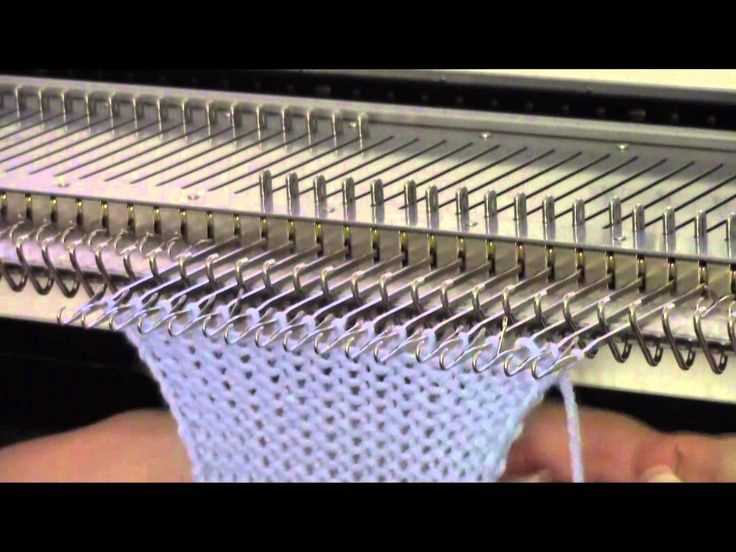
Once you’re happy with the length and design of the body, it’s time to start decreasing for the crown of the hat. This will give the hat its characteristic shape and ensure a snug fit. There are many different methods for decreasing, but a common one is to knit two stitches together at regular intervals to reduce the number of stitches on each row.
Continue decreasing until you have a small number of stitches left on your knitting machine. Then, carefully bind off the remaining stitches and weave in any loose ends. Congratulations, you’ve successfully knitted the body of your hat! Now you can move on to finishing touches like adding a pom-pom or blocking the hat to give it a polished look.
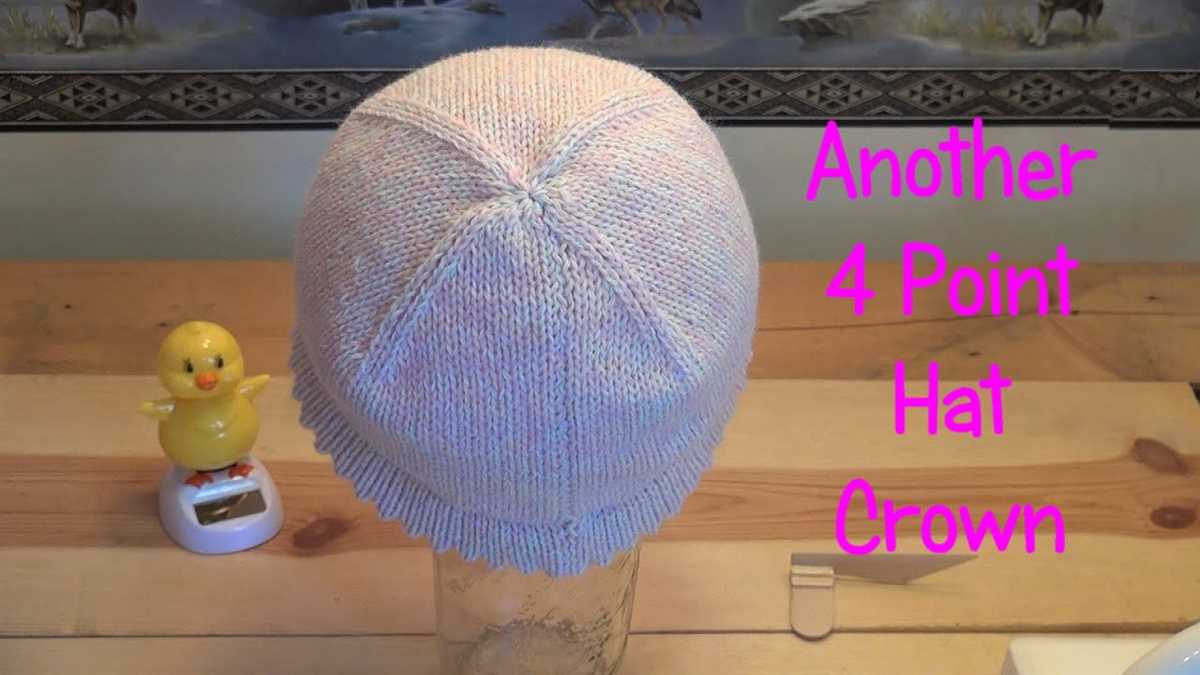
Shaping the Crown
When knitting a hat on a knitting machine, shaping the crown is an important step to create the desired fit and shape. The crown is the top part of the hat that covers the head. It can be shaped in various ways depending on the style and design of the hat.
Decreasing: One common method to shape the crown is by decreasing the number of stitches as you knit towards the top. This is usually done by knitting two stitches together at regular intervals. The frequency and placement of the decreases can be adjusted to create different shapes, such as a rounded crown or a more pointed top.
Shaping with short rows: Another technique to shape the crown is by using short rows. Short rows are partial rows of knitting that create extra fabric in certain areas. By working short rows in a specific pattern, you can create additional height or depth in the crown, giving it a unique shape.
Using a crown shaping template: Some knitting machines come with crown shaping templates that can be attached to the machine. These templates have predefined patterns and guidelines to help shape the crown accurately and consistently. The knitter can follow the template instructions to knit the crown in the desired shape without having to calculate decreases or work short rows.
Overall, shaping the crown of a hat on a knitting machine requires planning and attention to detail. Whether you choose to decrease stitches, work short rows, or use a crown shaping template, the goal is to create a hat that fits comfortably and looks stylish. With practice and experimentation, you can master different crown shaping techniques and create unique and beautiful hats with your knitting machine.
Binding Off
Binding off is the final step in completing a knitted project and gives the edges a finished look. It involves securing the stitches and closing them off so that they do not unravel. There are different methods of binding off, and the choice depends on the desired stretchiness and appearance of the finished project. Here are a few commonly used methods:
Standard Bind Off
The standard bind off is the most basic and commonly used method. To perform this bind off, work the first two stitches as usual, then insert the left needle into the first stitch, lift it over the second stitch, and off the right needle. Repeat this process, knitting one stitch and lifting the previous stitch over until only one stitch remains. Cut the yarn, leaving a long tail, and thread it through the final stitch to secure it.
Stretchy Bind Off
The stretchy bind off is useful for projects that require more elasticity, such as hats or sock cuffs. To achieve a stretchy edge, use a larger needle size and a different technique. Knit the first two stitches together through the back loop, then insert the left needle into the new stitch on the right needle and knit those two stitches together through the back loop. Repeat this process until only one stitch remains, then cut the yarn, leaving a long tail, and thread it through the final stitch.
It is essential to choose the appropriate bind off method based on the project’s requirements. Each method gives a different finished edge, allowing for customization and creating a professional-looking finished piece. Practice and experimentation with different bind off techniques will help knitters achieve the desired result.
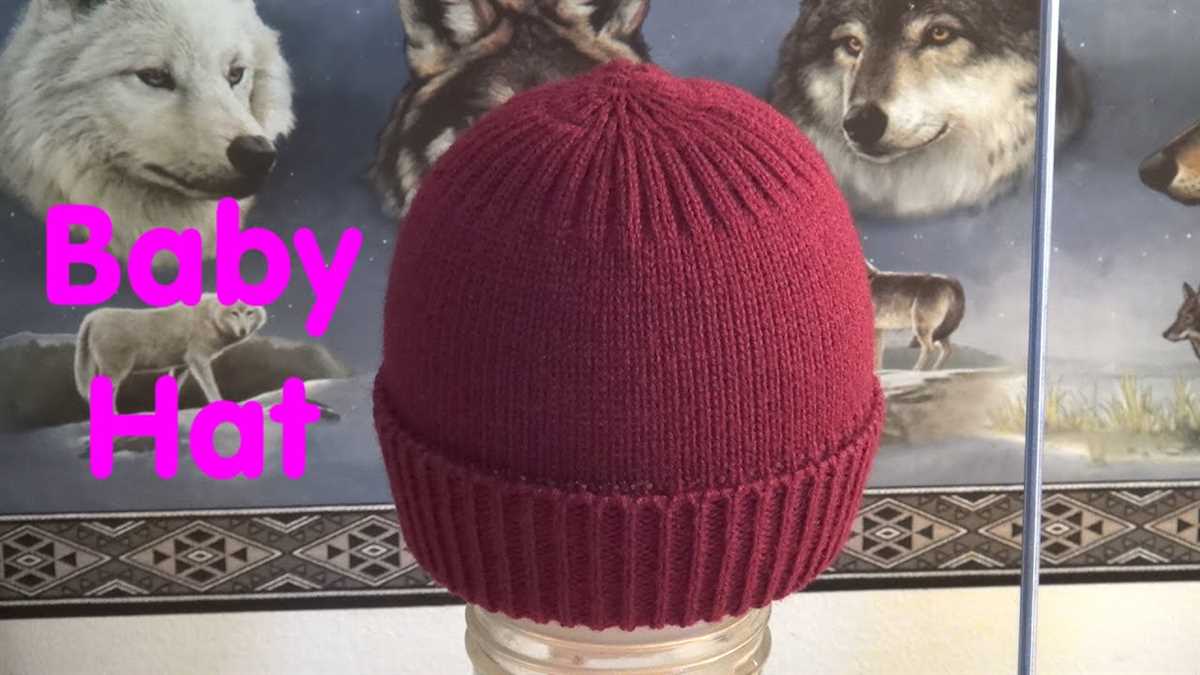
Finishing Touches
Once you have completed knitting your hat on a knitting machine, it’s time to add the finishing touches to make it look polished and professional. Here are some steps you can follow to achieve a beautiful final product:
1. Blocking
Blocking is an essential step in knitting that helps to even out your stitches and give your hat its final shape. To block your hat, you will need to soak it in lukewarm water and gently squeeze out the excess moisture. Then, lay the hat flat on a towel and shape it to the desired size and shape. Allow it to dry completely before moving on to the next step.
2. Sewing the Seam
If your hat was knit in multiple pieces, you will need to sew the seams together to create a seamless finish. Use a yarn needle and matching yarn to carefully stitch the pieces together, making sure to align the stitches and keep the tension consistent. Take your time with this step to ensure a neat and invisible seam.
3. Adding a Decorative Edge

To give your hat a unique and stylish touch, consider adding a decorative edge. This can be done by picking up stitches along the brim and knitting a few rounds in a contrasting color or stitch pattern. You can also add a crochet border or attach a ribbon or pompom for added flair.
4. Finishing Off the Ends
Lastly, don’t forget to weave in any loose ends to give your hat a clean and finished look. Use a yarn needle to carefully thread the ends through the stitches on the inside of the hat, making sure to secure them securely. Trim any excess yarn, and your hat is ready to be worn or gifted!
With these finishing touches, your knitting machine hat will be transformed into a beautiful and professional-looking accessory. Enjoy the satisfaction of completing a project and the joy of wearing or sharing your handmade creation. Happy knitting!
Common Mistakes and How to Fix Them
Knitting hats on a knitting machine can be a fun and efficient way to create beautiful hats. However, it is not uncommon to encounter some common mistakes along the way. These mistakes can range from minor errors in tension or stitch count to more significant issues with the overall shaping of the hat. Fortunately, most mistakes can be easily fixed with a little patience and attention to detail.
Inconsistent Tension
One of the most common mistakes in knitting machine hat patterns is inconsistent tension. This can result in a hat that is too tight or too loose in certain areas, making it uncomfortable to wear. To fix this issue, carefully check your knitting machine settings and make sure that the tension is set evenly throughout the entire knitting process. If you notice any areas where the tension is noticeably different, you can fix it by re-knitting those specific sections or adjusting the tension settings accordingly.
Incorrect Stitch Count
Another common mistake is an incorrect stitch count. This can happen when you accidentally skip a stitch or add an extra one, resulting in an uneven and misshapen hat. To fix this mistake, carefully count the number of stitches in each row and compare it to the pattern instructions. If you find any discrepancies, you can fix them by re-knitting the affected rows or removing/adding stitches as necessary. It is important to pay close attention to the stitch count throughout the entire knitting process to avoid any further mistakes.
Poor Shaping

Poor shaping is also a common mistake in knitting machine hat patterns. This can happen when the decreases or increases are not executed correctly, resulting in a hat that does not fit or flatter the wearer. To fix this mistake, carefully follow the pattern instructions for shaping and make sure to execute the decreases and increases accurately. If you notice any issues with the shaping, you can fix them by re-knitting the shaping sections or adjusting the decreases/increases as needed. Paying attention to the shaping details and using stitch markers can help ensure a well-shaped and nicely fitting hat.
Overall, while mistakes can happen when knitting hats on a knitting machine, they can be easily fixed with a bit of patience and attention to detail. By addressing common mistakes such as inconsistent tension, incorrect stitch count, and poor shaping, you can create beautiful hats that are comfortable to wear and showcase your knitting skills.
Variations and Design Ideas
There are countless possibilities for variations and design ideas when it comes to knitting machine hat patterns. Here are a few suggestions to inspire your creativity:
Colorwork: Experiment with different color combinations to create unique and eye-catching patterns. Whether you prefer traditional Fair Isle, geometric designs, or something more abstract, colorwork can take your hat to the next level.
Texture: Incorporate different stitch patterns to add texture and interest to your hat. Explore cables, ribbing, lace, or even bobbles to create a distinct look and feel.
Embellishments: Consider adding embellishments such as pom-poms, flowers, or buttons to personalize your hat. These small details can make a big difference and showcase your individual style.
Stripes and Patterns: Play with stripes of varying widths or experiment with different stitch patterns to create unique patterns and textures. You can combine different techniques to achieve the desired effect.
Customization: Don’t be afraid to make modifications to existing patterns or create your own from scratch. Knitting machine hat patterns are a great starting point, but you can always tailor them to suit your preferences and fit.
- Consider adjusting the sizing to fit your head or the intended recipient.
- Add or remove stitches to achieve the desired width.
- Experiment with different yarn weights and fibers for different effects.
- Try different brim styles, such as adding a folded ribbed brim or a rolled edge.
With a knitting machine, the possibilities are endless. Let your imagination run wild and create unique and stylish hats that are truly one of a kind.
Conclusion
Knitting machine hat patterns offer a convenient and efficient way to create beautiful and customized hats. Whether you’re a beginner or an experienced knitter, the versatility and speed of a knitting machine make it an excellent tool for hat-making. With a wide range of patterns and design ideas available, you can easily find or create a hat that suits your style and preferences. So get creative, have fun, and start knitting your own hats with a knitting machine!