
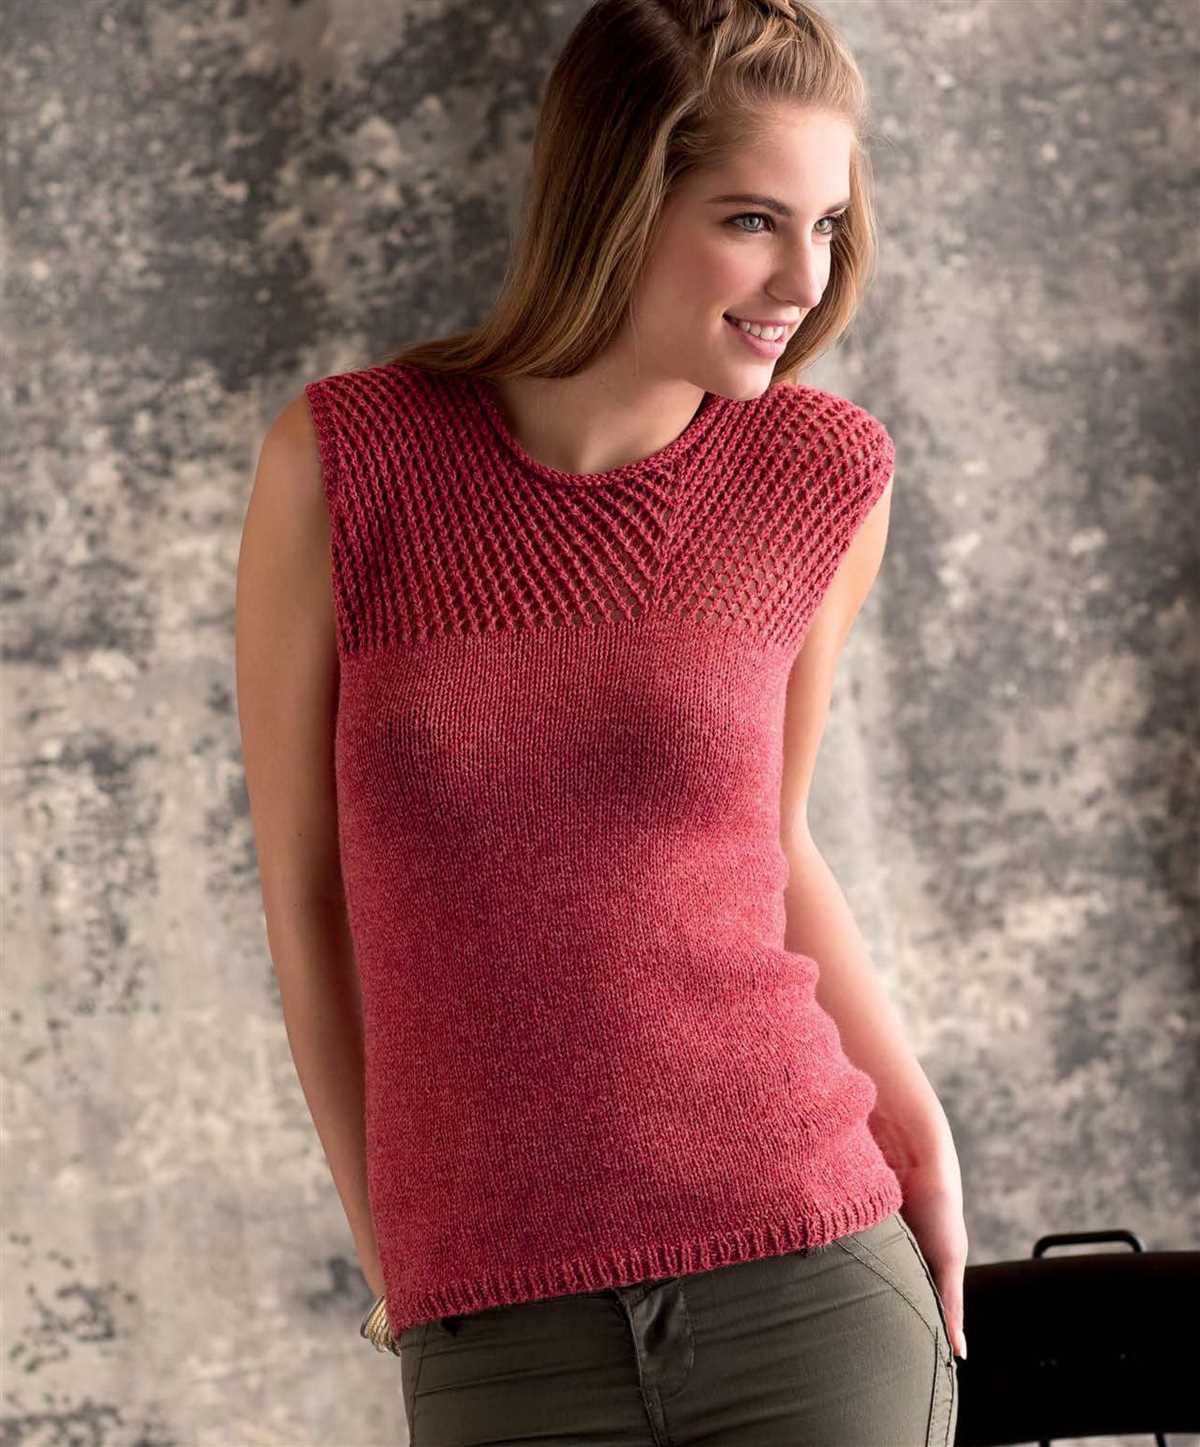
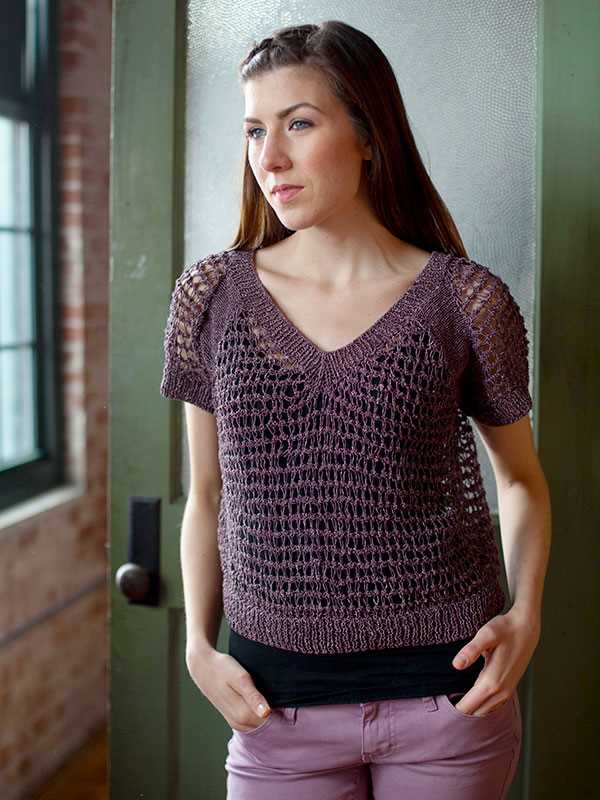
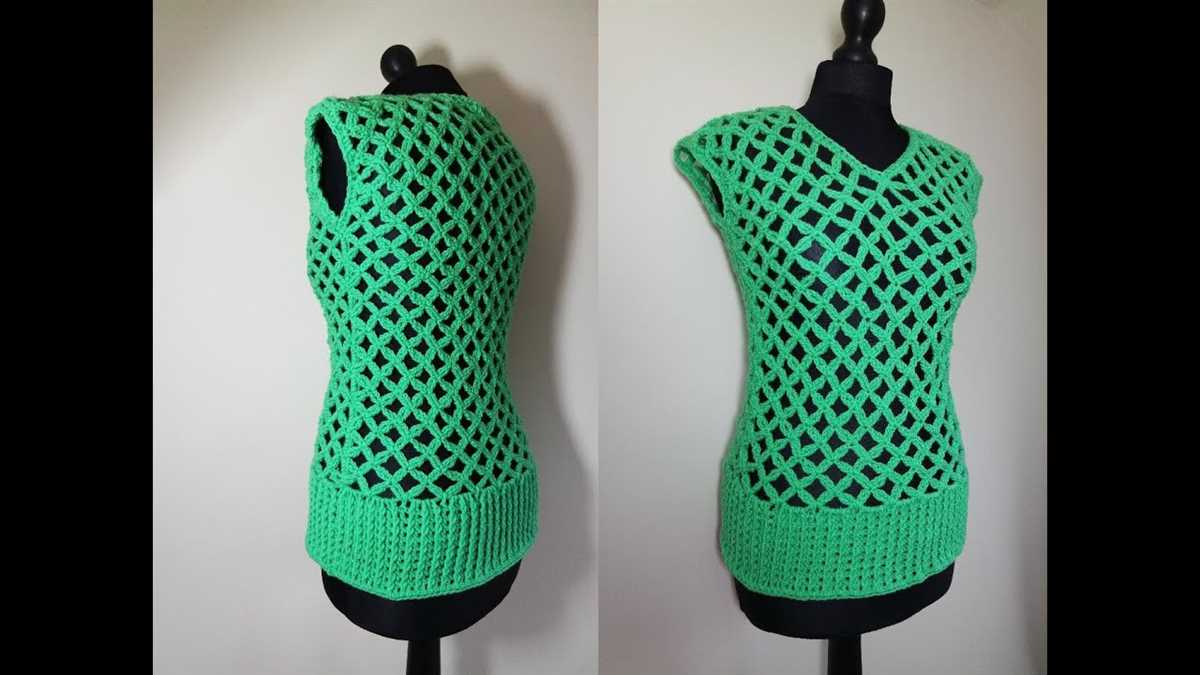
Knitting is a versatile and rewarding craft that allows you to create beautiful and unique garments. If you’re looking for a new project to showcase your knitting skills, consider trying out a knit mesh top pattern.
A knit mesh top is a lightweight and breathable garment that is perfect for warm weather. The open and airy design of the mesh allows for maximum airflow, keeping you cool and comfortable on hot summer days. Whether you’re heading to the beach or going out for a casual brunch, a knit mesh top is a stylish and practical choice.
There are many different patterns and styles available for knit mesh tops, so you can easily find one that suits your personal taste and skill level. From simple and beginner-friendly patterns to more intricate lace designs, there is something for everyone. You can choose to knit your top using a variety of yarns, from cotton or linen for a lightweight and breezy feel to silk or merino for a more luxurious and cozy touch.
Knitting a mesh top can be a fun and challenging project that will help you expand your knitting skills. From working with lace patterns to creating interesting stitch combinations, you’ll have the opportunity to learn new techniques and improve your knitting abilities. Plus, the end result will be a beautiful and stylish garment that you can proudly wear or gift to a loved one.
Knit Mesh Top Pattern
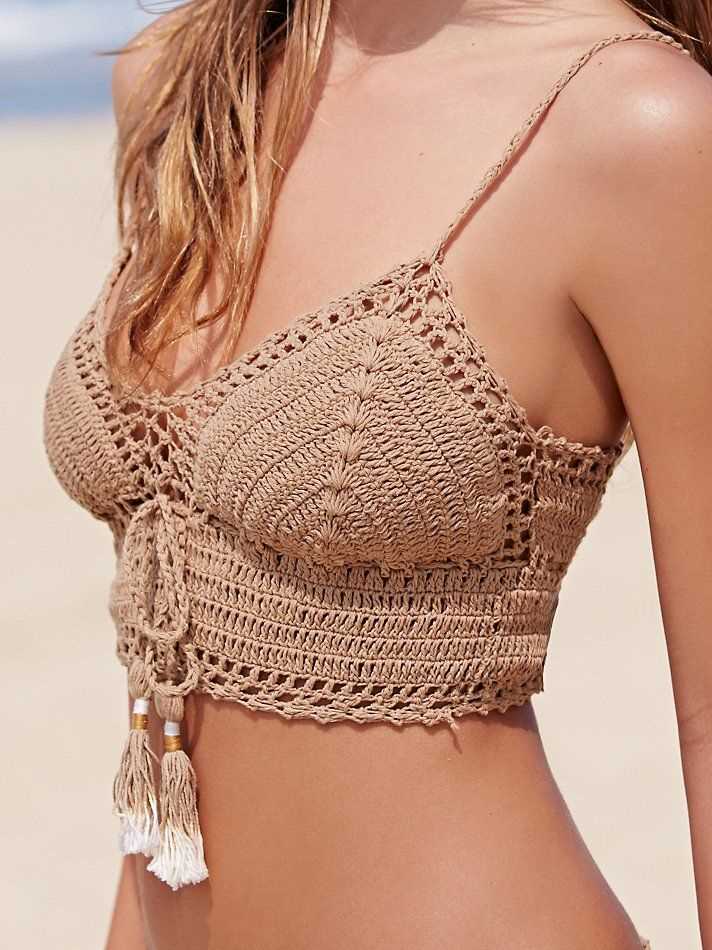
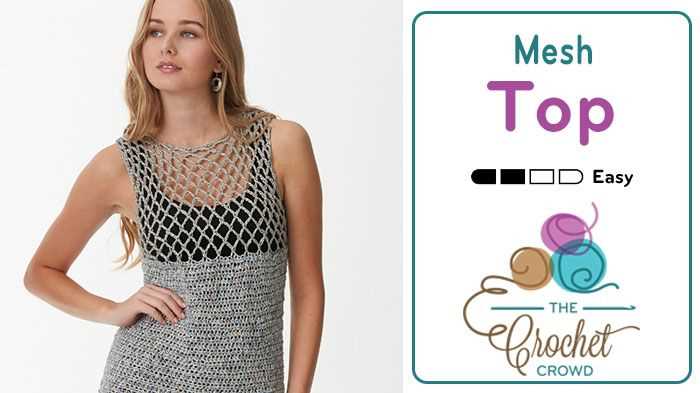
If you’re looking to add a stylish and versatile piece to your wardrobe, a knit mesh top is a perfect choice. With its unique texture and openwork design, a knit mesh top can be dressed up or down, making it suitable for any occasion. Whether you’re heading to the beach or out for a night on the town, this pattern will help you create a beautiful and trendy garment that you’ll love to wear.
The knit mesh top pattern is relatively easy to follow, making it a great project for both beginners and experienced knitters. The pattern typically involves using lightweight yarn and larger knitting needles to create an open and airy fabric. Some patterns may also incorporate different stitch patterns, such as lace or ribbing, to add visual interest to the garment.
Materials Needed:

- Lightweight yarn (recommended: cotton or linen blend)
- Knitting needles (size will vary based on the pattern)
- Tapestry needle
- Stitch markers
- Scissors
To start knitting your mesh top, you’ll first need to select a pattern that suits your style and skill level. There are many free and paid patterns available online, so you’ll have plenty of options to choose from. Once you have your pattern and materials ready, you can begin casting on and following the instructions provided.
As you work through the pattern, you’ll encounter different techniques and stitch patterns, such as yarn overs and decreases, that will create the mesh-like effect. It’s important to carefully follow the instructions and pay attention to any special stitches or techniques required. Don’t worry if it takes some practice to get the hang of it – knitting is a skill that improves with time and repetition.
Once you’ve completed all the required sections of the pattern, you’ll finish off by binding off the stitches and weaving in any loose ends. Then, you can try on your finished knit mesh top and admire your handiwork. Pair it with jeans and sneakers for a casual look or dress it up with a skirt and heels for a more formal occasion. The possibilities are endless!
Choosing the Right Yarn for a Knit Mesh Top
When it comes to knitting a mesh top, choosing the right yarn is crucial for achieving the desired look and feel of the garment. The yarn you select will determine not only the overall appearance of the top, but also its drape, breathability, and comfort. Therefore, it’s important to consider several factors when choosing yarn for a knit mesh top.
Fiber Content: The fiber content of the yarn plays a significant role in how the mesh top will turn out. For a lightweight and breathable top, natural fibers like cotton, linen, or bamboo are excellent choices. These fibers have excellent moisture-wicking properties, allowing air to circulate easily. Synthetic fibers like acrylic or nylon can also be used, as they can provide durability and stretch, giving the top more structure.
Yarn Weight: The weight of the yarn will determine the final look of the mesh top. You can choose a lace or fingering weight yarn for a delicate and airy effect, or opt for a sport or DK weight yarn for a slightly denser and more substantial fabric. The choice of yarn weight will also depend on the desired level of sheerness or opacity in the mesh top.
Color and Texture: The color and texture of the yarn can greatly enhance the visual appeal of the knit mesh top. Solid or tonal colors can highlight the intricate mesh pattern, while variegated or self-striping yarns can add interest and create a unique effect. Additionally, yarns with a subtle texture, such as a slub or tweed, can add dimension to the fabric and make the top more visually appealing.
Yardage: Before purchasing yarn for the knit mesh top, it’s crucial to calculate the required yardage. Mesh tops typically require more yarn due to the openwork nature of the stitch pattern. It’s advisable to purchase extra yarn to avoid running out in the middle of the project.
By considering the fiber content, yarn weight, color and texture, and yardage, you can select the perfect yarn for your knit mesh top. The right choice of yarn will not only ensure the success of your project but also result in a beautiful and comfortable garment.
Selecting the Appropriate Needles for a Knit Mesh Top
When knitting a mesh top, it is important to select the appropriate needles to achieve the desired drape and stitch definition. The type and size of needles can greatly affect the outcome of the final garment.
Size: The size of the needles will determine the gauge and overall size of the mesh top. If a looser, more open mesh is desired, larger needles should be used. Conversely, smaller needles will create a tighter, denser fabric with a finer mesh. Experimenting with different needle sizes can help achieve the desired effect.
Type: The type of needles can also impact the look and feel of the knit mesh top. Circular needles are often preferred for larger projects like tops, as they allow for easy knitting in the round and minimize the risk of dropped stitches. However, if knitting a smaller mesh top or working on a flat surface, straight needles can also be used.
Regardless of the needle type chosen, it is important to consider the material they are made of.
- Bamboo: Bamboo needles are lightweight and have a natural grip, making them a popular choice for many knitters. They are known for their flexibility and smooth surface, which can prevent the yarn from slipping.
- Metal: Metal needles, such as those made of aluminum or stainless steel, are durable and provide a slick surface for faster knitting. They are especially useful when working with slippery yarns.
- Plastic: Plastic needles are lightweight and affordable, making them a good choice for beginners. However, they may not be as durable as other materials and can have a bit more friction when working with certain yarns.
Ultimately, the choice of needles for a knit mesh top depends on personal preference and the desired outcome. It is recommended to swatch with different needle sizes and materials to find the perfect combination that will bring the mesh top to life.
Understanding Knit Mesh Patterns and Stitches
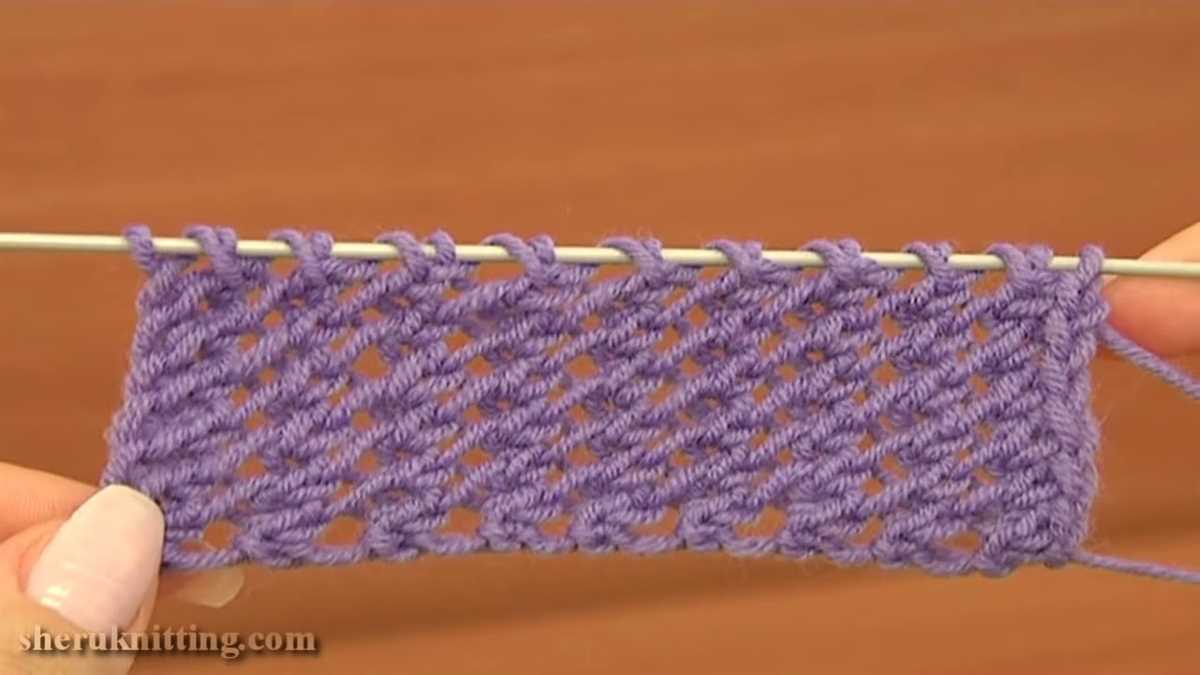
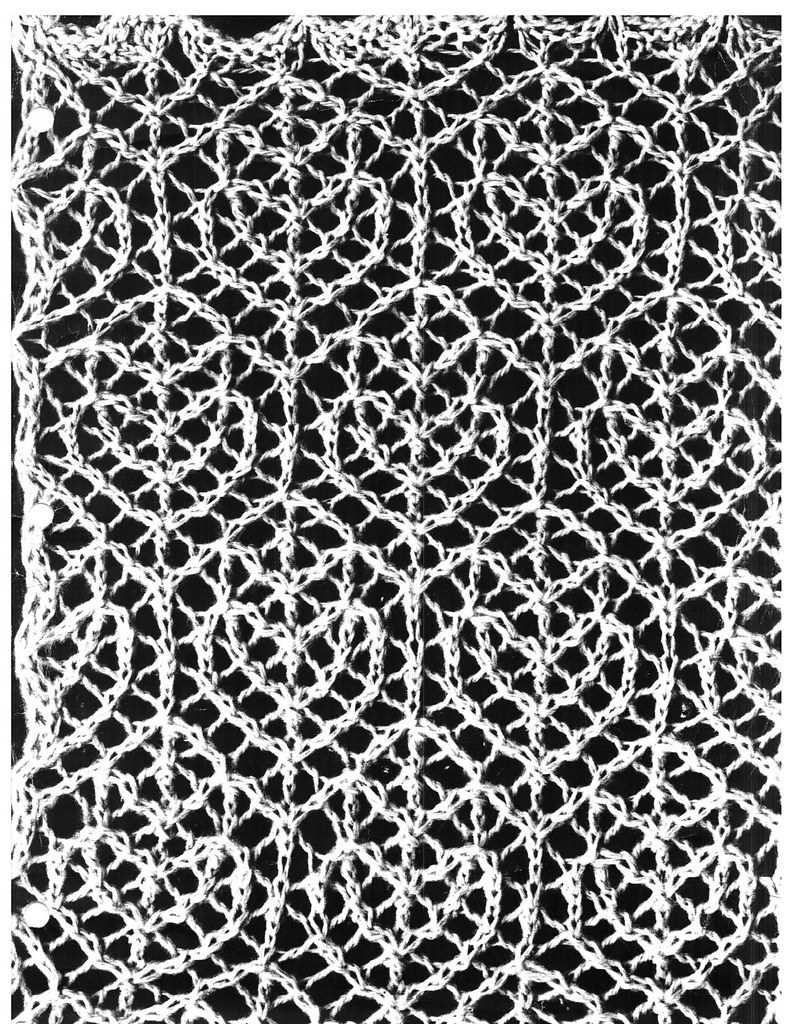
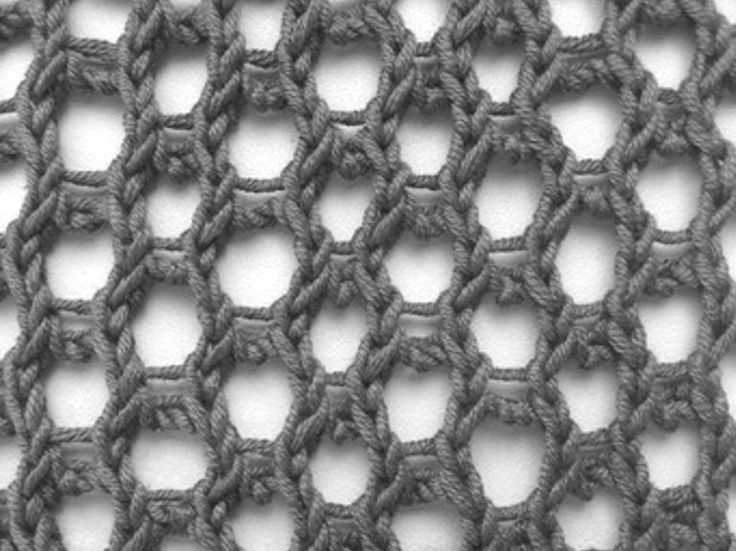
The art of creating knit mesh patterns and stitches requires an understanding of the basic techniques involved. Knit mesh refers to a type of fabric with an open, breathable structure that is achieved by using specific stitches and patterns. These patterns often feature a combination of yarn overs, decreases, and increases to create an intricate and delicate design.
One of the most common knit mesh patterns is the eyelet stitch. This stitch is created by alternating rows of yarn overs and decreases, resulting in small holes or “eyelets” throughout the fabric. Eyelet stitches are commonly used in garments such as lightweight tops, shawls, and scarves, as they add a touch of elegance and allow for better air circulation.
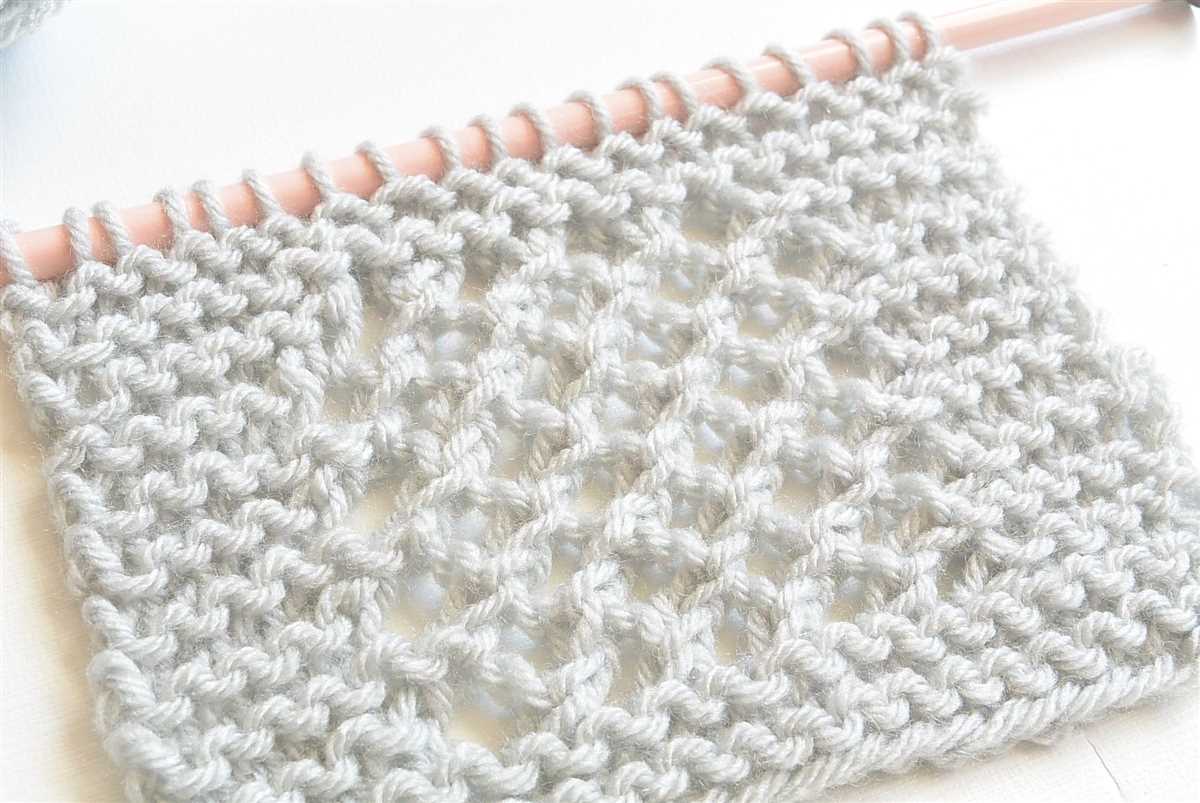
Another popular knit mesh pattern is the diamond lace stitch. This stitch creates a diamond-shaped design with a combination of yarn overs and decreases. The diamond lace stitch is often used in sweaters, cardigans, and accessories to add visual interest and texture to the garment.
When working with knit mesh patterns, it is important to pay attention to the tension of your stitches. Because knit mesh often has an open structure, it is essential to maintain a consistent tension to ensure that the fabric does not become too loose or stretched. This can be achieved by using the appropriate needle size and practicing even tension throughout your knitting.
Overall, understanding knit mesh patterns and stitches allows knitters to create beautiful and breathable garments. Whether you are a beginner or an experienced knitter, exploring different knit mesh patterns can add a new dimension to your knitting projects and help you create unique and stunning pieces.
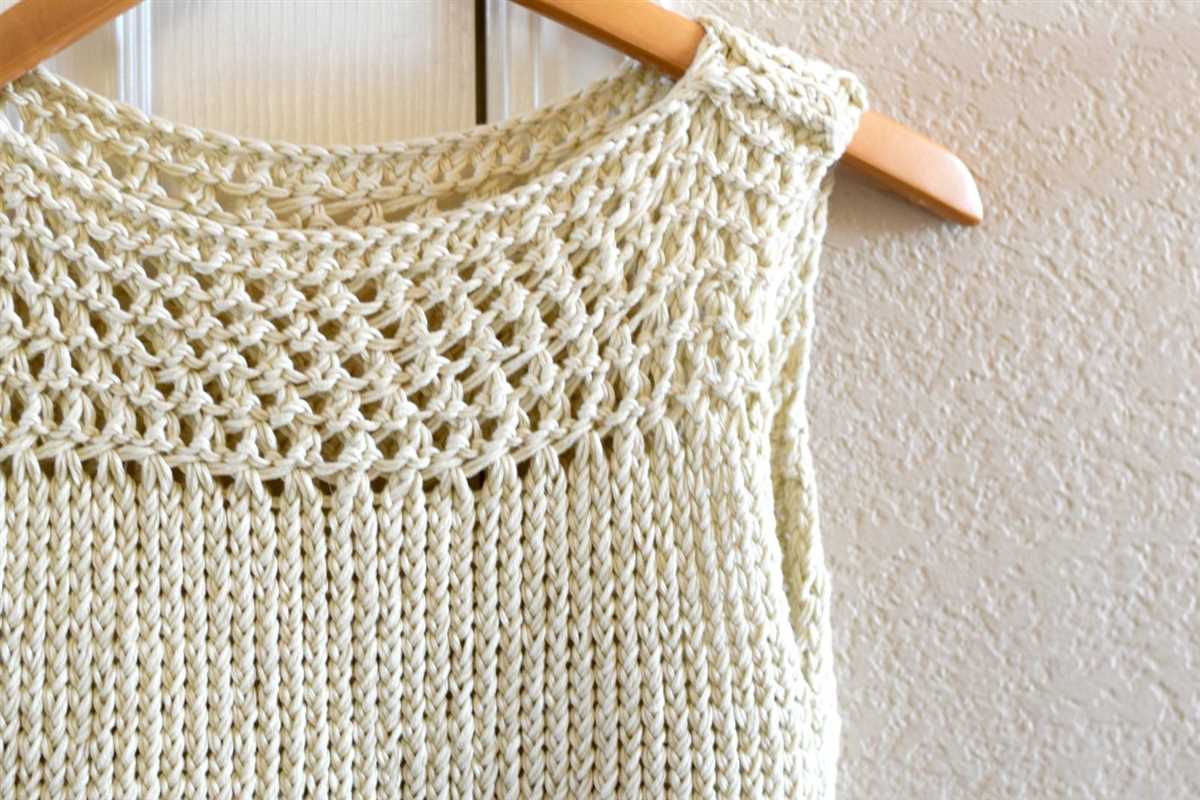
Knitting the Base of the Mesh Top
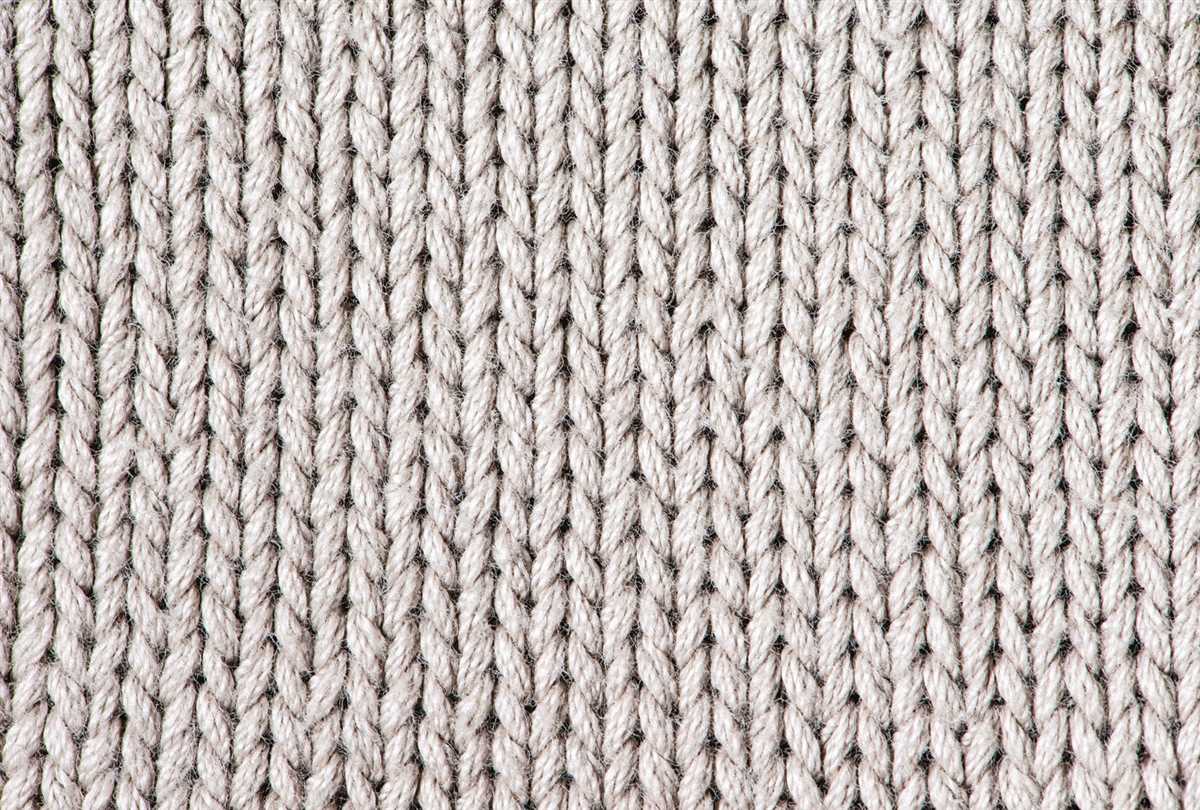
When knitting a mesh top, it is important to start with a strong and sturdy base. This base will provide the foundation for the mesh pattern and ensure that the top holds its shape well. There are a few different stitch patterns that can be used for the base, but the most common is the stockinette stitch. This stitch creates a smooth and even fabric that is perfect for showcasing the intricate mesh pattern.
To knit the base of a mesh top using the stockinette stitch, start by casting on the desired number of stitches. It is important to choose a yarn and needle size that will give you the correct gauge, as this will ensure that the top fits properly. Once the stitches are cast on, begin by knitting every stitch in the first row. Then, for the following rows, alternate between knitting and purling each row. This will create the classic stockinette stitch pattern.
Another option for the base of a mesh top is the garter stitch. This stitch pattern is created by knitting every row, which results in a bumpy texture. While the garter stitch is not as smooth as the stockinette stitch, it does provide more structure and stability to the fabric. To knit the base of a mesh top using the garter stitch, simply cast on the desired number of stitches and knit every row until the desired length is reached.
Regardless of the stitch pattern used, it is important to keep the tension even throughout the knitting process. This will help to ensure that the fabric is consistent and that the mesh pattern will not be distorted. Additionally, it is a good idea to use stitch markers to help keep track of any shaping or pattern repeats that may be required for the specific mesh top design. By following these steps, you will be well on your way to creating a beautiful and unique knit mesh top.
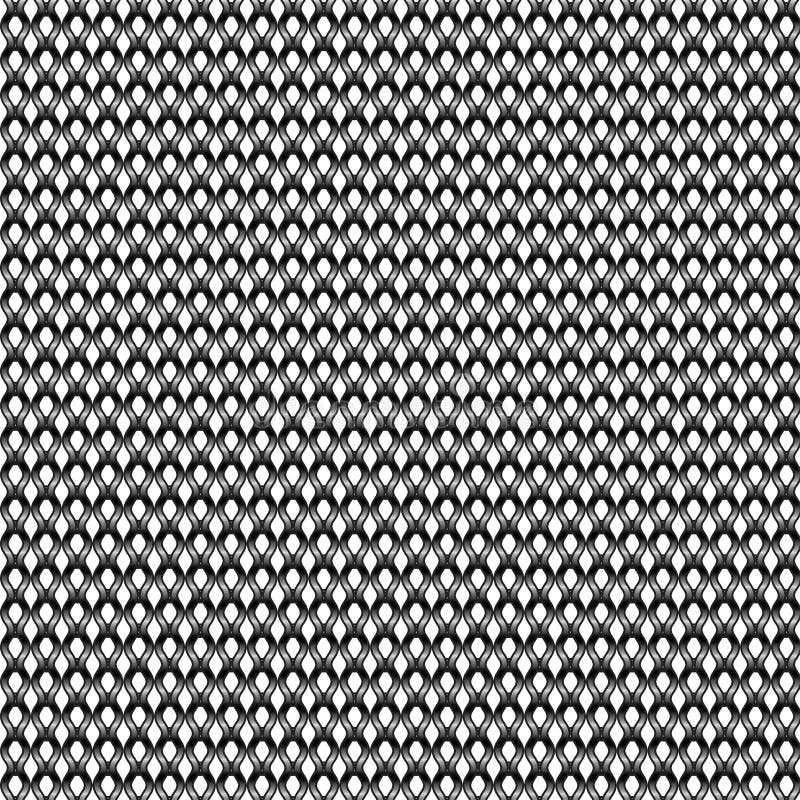
Creating the Mesh Pattern
When knitting a mesh top, the pattern is an essential element that gives the fabric its distinctive look. The mesh pattern creates an open, breathable texture that is perfect for warmer weather. Here are the steps to create the mesh pattern:
1. Choose the right yarn and needle size
To achieve the best results, it is important to select a lightweight yarn that is suitable for knitting a mesh pattern. A yarn made from cotton or linen works well for this type of project. Additionally, choose a needle size that is appropriate for the yarn thickness. Generally, a larger needle size will result in a looser and more open mesh pattern.
2. Cast on the desired number of stitches
Start by casting on the number of stitches required for your size. The number of stitches will depend on the desired width of the top and the gauge of your yarn and needles. It is essential to follow the pattern instructions to ensure the correct number of stitches.
3. Begin the mesh pattern
The mesh pattern typically consists of a combination of knit and yarn-over stitches. Start the pattern by knitting a row or two as the base. Then, on the next row, you will create the mesh by alternating between knitting and creating yarn-over stitches. The yarn-over stitches will create the holes in the fabric that give it the mesh-like appearance.
4. Repeat the mesh pattern
Continue repeating the mesh pattern rows until you have reached the desired length. Pay attention to any specific stitch sequence or pattern variations mentioned in the instructions. It is essential to maintain consistency throughout the project to create a uniform and attractive mesh texture.
5. Bind off and finish
Once you have completed the desired length of the mesh top, bind off the stitches to secure the edge. Make sure to follow the pattern instructions for the bind-off technique. After binding off, weave in any loose ends or seams to give the top a polished and finished look.
By following these steps, you can create a beautiful and airy mesh top that is perfect for summer days and evenings. The mesh pattern adds a touch of elegance to your knitting project and allows for comfortable and breathable wear. Experiment with different yarns and stitch variations to create your unique mesh top pattern.
Shaping the Knit Mesh Top for a Perfect Fit
If you are looking to create a stunning knit mesh top, it is important to ensure that it fits you perfectly. Shaping the top using the right techniques and measurements will help you achieve a flattering and comfortable fit.
1. Taking accurate body measurements: Before you start knitting, it is essential to take your body measurements accurately. Measure your bust, waist, and hip circumference, as well as the length from your shoulder to your desired top length. This will help you determine the appropriate size to knit and make any necessary adjustments for a personalized fit.
2. Choosing the right pattern size:
Once you have your measurements, refer to the pattern’s size chart to select the size that corresponds to your measurements. It is important to choose the size that matches your largest measurement, as you can always make adjustments for smaller areas later.
3. Making adjustments for a customized fit: If necessary, you can make slight modifications to the pattern to ensure a perfect fit. For example, you may need to add or subtract stitches to accommodate your bust size. You can also adjust the length of the top or the armhole shaping to suit your preferences.
- Adding or subtracting stitches: To adjust the width, you can add or subtract stitches from the front, back, or side panels of the top. This will help achieve the desired fit across the bust, waist, and hips.
- Length adjustments: If you prefer a longer or shorter top, you can easily modify the pattern instructions to match your desired length. Remember to adjust the shaping accordingly to maintain the proportions.
- Armhole shaping: If the armholes feel too tight or too loose, you can modify the shaping by adding or decreasing the number of stitches in the armhole section. Remember to maintain the overall stitch count to ensure balanced shaping.
4. Gauge swatching: To achieve the desired fit and size, it is crucial to check and match the gauge specified in the pattern. Knit a gauge swatch in the stitch pattern used for the mesh top and measure your stitches per inch. Adjust your needle size if necessary to match the gauge and achieve accurate sizing.
By shaping the knit mesh top with precision and making personalized adjustments, you can create a garment that fits you perfectly and showcases your knitting skills. Taking accurate measurements, choosing the right pattern size, and making modifications as needed will ensure a flattering and comfortable fit.
Adding Decorative Elements to a Knit Mesh Top
When it comes to creating a unique and stylish knit mesh top, adding decorative elements can really take your design to the next level. These elements can include different types of stitches, patterns, or even embellishments. They allow you to add your personal touch and make your top stand out from the crowd.
1. Different Stitch Patterns:
One way to add decorative elements to your knit mesh top is by incorporating different stitch patterns. You can experiment with lace, cable, or textured stitches to create interesting and eye-catching designs. Lace stitches, for example, can add a delicate and feminine touch to your top, while cable stitches can create a more intricate and structured look.
By combining different stitch patterns in various sections of your top, you can create a unique and visually appealing design that showcases your knitting skills.
2. Colorwork:
Add some color to your knit mesh top by incorporating colorwork techniques. You can use stranded knitting, intarsia, or Fair Isle techniques to create beautiful and vibrant patterns. These techniques involve working with multiple colors at a time to create intricate designs or motifs.
Consider using contrasting colors to make the patterns pop or create a gradient effect by blending different shades of the same color. The choice of colors and patterns is all up to you and can be tailored to match your personal style.
3. Embellishments:
For a more embellished look, you can add decorative elements such as beads, sequins, or even embroidery to your knit mesh top. These embellishments can be strategically placed to highlight certain areas or create a focal point on the garment.
When adding embellishments, make sure to consider the weight and texture of the materials you are using. You don’t want them to weigh down the delicate mesh fabric or make it uncomfortable to wear. Securely attach the embellishments using a matching thread or yarn to ensure they stay in place.
In conclusion, adding decorative elements to a knit mesh top allows you to showcase your creativity and make a unique statement piece. Whether it’s through different stitch patterns, colorwork, or embellishments, these elements can enhance the overall design and make your top truly one-of-a-kind.
Blocking and Finishing a Knit Mesh Top
Once you have completed knitting your mesh top, it’s time to block and finish it to achieve the desired fit and appearance. Blocking is an essential step in the finishing process as it helps to even out the stitches, open up the mesh pattern, and give the garment a polished look.
Blocking:
To block your knit mesh top, you will need to wet or steam it first. Fill a sink or basin with lukewarm water and add a small amount of gentle detergent. Place the top in the water and gently agitate it to ensure that it is evenly wet. Let it soak for about 15 minutes, then carefully remove the excess water by gently squeezing it without wringing.
Next, lay the top on a clean towel and gently roll it up to remove any remaining water. Lay another clean towel on a flat surface and place the rolled-up top on it. Gently stretch the top to the desired dimensions, making sure to maintain the stitch pattern. Use rust-proof pins to secure the edges and any shaping. Leave the top to dry completely. This may take a couple of days, depending on the humidity levels in your area.
Finishing:
Once your knit mesh top is dry, it’s time to finish it. Remove the pins and carefully remove any excess moisture that may have accumulated during the drying process. Weave in any loose ends using a tapestry needle and trim any excess yarn.
If your pattern includes ribbing or borders, you can finish them by picking up stitches along the edges and knitting a few rows of ribbing. This will give your top a neat and professional-looking finish. Alternatively, you can choose to leave the edges unfinished for a more casual and relaxed look.
Before wearing or storing your finished knit mesh top, give it a final inspection for any loose stitches or areas that may require reinforcing. If necessary, use a yarn needle to stitch any loose stitches back into place.
Now your knit mesh top is ready to be worn and enjoyed! The blocking and finishing process helps to enhance the beauty of your handmade garment and ensures that it retains its shape and longevity.
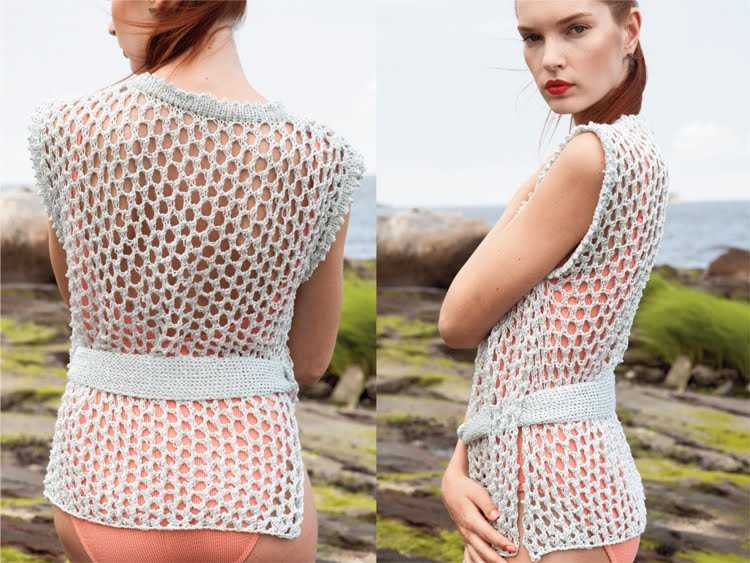
Styling and Wearing Your Finished Knit Mesh Top

Now that you have completed your knit mesh top, it’s time to style and wear it with confidence. Whether you’re dressing it up for a night out or keeping it casual for a day at the beach, there are plenty of ways to make your knit mesh top the focal point of your outfit.
Here are some styling tips to inspire you:
- Pair it with high-waisted bottoms: The cropped length of the mesh top makes it the perfect match for high-waisted jeans or skirts. This combination creates a stylish and flattering silhouette.
- Add a statement belt: To elevate your look, accessorize with a bold belt. Cinching in your waist will create a more polished and put-together outfit.
- Layer it over a camisole: If you prefer a bit more coverage, layering your mesh top over a camisole can add a touch of modesty while still showcasing the unique texture of the knit.
- Experiment with prints and patterns: Don’t be afraid to mix and match prints and patterns. Pairing your knit mesh top with a floral skirt or striped pants can create a fun and playful look.
- Dress it up with accessories: Add statement jewelry, a stylish handbag, or a pair of heels to instantly elevate your knit mesh top for a more formal occasion.
Ultimately, the key to styling your knit mesh top is to have fun and experiment with different combinations. Don’t be afraid to step out of your comfort zone and try new looks. With its unique texture and versatility, your knit mesh top is sure to become a staple in your wardrobe for every season.