
Knitting is an age-old craft that has captivated people for centuries. From simple scarves to intricate sweaters, knitters have the ability to create beautiful and unique pieces. One pattern that has gained popularity in recent years is the graph snowflake pattern.
The graph snowflake pattern is a unique and visually stunning design that is perfect for adding a touch of winter to any project. It typically features a snowflake motif created by using different colored yarns. The pattern is created by following a chart or graph, which shows the stitches and colors needed for each row.
While the graph snowflake pattern may appear complex, it is actually quite simple to knit. With a basic knowledge of knitting techniques, you can easily create this beautiful pattern. The pattern is often used on items such as hats, scarves, and blankets, adding a festive touch to winter accessories.
Whether you are a seasoned knitter or just starting out, the graph snowflake pattern is a great way to practice your skills and create something truly unique. The possibilities are endless when it comes to color and design choices, allowing you to customize your project to suit your style. So why not give the graph snowflake pattern a try and create your own winter wonderland?
What is a graph snowflake knitting pattern?

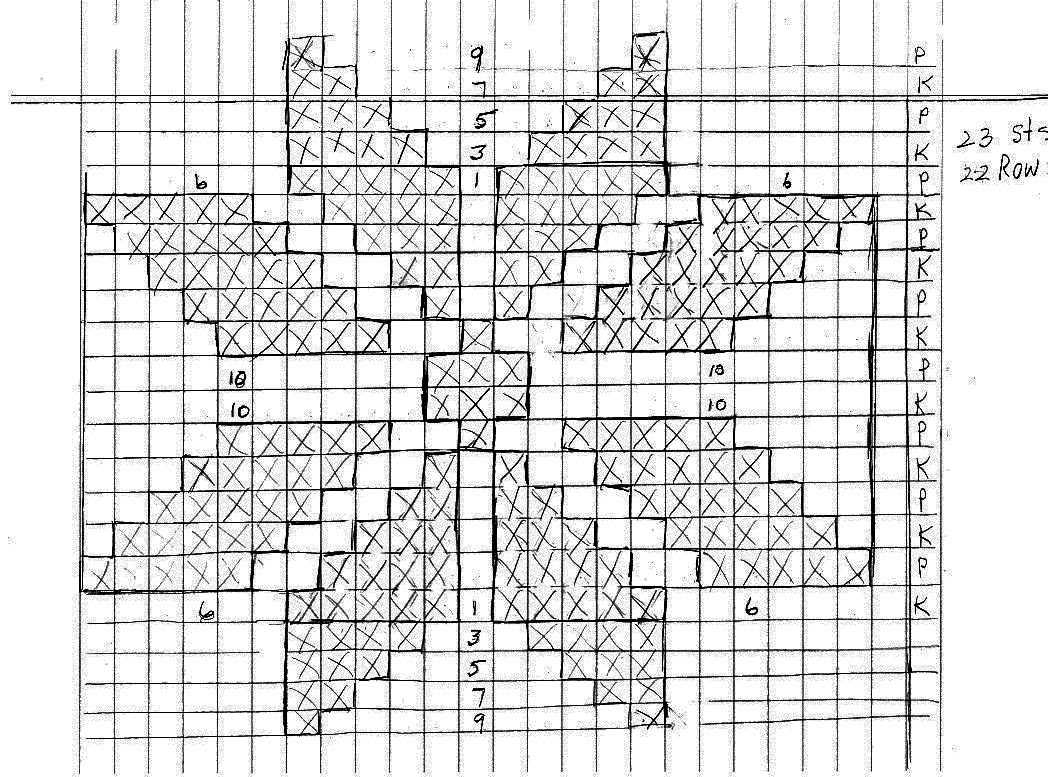
A graph snowflake knitting pattern is a design that is created using a chart or graph to represent each stitch in a knitting project. The chart is made up of square cells, with each cell representing one stitch. By following the chart, knitters can create intricate and detailed designs, including snowflakes.
The graph snowflake knitting pattern typically includes symbols or colors to represent different types of stitches, such as knit stitches, purl stitches, and yarn overs. These symbols are placed in the cells of the chart to indicate which stitch should be worked at each point in the pattern. By following the chart row by row, knitters can create a snowflake motif within their knitting project.
Graph snowflake knitting patterns can vary in complexity, with some patterns featuring simple snowflake designs and others incorporating more intricate and detailed motifs. The chart provides a visual representation of the pattern, making it easier for knitters to follow along and keep track of their stitches. It is a popular technique for creating unique and personalized knitting projects, allowing knitters to add their own creative touch to their work.
Knitters can find a variety of graph snowflake knitting patterns online or in knitting books and magazines. They can also create their own patterns by designing their own charts or modifying existing patterns to suit their preferences. With the availability of charting software and online knitting communities, it is easier than ever for knitters to access and share graph snowflake knitting patterns.
How to read a graph snowflake knitting pattern

If you are new to knitting or have never used a graph pattern before, reading a graph snowflake knitting pattern might seem intimidating at first. However, with a little practice and understanding of the symbols used, you will be able to follow the pattern and create beautiful snowflake designs in no time.
1. Familiarize yourself with the symbols: Graph snowflake knitting patterns use different symbols to represent various stitches. Common symbols include circles for knit stitches, dots for purl stitches, and diagonal lines for decreases or yarn overs. Take some time to review the key at the beginning of the pattern to understand what each symbol represents.
2. Start from the bottom right corner: When reading a graph snowflake knitting pattern, it is important to start from the bottom right corner and read each row from right to left. The graph is usually divided into squares, with each square representing one stitch. By following this method, you can easily keep track of your progress and ensure that your snowflake pattern is symmetrical.
3. Count the number of stitches: Before you begin knitting, count the number of stitches in each row of the graph pattern. This will help you determine the correct number of stitches to cast on and ensure that your snowflake turns out the correct size. Additionally, counting the stitches as you work can help you identify any mistakes or missed stitches in your knitting.
4. Use stitch markers: To help you keep track of your progress and easily identify where each snowflake motif begins and ends, consider using stitch markers. Place a stitch marker at the beginning and end of each motif to mark the boundaries and make it easier to follow the pattern.
5. Take it step by step: Reading a graph snowflake knitting pattern may seem overwhelming at first, but remember to take it one step at a time. Start with the first row and work your way up, paying close attention to the symbols and following the instructions carefully. With practice, you will become more comfortable reading graph patterns and be able to tackle more intricate snowflake designs.
Choosing the right yarn and needles

When it comes to knitting a graph snowflake pattern, choosing the right yarn and needles is essential to achieve the desired results. The yarn you select should be suitable for the intended use of the finished product, whether it’s a cozy winter hat or a decorative wall hanging. Additionally, the weight and texture of the yarn will affect the overall appearance and feel of the snowflake design.
Yarn weight: The weight of the yarn will determine the size and thickness of the snowflake. Thin, lace-weight yarn will create delicate and intricate designs, while bulky yarn will result in larger, more pronounced snowflakes. Consider the intended use and desired visual impact of your project when selecting the yarn weight.
Yarn texture: The texture of the yarn can add depth and visual interest to your knitted snowflake pattern. Smooth, plied yarn will provide a clean and crisp look, while yarn with a halo or fuzzy texture can create a soft and whimsical appearance. It’s important to consider how the texture will interact with the intricate details of the snowflake design.
Needle size: The size of your knitting needles will also play a role in the outcome of your snowflake pattern. Smaller needles will produce tighter stitches and finer details, while larger needles will result in looser stitches and a more open design. Experiment with different needle sizes to find the right balance of stitch definition and drape for your project.
Considerations for colorwork: If you plan to incorporate multiple colors into your snowflake pattern, it’s important to select yarns with good color contrast. This will ensure that the intricate details of the design stand out and are easily visible. Using yarns with different color values or hues can create a visually stunning and dynamic snowflake motif.
Overall, choosing the right yarn and needles for your graph snowflake pattern is an important decision that will greatly impact the final result. Consider factors such as yarn weight, texture, needle size, and color contrast to create a beautiful and eye-catching snowflake design.
Preparing your stitches
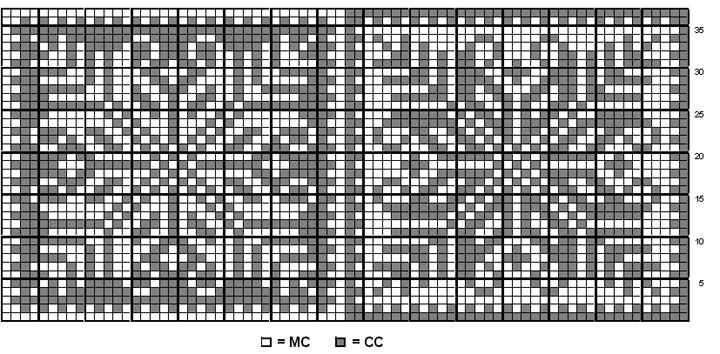
Before you start knitting the snowflake pattern, it’s important to prepare your stitches properly. This will ensure that your pattern comes out correctly and that you don’t encounter any issues along the way.
Casting on: To cast on your stitches, you can use any method you prefer. A popular choice for this pattern is the long-tail cast on, as it creates a neat and stretchy edge. Make sure to leave a long tail to weave in later.
Checking your gauge: To ensure that your snowflake pattern comes out to the correct size, it’s important to check your gauge. This can be done by knitting a small swatch using the recommended needle size and yarn weight. Measure the swatch and compare it to the gauge specified in the pattern. If your gauge doesn’t match, adjust your needle size accordingly.
Reading the chart: The snowflake pattern is represented by a chart, which shows the stitches you need to knit in each row. Before you start knitting, familiarize yourself with the symbols and how they correspond to each stitch. This will make it easier for you to follow the pattern and create the snowflake design accurately.
Marking your progress: As you knit the snowflake pattern, it can be helpful to use stitch markers or highlighter tape to mark your progress on the chart. This will make it easier for you to keep track of where you are and prevent any mistakes. Move the marker or tape as you complete each row to ensure that you’re following the pattern correctly.
Weaving in ends: Once you have completed the snowflake pattern, you’ll need to weave in any loose ends. Use a tapestry needle to carefully thread the ends through the back of the work, hiding them within the stitches. This will give your finished project a neat and professional look.
Starting the Graph Snowflake Knitting Pattern

When starting the graph snowflake knitting pattern, it is important to have all the necessary materials and tools at hand. This includes the appropriate knitting needles, yarn in a variety of colors, and a knitting pattern chart with the desired snowflake design. It is also helpful to have a row counter and stitch markers to keep track of progress.
Before beginning the pattern, it is important to familiarize oneself with the symbols and colors used in the chart. Each symbol represents a different stitch, and each color represents a different yarn color. Taking the time to understand the chart will make following the pattern much easier and help avoid mistakes.
Gathering the Materials
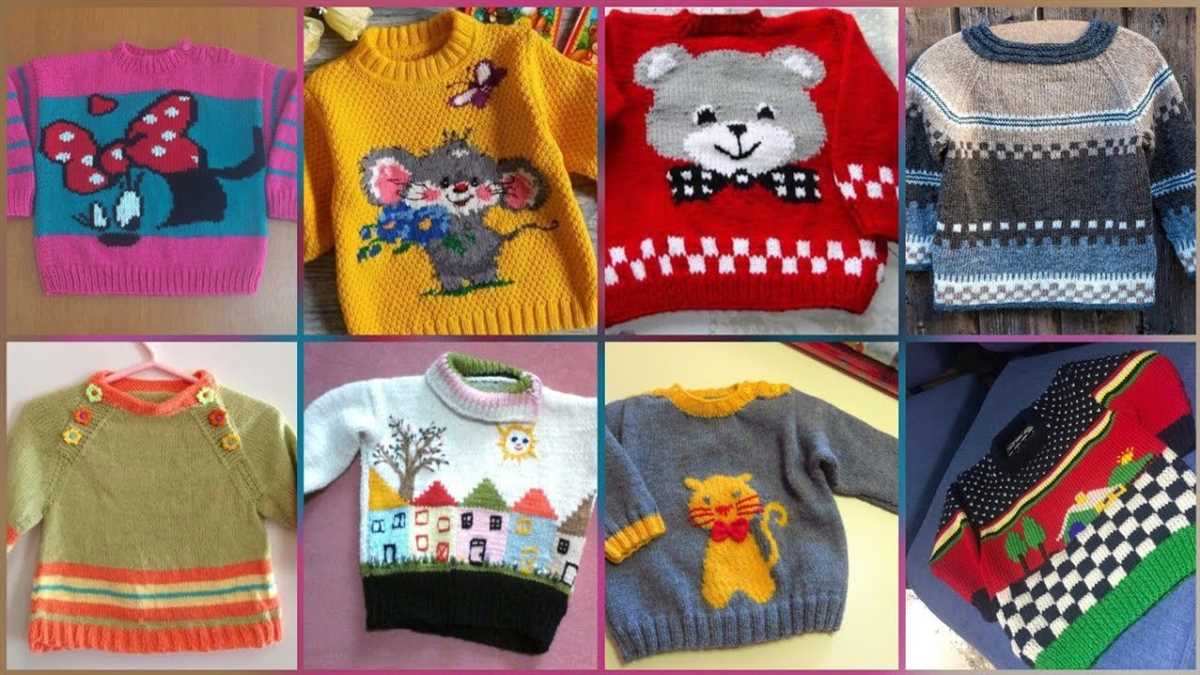
For the graph snowflake knitting pattern, you will need:
- Knitting needles in the appropriate size for your yarn
- Yarn in several different colors
- A knitting pattern chart or graph paper with your desired snowflake design
- A row counter and stitch markers
Having all these materials ready before you start will ensure a smooth and enjoyable knitting experience. Make sure to choose yarn colors that complement each other and create a beautiful snowflake design.
Understanding the Chart
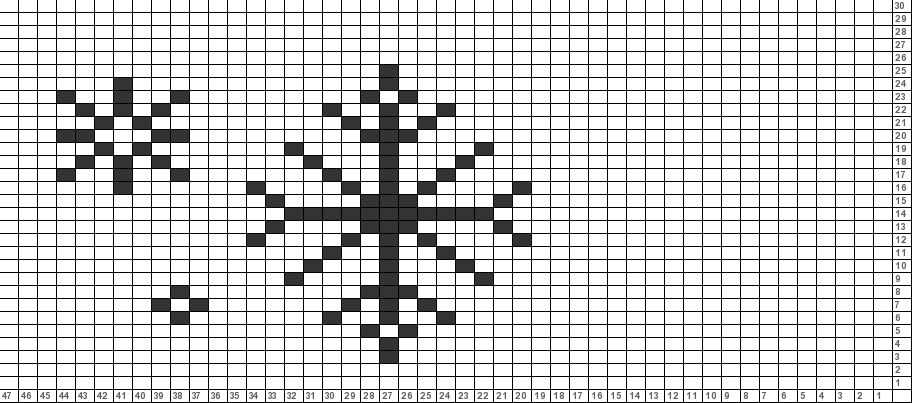
Before diving into the pattern itself, take some time to study the knitting pattern chart. Each symbol in the chart represents a specific stitch, and each color represents a different yarn color. This chart acts as a map for your knitting, guiding you through each row and stitch.
It is important to familiarize yourself with the symbols and colors used in the chart. This will help you avoid confusion and mistakes while knitting the snowflake pattern. Take note of any key or legend provided with the chart, as it may explain the meaning of each symbol or color.
Once you feel comfortable with the chart, you are ready to start knitting the graph snowflake pattern. Follow the chart row by row, stitch by stitch, and watch as the snowflake design comes to life on your knitting needles.
Working the Color Changes

When knitting the snowflake pattern, it is important to pay attention to the color changes in order to create the intricate design. The snowflake pattern typically consists of different sections or rounds, each with its own designated color. To achieve clean color transitions, there are several techniques that can be employed.
1. Carry the yarn: One method is to carry the unused color along the back of your work when switching to a new color. This technique is commonly used in fair isle or stranded knitting. However, it may result in loose floats on the wrong side of the fabric, so it is important to take care and not carry the yarn too tightly or loosely.
2. Intarsia: Another technique that can be used for color changes is intarsia. With intarsia, separate yarn bobbins or balls are used for each color section, and the yarn is twisted at the color change to prevent holes in the fabric. This method is especially useful for large color areas or when working with more than two colors in a row.
Additionally, it is important to pay attention to the chart or written instructions for the snowflake knitting pattern. The chart will indicate the specific color changes and which sections or rounds should be worked in each color. Following the chart accurately will ensure that the snowflake design is properly created.
Overall, working the color changes in the snowflake knitting pattern requires careful attention to detail and the use of appropriate techniques such as carrying the yarn or using intarsia. By following the pattern instructions and staying mindful of the color changes, you can create a beautiful snowflake design in your knitted project.
Creating the snowflake design
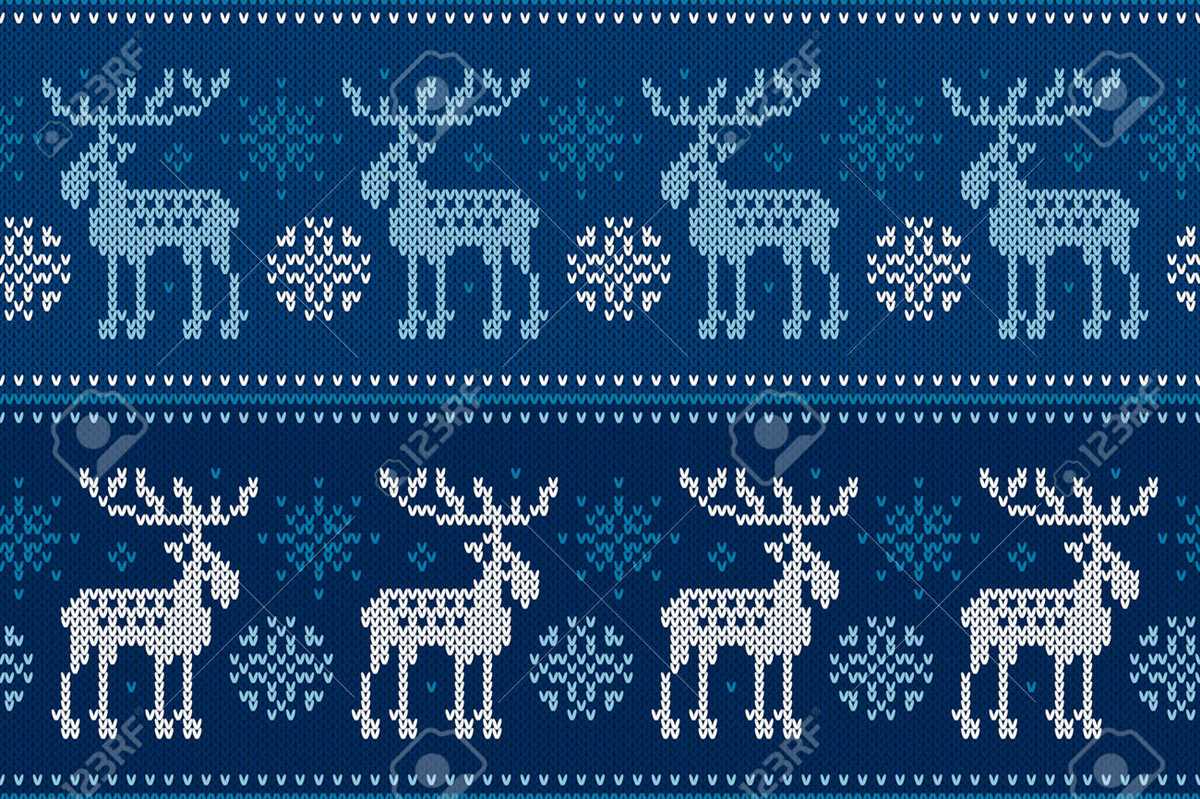
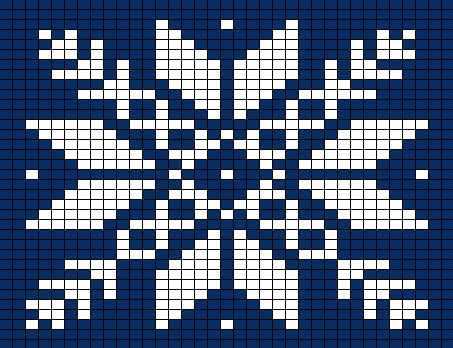
Making a snowflake design in your knitting project can be a fun and intricate way to add some winter-themed flair. There are various ways to create a snowflake design, but one popular method is by using a graph pattern. A graph pattern is like a chart that maps out the design and helps you to create the desired snowflake shape.
To create your own snowflake graph pattern, start by sketching out the design on square graph paper. Each square on the paper represents a stitch in your knitting project. Use a different symbol or color to represent the different types of stitches you want to use. For example, you could use squares to represent knit stitches and circles to represent purl stitches.
Once you have your design sketched out on graph paper, you can transfer it onto a digital platform for easier reference. There are many graphing tools available online that can help you create a digital version of your snowflake pattern. These tools allow you to easily color in the squares or circles to create your desired design.
Once you have your graph pattern finalized, you can use it as a guide while knitting your snowflake design. Follow the pattern row by row, making sure to knit or purl the stitches as indicated by the symbols or colors on the graph. Pay attention to any repeat sections in the pattern, as these will help create the intricate detail of the snowflake.
Creating a snowflake design using a graph pattern can be a rewarding and creative process. With a bit of planning and attention to detail, you can knit a beautiful snowflake pattern that is sure to impress.
Adding Texture to the Snowflake
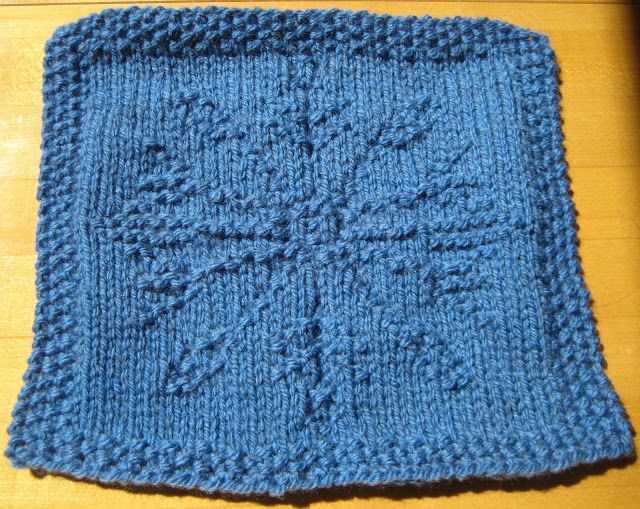
When it comes to knitting a snowflake pattern, adding texture can really enhance the overall design and make it stand out. There are several techniques you can use to achieve this, whether it’s through different stitches or by incorporating other elements.
1. Cable Stitches: Cable stitches are a great way to add depth and dimension to your snowflake pattern. By crossing stitches over each other, you can create beautiful twisting lines that mimic the intricate structure of a snowflake. Experiment with different cable patterns to find the one that best suits your design.
2. Bobbles: Bobbles are small, raised bumps of stitches that can be strategically placed within your snowflake pattern to add a touch of texture. These little round shapes can represent the icy bumps and edges found on real snowflakes, giving your knitted snowflake a more realistic appearance.
3. Lace Stitches: Lace stitches are often associated with delicate and intricate designs, which makes them perfect for creating the delicate look of a snowflake. By incorporating lace stitches into your pattern, you can achieve an airy and ethereal effect, mimicking the intricate complexity of a snowflake’s structure.
4. Beads and Sequins: For an added touch of sparkle and dimension, consider incorporating beads or sequins into your snowflake pattern. These embellishments can be strategically placed at the tips or center of each snowflake, adding a shimmering effect that catches the light and draws attention to the design.
5. Texture Through Yarn Choice: Finally, don’t underestimate the power of choosing the right yarn for your snowflake pattern. Opting for a yarn with a unique texture, such as mohair or boucle, can enhance the appearance of your snowflake and add an extra element of interest. Experiment with different yarns to see how they affect the overall texture of your design.
Summary:

Adding texture to a snowflake knitting pattern can bring it to life and make it more visually appealing. Whether you choose to incorporate cable stitches, bobbles, lace stitches, beads, sequins, or experiment with different yarns, each technique offers its own unique way to add depth, dimension, and realism to your snowflake design. Have fun exploring these options and bringing your knitted snowflakes to new levels of beauty!
Finishing the graph snowflake knitting pattern
Once you have completed knitting the graph snowflake, it is time to finish off your project. There are a few steps you can take to give your snowflake a polished and professional look.
Blocking: Start by blocking your finished piece. Blocking is the process of wetting your knitting and shaping it to the desired dimensions. This helps to even out any uneven stitches and gives your snowflake a more defined shape. To block your snowflake, gently soak it in lukewarm water and lay it flat on a towel. Pin the edges of the snowflake to the dimensions specified in the pattern and let it dry completely.
Weaving in ends: Next, you will need to weave in any loose ends. If you used multiple colors in your snowflake graph, you will have several ends to deal with. Thread each end onto a tapestry needle and weave it back and forth through the stitches on the wrong side of your work. Trim any excess yarn once the ends are securely woven in.
Finishing touches: To give your snowflake a polished look, you can add some additional touches. For example, you could sew a small bead or sequin in the center of the snowflake to serve as its focal point. Alternatively, you could embroider some additional details onto the snowflake using a contrasting color of yarn. These finishing touches can really take your snowflake to the next level.
Display or use: Once you have finished all the necessary steps, your graph snowflake knitting pattern is complete! You have a few options for what to do with your finished snowflake. You could frame it and hang it on the wall as a piece of art, use it as a decorative element on a pillow or blanket, or even turn it into a unique holiday ornament. The choice is yours!
Blocking and caring for your finished project
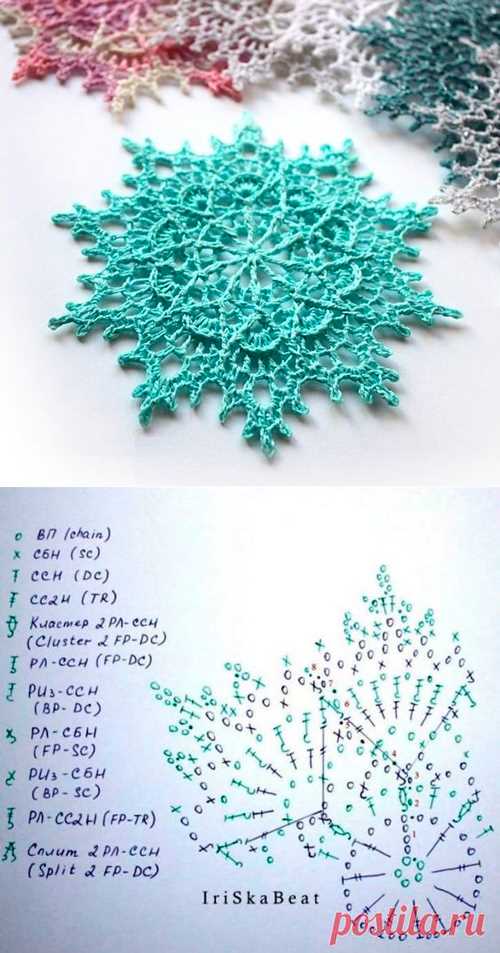
Blocking is an important step in finishing your knitted project. It helps to shape the fabric and even out any uneven stitches or edges. To block your graph snowflake knitting pattern, you will need a flat surface such as a blocking board or towel, some rustproof pins, and a spray bottle filled with water.
Start by pinning the edges of your project to the blocking board, making sure it is stretched to the desired size and shape. Then, lightly spray the fabric with water until it is damp but not soaking wet. Make sure to distribute the water evenly across the entire project.
Next, use the rustproof pins to secure the fabric to the board, starting at the corners and working your way around the edges. This helps to keep the fabric in place while it dries. If your pattern has intricate details or lacework, you can use more pins to shape those areas as well.
Leave the project to dry completely, which may take several hours or even overnight. Once it is dry, carefully remove the pins and admire your beautifully blocked snowflake pattern. The blocked fabric will have a more polished and professional appearance, showcasing the intricate details of the snowflake design.
To care for your finished project, it is best to hand wash it in cool water with a mild detergent. Gently squeeze out any excess water and lay it flat to dry. Avoid wringing or twisting the fabric, as this can cause it to lose its shape.
If you prefer machine washing, place your project inside a mesh laundry bag to protect it from snagging or stretching. Use a gentle cycle and cold water. After washing, reshape the fabric and lay it flat to dry, away from direct sunlight.
When storing your project, it is important to keep it in a cool, dry place to prevent any moisture or mildew. Folding the project neatly and placing it inside a breathable cotton storage bag or tissue paper can help prevent any creases or wrinkles.
By following these blocking and caring techniques, you can ensure that your graph snowflake knitting pattern stays beautiful and well-maintained for years to come.
Using the graph snowflake knitting pattern for other projects
If you’ve mastered the graph snowflake knitting pattern and are looking for ways to use it in different projects, there are plenty of options to explore. This versatile pattern can be adapted to various knitting projects, allowing you to create unique and beautiful designs.
Here are some ideas to get you started:
- Scarves and wraps: The snowflake pattern can be incorporated into scarves and wraps to add a touch of winter magic. You can use the pattern as a border or create an all-over design for a stunning effect.
- Hats and mittens: Knitting hats and mittens with the snowflake pattern can keep you warm and stylish during the colder months. You can use the pattern to accentuate the cuffs or create a repeating motif throughout the garment.
- Blankets and throws: Imagine snuggling up under a warm and cozy blanket with snowflake designs. Knitting a blanket or throw with the graph snowflake pattern can create a lovely wintery atmosphere in your home.
- Sweaters and cardigans: Adding snowflake motifs to sweaters and cardigans can make them stand out and add a festive touch to your wardrobe. You can place the snowflake pattern on the front, back, or sleeves, depending on your preference.
Keep in mind that these are just a few suggestions to inspire your creativity. The graph snowflake knitting pattern can be used in countless ways, allowing you to personalize your knitting projects and make them truly unique.
Experiment with different yarns, colors, and stitch combinations to make the snowflake pattern your own. Whether you’re a beginner or an experienced knitter, the graph snowflake pattern provides endless possibilities for creating beautiful and memorable pieces.