
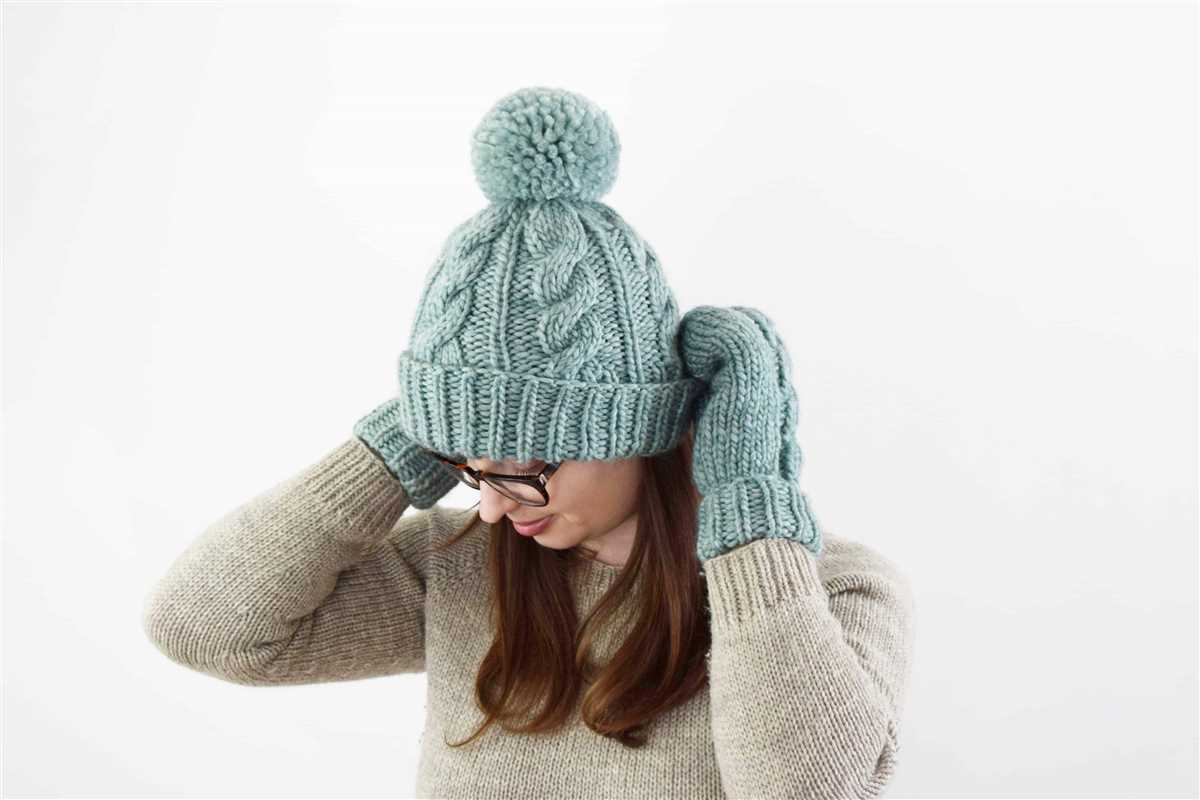
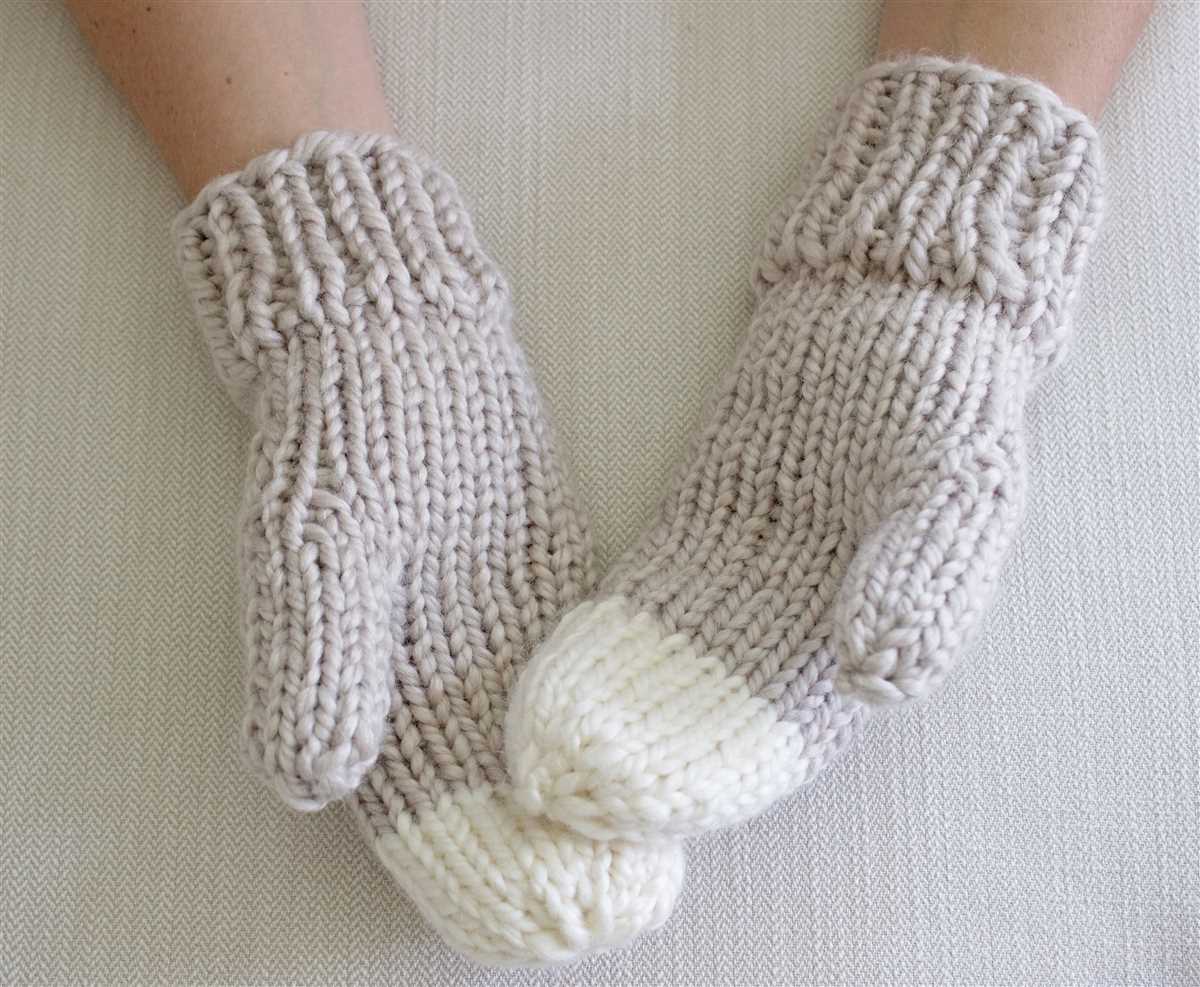
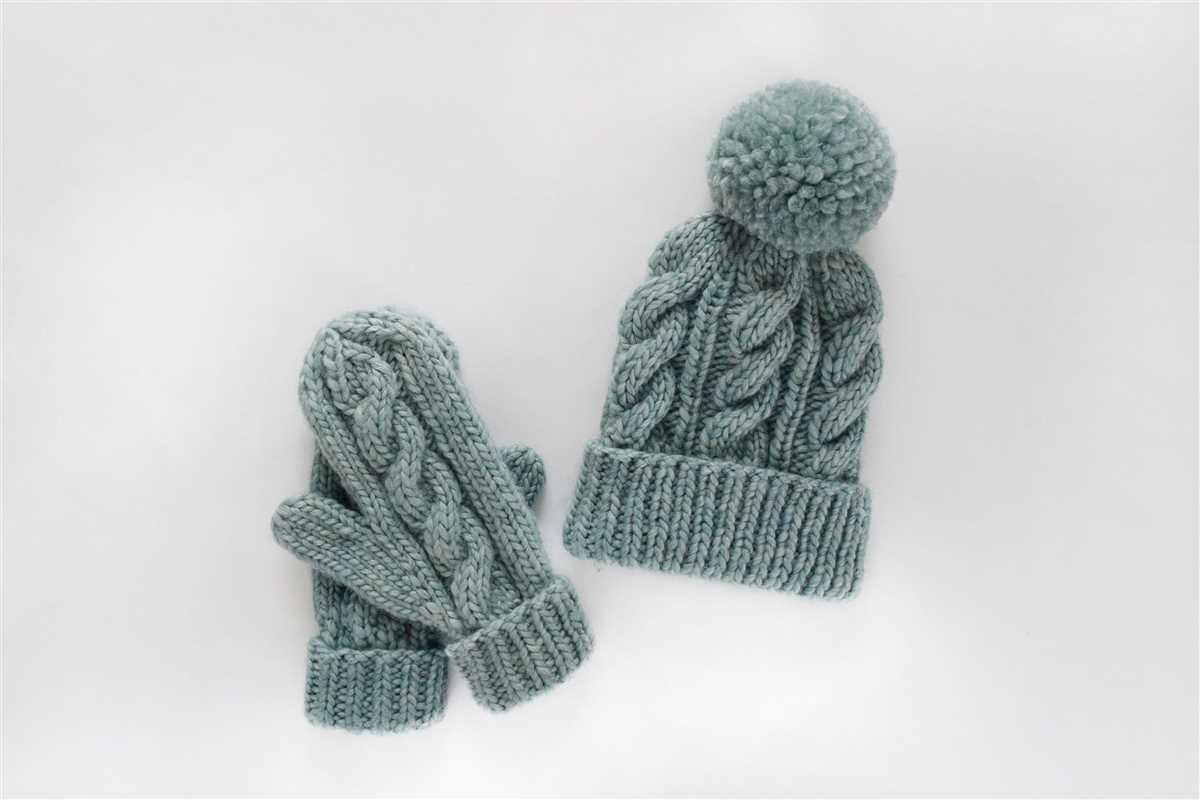
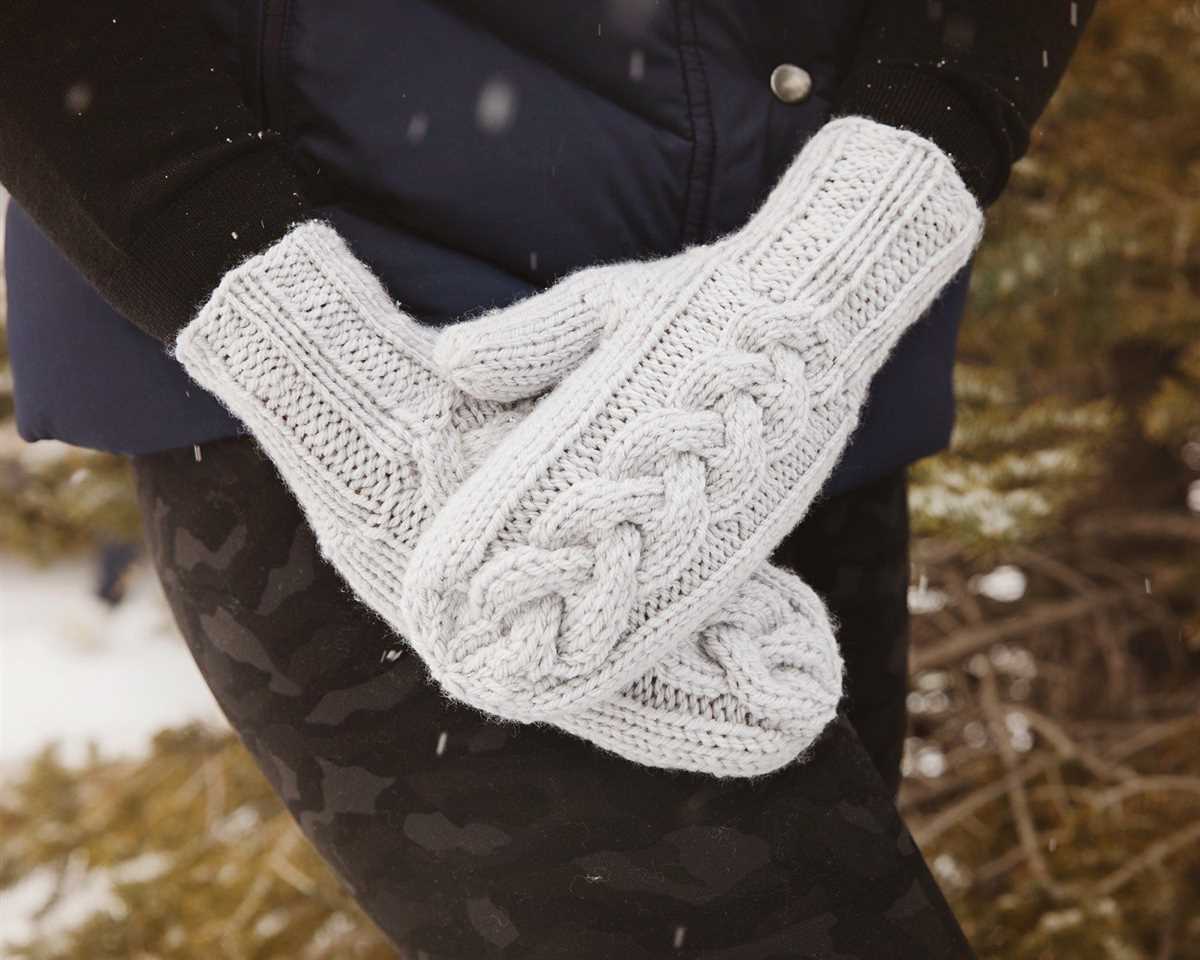
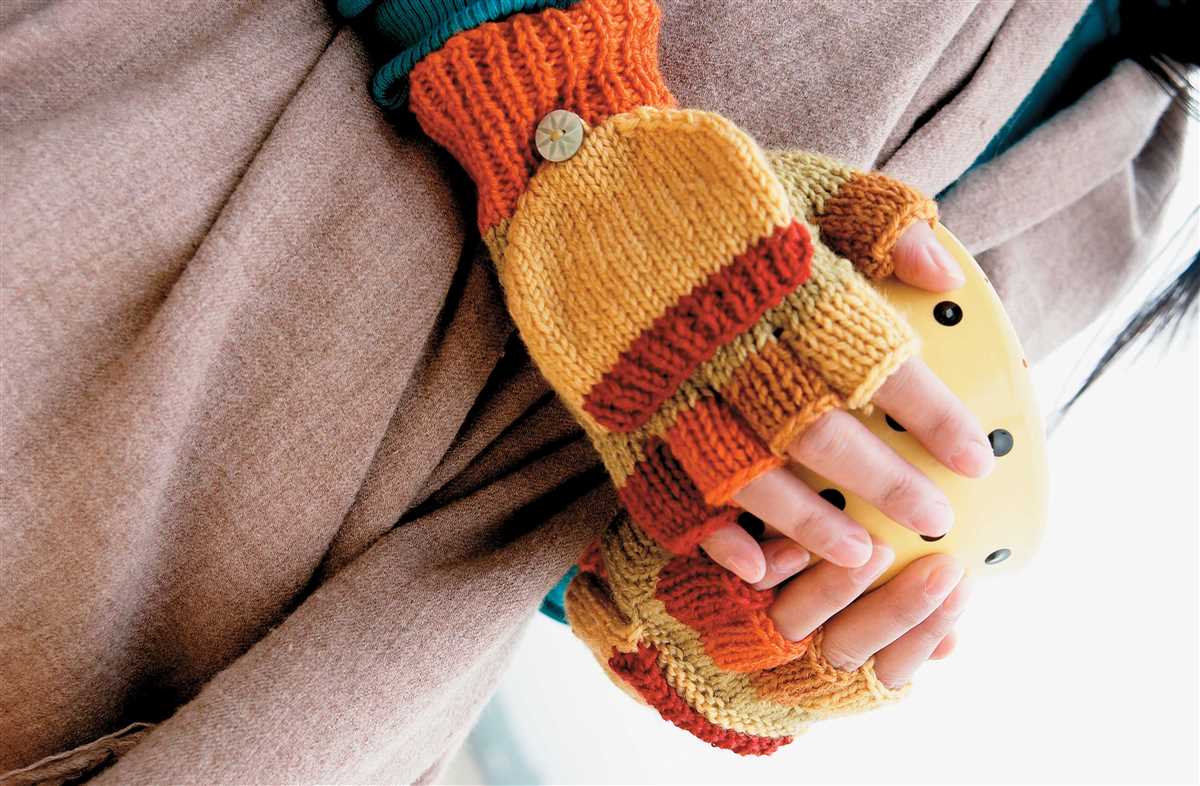
If you’re a fan of cozy winter accessories and enjoy knitting, then you’ll love this cable knit mittens free pattern. Cable knitting is a technique that creates intricate and stylish patterns by crossing stitches over each other, resembling cables. These mittens feature a beautiful cable design that adds elegance and warmth to your winter wardrobe.
Mittens are a must-have during the cold winter months as they provide better insulation for your hands compared to gloves. The cable knit pattern not only enhances the aesthetic appeal of the mittens but also adds an extra layer of warmth. The texture of cable knitting also makes the mittens thicker and more durable, ensuring they will keep your hands cozy and protected from the cold.
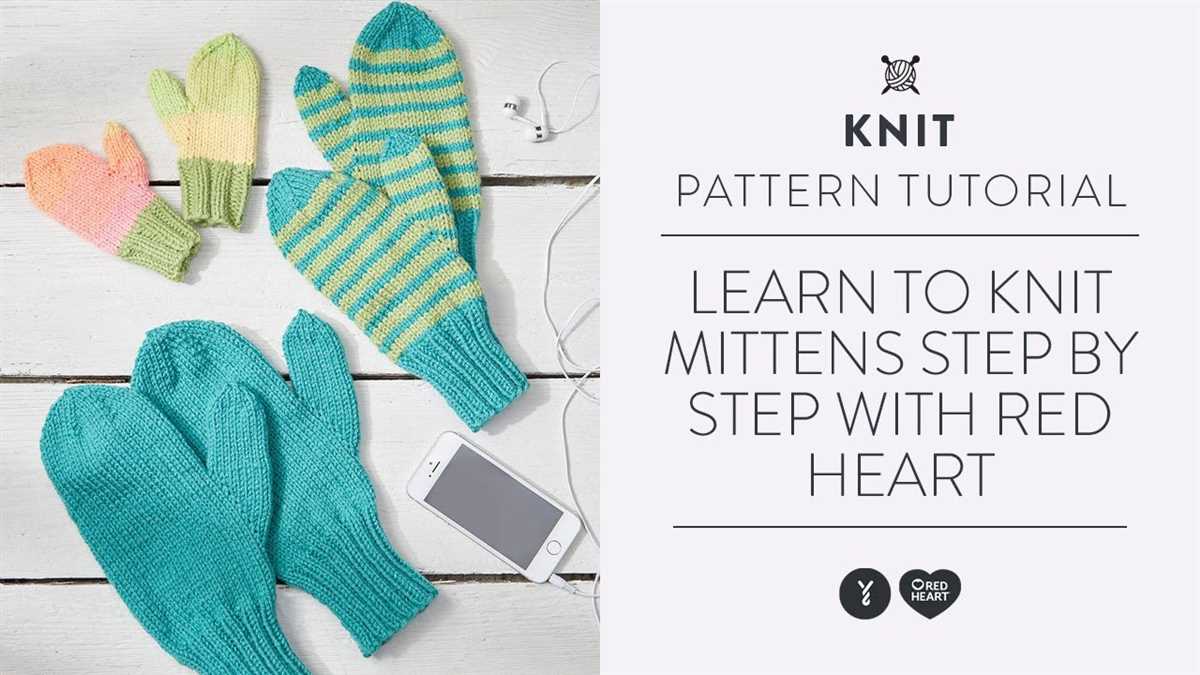
This free pattern is perfect for both beginner and experienced knitters. The detailed instructions will guide you through each step of the knitting process, from casting on to finishing off the mittens. You’ll learn how to create the cable pattern and shape the thumb hole, resulting in a pair of comfortable and stylish mittens that you can wear or gift to loved ones.
Get your knitting needles ready and explore the world of cable knitting with this free pattern. You’ll be able to create cozy and fashionable mittens that will keep you warm all winter long. So grab your favorite yarn and start knitting today!
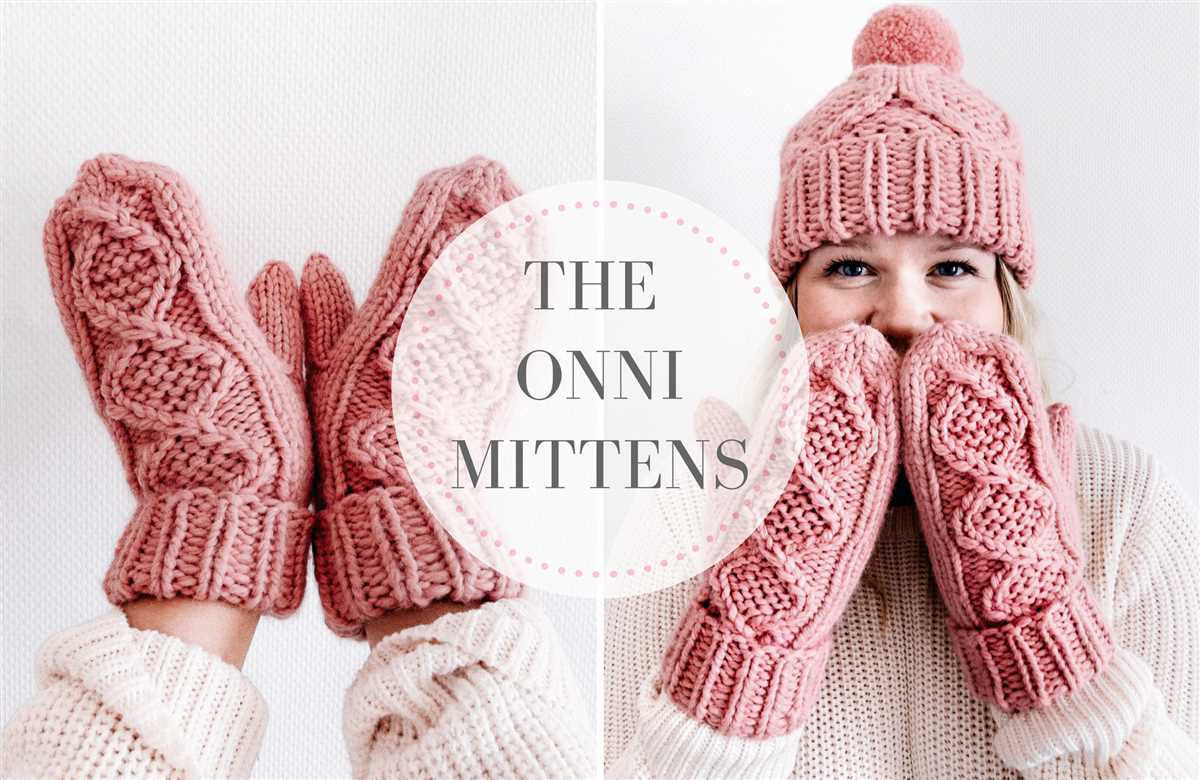
Cable Knit Mittens Free Pattern

Mittens are essential accessories for keeping our hands warm during the cold winter months. Cable knit mittens, with their intricate designs and cozy texture, are particularly popular among knitting enthusiasts. With a cable knit mittens free pattern, you can easily create your own pair of stylish and warm mittens.
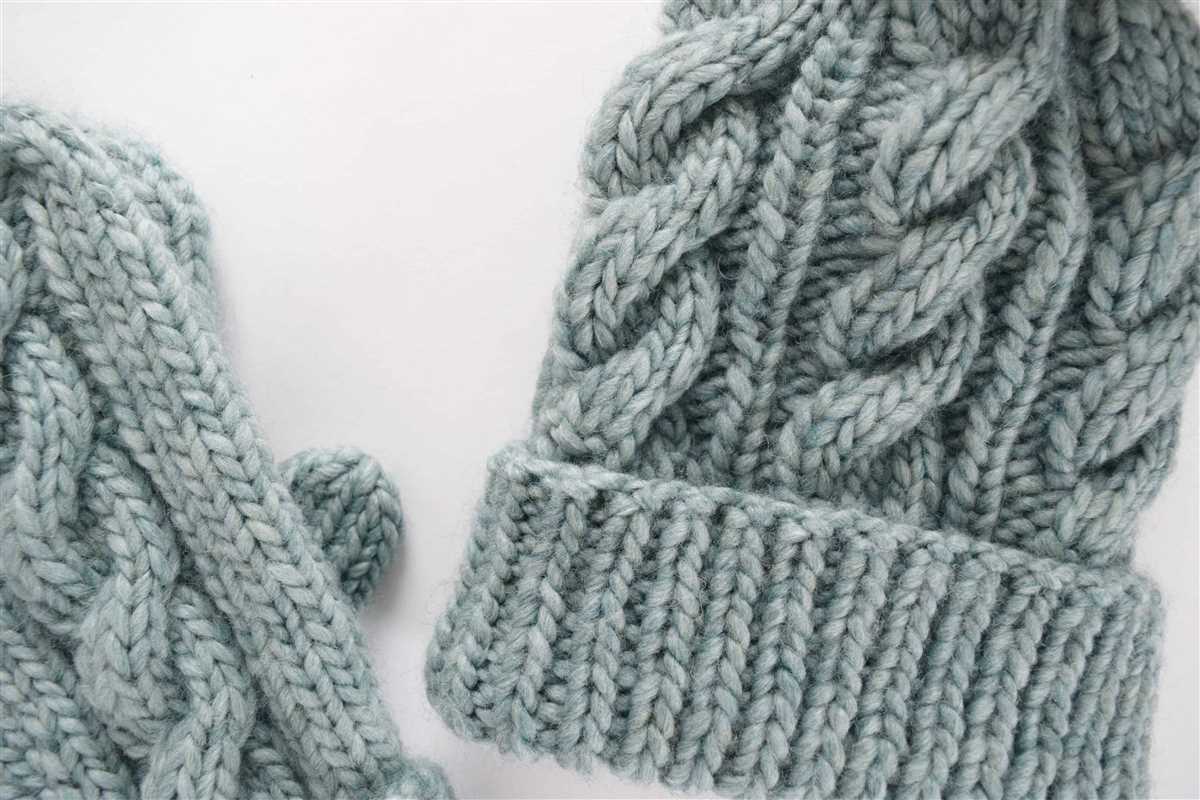
The cable knit pattern is a classic technique that adds a beautiful and timeless touch to any knitted item. By following a cable knit mittens free pattern, you can learn how to create those intricate cable designs using basic knitting stitches. The pattern will guide you through the steps of creating the cables, whether it’s a simple cable twist or a more complex cable pattern.
When choosing a cable knit mittens free pattern, consider the difficulty level that matches your knitting skills. Some patterns are suitable for beginners, while others may require more advanced knitting techniques. Look for patterns that provide clear instructions, including the type of yarn and needle size to use.
Once you have found the perfect cable knit mittens free pattern, gather all the necessary materials and get ready to start your knitting project. Follow the pattern’s instructions step by step, paying attention to stitch counts, cable placements, and shaping details. With patience and practice, you will soon have a cozy pair of cable knit mittens to keep your hands warm and stylish all winter long.
Remember to share your finished cable knit mittens with others, whether it’s with friends and family or by posting them on social media. Inspire others to try their hand at cable knitting and enjoy the satisfaction of creating a beautiful and functional accessory with their own two hands.
Materials Needed for Cable Knit Mittens
When it comes to knitting cable knit mittens, having the right materials is essential. To create a cozy and stylish pair of mittens, you will need the following supplies:
- Yarn: Choose a bulky weight yarn in the color of your choice. The yarn should be soft and warm, perfect for keeping your hands toasty in cold weather.
- Knitting Needles: Use a pair of size US 8 or 9 knitting needles. Make sure they are suitable for working with bulky yarn.
- Cable Needle: A cable needle is necessary for creating the cable stitch pattern. It is a short, double-pointed needle used to hold stitches temporarily while you work on other stitches.
- Tapestry Needle: A tapestry needle is needed for weaving in loose yarn ends at the end of your project. It is also useful for seaming any parts of the mittens together.
- Stitch Markers: Stitch markers help you keep track of your stitches and make it easier to follow the cable knit pattern. You can use small rings or even scraps of yarn as markers.
- Scissors: A good pair of sharp scissors is necessary for cutting the yarn and trimming any excess threads.
With these materials in hand, you will be ready to start knitting your cable knit mittens. It’s important to choose high-quality yarn and needles to ensure the durability and comfort of your finished mittens.
Step-by-Step Instructions for Cable Knit Mittens

If you’re looking to create a cozy and stylish pair of mittens, cable knit mittens are the perfect project for you. With their intricate patterns and warm design, these mittens will keep your hands toasty during the colder months. Follow these step-by-step instructions to create your own cable knit mittens.
Materials Needed:

- Knitting needles (size will depend on your desired gauge)
- Cable needle
- Worsted weight yarn
- Tapestry needle
- Scissors
Step 1: Cast on

Start by casting on the desired number of stitches for your mittens. This will depend on the size of your hands and the gauge of your yarn. Make sure to leave a long tail for sewing up the sides later on.
Step 2: Knit the cuff
Knit the cuff of the mittens by working in the desired ribbing pattern. This could be a simple knit 1, purl 1 rib or a more intricate cable pattern. Continue knitting until you reach the desired length for the cuff.
Step 3: Begin the hand portion
Once the cuff is complete, it’s time to start knitting the hand portion of the mittens. Begin by working in the desired cable pattern, following the instructions for the specific design you’ve chosen. Make sure to keep track of your cable stitches and follow the pattern carefully.
Step 4: Shape the thumb gusset
To create a thumb gusset, you’ll need to add increasing stitches to create the space for your thumb. This can be done by working a set number of stitches, then increasing one stitch at the beginning and end of the next row. Repeat this process until you’ve reached the desired number of thumb stitches.
Step 5: Complete the hand and thumb
Continue knitting the hand portion of the mittens, following the cable pattern until you’ve reached the desired length for the hand. Once the hand is complete, set aside the thumb stitches onto a stitch holder or spare yarn and continue knitting the main part of the hand.
Step 6: Shape the top of the mitten
To shape the top of the mitten, you’ll need to work decreases. This can be done by knitting two stitches together at the beginning and end of each row, or by following a specific decreasing pattern. Continue shaping the top of the mitten until only a few stitches remain.
Step 7: Finishing touches
Once you’ve completed the knitting portion of the mittens, it’s time to finish them off. Sew up the sides of the mittens using the long tail left from casting on, using a tapestry needle. Weave in any loose ends and trim off any excess yarn. Finally, try on your newly knitted cable mittens and enjoy the warmth and style they bring to your winter wardrobe!
Tips for Knitting Cable Knit Mittens

Knitting cable knit mittens can be a fun and rewarding project for knitters of all skill levels. Whether you are a beginner or an experienced knitter, these tips will help you create beautiful and cozy mittens:
Choose the Right Yarn
When knitting cable knit mittens, it’s important to choose a yarn that is suitable for the project. Look for a yarn that is both warm and durable, as mittens are often subjected to wear and tear. Wool or wool-blend yarns are popular choices for cable knit mittens, as they are soft, insulating, and have good stitch definition.
Use Stitch Markers
Stitch markers can be incredibly helpful when knitting cable knit mittens. They can help you keep track of your stitches, especially when working with complex cable patterns. Place stitch markers at the beginning and end of each cable pattern repeat to help you stay on track and prevent mistakes.
Read and Follow the Pattern Carefully

When knitting cable knit mittens, it’s important to carefully read and follow the pattern instructions. Cable patterns can be intricate and require precise stitch counts and techniques. Take the time to read through the pattern before you begin, and make sure you understand each step. Following the pattern correctly will help you achieve the desired results.
Practice Cable Knitting Techniques
If you are new to cable knitting, it can be helpful to practice the cable knitting techniques before starting your mittens. This will help you become familiar with the cable stitches and increase your confidence. You can practice by knitting swatches or small projects with cable patterns before tackling the mittens. This will also give you an opportunity to test different cable patterns and see which ones you like best.
Take Your Time
Knitting cable knit mittens can be a time-consuming process, especially when working with intricate cable patterns. Take your time and enjoy the process. Cable knitting requires concentration and patience, but the end result is well worth it. Take breaks when needed to prevent hand fatigue, and don’t rush through the stitches. Enjoy the journey of creating a cozy pair of cable knit mittens.
Choosing the Right Yarn for Cable Knit Mittens

When it comes to knitting cable knit mittens, choosing the right yarn is essential to ensure a successful and durable project. The type of yarn you select will greatly impact the overall look, feel, and functionality of your mittens.
Weight: The weight of the yarn refers to its thickness. For cable knit mittens, it is recommended to use a medium to heavyweight yarn, such as worsted or aran weight. These yarns are sturdy enough to hold the intricate cable patterns and provide the necessary warmth for your hands.
Fiber: The fiber content of the yarn will determine its softness, warmth, and durability. For cable knit mittens, wool is an excellent choice as it is naturally warm, breathable, and can retain heat even when wet. Other options include alpaca, cashmere, or a wool blend for added softness.
Twist: The twist of the yarn refers to the way the individual fibers are twisted together. For cable knit mittens, it is recommended to choose a yarn with a tight twist. This will help define and accentuate the cable stitches, resulting in a more pronounced design.
Color: The color of the yarn is a personal preference. However, when knitting cable knit mittens, it is important to consider how the color will affect the visibility of the cable patterns. Darker colors may make it more difficult to see the intricacies of the cables, while lighter colors can highlight the stitch work.
Quality: Lastly, it is important to choose a high-quality yarn for cable knit mittens. A yarn that is well-spun, has minimal pilling, and is made from quality fibers will result in a finished product that is both beautiful and long-lasting.
By considering these factors and selecting the right yarn for your cable knit mittens, you can create a cozy and stylish accessory that will keep your hands warm during the winter months.
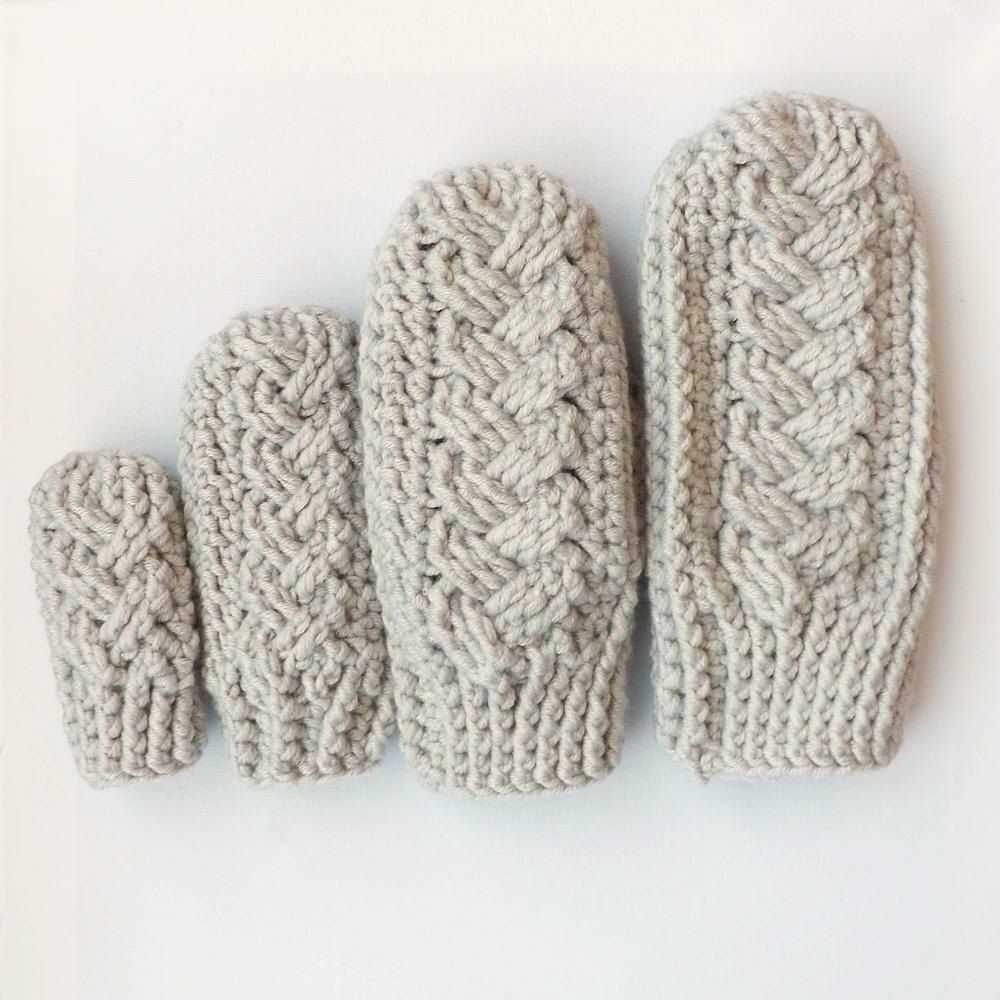
Customizing Cable Knit Mittens with Different Cable Patterns
Cable knit mittens are a cozy and stylish accessory for the colder months, and they can be customized with different cable patterns to create unique and personalized designs. Cable patterns are created by crossing stitches to form interlocking patterns and can range from simple twists to more intricate designs. By incorporating different cable patterns into your mitten knitting projects, you can add visual interest and texture to your finished mittens.
One popular cable pattern that can be used for mittens is the classic cable twist. This pattern involves crossing stitches over each other to create a twisted effect. You can vary the size and direction of the twists to create different looks. For example, a small twist can create a subtle texture, while a larger twist can make a bold statement.
Another cable pattern that can be used for mittens is the rope cable pattern. This pattern involves creating a rope-like design by crossing multiple stitches over each other. The result is a textured and eye-catching pattern that adds depth and dimension to the mittens.
If you want to add more intricate detail to your mittens, you can incorporate a honeycomb cable pattern. This pattern creates a series of interlocking hexagons, giving the mittens a visually interesting and unique look. The honeycomb cable pattern requires more advanced knitting skills, but the end result is well worth the effort.
- Classic Cable Twist: This pattern involves crossing stitches to create twists.
- Rope Cable: This pattern creates a rope-like design by crossing multiple stitches.
- Honeycomb Cable: This pattern creates interlocking hexagons for a more intricate look.
When customizing cable knit mittens with different cable patterns, it’s important to consider the thickness and warmth of the yarn you’re using. Thicker yarns will create more pronounced cable patterns, while finer yarns will result in more delicate patterns. Additionally, the number of stitches and rows used in the cable pattern can also affect the overall look of the mittens.
By experimenting with different cable patterns and considering the yarn and size of your mittens, you can create one-of-a-kind cable knit mittens that showcase your knitting skills and personal style.
Adding a Lining to Cable Knit Mittens for Extra Warmth
When the cold winter weather sets in, it’s essential to keep your hands warm and protected. One way to enhance the coziness and insulation of your cable knit mittens is by adding a lining. A lining can provide an extra layer of warmth and comfort, making your mittens perfect for even the coldest of days.
There are several options for adding a lining to your cable knit mittens. One popular choice is to use a soft and warm fabric such as fleece or flannel. These materials are excellent at trapping heat and can provide an additional barrier against the cold. To add the lining, simply cut out a pattern using the same shape as your mitten pieces and sew it into place before assembling the mittens.
Here are some steps you can follow to add a lining to your cable knit mittens:
- Measure and cut the lining fabric: Start by measuring the length and width of your mitten pieces. Use these measurements to cut out pieces of fabric in the same shape, ensuring that they are slightly smaller to allow for sewing the lining into the mittens.
- Sew the lining pieces: Fold the lining fabric in half, with the right sides facing each other. Sew along the sides, leaving the bottom open. This will create a pocket for your hand when the lining is inserted into the mittens.
- Attach the lining to the mittens: Place the lining inside the cable knit mittens, with the right sides facing each other. Align the edges and pin them in place. Sew around the edges, leaving a small opening for turning the mittens right-side out.
- Finish the mittens: Turn the mittens right-side out through the opening. Use a needle and thread to close the opening with an invisible stitch. This will give your mittens a neat and professional finish.
By adding a lining to your cable knit mittens, you can create a cozy and warm accessory that will keep your hands comfortable during the coldest winter days. Whether you choose fleece, flannel, or another soft fabric, the extra layer of insulation will make a noticeable difference in warmth. Don’t let the cold weather stop you from enjoying outdoor activities – stay warm with lined cable knit mittens!
Caring for Cable Knit Mittens
Cable knit mittens are not only stylish, but they also provide warmth and comfort during the cold winter months. To ensure that your cable knit mittens last for many seasons, it’s important to properly care for them. Here are some tips on how to care for your cable knit mittens:
1. Hand wash

To preserve the integrity of the cable knit pattern and prevent any damage, it’s best to hand wash your cable knit mittens. Use lukewarm water and a mild detergent specifically designed for wool or delicate fabrics. Gently swirl the mittens in the soapy water, making sure to pay extra attention to any stained or soiled areas. Avoid scrubbing or wringing the mittens to prevent stretching or distortion of the knit.
2. Rinse thoroughly

After washing, rinse the mittens thoroughly to remove any soap residue. Use cool water and gently squeeze the mittens to remove excess water. Avoid twisting or squeezing too hard, as this can cause damage to the knit. Repeat this rinsing process until the water runs clear.
3. Dry flat
When drying your cable knit mittens, it’s important to avoid hanging or using direct heat, as this can cause the mittens to lose their shape or shrink. Instead, lay them flat on a clean, dry towel or drying rack. Gently reshape the mittens to their original size and allow them to air dry naturally.
4. Store properly
To prevent damage and maintain the shape of your cable knit mittens, it’s important to store them properly. Avoid folding or creasing the mittens, as this can cause permanent lines or distortion in the knit. Instead, lay them flat in a drawer or place them in a breathable storage bag to protect them from dust and moths.
By following these care tips, you can keep your cable knit mittens looking their best and ensure that they provide warmth and comfort for many winters to come.
Additional Resources for Cable Knit Mittens Patterns
Knitting cable knit mittens can be a fun and challenging project for knitters of all experience levels. If you’re looking for more cable knit mitten patterns to try, here are a few additional resources to help you find inspiration and expand your knitting skills:
1. Ravelry: Ravelry is a popular online community for knitters and crocheters, and it offers a wide range of cable knit mitten patterns. You can search for patterns based on skill level, yarn weight, and other criteria to find the perfect pattern for your project.
2. Knitting Blogs: Many knitting bloggers share their cable knit mitten patterns for free on their websites. A quick internet search for “free cable knit mitten pattern” will yield a variety of options to choose from. Some popular knitting blogs to check out include Tin Can Knits, Purl Soho, and Yarnspirations.
3. Knitting Books: There are also many knitting books that include cable knit mitten patterns. Some popular options include “Cable Left, Cable Right” by Judith Durant and “60 Quick Knits” by Sixth&Spring Books. These books often provide detailed instructions and charts to help you create beautiful cable knit mittens.
4. Local Yarn Stores: If you prefer to shop for patterns in person, consider visiting your local yarn store. They may have pattern books or printed patterns available for purchase, and the staff can often provide guidance and recommendations based on your skill level and preferences.
With these additional resources, you’ll have plenty of options to choose from when it comes to cable knit mitten patterns. Whether you’re a beginner or an experienced knitter, there’s a pattern out there that will allow you to create cozy and stylish mittens to keep your hands warm all winter long.