
If you love knitting and cute animals, this easy plush cat knitting pattern is perfect for you! Knitting plush toys is a fun and relaxing way to indulge your crafting skills and create adorable stuffed animals. This pattern is great for beginners, as it uses basic knitting stitches and techniques. Whether you’re knitting for yourself or for a special little one in your life, this plush cat will make a delightful addition to any collection.
This pattern features a simple design that can be customized to your liking. You can choose different colors of yarn to create a unique and personalized cat. Add details like embroidered eyes, a tiny nose, and even a little bell around the cat’s neck. The possibilities are endless!
Not only is this plush cat knitting pattern fun to make, but the finished product also makes a wonderful gift. Imagine the joy on someone’s face when they receive a hand-knitted cat that they can cuddle and cherish. This plush toy is sure to become a treasured keepsake for years to come.
Easy Plush Cat Knitting Pattern

Are you looking for a simple and enjoyable knitting project? Look no further! Our easy plush cat knitting pattern is perfect for beginners and experienced knitters alike. With just a few basic stitches, you can create a cute and cuddly toy that will bring joy to both children and adults.
Materials Needed: To make this adorable plush cat, you will need:
– Worsted weight yarn in your desired color
– Knitting needles in size US 7 or 8
– Stuffing material
– Yarn needle
– Safety eyes (optional)
– Embroidery thread or yarn for sewing on details
– Scissors
Step-by-Step Instructions: Follow these simple steps to create your own plush cat:
1. Cast on 30 stitches using your chosen yarn and needle size.
2. Knit every row until your work measures approximately 8 inches in length.
3. To shape the ears, decrease 1 stitch at the beginning and end of every row for the next 6 rows.
4. Knit 2 rows without any decreases.
5. To shape the head, decrease 1 stitch at the beginning and end of every row for the next 10 rows.
6. Knit 2 rows without any decreases.
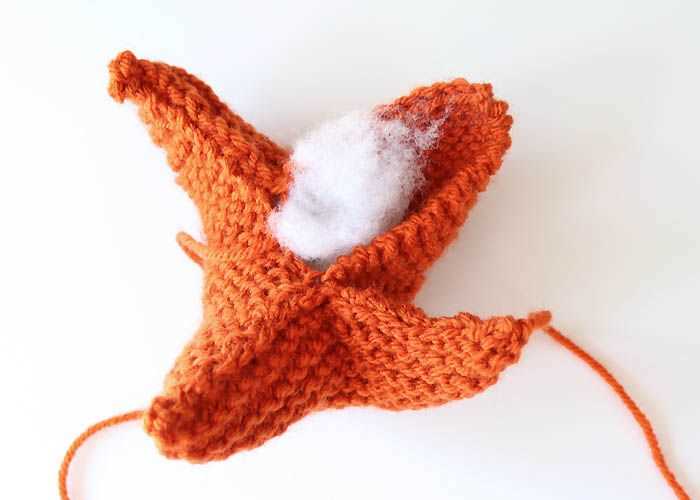
7. Stuff the head and body with your chosen stuffing material.
8. To shape the tail, decrease 1 stitch at the beginning and end of every row for the next 4 rows. Bind off.
9. Sew the sides of the cat together using a yarn needle, leaving a small opening for adding more stuffing if needed.
10. Embroider the facial details, such as the eyes, nose, and mouth, using embroidery thread or yarn.
11. Attach safety eyes if desired.
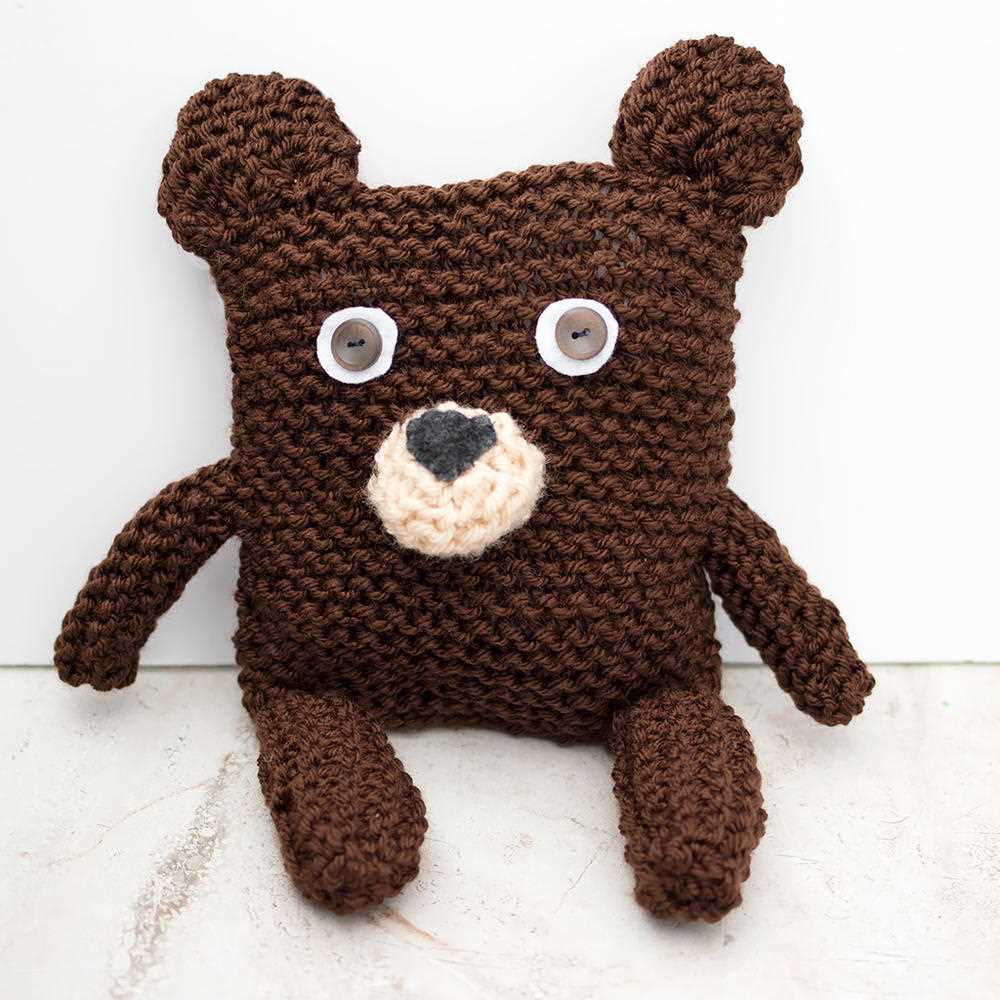
12. Your plush cat is now complete and ready to be enjoyed!
With its simple design and easy-to-follow instructions, our easy plush cat knitting pattern is a great project for knitters of all skill levels. Whether you’re looking to make a handmade gift or just want to have fun practicing your knitting skills, this pattern is sure to bring hours of knitting pleasure.
Materials Needed

In order to make a plush cat using this knitting pattern, you will need the following materials:
- Yarn: Choose a soft and durable yarn that is suitable for knitting toys. Acrylic or cotton yarn would work well for this project.
- Knitting Needles: Use a pair of knitting needles in the appropriate size for the yarn you have chosen. The size will depend on the gauge you want to achieve.
- Stuffing: You will need stuffing material to fill the cat and give it a plush and cuddly feel. Polyester fiberfill is a popular option for stuffing toys.
- Embroidery Thread: Get some embroidery thread in coordinating colors to create the facial features and other details on the cat.
- Yarn Needle: A large yarn needle with a blunt end will be needed for sewing up the seams and attaching the different parts of the cat together.
- Scissors: Keep a pair of scissors handy for cutting the yarn and embroidery thread.
- Stitch Markers: Stitch markers can be useful for marking important points in the pattern and keeping track of your progress.
Gather all these materials before you start knitting, and ensure that you have enough of each item to complete the project. Once you have everything ready, you can begin knitting your plush cat using the provided easy knitting pattern.
Getting Started
Are you ready to start knitting your very own easy plush cat? This adorable plush toy is perfect for both beginners and experienced knitters. Whether you’re looking to make a special gift for a cat lover in your life or simply want to add a cute and cuddly companion to your own collection, this knitting pattern will guide you through each step of the process.
Materials Needed:
- Knitting needles – size 4.5mm
- Yarn – medium weight (worsted), approximately 200 yards
- Tapestry needle
- Scissors
- Stuffing material
Step-by-Step Instructions:
- Start by casting on 30 stitches using your chosen yarn and knitting needles.
- Knit 30 rows in garter stitch, which is achieved by knitting every row.
- Next, switch to stockinette stitch by knitting one row and then purling the next row. Repeat this pattern for 60 rows.
- After completing the stockinette stitch section, it’s time to shape the head of the plush cat. Begin decreasing stitches gradually by knitting two stitches together at the beginning and end of each row until you have 10 stitches remaining.
- Continue knitting these 10 stitches for another 10 rows to create the neck and body of the plush cat.
- Once you’ve finished the body, it’s time to shape the head again. Begin increasing stitches gradually by knitting into the front and back of each stitch at the beginning and end of each row until you have 30 stitches.
- After completing the increases, knit another 30 rows in stockinette stitch.
- Finally, decrease stitches gradually by knitting two stitches together at the beginning and end of each row until you have 10 stitches remaining.
- Bind off the remaining stitches and leave a long tail for sewing.
- Using the tapestry needle, sew up the bottom of the plush cat and stuff it firmly with the chosen stuffing material.
- Sew up the top of the plush cat, leaving a small opening for inserting the ears.
- Knit two small triangles for the ears. Sew them onto the head of the plush cat.
- Finally, embroider a cute face onto the plush cat using the tapestry needle and yarn.
With these step-by-step instructions, you’ll have a lovely plush cat in no time! Don’t forget to have fun and get creative with different yarn colors and patterns to make each plush cat unique to your own style.
Knitting the Body
Knitting the body of a plush cat is an essential step in creating a cuddly and adorable toy. To begin, gather your materials and start by casting on the required number of stitches, as indicated in the pattern. This will establish the width of the cat’s body.
As you knit the body, it’s important to maintain an even tension to ensure the final toy is evenly stuffed. Use the specified knitting stitch, such as stockinette stitch, to create a smooth and uniform texture. You may also incorporate decreases and increases as directed in the pattern to shape the cat’s body and create curves.
Tip: To keep track of your progress and ensure accuracy, it can be helpful to use stitch markers to indicate specific sections or stitch counts along the way.
For example:
- Row 5: Knit 3 stitches, place a stitch marker, knit 10 stitches, place another stitch marker, knit to end of row.
- This will help you easily identify and count stitches for shaping or attaching additional features later on.
Continue knitting until you reach the desired length for the body, as specified in the pattern. Remember to periodically check your gauge to ensure the measurements match the pattern’s requirements. Once the body is complete, you can move on to knitting other components, such as the legs, tail, and head, to bring your plush cat to life!
Knitting the Legs

When knitting a plush cat, one of the most important parts to focus on are the legs. The legs are what give the cat its shape and provide stability. It’s crucial to make sure they are knit correctly to achieve the desired result.
Start by casting on the required number of stitches for the legs. Depending on the size of the plush cat, this number may vary. It’s best to refer to the knitting pattern for specific instructions.
Row 1: Knit all stitches
Begin by knitting all stitches in the first row. This will help form the foundation of the legs and create a sturdy base.
Row 2: Purl all stitches
On the second row, switch to purling all stitches. Purling creates a different texture and adds dimension to the legs of the plush cat.
Repeat Rows 1 and 2: Continue alternating between knitting and purling all stitches for the desired length of the legs. This will create a ribbed texture and make the legs more flexible.
Shaping the Toes: To shape the toes of the cat, begin decreasing stitches in each row. This will gradually taper the legs and create a more natural-looking shape. Follow the pattern’s instructions for the specific decreases to make.
Once the legs are the desired length and shape, bind off the stitches and cut the yarn, leaving a tail for sewing. Repeat the process to create the remaining legs.
By following these steps and paying attention to the knitting pattern, you can successfully create the legs for your plush cat. The legs are an essential part of the toy’s structure and appearance, so take your time and ensure they are knit with care!
Assembling the Legs

Once you have completed knitting the four leg pieces, it’s time to assemble them to create the plush cat’s legs. Follow these steps to ensure a sturdy and secure construction:
Step 1: Prepare the Leg Pieces
Start by laying out the four leg pieces flat on a surface, making sure that the right sides are facing outwards. Match up the pairs of leg pieces that belong together, ensuring that the cast-on edges are aligned.
Step 2: Sew the Sides
Using a yarn needle and the same yarn used for knitting the legs, sew up the sides of each pair of leg pieces. Start at the cast-on edge and work your way up to the top, using a mattress stitch or any other suitable sewing technique. This will create a neat seam and secure the legs together.
Step 3: Stuff the Legs

Before closing up the legs completely, it’s important to stuff them with polyester fiberfill or any other suitable stuffing material. Make sure to stuff the legs firmly, but not too tightly, to achieve the desired plushness. Use a small wooden dowel or the end of a knitting needle to help evenly distribute the stuffing.
Step 4: Finish the Top

After stuffing the legs, sew up the top edges of each leg pair to close them off. Again, use the same sewing technique employed in Step 2 to create a secure seam. Make sure to weave in any loose ends of yarn to prevent them from unraveling.
Once you have completed these steps for both leg pairs, you will have two fully assembled, plush cat legs ready to be attached to the body of the knitted cat. Move on to the next step in the pattern to continue constructing your adorable plush cat!
Knitting the Tail

When it comes to knitting a plush cat, one important element to focus on is the tail. The tail adds personality and charm to the finished toy, making it look more realistic and lifelike. In this knitting pattern, the tail is an integral part of the design and should not be overlooked.
Materials:
- Yarn: Choose a soft and fluffy yarn in the desired color for the tail. It’s best to use a yarn that matches the main color of the cat to maintain a cohesive look.
- Knitting Needles: Use knitting needles that are appropriate for the thickness of the chosen yarn. Refer to the yarn label for the recommended needle size.
- Tail Pattern: The knitting pattern should include instructions for knitting the tail. It may involve simple stitches like knit and purl, or more advanced techniques such as increases and decreases.
- Stuffing: To give the tail some shape and volume, you will need some stuffing material. This can be polyester fiberfill or any other soft and lightweight material.
Step 1: Casting On
Start by casting on the required number of stitches for the tail. The pattern should specify the number based on the desired length and thickness of the tail. Use the knitting needles and yarn to cast on the stitches, making sure to leave a long tail of yarn for sewing later on.
Step 2: Knitting the Tail
Follow the instructions in the knitting pattern to create the tail. This may involve knitting rows or rounds using various stitch patterns. Pay attention to any shaping or special instructions provided in the pattern to ensure the tail looks exactly as intended.
Knitting the Ears

When knitting the cat plush toy, one of the essential components to pay attention to are the ears. The ears are what give the plush cat its distinctive feline look. They add character and personality to the toy, making it even more adorable.
To knit the ears, start by casting on the required number of stitches, which is usually specified in the pattern. It is recommended to use double-pointed needles for knitting small parts like ears. Once the stitches are cast on, work in the desired stitch pattern, such as garter stitch or stockinette stitch, until the desired length is achieved.
Shaping the Ears
To shape the ears, start decreasing stitches at regular intervals. This can be done by knitting or purling two stitches together, depending on the stitch pattern being used. Gradually decrease the number of stitches until only a few remain. Then, cut the yarn, leaving a long tail for sewing.
Once the ears are knitted, they can be attached to the head of the cat plush toy. Use the long tail of yarn to sew the base of the ears securely in place. Take care to position the ears symmetrically to maintain a balanced look. After sewing, weave in any loose ends of yarn to ensure a neat finish.
Remember to check the knitting pattern for specific instructions on the size and shape of the ears, as well as any additional details or embellishments. With practice and attention to detail, the ears of the plush cat will be a charming feature that adds to the overall appeal of the toy.
Sewing the Ears
When it comes to sewing the ears on your plush cat, there are a few simple steps you can follow to ensure a clean and secure attachment. First, you’ll want to gather the necessary materials, including the cat head piece and ear pieces that you have previously knitted, a needle, and thread that matches the color of your yarn.
Begin by positioning the ears on the cat head piece in the desired location. Use pins to hold the ears in place temporarily, making sure they are symmetrical and sit at the same height on both sides. Once you are satisfied with the placement, thread your needle with a double strand of thread, knotting the end securely.
Next, take your needle and insert it through the back of the cat head and the base of one ear, creating a small stitch. Make sure to go through both layers of fabric to ensure a strong attachment. Repeat this stitch several times, working your way around the base of the ear until it feels secure. Once you reach the starting point, tie off your thread with a knot on the back of the head.
Repeat this process for the second ear, ensuring that it matches the placement and stitching of the first ear. Once both ears are securely sewn on, you can trim any excess thread and adjust the positioning if needed. Your plush cat is now one step closer to being complete!
Embroidering the Face
To complete your easy plush cat knitting project, you will need to embroider the face onto the cat. This step adds the finishing touch and brings your knitted cat to life.
Before you begin, make sure you have the necessary embroidery supplies, such as embroidery floss, a tapestry needle, and embroidery scissors. Choose colors that match the yarn you used for the cat’s body, or get creative and use contrasting colors for a unique look.
Start by embroidering the eyes. Thread your needle with the desired color of embroidery floss and begin stitching the eyes onto the cat’s face. You can choose to make simple stitches to create oval-shaped eyes, or get more detailed by using satin stitches or French knots. Remember to leave some space between the eyes to create a cute cat expression.
Next, embroider the nose and mouth. Use a contrasting color of embroidery floss to stitch a small triangular shape to represent the nose. You can stitch it directly onto the face or embroider a separate piece and sew it on. For the mouth, you can use straight stitches to create a simple smile or experiment with different stitch styles to give your cat a variety of expressions.
Finally, add some whiskers. Cut a few lengths of embroidery floss and stitch them onto the sides of the cat’s face to create whiskers. You can make them as long or as short as you like, and trim any excess threads once they are securely attached.
Once you have finished embroidering the face, take a step back and admire your adorable knitted cat. The embroidered features bring the toy to life and add a personal touch. It’s time to show off your creation or gift it to someone special!
Stuffing the Cat
Once you have finished knitting your plush cat, it’s time to stuff it and give it some life. Proper stuffing is essential to create a soft, cuddly toy that retains its shape over time. Here are a few tips on how to stuff your cat.
Gather the materials

Before you start, make sure you have all the necessary materials at hand. You will need polyester fiberfill or stuffing, a small crochet hook or knitting needle, and scissors. Ensure that the stuffing is soft and lightweight, as it will make the cat feel plush and huggable.
Start with the limbs

Begin by stuffing the limbs of the cat. Use the crochet hook or knitting needle to push the stuffing into the narrow areas, such as the paws and tail. Make sure to distribute the stuffing evenly and avoid over-stuffing, as it can distort the shape of the limbs.
Fill the body and head
Next, move on to the body and head of the cat. Gradually fill the body, starting from the bottom and working your way up. Use small amounts of stuffing at a time to achieve an even consistency and to prevent lumps or bulges. Pay special attention to the head, ensuring it is well-stuffed to maintain its shape and give the cat a cute, rounded appearance.
Final touches

Once you have finished stuffing, give the cat a gentle squeeze to make sure it feels soft and squishy. If needed, add more stuffing to any areas that feel too hollow. Trim any excess stuffing that may be sticking out of the seams, and use the crochet hook or knitting needle to push it back into place. Finally, securely close the opening using a ladder stitch or any other technique that gives a neat, invisible finish.
With these steps, you can ensure that your plush cat is perfectly stuffed and ready to be loved and cherished by anyone who receives it. Have fun creating your adorable knitted cat!
Sewing the Body

The body of the plush cat is the main part of the toy and it requires meticulous sewing to ensure a sturdy and durable result. Start by gathering all the necessary materials, including the main body fabric, stuffing, needle, thread, and scissors.
First, cut out the body pattern pieces from the main fabric, making sure to follow the instructions provided with the knitting pattern. The pattern pieces will usually include a front and back piece, as well as any additional pieces for paws or tail. Use sharp scissors to carefully cut along the lines of the pattern.
Next, align the front and back pieces of the body with their right sides together. Pin the pieces in place to secure them while sewing. Using a strong thread and a sewing needle, sew along the edges of the pattern pieces, leaving a small opening for stuffing. Take your time to ensure the stitches are even and tight.
Once the body is sewn together, turn it right side out and gently stuff it with the stuffing material. Use small amounts of stuffing at a time to achieve a smooth and evenly filled body. Make sure to stuff the paws and tail, if applicable, before closing the opening with a neat and secure stitch.
To give the plush cat a more professional finish, you can also add any desired embellishments, such as embroidered features or a ribbon collar. These details can enhance the overall appearance of the toy and provide additional character.
Finally, inspect the body for any loose threads or uneven stitching, and make any necessary adjustments to ensure a polished final result. Once the body is complete, you can move on to sewing the other parts of the plush cat, such as the head and ears, following the same steps as for the body.
Finishing Touches
Once you have completed knitting your plush cat, it’s time to add the finishing touches to give it that extra special touch. Here are a few steps you can follow to complete your project:
- Seaming: Start by carefully seaming the different parts of the cat together using a yarn needle and the mattress stitch. This will create a smooth and seamless look.
- Embroidery: Next, add the details to your cat’s face using embroidery floss. You can add eyes, a nose, and even whiskers. Get creative and give your cat its own unique expression!
- Stuffing: Once you have finished sewing all the pieces together, it’s time to stuff your cat. Use polyester fiberfill or any other stuffing material of your choice. Make sure to stuff it firmly to give your cat the desired shape.
- Finishing stitches: Finally, close up the opening of your cat using a ladder stitch or any invisible stitch of your choice. This will ensure that the stuffing doesn’t come out and give your cat a professional finish.
Once you have completed these finishing touches, you will have your very own adorable and cuddly plush cat. Feel free to customize it with different colors or accessories to make it truly unique. This easy knitting pattern is perfect for both beginners and experienced knitters, and the end result will be a cherished handmade toy that can be enjoyed for years to come.
Q&A:
Where can I find an easy plush cat knitting pattern?
You can find easy plush cat knitting patterns on websites like Ravelry, Etsy, and Pinterest. There are also many free patterns available online.
What level of knitting skills do I need for an easy plush cat knitting pattern?
An easy plush cat knitting pattern is usually suitable for beginner to intermediate knitters. It requires basic knitting skills like casting on, knitting, purling, increasing, and decreasing.
What materials do I need to knit an easy plush cat?
To knit an easy plush cat, you will typically need yarn in your chosen colors, knitting needles of the appropriate size, stuffing or fiberfill for the toy, and basic knitting tools like scissors and a yarn needle.
How long does it take to knit an easy plush cat?
The time it takes to knit an easy plush cat can vary depending on your knitting speed and experience. On average, it may take a few hours to a few days to complete the project.
Can I customize the colors and size of the plush cat?
Yes, you can definitely customize the colors and size of the plush cat. Many knitting patterns provide instructions on how to adjust the size or change the colors to suit your preferences.