
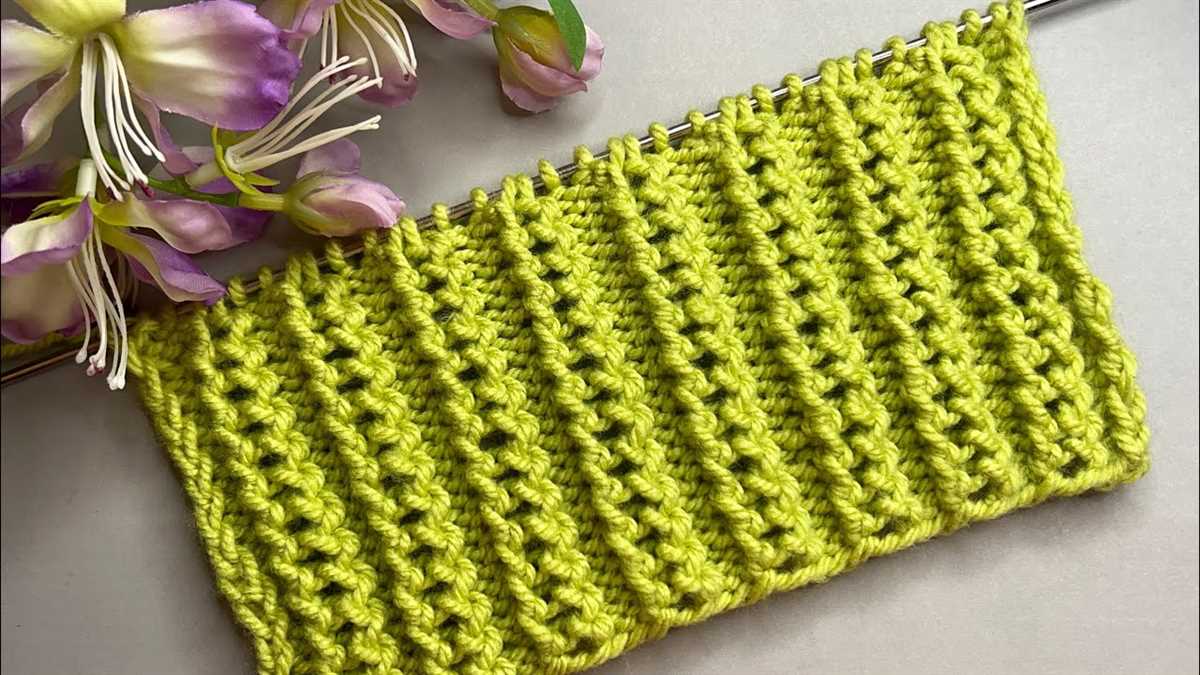
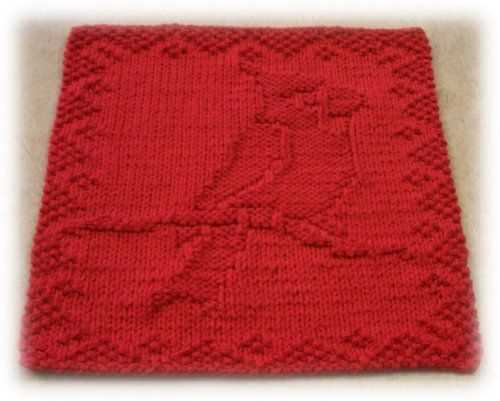
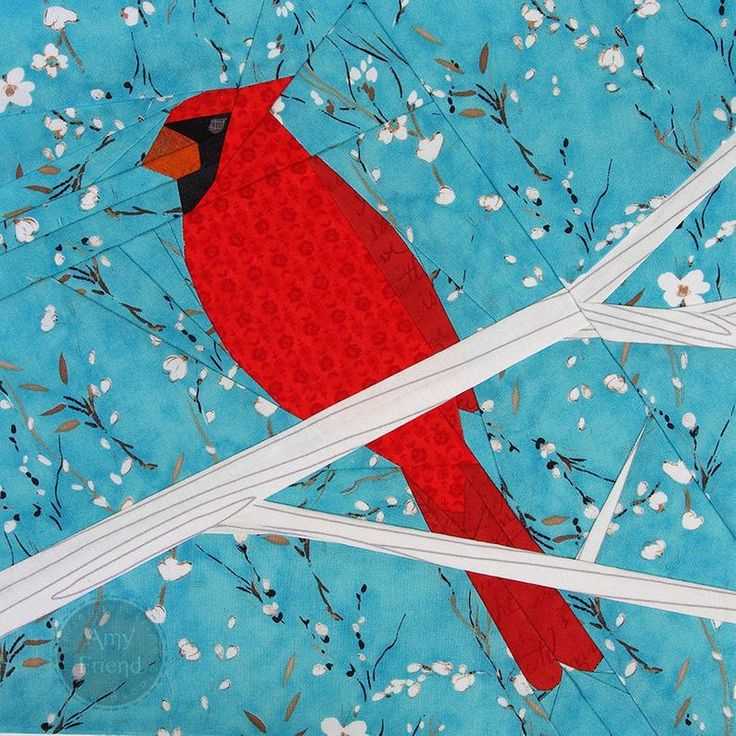
Knitting is a popular hobby that allows you to create beautiful and intricate pieces of clothing and accessories. One pattern that has gained popularity in recent years is the cardinal knitting pattern. This pattern features a design inspired by the vibrant and majestic cardinal bird, with its bright red feathers and distinctive crest.
The cardinal knitting pattern is perfect for those looking to add a pop of color to their wardrobe or home decor. It can be used to create a variety of items, such as scarves, hats, sweaters, and even blankets. The pattern typically consists of a repeating motif of cardinals, often interspersed with branches or other elements of nature.
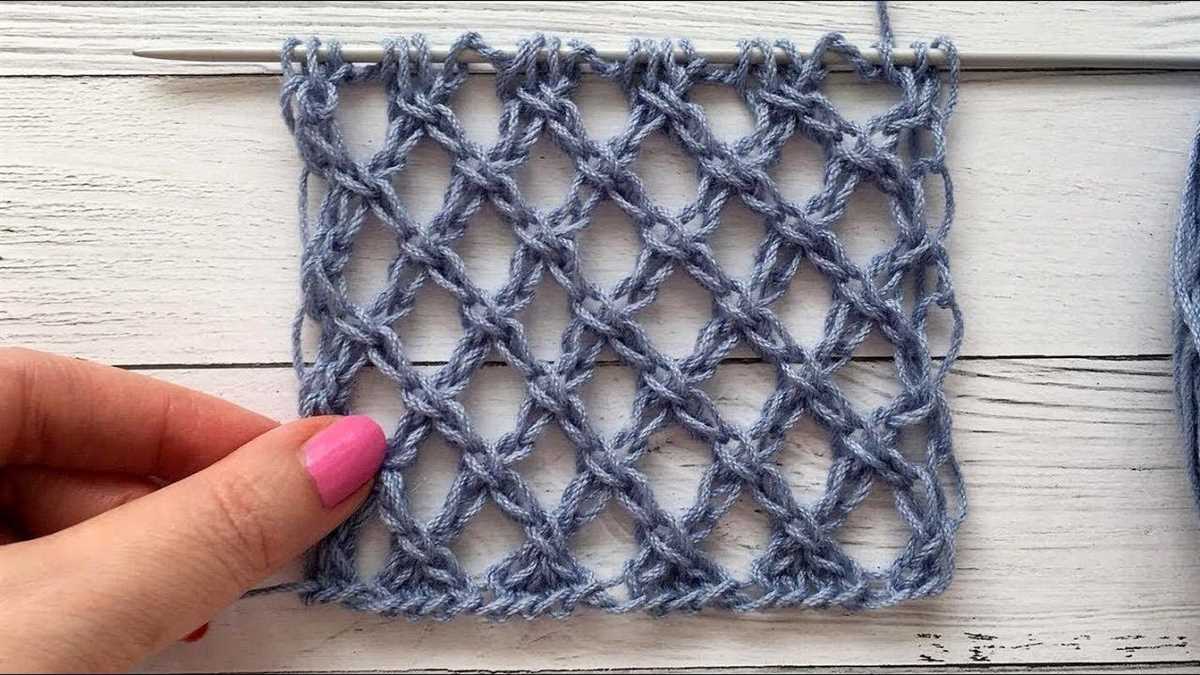
Knitting the cardinal pattern requires a basic knowledge of knitting techniques, such as casting on, knitting, purling, and binding off. It also often involves colorwork, where multiple colors of yarn are used to create the design. This adds an extra level of complexity and visual interest to the finished product.
If you’re new to knitting or are looking for a challenge, the cardinal knitting pattern may be just what you’re looking for. With its intricate design and bold colors, it’s sure to impress and delight anyone who sees the finished product. So grab your needles and yarn, and get ready to create something truly special!
Cardinal Knitting Pattern
The Cardinal Knitting Pattern is a popular and versatile design that adds a touch of elegance to any project. Whether you’re knitting a sweater, hat, scarf, or even socks, this pattern is sure to impress. The pattern features a repeating motif of cardinals, which are iconic birds known for their vibrant red feathers.
To create the Cardinal Knitting Pattern, you’ll need a basic understanding of knitting techniques such as knit, purl, and yarn overs. The pattern is charted, making it easy to follow along and keep track of your stitches. Each cardinal motif is carefully charted, detailing the placement of each stitch and color change.
To begin the Cardinal Knitting Pattern, cast on the desired number of stitches and work in the chosen stitch pattern until the desired length is reached. Then, follow the charted pattern for the cardinal motif, using different colors for each section. Repeat the motif as many times as necessary to complete your project.
The Cardinal Knitting Pattern is a great way to showcase your knitting skills and create a stunning, one-of-a-kind garment or accessory. The vibrant red color of the cardinals adds a beautiful pop of color to any project, making it perfect for adding a touch of style to your wardrobe. Whether you’re an experienced knitter looking for a new challenge or a beginner wanting to try something new, the Cardinal Knitting Pattern is a great choice.
To get started on your Cardinal Knitting Pattern project, gather your materials, including your favorite yarn in a variety of colors, knitting needles in the appropriate size, and any additional tools or notions you may need. Then, find a quiet and comfortable space where you can focus on your knitting. Take your time and enjoy the process, and soon you’ll have a beautiful finished project to show off!
- Benefits of the Cardinal Knitting Pattern:
- – Adds elegance to any project
- – Versatile design
- – Charted pattern for easy following
- – Showcases knitting skills
- – Vibrant red color adds a pop of color
- – Great for all skill levels
- – Creates a stunning, one-of-a-kind garment or accessory
Overview of Cardinal Knitting Pattern

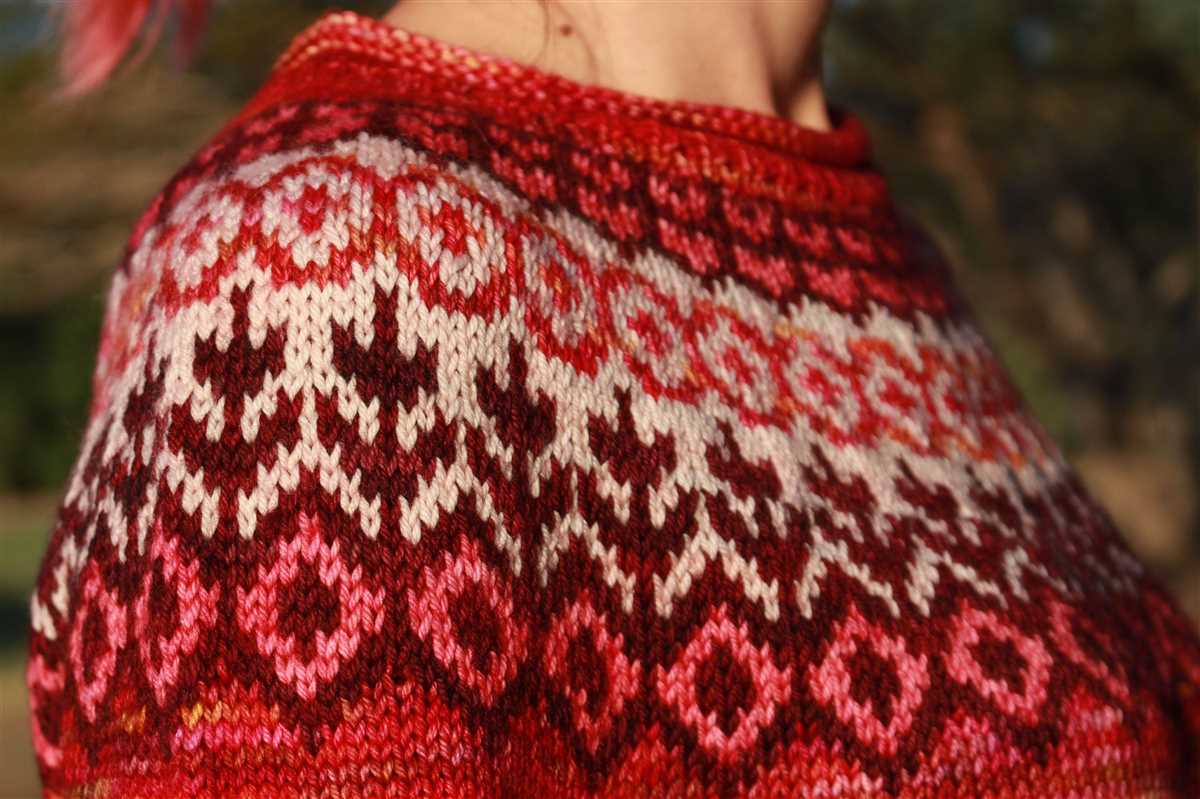
The Cardinal knitting pattern is a popular design that features a beautiful combination of intricate stitches to create a stunning motif of cardinals. This pattern is often used in various knitting projects, such as sweaters, scarves, and hats, to add a touch of nature and elegance. The Cardinal knitting pattern is suitable for both beginners and experienced knitters, as it combines simple techniques with more advanced stitch patterns.
The main highlight of the Cardinal knitting pattern is the detailed depiction of cardinals, which are often associated with beauty, strength, and passion. The pattern typically includes instructions for creating the cardinal motif using a combination of colorwork and textured stitches. The cardinals are usually knitted in contrasting colors, such as red and black, to make them stand out and create a bold visual impact.
To create the Cardinal knitting pattern, knitters will usually need to have a basic understanding of various knitting techniques, such as knit, purl, and stranded colorwork. The pattern may also include instructions for special stitches, such as cables or bobbles, to add an extra level of intricacy to the design. Knitters can choose to follow a written pattern or use a chart, depending on their personal preferences.
The Cardinal knitting pattern allows for customization and creativity, as knitters can choose their own color palette and modify the pattern to suit their project. Some patterns may also include variations, such as adding additional cardinals or incorporating the motif into different knitting projects. The end result is a unique and eye-catching piece that showcases the beauty of the cardinal motif.
The Cardinal knitting pattern has gained popularity not only for its stunning visual appeal but also for the symbolism and meaning associated with cardinals. These birds are often seen as a symbol of hope, love, and spirituality, making the Cardinal knitting pattern a meaningful choice for those looking to create a special and heartfelt gift or accessory.
Choosing the Right Yarn for Cardinal Knitting Pattern
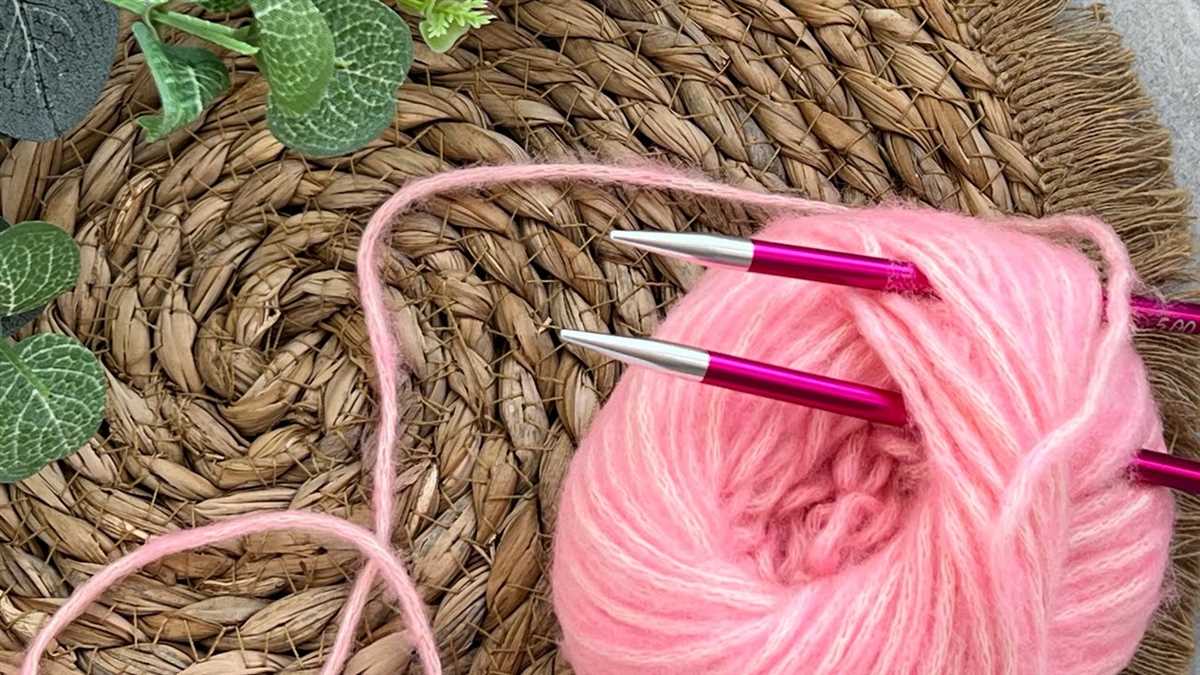
When it comes to knitting the beautiful Cardinal pattern, choosing the right yarn is essential. The pattern’s intricate details and design require a yarn that can showcase its beauty and provide the necessary stitch definition. Here are a few factors to consider when selecting the perfect yarn for your Cardinal project:
Type of Yarn:
Opting for a yarn that is soft and lightweight is a great choice for the Cardinal knitting pattern. The delicate nature of the pattern requires a yarn that won’t overpower the design but will still provide warmth and comfort. Consider using a yarn with a blend of merino wool, silk, or bamboo to achieve a soft and luxurious feel.
Yarn Weight:

The weight of the yarn will determine the overall size and drape of your finished Cardinal project. For a more delicate and intricate look, consider using a sport or fingering weight yarn. However, if you prefer a thicker and cozier finished piece, a DK or worsted weight yarn may be more suitable. Just keep in mind that the yarn weight may affect the overall gauge of the pattern, so make sure to swatch and adjust accordingly.
Color Choices:
The Cardinal pattern showcases its beauty through contrasting colors that create stunning visual effects. Consider using yarns with vibrant and contrasting shades to bring out the intricate details and make the design truly pop. Additionally, yarns with subtle variegation or heathered tones can add depth and dimension to the pattern.
Yarn Composition:
The composition of the yarn can greatly affect the final look and feel of your Cardinal project. Choosing a yarn with natural fibers, such as wool or cotton, can provide excellent stitch definition and durability. Alternatively, blends with synthetic fibers can offer added stretch and ease of care. Consider the desired characteristics of your finished project when selecting the yarn composition.
By carefully considering these factors, you can ensure that you choose the perfect yarn for your Cardinal knitting pattern. The right yarn will not only enhance the beauty of the design but also provide the comfort and quality you desire in your finished project. So take your time, explore different options, and enjoy the process of finding the perfect yarn for your Cardinal knitting adventure.
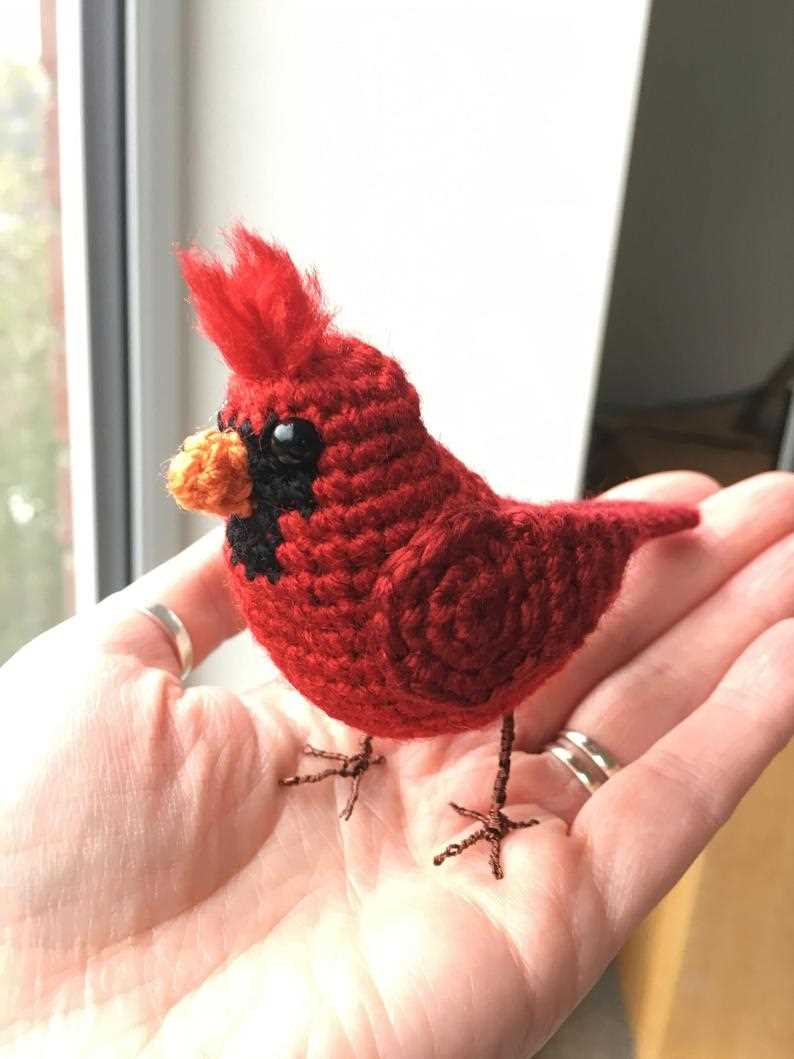
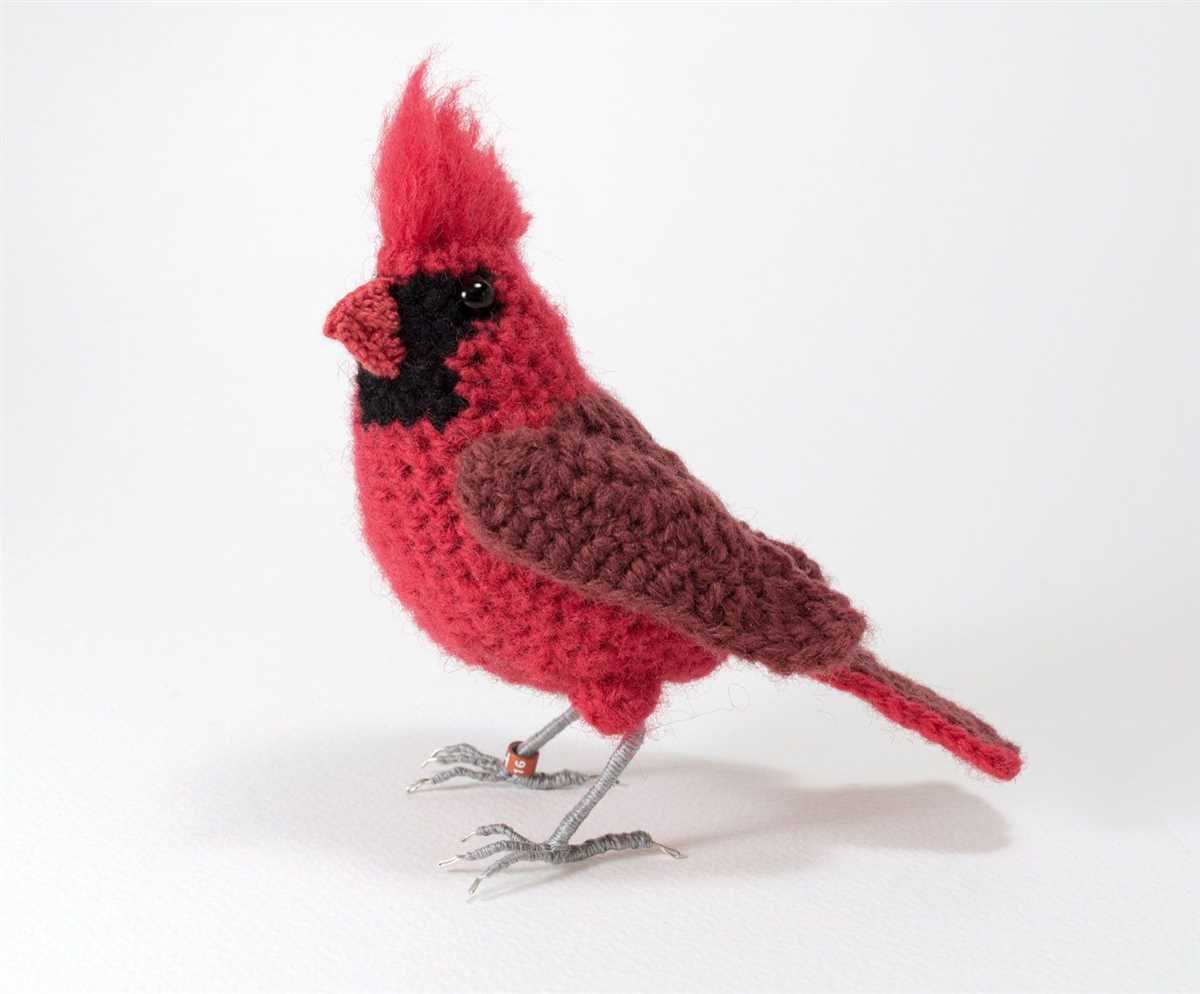
Tools and Materials Needed for Cardinal Knitting Pattern

When starting the Cardinal Knitting Pattern, it is essential to have the right tools and materials prepared. Having everything you need on hand will make the knitting process more enjoyable and ensure the best results. Here is a list of the essential tools and materials you will need:
Knitting Needles:
- A pair of US size 6 (4mm) knitting needles for the body of the cardinal.
- A pair of US size 5 (3.75mm) knitting needles for the smaller details, such as the wings and beak.
Yarn:
- Red yarn in worsted weight (medium/4) for the main body of the cardinal.
- Black yarn in worsted weight (medium/4) for the smaller details, such as the wings and beak.
- White yarn in worsted weight (medium/4) for the eyes and belly of the cardinal.
Stuffing:

You will need polyester fiberfill or any other type of stuffing material to stuff the cardinal and give it a three-dimensional shape.
Tapestry Needle:
A tapestry needle with a large eye will be necessary for sewing the different parts of the cardinal together and weaving in any loose ends.
Scissors:
A pair of sharp scissors will be needed to cut the yarn and trim any excess materials.
With these tools and materials prepared, you will be ready to start knitting the Cardinal Pattern and bring this beautiful bird to life. Enjoy the knitting process and create a lovely cardinal to adorn your home or give as a gift.
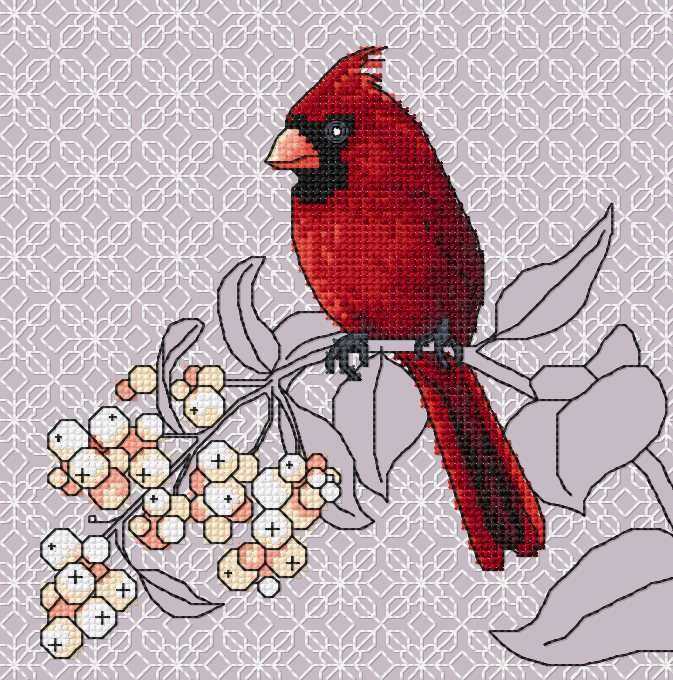
Understanding the Cardinal Knitting Pattern Chart
In knitting, charts are often used to visually represent patterns and designs. One popular knitting pattern chart is the Cardinal pattern, which features a beautiful bird motif. Understanding how to read and interpret the Cardinal knitting pattern chart is key to successfully knitting this design.
Key Elements of the Chart:
The Cardinal knitting pattern chart consists of rows and columns, with each square representing a stitch. The chart typically includes a legend that explains the symbols or colors used to represent specific stitches. This makes it easier to track and follow the pattern.
Reading the Chart:
To read the Cardinal knitting pattern chart, start at the bottom right corner, which represents the first stitch of your knitting project. Each row of the chart represents a row of knitting, and you read from right to left for right-side (RS) rows and from left to right for wrong-side (WS) rows.
Note: Some charts may also include additional information, such as stitch counts or repeat sections. It’s important to carefully review the chart key and any accompanying instructions to understand these extra details.
Tracking Progress:
As you work on your Cardinal knitting project, it’s helpful to use a highlighter or marker to track the rows and stitches you have completed on the chart. This ensures that you don’t lose your place and helps you catch any mistakes early on.
Troubleshooting:
If you encounter any difficulties while working with the Cardinal knitting pattern chart, such as miscounted stitches or confusion about a symbol, refer back to the chart key and any written instructions provided. It’s also useful to compare your work to a picture or visual representation of the finished design to ensure accuracy.
By understanding and effectively using the Cardinal knitting pattern chart, you can create a stunning knitted item featuring a beautiful bird motif. With practice, you’ll become more comfortable and confident in working with knitting charts, opening up a world of design possibilities for your knitting projects.
Step-by-Step Instructions for Cardinal Knitting Pattern
If you’re a knitting enthusiast looking for a new project, the cardinal knitting pattern is a great choice. This pattern allows you to create an adorable bird motif, making it perfect for winter decorations or themed gifts. With the step-by-step instructions below, you’ll be able to easily master this pattern and create your own beautiful cardinal.
Materials Needed:
- Red worsted weight yarn
- Black worsted weight yarn
- White worsted weight yarn
- Double-pointed knitting needles
- Tapestry needle
- Polyester fiberfill
- Scissors
Step 1: Cast On and Knit the Body
- Using the red yarn and double-pointed knitting needles, cast on 24 stitches.
- Join the round, being careful not to twist the stitches.
- Knit every round until the body measures approximately 2 inches in length.
- Stuff the body with polyester fiberfill, leaving enough space for the neck and head.
Step 2: Knit the Wings
- Switch to black yarn and knit 6 stitches.
- Slide these 6 stitches onto a stitch holder.
- Join another ball of black yarn and knit the next 6 stitches.
- Slide these stitches onto a second stitch holder.
- Switch back to red yarn and knit the remaining 12 stitches.
Step 3: Shape the Head
- Continue knitting the 12 stitches in red yarn for 6 rounds.
- Decrease 2 stitches evenly across the round, leaving you with 10 stitches.
- Knit for another 3 rounds.
Step 4: Finishing Touches
- Switch to white yarn and knit 1 round.
- Bind off the stitches.
- Using the tapestry needle, sew the wings onto the body.
- Embroider the eyes using black yarn.
- Your cardinal knitting pattern is now complete!
With these step-by-step instructions, you’ll be able to create your own adorable cardinal knitting pattern. Have fun with different color variations and experiment with different poses for your bird. Whether you use it as a decoration or a gift, your cardinal will surely be a cherished item for any knitting enthusiast or nature lover.
Tips and Tricks for Perfecting the Cardinal Knitting Pattern
Knitting the Cardinal pattern can be a challenging but rewarding project. With its intricate design featuring cardinals perched on branches, it requires attention to detail and precision. Here are some tips and tricks to help you perfect the Cardinal knitting pattern.
1. Choose the Right Yarn and Needles
When starting the Cardinal pattern, it’s important to choose the right yarn and needles. Opt for a medium-weight yarn with good stitch definition, as this will showcase the intricate details of the cardinals and branches. Be sure to use needles that are suitable for your chosen yarn weight, as this will ensure that your stitches are even and consistent.
2. Use Stitch Markers
Stitch markers can be extremely helpful when working on the Cardinal pattern. They can help you keep track of your pattern repeats and ensure that you don’t miss any increases or decreases. Place a stitch marker at the beginning and end of each pattern repeat, and move them up as you progress. This will help you stay organized and avoid mistakes.
3. Read the Pattern Carefully

The Cardinal pattern may have complex instructions, so it’s important to read the pattern carefully before you begin. Familiarize yourself with any special stitches or techniques that may be required. Take the time to understand the abbreviations and symbols used in the pattern, and make sure you know how to execute each one correctly. This will help you avoid errors and confusion as you work through the pattern.
4. Pay Attention to Tension
Keeping an even tension is crucial when knitting the Cardinal pattern. Uneven tension can result in distorted stitches and affect the overall appearance of the design. Take your time and make sure that your tension remains consistent throughout the project. If you find that your tension is too tight or too loose, adjust your needle size accordingly.
5. Practice Patience
Knitting the Cardinal pattern requires patience and perseverance. It may take some time to get used to the intricacies of the design and develop a rhythm. Don’t get discouraged if it doesn’t look perfect right away – take your time, practice, and trust in your skills. Remember, knitting is a journey, and each stitch brings you closer to a beautiful finished project.
- Choose the right yarn and needles
- Use stitch markers
- Read the pattern carefully
- Pay attention to tension
- Practice patience
Adapting the Cardinal Knitting Pattern for Different Sizes
When it comes to knitting the popular Cardinal pattern, one of the challenges that many knitters face is adapting the pattern for different sizes. Whether you’re knitting a sweater, a hat, or any other item using the Cardinal pattern, it’s important to ensure that it fits the intended recipient perfectly. Fortunately, with a few simple adjustments, you can easily adapt the Cardinal knitting pattern to different sizes.
1. Adjusting the Cast-On Stitches: The first step in adapting the Cardinal knitting pattern for different sizes is to adjust the number of cast-on stitches. This will depend on the gauge of your knitting and the measurements of the person you are knitting for. You may need to add or subtract stitches to achieve the desired width. Remember to measure the person’s chest circumference or head circumference and calculate the number of stitches required based on your gauge.
2. Modifying the Increases and Decreases: The next step is to modify the increases and decreases in the pattern to suit the size you are knitting. This will ensure that the garment fits properly and has the right proportions. You may need to space out the increases or decreases more or less frequently, depending on the size. Be sure to follow the instructions for shaping the garment, but adjust the placement of the increases and decreases as needed.
3. Adjusting the Length: Finally, you’ll want to adjust the length of the garment to fit the intended size. For example, if you’re knitting a sweater, you may need to knit more or fewer rows before starting the neckline shaping. Similarly, if you’re knitting a hat, you may need to adjust the number of rows for the ribbing or the length of the main body of the hat. Take accurate measurements of the person you are knitting for and make adjustments accordingly.
By following these tips and making the necessary adjustments, you can easily adapt the Cardinal knitting pattern for different sizes. Remember to take accurate measurements and calculate the number of stitches required based on your gauge. With a little bit of effort, you can create a perfectly fitting garment using the beautiful Cardinal pattern.
Creating Variations with the Cardinal Knitting Pattern

If you are familiar with the Cardinal knitting pattern, you already know the basic steps to create a beautiful and intricate design. However, did you know that you can also tweak the pattern to create a variety of different looks? By making some adjustments to the stitch count, color choices, or even adding embellishments, you can transform the Cardinal pattern into something unique and personalized.
Adjusting the stitch count: One way to create variations with the Cardinal knitting pattern is to change the stitch count. For example, if you want a more intricate design, you can increase the number of stitches in each repeat. This will result in a denser and more detailed pattern. On the other hand, if you prefer a more delicate look, you can decrease the stitch count to create a lacy effect.
Playing with color: Another way to add variation to the Cardinal pattern is through color choices. While the original pattern typically uses one or two colors, you can experiment with different color combinations to create different effects. For example, using a gradient yarn can give the pattern a beautiful ombre effect. Alternatively, using contrasting colors can make the pattern pop and stand out.
Embellishments and additions: If you want to take your Cardinal knitting pattern to the next level, consider adding embellishments or making additional modifications. For example, you can incorporate beads into the design by threading them onto the yarn and knitting them into the pattern. This can add a touch of sparkle and elegance to your finished project. Additionally, you can also experiment with adding different types of stitches or textures to create an even more unique look.
In conclusion, the Cardinal knitting pattern is a versatile design that can be customized in various ways to create different looks. Whether you choose to adjust the stitch count, play with colors, or add embellishments, there are endless possibilities to explore. Have fun experimenting and creating your own variations with this beautiful pattern!
Finishing Techniques for Cardinal Knitting Pattern
Once you have completed knitting the Cardinal pattern, it’s time to add those finishing touches that will make your project truly stand out. Whether you’re a beginner or an experienced knitter, learning and mastering these finishing techniques will elevate your knitted cardinal to the next level.
1. Weaving in Ends: To give your cardinal a polished look, it’s important to neatly weave in all loose ends from your yarn. Use a tapestry needle to carefully thread the ends through the stitches in the back of your work. Avoid pulling the yarn too tight, as this can cause puckering or distortion. Trim off any excess yarn, making sure to leave a small tail securely woven into the fabric.
2. Blocking: Blocking is a crucial step in finishing any knitting project, as it helps to even out stitches, open up lace patterns, and give the fabric a professional finish. For your cardinal, gently wet the finished piece in lukewarm water and lay it flat on a blocking mat or towel. Use rustproof pins to gently stretch the fabric into the desired shape and size. Allow it to dry completely before removing the pins.
3. Embroidery Details: To really bring your cardinal to life, consider adding some embroidery details. Use a contrasting yarn or embroidery floss to stitch on the bird’s eyes, beak, and any other desired features. You can also use embroidery techniques to enhance the texture of the feathers or create additional designs on the cardinal’s body.
4. Sewing on Buttons or Beads: A fun and creative way to add personality to your cardinal is by sewing on buttons or beads. Choose buttons or beads that complement the colors and design of your cardinal, and carefully attach them to the body of the bird using a needle and thread. This can create a beautiful effect and add an extra touch of charm to your knitted cardinal.
5. Finishing Edges: Finally, pay attention to the edges of your knitted cardinal. Depending on the pattern you used, you may need to add a border or finish off the edges to prevent them from curling. Options for finishing edges include adding a row of single crochet or slip stitch, or picking up stitches along the edge and knitting a few rows in a contrasting color.
By following these finishing techniques, you can take your Cardinal knitting pattern to the next level and create a beautiful and professional-looking knitted bird. Experiment with different finishing touches to make your project unique and truly special.
Project Ideas Using the Cardinal Knitting Pattern

Now that you have learned the Cardinal knitting pattern, it’s time to put your skills to use and create some beautiful projects. Whether you’re a beginner or an experienced knitter, there are plenty of options to choose from. Here are a few project ideas to inspire you:
1. Cardinal Sweater
Create a cozy and stylish sweater using the Cardinal knitting pattern. You can choose to knit the entire sweater using the pattern or add smaller accents like a cardinal design on the front or back. Experiment with different colors to make your sweater truly unique.
2. Cardinal Hat
Keep your head warm during the winter months with a cardinal hat. This project is perfect for beginners as it involves working the pattern in the round. Choose a soft and warm yarn to ensure maximum comfort.
3. Cardinal Scarf

Add a touch of elegance to your winter wardrobe with a cardinal scarf. Knit the pattern on a long scarf or create smaller motifs along the length. Experiment with different yarns and colors to create a scarf that reflects your personal style.
4. Cardinal Mittens
Stay warm and stylish with a pair of cardinal mittens. This project is great for practicing colorwork and can be customized to fit your hand size. Add a lining for extra warmth and comfort.
5. Cardinal Baby Blanket

Create a beautiful and heirloom-worthy baby blanket using the cardinal knitting pattern. This project is perfect for welcoming a new baby into the world and can be knit in soft and delicate colors. The pattern adds a playful and adorable touch to any nursery.
These are just a few ideas to get you started. The cardinal knitting pattern can be used in a variety of projects, so feel free to get creative and experiment with different designs. Happy knitting!