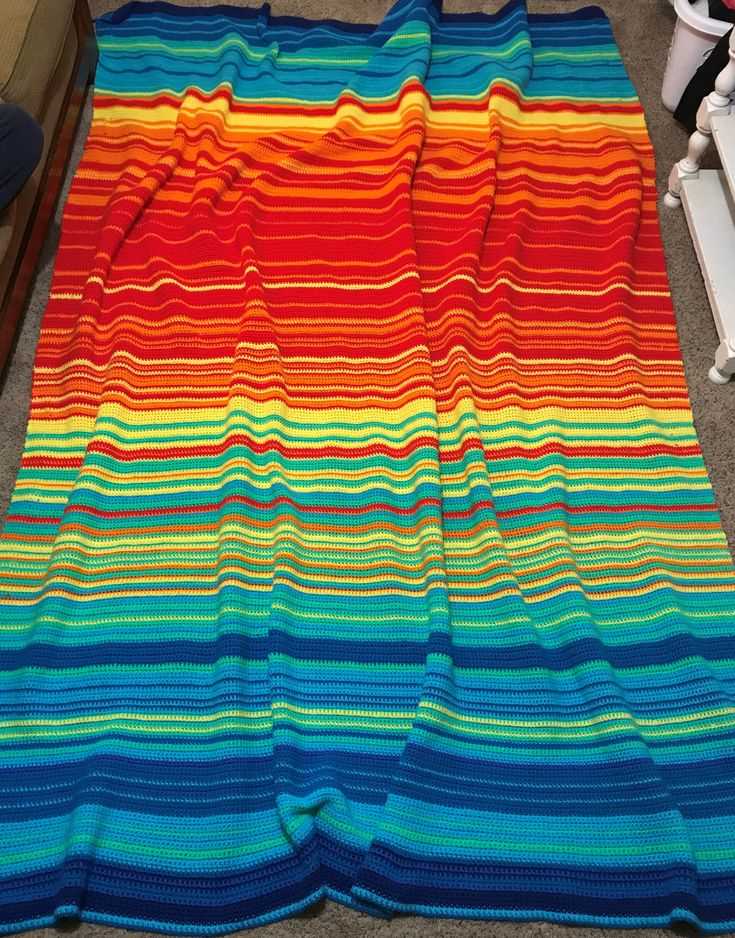
Are you looking for a fun and creative knitting project? Look no further than the temperature blanket pattern! Not only is this pattern easy to follow, but it also allows you to track and visualize the changing weather throughout the year. Whether you’re a beginner or an experienced knitter, this pattern is suitable for all skill levels.
A temperature blanket is a unique and personalized way to document the daily temperature in your area. Each day, you will knit a stripe in a color that corresponds to the temperature. By the end of the year, you will have a beautiful and cozy blanket that represents a year’s worth of weather. It’s like a visual diary of the changing seasons!
This free knitting pattern is a great way to stay motivated and committed to your knitting practice. With each day’s stripe, you’ll feel a sense of accomplishment as you watch the blanket grow. Plus, the color-changing aspect of the pattern adds an element of excitement and anticipation to the project.
Don’t worry if you’re not confident in choosing the right colors for each temperature range. The pattern provides a color chart that you can follow, ensuring that your blanket will be colorful and visually appealing. So grab your knitting needles, choose your yarn, and get ready to embark on a knitting adventure with the temperature blanket pattern!
What is a temperature blanket?
A temperature blanket is a unique type of knitting or crocheting project that involves creating a blanket where the color of each row or square corresponds to the temperature of a specific day. This means that each day you record the temperature and then choose a specific color that represents that temperature to create a unique pattern. Over time, this creates a visual representation of the changing temperatures throughout the year.
This trend originated as a way to create a personalized and meaningful keepsake that captures the memories and experiences of a particular year. The concept of a temperature blanket allows individuals to create something beautiful while also tracking and reflecting on the changing weather patterns and seasons.
The process of creating a temperature blanket typically involves selecting a color palette that represents the range of temperatures in your area. For example, you might choose blues and purples for colder temperatures, greens and yellows for moderate temperatures, and oranges and reds for warmer temperatures. As the year progresses and temperatures fluctuate, you will complete rows or squares in the corresponding colors, gradually building a unique and visually striking blanket.
Many knitters and crocheters find the process of creating a temperature blanket to be both engaging and therapeutic. It allows them to incorporate a creative outlet into their daily lives while also serving as a record of the changing seasons and weather patterns. Additionally, temperature blankets can also make thoughtful and personalized gifts for loved ones, as they capture a specific time period and the memories associated with it.
How to Knit a Temperature Blanket
Knitting a temperature blanket is a fun and creative way to track the weather throughout the year. This project involves knitting a row or square for each day of the year, using colors that correspond to the temperature. Here are some steps to help you get started on your temperature blanket:
1. Choose your color scheme
Before you begin knitting, decide on a color scheme that represents the temperature range. For example, you can assign a different color to each 10-degree Fahrenheit range, or you can create a gradient of colors that represents the temperature spectrum. Be creative and choose colors that you find aesthetically pleasing.
2. Create a knitting chart
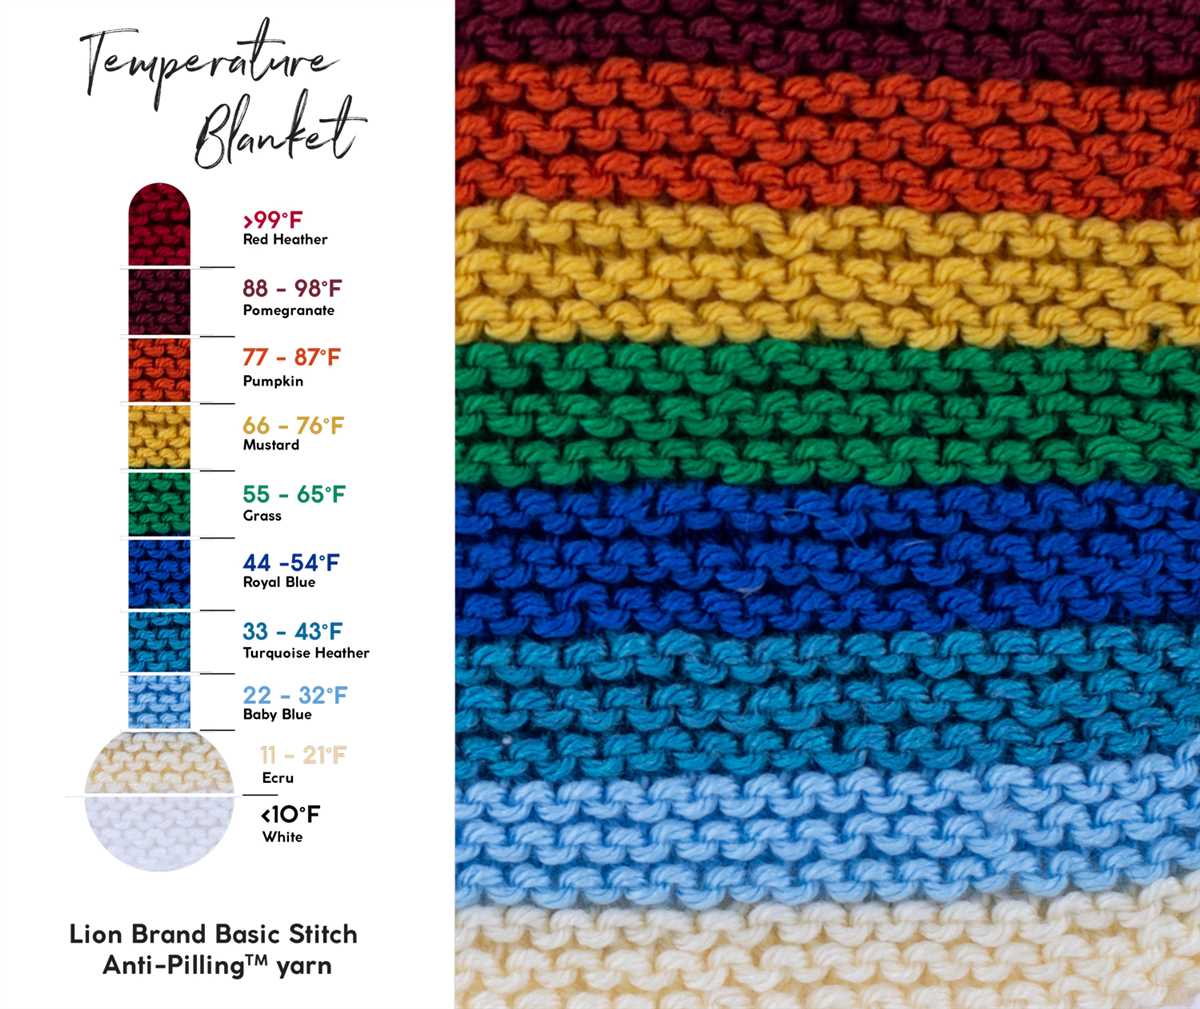
To keep track of the daily temperature and the corresponding color, create a knitting chart or use an online temperature tracker. This will help you stay organized and ensure that you use the correct color for each day’s knitting. You can create a simple chart with columns for the date, temperature, and color.
3. Start knitting
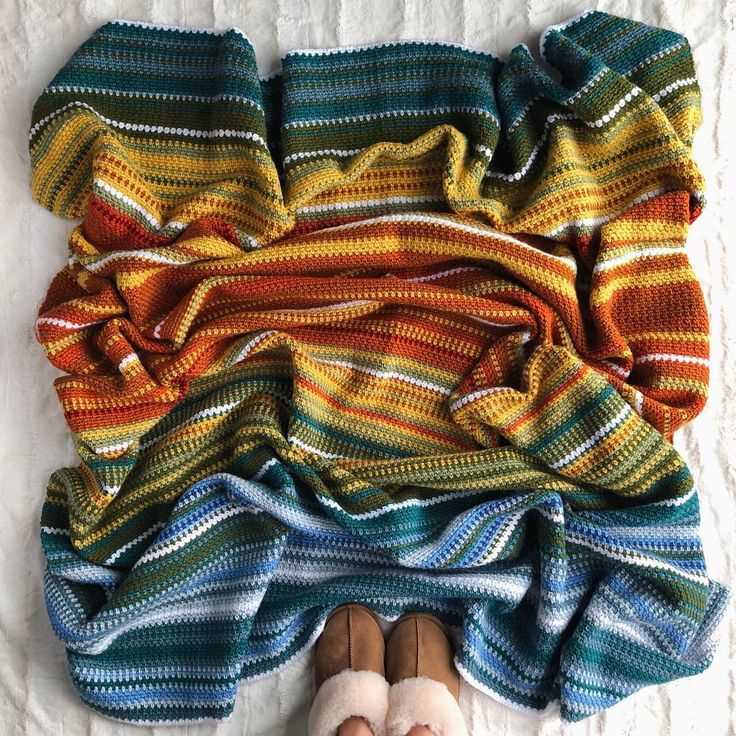
Once you have your color scheme and knitting chart ready, it’s time to start knitting! You can choose to knit each row or square for the day’s temperature, or you can knit a few rows each week to represent the weekly average temperature. It’s up to you to decide the size of your blanket and how you want to interpret the temperature data.
4. Stay consistent
It’s important to stay consistent with your knitting throughout the year. Make sure to knit on a regular basis and keep track of the daily temperature accurately. This will ensure that your temperature blanket accurately reflects the weather patterns of the year.
5. Finishing touches
Once the year is over, you can add finishing touches to your temperature blanket. You can block the blanket to give it a smooth and finished look, and you can add a border or edging if you prefer. Finally, you can enjoy your temperature blanket as a beautiful and unique reminder of the weather patterns throughout the year.
Knitting a temperature blanket is a rewarding and enjoyable project that allows you to combine your love for knitting with your interest in weather data. With some planning and creativity, you can create a beautiful and meaningful blanket that captures the temperature variations of an entire year.
Choosing the right yarn for your temperature blanket
When it comes to knitting a temperature blanket, one of the most important decisions you’ll make is choosing the right yarn. The yarn you choose will not only affect the overall look and feel of your blanket, but it will also impact how well the blanket is able to accurately represent the temperatures throughout the year.
1. Weight: First and foremost, consider the weight of the yarn. A temperature blanket typically requires a large quantity of yarn, so you’ll want to choose a weight that is appropriate for the size of blanket you want to make. Worsted weight yarn is a popular choice for temperature blankets as it is versatile and widely available.
2. Fiber: The fiber content of the yarn will also play a role in how your temperature blanket turns out. Natural fibers such as wool or alpaca can provide excellent temperature regulation, making them a great choice for accurately representing the temperatures throughout the year. However, if you prefer a yarn that is easy to care for and requires less maintenance, acrylic or cotton blends may be a better option.
3. Color range: Another important factor to consider is the color range available in the yarn. Since the purpose of a temperature blanket is to represent different temperatures with different colors, you’ll want to choose a yarn that offers a wide range of colors. Look for a yarn brand that offers a diverse palette, with colors that range from cool blues to warm oranges and everything in between.
4. Budget: Finally, consider your budget when choosing yarn for your temperature blanket. The cost of yarn can vary greatly depending on the brand, fiber content, and quantity needed. While it’s tempting to splurge on luxurious yarns, keep in mind that a temperature blanket will require a significant amount of yarn, so make sure to choose a yarn that fits within your budget.
By carefully considering the weight, fiber, color range, and budget, you can choose the perfect yarn for your temperature blanket. Whether you opt for natural fibers or budget-friendly acrylic blends, the most important thing is to choose a yarn that you love working with and that will help you create a beautiful and meaningful blanket to commemorate the changing seasons and temperatures.
Selecting the right colors for your temperature blanket

When creating a temperature blanket, one of the most important decisions you’ll make is choosing the colors that will represent the different temperature ranges. The colors you select can have a big impact on the overall look and feel of your blanket, so it’s important to choose wisely.
To begin, think about the temperature ranges you want to include in your blanket. For example, you might decide to have a color for each 10-degree Fahrenheit range, or you might opt for larger or smaller ranges depending on your preferences. Once you’ve determined the temperature ranges, you can start selecting colors that best represent them.
When choosing colors, consider the emotions and feelings that different colors evoke. For cooler temperature ranges, you may want to select colors that are calming and soothing, such as blues and purples. On the other hand, for warmer temperature ranges, you may want to choose colors that are more energetic and vibrant, like oranges and reds.
Another factor to consider is the availability of yarn in the colors you want. Check with local yarn stores or online retailers to see what options are available to you. If you can’t find the exact shades you’re looking for, consider mixing different shades or using variegated yarns to create the desired effect.
It’s also a good idea to consider the overall aesthetic you want for your blanket. If you’re going for a more subtle and understated look, you may want to stick to a more limited color palette. On the other hand, if you want a bold and vibrant blanket, feel free to experiment with a wider range of colors.
Lastly, don’t be afraid to let your personal style and taste shine through in your color choices. Your temperature blanket is a reflection of you, so choose colors that speak to your preferences and personality. Whether you prefer bright and bold or soft and muted colors, there’s a perfect combination out there for your temperature blanket.
Understanding the temperature chart
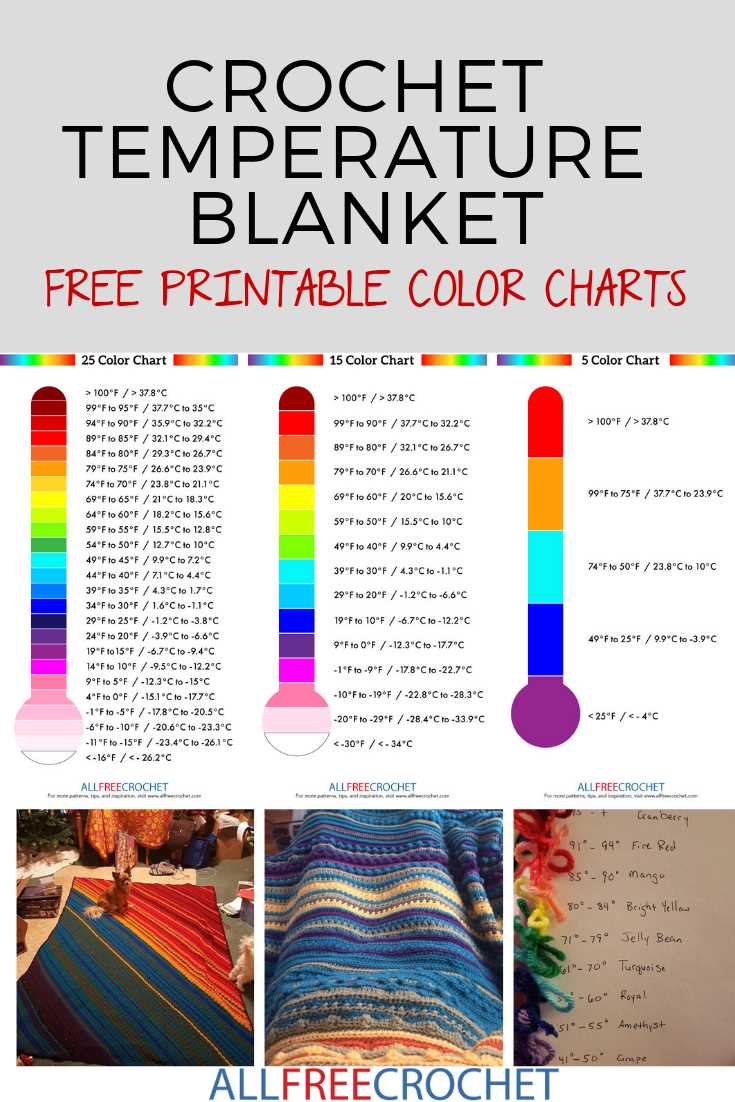
When starting your knit temperature blanket project, one of the most important elements to understand is the temperature chart. This chart will serve as your guide for selecting the colors of yarn to use for each day’s temperature. By utilizing a specific range of colors, you can create a visual representation of the changing temperatures throughout the year.
The temperature chart typically consists of a color key, with each color corresponding to a specific temperature range. For example, you might assign a deep blue color for temperatures below freezing, a light blue for temperatures between freezing and 32 degrees Fahrenheit, a green for temperatures between 32 and 50 degrees, and so on. This color key helps to differentiate between the various temperature ranges and adds depth and visual interest to your blanket.
It is important to note that the temperature chart can vary depending on your personal preference and the climate of your location. Some individuals may choose to use a smaller range of colors, while others may opt for a wider range to capture more nuanced temperature changes. Additionally, you may choose to assign different colors to different temperature ranges based on personal preference or visual aesthetics.
To utilize the temperature chart effectively, it is recommended to keep a record of the daily temperatures in a spreadsheet or journal. This will allow you to refer back to the chart regularly and ensure accuracy in color selection. By following the temperature chart closely, you can track the fluctuations in temperature over time and create a beautiful and meaningful representation of the year’s weather patterns.
Creating the pattern for your temperature blanket
When it comes to creating a temperature blanket, one of the first steps is deciding on a pattern. There are many different options to choose from, depending on your personal preferences and the desired final look of your blanket. Some knitters prefer a simple striped pattern, while others may opt for more complex designs such as granny squares or chevron patterns.
Color selection: Before you start knitting, it’s important to choose the colors that correspond to the temperature ranges you want to track. This can be as simple as selecting a different color for each degree or as complex as using a color gradient to represent temperature variations. You can also choose to assign specific colors to specific temperature ranges, such as using shades of blue for colder temperatures and shades of red for warmer temperatures.
Tracking temperature:
Once you have chosen your colors, you will need to decide how you want to track the temperature. This can be done in a variety of ways, depending on your preferences and the tools you have available. Some knitters prefer to use a digital thermometer to record the temperature each day, while others may choose to use an online weather service or a paper calendar to track the daily highs and lows.
Creating the pattern: Once you have the color scheme and temperature tracking method in place, it’s time to create the pattern for your temperature blanket. This can be as simple as knitting a row or square for each day’s temperature, or you can get more creative and incorporate different stitch patterns or motifs to represent the temperature variations. You can also choose to knit the entire blanket in one piece or create smaller panels that will be sewn together later.
In conclusion, creating a pattern for your temperature blanket requires careful consideration of color selection, temperature tracking method, and the overall design of your blanket. Whether you choose a simple striped pattern or a more intricate design, the end result will be a unique and personal creation that reflects the changing temperatures throughout the year.
Calculating the number of stitches and rows
When embarking on a knit temperature blanket project, it is important to calculate the number of stitches and rows needed to create the desired size of the blanket. This will ensure that the blanket turns out to be the right dimensions and that the pattern is consistent throughout.
To calculate the number of stitches, you will first need to determine the gauge of your knitting. Gauge refers to the number of stitches and rows per inch that you achieve with a particular yarn and needle size. You can find this information on the yarn label or by knitting a gauge swatch. Once you know your gauge, you can measure the width of the blanket you want to make and multiply it by the number of stitches per inch to determine the total number of stitches needed.
For example, if your gauge is 5 stitches per inch and you want to make a blanket that is 40 inches wide, you would multiply 5 by 40 to get 200 stitches. This is the number of stitches you would cast on to begin your blanket.
In addition to calculating the number of stitches, you will also need to calculate the number of rows. This will depend on the height of the blanket you want to make and the number of rows per inch in your gauge. To determine the total number of rows needed, multiply the desired height of the blanket by the number of rows per inch.
For example, if your gauge is 7 rows per inch and you want to make a blanket that is 60 inches tall, you would multiply 7 by 60 to get 420 rows. This is the number of rows you would knit to complete your blanket.
Knitting Techniques for Your Temperature Blanket
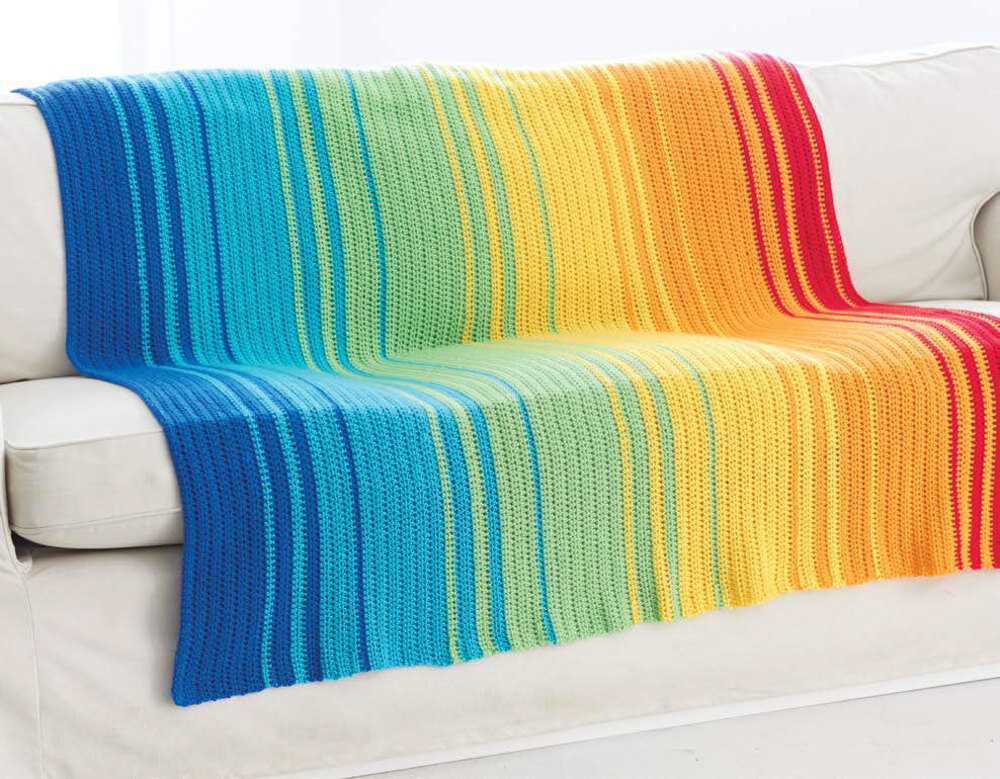
Creating a temperature blanket can be a fun and rewarding knitting project. Not only will you end up with a beautiful blanket, but you will also have a unique keepsake that reflects the changing temperatures throughout the year. To make your temperature blanket truly special, here are some knitting techniques you can incorporate into your project:
1. Colorwork:
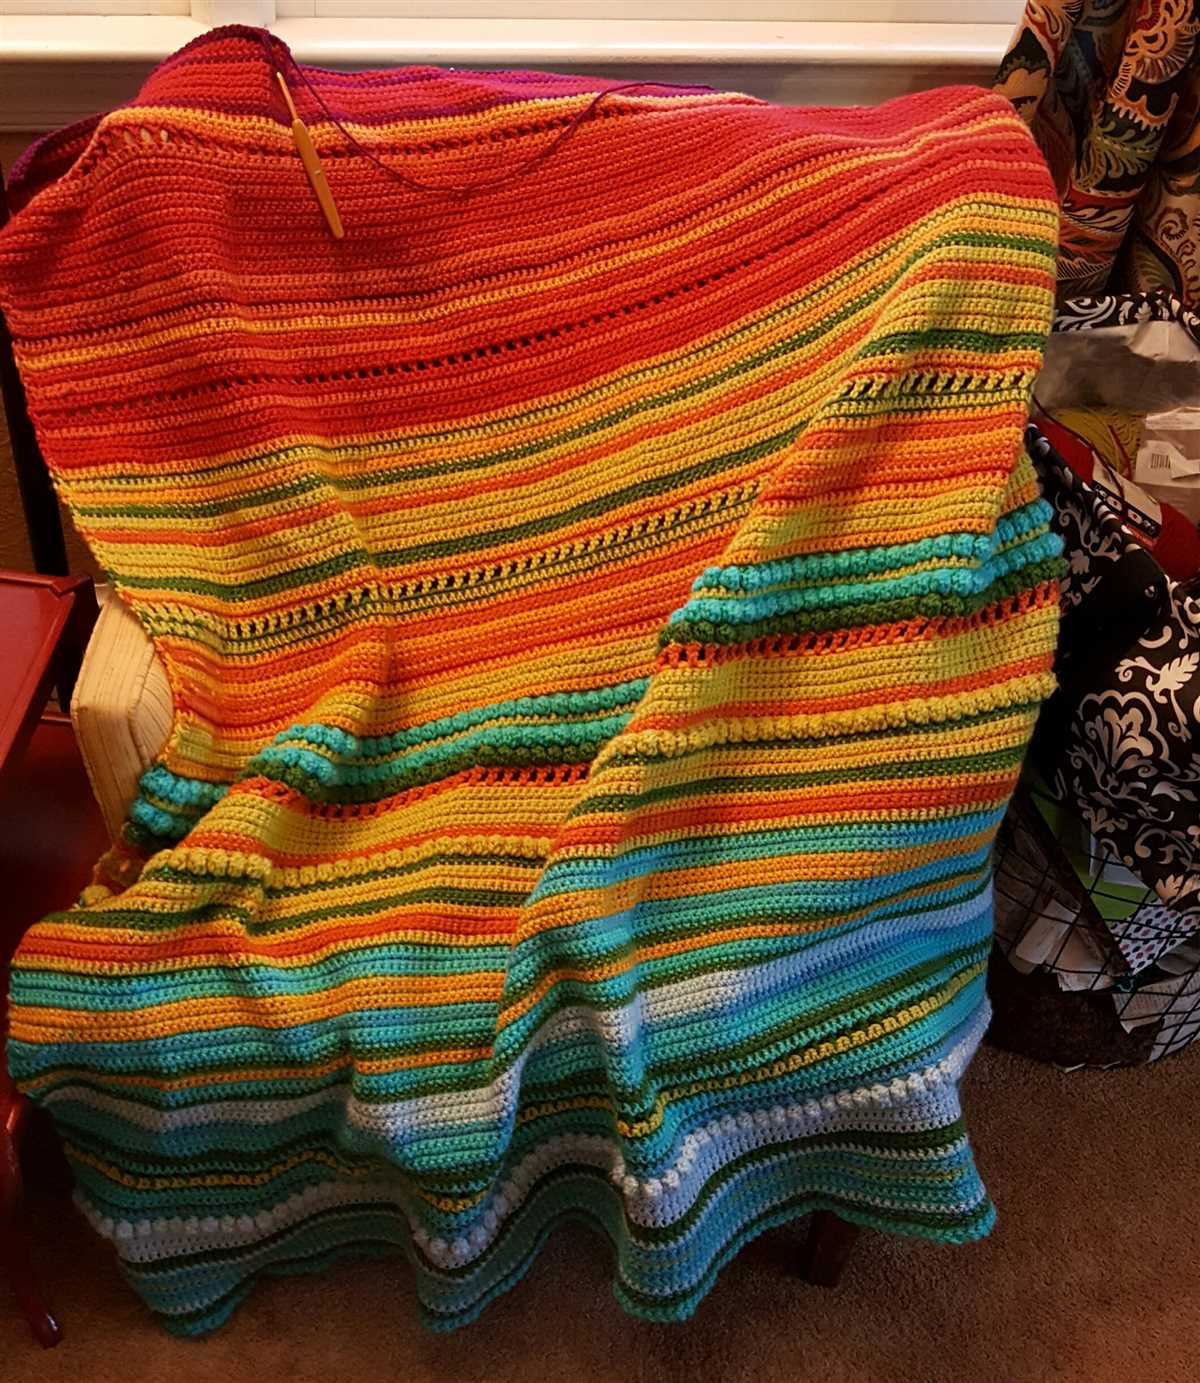
Colorwork is a popular technique to represent temperature variations in a blanket. You can use different colors, each representing a specific range of temperatures. For example, you can use shades of blue for cooler temperatures, and warmer colors like red and orange for hotter temperatures. This technique allows you to create a visually striking blanket that showcases the temperature changes over time.
2. Stripes:
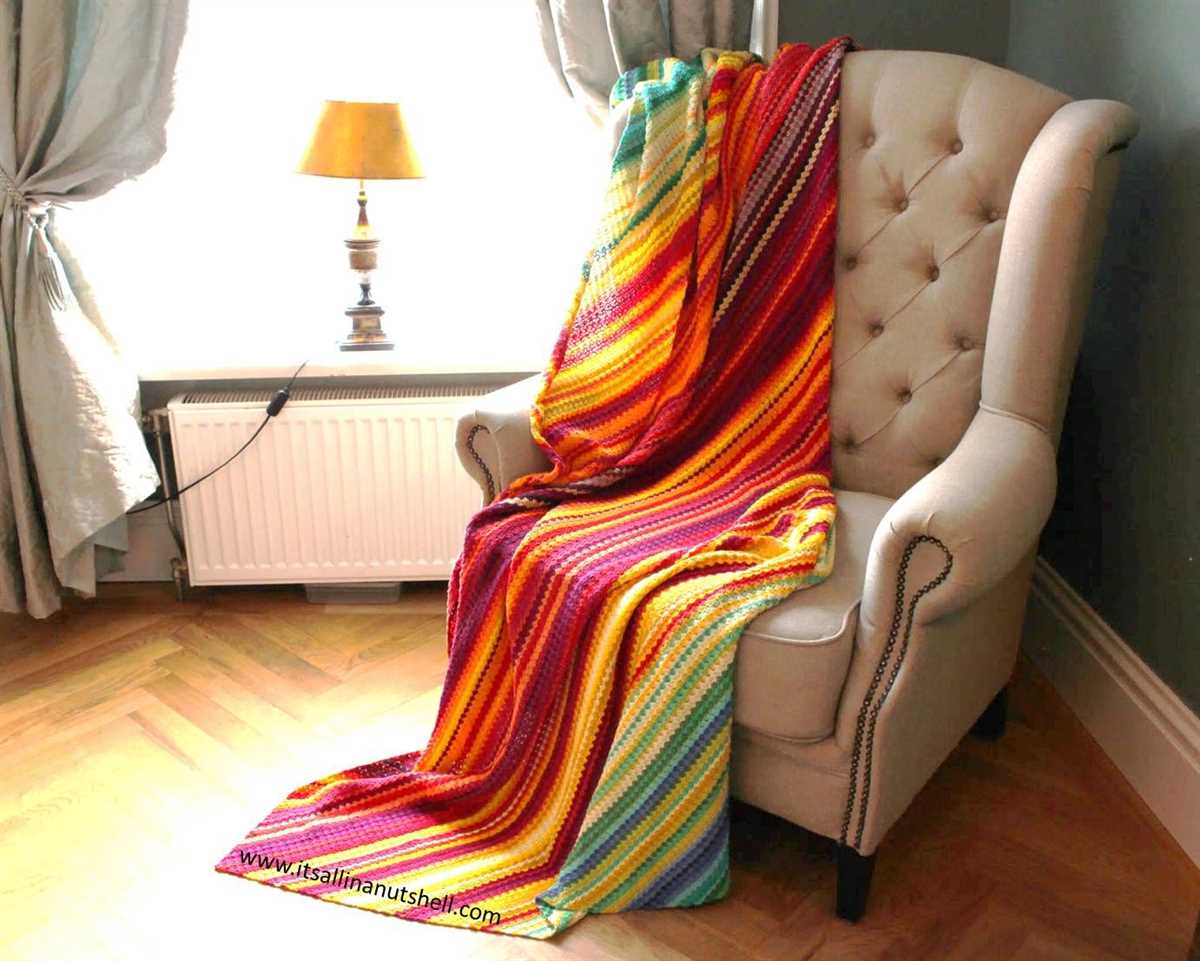
If you prefer a simpler approach, incorporating stripes into your temperature blanket can be a great option. Each stripe can represent a specific time period, such as a day or a week, and you can use different colors for different temperature ranges. This technique is easy to follow and can create a visually appealing blanket that highlights the variations in temperature.
3. Texture Stitches:
If you want to add some depth and texture to your temperature blanket, consider using different stitch patterns. You can choose stitches that represent certain temperatures or use them to add visual interest to your blanket. For example, you can use a moss stitch for cooler temperatures and a lace pattern for warmer temperatures. This technique allows you to create a unique and textured blanket that reflects the changing temperatures throughout the year.
These are just a few knitting techniques you can use to make your temperature blanket stand out. Whether you decide to incorporate colorwork, stripes, or texture stitches, remember to choose colors and patterns that reflect your personal style and preferences. Enjoy the process of knitting your temperature blanket and have fun watching it come to life as the year progresses!
Tracking and recording daily temperatures
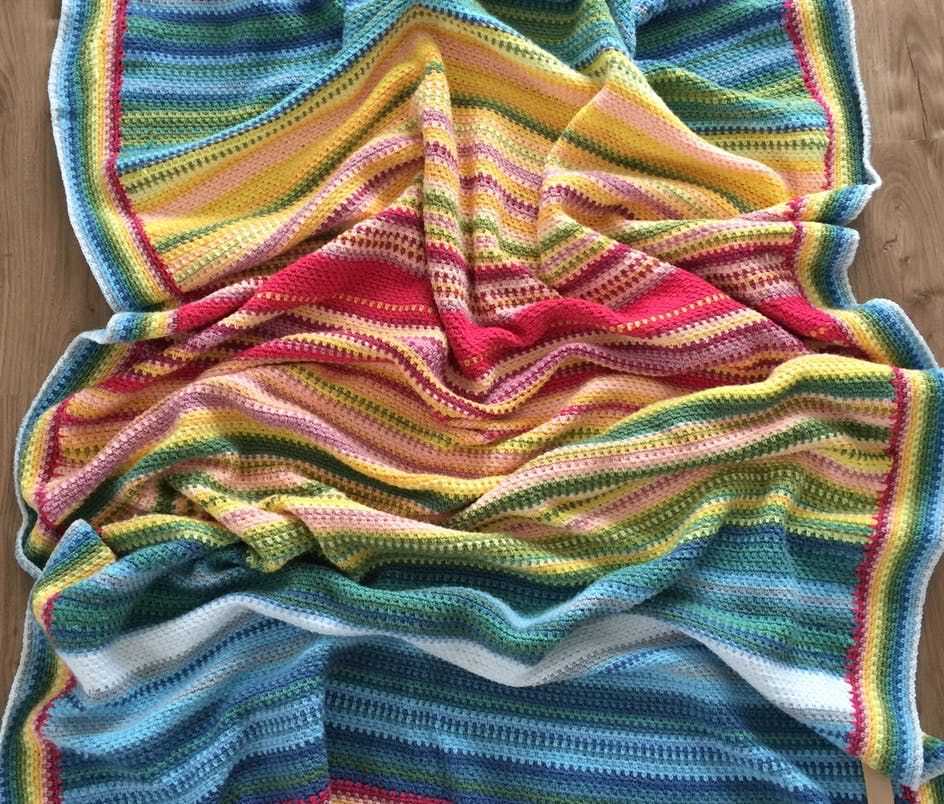
Tracking and recording daily temperatures is a crucial step in creating a knit temperature blanket pattern. This process allows you to capture the temperature data over a specific period of time, such as a year, and use it to design a beautiful and meaningful blanket.
Choosing the right method: There are different ways to track and record daily temperatures, depending on your preference and availability of resources. You can use a traditional thermometer and manually note down the temperature each day, or you can utilize online weather APIs or weather stations that provide the data directly to your computer or smartphone.
Creating a temperature log: Once you have decided on the method, it’s important to create a temperature log where you can record the daily temperatures. You can use a simple spreadsheet or a notebook, or even a dedicated app or software for this purpose. Make sure to include the date, time, and temperature reading for each day.
Organizing the data: As you track the temperatures over time, organizing the data becomes essential. You can group the temperatures by month or week, making it easier to analyze the patterns and trends. This information will be invaluable when designing your temperature blanket pattern.
Analyzing the data: Once you have accumulated a significant amount of temperature data, it’s time to analyze it. Look for patterns, such as temperature fluctuations throughout different seasons, or the hottest and coldest days of the year. This analysis will help you determine the color scheme and temperature ranges for your knit temperature blanket.
Designing the pattern: Armed with the analyzed temperature data, you can now start designing the pattern for your temperature blanket. Assign each temperature range a specific color, and create a chart or legend that will guide you throughout the knitting process. You can choose to represent each day with a single stitch, or use larger sections to represent weeks or months.
By tracking and recording daily temperatures, you can create a unique and personalized knit temperature blanket that reflects the climate of a specific time period. This process allows you to craft a meaningful keepsake that captures memories and showcases your knitting skills.
Organizing and storing temperature data
When creating a temperature blanket, it’s important to have a system in place for organizing and storing the temperature data you collect. This will ensure that you can easily access and reference the information as you work on your project.
1. Create a temperature tracking spreadsheet: One effective way to organize your temperature data is by creating a spreadsheet. Use a program like Microsoft Excel or Google Sheets to set up columns for the date, temperature, and any additional notes you want to include. This will allow you to easily enter and update the data as you continue tracking the temperatures.
2. Use color-coding: To make it even easier to visualize the temperatures and identify patterns, consider using color-coding on your spreadsheet. Assign different colors to different temperature ranges (e.g., blue for below freezing, green for mild temperatures, and red for hot temperatures), and fill in the corresponding cells with the appropriate color. This technique can help you easily identify trends and patterns in the temperature data.
3. Store temperature data online: If you’re concerned about losing your temperature data or want to access it from multiple devices, consider storing it online. There are various platforms and apps available that allow you to store and access data remotely. This can be particularly useful if you’re working on your temperature blanket while traveling or don’t have immediate access to your computer or spreadsheet.
4. Create a physical temperature journal: For those who prefer a more tangible method of tracking temperature data, consider creating a physical temperature journal. Use a notebook or journal to record the date, temperature, and any additional notes you want to include. This can be a great way to add a personal touch to your temperature blanket project and have a physical record of your progress.
5. Backup your data: Regardless of the method you choose to organize and store your temperature data, it’s essential to regularly backup your data. This will prevent the loss of valuable temperature information in case of technical issues or accidental deletion. Make it a habit to save and backup your data in multiple locations, such as cloud storage, external hard drives, or physical copies.
Using online resources for temperature data
When it comes to creating a temperature blanket, gathering accurate and up-to-date temperature data is essential. Fortunately, there are several online resources available that can provide the necessary information to make your project a success.
One popular online resource for temperature data is weather websites. Websites like Weather.com, AccuWeather, and The Weather Channel offer comprehensive weather forecasts that include current temperatures, highs and lows for the day, and historical temperature data. These websites often provide information for specific locations, allowing you to customize your temperature blanket to reflect the climate of your chosen area.
Another option for obtaining temperature data is through government weather agencies. Organizations like the National Oceanic and Atmospheric Administration (NOAA) and the Meteorological Service of Canada provide reliable and accurate weather data for various locations. Their websites often include historical temperature records that can be used to create a comprehensive temperature blanket pattern.
Additionally, there are online communities and forums dedicated to temperature blanket knitting that can be a valuable resource for obtaining temperature data. These communities often share tips, patterns, and even specific temperature data for different regions. Participating in these communities can not only help you gather the necessary temperature information, but also provide a sense of camaraderie and support throughout your knitting journey.
In conclusion, utilizing online resources for temperature data is crucial when creating a temperature blanket. Whether through weather websites, government agencies, or online communities, these resources can provide the necessary information to accurately reflect the temperature fluctuations in your region and make your temperature blanket project a success.
Completing and finishing your temperature blanket
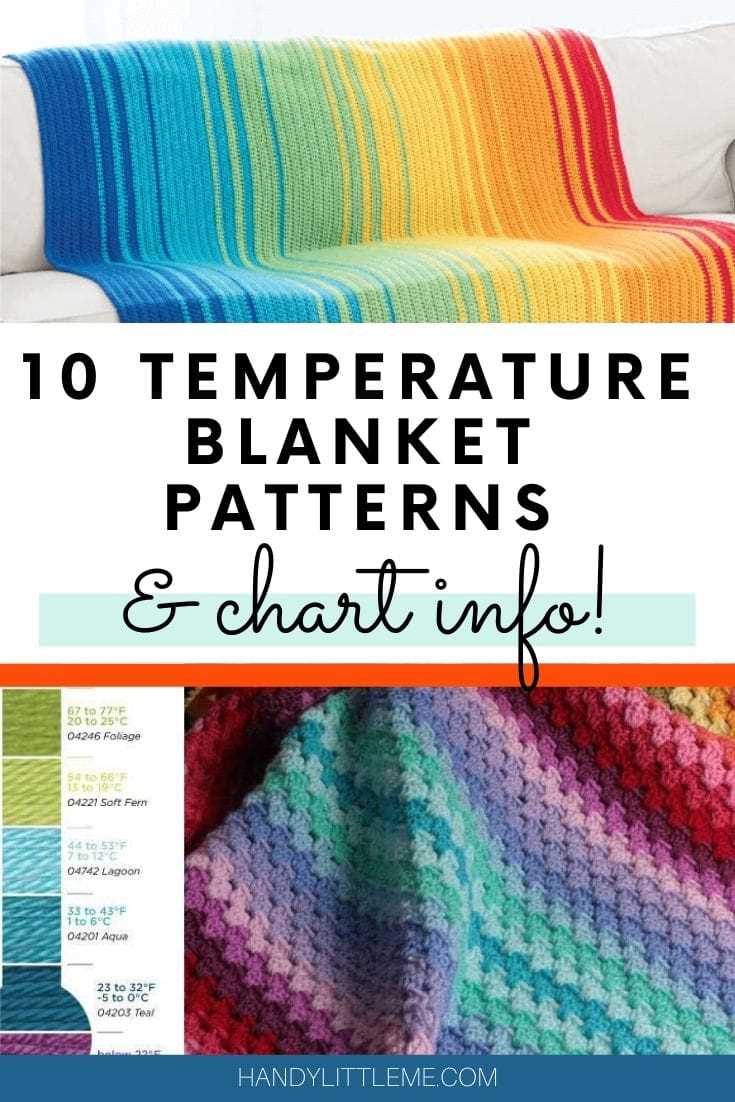
After months of diligently knitting and recording the daily temperatures, it’s finally time to complete and finish your temperature blanket. Here are some final steps to take:
1. Weave in loose ends
Before you begin any finishing touches, take the time to weave in any loose ends from your color changes. This will give your blanket a clean and polished look.
2. Block your blanket
To ensure that your temperature blanket maintains its shape and looks even, it’s important to block it. Blocking involves washing your blanket gently, shaping it to its desired dimensions, and allowing it to dry flat. This will help improve the drape and overall appearance of your blanket.
3. Add a border (optional)

If you’d like to add an extra touch to your temperature blanket, consider adding a border. You can choose a coordinating color or a contrasting color to frame your blanket and give it a finished look. Experiment with different border stitch patterns or keep it simple with a single crochet or garter stitch border.
4. Personalize and label your blanket

Since your temperature blanket is a unique keepsake, consider personalizing it by adding a label. You can embroider your name, the year, or any meaningful message onto a small patch of fabric and sew it onto your blanket. This adds a special touch and ensures that your blanket will always be associated with cherished memories.
5. Care for your blanket
Now that your temperature blanket is complete, it’s essential to care for it properly to maintain its quality. Check the yarn label for washing instructions, but generally, hand washing or gentle machine washing in cold water with a mild detergent is recommended. Avoid using bleach or harsh chemicals and always lay your blanket flat to dry.
Completing a temperature blanket is a significant accomplishment and a testament to your dedication and perseverance. Your finished blanket will not only provide warmth but also serve as a visual representation of the year’s temperatures and memories. Cherish your blanket and enjoy the comfort it brings for years to come.