
Looking for a fun and creative way to personalize your golf clubs? Knitting your own driver head covers is a great way to add a touch of personality to your game. Whether you’re looking to showcase your favorite sports team, show off your knitting skills, or just want to protect your clubs in style, knitting your own head covers is a rewarding and enjoyable project.
The driver head cover knitting pattern is a relatively simple pattern that can be customized to fit your individual style and preferences. With just a few basic knitting techniques, you can create a head cover that is both functional and fashionable. Plus, knitting your own head covers allows you to choose your own colors and materials, ensuring that your clubs will stand out on the green.
Not only is knitting your own driver head covers a fun and creative outlet, it also allows you to add a personal touch to your golf game. Whether you’re knitting head covers as gifts for friends or for your own clubs, you can incorporate unique designs and patterns that reflect your personality and interests. From stripes and polka dots to intricate cable-knit designs, the possibilities are endless when it comes to creating your own head covers.
How to Knit a Driver Head Cover: A Step-by-Step Guide

Knitting your own driver head cover is a fun and creative project that allows you to customize your golf gear. With this step-by-step guide, you’ll learn how to create a cozy and stylish driver head cover that will keep your club safe and add a personal touch to your golf bag.
Materials Needed:
- Size 8 knitting needles
- Worsted weight yarn in your chosen color
- Cable needle
- Tapestry needle
Step 1: Cast On

Start by casting on 80 stitches using your chosen color of worsted weight yarn. This will be the base for your driver head cover.
Step 2: Knit the Ribbing
Row 1: *Knit 2, purl 2* – repeat this pattern until the end of the row.
Row 2: *Purl 2, knit 2* – repeat this pattern until the end of the row.
Continue knitting in this ribbing pattern for the next 2 inches.
Step 3: Create the Cable Pattern
Row 1: *Knit 4, slip 2 stitches onto the cable needle and hold in front, knit the next 2 stitches, then knit the 2 stitches from the cable needle* – repeat this pattern until the end of the row.
Row 2: Purl all stitches.
Repeat these two rows until your cable pattern measures 6 inches in length.
Step 4: Knit the Crown
Switch back to knitting in the ribbing pattern for the next 2 inches.
Then, decrease 10 stitches evenly across the row to form the crown. Continue knitting in this ribbing pattern for another inch.
Step 5: Bind Off
Bind off all stitches and cut the yarn, leaving a long tail. Thread the tail through a tapestry needle and weave it through the remaining stitches to secure the crown of the driver head cover.
Once you’ve finished knitting, make sure to give your driver head cover a gentle stretch to improve its fit. Now you have a cozy and stylish driver head cover that you can proudly show off on the golf course!
Gather Your Materials

Before you begin knitting your driver head cover, it’s important to make sure you have all the necessary materials. Here is a list of items you will need:
- Yarn: Choose a yarn that is suitable for knitting. It should be durable and able to withstand the wear and tear of being on a golf course. You can choose any color or pattern that you like.
- Knitting Needles: Select a set of knitting needles that are appropriate for the weight of your chosen yarn. Make sure they are the correct size and length for your knitting style.
- Tape Measure: You will need a tape measure to ensure that your head cover is the correct size. This will help you determine how many stitches to cast on and how long to make your cover.
- Stitch Markers: Stitch markers are helpful for keeping track of your stitches, especially if you are working in the round. These can be small rings or safety pins that you can easily move as you progress.
- Yarn Needle: A yarn needle is necessary for weaving in loose ends and finishing your project. Choose one with a large eye that is suitable for the thickness of your yarn.
- Pattern: Find a driver head cover knitting pattern that you like. This will serve as a guide for your project and provide instructions on stitch counts, shaping, and finishing details.
Once you have gathered all your materials, you will be ready to start knitting your driver head cover. Make sure to read through the pattern instructions and familiarize yourself with the stitches and techniques before you begin. Happy knitting!
Choose Your Yarn and Needles

When it comes to knitting a driver head cover, the first step is to choose the right yarn and needles for the project. The yarn you select will determine the look, feel, and durability of the finished cover, so it’s important to choose wisely. There are a variety of yarn options available, each with their own unique qualities. Consider factors such as fiber content, weight, and color when making your decision.
Fiber content: The fiber content of the yarn will play a role in the overall performance of the driver head cover. Wool yarns are a popular choice for their warmth and ability to retain their shape. Acrylic yarns are often chosen for their affordability and ease of care. Cotton yarns can be a good choice for warmer climates as they are lightweight and breathable. Consider your desired level of warmth, breathability, and maintenance when choosing a yarn.
Weight: The weight of the yarn refers to how thick or thin it is. This will impact the size of the stitches and the overall size of the driver head cover. Bulky or chunky weight yarns will create larger stitches and a thicker cover, while fingering or sport weight yarns will create smaller stitches and a more delicate cover. Consider the desired level of insulation and the overall look you want to achieve when selecting the weight of your yarn.
Color: The color of the yarn is another important consideration, as it will determine the appearance of the driver head cover. You can choose a yarn in a single solid color for a classic and timeless look, or opt for a variegated or self-striping yarn for a more unique and dynamic design. Consider the overall aesthetic you want to achieve and how the yarn color will coordinate with your golf clubs and personal style.
Once you have chosen your yarn, you will need to select the appropriate knitting needles for the project. The size of the needles will depend on the weight of the yarn you have chosen, as well as the desired tension and drape of the fabric. Be sure to check the yarn label for recommended needle sizes, and also consider your own personal knitting style and preferences. Some knitters may prefer to use bamboo or wooden needles for their warmth and grip, while others may prefer metal needles for their smoothness and speed.
By carefully considering the fiber content, weight, and color of your yarn, as well as selecting the appropriate knitting needles, you will be well on your way to creating a beautiful and functional driver head cover. The right choices will ensure a finished product that fits well, looks great, and protects your driver in style.
Measure and Cast On
Before you start knitting your driver head cover, it is important to measure the size of your driver head. This will ensure that your cover fits perfectly and provides proper protection for your golf club. To measure the size, take a measuring tape and measure the circumference of the widest part of the driver head. Note down the measurement in inches or centimeters, depending on your preference.
Once you have measured the size of your driver head, you can start casting on stitches for your knitting project. To calculate the number of stitches you need to cast on, you will need to know the gauge of your knitting pattern. The gauge refers to the number of stitches and rows per inch or centimeter. Refer to the knitting pattern instructions to determine the gauge and adjust your stitches accordingly.
Step 1: With the appropriate yarn and needles, cast on the required number of stitches as per the knitting pattern instructions.
Step 2: After casting on, make sure to join the stitches in the round if you are knitting a seamless driver head cover. Alternatively, if you are knitting a flat driver head cover, you can leave the stitches as they are.
Step 3: Now that you have cast on the stitches, you are ready to start knitting the body of the driver head cover according to the pattern instructions. Make sure to follow the pattern closely to create the desired design and shape.
Knitting the Stockinette Stitch

The stockinette stitch is one of the most basic and commonly used stitch patterns in knitting. It creates a smooth, flat fabric with a distinct “v” pattern on one side, and a smooth, purl-like texture on the other. To knit the stockinette stitch, you will need basic knitting skills and knowledge of knit and purl stitches.
To start knitting the stockinette stitch, Cast on the desired number of stitches using a knitting needle, and hold the needle with the cast-on stitches in your right hand. With the yarn in back of the needle, insert the right-hand needle into the first stitch on the left-hand needle from the left to right. Wrap the yarn around the right-hand needle counterclockwise, and pull it through the loop to create a new stitch. Slip the old stitch off the left-hand needle, and repeat this process across the row.
To create the purl side of the stockinette stitch, simply reverse the knit stitch process. Insert the right-hand needle into the first stitch on the left-hand needle from right to left. Wrap the yarn counterclockwise around the right-hand needle, and pull it through the loop to create a new stitch. Slip the old stitch off the left-hand needle, and repeat this process across the row.
Continue repeating the knit and purl stitches, alternating between the right-side and wrong-side rows, until you have reached the desired length. Remember to always knit the knit stitches and purl the purl stitches, as this will maintain the proper pattern. The stockinette stitch is versatile and can be used to create a wide range of projects, from cozy sweaters to stylish accessories like the driver head cover mentioned earlier.
Creating the Ribbing
Knitting the ribbing for the driver head cover is an essential step in creating a snug and stretchy fit. The ribbing not only adds a decorative touch to the design, but also helps keep the cover securely in place on your golf club.
To create the ribbing, you will need to use a smaller needle size compared to the main body of the head cover. This will create a tighter knit that will provide the necessary stretch. Typically, a size US 3 or 4 needle is recommended for the ribbing.
Begin by casting on the required number of stitches for the ribbing. The number of stitches will depend on the circumference of your golf club head and personal preference. A common ribbing stitch pattern is the 1×1 rib, which alternates knit stitches with purl stitches. This creates a stretchy and elastic fabric that will mold nicely to the shape of the golf club head.
Work the ribbing stitch pattern for the desired length, usually about 1-2 inches. Make sure to maintain a consistent tension throughout the knitting process to ensure an even and professional-looking ribbing.
Once the ribbing is complete, you can continue knitting the main body of the head cover using the desired pattern or stitch. The ribbing will serve as the base for attaching the cover to the club and will provide a neat finish to the overall design.
Consider experimenting with different ribbing stitch patterns, such as the 2×2 rib or the seed stitch, to add variety and texture to your driver head cover. You can also incorporate contrasting colors or stripes into the ribbing for a more dynamic look.
Creating the Ribbing: Step-by-step Guide
- Select a smaller needle size, typically US 3 or 4, for the ribbing.
- Cast on the required number of stitches for the ribbing, based on the circumference of your golf club head.
- Start knitting the ribbing stitch pattern, such as the 1×1 rib, alternating knit stitches with purl stitches.
- Continue working the ribbing stitch pattern for the desired length, usually about 1-2 inches.
- Maintain an even tension throughout the knitting process to ensure a consistent and professional-looking ribbing.
- Once the ribbing is complete, you can move on to knitting the main body of the head cover, attaching it to the ribbing as needed.
Decreasing Stitches for Shaping

When knitting a driver head cover, it is important to decrease stitches in order to shape the cover. Decreasing stitches can provide a more fitted and tailored look to the cover, enhancing both its functionality and visual appeal.
One common method of decreasing stitches is through a basic knit-two-together (k2tog) decrease. To work this decrease, simply insert the right needle into the next two stitches on the left needle, from left to right, and knit them together as if they were one stitch. This decreases two stitches into one, and can be used to create more tapered edges or decrease the overall size of the project.
Another decrease often used in knitting patterns is the slip-slip-knit (ssk) decrease. To work this decrease, slip the next stitch knitwise onto the right needle, slip the following stitch knitwise onto the right needle, then insert the left needle into the front of both slipped stitches and knit them together through the back loops. This decreases two stitches into one and creates a left-leaning decrease, which can be useful when shaping the cover.
It is important to follow the specific knitting pattern instructions for the driver head cover to determine when and how many stitches to decrease. Different patterns may incorporate specific decreases at different points to achieve the desired shaping. By using the proper techniques and following the pattern instructions, you can successfully decrease stitches to shape your driver head cover and achieve a professional-looking result.
Adding the Pom Pom
Adding a pom pom to your driver head cover is a fun and stylish way to personalize your knitting project. It is a small finishing touch that can make a big impact. Here is a simple guide on how to add a pom pom to your driver head cover:
Materials Needed:
- Yarn in your desired color
- Pom pom maker or cardboard cut into a circle
- Scissors
- Yarn needle
Step 1: Make the Pom Pom
Start by making a pom pom using a pom pom maker or cardboard cut into a circle. If you are using a pom pom maker, follow the instructions provided. If you are using cardboard, cut two circles with a diameter of your desired pom pom size. Cut a small hole in the center of each circle. Place the two cardboard circles together and begin wrapping yarn around them until the hole in the center is filled. Use scissors to cut along the edges of the circles, making sure to cut through all the layers of yarn. Take a separate piece of yarn and thread it through the center of the cardboard circles, tying it tightly to secure the pom pom. Remove the cardboard circles and fluff up the pom pom.
Step 2: Attach the Pom Pom
Take your yarn needle and thread a piece of yarn through it. Insert the needle through the top of the driver head cover, near the center. Leave a long enough tail of yarn to tie off later. Next, thread the needle through the center of the pom pom, pulling it all the way through. Repeat this process a few more times in different spots to securely attach the pom pom to the driver head cover. Once you are satisfied with the attachment, tie off the yarn at the top of the driver head cover, making a secure knot. Trim any excess yarn.
By following these simple steps, you can easily add a pom pom to your driver head cover and create a unique and eye-catching accessory for your golf club.
Finishing Touches: Sewing and Weaving in Ends
Once you have finished knitting your driver head covers, it’s time to give them the finishing touches. One important step is sewing and weaving in the loose ends of yarn to ensure that your head covers have a clean and polished look.
To sew in the ends, start by threading a tapestry needle with the loose end of yarn. Then, bring the needle through the back of the fabric, close to where the yarn ends. Next, weave the needle in and out of the stitches, going back and forth through the fabric for about an inch. Make sure to keep the tension of the strands consistent, so the ends are secure but not too tight. Finally, trim the excess yarn close to the fabric, being careful not to cut any of the stitches.
Remember: It is important to sew in the ends on both the inside and outside of the head covers to make sure they are securely fastened.
For a neater finish, you can also weave in the ends as you go along while knitting the head cover. Simply take the loose end of yarn and hold it alongside the working yarn as you knit. Make sure to catch the loose end in the stitches every few rows to secure it in place. This technique eliminates the need for sewing in ends after completing the project.
If you prefer a more structured look, you can also use a crochet hook to weave in the ends. Insert the crochet hook into the fabric close to where the end of the yarn is and catch the loose end with the hook. Then, pull the loose end through the fabric, creating a loop. Insert the loose end into the loop and pull it tight, securing the end in place. Repeat this process every few stitches to ensure the end is securely woven in.
Tip: Before cutting the excess yarn, give the head covers a gentle tug to make sure the ends are securely fastened. If any ends feel loose, simply go back and sew or weave them in again before trimming.
By taking the time to sew and weave in the loose ends, you can ensure that your driver head covers have a professional and polished finish. This attention to detail will not only make your head covers look great but also increase their durability and longevity. So don’t skip this essential step and enjoy the satisfying final touch of a well-crafted project.
Customizing Your Design: Color and Pattern Options

When it comes to knitting your own driver head cover, one of the most exciting aspects is the ability to customize your design. One way to add a personal touch to your driver head cover is by choosing unique colors. Consider the color scheme of your golf bag, or even your favorite sports team, and select yarn colors that complement or match those colors. You can opt for a solid color for a sleek and classic look, or experiment with different variegated yarns for a more vibrant and eye-catching design.
Another way to customize your driver head cover is by incorporating different patterns into your knitting. You can choose from a wide range of stitch patterns, such as cables, ribbing, or even more intricate Fair Isle or intarsia designs. You can also add stripes or color blocks to create visual interest and make your driver head cover truly unique.
- Cables: Cables add texture and depth to your driver head cover. You can incorporate simple twisted cables or more complex braided cables for a striking look.
- Ribbing: Ribbing is a classic knitting technique that creates a stretchy and snug fabric. Consider adding ribbed sections to your driver head cover for a tailored and professional appearance.
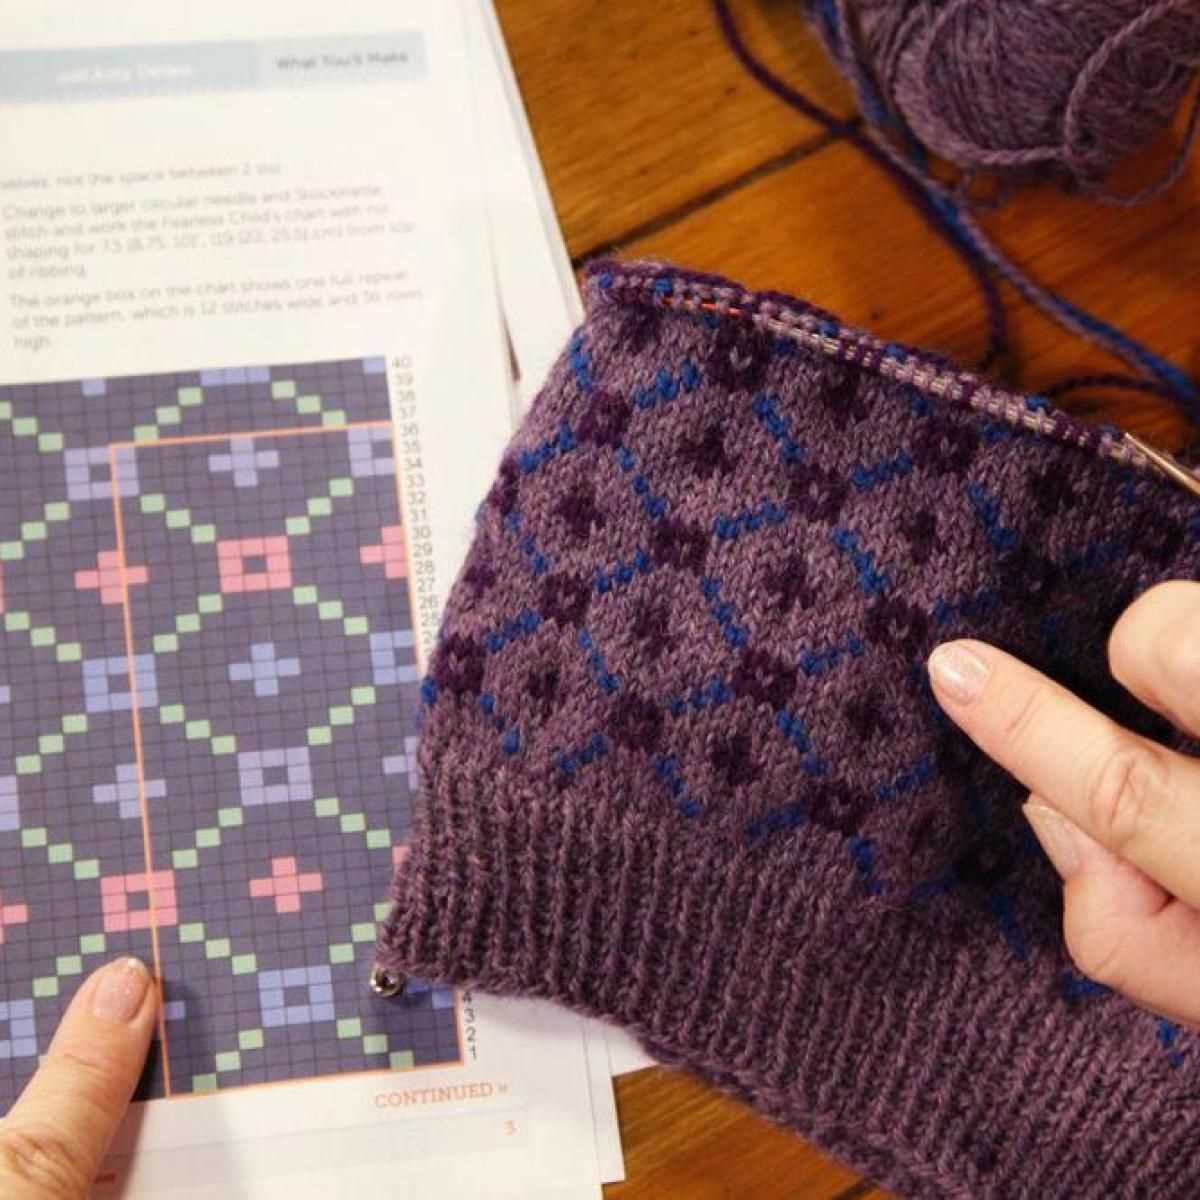
- Fair Isle and intarsia: These techniques allow you to create intricate patterns using multiple colors. You can depict images, logos, or even initials in your driver head cover.
- Stripes and color blocks: By alternating colors or knitting sections in different colors, you can create visually appealing stripes or color blocks that will make your driver head cover stand out.
Remember, when customizing your design, it’s important to choose patterns and colors that you love and that reflect your personal style. Whether you prefer a bold and colorful design or a more subtle and elegant look, the possibilities are endless when it comes to creating your own unique driver head cover.
Tips and Tricks for A Professional Finish
When it comes to knitting a driver head cover, achieving a professional finish is important for both the look and functionality of the final product. Here are some tips and tricks to help you create a polished and well-fitting head cover.
1. Gauge Matters
Before you start knitting, make sure to check your gauge. The recommended gauge for your chosen yarn and needle size ensures that your stitches will be the right size to create a cover that fits snugly over the driver head. Swatching and measuring your gauge is crucial for achieving a professional finish.
2. Use Provisional Cast-On
For a clean and seamless look, consider using a provisional cast-on method. This technique allows you to create a temporary cast-on that can be easily removed to reveal live stitches, which can then be joined seamlessly or finished with a neat edge. This method is particularly useful for creating a professional-looking brim or edge on your driver head cover.
3. Pay Attention to Tension
Consistent tension throughout your knitting is essential for a professional finish. Pay attention to your tension and make sure that your stitches are evenly sized and have a uniform appearance. Avoid pulling the yarn too tightly or loosely, as this can result in an uneven fabric and affect the fit of the head cover.
4. Finishing Techniques

The way you finish your driver head cover can make a big difference in its overall appearance. Consider using techniques such as mattress stitch for invisible seaming, blocking to even out stitches and shape the cover, and adding professional-looking details such as decorative accents or embroidered logos.
5. Practice and Patience
Lastly, practice and patience are key to achieving a professional finish. Don’t be discouraged if your first attempt doesn’t turn out perfectly. Take the time to practice your stitches and techniques, and be patient with yourself as you work through the knitting process. With practice, your skills and the quality of your finished head covers will improve.
By following these tips and tricks, you can create beautifully knitted driver head covers with a professional finish. Remember to pay attention to gauge, use provisional cast-on when needed, maintain consistent tension, master finishing techniques, and practice your skills. With dedication and attention to detail, your knitted head covers will stand out with their polished and professional appearance.
Show Off Your Handiwork! Style and Care of Your Driver Head Cover

Congratulations on completing your driver head cover knitting project! Now it’s time to show off your handiwork and make sure your head cover stays looking its best. Here are some tips on how to style and care for your driver head cover:
Style Tips

Coordinate with your golfing attire: Choose a yarn color that complements or matches your golfing outfit. This will create a cohesive and stylish look when you’re out on the course.
Add personal touches: Embellish your head cover with buttons, appliques, or embroidery. This will give it a unique and personalized touch that reflects your personality.
Experiment with patterns: Once you’ve mastered the basic knitting pattern, don’t be afraid to try out different stitch patterns or colorwork techniques. This will keep your head cover designs fresh and interesting.
Care Tips
Handwash your head cover: To keep your head cover in the best condition, it’s best to handwash it using mild detergent and cool water. Gently squeeze out excess water and reshape the cover while damp.
Avoid using bleach or harsh chemicals: These can damage the yarn and alter the color of your head cover. Stick to gentle detergents specifically designed for handwashing knitted items.
Store it properly: When you’re not using your head cover, store it in a cool, dry place to prevent any moisture or mold from damaging the yarn. It’s also a good idea to keep it away from direct sunlight, as this can cause the colors to fade over time.
Repair any damage promptly: If you notice any holes, loose threads, or other damage, take the time to repair it as soon as possible. This will help extend the lifespan of your head cover and ensure it stays in good condition for years to come.
By following these style and care tips, you’ll be able to show off your handiwork on the golf course while keeping your driver head cover looking its best. Enjoy your time on the course with your custom-made head cover!
Q&A:
What is a driver head cover knitting pattern?
A driver head cover knitting pattern is a set of instructions that allows you to create a cover for the head of a golf driver club using knitting techniques.
Where can I find driver head cover knitting patterns?
You can find driver head cover knitting patterns online, on knitting pattern websites, or in knitting magazines or books.
Are there different types of driver head cover knitting patterns available?
Yes, there are various types of driver head cover knitting patterns available. Some patterns feature different designs, such as stripes, cables, or fair isle patterns, while others may have different sizes to fit different club heads.
What materials are needed to knit a driver head cover?
To knit a driver head cover, you will need yarn in your desired color or colors, knitting needles in the appropriate size, and possibly other accessories such as buttons or pom-poms, depending on the pattern.
How difficult is it to knit a driver head cover?
The difficulty level of knitting a driver head cover can vary depending on the pattern and your knitting skills. Some patterns may be more complex and require advanced techniques, while others may be suitable for beginners. It’s always a good idea to choose a pattern that matches your skill level.