
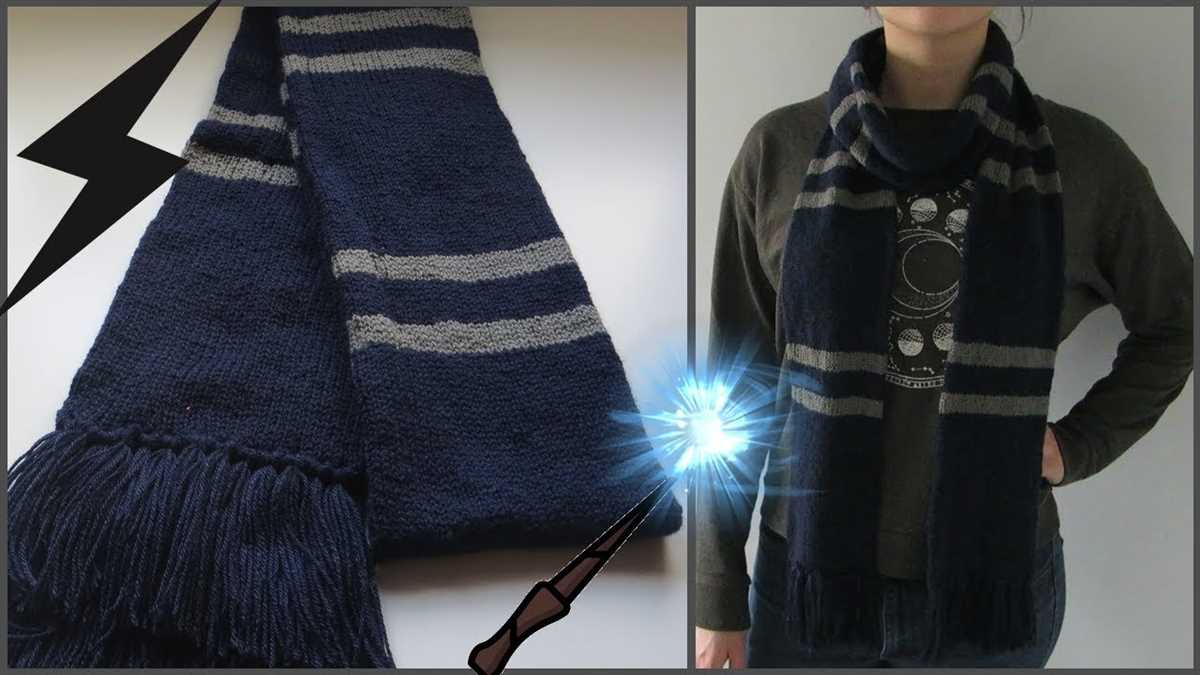
Knitting can be a relaxing and fulfilling hobby, especially when it involves creating items inspired by your favorite fictional universe. If you’re a fan of the Harry Potter series and belong to the house of Hufflepuff, then this knitting pattern is perfect for you! In this article, we will guide you through the process of creating your very own Hufflepuff scarf using a simple knitting pattern.
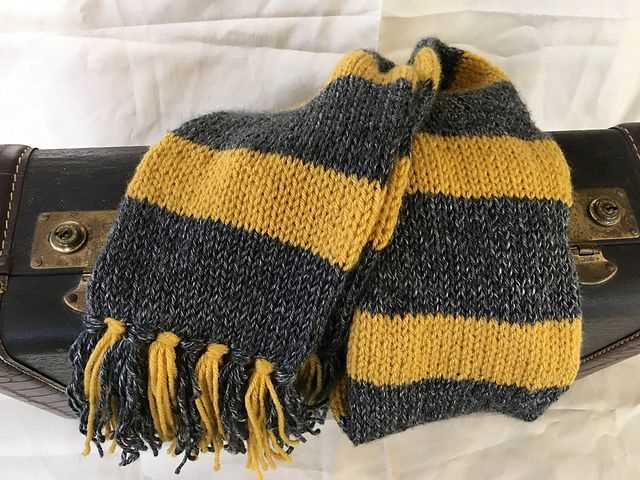
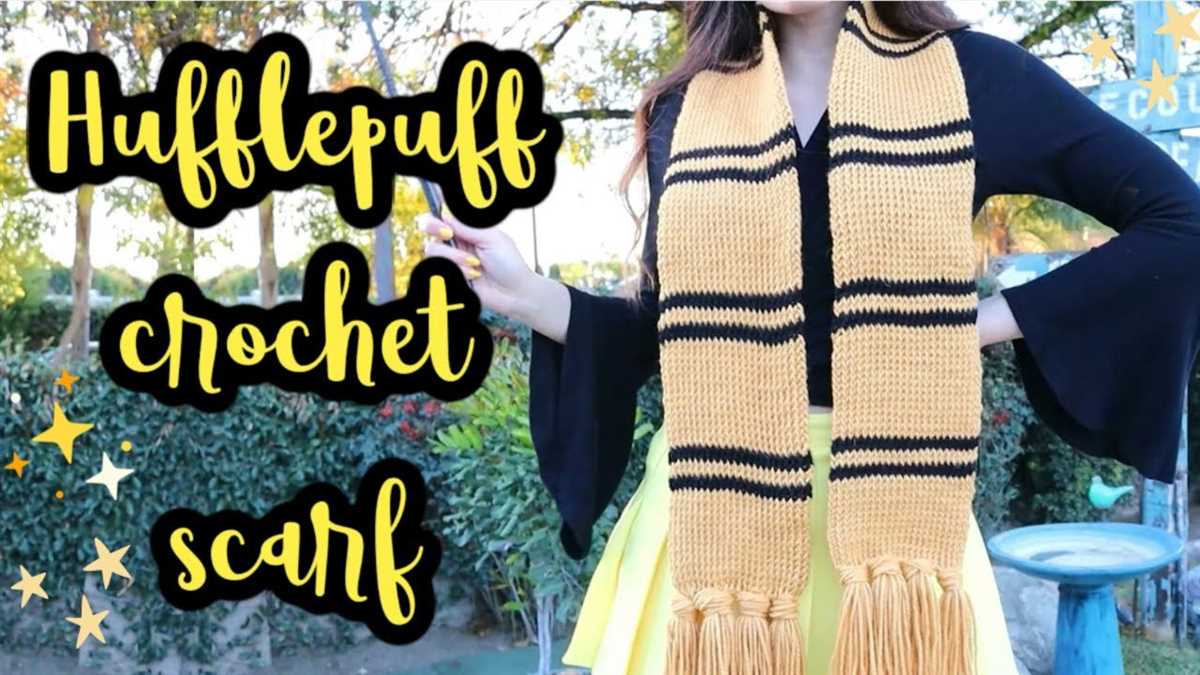
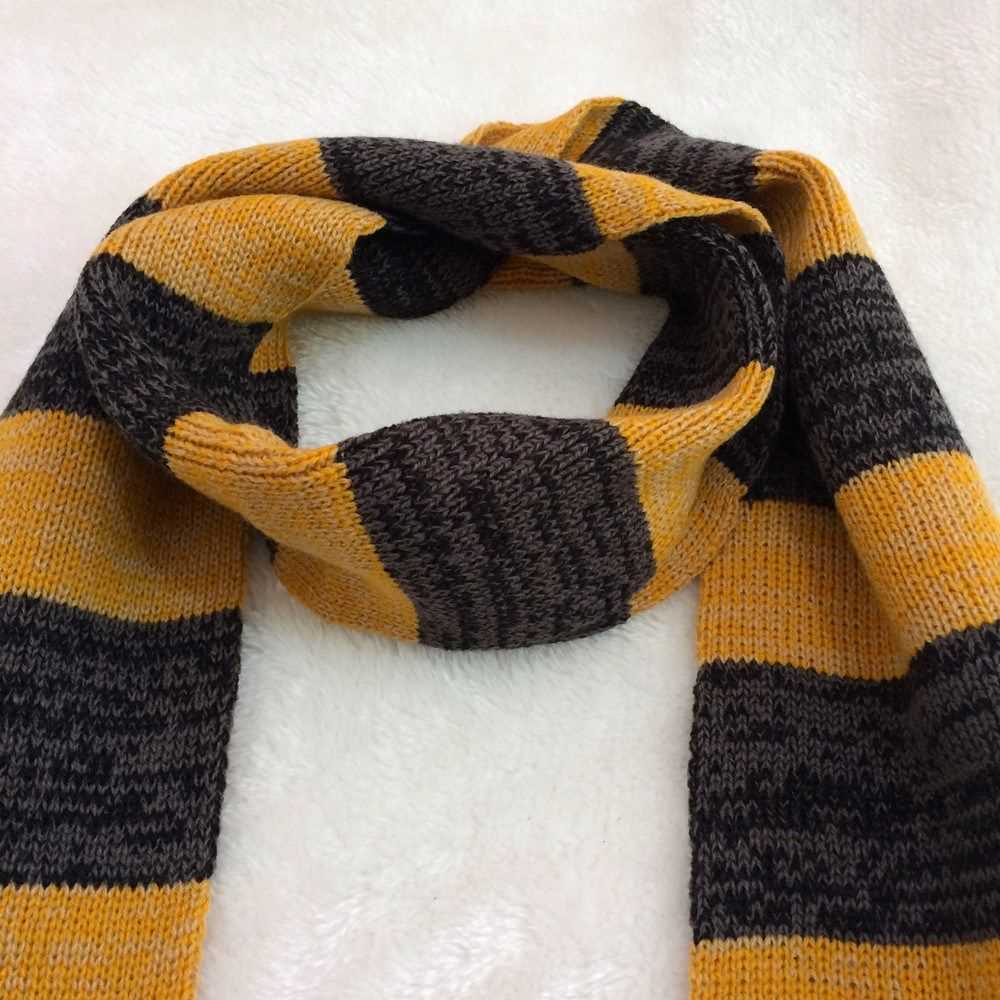
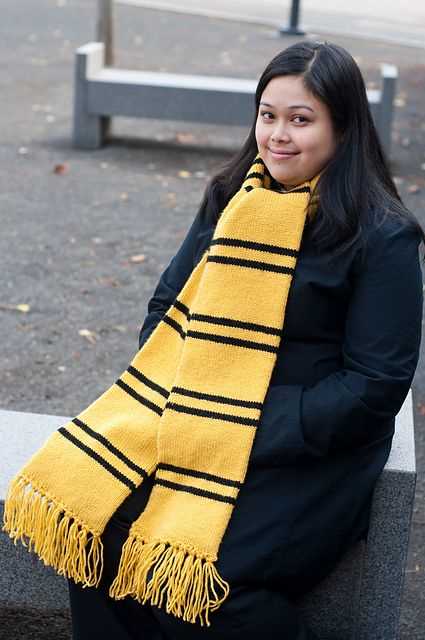
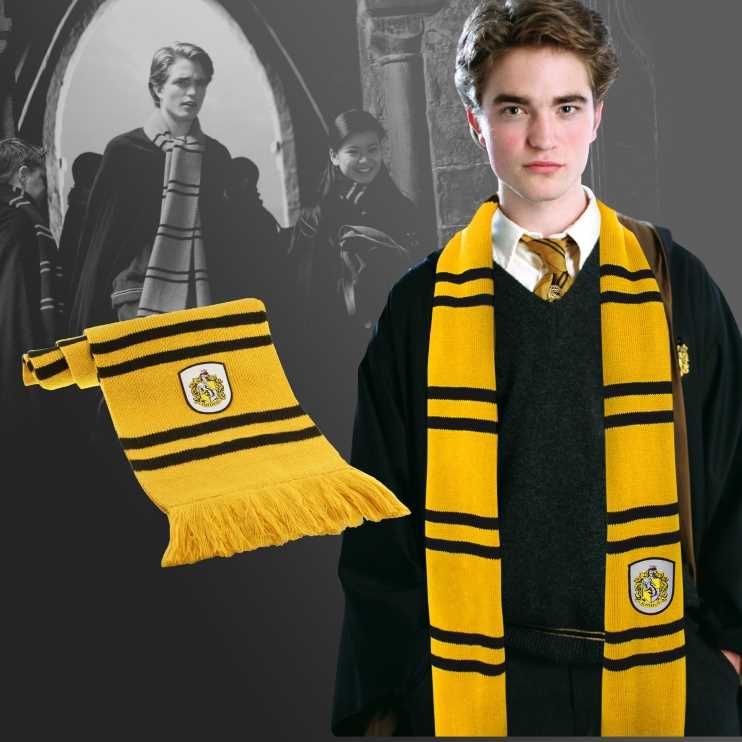
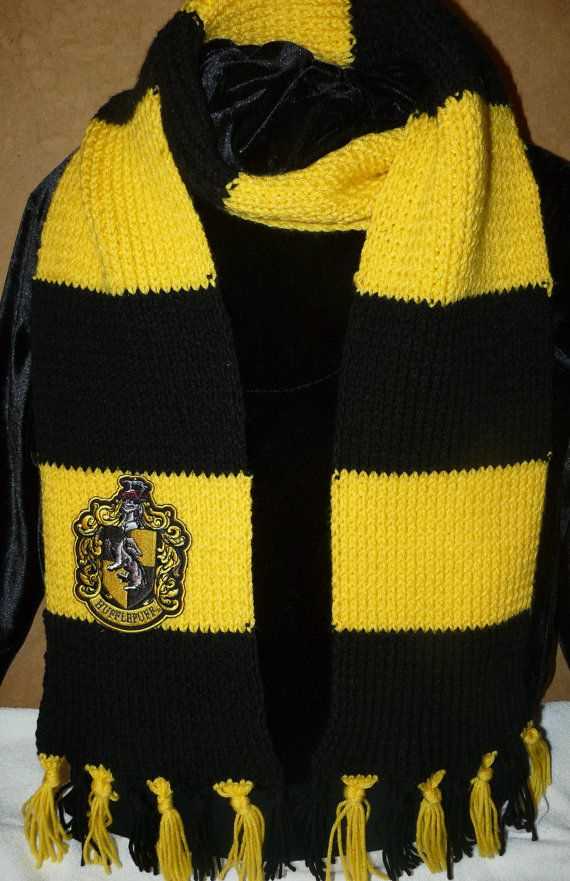
The Hufflepuff scarf is a must-have accessory for any dedicated Harry Potter fan. It features the house colors of yellow and black and is often adorned with the Hufflepuff house crest at the ends. Whether you want to wear it as part of your everyday outfit or show off your Hufflepuff pride at a costume party, this scarf is sure to make a statement.
Knitting your own Hufflepuff scarf allows you to customize it to your liking and ensure that it fits perfectly. Plus, it’s a great way to showcase your knitting skills while expressing your love for the Harry Potter series. So grab your knitting needles and let’s get started on this magical project!
Hufflepuff Scarf Knitting Pattern
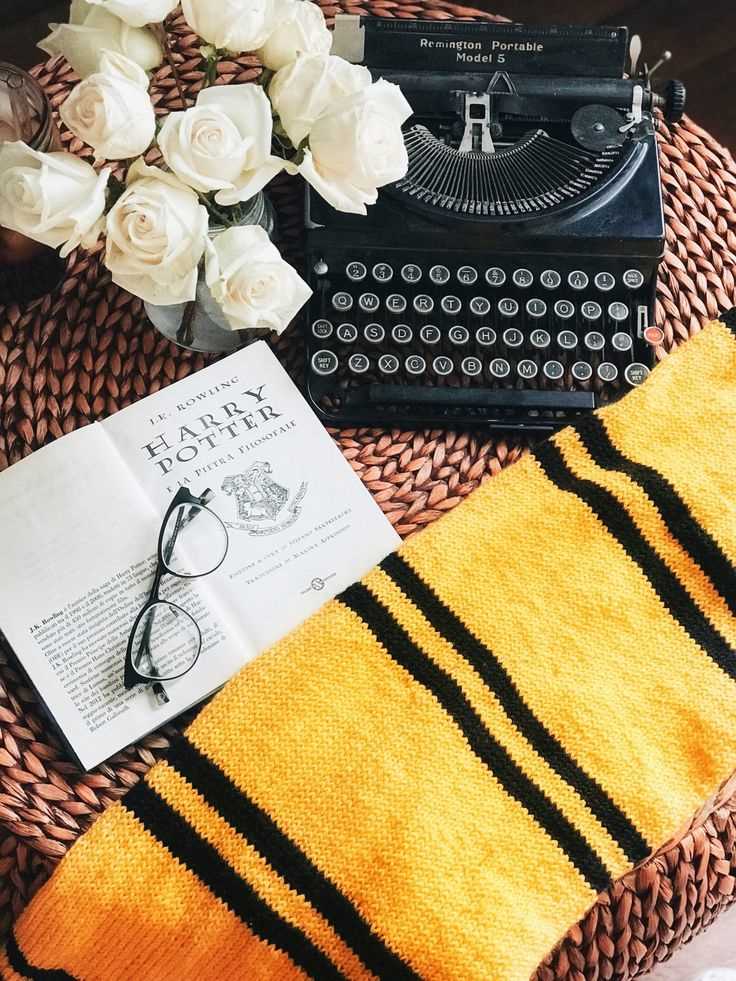
A Hufflepuff scarf is an essential accessory for any Harry Potter fan. The distinct yellow and black stripes represent the house of Hufflepuff, known for its traits of loyalty, hard work, and dedication.
To create your own Hufflepuff scarf, you will need the following supplies: yellow and black yarn, knitting needles (size 7 or 8), a yarn needle, and scissors.
Start by casting on 40 stitches with the yellow yarn. Begin knitting in a 1×1 rib pattern, alternating between knit and purl stitches, for a total of 6 rows. Then, switch to the black yarn and continue knitting in the rib pattern for 10 rows. Repeat this pattern, changing colors every 10 rows, until the desired length is reached.
For the fringe, cut equal lengths of yellow and black yarn. Fold each piece in half and use a crochet hook to pull the folded end through the edge of the scarf. Thread the loose ends through the loop created and pull tight. Repeat this process along the edges of the scarf, spacing the fringe evenly.
The finished Hufflepuff scarf will keep you warm and stylish, whether you’re cheering on your favorite Quidditch team or just showing off your love for the Harry Potter series.
Materials You Will Need
Knitting the perfect Hufflepuff scarf requires some essential materials to ensure its authenticity and quality. Here is a list of items you will need to get started:
- Yarn: Choose high-quality, yellow and black yarn to capture the distinctive Hufflepuff colors. Look for soft and durable yarn that will keep you warm throughout the winter.
- Knitting needles: Select a pair of knitting needles that are suitable for the yarn thickness you have chosen. The size will depend on your personal knitting tension and the desired gauge for the scarf.
- Scissors: Have a pair of sharp scissors on hand for cutting the yarn and any excess thread.
- Tape measure: Ensure accuracy by using a tape measure to measure the length and width of your scarf as you progress.
- Tapestry needle: A tapestry needle is essential for weaving in loose ends and finishing off your scarf neatly.
With these materials in hand, you will be ready to embark on your knitting journey and create an authentic Hufflepuff scarf that would make any Harry Potter fan proud.
Choosing the Right Yarn
When it comes to knitting a Hufflepuff scarf, choosing the right yarn is crucial. The scarf needs to be both warm and durable, so you’ll want to select a yarn that meets these requirements.
Material: For a Hufflepuff scarf, you’ll want to choose a yarn that is made from high-quality materials. Wool is an excellent choice as it is warm, soft, and durable. Acrylic yarn can also be a good option as it is affordable and easy to care for. Both cotton and bamboo yarn can provide a lightweight and breathable option for those who prefer a less bulky scarf.
Weight: The weight of the yarn will determine the thickness of the scarf. For a Hufflepuff scarf, you’ll want to use a medium-weight or worsted weight yarn. This weight is perfect for achieving the desired warmth and thickness without being too bulky.
Colors: The traditional Hufflepuff colors are black and yellow. Look for a yarn that offers these colors in vibrant shades. You can choose a solid color, or opt for a yarn with variegated shades to add some visual interest to your scarf.
Texture: Consider the texture of the yarn as well. A smooth yarn will give your scarf a sleek and polished look, while a textured yarn can add dimension and visual appeal. Experiment with different textures to achieve the desired effect for your Hufflepuff scarf.
Price: Finally, consider your budget when selecting yarn. High-quality yarn can be more expensive, but it will also provide a better finished product. If you’re on a tight budget, look for sales or discounts to find a good deal on the right yarn for your Hufflepuff scarf.
Selecting the Right Needles
When it comes to knitting, selecting the right needles can make all the difference in your project. Whether you’re a beginner or an experienced knitter, choosing the correct needles for your project is essential for achieving the desired results. Here are some factors to consider when selecting your needles:
1. Needle Size

- Gauge: The needle size will determine the gauge or tension of your knitting. Depending on the pattern, you may need a specific gauge to ensure accurate measurements. Make sure to choose needles that match the gauge recommended in the pattern.
- Yarn Weight: The size of your needles will also depend on the weight of your yarn. Thicker yarns generally require larger needles, while thinner yarns work best with smaller needles. Check the yarn label for recommended needle sizes.
2. Needle Material
- Wood/Bamboo: Wooden or bamboo needles are great for beginners as they provide more friction, making it easier to control the stitches. They also tend to be quieter and more comfortable to work with.
- Metal: Metal needles are known for their durability and smoothness. They allow the yarn to slide easily, making knitting faster. They are a popular choice for experienced knitters.
- Plastic: Plastic needles are lightweight and affordable. They are a good choice for knitters with arthritis or joint pain, as they are gentle on the hands.
By considering these factors, you can select the right needles for your Hufflepuff scarf knitting project. It’s important to find a balance between comfort, ease of use, and achieving the desired gauge. Happy knitting!
Casting On

Before you can begin knitting your Hufflepuff scarf, you need to cast on your stitches.
Casting on is the process of creating the initial row of stitches on your knitting needle. It is the first step in most knitting projects and sets the foundation for your work.
There are several different methods you can use to cast on, but for this pattern, we will be using the long tail cast on method.
To begin, measure out a length of yarn that is approximately 3 times the width of your scarf. This will be your “tail” that you will use to create the stitches.
Take the end of the yarn and make a slipknot, leaving a loop large enough to fit your needle through. Slide your knitting needle through the loop and tighten the knot around the needle.
Hold the needle with the slipknot in your right hand and the tail of the yarn in your left hand. With your left hand, wrap the yarn around your thumb, keeping tension on the yarn.
Working from left to right, insert the right needle from front to back under the loop on your left thumb, then bring the needle up and over the loop, slipping it off your thumb and onto the right needle.
Continue this process until you have cast on the required number of stitches for your project. Make sure to keep the tension even as you work.
Once you have finished casting on, you are ready to begin knitting your Hufflepuff scarf!
Making the Stripes
To start, cast on an even number of stitches with the yellow yarn. The number of stitches will depend on the desired width of the scarf. It’s always a good idea to double-check the gauge to ensure the scarf is the right size. You can make a small sample swatch and measure it with a ruler or tape measure.
Striping Technique
Once the foundation row is knitted with the yellow yarn, it’s time to introduce the black color. At this point, you can cut the yellow yarn, leaving a tail for weaving in later. Join the black yarn and knit the next row using the new color.
Continue knitting rows of black until you have reached the desired width for the black stripe. This can vary depending on personal preference and the specific design you are following. Once the desired width is achieved, it’s time to switch back to the yellow yarn.
After joining the yellow yarn, continue knitting rows of yellow until you reach the desired width for the yellow stripe. Repeat the process of alternating between the two colors, always knitting with the same color that was used in the previous stripe.
Continue this striping technique until you have reached the desired length of the scarf. Remember to periodically check the width and length to ensure consistency. Once you have finished the final stripe, bind off the stitches and weave in any loose ends, and your Hufflepuff scarf with its distinct yellow and black stripes will be complete!
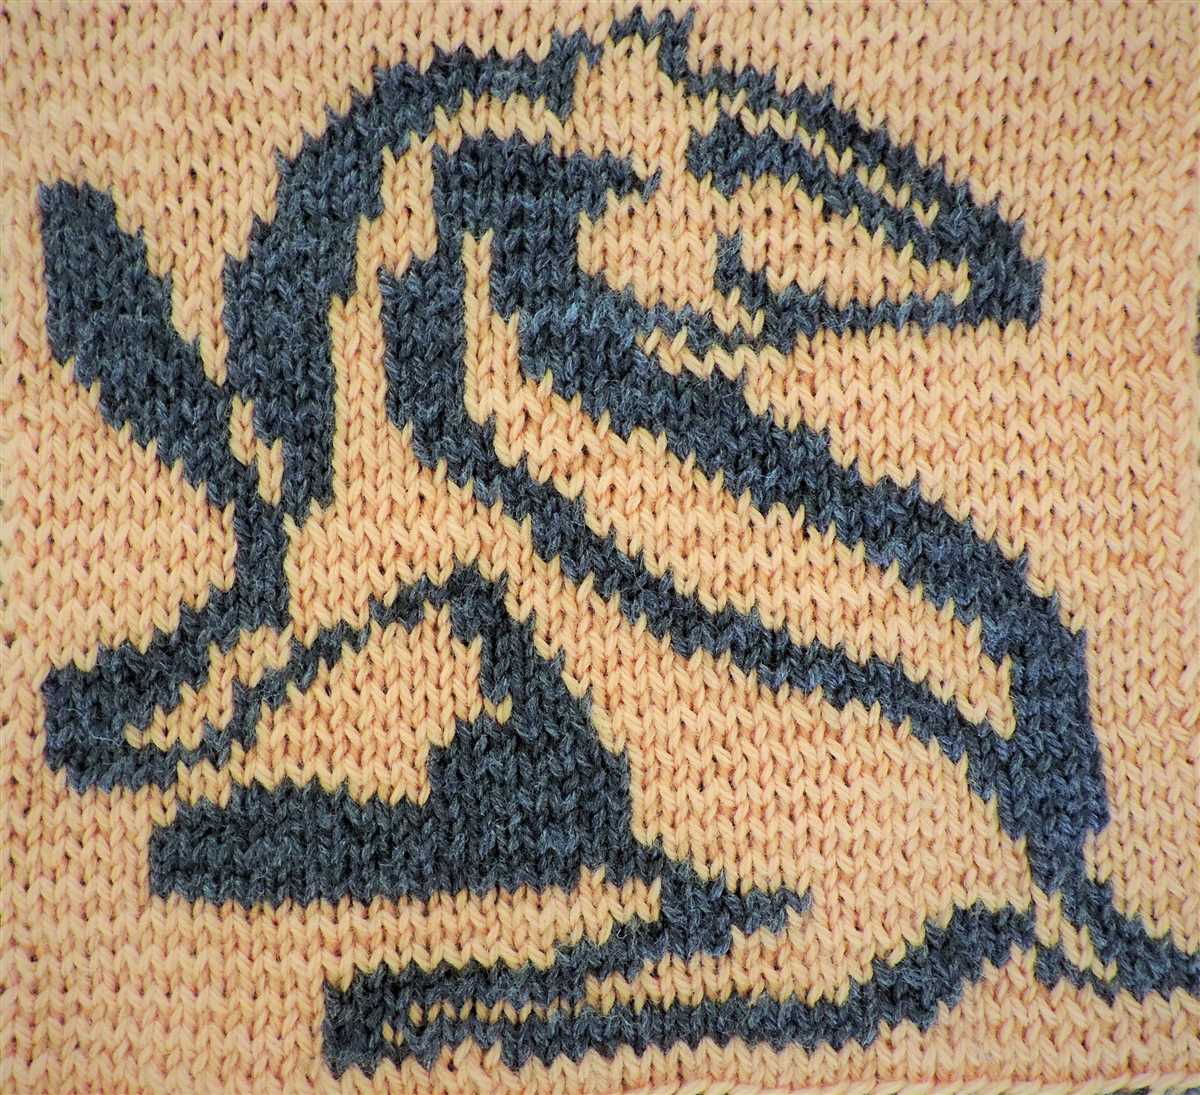
Creating the Hufflepuff Logo
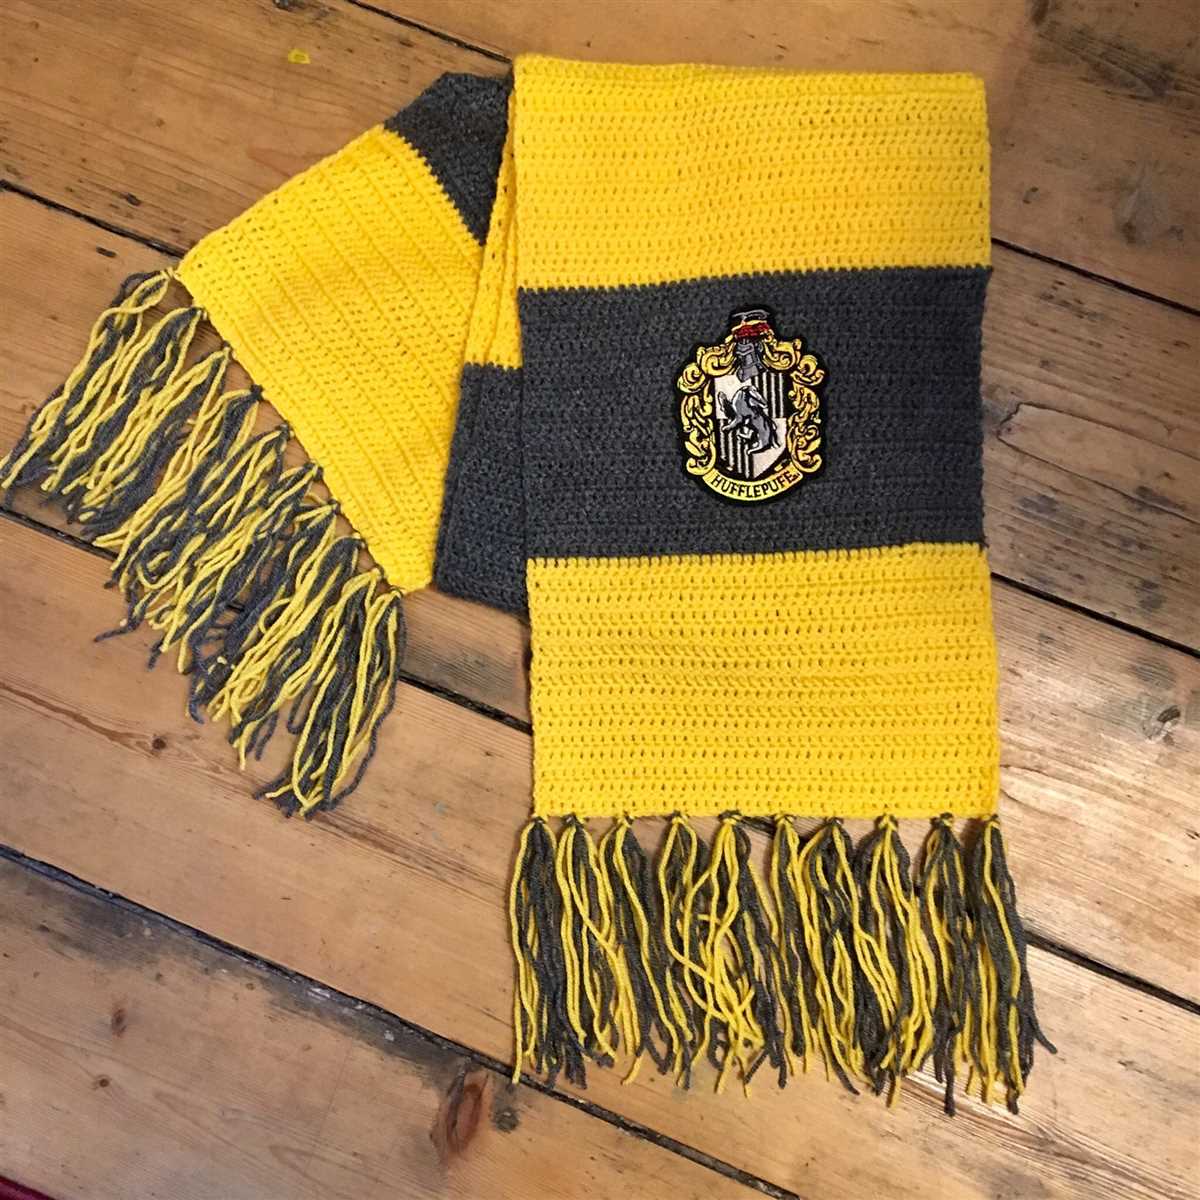
The Hufflepuff logo is an important symbol for fans of the Harry Potter series, representing the house of Hufflepuff at Hogwarts School of Witchcraft and Wizardry. Recreating this logo can be a fun and creative project for fans who want to show off their Hufflepuff pride.
Designing the logo: The Hufflepuff logo features a badger, which is the mascot of the house. The badger is typically depicted standing on its hind legs with its front paws crossed. The logo also includes the Hufflepuff house colors, yellow and black. To create the logo, you can start by sketching the basic shape of the badger using a pencil. Then, add in the details such as the crossed paws and facial features. Once you’re happy with the design, you can move on to adding the colors.
Adding colors: To add the Hufflepuff colors to the logo, you will need yellow and black paint or markers. Start by filling in the body of the badger with yellow, making sure to leave the crossed paws and facial features blank. Then, use the black color to add in the details, such as the stripes on the badger’s face and the crossed paws. You can also use black to outline the shape of the badger and add any additional details that you want. Once the colors are dry, you can move on to the final step.
Final touches: To give your Hufflepuff logo a polished finish, you can add any additional details or embellishments that you want. For example, you can use a fine-tip black marker to add in the smaller details, such as the whiskers of the badger. You can also use a gold or silver marker to add some metallic accents to the logo, such as outlining the edges or adding highlights. Once you’re happy with the final design, you can display your Hufflepuff logo proudly as a sign of your house loyalty.
Changing Colors
Knitting is a versatile craft that allows you to create beautiful designs and patterns using different colors. With the Hufflepuff scarf knitting pattern, you have the opportunity to bring your creativity to life and play with changing colors to make your scarf unique.
Choosing the Right Colors
When selecting the colors for your Hufflepuff scarf, it’s important to consider the house’s signature colors: yellow and black. These colors symbolize loyalty, hard work, and dedication. You can choose to use solid yellow and black yarns or even incorporate variations of these colors, such as shades of gold or charcoal.
Changing Colors in Your Knitting
The Hufflepuff scarf pattern offers you the chance to create bold stripes by changing colors in your knitting. To switch colors, simply finish knitting with one color and then join the new color by leaving a 4-6 inch long tail. When you start working with the new color, make sure to weave the tail into your stitches to secure it.
For a clean color change, it’s recommended to change colors at the beginning of a row. However, if you prefer to change colors in the middle of a row, you can create a neater transition by twisting the two colors together before continuing with the new color. This will prevent any gaps or loose stitches.
Playing with Color Patterns
Once you’ve mastered the art of changing colors, you can get creative with your Hufflepuff scarf. You can create a traditional stripe pattern, alternating between yellow and black. Alternatively, you can experiment with different color combinations, such as yellow and gold or black and charcoal, to add depth and visual interest to your scarf.
Remember, the key to achieving a beautiful color pattern is consistency in your tension and stitch size. Make sure to knit with care and pay attention to your gauge to ensure that your colors transition smoothly and evenly throughout the scarf.
Knitting the Length
When it comes to knitting the length of a Hufflepuff scarf, it’s all about patience and precision. Whether you’re an experienced knitter or a beginner, following the pattern correctly is crucial to achieving the desired result. The length of a scarf can vary depending on personal preference, but typically it should be long enough to wrap around the neck comfortably and have a few inches of length hanging down on either side.
Materials: To begin knitting the length of the Hufflepuff scarf, you will need a set of size 8 US (5mm) knitting needles and two skeins of yellow and black worsted weight yarn. It’s important to choose a yarn that is soft and warm, as the scarf will be worn during colder months.
Step 1: Start by casting on the desired number of stitches, usually around 40-50 stitches. This will create the width of the scarf. Make sure to leave a long tail of yarn at the beginning for later weaving in.
Step 2: Once the stitches are cast on, begin knitting in a simple garter stitch pattern. This means that every row will be knit, resulting in a textured fabric. Knit every row until the scarf reaches the desired length, usually around 60-70 inches.
Step 3: Once the desired length is reached, it’s time to bind off the stitches. This is done by knitting two stitches, then passing the first stitch over the second stitch and off the needle. Continue this process until only one stitch remains, then cut the yarn and pull it through the remaining stitch to secure it. Leave a long tail of yarn for weaving in later.
Step 4: To give the scarf a clean and finished look, weave in all loose ends using a tapestry needle. Start by threading the yarn onto the needle, then insert it into the wrong side of the scarf and weave it through the stitches for a few inches. Trim any excess yarn.
Step 5: Finally, block the scarf to give it a polished appearance. To do this, dampen the scarf with water and lay it flat on a clean towel. Gently pat the scarf into shape, making sure to straighten out any curls or uneven edges. Leave it to air dry completely before wearing or storing.
With these steps, you can confidently knit the length of your Hufflepuff scarf and proudly represent your house at Hogwarts. Whether you’re knitting it for yourself or for a fellow Hufflepuff, the finished product is sure to be cozy and stylish.
Finishing Off the Scarf
After many hours of knitting, your Hufflepuff scarf is finally taking shape. With just a few more steps, you’ll have a completed scarf ready to wear proudly.
To finish off your scarf, you’ll need a yarn needle and scissors. Start by cutting the yarn, leaving a tail of about 6 inches. Thread the yarn needle with the tail, and carefully weave it through the stitches on your knitting needle, removing them as you go. This will create a neat edge for your scarf.
Next, it’s time to secure the ends of your scarf. Fold each end in half lengthwise, with the wrong sides together. Use your yarn needle to sew the ends together, making sure to catch both layers of the fabric. This will create a seamless finish and prevent your scarf from unraveling.
Once the ends are secured, you can add some extra embellishments if you’d like. You could attach a Hufflepuff house patch or even sew on some tassels. Get creative and make your scarf uniquely yours.
Finally, give your scarf a good block. Lay it flat on a clean towel and gently stretch it to its desired dimensions. Use rust-proof pins to hold the shape, and let it dry completely before wearing or storing.
Now that your Hufflepuff scarf is finished, you’re ready to show off your house pride. Whether you’re wearing it to a Quidditch match or just to keep warm on a chilly day, your handmade scarf is sure to be a treasured accessory for years to come.
Styling and Wearing your Hufflepuff Scarf
Now that you have finished knitting your Hufflepuff scarf, it’s time to style it and show off your Hogwarts pride! Here are some ideas on how to wear and accessorize your scarf.
1. Classic Loop
The most traditional way to wear your Hufflepuff scarf is to simply wrap it around your neck and let the ends hang down in front. This classic loop style is timeless and allows you to display the bold colors and patterns of your scarf.
2. Knot
If you want to add some extra flair to your Hufflepuff scarf, try tying it in a knot. This style is not only stylish, but also practical as it keeps your scarf securely in place. You can tie the knot either in the front or to the side, depending on your personal preference.
3. Draped
If you prefer a more relaxed and effortless look, try draping your Hufflepuff scarf over your shoulders. This style is great for colder days when you want to keep your neck and shoulders warm. You can let the ends hang loose or secure them with a brooch or pin for added flair.
4. Layered
For a cozy and chic look, you can layer your Hufflepuff scarf over other clothing items. Try wearing it over a leather jacket or a chunky sweater for a stylish and warm outfit. The contrasting colors of the scarf will add a pop of color to your overall look.
5. Accessorize
To complete your Hufflepuff inspired outfit, don’t forget to accessorize! Pair your scarf with other Hufflepuff themed items, such as a pin, hat, or gloves, to show off your House pride. You can also coordinate your scarf with other yellow and black accessories to create a cohesive look.
With these styling tips, you are ready to wear your Hufflepuff scarf with confidence and showcase your love for Hogwarts and the Hufflepuff House. Whether you choose a classic or more creative way to wear it, your scarf is sure to make a statement and keep you cozy throughout the year.