
Are you a passionate knitter looking for a new project? Have you accumulated a stash of leftover sock yarn that you’re not sure what to do with? Look no further! The sock yarn blanket knitting pattern is the perfect solution for using up those small amounts of yarn and creating a beautiful and cozy blanket in the process.
This pattern is ideal for knitters of all skill levels. Whether you’re a beginner or an advanced knitter, this project provides endless possibilities. The sock yarn blanket is a great way to practice different stitches and experiment with color combinations. You can choose to create a uniform blanket with one type of stitch or get creative and mix and match stitches and colors.
The beauty of the sock yarn blanket is that you can work on it at your own pace. Since you’re using small amounts of yarn, it’s a project that you can easily pick up and put down whenever you have some free time. Whether you want to knit a few squares a day or complete a section in one sitting, the choice is yours.
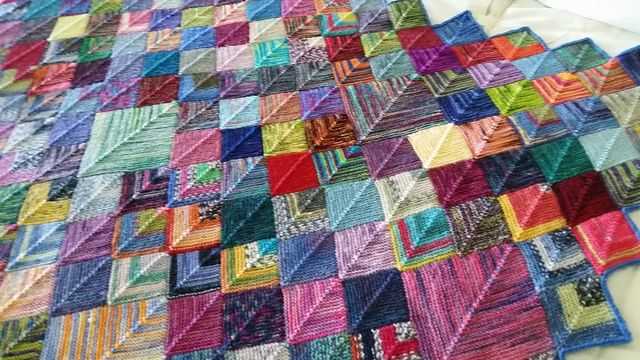
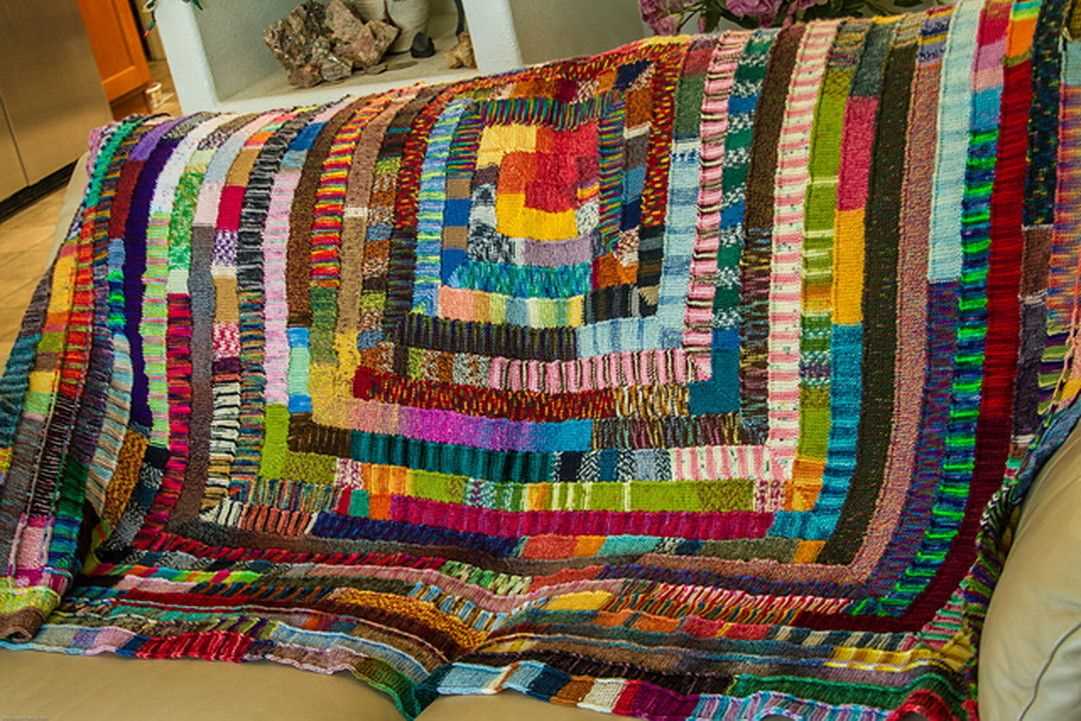
Not only is the sock yarn blanket knitting pattern a great way to use up your stash, but it also results in a beautiful and unique blanket that will be cherished for years to come. Each square holds its own story, representing different projects and memories. It’s a truly special piece that will bring warmth and comfort to your home.
Materials needed

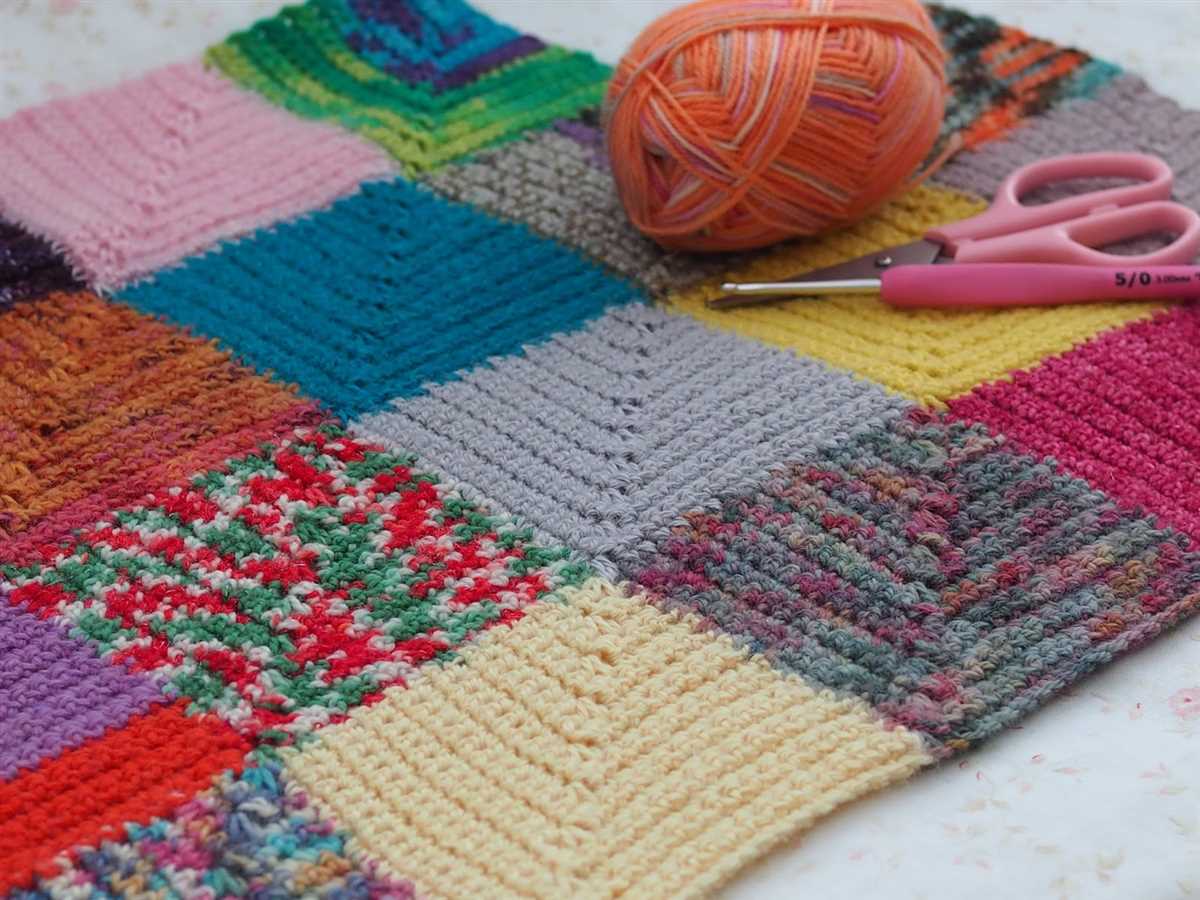
In order to complete your sock yarn blanket, you will need the following materials:
- Sock yarn: This pattern is designed to use up leftover sock yarn, so you can mix and match different colors and yarn weights. You will need a variety of colors to create the patchwork effect.
- Knitting needles: You will need a pair of knitting needles that are appropriate for the weight of your yarn. Choose a needle size that will give you the desired tension and gauge for your blanket.
- Tapestry needle: This needle will be used for weaving in ends and sewing the patches together. Choose a needle with a large eye and a blunt tip for easy use.
- Scissors: A pair of scissors will be handy for cutting yarn and trimming any excess.
- Measuring tape: You will need a measuring tape to make sure your blanket is the desired size and to measure your gauge.
Optional materials:
- Crochet hook: If you prefer, you can use a crochet hook to join your patches together instead of sewing them.
Before starting your sock yarn blanket, make sure you have all the necessary materials on hand. Collecting a variety of sock yarn colors and weights can be a fun and creative process, and you can personalize your blanket with your favorite combinations. Remember to check your gauge before beginning to ensure that your blanket will turn out the right size.
Sock Yarn

Sock yarn is a type of yarn that is specifically designed for knitting or crocheting socks. It tends to be thinner and more durable than other types of yarn, making it ideal for creating long-lasting and comfortable socks. Sock yarn is usually made from a blend of fibers, such as wool, nylon, or acrylic, that provide both warmth and strength.
One of the key features of sock yarn is its tight twist, which helps to prevent the yarn from unraveling or wearing out quickly. This makes it perfect for projects that require durability, such as socks or other items that will be subject to a lot of wear and tear. Sock yarn is also known for its excellent stitch definition, allowing intricate patterns and designs to really stand out.
There are many different types of sock yarn available, each with its own unique properties and characteristics. Some sock yarns are self-striping, meaning that they feature multiple colors that automatically create stripes as you knit or crochet. This can add a fun and colorful element to your projects, without the need for multiple balls of yarn.
When choosing a sock yarn, it’s important to consider not only the fiber content and durability, but also the softness and comfort of the finished socks. Merino wool, for example, is known for its softness and temperature-regulating properties, making it a popular choice for sock yarn. On the other hand, nylon or acrylic blends can add strength and stretch to the yarn, ensuring that your socks will fit well and hold their shape.
Overall, if you’re looking to make durable, comfortable, and stylish socks, sock yarn is the way to go. With its tight twist, excellent stitch definition, and a wide range of colors and patterns, sock yarn is a versatile and popular choice for knitters and crocheters alike.
Knitting Needles
Knitting needles are essential tools for any knitter. They come in a variety of sizes and materials, allowing knitters to create different types of stitches and achieve different tensions in their projects. The right needle can make a huge difference in the outcome of a knitting project.
There are two main types of knitting needles: straight needles and circular needles. Straight needles are the traditional type and have a pointed end on one side and a stopper or knob on the other side to prevent stitches from sliding off. They are usually made of wood, bamboo, or metal, and come in sizes ranging from tiny 2mm needles for delicate lacework to larger 15mm needles for chunky projects.
Circular needles, on the other hand, consist of two connected needle tips with a flexible cable in between. These needles are great for knitting large or heavy projects, such as blankets, as the cable allows the weight of the project to rest on the knitter’s lap. Circular needles also work well for knitting in the round, such as for making hats or seamless sweaters.
When choosing knitting needles, it is important to consider the type of yarn being used and the desired outcome of the project. Thinner yarns typically require smaller needle sizes, while thicker yarns may require larger needle sizes to create the desired fabric. Some knitters also have a preference for the type of material, as different materials can have varying levels of grip and flexibility.
In addition to straight and circular needles, there are also double-pointed needles (DPNs) and interchangeable needle sets available. DPNs are used for knitting small circumference projects, such as socks or sleeves, and come in sets of four or five. Interchangeable needle sets are a versatile option that allow knitters to change needle sizes and cable lengths as needed for different projects.
Overall, knitting needles are a knitter’s best friend. They are the tools that bring yarn to life, transforming it into beautiful and cozy garments. Whether using straight needles, circular needles, or any other type, finding the right needles for the job is an important step in any knitting project.
Tapestry Needle
A tapestry needle is an essential tool for any knitter or crocheter. It is a type of sewing needle that has a blunt tip and a large eye, which makes it easier to thread yarn through.
When working on a sock yarn blanket knitting pattern, a tapestry needle is particularly useful for weaving in ends. As you knit or crochet each square of the blanket, you will have loose ends of yarn that need to be secured. The tapestry needle allows you to neatly weave these ends into your work, ensuring that they are not visible and that your blanket looks clean and finished.
Another important use for a tapestry needle in a sock yarn blanket knitting pattern is joining the squares together. Once you have completed all the individual squares, you will need to sew them together to create the final blanket. The tapestry needle is the perfect tool for this task, as it allows you to easily sew through the yarn without damaging it.
When choosing a tapestry needle for your sock yarn blanket project, it is important to consider the size and material of the needle. A larger needle with a bigger eye will make it easier to thread the yarn through, especially if you are working with thicker sock yarn. Additionally, a needle made from a smooth material, such as stainless steel or plastic, will glide through the yarn more easily, making the sewing process quicker and more enjoyable.
In conclusion, a tapestry needle is an essential tool for any knitter or crocheter, and it is particularly useful when working on a sock yarn blanket knitting pattern. Whether you are weaving in ends or joining squares together, the tapestry needle allows you to create a clean and finished look for your blanket. When choosing a needle, consider the size and material to ensure the best results.
Scissors
Scissors are an essential tool for any knitter or crafter. Whether you are cutting yarn, fabric, or paper, having a pair of sharp, reliable scissors is crucial for achieving clean and precise cuts.
When it comes to choosing the right scissors for your sock yarn blanket knitting project, there are a few factors to consider. Firstly, you’ll want to find a pair of scissors that are sharp enough to easily cut through multiple strands of yarn without fraying or snagging. Look for scissors with stainless steel blades, as these tend to stay sharp for longer periods of time.
Size and comfort are also important considerations. A pair of small, lightweight scissors is ideal for knitting on the go, as they can easily fit into your project bag or knitting pouch. Look for scissors with comfortable handles that are easy to grip, as this will make cutting your yarn much more comfortable and efficient.
Finally, it’s worth investing in a pair of scissors that are specifically designed for cutting delicate materials like yarn. These scissors often have serrated blades, which help to grip the yarn and prevent it from slipping while cutting. They may also have a fine, pointed tip that allows for precise cuts, especially when working on intricate patterns or designs.
Remember to always keep your scissors clean and sharp to ensure they perform their best. Regularly wipe them down with a soft cloth or tissue, and if necessary, sharpen them using a scissors sharpener or sharpening stone. With the right pair of scissors, your sock yarn blanket knitting project will be a breeze!
Instructions
To create the sock yarn blanket, follow the simple steps below:
Materials:
- Sock yarn in various colors
- Circular knitting needles, size US 6 or size needed to obtain gauge
- Tapestry needle
Gauge:
The gauge for this project is not crucial as it’s a blanket. However, you can check your gauge by knitting a swatch and measuring 4 inches in both width and height. Adjust your needle size if necessary.
Pattern:
- Start by casting on 200 stitches using the long-tail cast-on method.
- Knit the first row using the sock yarn color of your choice.
- Continue knitting each row in garter stitch until your blanket reaches the desired length.
- Change colors as desired, making sure to leave a long enough tail to weave in later.
- When you run out of a color, join another sock yarn color by simply knitting the first stitch of the new color together with the last stitch of the old color to create a smooth transition.
- Repeat steps 3-5 until your blanket is wide enough.
- Once you’ve reached the desired size, bind off all stitches using a stretchy bind-off method.
- Weave in all loose ends using a tapestry needle.
And there you have it! Your very own sock yarn blanket. Enjoy the cozy warmth it brings, knowing that each colorful square represents a different sock yarn project.
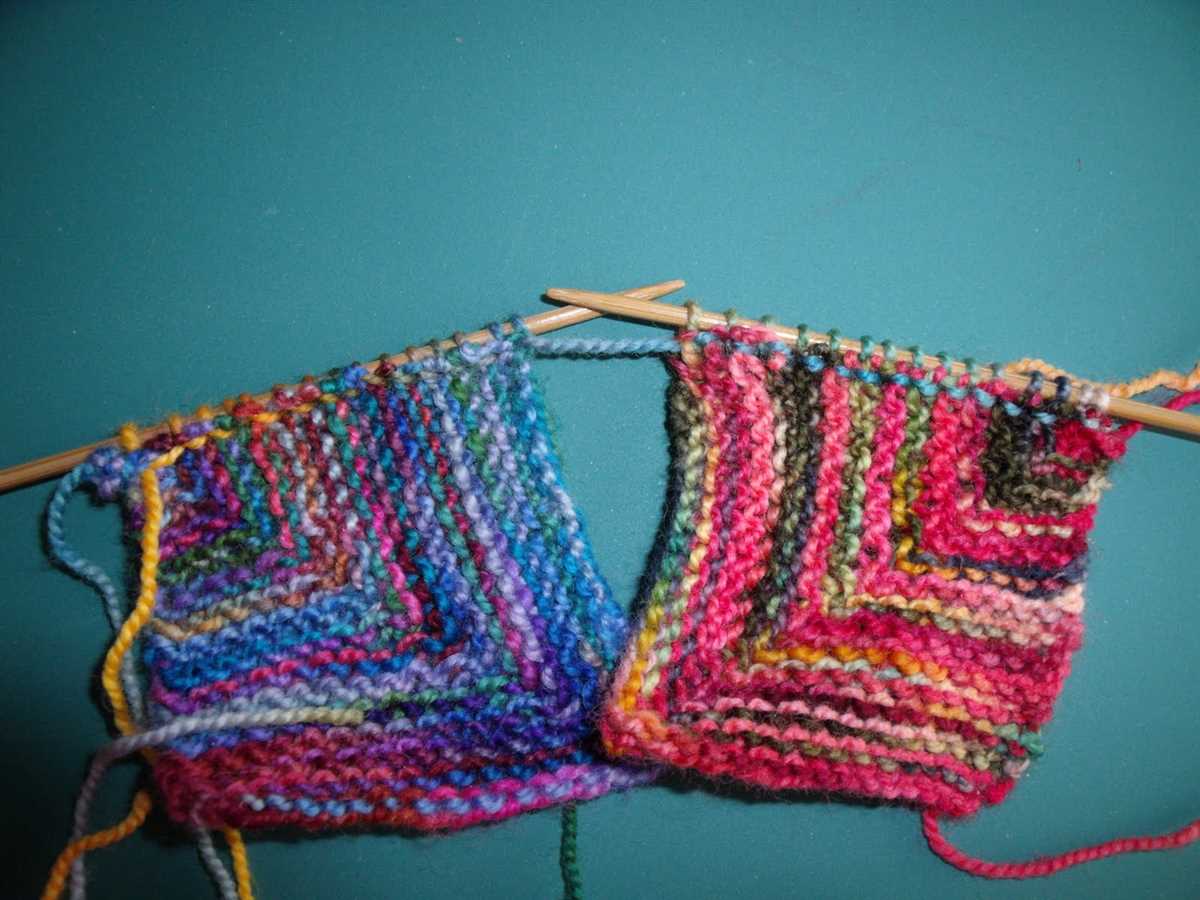
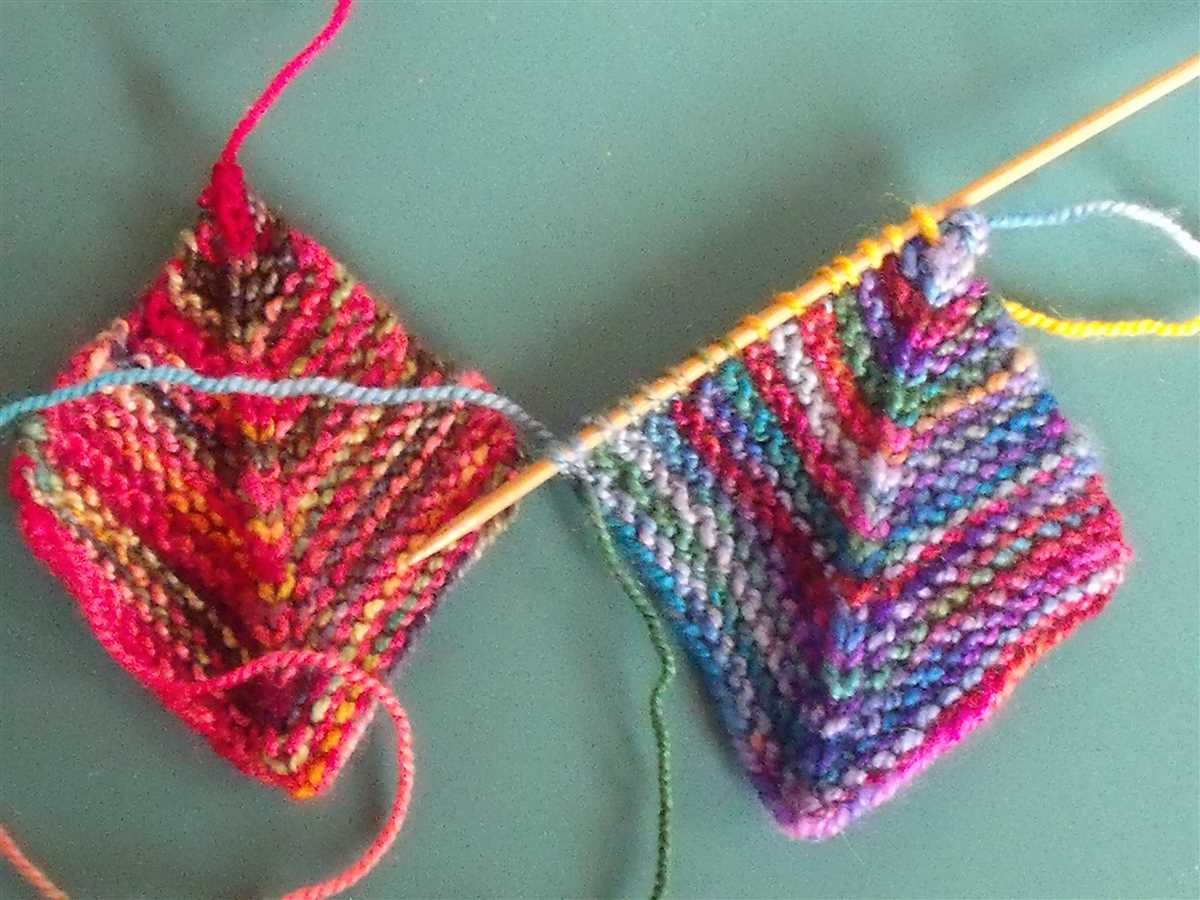
Cast on stitches
When beginning a sock yarn blanket knitting pattern, one of the first steps is to cast on stitches. The number of stitches you cast on will depend on the size of the blanket you want to make. This pattern typically uses a long-tail cast on method, which is a popular choice for many knitters. To start, you’ll need a pair of knitting needles and your chosen sock yarn.
To cast on using the long-tail method, hold both the yarn end and working yarn in one hand, and create a slipknot by crossing the yarn end over the working yarn. Slide the slipknot onto one of the knitting needles and tighten it slightly. Then, hold the knitting needle with the slipknot in your right hand and the other needle in your left hand.
To begin casting on stitches, bring the working yarn over your left thumb and the yarn end over your left index finger. Insert the right needle into the slipknot from front to back, going under the yarn end and over the working yarn. With your right hand, catch the working yarn with the right needle and bring it through the slipknot. Slip the newly formed stitch onto the left needle, keeping it loose. Repeat this process until you have cast on the desired number of stitches.
It’s important to maintain an even tension while casting on stitches to ensure that your blanket doesn’t have any tight or loose edges. Once you have cast on all the stitches, you can start working the pattern as instructed, creating a beautiful sock yarn blanket.
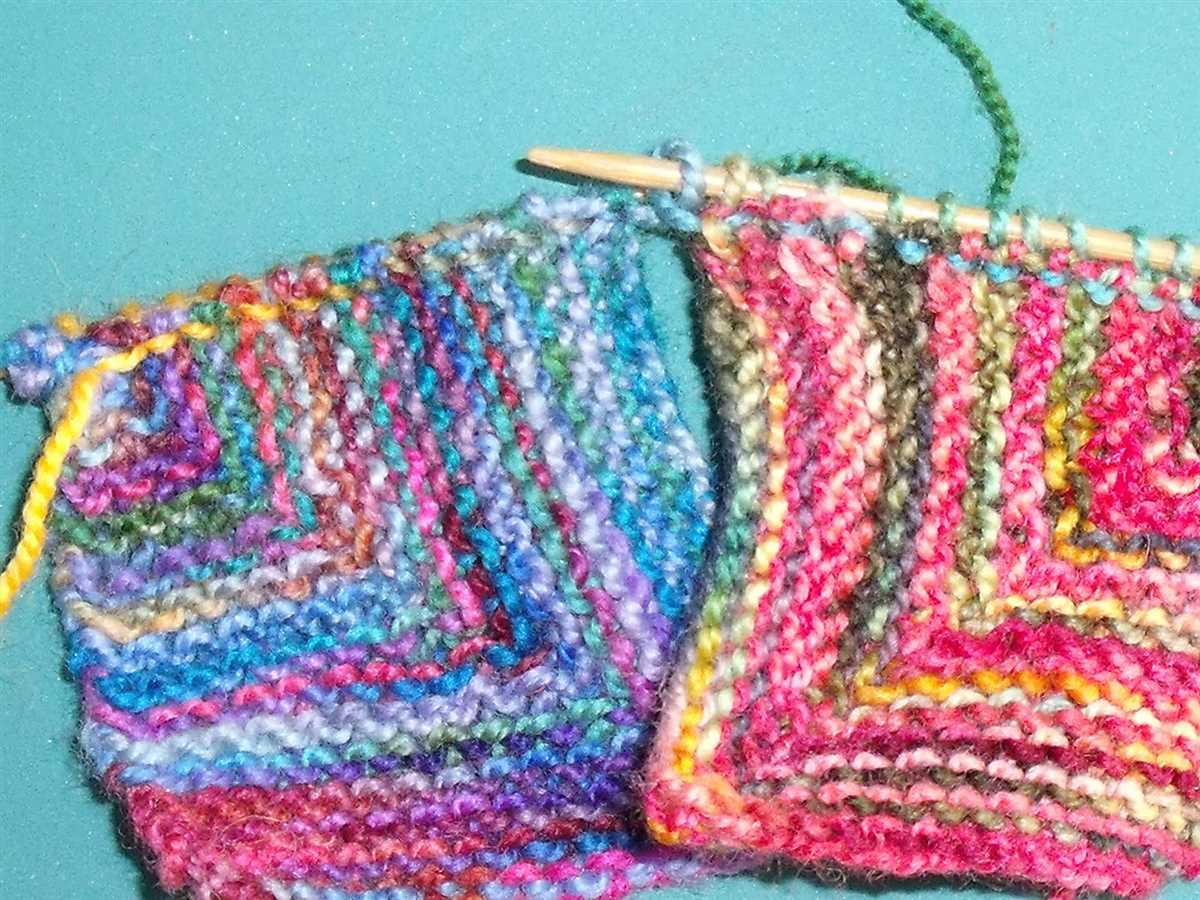
Knit the first row
In the Sock yarn blanket knitting pattern, the first row is an important step in getting started on your cozy blanket project. This row sets the foundation for the rest of the blanket and determines the overall size and shape.
To knit the first row, you will need your chosen sock yarn and a suitable pair of knitting needles. Start by casting on the desired number of stitches, following the pattern instructions. Make sure to leave a long tail for weaving in later.
Row 1: Begin knitting the first row following the knitting pattern. This may involve a combination of knit and purl stitches, depending on the desired stitch pattern. Pay close attention to the pattern instructions and make sure to count your stitches as you go to ensure accuracy.
As you knit the first row, the blanket will begin to take shape. This is an exciting moment as you see the pattern come to life and visualize how the final product will look. Take your time and enjoy the process, making sure to maintain consistent tension throughout the row.
Once you have completed the first row, you can continue on to the next rows as per the pattern instructions. Remember to keep track of your progress and refer back to the pattern regularly to ensure accuracy.
Continue knitting rows
In order to continue knitting rows for your sock yarn blanket, you will need to follow the pattern stitch and repeat the necessary stitches. Begin by working the next row as instructed in the pattern. This may involve knitting, purling, and potentially using other stitch patterns or techniques.
As you continue knitting rows, be sure to keep track of your progress. It can be helpful to use stitch markers or a row counter to keep track of the number of rows you have completed. This will be important for maintaining consistency and ensuring that your blanket turns out the way you desire.
Remember to refer to the pattern instructions for any specific details or variations for each row. It is important to follow the pattern accurately to achieve the desired results.
Continue knitting rows until you have reached the desired length for your blanket. This will depend on your personal preference and the size of blanket you wish to create. Some patterns may specify a certain number of rows or inches to knit, while others may provide a target measurement for the finished blanket.
Once you have completed all the necessary rows, you can then proceed to finish the blanket according to the pattern instructions. This may involve binding off, adding any decorative borders, or blocking the finished piece to ensure it lays flat and looks its best.
Change yarn colors
When working on a sock yarn blanket, changing yarn colors can add an extra touch of creativity and visual interest to your project. While it may seem daunting at first, with a little practice and some helpful tips, you can easily switch between different yarn colors and create beautiful designs.
Planning: Before starting your project, it’s essential to plan out your color scheme. Think about the overall look you want to achieve and how the colors will blend together. You can create an ombre effect by gradually transitioning from one color to another or use contrasting colors for a bold and vibrant blanket.
Joining new yarn: To change yarn colors, begin by finishing the last stitch of the old color. Leave a tail of yarn, approximately six inches long. Take the new color and make a slipknot on your needle. Insert the needle into the next stitch, holding both old and new yarns together. Knit or purl the stitch as usual, ensuring that you tighten the new yarn to secure it in place.
Weaving in ends: After changing colors, you will have loose ends of yarn to weave in. This is important to ensure that your blanket remains neat and durable. To weave in the ends, use a tapestry needle and thread the yarn tails through several stitches, going back and forth in different directions to secure them. Be careful not to pull too tightly or distort the fabric.
Creating color patterns: Once you feel comfortable changing yarn colors, you can experiment with different patterns and motifs. You can create stripes by alternating between two or more colors in a regular pattern. For a more intricate design, try incorporating colorwork techniques such as Fair Isle or intarsia. These techniques involve working with multiple colors in a single row or round to create intricate patterns.
Finishing touches: To add a professional finish to your sock yarn blanket, consider adding a border. This can be done with a contrasting yarn color or by using the same color as the edging. A simple garter stitch or seed stitch border can add a polished look to your blanket and help stabilize the edges.
With these tips, changing yarn colors in your sock yarn blanket knitting project will become a breeze. Embrace your creativity, experiment with different color combinations, and enjoy the process of creating a unique and beautiful blanket.
Weave in loose ends

Weaving in loose ends is an important step in completing your sock yarn blanket. It ensures that your work looks neat and professional, and prevents any loose ends from unraveling over time.
To weave in loose ends, start by threading the end of the yarn onto a tapestry needle. Insert the needle under several stitches along the back of your work, following the direction of the yarn. This will help secure the end in place.
Tip: It’s a good idea to weave in the ends as you go, rather than waiting until the end. This will make the process more manageable and prevent a huge pile of loose ends from building up.
Next, bring the needle through the yarn loop, and then back under the stitches in the opposite direction. This creates a secure knot that will keep the yarn end from coming loose.
Continue weaving in the loose end, going back and forth under the stitches in different directions. This helps distribute the tension and ensures that the yarn is securely woven into the fabric.
Tip: If you’re working with different colors of yarn, make sure to weave in the ends in a discreet manner along the edges or in areas where the ends won’t be noticeable.
Once you have woven in the loose end for a sufficient length, you can trim off any excess yarn close to the fabric. Be careful not to cut the fabric itself.
Tip: If you’re uncertain how much to trim, it’s better to leave a slightly longer tail and trim it later if needed. This will give you more flexibility in case you need to adjust or undo any weaving-in that you’ve done.
By taking the time to weave in loose ends, you’ll ensure that your sock yarn blanket is finished with a polished look and will last for years to come.
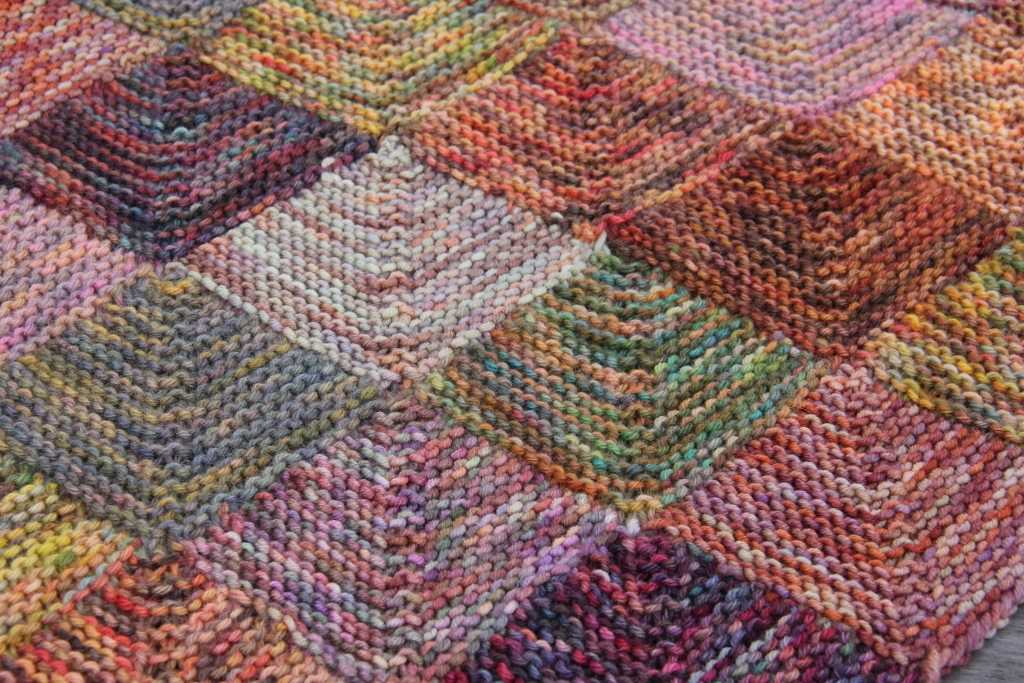
Block the Blanket

Once you have finished knitting all the squares for your sock yarn blanket, it’s time to block them. Blocking is an important step in the knitting process that helps to even out the stitches and give the blanket a more polished look. It also helps to set the dimensions and shape of the squares.
To block your sock yarn blanket squares, follow these steps:
- Wet the squares: Fill a basin with lukewarm water and place the squares inside. Gently press the squares down to submerge them completely. Allow the squares to soak for about 10-15 minutes.
- Remove excess water: Carefully lift each square out of the basin and gently squeeze out any excess water. Do not wring or twist the squares, as this can stretch or damage the fibers.
- Arrange the squares: Lay the squares flat on a clean towel or blocking mat, making sure they are in the desired shape and size. Adjust any edges or corners that may have curled or stretched during the knitting process.
- Pinning: Use rustproof T-pins or blocking wires to secure the squares in place. Start by pinning the corners and then work your way around, placing pins about 1 inch apart. Make sure the squares are evenly stretched and taut, but not overly stretched.
- Dry: Allow the squares to dry completely. This can take anywhere from a few hours to a full day, depending on the yarn and humidity levels. Avoid exposing the squares to direct sunlight or heat sources, as this can cause the yarn to fade or become damaged.
- Finishing touches: Once the squares are dry, carefully remove the pins or blocking wires. If there are any wrinkles or creases, gently steam the squares using a steam iron or handheld steamer. Be cautious not to touch the yarn directly with the iron, as this can cause it to melt or flatten.
Blocking your sock yarn blanket squares will give your blanket a professional finish and help to ensure that all the squares are the same size and shape. It may seem like an extra step, but it’s well worth the effort for a beautifully finished blanket.