
If you’re a fan of knitting stuffed animals, then you’re going to love this Buddy Bear knitting pattern. This adorable pattern creates a cuddly bear that will quickly become your little one’s favorite toy.
The Buddy Bear pattern is perfect for knitters of all skill levels. Whether you’re a beginner or an experienced knitter, you’ll be able to create a soft and huggable bear with this pattern. The pattern includes detailed instructions and step-by-step photos to guide you through the knitting process.
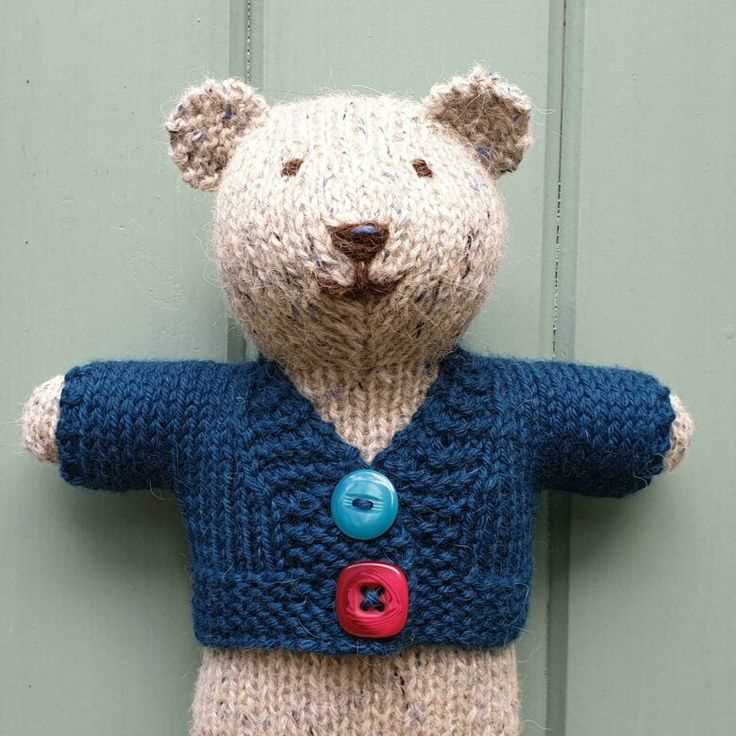
With its cute round shape and friendly face, the Buddy Bear will make a wonderful gift for a baby shower or a child’s birthday. You can personalize your bear by choosing different colors of yarn and adding accessories like a bow tie or a scarf. No matter how you customize it, the Buddy Bear is sure to become a cherished companion for your little one.
Buddy Bear Knitting Pattern
Looking for a cute and cuddly knitting project? The Buddy Bear knitting pattern is the perfect choice! With this pattern, you can create your very own adorable knitted bear that will surely become your new best friend.
The Buddy Bear knitting pattern is suitable for knitters of all skill levels. Whether you’re a beginner or an experienced knitter, you’ll find this pattern easy to follow and enjoyable to work on. All you need is some basic knitting knowledge and a little bit of patience to bring this lovable bear to life.
To start knitting your Buddy Bear, you’ll need a few essential materials. First and foremost, you’ll need yarn in your preferred colors. You can choose traditional bear colors like brown or experiment with more vibrant shades if you prefer. Additionally, you’ll need knitting needles in the appropriate size for your chosen yarn and some stuffing to fill your bear.
The pattern provides step-by-step instructions on how to knit each part of the bear, from the body and head to the arms and legs. It also includes details on how to assemble the bear and add any additional features like a cute button nose or embroidered eyes. You can customize your Buddy Bear however you like, making each creation unique and special.
Knitting the Buddy Bear will not only provide you with a delightful handmade toy but also a great opportunity to practice your knitting skills and create something truly special. Whether you keep your Buddy Bear for yourself or give it as a gift to someone special, it’s sure to bring joy and warmth.
Materials Needed for Buddy Bear Knitting Project
In order to complete the Buddy Bear knitting project, you will need several materials. These materials will ensure that you have everything necessary to create a cute and cuddly bear for yourself or a loved one.
Yarn: The first essential material you will need is yarn. You can choose any color you like for your Buddy Bear, but it is recommended to use a soft and fluffy yarn that will provide a cozy texture. Look for a medium-weight yarn that is suitable for knitting.
Knitting Needles: You will also need a pair of knitting needles to work with the yarn. The size of the needles will depend on the thickness of the yarn you choose. Check the yarn label for recommended needle sizes. Generally, a set of size 8 or 9 needles should work well for most medium-weight yarns.
Scissors: A good pair of scissors is essential for any knitting project. You will need them to cut the yarn and trim any loose ends. Make sure to choose a pair of sharp and durable scissors that will easily cut through the yarn without fraying or damaging it.
Stuffing: To give your Buddy Bear a nice and plump shape, you will need some stuffing material. This can be polyester fiberfill, cotton stuffing, or any other soft and lightweight material that can be easily inserted into the bear’s body. Make sure to have enough stuffing to fill the entire bear evenly.
Yarn Needle: A yarn needle is used for sewing different parts of the bear together. It should have a large eye to accommodate the yarn and a sharp pointed tip for easy insertion. This needle will be particularly useful when attaching the arms, legs, and head to the body of the bear.
Optional Accessories: Depending on your preferences, you may also want to gather some optional accessories for your Buddy Bear. These can include buttons for the eyes, a small piece of fabric for a bowtie or vest, and embroidery floss or thread for adding facial details. These accessories will give your bear a personalized touch and make it even more special.
Now that you have all the necessary materials, you are ready to start knitting your Buddy Bear! Follow the knitting pattern and enjoy the process of creating a lovely bear companion.
Step-by-Step Knitting Instructions for Buddy Bear

Knitting your very own Buddy Bear can be a rewarding and enjoyable project. With these step-by-step instructions, you’ll be able to create an adorable bear that will be treasured for years to come. Here are the detailed instructions to get you started.
Materials:
- Yarn: Choose a soft and cuddly yarn in your desired color. A medium-weight yarn is recommended.
- Knitting Needles: Use a pair of knitting needles that are appropriate for your chosen yarn. Many patterns recommend using size US 8 (5mm) needles, but be sure to check the gauge for your specific yarn.
- Stuffing: You’ll need polyester stuffing or your preferred bear stuffing material to fill the completed bear.
- Yarn Needle: A yarn needle with a large eye is useful for weaving in loose ends and sewing the bear together.
- Scissors: A pair of scissors is essential for cutting the yarn.
Instructions:
- Start by casting on the required number of stitches for the bear body. The pattern will specify the number of stitches depending on the size you want to create.
- Work in a specific stitch pattern, such as stockinette stitch or garter stitch, until the body measures the desired length.
- Next, shape the bear’s head by decreasing stitches gradually. Follow the pattern instructions to ensure you create a symmetrical and proportionate head shape.
- After completing the head, you’ll move on to the bear’s arms and legs. These are typically knit separately and then sewn onto the body. Be sure to make two arms and two legs.
- Once all the components are knit, it’s time to assemble the bear. Use the yarn needle to sew the arms and legs onto the body, and attach the head at the top.
- When sewing the pieces together, ensure that everything is securely attached, leaving a small opening for stuffing.
- Fill the bear with stuffing to your desired level of firmness. Avoid overstuffing, as it can distort the bear’s shape.
- Finally, sew up the remaining opening and weave in any loose ends to complete your Buddy Bear.
With these step-by-step knitting instructions, you’ll be able to create your own adorable Buddy Bear. Let your creativity shine by choosing unique colors and adding personal touches. Whether you’re a beginner or an experienced knitter, this project is sure to bring joy and satisfaction.
Tips for Knitting Buddy Bear
If you’re planning to knit a Buddy Bear, here are some helpful tips to ensure your project is a success:
1. Choose the right yarn

When knitting a Buddy Bear, it’s important to select the right yarn. You’ll want a soft and durable yarn that will hold up well over time. Acrylic or cotton blends are often good choices for toy knitting, as they are easy to care for and maintain their shape.
2. Use the correct needle size
Using the correct needle size is crucial for achieving the proper gauge and ensuring that your bear turns out the correct size. Be sure to check the gauge listed in the pattern and use the recommended needle size to achieve it. If needed, adjust your needle size up or down to obtain the correct gauge.
3. Follow the pattern instructions carefully
Knitting a Buddy Bear involves following a pattern, so it’s important to carefully read and follow the instructions. Pay attention to any specific techniques or stitch patterns mentioned in the pattern, as these can greatly impact the final outcome of your bear. Take your time and refer back to the pattern as needed.
4. Practice basic knitting techniques
Before embarking on your Buddy Bear project, it’s helpful to have a good grasp of basic knitting techniques, such as casting on, knitting, purling, increasing, and decreasing. Familiarize yourself with these techniques and practice them before starting your bear to ensure that you’re comfortable with them.
5. Take your time and enjoy the process

Knitting a Buddy Bear can be a fun and rewarding project, so make sure to take your time and enjoy the process. Don’t rush through the knitting, and take breaks when needed to avoid fatigue. Remember to have patience and enjoy watching your bear come to life stitch by stitch.
By following these tips, you’ll be well on your way to knitting a beautiful Buddy Bear that will be cherished for years to come. Happy knitting!
Different Variations of Buddy Bear Knitting Pattern
The Buddy Bear knitting pattern is a popular choice among crafters and knitters due to its adorable design and versatility. There are several variations of the Buddy Bear pattern that can be customized to suit different preferences and skill levels.
1. Classic Buddy Bear
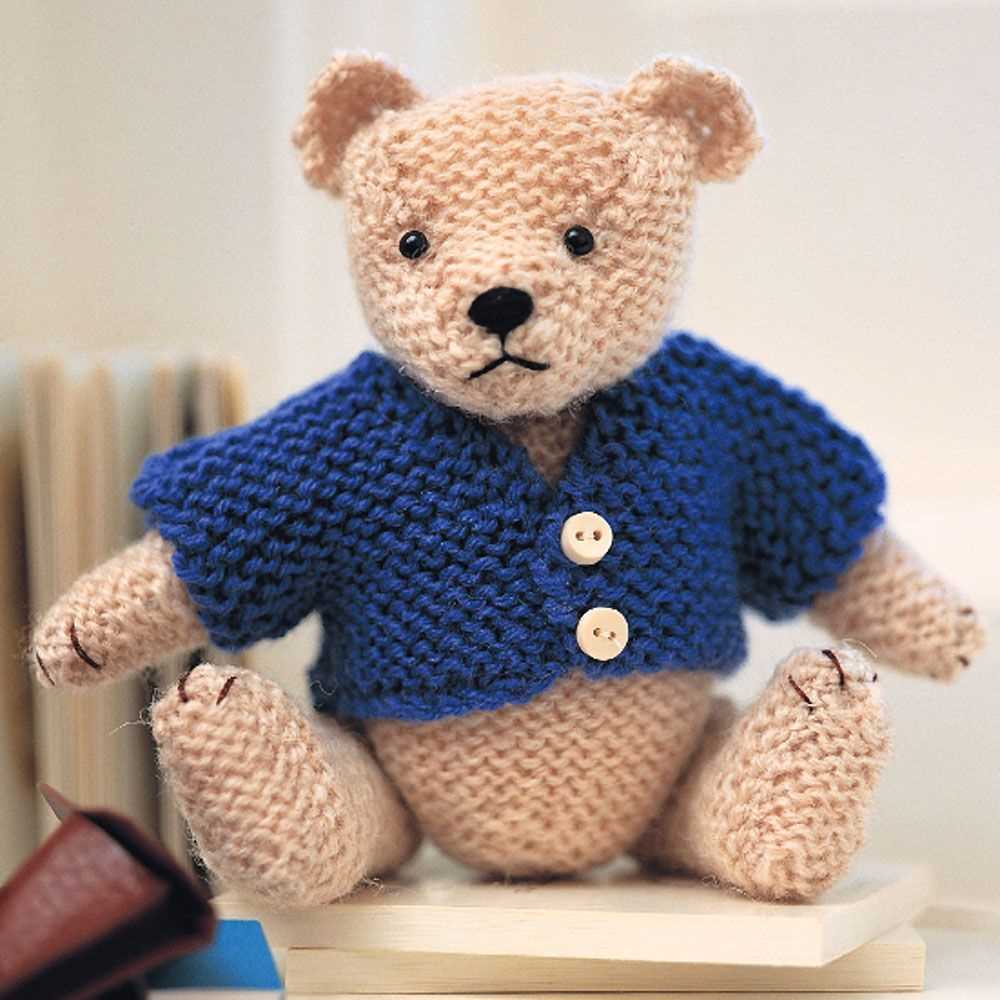
The classic Buddy Bear pattern features a simple design with a rounded body, stubby arms and legs, and a cute round face. This pattern is perfect for beginners or those looking for a quick and easy project. The finished bear can be knit in a single color or with contrasting colors for the body, arms, and legs.
2. Fancy Buddy Bear

For those looking to add a little flair to their Buddy Bear, there is the Fancy Buddy Bear variation. This pattern allows for the integration of different stitch patterns, such as cables or lace, to create a more intricate and textured look. The Fancy Buddy Bear may also have additional accessories, such as a knitted bow tie or scarf, to add even more personality.
3. Mini Buddy Bear
If you prefer smaller projects or want to make a cute keychain or charm, the Mini Buddy Bear pattern is the perfect choice. This variation involves using thinner yarn and smaller needles to create a miniature version of the classic Buddy Bear. These tiny bears make great gifts or decorations and can be easily attached to bags or keyrings.
4. Dress-Up Buddy Bear
For those who enjoy dressing up their knitted toys, the Dress-Up Buddy Bear pattern offers endless possibilities. This variation includes instructions for creating different outfits and accessories, such as hats, dresses, pants, and even tiny shoes. Knitters can let their creativity shine by mixing and matching colors and patterns to create unique and personalized outfits for their Buddy Bear.
5. Holiday Buddy Bear

To add a festive touch to your Buddy Bear collection, the Holiday Buddy Bear pattern is a must-try. This variation provides instructions for creating bears dressed up for various holidays, such as Christmas, Halloween, or Easter. From Santa hats to bunny ears, these themed bears are sure to bring holiday cheer to any home.
No matter which variation you choose, the Buddy Bear knitting pattern is a fun and rewarding project that allows knitters to showcase their creativity and create adorable bears that can be cherished for years to come.
Customizing Your Buddy Bear
When it comes to knitting your own Buddy Bear, there are many ways to customize and make it your own. Whether you want to add a personal touch or adapt the pattern to fit your style, here are a few ideas to get you started:
Choose Your Yarn
One of the easiest ways to customize your Buddy Bear is by choosing the perfect yarn. You can experiment with different colors and textures to create a unique look. Opt for bold and vibrant hues for a fun and playful bear, or go for softer pastels for a more delicate and cuddly appearance.
Customize the Accessories
In addition to the yarn, you can also customize the accessories of your Buddy Bear. The pattern usually includes instructions for a scarf or a bowtie, but you can get creative and make your own accessories. Consider adding a hat, a sweater, or even a tiny backpack to give your bear some extra personality.
Add Embroidery Details
If you want to add more intricate details to your Buddy Bear, consider incorporating embroidery. You can use different colored yarns to embroider facial features like the nose and eyes, or add small stitches to create unique patterns on the bear’s body. This can add depth and texture to your finished knitting project.
Personalize with Initials
To make your Buddy Bear truly one-of-a-kind, you can personalize it with initials. You can knit or embroider your initials onto a patch and sew it onto the bear’s belly or back. This simple addition can make your bear a special keepsake or a thoughtful gift for someone dear to you.
Remember, the key to customizing your Buddy Bear is to have fun and let your creativity flow. Don’t be afraid to experiment and make changes to the pattern. With a little bit of imagination, you can create a Buddy Bear that is truly unique and reflects your personal style.
Adding Embellishments to Your Buddy Bear
Once you have completed knitting your Buddy Bear, you might want to add some embellishments to give it a unique and personal touch. There are several options for adding embellishments to your bear, depending on your preferences and the look you want to achieve.
If you want to add some facial features to your Buddy Bear, you can use embroidery to create eyes, nose, and mouth. Use black or brown yarn to stitch small stitches for the eyes, a triangle shape for the nose, and a simple smile for the mouth. Make sure to place the facial features symmetrically to give your bear a cute and friendly expression.
If you want to give your Buddy Bear a bit of sparkle, you can use beads to create accessories like bows or hats. Thread the beads onto a thin wire or string, and then attach them to the bear’s head, ears, or neck. You can also use beads to create a necklace or bracelet for your bear. Choose beads in coordinating colors and sizes to add a touch of whimsy to your bear’s outfit.
Another option for adding embellishments is to use fabric scraps or felt to create clothing or accessories for your Buddy Bear. Cut out small pieces of fabric in the desired shape and size, and then use fabric glue or small stitches to attach them to the bear’s body. You can create a cute dress, a cozy sweater, or even a tiny backpack for your bear. Adding fabric embellishments allows you to customize your bear’s outfit and make it truly one-of-a-kind.
Whichever embellishment option you choose, remember to take your time and enjoy the process. Adding these personalized touches to your Buddy Bear will not only make it look more unique but will also make it extra special to you or the person you are giving it to. Have fun experimenting with different embellishment ideas and make your Buddy Bear truly stand out!
Finishing Touches for Buddy Bear
After knitting a Buddy Bear using the provided pattern, there are a few finishing touches you can add to make your bear even more adorable. These final details will truly bring your Buddy Bear to life and give it a personal touch.
One of the first things you can do is embroider the bear’s facial features. Using a contrasting color of yarn, carefully stitch on the eyes, nose, and mouth. You can choose to make them cute and round or give your bear a mischievous smile. This step adds character and expression to your Buddy Bear.
To give your bear a bit of texture, you can also add some small details using duplicate stitch. This technique involves placing stitches over existing stitches to create additional designs. For example, you can embroider a heart on the bear’s paw or add a small flower to its ear. These subtle touches add a touch of whimsy and make your bear truly unique.
Materials needed:
- Contrasting yarn for embroidery
- Tapestry needle
- Scissors
Instructions:
- Thread the tapestry needle with the contrasting yarn.
- Start by embroidering the eyes. Use small, straight stitches to create the shape of the eyes. You can make them round or almond-shaped, depending on the look you want.
- Next, embroider the nose. Use a simple triangle shape and secure the yarn with a few extra stitches to ensure it stays in place.
- Finally, sew the mouth using small, curved stitches. You can make a smile, a frown, or a neutral expression, depending on your preference.
- If desired, use duplicate stitch to add additional details. Choose a design you like and carefully embroider it onto your bear.
- Trim any excess yarn and secure the ends by weaving them back into the fabric.
Once you’ve finished embroidering your bear, take a step back and admire your work. The finishing touches you’ve added have given your Buddy Bear its own unique personality. Whether you keep it for yourself or gift it to someone special, this adorable bear is sure to bring joy and comfort for years to come.
Creating a Clothing Wardrobe for Buddy Bear

Buddy Bear, the adorable knitted bear, can be dressed up in various outfits to suit any occasion. With a few basic knitting patterns and some creativity, you can create a diverse and stylish clothing wardrobe for your Buddy Bear. Whether you want to dress him up for a tea party, a day at the beach, or a cozy night in, there are plenty of options available.
The first step in creating Buddy Bear’s wardrobe is to choose the right yarn. Opt for soft, washable yarns in a variety of colors to add vibrancy to his outfits. Choose yarns that are suitable for the type of clothing you want to make. For warmer clothes, like sweaters and hats, choose a thicker yarn. For lighter, more delicate pieces, like dresses or scarves, opt for a thinner yarn. Don’t be afraid to mix and match different yarns to create unique textures and patterns.
Knitting Patterns for Buddy Bear’s Wardrobe:

- Sweaters: Keep Buddy Bear warm and cozy with hand-knitted sweaters. Choose patterns with fun designs or patterns that reflect Buddy Bear’s personality. Knit sweaters in different colors and styles, such as pullovers, cardigans, or turtlenecks.
- Hats: Protect Buddy Bear’s head from the cold or add a touch of style with knitted hats. Choose patterns with pom-poms, ear flaps, or cables for added visual interest.
- Dresses: For a feminine touch, knit Buddy Bear adorable dresses. Opt for patterns with lace or ruffle details. Experiment with different lengths and color combinations to create various looks.
- Scarves and Accessories: Complete Buddy Bear’s outfits with knitted scarves, mittens, and other accessories. Choose patterns with intricate stitch patterns or add embellishments like buttons or bows for a playful touch.
- Swimsuits: Get Buddy Bear ready for a day at the beach with knitted swimsuits. Choose patterns with vibrant colors or playful prints. Don’t forget to add details like straps or ruffles to make the swimsuit extra adorable.
Remember to always take measurements of Buddy Bear to ensure a proper fit. Knit a gauge swatch before starting each project to ensure you are using the correct needle size and yarn weight. Get creative and have fun with your Buddy Bear’s wardrobe, and watch as he brings smiles and joy wherever he goes!
Additional Projects Using Buddy Bear Knitting Pattern
If you’ve enjoyed knitting the Buddy Bear pattern and want to explore more projects, here are some ideas to get you started:
You can customize your Buddy Bear by using different colors of yarn. Create a whole family of bears in different shades, or add stripes or spots for a fun twist. You can also experiment with different types of yarn, like mohair or alpaca, to give your bears a different texture.
Here are some additional project ideas:
- Buddy Bear Keychain: Use lightweight yarn and smaller needles to create a miniature version of Buddy Bear. Attach a keychain ring to the top of the bear’s head and you have a cute accessory for your keys or bag.
- Buddy Bear Baby Mobile: Knit several Buddy Bears in different colors and attach them to a wooden mobile frame. Hang the mobile above your baby’s crib for a whimsical and handmade touch to the nursery.
- Buddy Bear Finger Puppets: Make smaller versions of Buddy Bears to use as finger puppets. These are great for storytelling or entertaining kids.
- Buddy Bear Hat: Use the Buddy Bear pattern as a base to knit a hat. Simply elongate the body section and add earflaps to create a cute bear hat for kids or adults.
- Buddy Bear Scarf: Knit a scarf using the Buddy Bear pattern. Attach two small Buddy Bears to each end of the scarf for a playful accessory.
These are just a few ideas to inspire you to continue knitting with the Buddy Bear pattern. Have fun exploring different projects and let your creativity shine!