
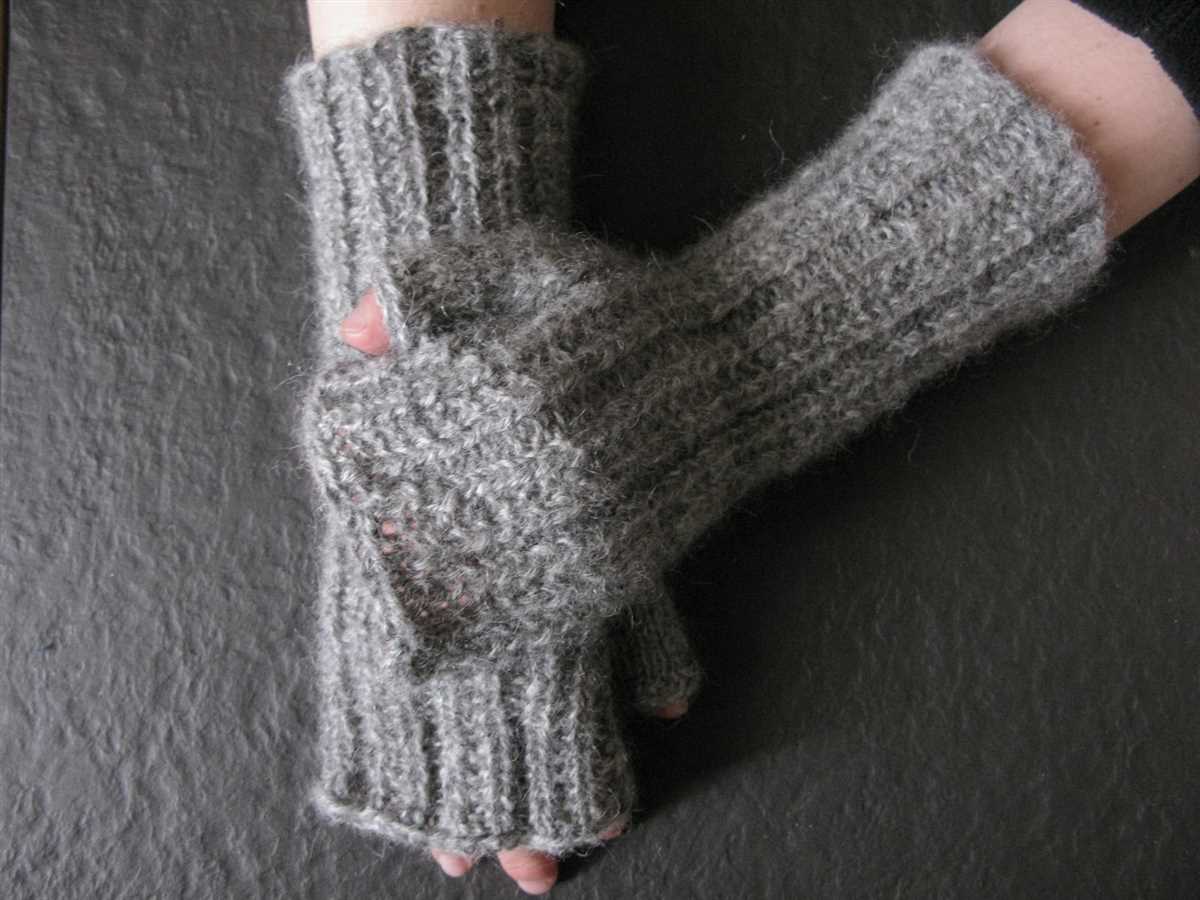
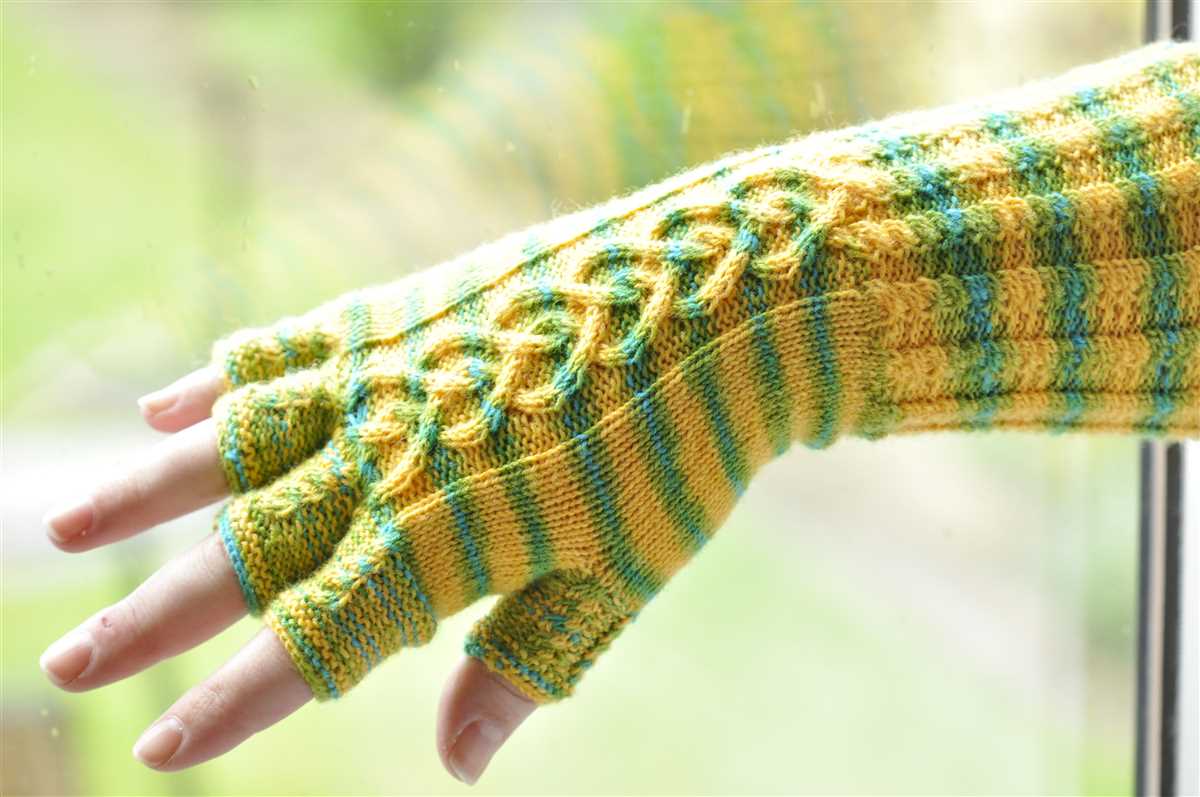
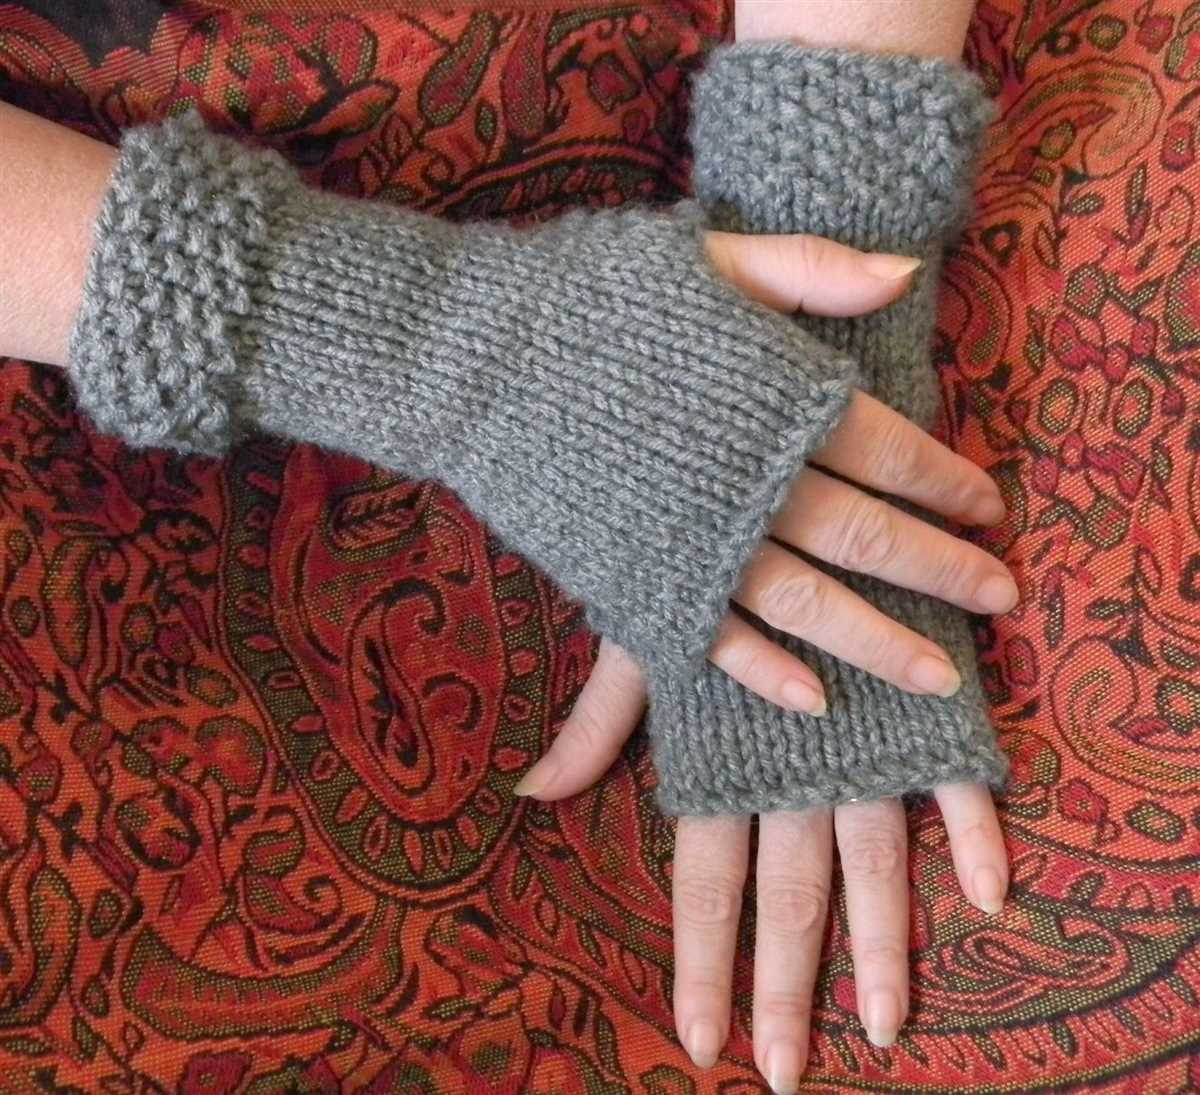
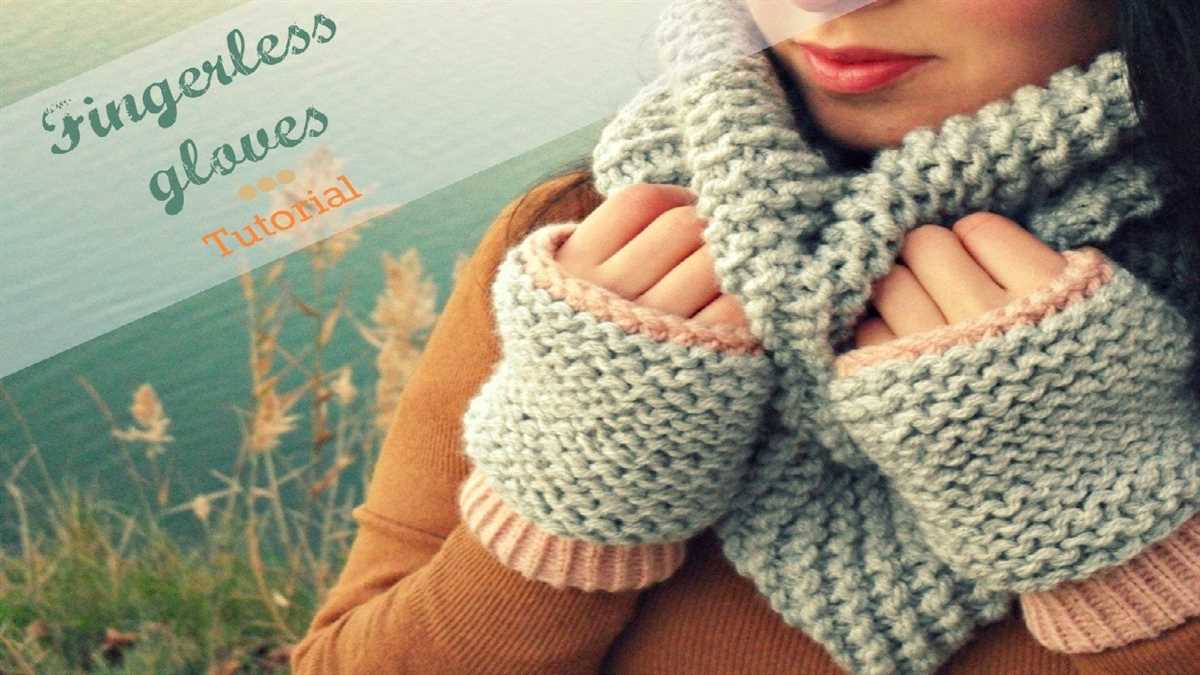
If you’re in need of a new knitting project and want to keep your hands warm and stylish at the same time, then this free knitting pattern for half finger gloves is just what you need. These gloves are not only practical, but also a fun and quick project to make. The best part is that you only need 2 needles to complete them, so no need to worry about using double pointed needles!
With this pattern, you’ll be able to create a pair of half finger gloves that are perfect for those chilly autumn and winter days. The open finger design allows you to easily use your smartphone, type on a keyboard, or even knit without having to take off your gloves. Plus, they can be easily customized to fit your hand size and style preferences.
Whether you’re a beginner or an experienced knitter, this pattern is suitable for all skill levels. With step-by-step instructions and detailed stitch diagrams, you’ll be able to create a pair of gloves that look like they were made by a professional. So grab your yarn and needles, and get ready to create a cozy and stylish accessory that you’ll love wearing all season long!
Free Knitting Pattern for Half Finger Gloves Using 2 Needles
If you’re looking for a simple and practical knitting project, these free half finger gloves are a great option. With this knitting pattern, you can create cozy and stylish gloves that will keep your hands warm while leaving your fingers free for any tasks at hand. The best part is that you only need 2 needles to complete this project, making it accessible for knitters of all skill levels.
To get started, gather your materials: a pair of knitting needles in the appropriate size for your yarn, a tapestry needle for weaving in ends, and your preferred yarn. Choose a yarn that is both soft and warm, such as a wool blend or an acrylic yarn with a bit of stretch.
Materials:
- 2 knitting needles
- Tapestry needle
- Yarn in your preferred color
Begin by casting on the required number of stitches, which will vary depending on the size of the gloves. Follow the instructions in the pattern to knit the ribbing for the cuff, then transition into the main body of the glove. The pattern will guide you through the shaping of the fingers and the thumb, ensuring a comfortable and snug fit.
Once you have completed the glove, use the tapestry needle to weave in any loose ends and give it a final blocking. This will help the gloves retain their shape and give them a polished look. Now you’re ready to enjoy your new half finger gloves!
This free knitting pattern for half finger gloves using 2 needles is a great project for knitters of all skill levels. Whether you’re a beginner or an experienced knitter, you’ll enjoy creating these cozy and versatile gloves. They make great gifts for friends and family, or you can keep them for yourself and stay warm while still being able to use your fingers freely. Happy knitting!
Materials Needed

Before you begin knitting the half finger gloves, make sure you have all the necessary materials. Here is a list of what you will need:
- Yarn: Choose a medium weight yarn in the color of your choice. Ensure that the yarn is suitable for knitting needles size 5 (3.75mm).
- Knitting Needles: You will need a pair of straight knitting needles size 5 (3.75mm) or a size that gives you the correct gauge.
- Tapestry Needle: This needle will be used for weaving in ends and sewing any small seams.
- Scissors: Have a pair of sharp scissors on hand for cutting the yarn.
With these materials, you will be well equipped to start the knitting process for the half finger gloves. Make sure to gather all your supplies before you begin, as it will make the knitting process much smoother and more enjoyable.
Step-by-Step Instructions
In order to create these half finger gloves, you will need to follow the step-by-step instructions listed below. These instructions will guide you through knitting the gloves using only 2 needles.
Materials:
- Yarn of your choice
- Knitting needles (size will depend on your yarn choice)
- Tape measure
- Scissors
- Yarn needle
Instructions:
- Start by casting on the required number of stitches, which will depend on the size of your hand and desired fit of the gloves. It is recommended to cast on using the long tail cast on method.
- Once you have cast on the stitches, work in a rib stitch pattern for the desired length of the cuff. This can be anywhere from 1 to 2 inches.
- After completing the cuff, switch to stockinette stitch for the main part of the glove. Knit all stitches on the right side rows and purl all stitches on the wrong side rows.
- Continue knitting in stockinette stitch until you reach the desired length for the gloves. This will depend on how far up you want the gloves to cover your fingers.
- Next, it is time to start creating the finger openings. To do this, you will need to divide the stitches evenly onto two needles. You can do this by slipping half of the stitches onto another needle or by using stitch holders.
- Once the stitches are divided, continue working in stockinette stitch on one set of stitches while leaving the other set on hold.
- When you reach the desired length for the fingers, it is time to start shaping the finger openings. To do this, decrease 1 stitch at the beginning and end of every other row until the desired number of stitches remain.
- Repeat the shaping process for each finger opening until you have reached the desired length for all fingers.
- Once all fingers have been completed, bind off all stitches and weave in any loose ends using a yarn needle.
- Finally, repeat the entire process to create the second glove, making sure to match the measurements and shaping for a matching pair.
Following these step-by-step instructions will allow you to create a pair of half finger gloves using only 2 needles. Feel free to customize the pattern to fit your own style and preferences, such as adding cables or colorwork.
Choosing the Right Yarn

When it comes to knitting, choosing the right yarn for your project is crucial. The yarn you select will determine the overall look, feel, and durability of your finished gloves. Here are a few key considerations to keep in mind:
Fiber Content: The type of fiber used in the yarn will greatly influence the qualities of the gloves. Wool, for example, is known for its warmth and natural elasticity, making it a popular choice for winter accessories. Cotton, on the other hand, is breathable and lightweight, making it suitable for spring or fall gloves. Consider the desired properties of your gloves, such as softness, drape, or moisture-wicking capabilities, and choose a yarn that complements those needs.
Weight: The weight of yarn refers to its thickness or thinness. It is usually categorized into different weight classes, ranging from super fine to super bulky. For half finger gloves, a medium-weight yarn (known as DK or worsted weight) is often a good choice as it provides a balance between warmth and dexterity. However, you can experiment with other weights to achieve different effects – lighter yarn for more breathable gloves or heavier yarn for extra warmth and thickness.
Color and Texture: The color and texture of the yarn will play a significant role in the appearance of your gloves. You can choose a solid color for a classic and versatile look, or opt for variegated or self-striping yarn to add interest and visual appeal. Additionally, consider the texture of the yarn – smooth or fluffy, matte or shiny – to complement the style of your gloves. Keep in mind that the stitch pattern you choose may also affect the look of the yarn, so make sure to consider how they work together.
Overall, the yarn you choose should not only meet the practical requirements of your gloves but also reflect your personal taste and style. Knitting is a creative and personal craft, and the yarn you select is an important part of that creative process. So take your time, explore different options, and find the perfect yarn that will bring your half finger gloves to life.
Choosing the Right Needles
When it comes to knitting gloves using 2 needles, it is important to choose the right needles for your project. The type and size of needles you choose can greatly affect the outcome of your gloves. Double-pointed needles (DPNs) are often the preferred choice for knitting gloves, as they allow you to easily work in the round and create a seamless finish.
When selecting DPNs, it is important to consider the material they are made from. Different materials, such as metal, wood, or bamboo, can have different effects on the knitting process. Metal needles are known for their smoothness and durability, while wooden and bamboo needles provide a warm and comfortable grip. Additionally, the size of the needles determines the gauge of your knitting, so make sure to choose needles that match the gauge specified in the pattern.
Circular needles can also be used for knitting gloves, especially if you prefer to work in the magic loop method. These needles have a flexible cable connecting two needle tips, allowing you to comfortably knit even the smallest rounds. Circular needles are versatile and can be used for a variety of projects, making them a great investment for knitters.
Finally, whether you choose DPNs or circular needles, it is important to consider the length of the needles. For gloves, shorter needles are typically more convenient, as they allow you to easily navigate the smaller circumference of the fingers without too much excess needle length getting in the way. However, longer needles can be useful for certain techniques, such as when working on the thumb gusset. Ultimately, the choice of needle length depends on your personal preferences and knitting style.
Cast On
Before you can begin knitting your half finger gloves, you need to cast on your stitches. The cast on is the foundation of your work and sets the number of stitches you’ll be working with. For this pattern, we’ll be using the long-tail cast on method.
To start, measure out a tail of yarn that is approximately three times the width of your work. Make a slip knot at the end of your yarn, leaving a tail about 6 inches long.
- Step 1: Insert one needle into the slip knot, making sure the tail is hanging down.
- Step 2: With your other hand, bring the working yarn over the needle, forming a loop.
- Step 3: Insert the needle into the loop on the needle, going from front to back.
- Step 4: Pull the working yarn tight to secure the stitch on the needle.
- Step 5: Repeat steps 2-4 until you have cast on the desired number of stitches.
Once you’ve cast on all of your stitches, you’re ready to start knitting your half finger gloves!
Knitting the Ribbing
When knitting the ribbing for your half finger gloves, you will be working with a smaller needle size than the main part of the gloves. This helps create a tighter, stretchy fabric that will fit snugly around your wrist.
To begin, cast on the required number of stitches using the smaller needle size. You can use a long-tail cast-on method or any other preferred cast-on method.
Next, you will start the ribbing pattern. This pattern usually consists of alternating knit and purl stitches to create a textured, stretchy fabric. One common ribbing pattern is the 1×1 rib, where you knit one stitch and purl one stitch across the row.
For example:
Row 1: *K1, P1; repeat from * to end of row.
Row 2: *P1, K1; repeat from * to end of row.
Repeat these two rows until you reach the desired length for the ribbing section. This could be anywhere from 1 to 2 inches depending on your preference.
Remember to always keep count of your stitches to ensure the ribbing remains consistent. If you accidentally knit two stitches in a row instead of alternating between knit and purl, your ribbing pattern will be disrupted.
When you have reached the desired length for the ribbing, you can switch to the main needle size and continue with the rest of the glove pattern.
Knitting the Hand
When knitting gloves, it is important to pay special attention to the hand section. This is the part that will cover the fingers and palm, providing warmth and protection. Knitting the hand involves creating a fabric that is both flexible and snug, allowing for easy movement. This can be achieved through careful stitch selection and shaping techniques.
Shaping the Fingers
To create a comfortable fit, it is important to shape the fingers of the glove. This can be done by decreasing stitches in a controlled manner. This is typically done by knitting two stitches together to decrease one stitch. The number of decreases and the rate at which they are made will depend on the size of the hand and the desired fit.
To ensure a smooth and seamless transition between the fingers, it is also important to shape the gaps between them. This can be done by working short rows or by adding stitches to create a thumb gusset. These techniques help prevent any uncomfortable bulkiness or tightness between the fingers.
Adding Thumb Opening
In addition to shaping the fingers, it is also important to create an opening for the thumb. This can be done in a variety of ways, such as knitting a separate thumb section and attaching it later, or by incorporating a thumb gusset into the glove design. The thumb opening should be spacious enough to allow for comfortable movement, while still providing a snug fit to keep the glove in place.
- When knitting the hand section of gloves, pay attention to shaping the fingers and gaps between them.
- Use techniques like decreasing stitches and short rows to shape the fingers.
- Create a thumb opening that is spacious yet snug for comfortable movement.
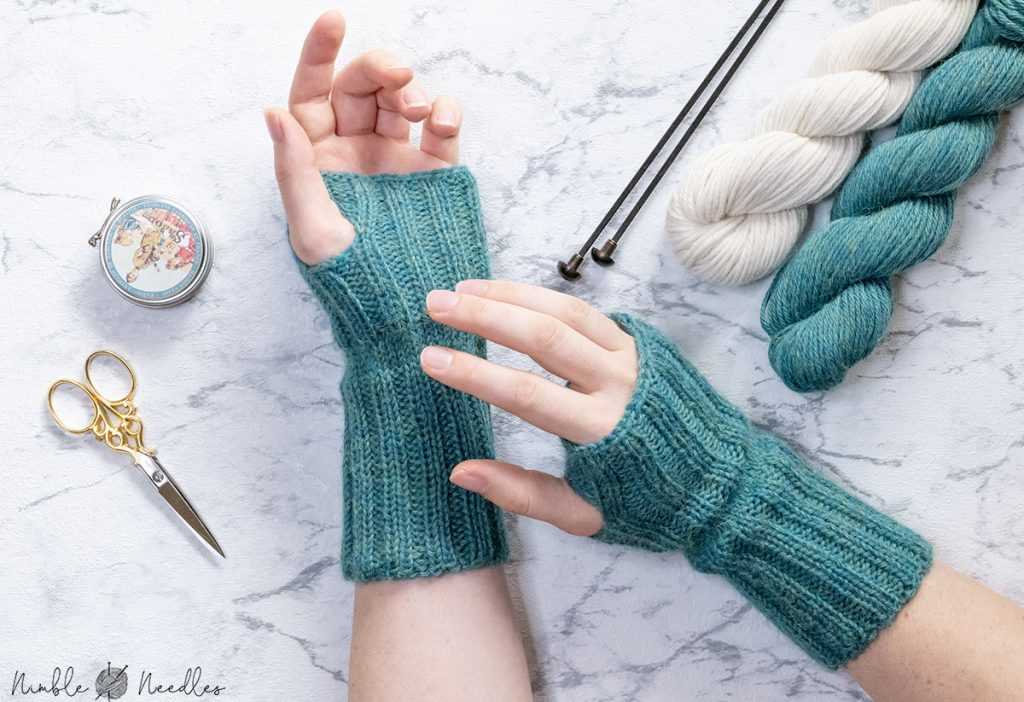
Creating the Thumbhole
Once you have completed knitting the fingerless glove to the desired length, it’s time to create the thumbhole. The thumbhole allows for easy movement and flexibility while wearing the gloves.
To create the thumbhole, you will need to work a few rows where the stitches for the thumb are placed on hold. Start by knitting across the first row of the glove as usual until you reach the desired position for the thumbhole.
Next, place a stitch marker on the right needle to mark the start of the thumbhole. Then, slip the desired number of stitches onto a stitch holder or a piece of scrap yarn. This will create the opening for the thumb. Make sure to slip the stitches with the same tension you’ve been using throughout the project to maintain an even appearance.
Continue knitting across the remaining stitches of the row, working in the established stitch pattern. On the next row, when you reach the stitch marker indicating the start of the thumbhole, simply knit across the stitches on the left needle, ignoring the stitches on the stitch holder.
Later, when you’re finished knitting the rest of the glove, you’ll be able to pick up the stitches from the stitch holder and work them in the round to create the thumb. This creates a seamless and comfortable thumbhole in your fingerless gloves.
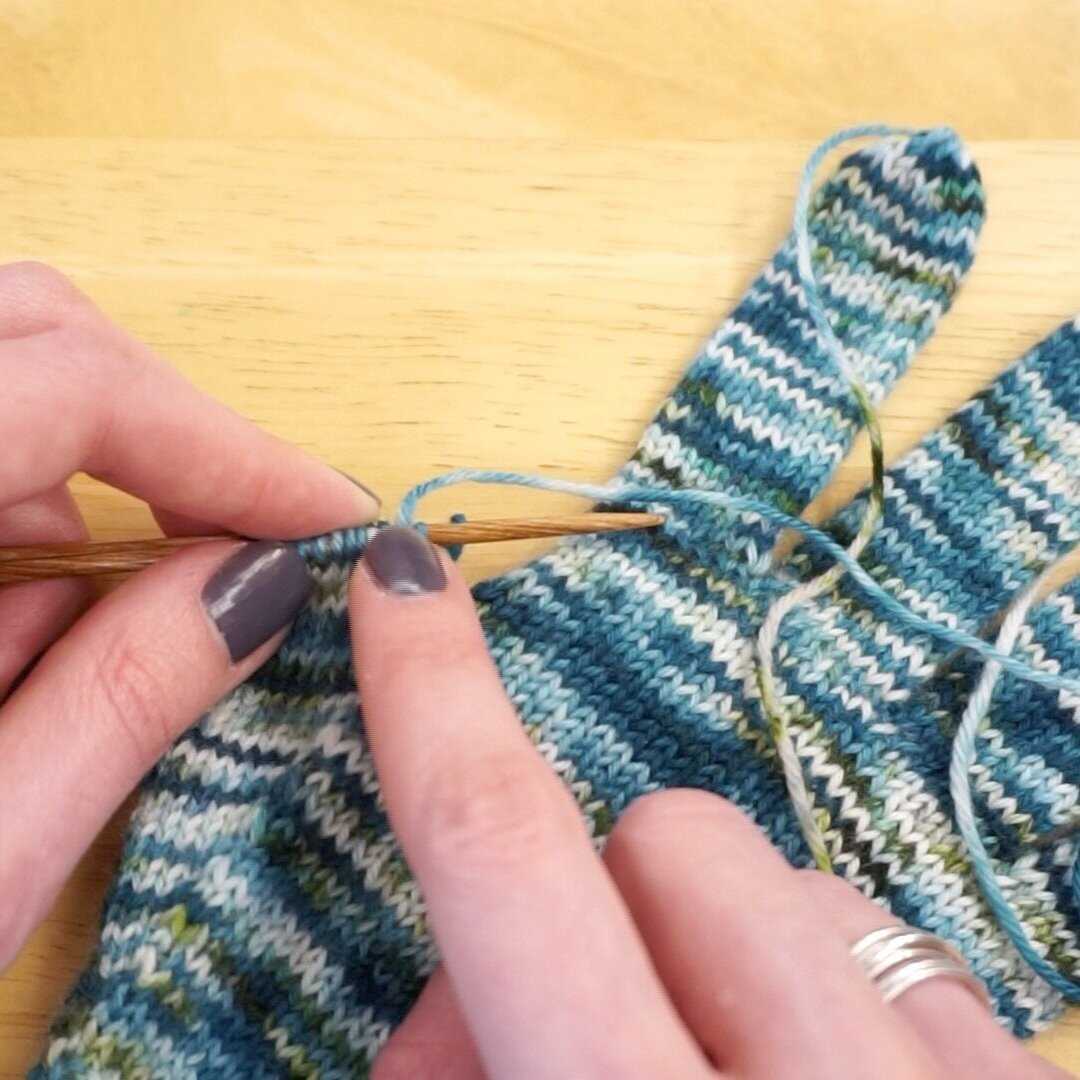
Knitting the Fingers
When knitting fingerless gloves, one of the most challenging parts is knitting the fingers. However, with a bit of practice and patience, it can become an enjoyable part of the knitting process. Here are some tips and techniques for knitting the fingers of your gloves.
1. Divide the Stitches: Before you start knitting the fingers, divide the stitches evenly onto three double-pointed needles. This will help you keep the stitches organized and make it easier to work with.
2. Start with the Pinky Finger: Begin knitting the fingers by starting with the pinky finger. This is because it is the shortest finger and will require fewer rounds to complete. Work the desired number of rounds for the pinky finger and then move on to the next finger.
3. Use Decreases: To shape the fingers, you will need to decrease the number of stitches. This can be done by knitting two stitches together (k2tog), slipping two stitches knitwise and then knitting them together (ssk), or using any other decrease method you prefer. Follow the pattern instructions for the specific decreases for each finger.
4. Try Using Stitch Markers: To keep track of the beginning of each finger, it can be helpful to place a stitch marker at the start of each finger section. This will make it easier to count the rounds and ensure the fingers are all the same length.
5. Repeat for each Finger: Once you have completed knitting the pinky finger, continue the same steps for each subsequent finger. Remember to decrease the stitches as necessary and place stitch markers for each finger. Take your time and work at your own pace.
Following these tips and techniques will help you successfully knit the fingers of your fingerless gloves. Enjoy the process and have fun creating your own cozy accessories!
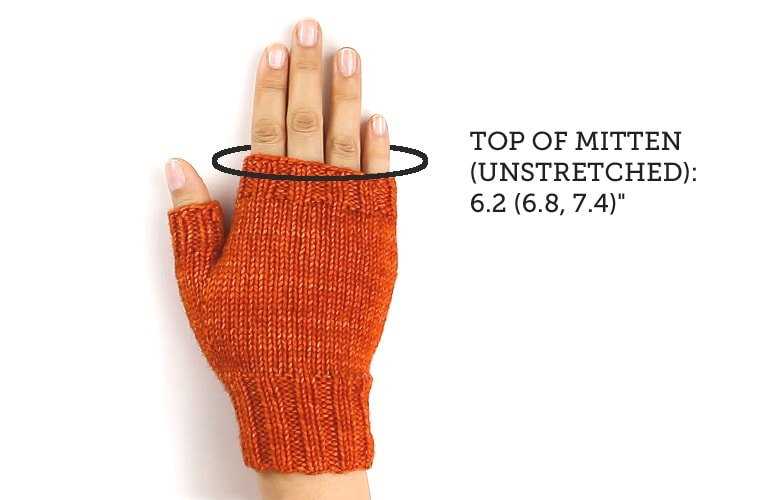
Shaping the Top of the Fingers
To shape the top of the fingers, begin by knitting across the first row until you reach the stitch marker. Once you reach the stitch marker, slip the next stitch onto a stitch holder, and remove the stitch marker. This will be the first finger. Then, continue knitting across the row until you reach the next stitch marker. Repeat this process for each finger, slipping the stitch onto the stitch holder and removing the stitch marker.
Once all the finger stitches have been placed on stitch holders, you will work on shaping the top of each finger. To do this, you will decrease the number of stitches at the top of each finger. Start by knitting across the first finger stitches until you reach the last 2 stitches. Then, knit these 2 stitches together. This will decrease the number of stitches by 1. Repeat this process for each finger, decreasing the number of stitches at the top of each finger by 1.
After you have decreased the stitches for each finger, continue knitting in pattern for a few more rows. This will help to shape the top of the fingers and create a tapered effect. Once you have achieved the desired length for the fingers, you can proceed to the final steps of finishing the gloves.
Finishing Touches
After completing your half finger gloves, it’s time to add the finishing touches to make them look polished and professional. Here are some steps to consider:
1. Secure loose ends:
Take a few minutes to weave in any loose ends on your gloves. This will not only give them a neater appearance but also prevent them from unraveling over time.
2. Add embellishments:

If you want to add some personal flair to your gloves, consider embellishing them with buttons, beads, or embroidery. You can sew these onto the cuffs or back of the gloves to create a unique and stylish design.
3. Block the gloves:
To ensure that your gloves have a polished look, you may want to consider blocking them. Blocking involves wetting the gloves, shaping them, and allowing them to dry in the desired shape. This can help even out any uneven stitches and give the gloves a more professional finish.
4. Care instructions:
Before you begin wearing or gifting your gloves, it’s important to provide care instructions. Make a small tag or note that includes information on how to wash and care for the gloves. This will help the recipient prolong the lifespan of the gloves and keep them looking their best.
By following these finishing touches, you can take your half finger gloves from basic to beautiful. Whether you’re making them for yourself or as a gift, adding these final steps will elevate the overall look and ensure that your gloves are both stylish and functional.
Adding Embellishments
Once you’ve finished knitting your half finger gloves using the 2-needle method, you may want to add some embellishments to make them even more unique and stylish. Here are a few ideas to get you started:
- Embroidery: Use colorful yarn or embroidery floss to create beautiful designs on the back of the gloves. You can add flowers, geometric patterns, or even personalized monograms.
- Buttons: Sewing buttons onto the gloves can be both functional and decorative. Choose buttons that match the color and style of your gloves and sew them near the wrists or on the back for added flair.
- Ribbons: Adding a ribbon bow or tying a ribbon around the wrist can give your gloves a delicate and feminine touch. You can use satin, velvet, or any other type of ribbon that complements your yarn.
- Beads and Sequins: Sewing beads or sequins onto the gloves can give them a glamorous and eye-catching look. You can add them sporadically or create intricate patterns for a more elaborate design.
- Embroidered Patches: If you have any small embroidered patches, you can sew them onto the gloves to add a touch of whimsy and personality.
Remember to be creative and have fun with your embellishments. Customizing your half finger gloves will not only make them one-of-a-kind but also showcase your personal style. Experiment with different techniques and materials to create gloves that are truly unique.
Adding embellishments to your hand-knit gloves can be a fun and rewarding way to add a personal touch to your accessories. Whether you choose to embroider, sew on buttons, or add beads, your gloves are sure to stand out and become a conversation starter. Don’t be afraid to get creative and experiment with different embellishments to make your gloves truly your own.
Q&A:
Is there a free knitting pattern available for half finger gloves?
Yes, there are many free knitting patterns available for half finger gloves. You can search on knitting websites or platforms like Ravelry for a variety of patterns.
Can I use 2 needles for knitting half finger gloves?
Yes, you can definitely use 2 needles for knitting half finger gloves. Many patterns are designed to be knit with 2 needles, also known as straight needles. However, you can also use circular needles or double-pointed needles, depending on your preference.
Where can I find a step-by-step tutorial for knitting half finger gloves?
There are many online resources available where you can find step-by-step tutorials for knitting half finger gloves. Websites like YouTube, Craftsy, and Knitting Help offer video tutorials that can guide you through the process.
Are there any specific yarn recommendations for knitting half finger gloves?
There are no specific yarn recommendations for knitting half finger gloves. You can choose any yarn that you like and that meets your desired gauge for the project. However, it is recommended to use a yarn that is warm and durable, such as wool or a wool blend, as gloves are typically worn in cold weather.
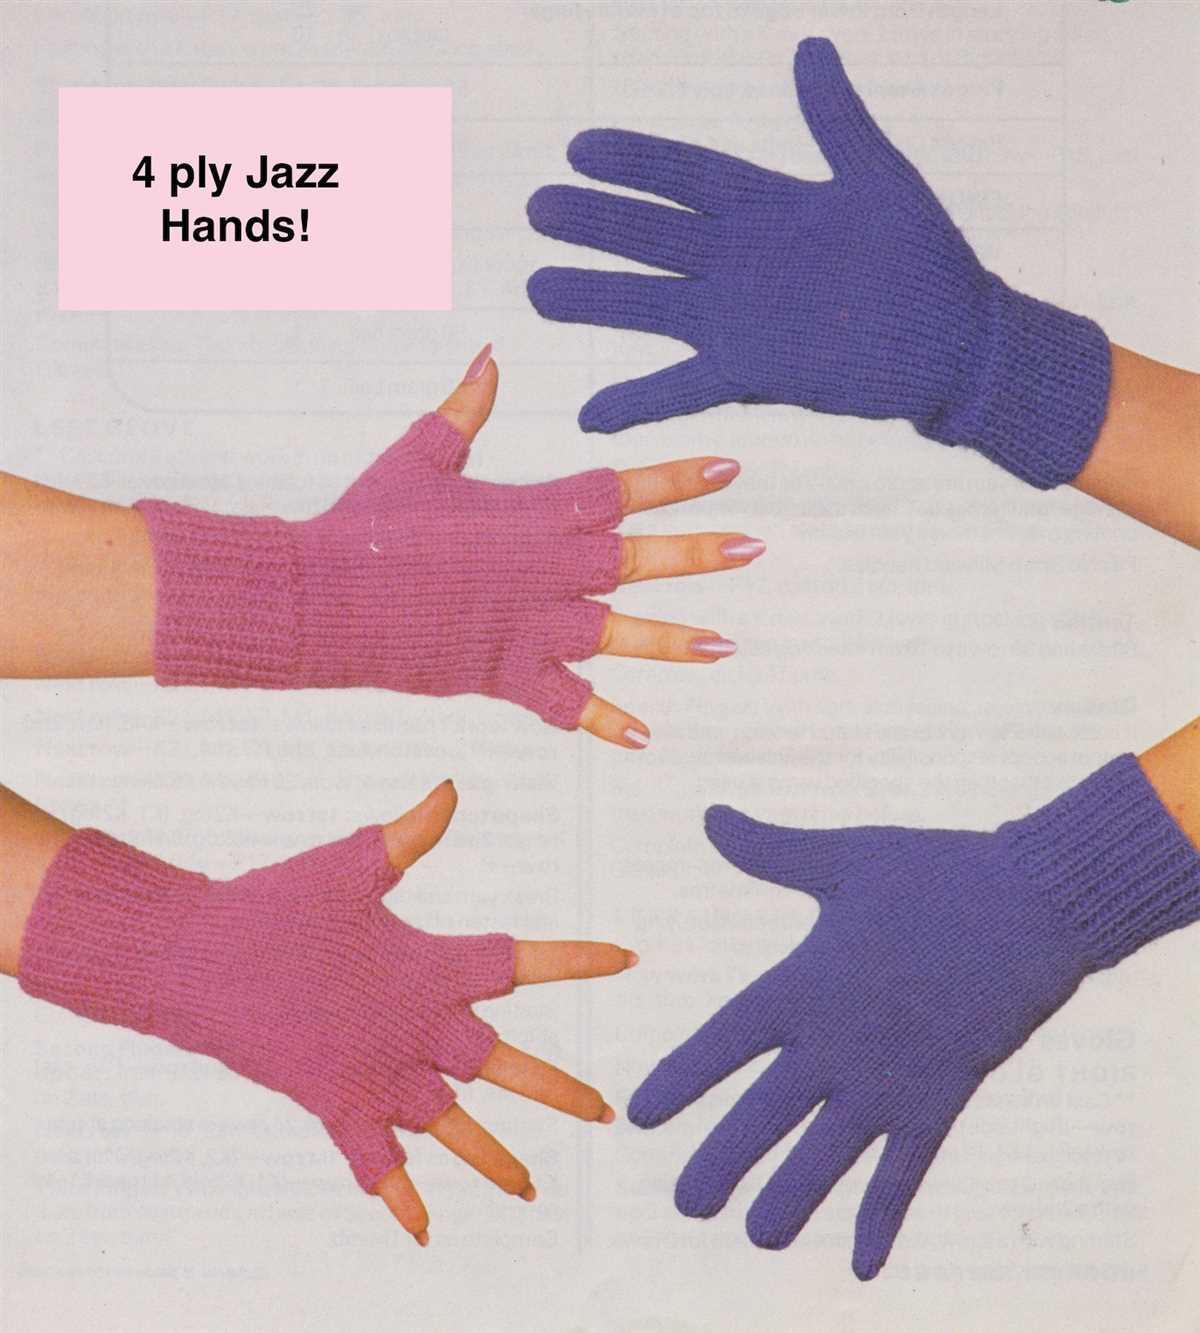
Can I modify the pattern to make full finger gloves instead of half finger gloves?
Yes, you can definitely modify the pattern to make full finger gloves instead of half finger gloves. You can simply continue knitting the finger portion of the glove instead of stopping at the half finger length. You may need to adjust the number of stitches or rows to accommodate the additional fingers.
Is there a free knitting pattern for half finger gloves using 2 needles?
Yes, there are many free knitting patterns available for half finger gloves using 2 needles. These patterns typically involve knitting in the round or knitting flat and seaming the gloves afterwards.
Where can I find a free knitting pattern for half finger gloves using 2 needles?
You can find free knitting patterns for half finger gloves using 2 needles on various websites and knitting forums. Some popular sources for free knitting patterns include Ravelry, LoveKnitting, and KnittingPatternCentral.