
Knitting your own sweater is a rewarding and creative process that allows you to customize your wardrobe with unique pieces. If you’re new to knitting or looking for a project that’s simple yet stylish, a v neck sweater is a great choice. The v neck style is timeless and flattering, making it a versatile addition to any wardrobe.
This simple v neck sweater knitting pattern is perfect for beginner knitters or those looking for a quick and easy project. The pattern uses basic knitting stitches and techniques, making it accessible to knitters of all skill levels. With a few simple measurements and some yarn and needles, you’ll be on your way to creating a cozy and stylish sweater in no time.
This pattern allows you to customize your sweater to fit your personal style and preferences. You can choose your favorite yarn color to create a sweater that matches your wardrobe, or experiment with different stitch patterns and textures to add a unique touch to your design. Whether you’re knitting for yourself or as a gift for a loved one, this simple v neck sweater knitting pattern is sure to be a hit.
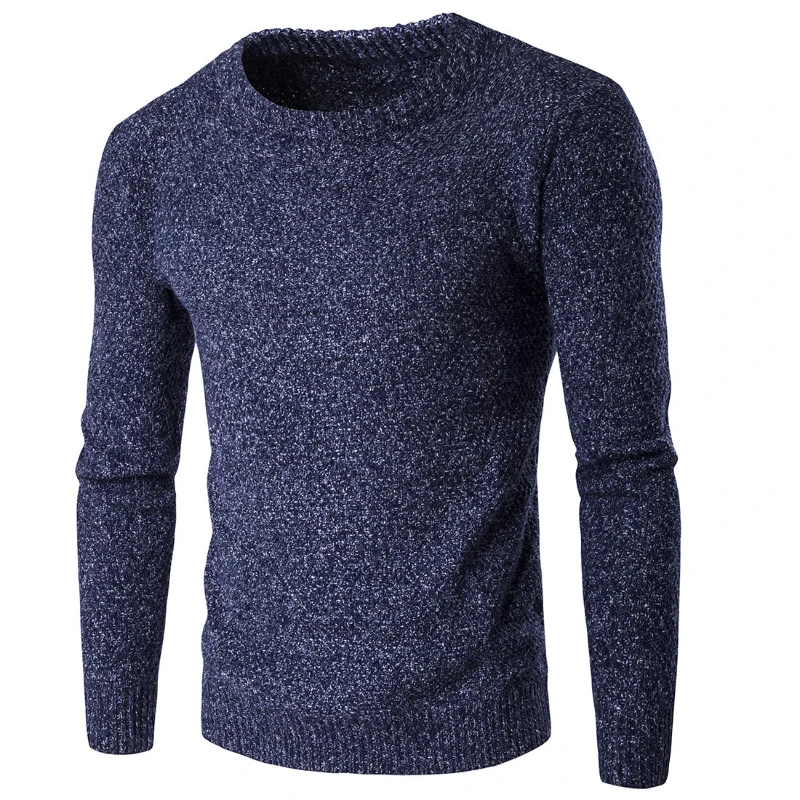
Simple V Neck Sweater Knitting Pattern
If you’re looking for a beginner-friendly knitting project that will result in a cozy and stylish sweater, look no further than the simple V neck sweater knitting pattern. With its classic V neckline and minimalistic design, this pattern is perfect for both men and women.
To begin, gather your materials: a pair of knitting needles, yarn in your chosen color, stitch markers, and a tapestry needle. Start by casting on the required number of stitches for your size, following the pattern instructions.
The body of the sweater is worked in a combination of knit and purl stitches, creating a textured pattern that adds interest to the design. The V neck is formed by gradually decreasing stitches on either side of the center front, creating a flattering and comfortable fit.
Once the body is complete, it is time to move on to the sleeves. The sleeves can be knit in the round or flat, depending on your preference. Follow the pattern instructions for shaping the sleeves and continue knitting until they reach the desired length.
Once all pieces are complete, it’s time to assemble the sweater. Use the tapestry needle to sew the shoulder seams together, leaving an opening for the neckline. Then, sew the side seams together, leaving openings for the sleeves. Finally, pick up stitches around the neckline and knit a ribbed collar to finish off the sweater.
With just a few easy steps, you’ll have a beautiful and comfortable V neck sweater that you can wear proudly. Experiment with different yarn colors and textures to create a sweater that matches your personal style. Whether you’re a seasoned knitter or just starting out, this simple V neck sweater knitting pattern is sure to be a rewarding project.
Materials Needed

Before you get started on your simple v neck sweater knitting project, you’ll need to gather the necessary materials. Here’s a list of what you’ll need:
- Yarn: Choose a yarn that is suitable for the pattern and will give you the desired finished sweater. Make sure to check the recommended gauge for the pattern to ensure the correct fit.
- Knitting Needles: You’ll need a pair of knitting needles in the size recommended for the pattern, usually circular needles or straight needles.
- Tape Measure: This will be essential for measuring your gauge and determining the correct size of your sweater.
- Stitch Markers: These little markers will help you keep track of your stitches and any pattern repeats.
- Yarn Needle: You’ll need a yarn needle or tapestry needle for weaving in ends and seaming your sweater together.
- Scissors: A pair of small, sharp scissors will come in handy for cutting your yarn when needed.
- Stitch Holder: Sometimes you may need a stitch holder to hold stitches while you work on other parts of your sweater.
Once you have gathered all of these materials, you’ll be ready to start knitting your simple v neck sweater. Make sure to read through the pattern thoroughly before beginning to ensure you understand all the instructions and techniques required. Happy knitting!
Choosing the Right Yarn
When it comes to knitting a simple v-neck sweater, choosing the right yarn is crucial. The yarn you select will determine the overall look and feel of your finished project. There are several factors to consider when making your decision.
Fiber Content: The first thing to consider is the fiber content of the yarn. Wool is a popular choice for sweaters as it is warm, lightweight, and durable. However, if you are allergic to wool or prefer a different fiber, there are plenty of alternatives available such as cotton, acrylic, or alpaca.
Weight: The weight of the yarn is another important consideration. It can affect the drape and the overall feel of the sweater. For a v-neck sweater, a medium-weight yarn is typically a good choice. It should be thick enough to provide warmth and structure, but not too bulky.
Texture: The texture of the yarn can also play a role in the final look of your sweater. Smooth, plied yarns can create a more polished and even fabric, while yarns with a halo or a bouclé texture can add interest and dimension. Consider the stitch pattern you plan to use and how it will interact with the yarn’s texture.
Color: Finally, think about the color of the yarn. A simple v-neck sweater can look elegant in a neutral shade, or you can add a pop of color to make it more vibrant and eye-catching. Consider your personal style and the colors that suit you best when making your choice.
In conclusion, selecting the right yarn for your simple v-neck sweater is crucial for achieving the desired result. Consider the fiber content, weight, texture, and color to make an informed decision. With the right yarn, you’ll be on your way to knitting a cozy and stylish sweater that you’ll love to wear.
Selecting the Appropriate Needle Size

When knitting a simple v neck sweater, it is important to select the appropriate needle size to achieve the desired gauge and fit. The needle size will determine the tension and size of the stitches, which in turn will affect the overall look and feel of the sweater.
Factors to Consider
When selecting the needle size, there are several factors to consider. The first is the recommended gauge for the pattern. The gauge is the number of stitches and rows per inch that the designer has specified for the sweater. It is crucial to match this gauge in order to achieve the correct size and fit. Using a smaller needle size will result in tighter stitches and a smaller finished garment, while a larger needle size will create looser stitches and a larger finished garment.
The second factor to consider is the yarn weight. Different yarn weights require different needle sizes to achieve the desired gauge. For a simple v neck sweater, typically a medium weight yarn, such as worsted or aran, is used. The recommended needle size for this type of yarn is usually between US 7-9 (4.5-5.5 mm). However, it is important to check the yarn label for specific recommendations as some yarns may require a different needle size.
Tips for Selecting the Needle Size
Here are some tips to help you select the appropriate needle size for your simple v neck sweater:
- Always check the gauge swatch. Before starting the sweater, it is essential to knit a gauge swatch and measure it to ensure that you are obtaining the correct number of stitches and rows per inch. If the gauge is off, you may need to adjust your needle size.
- Consider the fabric drape. The needle size will not only affect the size of the stitches but also the fabric drape. A smaller needle size will create a denser and stiffer fabric, while a larger needle size will result in a looser and drapier fabric. Consider the desired look and feel of your sweater when selecting the needle size.
- Experiment with different needle sizes. If you are unsure which size to choose, you can always experiment with different needle sizes by knitting small swatches and comparing the results. This will give you a better understanding of how different needle sizes affect the final fabric.
By considering the recommended gauge, yarn weight, and following these tips, you can select the appropriate needle size for your simple v neck sweater and ensure that it turns out just right.
Gauge Swatch

Before starting your simple v neck sweater knitting pattern, it is important to create a gauge swatch to ensure that your finished sweater will fit properly. A gauge swatch is a small sample of knitting that you work up using the same yarn and needles that you will be using for your project. By measuring the gauge swatch, you can determine how many stitches and rows you need to achieve the desired measurements for your sweater.
To create a gauge swatch for your simple v neck sweater, cast on a few more stitches than the recommended number for 4 inches. For example, if the pattern recommends 20 stitches for 4 inches, cast on 24 stitches. Knit in the specified pattern for a few inches, making sure to keep track of your row count.
Once your gauge swatch is complete, lay it flat and use a ruler or tape measure to measure the number of stitches and rows within a 4-inch square. Compare these measurements to the gauge specified in your pattern. If your gauge is too tight, try using larger needles. If your gauge is too loose, try using smaller needles. Repeat the process until your gauge matches the pattern’s specifications.
Creating a gauge swatch may seem like an extra step, but it is crucial for ensuring that your simple v neck sweater turns out the way you want it to. Taking the time to work up a gauge swatch will help you avoid the disappointment of spending hours knitting a sweater that ends up being too small or too large.
Casting on Stitches

When starting a knitting project, one of the first steps is to cast on stitches. This is the process of creating the initial row of stitches on the knitting needle. There are different methods for casting on stitches, but one common method is the long-tail cast on.
The long-tail cast on is popular because it creates a neat and flexible edge. To begin, you will need to estimate the amount of yarn needed to cast on the desired number of stitches. This can be done by leaving a long tail of yarn, approximately three times the width of the knitting project.
To perform the long-tail cast on, hold the knitting needle in your right hand and the tail and working yarn in your left hand. Make a slipknot with both strands of yarn, placing the loop on the needle. Then, using the needle, insert it into the loop of the slipknot and tighten it onto the needle.
Next, hold the needle with the slipknot in your right hand and the working yarn in your left hand. Insert the needle into the slipknot, going under the tail yarn and over the working yarn. Grab the working yarn with the needle and pull it through the slipknot, creating a new loop on the needle.
Continue this process of inserting the needle into the loop, going under the tail yarn and over the working yarn, and pulling the working yarn through to create new loops. Repeat until you have cast on the desired number of stitches.
Once you have cast on all the stitches, you can proceed with the rest of the knitting pattern. Casting on stitches is an important technique to master, as it sets the foundation for the entire project.
Knitting the Ribbing
Before you begin knitting the ribbing for your simple V-neck sweater, you must first cast on the required number of stitches using the long tail cast-on method. Make sure to leave a long enough tail so that you can weave it in later. The ribbing is typically worked in a combination of knit and purl stitches to create a stretchy and textured fabric.
To knit the ribbing, follow these steps:
- Start by knitting the first stitch.
- Next, purl the next stitch. Repeat this pattern of knitting and purling until you reach the end of the first row.
- For the subsequent rows, continue knitting the knits and purling the purls. This means that if you see a knit stitch, knit it, and if you see a purl stitch, purl it.
- Continue working in this pattern for the desired length of ribbing. The most common ribbing lengths are 1 inch or 2 inches, but you can adjust the length according to your preference.
- Once you have finished knitting the ribbing, you can bind off the stitches using your preferred bind-off method. Make sure to leave a long enough tail for sewing or seaming the ribbing to the rest of the sweater.
By following these steps, you will successfully knit the ribbing for your simple V-neck sweater. The ribbing adds a professional and polished touch to your garment while also providing a snug and comfortable fit.
Working the Body

Once you have completed the ribbing and set up rows, it’s time to start working on the body of your v-neck sweater. In this section, we will guide you through the steps to create a beautiful and comfortable fit.
1. Knitting the Main Body
Continue knitting in stockinette stitch, working evenly on both the front and back of the sweater. Remember to always follow the pattern’s instructions for shaping and decreases.
You can add your desired design elements such as cables or lace patterns to make your sweater unique and personalized. Just make sure to keep track of any pattern repeats.
2. Shaping the Waist

To create a fitted look, you will need to shape the waist of your sweater. This is typically done by gradually decreasing the number of stitches as you approach the waistline. Follow the pattern’s instructions for the specific decreases and how often they should be made.
It’s important to maintain an even tension while shaping the waist to ensure that the sweater fits properly. Take your time and double-check your stitch count frequently to avoid any mistakes.
3. Shaping the Armholes

As you continue knitting the body, you will eventually reach the point where you need to shape the armholes. This is done by binding off a certain number of stitches at each side of the sweater.
Be sure to follow the pattern’s instructions for the armhole shaping, as it may vary depending on the size and style of the sweater. It’s important to maintain an even tension while binding off to prevent any gaps or inconsistencies.
4. Knitting to the Desired Length
Continue knitting the body of the sweater until you reach your desired length. This will vary depending on your personal preference and the pattern’s instructions.
Measure your progress frequently to ensure that you are knitting the body to the correct length. You can use a tape measure or simply try the sweater on to get an accurate measurement.
By following these steps, you will be able to successfully work the body of your v-neck sweater. Remember to take your time, follow the pattern’s instructions, and regularly check your progress for a beautiful and well-fitting garment.
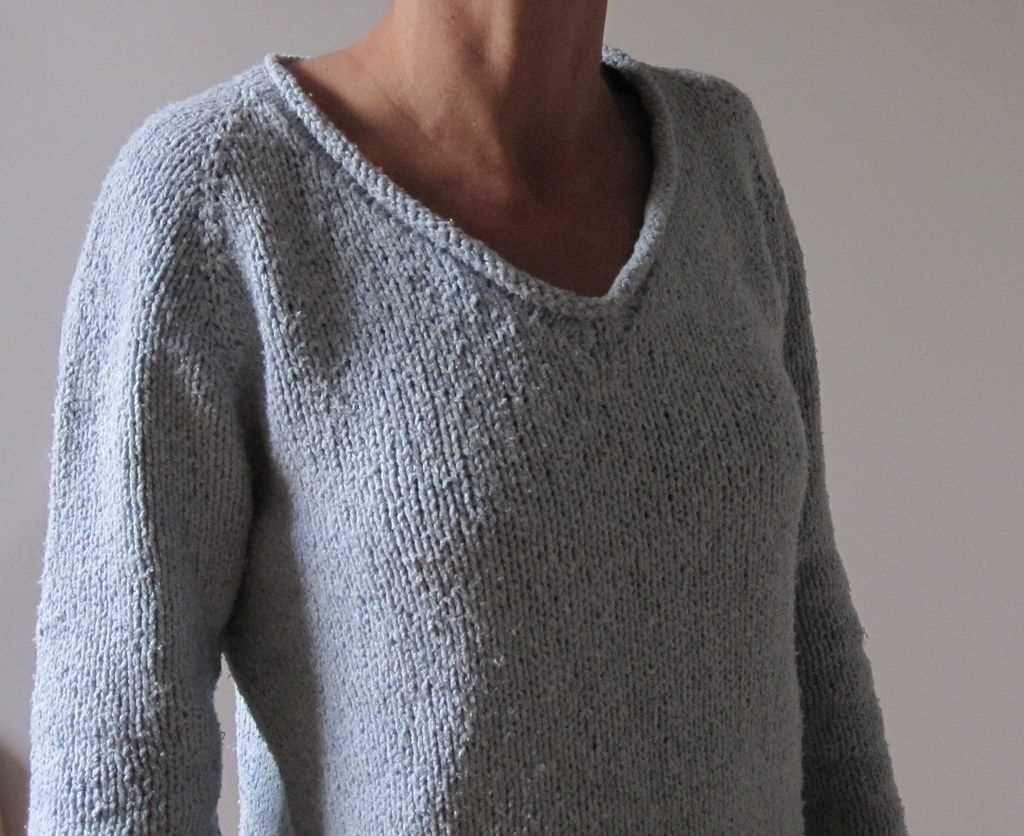
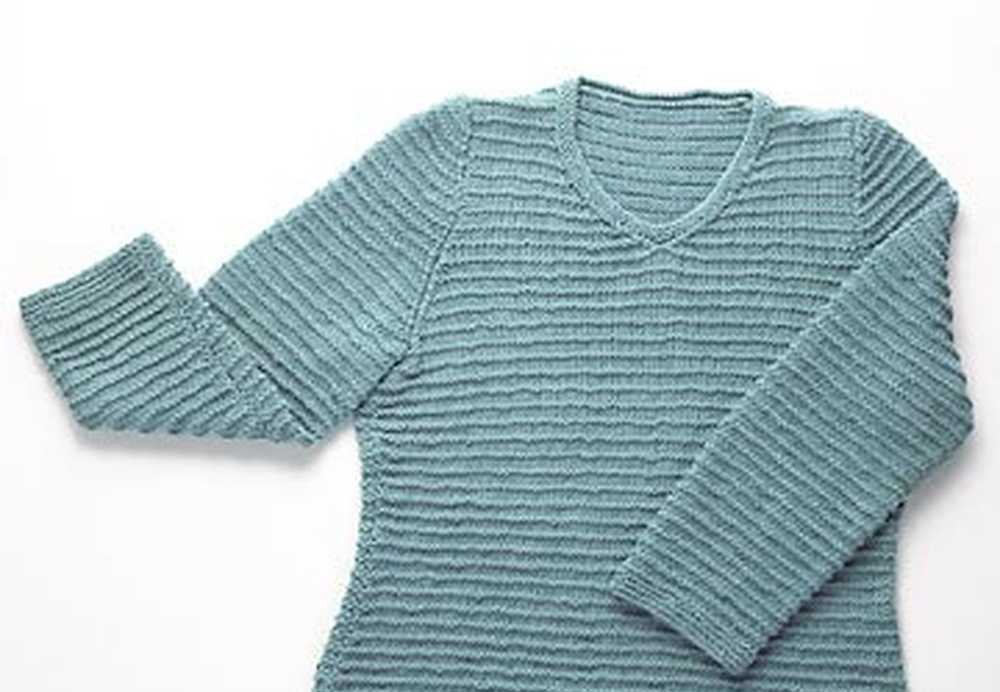
Shaping the V Neck
When knitting a simple v neck sweater, shaping the v neck is an important step that gives the sweater its distinctive neckline. To shape the v neck, you will need to follow a specific pattern that involves decreasing stitches on each side of the neck opening.
Step 1: To begin shaping the v neck, you will first need to determine the desired width of the neck opening. This will depend on the size of the sweater and personal preference. Once you have determined the width, mark the center stitch of the neck opening.
Step 2: Starting from the right side of the sweater, work the pattern as instructed until you reach the center stitch. Once you reach the center stitch, you will start decreasing stitches on both sides of the neck opening.
Step 3: To decrease stitches, you can use techniques such as knit two stitches together (k2tog) or slip, knit, pass slipped stitch over (skp). These techniques help reduce the number of stitches and shape the v neck.
Step 4: Continue working the pattern, decreasing stitches on each side of the neck opening until you have reached the desired shape and width of the v neck. Be sure to follow the pattern instructions carefully to maintain the correct stitch count and shaping.
Step 5: Once you have finished shaping the v neck, you can then continue working the rest of the sweater according to the pattern instructions. The v neck should now be clearly defined and provide a stylish and flattering neckline for your sweater.
Knitting the Sleeves

When it comes to knitting the sleeves for your simple v neck sweater, there are a few steps to follow to ensure a successful result. First, you will need to determine the number of stitches you will need for each sleeve. This will depend on the size of the sweater and your gauge. It’s always a good idea to make a gauge swatch before starting your project to ensure accuracy.
Once you have determined the number of stitches, you can begin knitting the sleeves. Start by casting on the required number of stitches and join in the round. You can use double-pointed needles or a circular needle, depending on your preference. It’s helpful to use stitch markers to indicate the beginning of the round.
Row 1: Knit all stitches in the round.
Row 2: Purl all stitches in the round.
Repeat these two rows until the sleeve reaches the desired length, typically measured from the underarm. Remember to check your gauge as you go to ensure the sleeve matches the rest of the sweater in terms of size and fit.
Once the sleeve is the desired length, you can begin shaping the sleeve cap. This is done by decreasing stitches gradually to create a curved shape. There are various methods for shaping the sleeve cap, such as using decreases at regular intervals or using short rows. Follow the instructions provided in your knitting pattern for shaping the sleeve cap.
After shaping the sleeve cap, you can bind off the remaining stitches and weave in any loose ends. Repeat these steps to knit the second sleeve, and soon you’ll have a completed simple v neck sweater with beautiful, cozy sleeves!
Finishing Touches
Once you have finished knitting your simple v neck sweater, it’s time to add the finishing touches to complete the look. These final steps will give your sweater a polished and professional appearance.
1. Blocking

Before you start adding any details to your sweater, it’s important to block it. Blocking involves soaking the finished garment in water and then shaping it to the desired dimensions. This step helps to even out the stitches and ensure that your sweater maintains its shape. You can use blocking mats and pins to help you achieve the desired measurements. Allow the sweater to dry completely before moving on to the next step.
2. Neckband
One of the finishing touches for your v neck sweater is the neckband. This is where you will pick up stitches along the neck opening and create a ribbed or garter stitch band to frame the neckline. The neckband adds structure and stability to the sweater and also gives it a clean and professional look. You can choose to knit the neckband in a contrasting color or use the same yarn as the body of the sweater.
3. Seaming
Seaming is another important step in finishing your sweater. This involves sewing together the different pieces of the sweater to create a seamless and polished appearance. You can use a mattress stitch or a whip stitch to join the front and back pieces, sleeves, and sides. Take your time with this step to ensure that your seams are neat and even.
4. Buttons and Trims
If your sweater has a button-up front or any other decorative trims, now is the time to add them. Choose buttons that complement the color and style of your sweater. Sew them on securely and make sure they are evenly spaced. You can also add any other trims or embellishments, such as ribbon or crochet edging, to add a personal touch to your sweater.
5. Finishing Details
Finally, take a close look at your sweater and make any necessary adjustments or repairs. Check for any loose threads or uneven stitches and fix them as needed. You can also block the sweater again after all the finishing touches to ensure that it maintains its shape. Give your sweater a gentle steam or press to smooth out any wrinkles and give it that final touch of perfection.
By following these steps and paying attention to the finishing touches, you can turn a simple v neck sweater into a beautifully crafted garment that you can be proud to wear or gift to someone special. Take your time and enjoy the process of adding those final details to bring your creation to life.
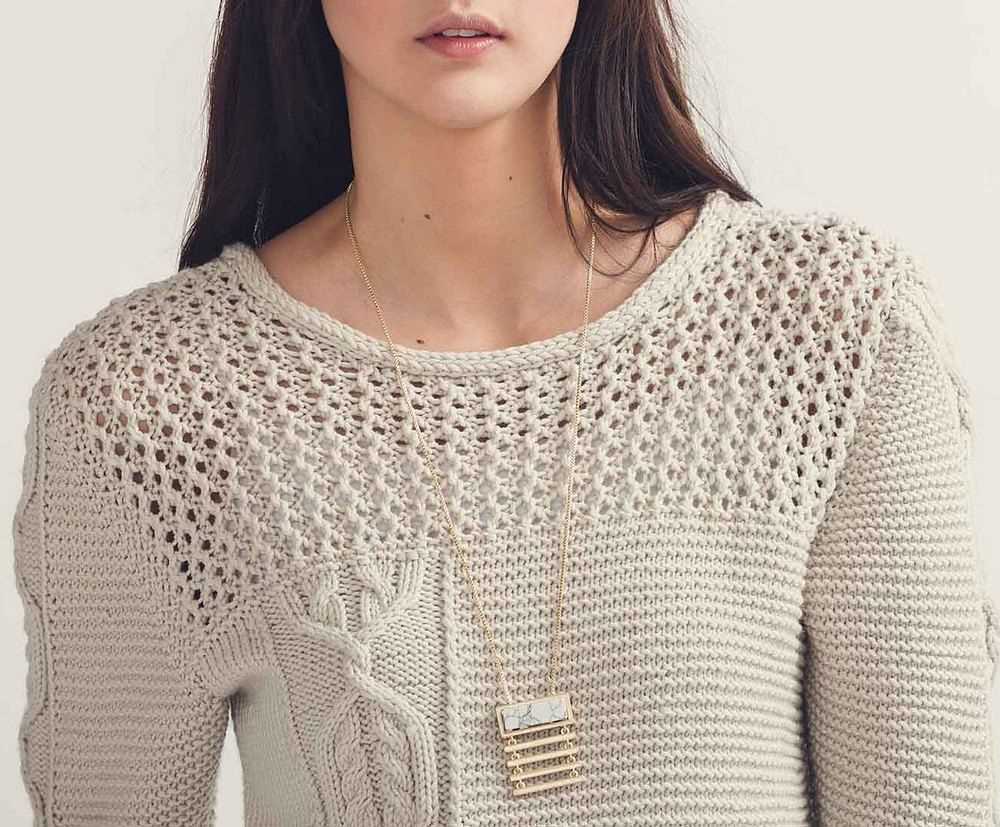
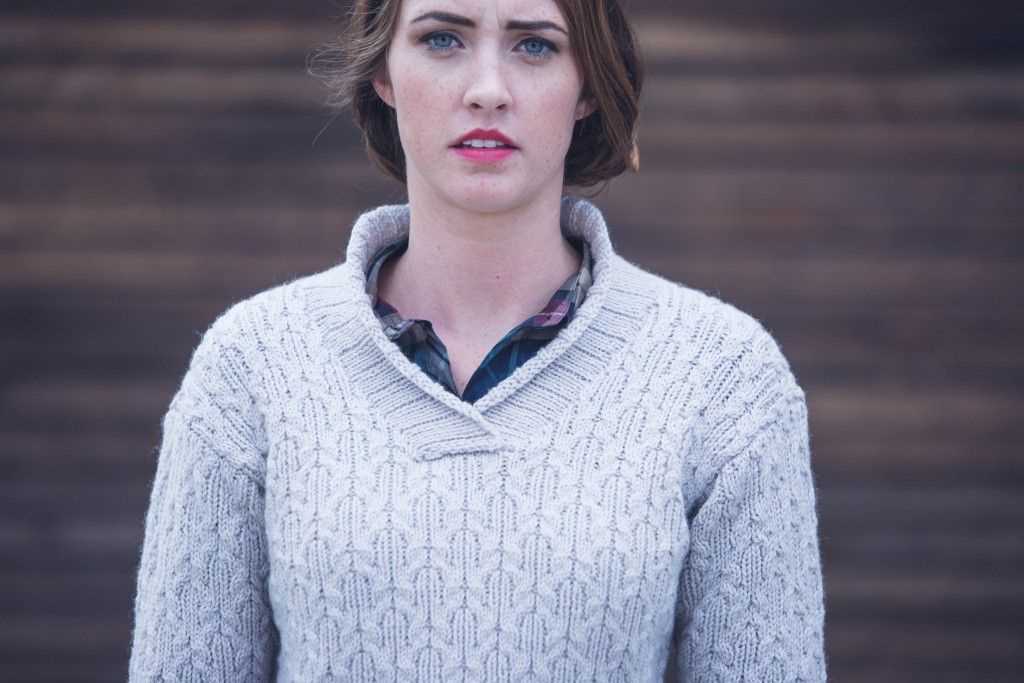
Styling and Wearing Your V Neck Sweater

Once you have finished knitting your v neck sweater using the simple pattern, it’s time to style and wear it with confidence. Here are a few tips on how to make the most of your new sweater:
1. Layer It
One of the great things about a v neck sweater is that it can easily be layered over other garments. Pair it with a collared shirt for a smart and polished look, or wear it over a simple t-shirt for a more casual and relaxed outfit. Experiment with different layering options to create various styles.
2. Dress It Up or Down
The versatility of a v neck sweater allows you to dress it up or down depending on the occasion. For a dressier look, wear your sweater with tailored pants or a skirt, and accessorize with statement jewelry and heels. To achieve a more casual look, pair it with your favorite jeans and sneakers. The possibilities are endless!
3. Play with Colors
Don’t be afraid to experiment with different colors when it comes to your v neck sweater. Neutral shades like black, white, gray, or navy are timeless options that can be easily paired with any outfit. However, you can also opt for bolder colors or even a patterned yarn to add a pop of color and make a statement.
4. Take Care of Your Sweater
Proper care is essential to make your v neck sweater last. Always check the washing instructions on the yarn label and follow them accordingly. Hand washing is usually recommended for knitted garments to prevent stretching or damage. Lay the sweater flat to dry and avoid hanging it to maintain its shape.
With these styling tips in mind, you’re ready to rock your new v neck sweater with confidence and flair. Whether you’re dressing it up for a special occasion or keeping it casual for everyday wear, your hand-knit sweater is sure to be a cozy and stylish addition to your wardrobe.
Q&A:
Can you recommend a simple v neck sweater knitting pattern?
Yes, I can recommend a simple v neck sweater knitting pattern. There are many free patterns available online, such as those on websites like Ravelry or AllFreeKnitting. These patterns usually include detailed instructions and a list of required materials. You can also find v neck sweater patterns in knitting magazines or books.
What skill level is required to knit a v neck sweater?
Knitting a v neck sweater generally requires intermediate or advanced knitting skills. The pattern may involve techniques such as shaping, increases and decreases, and knitting with multiple needles or in the round. If you are a beginner knitter, it might be helpful to start with simpler projects before attempting a v neck sweater.
What materials do I need to knit a v neck sweater?
The materials required to knit a v neck sweater will depend on the specific pattern you choose. In general, you will need yarn in the weight and color specified by the pattern, knitting needles in the size recommended by the pattern, stitch markers, a tapestry needle for sewing seams or weaving in ends, and any additional notions or embellishments mentioned in the pattern.
How long does it usually take to knit a v neck sweater?
The time it takes to knit a v neck sweater can vary depending on factors such as the complexity of the pattern, your knitting speed, and the amount of time you can dedicate to the project. On average, it may take several weeks to a month or more to complete a v neck sweater. It’s important to be patient and enjoy the process of knitting.
Can I customize the v neck sweater pattern to fit my size?
Yes, you can customize the v neck sweater pattern to fit your size. Most patterns will include instructions for multiple sizes, and some may even provide guidance on how to adjust the pattern for a better fit. You can also make modifications such as adjusting the length of the sweater, changing the sleeve style, or adding or removing waist shaping according to your preferences.
What is a simple v neck sweater knitting pattern?
A simple v neck sweater knitting pattern is a set of instructions that guide you in creating a basic v neck sweater using knitting techniques. It typically includes details such as the size, gauge, yarn requirements, and step-by-step instructions for the specific stitches and techniques used in the pattern.