
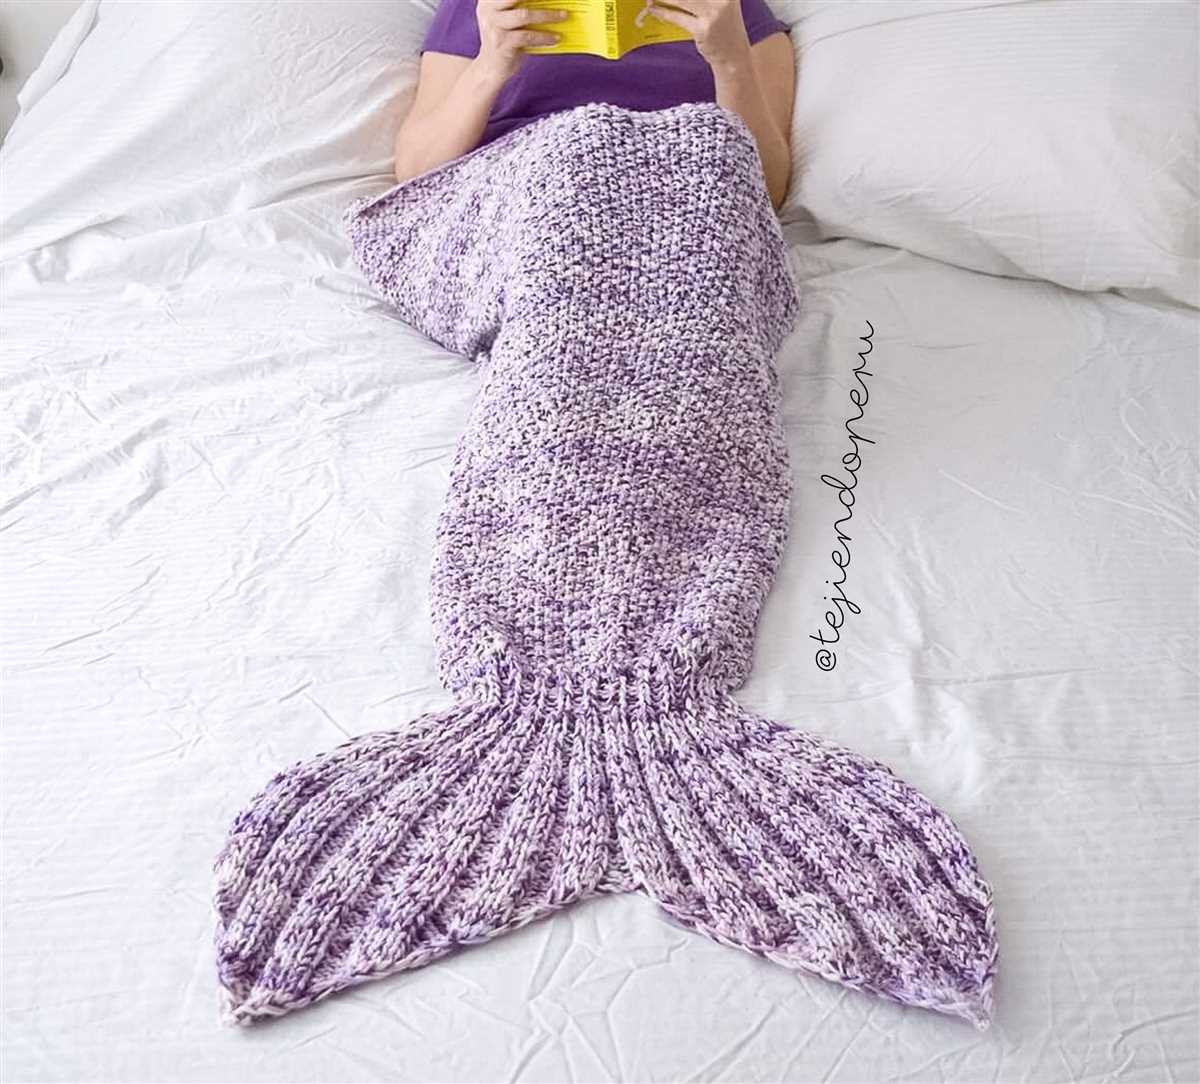
If you love to knit and have always wanted to make a unique and cozy blanket, then a mermaid tail blanket might be the perfect project for you. Knitting a mermaid tail blanket is a fun and creative way to add some whimsy to your knitting repertoire. Whether you are knitting for yourself, a friend, or a loved one, the mermaid tail blanket is sure to bring joy and warmth.
This article will provide you with a step-by-step guide to knitting your own mermaid tail blanket. We will cover everything from choosing the right yarn and needles to understanding the pattern and creating the tail shape. Whether you are an experienced knitter or a beginner, this pattern is accessible and enjoyable, and it will allow you to create a beautiful and functional blanket.
With this knit mermaid tail blanket pattern, you will be able to create a cozy and unique blanket that will have everyone asking where you got it. So grab your knitting needles and let’s get started!
Knit Mermaid Tail Blanket Pattern
Are you looking for a fun and cozy project to knit? Why not try making a mermaid tail blanket? These blankets are not only cute and whimsical, but they also keep you warm and cozy. Whether you want to make one for yourself or as a gift for someone special, this knit mermaid tail blanket pattern is a great choice.
Materials Needed:
- Knitting needles (size will depend on your desired gauge)
- Yarn (choose a soft and warm yarn in your preferred colors)
- Tapestry needle
- Scissors
Pattern:
- Start by casting on the desired number of stitches, depending on the size of the blanket you want to make. Make sure to leave a long tail for sewing up the bottom of the blanket later.
- Begin knitting in the round, using the stitch pattern of your choice. You can try a simple stockinette stitch or experiment with different patterns for the body of the blanket.
- Continue knitting until the body of the blanket reaches the desired length. Remember to leave enough yarn for binding off and sewing up the top of the blanket later.
- Once the body is complete, it’s time to shape the tail. You can do this by decreasing stitches gradually to create a tapered effect. Follow a pattern or create your own shaping design.
- After shaping the tail, bind off all stitches and weave in any loose ends.
- Now, fold the blanket in half and sew up the bottom using the long tail left from casting on. This will create a pocket for your feet.
- Finally, finish off the top of the blanket by sewing up the opening using the remaining yarn. You can also add a drawstring or ribbon for added detail.
Once your mermaid tail blanket is complete, you can snuggle up in it and enjoy the cozy and magical feeling of being a mermaid. It’s a great project for beginner knitters or anyone looking for a fun and unique knitting project.
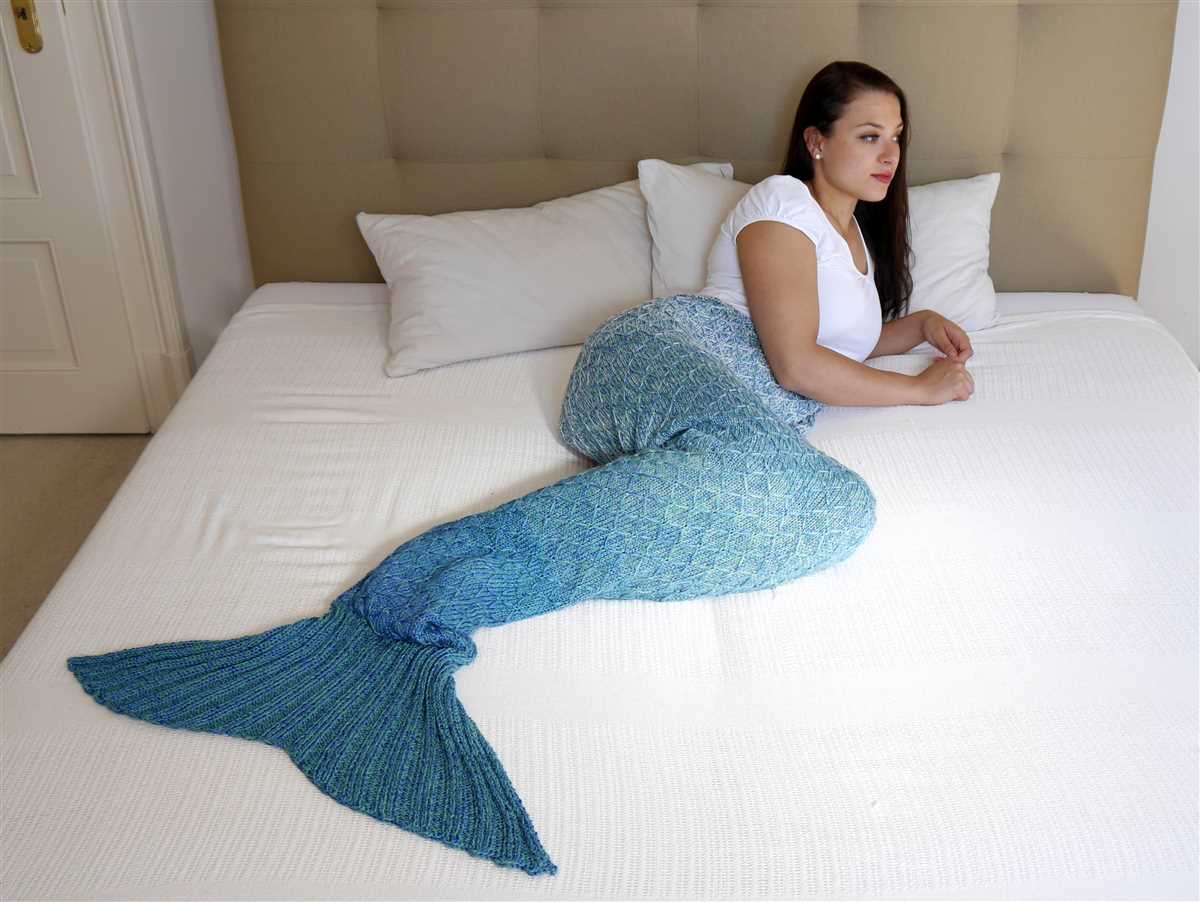
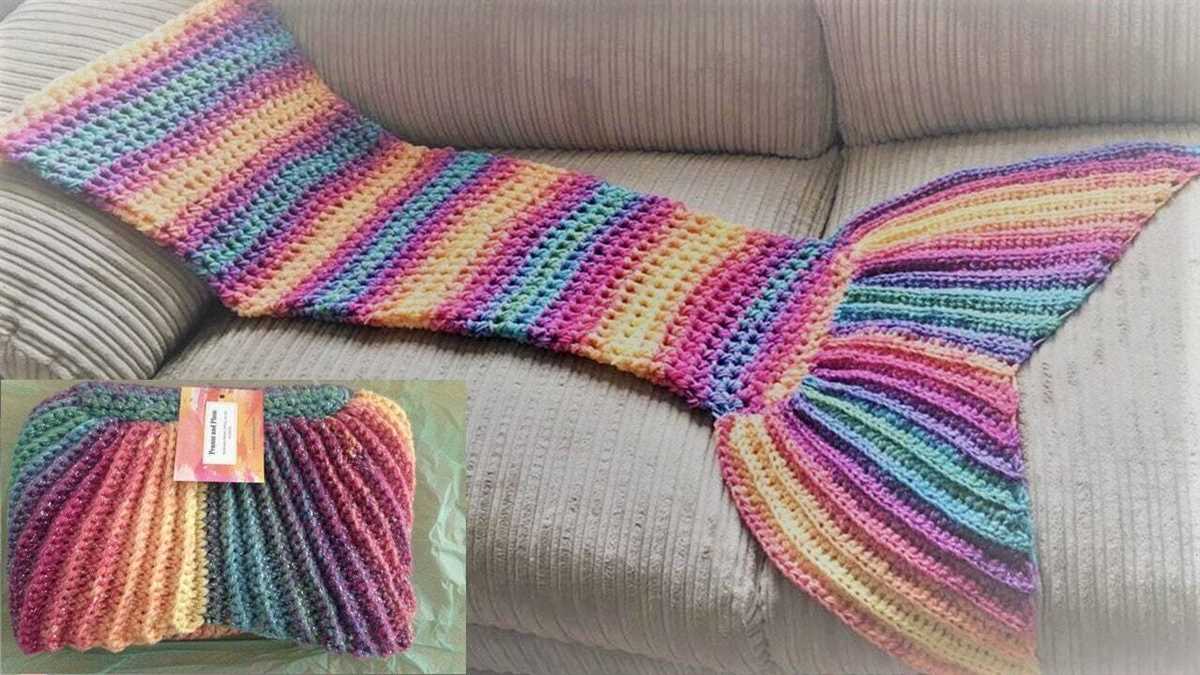
Mermaid Tail Blankets: A Trendy and Fun Knitting Project
Knitting has always been a popular pastime, allowing people to create beautiful and functional items with just a few simple tools. One of the latest trends in knitting is the mermaid tail blanket. These cozy and whimsical blankets are inspired by the mythical creatures of the sea and have become a must-have accessory for those who want to add a touch of magic to their home.
Mermaid tail blankets are not only trendy but also fun to make. With a little bit of knitting knowledge and some basic supplies, you can create your very own mermaid tail blanket in no time. The pattern typically involves knitting in the round and using simple stitches like knit and purl, making it accessible to beginners as well as experienced knitters.
Materials Needed:
- Worsted weight yarn in your choice of colors
- Circular knitting needles
- Cable needle
- Tapestry needle
Pattern Instructions:

- Cast on the desired number of stitches, depending on the size of the blanket you want to make.
- Join the round and knit in the round until the mermaid tail reaches the desired length.
- Once the tail is complete, you can add an optional fin by knitting a separate piece and sewing it onto the bottom of the tail.
- Weave in any loose ends and your beautiful mermaid tail blanket is ready to use!
With endless possibilities for customization, mermaid tail blankets are a fun and creative way to show off your knitting skills. You can experiment with different colors, stitch patterns, and embellishments to make each blanket truly unique. Whether you want to make one for yourself or as a gift for a loved one, a mermaid tail blanket is sure to bring a touch of enchantment to any home.
Choosing the Right Yarn and Needles for your Mermaid Tail Blanket
When it comes to creating your own mermaid tail blanket, one of the most important decisions is choosing the right yarn and needles. The type of yarn you select will greatly impact the look, feel, and durability of your finished blanket.
Yarn: Your yarn choice will depend on your personal preferences and the desired effect for your mermaid tail blanket. If you want a soft and cozy blanket, consider using a chunky or super bulky weight yarn. These yarns will provide a warm and plush feel for your blanket. Alternatively, if you prefer a lighter and more intricate design, you can opt for a lighter weight yarn, such as sport or DK weight.
When selecting the yarn, also consider the fiber content. Acrylic yarn is a popular choice for mermaid tail blankets as it is affordable, easy to care for, and comes in a wide range of colors. However, if you prefer a more luxurious option, you can choose yarns made of natural fibers such as wool or cotton.
Needles: The size of your needles will depend on the thickness of the yarn you choose. If you are using a chunky or super bulky yarn, you will need larger needles to accommodate the thickness. On the other hand, if you are working with a lighter weight yarn, you will need smaller needles to create finer stitches.
In addition to the needle size, you can also consider the type of needles you prefer. Circular needles are often recommended for large projects like mermaid tail blankets because they can hold a large number of stitches and distribute the weight of the blanket more evenly. However, if you prefer working with straight needles, you can still use them for your blanket, just keep in mind that you may need longer needles to accommodate the width of the blanket.
Ultimately, the choice of yarn and needles for your mermaid tail blanket will depend on your personal preferences and the look you want to achieve. Experiment with different yarns and needle sizes to find the perfect combination that will result in a beautiful and comfortable blanket.
Getting Started: Casting on Stitches for your Mermaid Tail
Before you can start knitting your mermaid tail blanket, you’ll need to cast on the stitches. The number of stitches you cast on will depend on the size of your blanket and the pattern you are following. Make sure to read the instructions carefully to determine the correct number of stitches.
To cast on stitches, you’ll need a pair of knitting needles and your chosen yarn. Begin by making a slipknot and placing it on one of the knitting needles. Pull the yarn through the slipknot to secure it on the needle.
Hold the needle with the slipknot in your right hand and the other needle in your left hand. Insert the point of the left needle into the slipknot from front to back, keeping the right needle behind it. With the yarn held in your left hand, wrap it around the point of the right needle, moving from back to front.
Bring the right needle back through the slipknot, pulling the loop of yarn through to create a new stitch on the right needle. Slip this new stitch onto the left needle, sliding it down to join the other stitches. Repeat this process until you have cast on the desired number of stitches.
Remember to keep the tension of your stitches even as you cast on. If your yarn feels too tight or too loose, adjust your grip accordingly. Once you have cast on all the stitches, you’re ready to begin knitting your mermaid tail blanket!
Knitting the Body of the Mermaid Tail Blanket
After completing the fin section of the mermaid tail blanket, it’s time to start working on the body. This is where the main part of the blanket is created, providing warmth and comfort for the wearer.
To knit the body, you will continue with the same stitch pattern used for the fin or choose a different pattern to create an interesting texture. You can use a variety of stitches such as garter stitch, stockinette stitch, or ribbing to add visual interest to the body of the blanket.
When knitting the body, it’s essential to decide on the desired length of the blanket. You can measure the length from the base of the fin to the desired point where the blanket will end. This will determine how many rows you need to knit to achieve the desired length.
It’s also important to consider the size of the person who will be using the blanket. If it’s for a child, you may want to make it shorter, while for an adult, you can make it longer to provide full coverage and warmth.
Once you have determined the length, you can begin knitting the body by continuing with the chosen stitch pattern. Make sure to maintain an even tension and check the measurements periodically to ensure you’re on track to achieve the desired size.
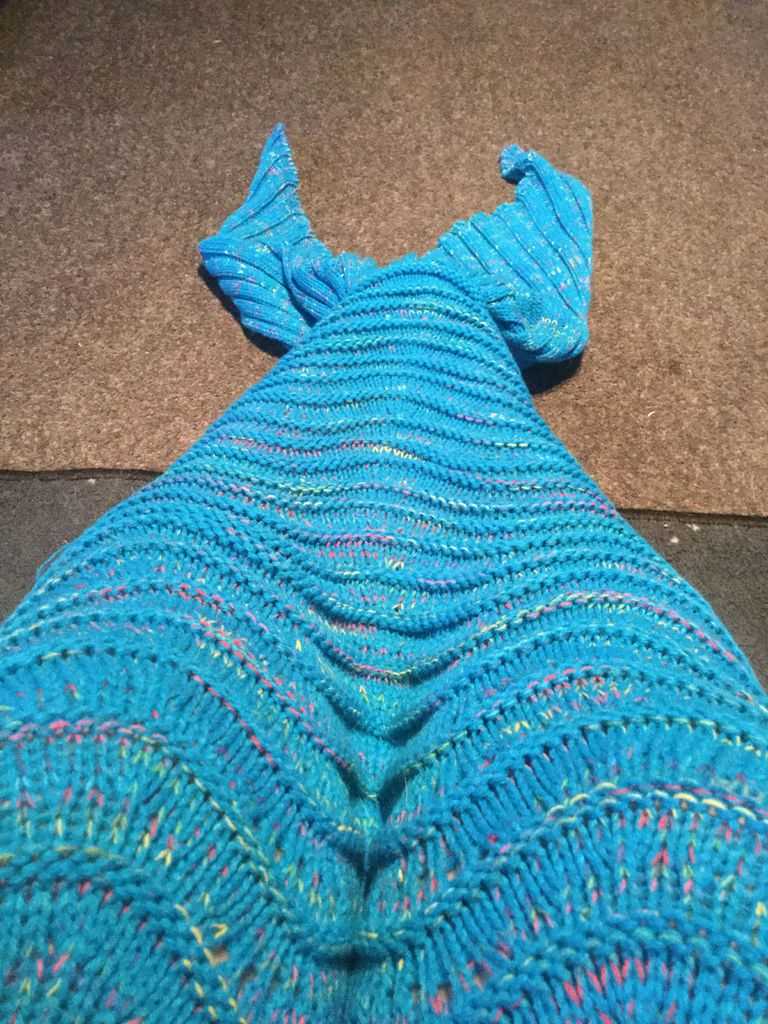
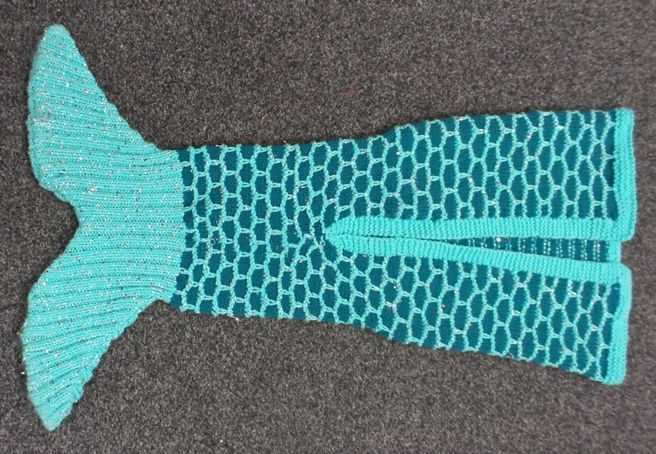
Creating the Fin: Adding Shaping and Texture
Adding a fin to your knitted mermaid tail blanket pattern not only enhances the overall visual appeal of the design but also adds a practical element for added warmth and comfort. To create a fin, you will need to incorporate shaping and texture into your knitting.
Shaping the Fin
To shape the fin, you will need to increase and decrease stitches in strategic places. You can do this by working increases and decreases at one edge of the knitting, gradually reducing or expanding the number of stitches to achieve the desired fin shape. Utilizing techniques such as knitting two stitches together or yarn over will help you create the necessary shaping.
Adding Texture
To give your fin a realistic texture, you can incorporate different stitch patterns or techniques. Consider using a combination of knit and purl stitches to create a ribbed, scale-like effect. Another option is to incorporate cables into your knitting, which will mimic the appearance of ridges on a fish’s fin. Experiment with different stitch patterns to achieve the desired texture and visual effect.
To make your fin stand out even more, you can utilize contrasting yarn colors for the textured sections. For example, you could use a variegated yarn with shades of blue or green to mimic the colors of the ocean.
Remember to consult your knitting pattern for any specific instructions on shaping and texture for the fin. By incorporating these techniques, you can create a beautifully textured and shaped fin for your knitted mermaid tail blanket, enhancing the overall design and adding an extra touch of whimsy.
Finishing Touches: Bind Off and Weaving in Ends
After completing your cozy mermaid tail blanket, the final steps are to bind off your work and weave in any loose ends to give it a polished, professional finish. Follow these simple instructions to complete your project with finesse.
Binding Off
To bind off, start by knitting the first two stitches as normal. Then, insert your left needle into the first stitch on your right needle and lift it over the second stitch and off the needle. Repeat this process until you have only one stitch left on your right needle. Cut the yarn, leaving a tail that is at least 6 inches long. Thread the tail through the last stitch to secure it, and gently pull to tighten.
Weaving in Ends
With your project now bound off, it’s time to weave in any loose ends. Thread your yarn needle with one of the yarn tails and carefully weave it through the stitches on the wrong side of your work. Be sure to secure the end by weaving it in a few different directions to prevent it from coming loose. Repeat this process with any remaining tails, making sure to weave them into the fabric as discreetly as possible.
By taking the time to properly bind off and weave in ends, you will ensure that your mermaid tail blanket not only looks great but also withstands the test of time. With these finishing touches complete, you can now enjoy snuggling up in your cozy creation or delight a loved one with a thoughtful and handmade gift.
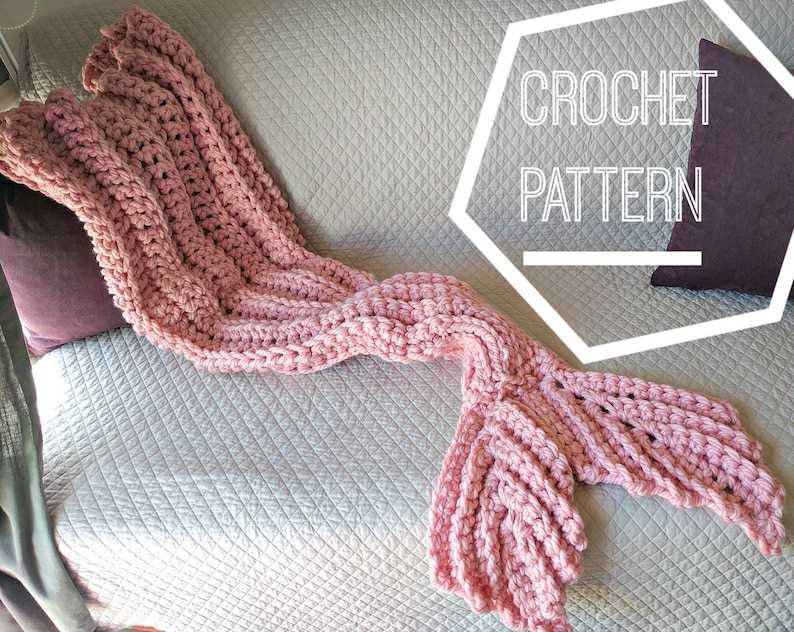
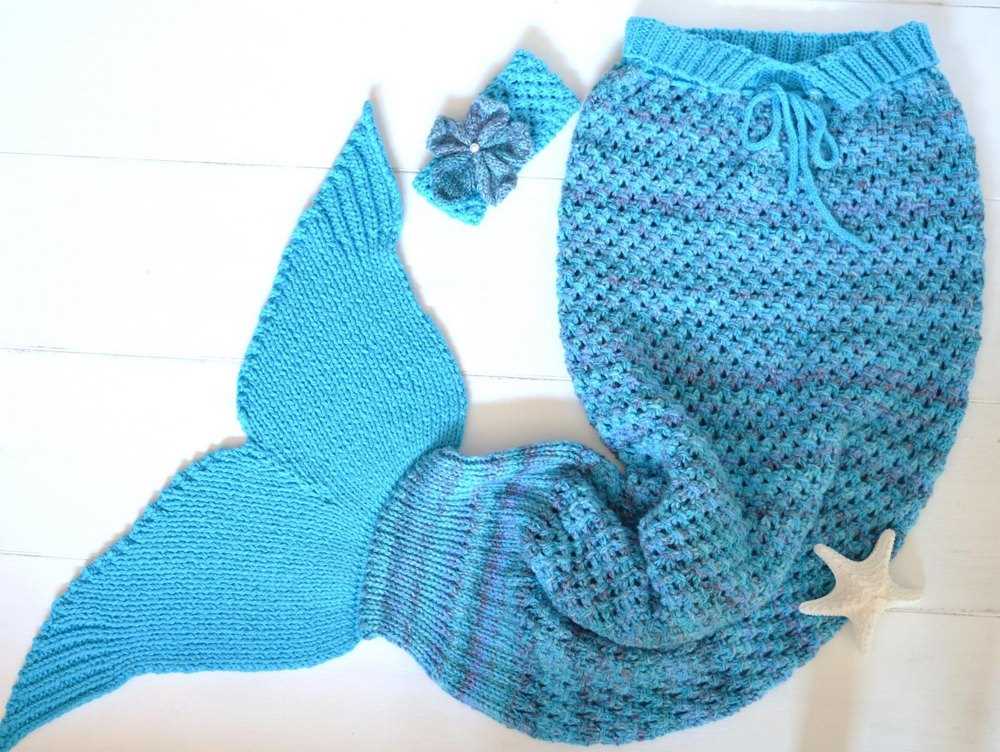
Customizing your Mermaid Tail Blanket: Embellishments and Accents
The knit mermaid tail blanket pattern provides a great canvas for adding personalized embellishments and accents to make your blanket truly unique. Whether you’re making it for yourself or as a gift, these additions can add a touch of personalization and style.
1. Shell Stitch Embellishments: One popular way to customize a mermaid tail blanket is by adding shell stitch embellishments. With a contrasting color yarn and a crochet hook, you can create beautiful shell-shaped motifs along the sides of the blanket, resembling the scales of a mermaid tail. This technique can add texture and visual interest to the design.
2. Beaded Accents: For those looking to add a bit of sparkle, consider incorporating beads into your blanket. You can place small beads sporadically throughout the knit stitches or create a beaded fringe at the bottom of the blanket. This subtle touch can add a delicate and whimsical element to your mermaid tail blanket.
3. Tail Fin Appliques: Another way to customize your mermaid tail blanket is by sewing on tail fin appliques. These can be made from felt or fabric in various colors and shapes. Sewing or gluing these appliques onto the back of the blanket can create a fun and realistic look, making your blanket resemble an actual mermaid tail.
4. Embroidery and Monograms: You can also add a personal touch to your mermaid tail blanket by using embroidery to stitch names, initials, or small designs onto the surface. Choose a contrasting thread color that complements the yarn used for the blanket to make the embroidery stand out. This way, you can customize the blanket for someone special or simply add a unique and personalized element to your own creation.
5. Ribbon and Lace Trims: To enhance the aesthetic appeal of your mermaid tail blanket, consider adding ribbon or lace trims to the edges. Sewing or attaching these delicate trims can give the blanket a finished and polished look. Choose colors and styles that complement the overall design and color palette of your blanket.
Remember, the possibilities for customizing your mermaid tail blanket are endless. Get creative and experiment with different techniques and materials to make your blanket truly one-of-a-kind.
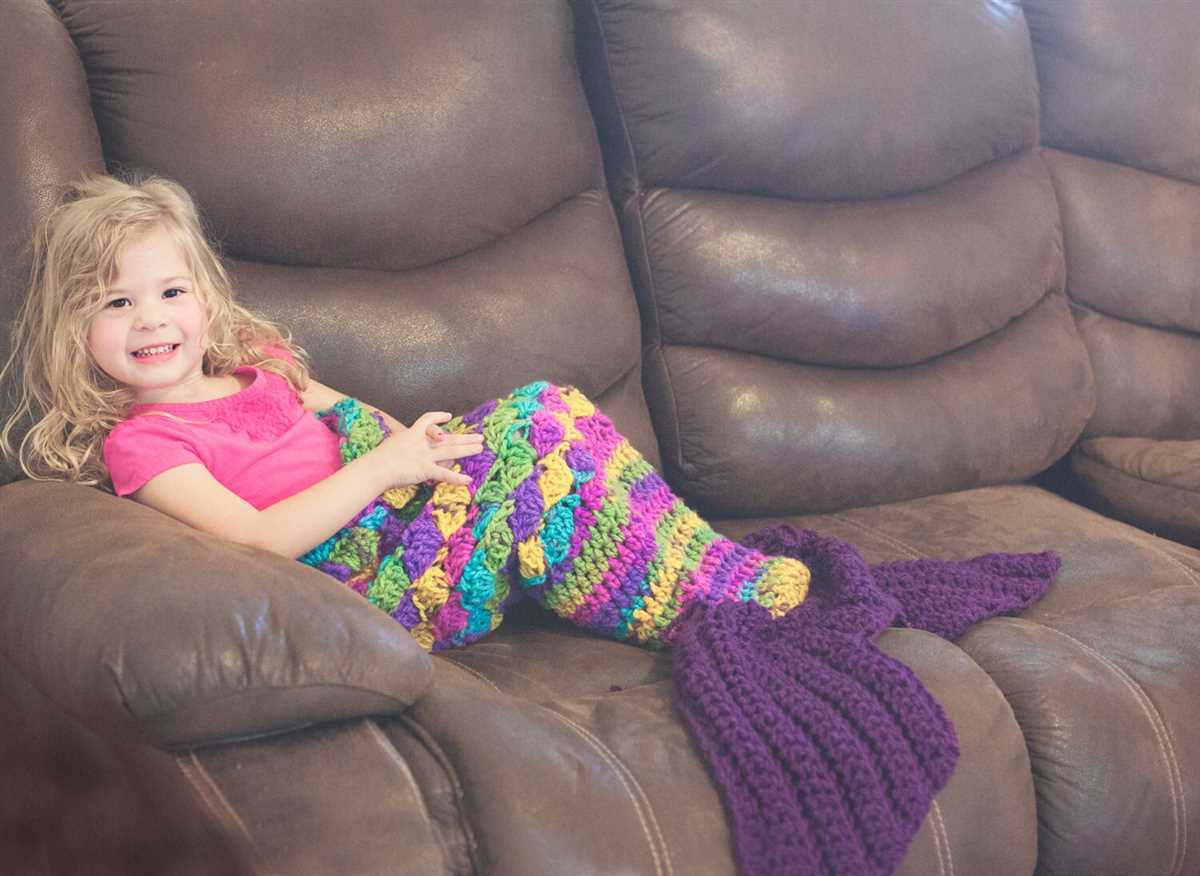
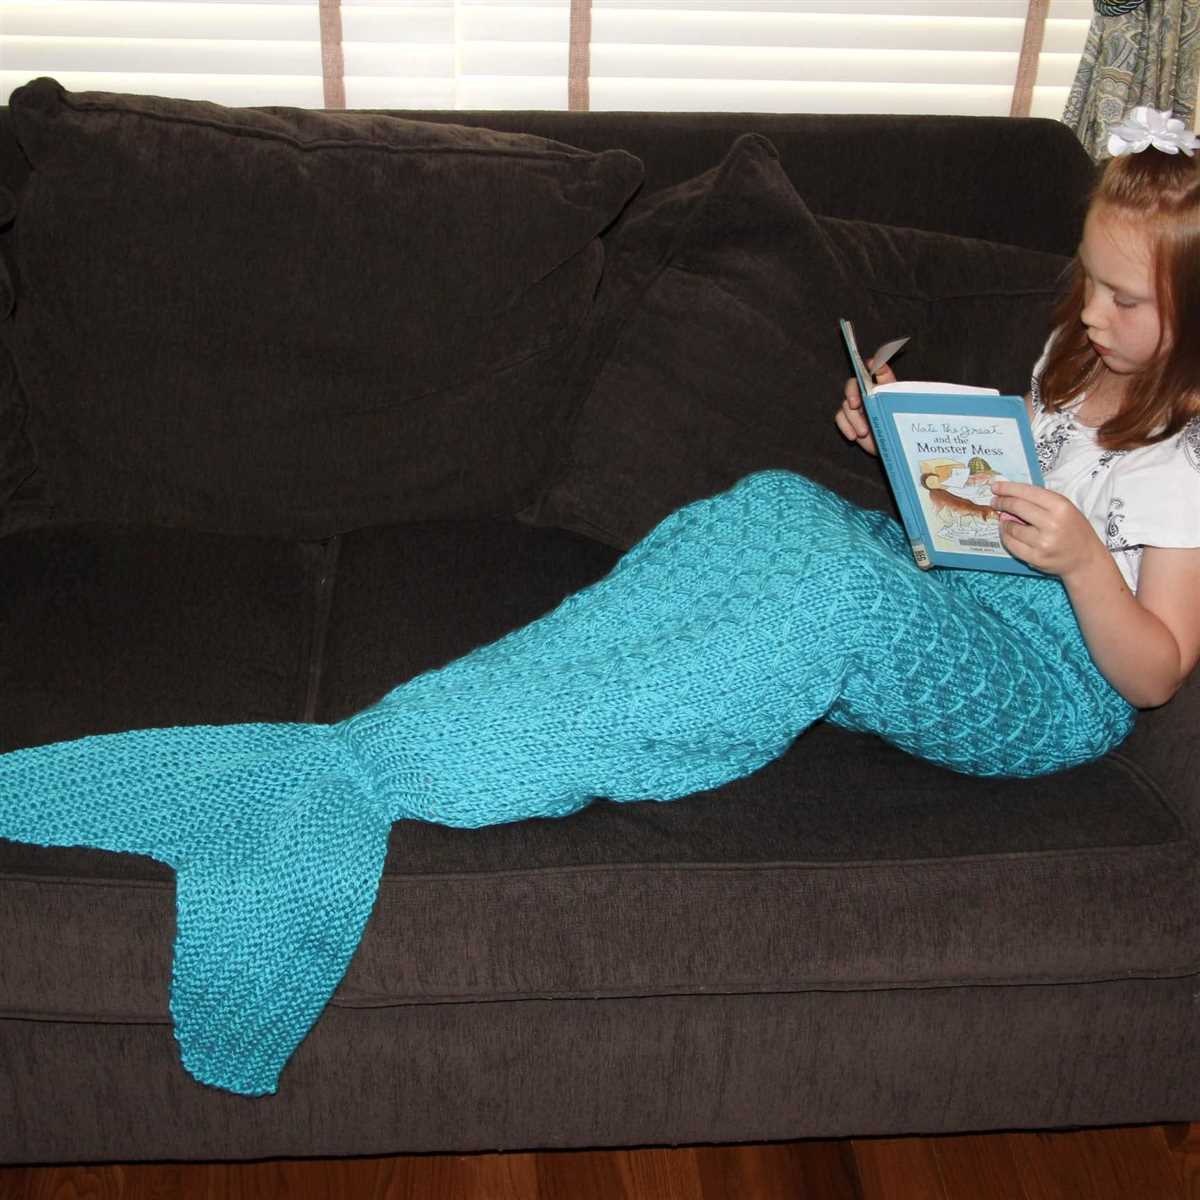
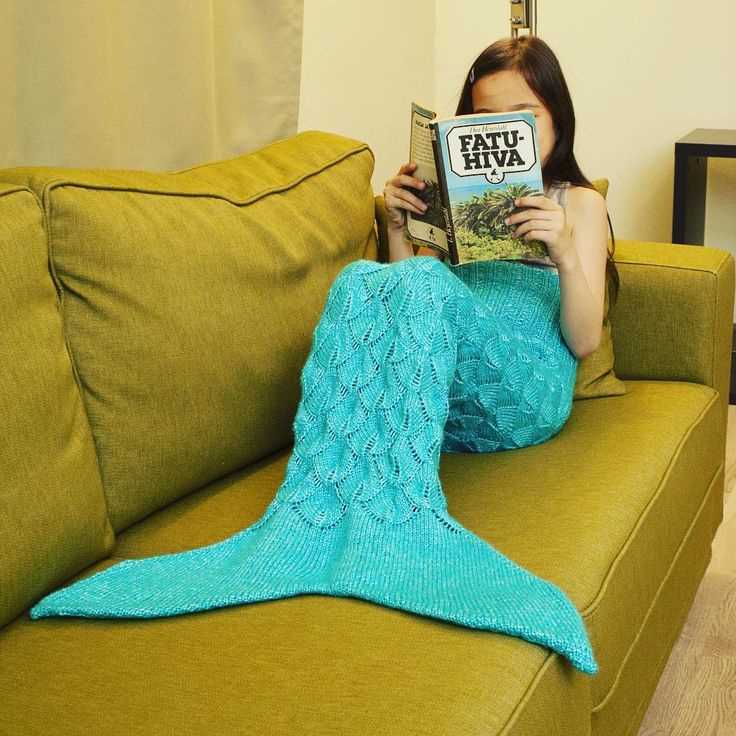
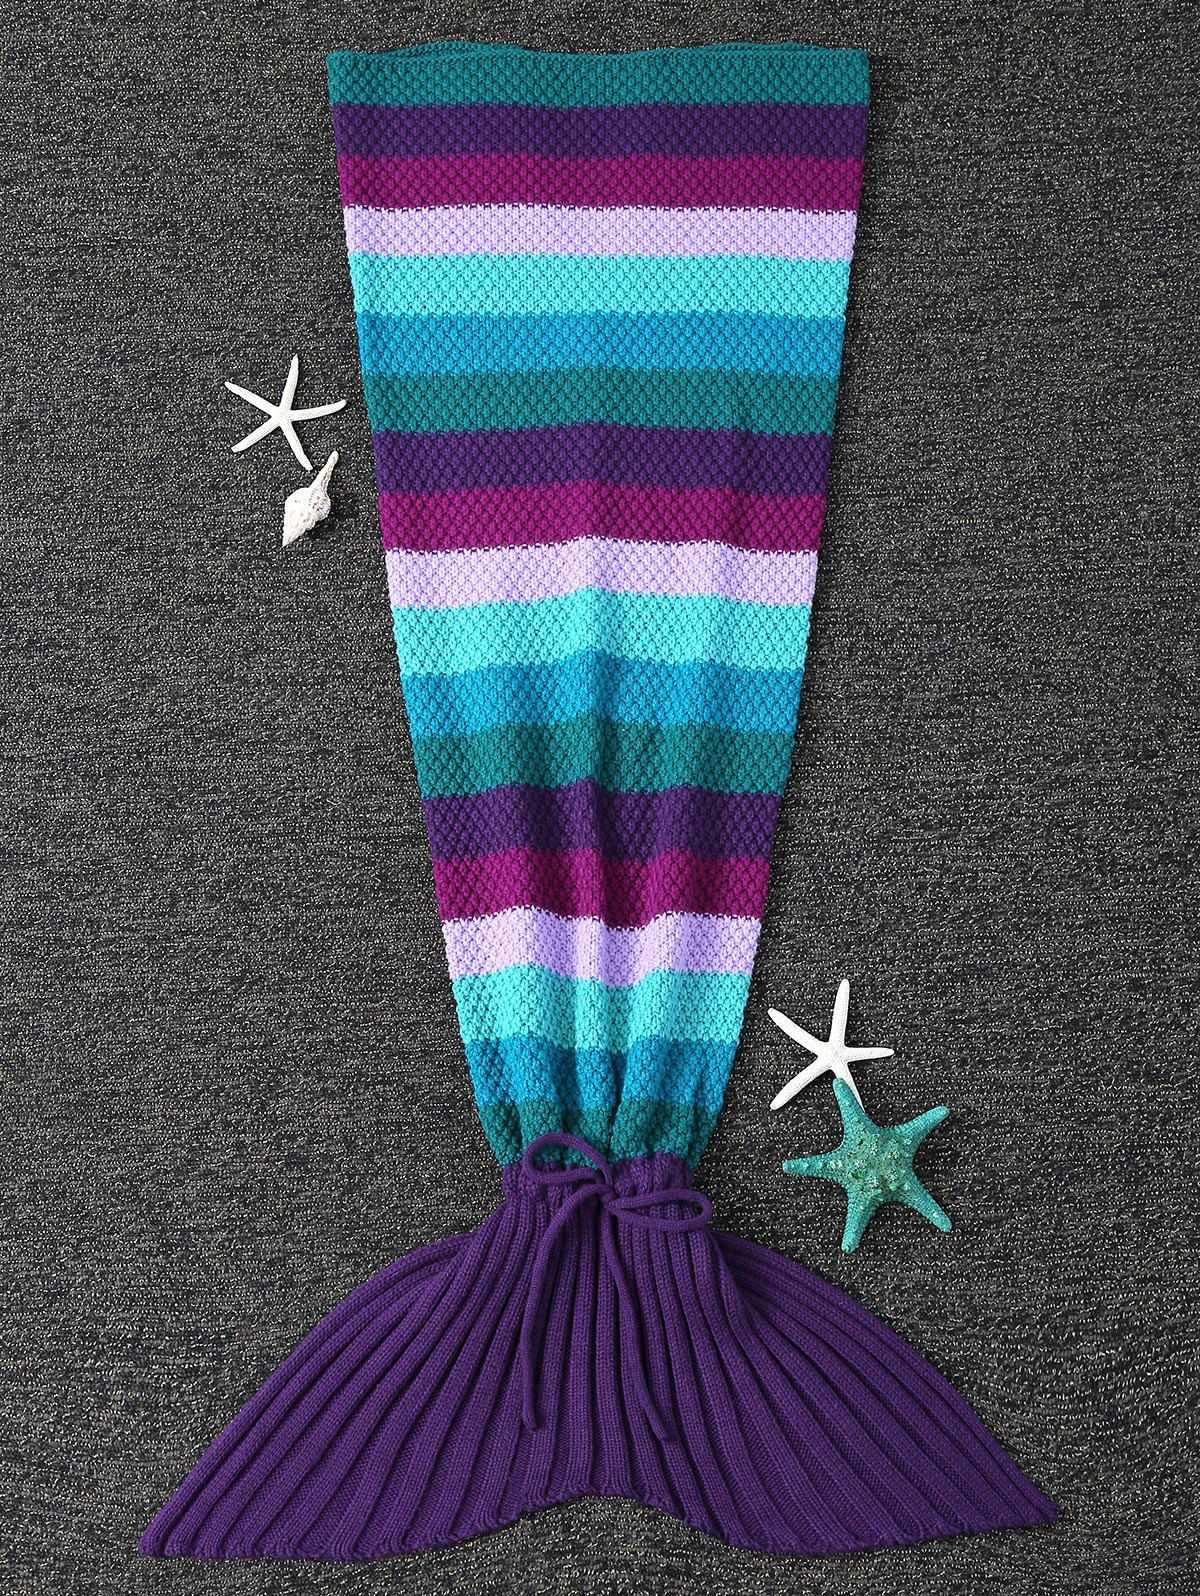
Mermaid Tail Blanket Pattern Variations: Different Sizes and Styles
When it comes to knitting a mermaid tail blanket, there are various pattern variations available to suit different sizes and styles. Whether you are knitting for a child or an adult, or prefer a classic or unique design, there is a pattern out there for you.
Sizes: Mermaid tail blanket patterns typically come in multiple sizes to accommodate different age groups and body types. There are patterns specifically designed for babies, toddlers, children, teenagers, and adults. Each size is tailored to ensure a snug and comfortable fit, allowing the wearer to fully enjoy the cozy and whimsical experience of being a mermaid!
Styles: The style of mermaid tail blanket patterns can vary greatly, offering a wide range of options to suit different tastes. Some patterns feature a more traditional and realistic mermaid tail design, with intricate detailing and scales. Others embrace a more playful and imaginative approach, incorporating bold colors, different textures, and even novelty elements such as fins or flippers. Whether you prefer a classic and elegant look or a fun and whimsical style, there is a mermaid tail blanket pattern to match your vision.
Additional Variations:
- Texture: In addition to different sizes and styles, mermaid tail blanket patterns also often offer variations in texture. Some patterns may incorporate different stitches or techniques to create interesting textures, such as ribbing, cables, or lacework.
- Color: The color choices for mermaid tail blanket patterns are endless. From soft pastels to vibrant neon hues, you can choose the perfect color palette to reflect your personal style or match the recipient’s preferences.
- Finishing Touches: Depending on the pattern, there may be options for adding additional embellishments or finishing touches to make your mermaid tail blanket truly unique. This could include decorative edgings, appliques, or even embroidery.
With the abundance of mermaid tail blanket pattern variations available, you can easily find the perfect one to make your own or as a special gift for someone else. Get ready to dive into the wonderful world of mermaid knitting!
Tips and Tricks for a Successful Mermaid Tail Blanket Project
Knitting a mermaid tail blanket can be a fun and rewarding project. Whether you’re making it for yourself or as a gift, here are some tips and tricks to help you create a successful and beautiful blanket.
1. Choose the right yarn
When selecting yarn for your mermaid tail blanket, it’s important to choose one that is both soft and durable. Acrylic or cotton yarns are often good choices as they are easy to work with and can withstand regular use. Consider the recipient’s preferences when it comes to color and texture, and opt for a yarn that will create a cozy and comfortable blanket.
2. Use the right needle size
The needle size you use can greatly affect the final outcome of your mermaid tail blanket. Be sure to check the pattern instructions for the recommended needle size and gauge. Using a needle that is too small may result in a tight and stiff fabric, while using a needle that is too large can create a loose and floppy blanket. Experiment with different needle sizes to find the one that gives you the desired texture and drape.
3. Pay attention to stitch count
It’s important to keep track of your stitch count throughout the project, especially when working on the tail fin. Mistakes in stitch count can lead to an uneven or misshapen blanket. Use stitch markers to mark key points and regularly count your stitches to ensure accuracy. If you do make a mistake, it’s easier to fix it early on rather than trying to correct it later.
4. Take your time with the details
The beauty of a mermaid tail blanket lies in the details. Take your time with the finishing touches, such as the edging and embellishments. Adding a decorative border or small seashell motifs can make the blanket truly unique and special. Pay attention to the pattern instructions and take the time to carefully execute each step to achieve a polished and professional-looking result.
5. Block your blanket
Blocking is an important step in knitting that can greatly enhance the appearance of your finished blanket. It involves shaping and smoothing the fabric to give it a more polished and even look. Follow the blocking instructions provided with your yarn and take the time to block your blanket before gifting or using it. This step can make a significant difference in the overall presentation of your mermaid tail blanket.
In conclusion, knitting a mermaid tail blanket can be a fun and rewarding project. By following these tips and tricks, you can ensure a successful outcome and create a beautiful and cozy blanket that will be cherished for years to come.
Sharing your Finished Mermaid Tail Blanket: Gift Ideas and Inspiration
Once you have completed your beautiful mermaid tail blanket, you may be wondering what to do with it. Here are some gift ideas and inspiration on how you can share your creation with others.
Gifting the Mermaid Tail Blanket

The mermaid tail blanket you have knitted would make a thoughtful and unique gift for your loved ones. Whether it’s for a birthday, holiday, or just to show someone you care, this cozy and special blanket is sure to bring joy to its recipient. You can personalize the gift by selecting colors and patterns that match the recipient’s taste and style.
Consider adding a personal touch by including a handwritten note explaining the love and effort that went into creating the blanket. This will make the gift even more meaningful and cherished. Don’t forget to include care instructions, so the recipient can enjoy their blanket for years to come.
Inspiration for Sharing
If you would like to go beyond gifting and share your mermaid tail blanket with a wider audience, there are many creative ways to do so.
- Donate to a Charity: Many organizations, shelters, and hospitals accept donations of blankets to provide warmth and comfort to those in need. Your knitted mermaid tail blanket would make a lovely contribution to these causes.
- Participate in Craft Fairs: If you enjoy attending craft fairs, consider setting up a booth to showcase and sell your mermaid tail blankets. This can be a great way to share your talent with others and even turn it into a small business.
- Host a Knitting Workshop: Share your skills and passion for knitting by organizing a workshop where you teach others how to make their own mermaid tail blankets. This can be a fun and interactive way to bring people together and inspire their creativity.
Whichever way you choose to share your finished mermaid tail blanket, know that your hard work and talent will bring warmth and joy to others. Whether it’s through gifting, donating, selling, or teaching, your creation will be a keepsake that will be treasured for years to come.
Remember, the possibilities are endless, and your creativity can make a difference in people’s lives.