
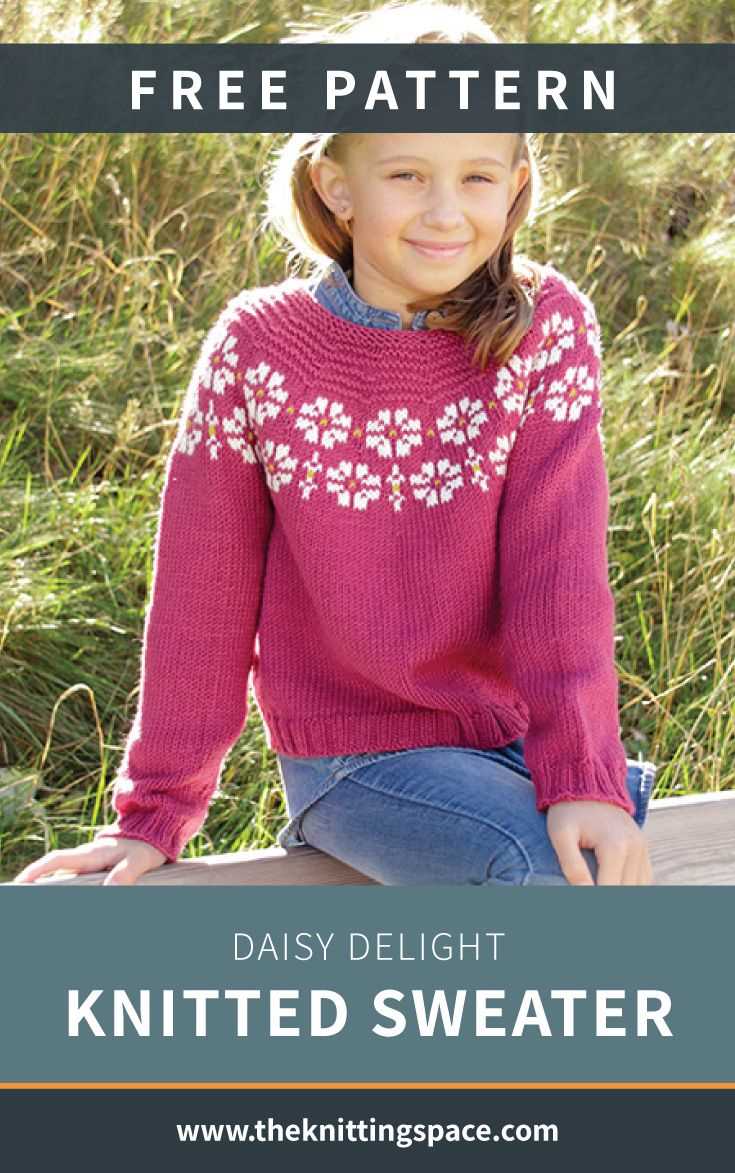
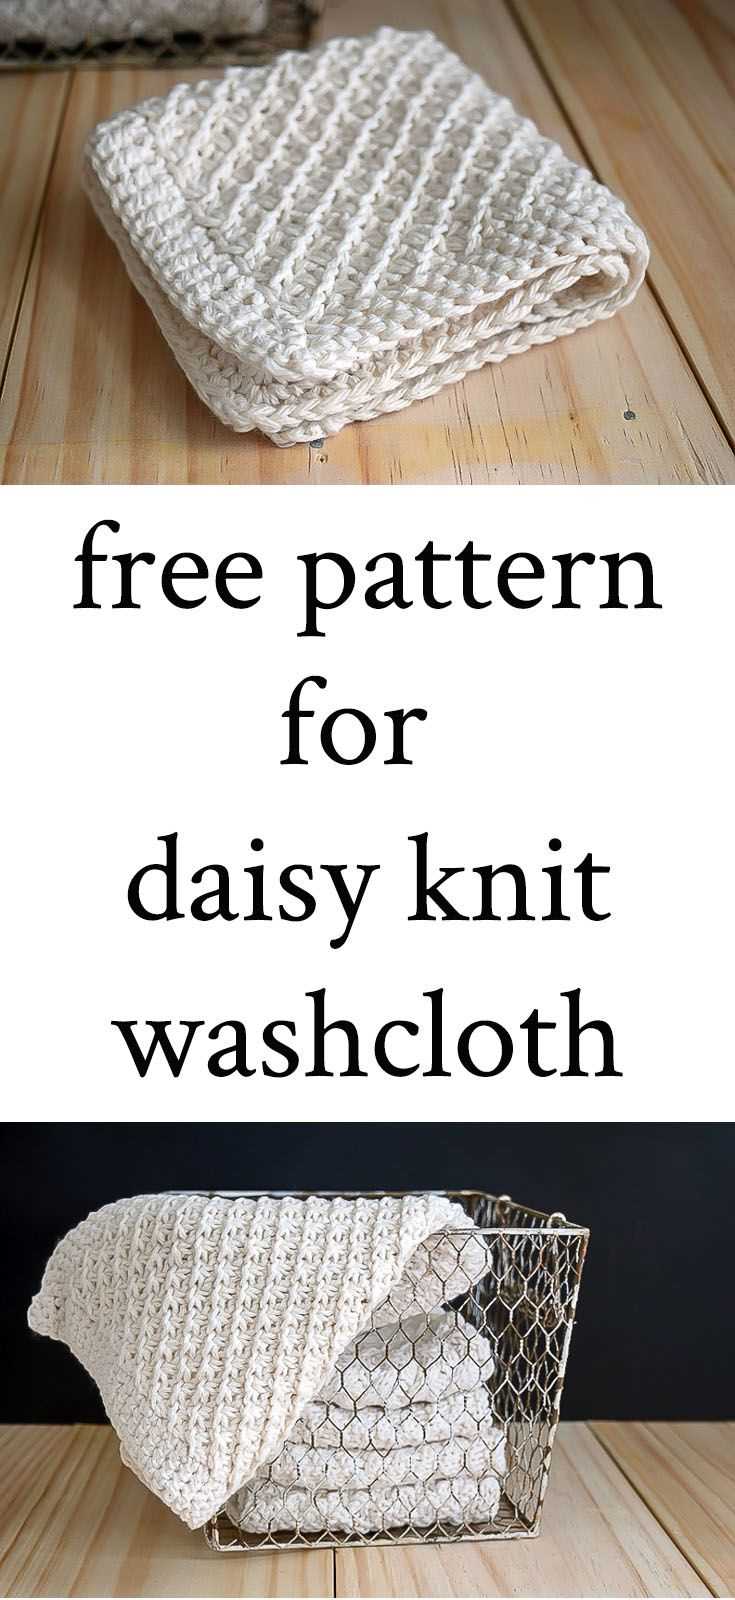
Daisy knitting pattern is a popular choice among knitters of all skill levels. This beautiful floral design adds a touch of whimsy to any project, whether it’s a cozy sweater or a delicate shawl. The daisy pattern is known for its simplicity and versatility, making it a great choice for both beginners and experienced knitters.
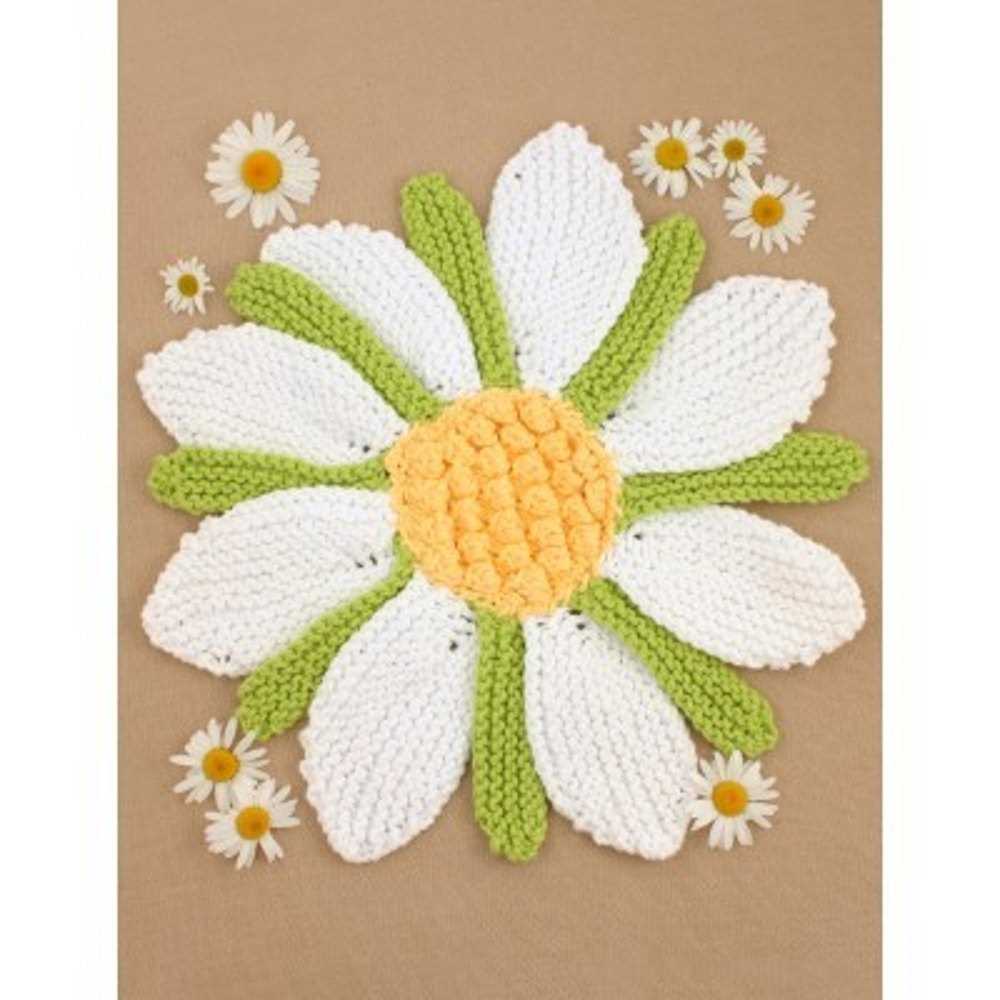
Knitting a daisy pattern involves creating a series of petals that radiate from a central point, giving the illusion of a daisy flower. The petals can be knit in different colors to create a vibrant and eye-catching design, or in a single color for a more understated and elegant look. The pattern can be worked in the round or flat, depending on the desired outcome and the project you’re working on.
There are many variations of the daisy knitting pattern, allowing knitters to put their own spin on this classic design. Some patterns use a combination of knit and purl stitches to create texture, while others incorporate lace or cable stitches for added interest. Whether you prefer a traditional daisy pattern or a more modern interpretation, there is a pattern out there to suit your style and skill level.
Get started: Essential materials for creating a daisy knitting pattern

Creating a daisy knitting pattern requires a few essential materials to get started. Whether you’re an experienced knitter or new to the craft, having the right tools and materials is essential for a successful project. Here are some key items you’ll need:
Yarn:
Choose a yarn that is suitable for knitting flowers, such as a lightweight or medium weight yarn in a variety of colors. Opt for yarns with good stitch definition and durability, as they will help bring out the intricate details of your daisy pattern.
Knitting Needles:

Select a pair of knitting needles that are appropriate for the yarn you have chosen. The size of the needles will depend on the weight of the yarn and the desired tension of your project. Circular or double-pointed needles may be preferred for knitting in the round.
Tapestry Needle:
A tapestry needle or yarn needle is an essential tool for weaving in loose ends and finishing off your knitting project. It is also useful for sewing any knit pieces together to create the daisy petals or other components.
Stitch Markers:
Stitch markers are helpful for keeping track of specific stitches or sections of your daisy knitting pattern. They can be used to mark the beginning of rounds, increases, or any other important points in your design.
Scissors:

A pair of sharp scissors is necessary for cutting the yarn and trimming any excess ends. Make sure they are small and easy to handle, allowing you to cut accurately and neatly as you work on your daisy knitting pattern.
Having these essential materials will set you on the right path to creating a beautiful daisy knitting pattern. With the right tools in hand, you can unleash your creativity and begin bringing your floral masterpiece to life.
Choosing the right yarn: The key to achieving a realistic daisy design
When it comes to knitting a realistic daisy design, the choice of yarn plays a crucial role in bringing your creation to life. The right yarn can make all the difference in achieving the desired texture, color, and overall appearance of the daisy.
Texture: In order to replicate the delicate petals of a daisy, it is important to choose a yarn that has a soft and smooth texture. Opt for a yarn that is lightweight and has a subtle sheen to mimic the natural shine of the petals. This will enhance the realism of your knitted daisy and make it visually appealing.
Color: When selecting the yarn color for your daisy, consider the natural hues of the flower. Look for a yarn that matches the white or yellow tones of a daisy, as this will make your knitted creation look more authentic. Additionally, using a variegated yarn that incorporates multiple shades of white or yellow can add depth and dimension to your daisy.
Thickness: The thickness or weight of the yarn also plays a significant role in achieving a realistic daisy design. Choose a yarn that is thin enough to create intricate details on the petals, such as subtle ridges or scalloped edges. A fingering or sport weight yarn is often ideal for creating the fine details required for a lifelike daisy.
Quality: Investing in a high-quality yarn is essential to achieve a realistic daisy design. Look for yarns that are made from natural fibers, such as cotton or silk, as they will provide a smoother finish and better drape for your daisy. Avoid using synthetic yarns, as they tend to have a more artificial look and feel.
Conclusion: The choice of yarn is a critical factor in creating a realistic daisy design. By considering the texture, color, thickness, and overall quality of the yarn, you can ensure that your knitted daisy looks lifelike and visually appealing. Experiment with different yarns to find the perfect one that brings your daisy to life and adds a touch of realism to your knitting project.
Expert tips and tricks: Techniques to enhance your daisy knitting pattern
When knitting a daisy pattern, there are several techniques you can use to enhance the final result and make your project truly standout. Here are some expert tips and tricks to consider:
1. Pay attention to color selection:
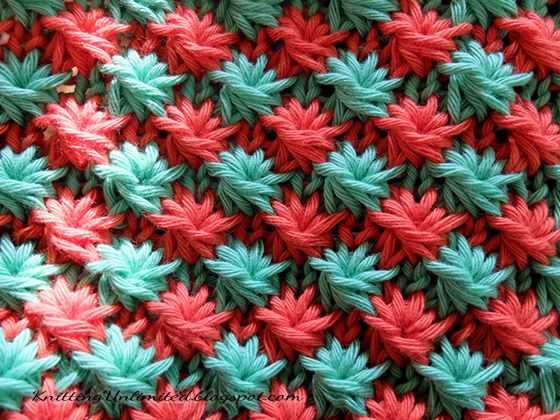
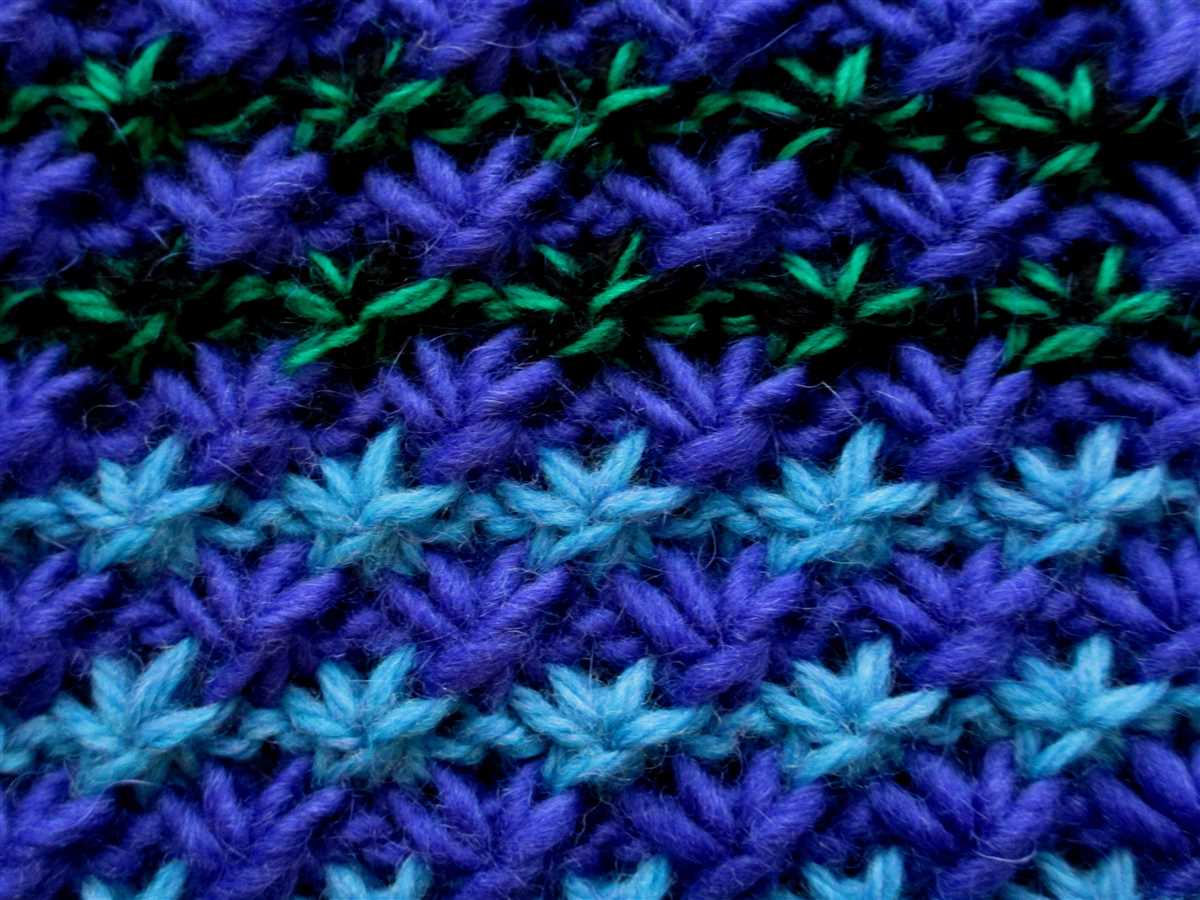
Choosing the right colors for your daisy pattern can greatly enhance its visual appeal. Consider using contrasting colors for the petals and center of the daisy to make them pop. Experiment with different color combinations to create a unique and eye-catching design.
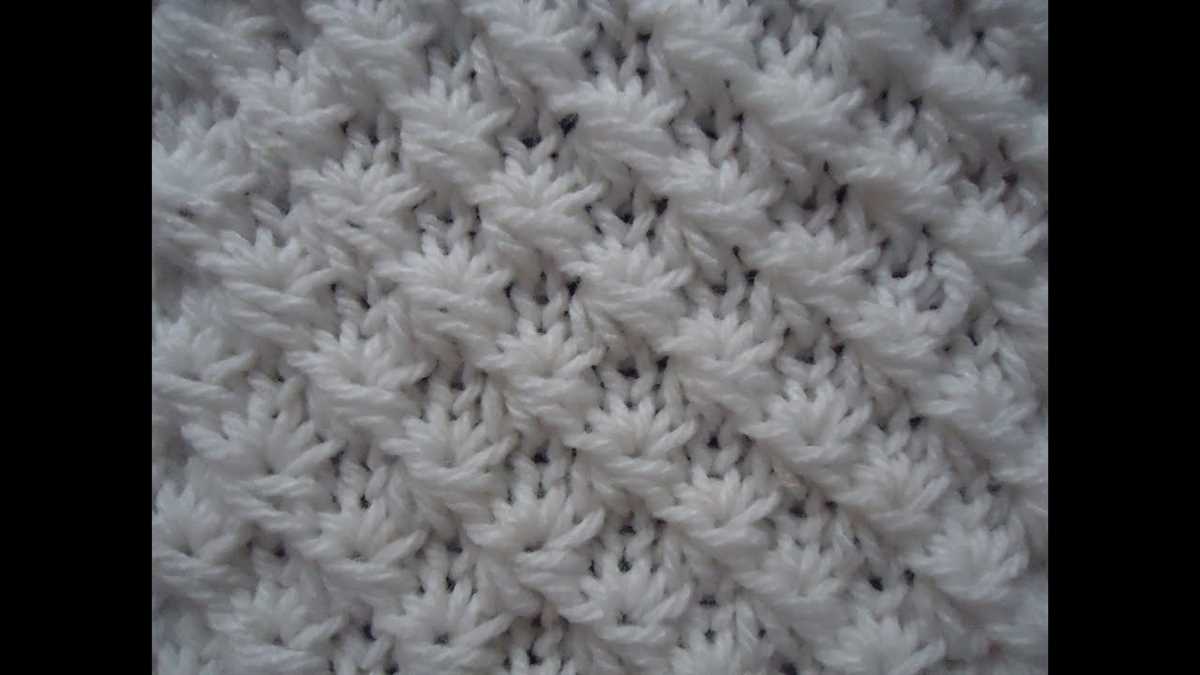
2. Incorporate texture:
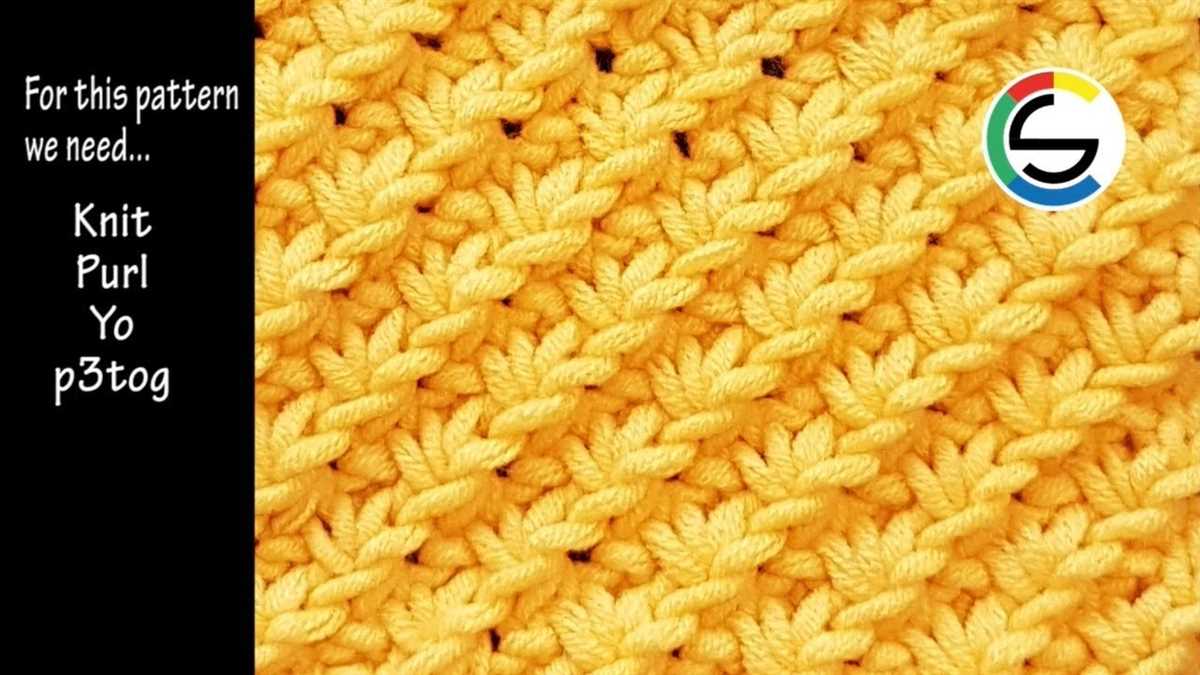
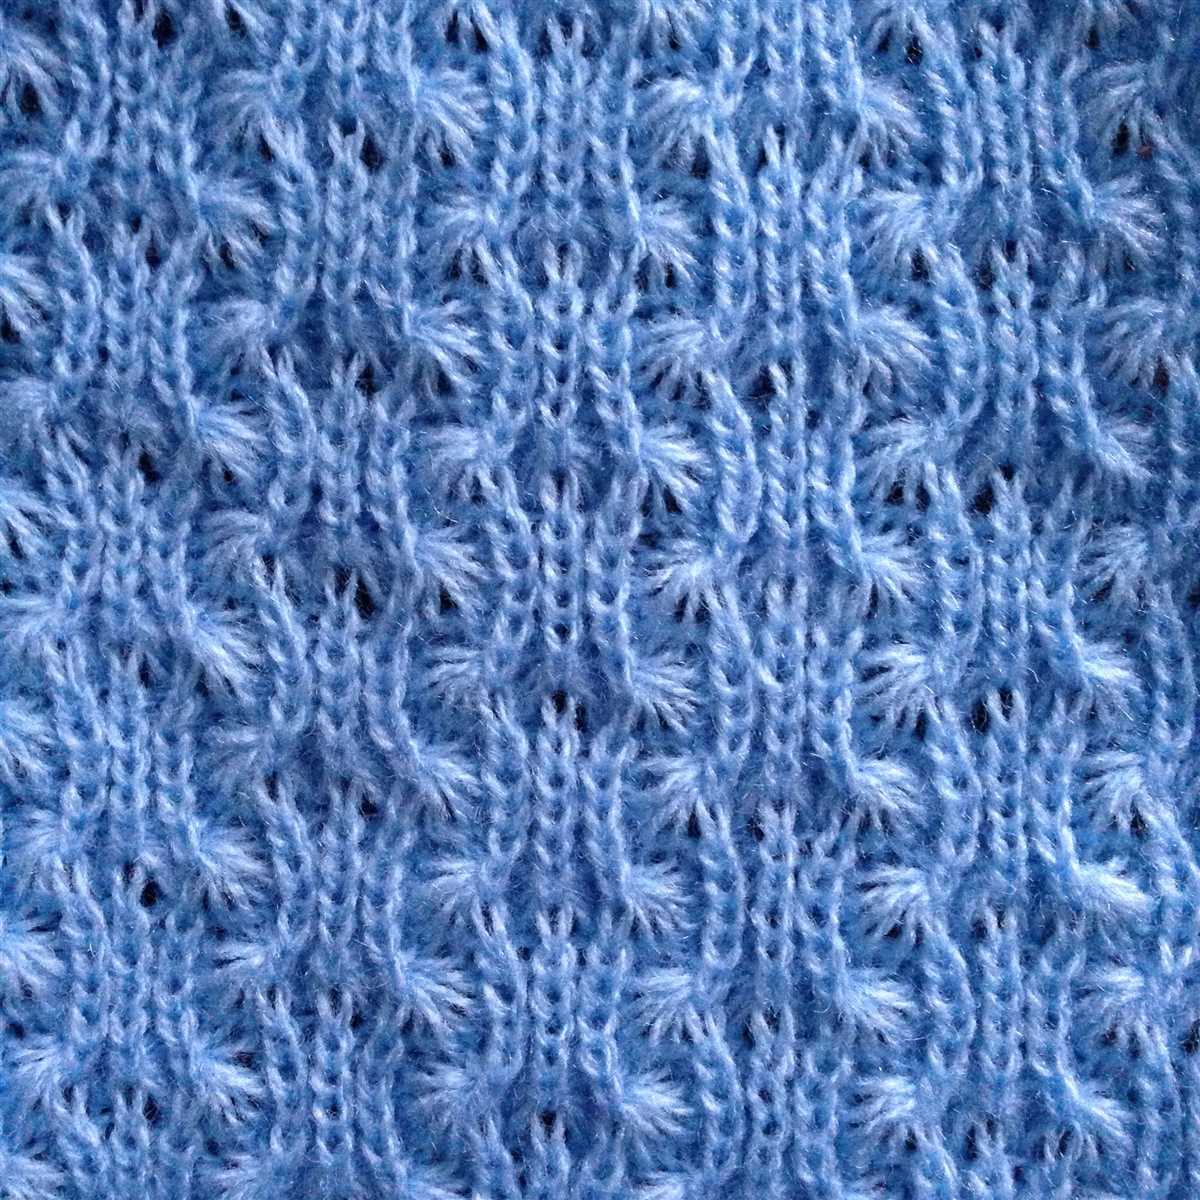
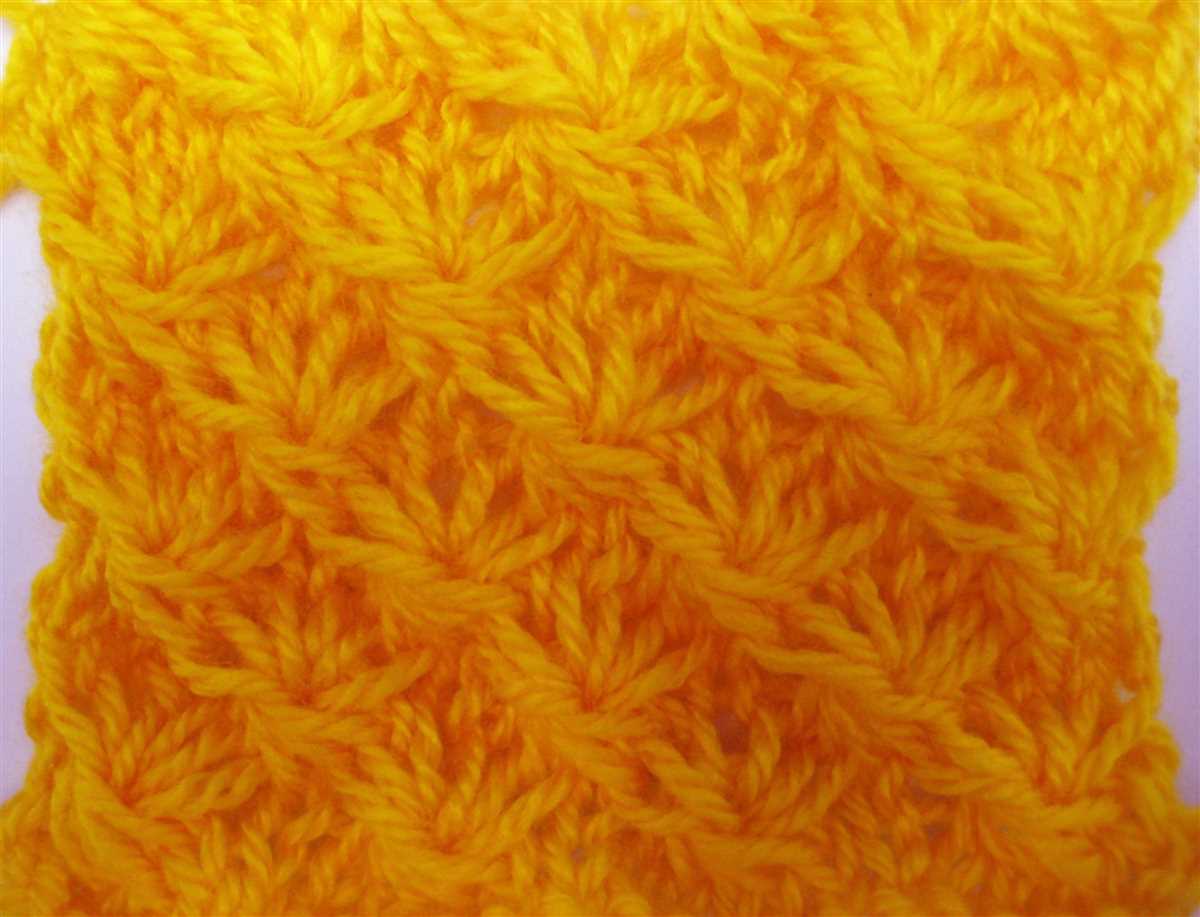
Add texture to your daisy knitting pattern by incorporating different stitches or techniques. For example, you can use seed stitch for the petals to give them a bumpy, textured look. Adding texture can make your daisies look more realistic and interesting.
3. Use embroidery for details:
To bring your daisies to life, consider adding embroidery for the finer details. You can use embroidery thread to create intricate designs for the petals or to add highlights and shading. This can give your daisies a more realistic and three-dimensional look.
4. Experiment with yarn weight:

Try using different yarn weights to create daisies of varying sizes. Using a lighter weight yarn will result in smaller, delicate daisies, while using a heavier weight yarn will create larger, bolder daisies. Play around with different yarn weights to achieve the desired effect.
5. Customize the pattern:

Don’t be afraid to modify the daisy knitting pattern to make it your own. You can add more petals, adjust the size of the center, or even incorporate different types of flowers alongside the daisies. Personalizing the pattern will make your project unique and showcase your creativity.
By following these expert tips and tricks, you can take your daisy knitting pattern to the next level and create beautiful and unique designs. Have fun experimenting with colors, textures, and customization to make your daisies truly stand out.
Step-by-step instructions: Creating the center of the daisy
Creating the center of the daisy is an important step in knitting this beautiful flower pattern. Follow these step-by-step instructions to achieve a realistic and intricate center for your daisy.
Materials needed:

- Yarn: Choose a suitable color for the center of your daisy, such as yellow or brown.
- Knitting needles: Select the appropriate size needles for your chosen yarn weight.
- Tapestry needle: Use a needle with a large eye for easy threading.
- Scissors: Have a pair of scissors on hand for cutting the yarn.
Instructions:
- Cast on the required number of stitches for the center of the daisy. This will depend on the pattern you are following.
- Begin knitting in the round, making sure to join the stitches together to create a seamless center.
- Knit the desired number of rounds to create the height of the center. This will also depend on the pattern.
- Next, you will start creating the textured look of the center. To do this, switch to a purl stitch for a few rounds.
- Once you have completed the purl rounds, switch back to knitting for a few more rounds to create a contrast in texture.
- Continue alternating between purl and knit rounds until you have achieved the desired texture and height for the center of your daisy.
- Finally, bind off your stitches to secure the center of the daisy. Cut the yarn, leaving a tail for weaving in later.
Following these step-by-step instructions will ensure that you create a beautiful and realistic center for your daisy knitting pattern. Be sure to check the specific pattern you are using for any additional instructions or variations.
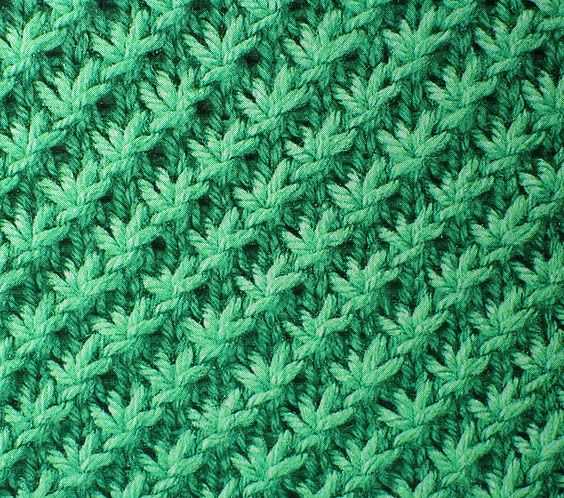
Knitting the petals: Adding depth and dimension to your daisy design
When it comes to knitting a daisy design, one of the most important aspects is creating lifelike petals that add depth and dimension to your finished piece. The way you knit the petals can make a big difference in how realistic and visually appealing your daisies turn out. Here are some tips to help you achieve stunning petal designs:
Using different stitch patterns: Experimenting with different stitch patterns can give your petals a more textured and realistic appearance. For example, you can use a combination of purl stitches and decreases to create a petal that has a slightly crinkled texture. Playing with stitch patterns can add depth and dimension to your daisy design, making it stand out.
Adding shaping: Adding shaping to your petals can make them look more realistic and natural. Consider gradually increasing and decreasing stitches along the edges of the petal to give it a curved shape. This will mimic the natural curve of a real daisy petal, creating an authentic look. Additionally, adding a slight twist or bend to the petals can also enhance the overall depth of your design.
Color blending: Another way to add dimension to your daisy design is by using color blending techniques. Try using different shades of yellow or off-white yarn to create a gradient effect on the petals. This can give the illusion of shadows and highlights, further enhancing the depth of your design. The gradient effect can be achieved by using multiple strands of yarn or by using variegated yarn with subtle color changes.
Layering the petals: To create a more three-dimensional look, consider layering multiple petals on top of each other. This can be done by knitting smaller petals and attaching them to the larger ones. By carefully arranging and sewing the petals together, you can achieve a fuller and more realistic daisy design. This technique also allows for more flexibility in terms of color and texture combinations.
Remember, the key to knitting lifelike daisy petals lies in experimenting with different techniques and being creative with your design. Don’t be afraid to try new stitch patterns, colors, and shaping methods to achieve the desired depth and dimension in your daisy design.
Finishing touches: Securing and shaping the completed daisy
Once you have completed knitting your daisy using the provided pattern, there are a few final touches you can do to secure and shape it. These steps will ensure that your daisy looks neat and polished, ready to be used as a decorative accent or embellishment on various projects.
1. Secure the ends: Start by weaving in any loose ends of yarn to the back of the daisy. Use a tapestry needle to carefully thread the ends through the stitches, making sure they are secure and won’t come undone.
2. Block the daisy: To shape and flatten the daisy, you can block it using a steam iron or a spray bottle. Gently dampen the daisy with water, making sure it is evenly moist. Place the daisy on a clean towel and use your fingers to shape the petals and center, gently stretching or pinching them as desired. Allow the daisy to air dry completely before using or storing.
3. Additional options: If you want to add extra stability, you can attach a felt or fabric backing to the daisy. Cut out a small circle or oval shape from the fabric and carefully sew it onto the back of the daisy using a thread that matches the yarn color. This will give the daisy some structure and prevent it from losing its shape over time.
4. Embellish further: If you want to give your daisy an extra touch, you can add a button or bead to the center. Sew it securely onto the middle of the daisy, making sure it is centered and won’t come off easily. This will add a unique and eye-catching element to your finished daisy.
Following these finishing touches will ensure that your completed daisy is secure, shaped, and ready to be used in a variety of crafting projects. Whether you choose to attach it to a bag, hat, or use it as a decorative element on its own, your daisy will be a beautiful and charming addition to any creation.
The customization options for the Daisy knitting pattern

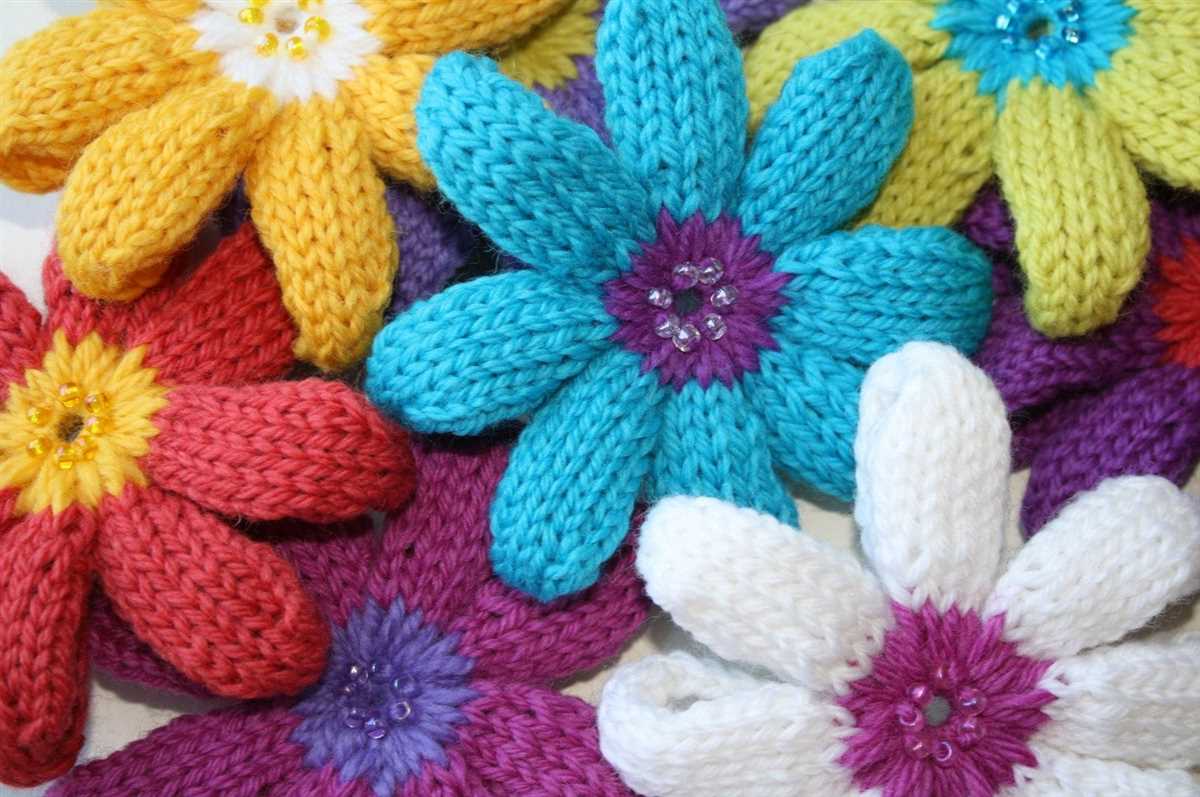
When it comes to the Daisy knitting pattern, one of the most exciting aspects is the ability to experiment with different daisy color variations. This allows knitters to truly make the pattern their own and create unique and personalized pieces.
One option for customization is to stick with traditional colors for the daisy petals, such as yellow or white. These classic choices create a timeless and elegant look. Alternatively, knitters can choose vibrant and bold colors, like red or purple, to create a more eye-catching and modern design.
The center of the daisy can also be customized to match the chosen petal colors. Some knitters may choose to use a contrasting color, while others may prefer a more cohesive look by using the same color as the petals. This decision can change the overall appearance of the daisy and add an extra touch of personalization.
Furthermore, knitters can experiment with the background color of the knitting project. A neutral color, such as gray or beige, can create a more subtle and understated look. On the other hand, a bright and vibrant background color, such as green or blue, can make the daisy pattern really stand out.
Avoiding common mistakes: Tips for troubleshooting your daisy knitting pattern
Knitting a daisy pattern can be a fun and satisfying project, but it can also be frustrating if you run into common mistakes. Here are some tips for troubleshooting your daisy knitting pattern to ensure a successful and error-free project.
1. Count your stitches
One of the most common mistakes when knitting a daisy pattern is losing track of your stitches. It’s important to count your stitches after every row or round to make sure you haven’t accidentally added or skipped any. If you notice a discrepancy in your stitch count, go back and carefully review your work to find and fix any mistakes.
2. Follow the pattern instructions closely
Another common mistake is not following the pattern instructions closely. Each pattern will have specific instructions on how to create the daisy design, and it’s important to follow them exactly. Take the time to read through the pattern before you start knitting, and refer back to it frequently to ensure you’re on the right track.
3. Check your gauge
Gauge is crucial in any knitting project, and knitting a daisy pattern is no exception. Make sure you check your gauge before you begin knitting to ensure that your stitches and rows match the gauge specified in the pattern. This will help you achieve the correct size and shape for your daisy design.
4. Use stitch markers
Stitch markers can be a helpful tool when knitting a daisy pattern, especially if the pattern has complex stitch repeats or shaping. Place stitch markers at key points in your work to help you keep track of where you are in the pattern and to mark any increases or decreases. This can prevent mistakes and make it easier to follow the pattern accurately.
5. Fix mistakes as you go
If you do spot a mistake in your daisy knitting pattern, it’s best to fix it as soon as possible. Don’t be afraid to backtrack and undo a few rows or stitches to correct the error. It’s much easier to fix a mistake early on than to try to fix it later when there’s more knitting to undo.
By following these tips, you can avoid common mistakes and successfully troubleshoot your daisy knitting pattern. Happy knitting!
Project inspiration: Creative ideas for incorporating daisies into your knitting projects
Incorporating daisies into your knitting projects can add a touch of whimsy and charm to your creations. Whether you’re knitting a cozy sweater, a delicate scarf, or a cute pair of mittens, daisies can be a beautiful addition that adds a pop of color and a touch of nature.
One creative idea for incorporating daisies into your knitting projects is to use them as an appliqué. You can knit or crochet daisies separately and sew them onto your finished project, such as a hat or a bag. This allows you to customize your project and add daisies wherever you like. You can experiment with different sizes and colors of daisies to create a unique and eye-catching design.
If you’re feeling adventurous, you can also try knitting daisies directly into your project. This can be done by using a stranded or fair isle knitting technique, where you knit with multiple colors at the same time. By charting a daisy pattern and incorporating it into your knitting, you can create a stunning and intricate design that will surely impress.
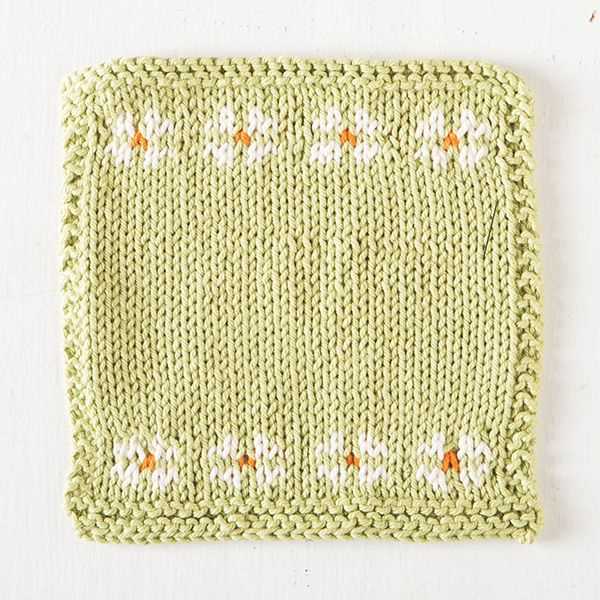
Another creative idea is to knit daisies as a border or edge for your project. You can knit a row of daisies along the hem of a sweater or the edge of a blanket. This adds a feminine and delicate touch to your knitting and makes your project truly unique.
In conclusion, there are many creative ways to incorporate daisies into your knitting projects. Whether you choose to use them as an appliqué, knit them directly into your project, or use them as a border or edge, daisies can add a touch of beauty and whimsy to your creations. So grab your knitting needles, gather some daisy-inspired patterns, and let your creativity bloom!
Showcasing your daisy creation: Photographing and sharing your finished piece
Once you’ve completed knitting your beautiful daisy creation, it’s time to show it off to the world and share your hard work with others. Here are some tips for capturing stunning photographs of your finished piece and sharing it with pride.
Firstly, find a well-lit area to photograph your daisy creation. Natural light is always the best option, so try to take your photos near a window or outside on a sunny day. Avoid using direct flash, as it can create harsh shadows and wash out the colors of your piece.
Photographing tips:
- Lay your daisy creation flat on a clean surface, ensuring that there are no wrinkles or creases.
- Experiment with different angles and perspectives to find the best way to showcase your piece.
- Zoom in to capture the intricate details of your knitting, such as the daisy stitches or the color variations.
- Consider using props or incorporating the daisy creation into a larger scene to add visual interest.
Sharing tips:
- Take multiple photos from different angles and choose the best ones to share.
- Edit your photos to enhance the colors and make any necessary adjustments.
- Choose the right platform to share your photos, such as social media, knitting communities, or your personal blog.
- Write a caption or description to accompany your photo, explaining the inspiration behind your daisy creation or any special techniques you used.
Lastly, don’t be afraid to share your finished piece with others. You’ve put time and effort into creating something unique and beautiful, so let the world admire your knitting skills. Enjoy the process of capturing and sharing your daisy creation, and inspire others to try their hand at knitting as well.