
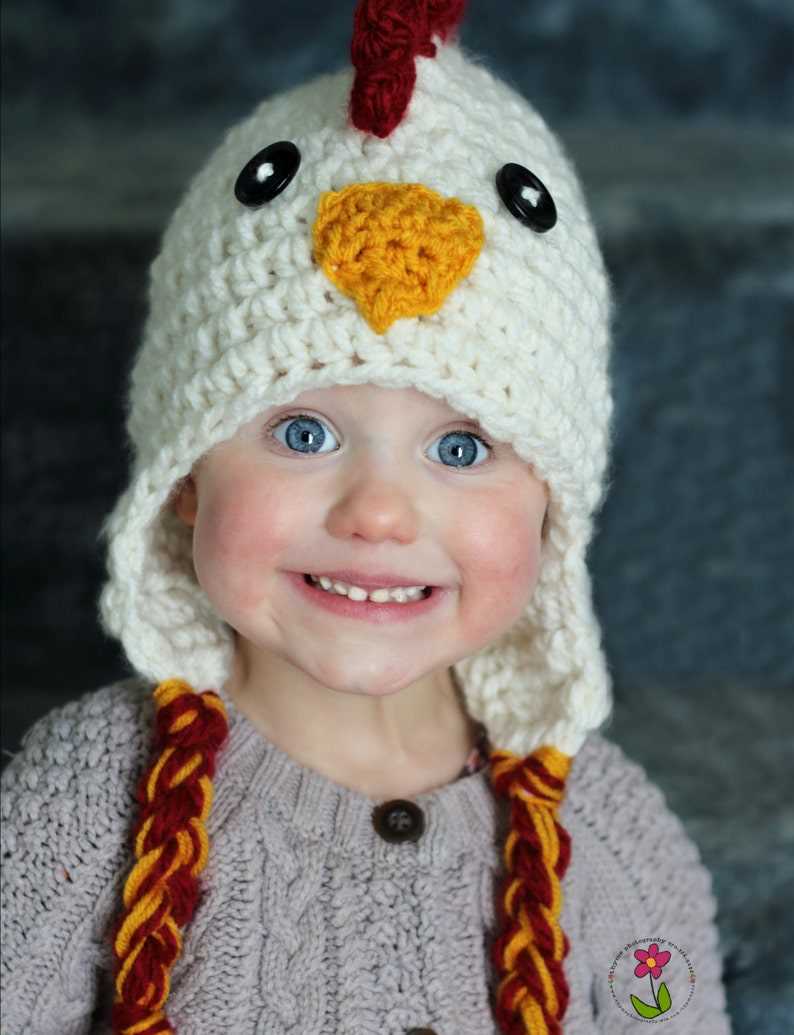
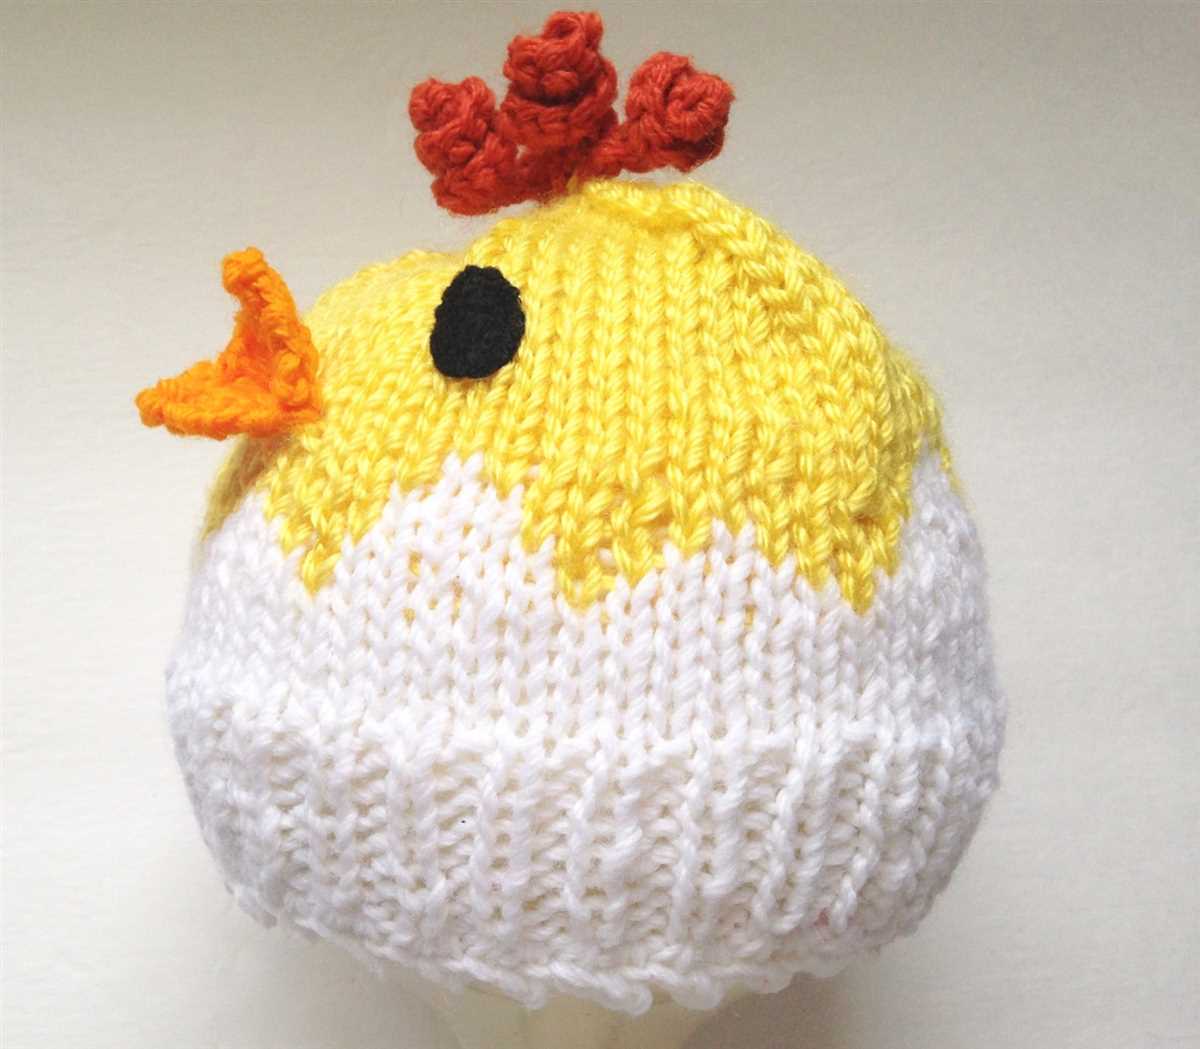
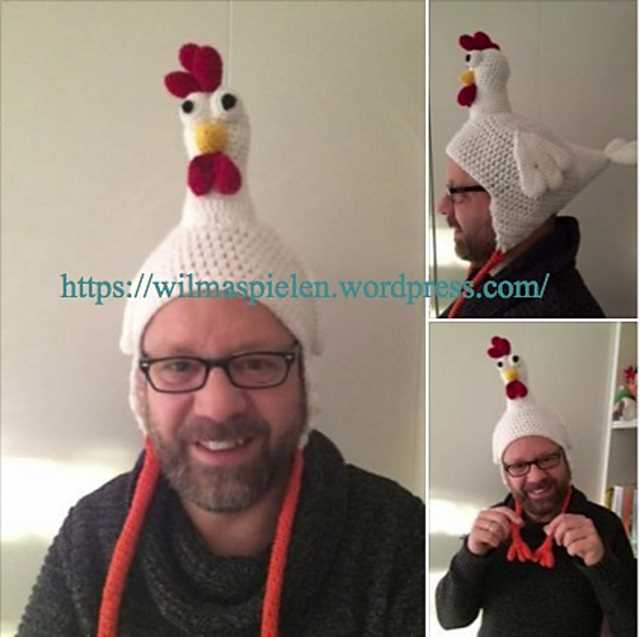
Knitting has always been a popular pastime, allowing crafters to create unique and stylish items. One such item that has gained attention recently is the knitted chicken hat. This adorable accessory is perfect for keeping warm during the cold winter months while adding a touch of whimsy to any outfit. Whether you’re looking to make a fun hat for yourself or a charming gift for a loved one, this knitted chicken hat pattern is sure to delight.
Designed with both comfort and style in mind, this pattern uses a combination of basic knitting stitches and more intricate techniques to create a hat that is as fun to make as it is to wear. The body of the hat is knitted in a soft and cozy yarn, while the chicken’s face and crowning comb are created using a combination of intarsia and fair isle knitting.
With detailed instructions and helpful tips, even beginner knitters can successfully complete this project. The pattern is also easily customizable, allowing crafters to choose different colors and embellishments to suit their personal style. Whether you prefer a traditional white chicken or want to get creative with vibrant hues, the possibilities are endless.
Knitted Chicken Hat Pattern

Looking for a fun and quirky knitting project? Why not try making a knitted chicken hat? This adorable and unique accessory is sure to bring smiles to everyone’s faces. Whether you want to add a touch of whimsy to a child’s wardrobe or dress up for a costume party, this hat is a perfect choice.
To get started, you will need the following materials: knitting needles, yarn (in yellow, orange, and red), a tapestry needle, and scissors. The pattern uses basic knitting stitches such as knit, purl, and decrease, making it suitable for knitters of all skill levels.
The first step is to cast on the required number of stitches, which will depend on the size of the hat you want to make. Then, you will work in the round, knitting the body of the hat in stockinette stitch until you reach the desired length. Next, you will shape the top of the hat by decreasing the number of stitches in each round.
Once you have finished knitting the body and shaping the top, it’s time to add the finishing touches. Use the tapestry needle to sew on the beak and comb, which can be made using the red and orange yarn. You can also add eyes and a little tuft of feathers on top to make your chicken hat even more adorable.
When you have completed all the steps, you will have a charming chicken hat that is sure to be a conversation starter. Whether you wear it for a special occasion or give it as a gift, this knitted accessory is bound to bring joy and laughter. So grab your knitting needles and get started on this fun and creative project today!
Materials Needed

In order to make a knitted chicken hat, you will need several materials. These include:
- Yarn: You will need a ball of yarn in the color of your choice. Opt for a soft, cozy yarn that is suitable for knitting.
- Knitting Needles: Make sure to have a pair of suitable knitting needles. The size of the needles will depend on the yarn you are using and the desired gauge.
- Tape Measure: A tape measure will come in handy for measuring your gauge and ensuring the hat fits properly.
- Tapestry Needle: A tapestry needle is necessary for weaving in the loose ends of yarn and finishing your hat.
- Stitch Markers: Stitch markers can be useful for keeping track of your stitches and pattern repeats.
- Scissors: A pair of scissors will be needed for cutting the yarn.
- Buttons and Decorations: If desired, you can also gather buttons or other decorations to add embellishments to your hat.
These are the basic materials you will need to get started with your knitted chicken hat project. Make sure to gather everything before you begin, so you can enjoy a smooth and uninterrupted knitting experience!
Choosing the Right Yarn
When it comes to knitting a chicken hat, choosing the right yarn is essential to achieve the desired result. The type of yarn you choose will determine the hat’s appearance, texture, and warmth. It’s important to consider factors such as fiber content, weight, and gauge.
Fiber Content: The fiber content of the yarn will determine the hat’s feel and durability. Common yarn fibers used for knitting include wool, acrylic, cotton, and blends. Wool yarns provide excellent warmth and elasticity, making them suitable for winter hats. Acrylic yarns are affordable and easy to care for, while cotton yarns are breathable and suitable for warmer climates. Consider the desired properties of the hat and choose a yarn with a suitable fiber content.
Weight: Yarn weight refers to the thickness of the yarn strand and affects the finished size and drape of the hat. The pattern for a knitted chicken hat may specify a specific yarn weight, such as DK (double knitting) or worsted. It’s important to choose a yarn that matches the recommended weight to ensure that the hat turns out as expected. However, if you want to modify the size or texture of the hat, you can experiment with different yarn weights.
Gauge: Gauge is the number of stitches and rows per inch of knitted fabric. It’s crucial to check the gauge mentioned in the pattern and match it with the yarn you choose. The gauge determines the overall size and fit of the hat. Using a different yarn or needle size may result in a hat that is too large or too small. Make a gauge swatch before starting your project to ensure that your tension matches the pattern’s requirements.
Color: The color of the yarn is another important factor to consider. For a chicken hat, you may want to choose a yarn color that resembles a chicken’s feathers, such as various shades of brown or yellow. Alternatively, you can get creative and choose a fun and vibrant color that matches your personal style. Consider the recipient’s preferences and the occasion for which the hat is being knitted.
- Summary:
Choosing the right yarn for a knitted chicken hat involves considering the fiber content, weight, gauge, and color. Wool yarns provide warmth, while acrylic yarns are affordable and easy to care for. Cotton yarns are breathable and suitable for warmer climates. Matching the recommended yarn weight and gauge is crucial for achieving the desired size and fit of the hat. Lastly, consider the color of the yarn and choose a shade that suits the recipient’s preferences and the occasion for the hat.
Selecting Needles
When it comes to knitting a chicken hat, selecting the right needles is crucial to achieve the desired outcome. The right choice of needles can make a significant difference in the overall appearance and fit of the hat. There are a few factors to consider when selecting needles for knitting a chicken hat.
First, it is important to choose the appropriate needle size. The needle size will determine the gauge of the stitches and ultimately the size of the hat. For a knitted chicken hat pattern, it is recommended to use a medium-sized needle, around US size 7 or 8. This will create a fabric with enough stretch to fit comfortably on the head of the wearer.
Another factor to consider is the needle material. Needles come in various materials, such as metal, wood, and plastic. The choice of material can affect the overall feel of the knitting process. Metal needles are known for their smoothness and durability, making them a popular choice for many knitters. Wood needles, on the other hand, have a warmer feel and provide a better grip on the yarn. Plastic needles can be a good option for beginners as they are lightweight and inexpensive.
In addition, the type of needle, whether it is straight, circular, or double-pointed, should also be taken into consideration. For knitting a chicken hat, straight or circular needles are recommended. Straight needles are commonly used for flat knitting, while circular needles can be used for both flat and seamless knitting. Circular needles are particularly useful when knitting in the round, as in the case of a chicken hat.
In conclusion, selecting the right needles for knitting a chicken hat involves considering the needle size, material, and type. By choosing the appropriate needles, knitters can ensure a successful and enjoyable knitting experience, resulting in a well-fitting and adorable chicken hat.
Knitting Techniques

Knitting is a popular craft that involves creating fabric by interlocking loops of yarn. There are several techniques and stitches that knitters use to create different textures and patterns in their projects. Here are a few key knitting techniques that are commonly used:
Casting On:

Casting on is the first step in starting a knitting project. It involves creating the foundation row of stitches on the knitting needle. There are various methods for casting on, such as the long tail cast-on, the knit cast-on, and the cable cast-on. Each method creates a different edge and tension for the project.
Knit Stitch:
The knit stitch is the fundamental stitch in knitting. It creates a smooth and flat surface on the right side of the fabric. To knit, the knitter inserts the needle into a stitch on the left needle, wraps the yarn around the right needle, and pulls it through to create a new stitch. This stitch can be repeated to create rows of knit stitches.
Purl Stitch:
The purl stitch is the reverse of the knit stitch and creates a bumpy texture on the right side of the fabric. To purl, the knitter inserts the right needle into the stitch from back to front, wraps the yarn around the right needle, and pulls it through to create a new stitch. Alternating between knit and purl stitches creates different patterns, such as ribbing.
Decreasing and Increasing:
Decreasing and increasing are techniques used to shape knitting projects. Decreasing involves reducing the number of stitches in a row, usually by knitting or purling two stitches together. Increasing involves adding stitches to a row, such as by knitting into the front and back of the same stitch. These techniques are used to create shaping, such as for sleeves or curved edges.
Cable Knitting:
Cable knitting is a technique that creates twisted stitch patterns, resembling braids or cables. It involves crossing stitches over each other to create the cable effect. Cable needles or double-pointed needles are used to hold the stitches in place while the other stitches are manipulated. This technique adds texture and visual interest to knitting projects.
Finishing Techniques:
Once the knitting is complete, there are various finishing techniques that give the project a polished look. This can include weaving in loose ends, blocking the project to shape and relax the stitches, and sewing pieces together, such as for garments. These finishing touches ensure that the knitted item is neat, professional, and ready to be enjoyed or gifted.
Casting On
When starting a knitting project, one of the first steps is casting on. This is the process of creating the initial row of stitches on the knitting needle. There are different methods of casting on, depending on the desired outcome and personal preference.
The most common method of casting on is the long tail cast on. To do this, you will need to estimate the amount of yarn needed for the number of stitches you want to cast on, plus a little extra for the tail. Make a slipknot at the end of the yarn, leaving a long tail. Insert the needle through the slipknot and use it to grab the yarn tail, pulling it through the loop. Continue this process until you have the desired number of stitches on the needle.
Other Casting On Methods
Another popular casting on method is the knitted cast on. To do this, make a slipknot and place it on the left needle. Insert the right needle through the slipknot from left to right, and wrap the working yarn around the needle counterclockwise. Pull the loop through the slipknot, creating a new stitch. Repeat this process until you have the desired number of stitches on the needle.
There are also provisional cast on methods, which allow for a temporary cast on that can be easily undone later. This is useful for projects that require picking up stitches or grafting later on. One method of provisional cast on is the crochet chain method, where you create a chain of crochet stitches and then pick up the stitches from the chain with the knitting needle. Another method is the waste yarn method, where you cast on with a scrap piece of yarn that can be removed later.
Tips and Tricks

When casting on, it’s important to keep your stitches loose enough so that they are easy to work with but not too loose that they become sloppy. If your cast on stitches are too tight, you can use a larger needle or try casting on with two needles held together. If your cast on stitches are too loose, you can try pulling the yarn tighter as you go or using a smaller needle.
It’s also helpful to leave a tail of yarn at least three times the width of your knitting project to make sure you have enough yarn to weave in later. And don’t forget to count your stitches as you go to make sure you have the correct number on your needle before you start the next row.
Making the Hat Body
To begin making the hat body, you will need to cast on the required number of stitches. The pattern should indicate the specific number of stitches needed based on the size of the hat you are making. Make sure to use the appropriate size knitting needles to achieve the correct gauge.
Once you have cast on the stitches, you can begin working in the main stitch pattern. This could be a basic knit and purl pattern, or it could involve more intricate stitches such as cables or lace. The pattern should provide detailed instructions on the stitch pattern and any required repeats.
Continue working in the stitch pattern until you reach the desired length for the hat body. This will again be specified in the pattern based on the size of the hat. It is important to measure your work as you go to ensure it is coming out to the correct size.
If the pattern calls for any shaping, such as decreases or increases, make sure to follow the instructions carefully. These shaping techniques will determine the overall shape and fit of the hat. Be sure to take note of any stitch markers or special instructions provided in the pattern.
Shaping the Crown

When knitting a chicken hat, one of the important steps is shaping the crown. This is the part of the hat that sits on top of the head and gives it a rounded shape. To achieve this, various techniques can be used, including decreasing stitches and creating a dome-like structure.
One popular method for shaping the crown is using decreases. This involves knitting or purling together two stitches to create one, thus reducing the total number of stitches on the needles. Decreases are usually done in a specific pattern or sequence to create a symmetrical shape. For example, a common decrease pattern is to knit two stitches together (k2tog) followed by knitting two stitches separately, repeating this sequence until the desired number of stitches is reached.
Another technique for shaping the crown is creating a dome-like structure. This is achieved by gradually decreasing stitches in a concentric circle formation. Each round of decreases brings the stitches closer together, creating a rounded shape. This method is often used for hats with a more seamless and polished look.
Once the crown is shaped, it is important to secure the stitches either by binding them off or using a stitch marker. This ensures that the shape is maintained and the hat does not unravel. After shaping the crown, you can continue knitting the rest of the hat, such as the brim or any additional embellishments, to complete the fun and whimsical chicken hat.
Adding Embellishments

Once you have finished knitting the basic chicken hat, you can add embellishments to give it a unique and personal touch. There are many different options for embellishing a knitted chicken hat, depending on your preferences and creativity.
Feathers: One popular option is to attach feathers to the top of the hat to mimic the appearance of a real chicken. You can use either real feathers or synthetic ones, depending on your preference. Simply sew or glue the feathers onto the hat, making sure they are securely attached.
Buttons: Adding buttons can be a fun and playful way to enhance the design of the hat. You can sew on buttons in various shapes and sizes to create eyes, a beak, or other details. Make sure to choose buttons that are securely sewn on so they don’t pose a choking hazard.
Embroidery: Another option is to use embroidery to add details and accents to the hat. You can embroider additional feathers, a face, or any other design you like. Use colorful threads and different stitch techniques to bring your knitted chicken hat to life.
Ribbons and Bows: Ribbons and bows can add a cute and feminine touch to the hat. You can attach them at the top or on the sides, depending on your preference. Choose ribbons in colors that complement the yarn you used for the hat, and tie them in bows for a sweet finishing touch.
Pom-poms: Pom-poms can add a playful and fluffy element to the hat. You can make pom-poms using yarn in a coordinating color and attach them to the top or sides of the hat. Simply tie the pom-poms onto the hat securely so they don’t come loose.
Remember to have fun and let your creativity shine when adding embellishments to your knitted chicken hat. These additions will make your hat stand out and can be a great conversation starter. Experiment with different materials, colors, and techniques to create a hat that is one-of-a-kind.
Finishing Touches

Once you have completed knitting your chicken hat, it’s time to add some finishing touches to make it even more adorable and unique. Here are a few ideas to help you get started:
1. Embroidery: Add some fun and colorful embroidery to your chicken hat. You can use different stitches and colors to create eyes, beaks, or feathers. Get creative and make your chicken hat come to life!
2. Pom-pom: Attach a cute pom-pom to the top of the hat for an extra touch of whimsy. You can make a pom-pom using yarn in a contrasting color or opt for a fluffy one that matches the main color of the hat.
3. Buttons: Sew on some small buttons to create eyes or add a button or two for decoration. Make sure to use buttons that are securely sewn on and won’t pose a choking hazard.
4. Ribbons or bows: Attach small ribbons or bows to the sides of the hat to make it even more adorable. Choose ribbons that complement the colors of your hat and tie them in a way that looks cute and playful.
5. Earflaps or tassels: If you want to add some extra warmth and style to your chicken hat, consider adding earflaps or tassels. These can be made with yarn in a contrasting color and securely attached to the sides of the hat.
Remember to have fun and get creative with your finishing touches. Personalize your chicken hat to make it truly one-of-a-kind!
Disclaimer: Always make sure to supervise children while wearing knitted accessories to ensure their safety and prevent any accidents.