
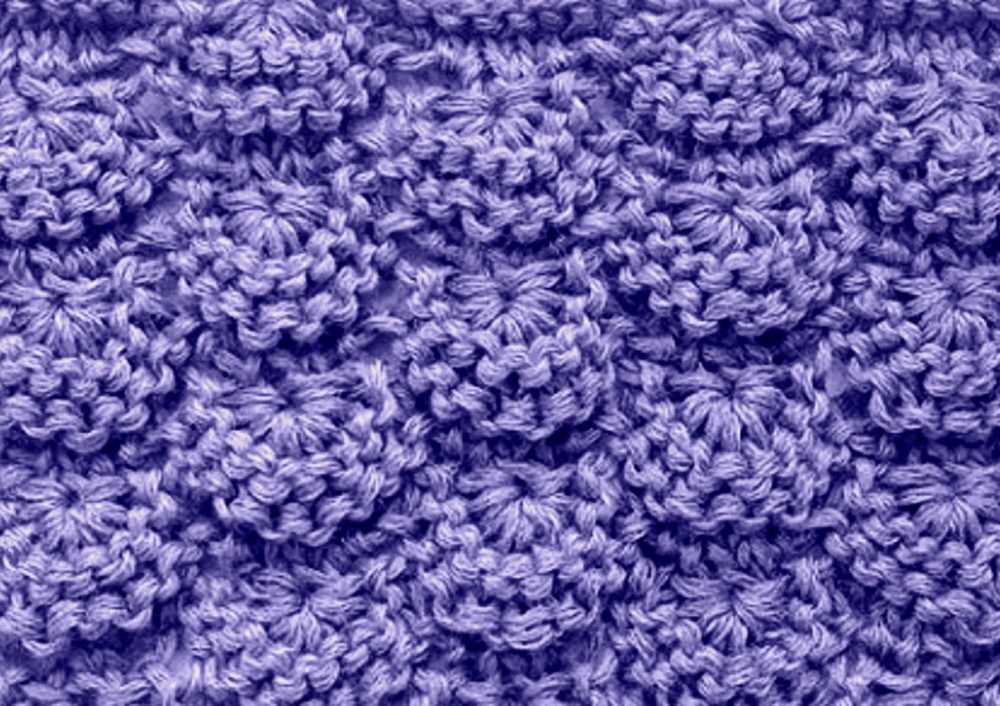
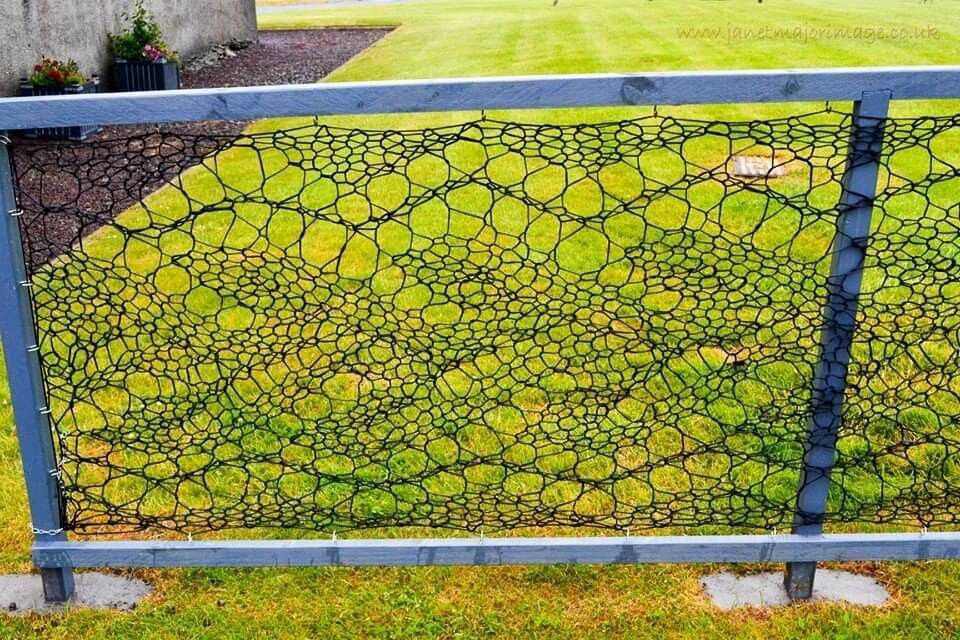
Knitting is a versatile craft that allows for endless creativity. From scarves to hats to blankets, there are countless patterns and designs to choose from. One unique and eye-catching pattern is the knit fence pattern. This pattern is inspired by the look of a classic picket fence and adds a charming touch to any knitting project. Whether you’re a beginner or an experienced knitter, the knit fence pattern is a fun and engaging design to try.
The knit fence pattern involves a combination of basic knitting stitches such as knit and purl. By using these stitches in a specific arrangement, you can create a pattern that resembles the look of a fence. This pattern typically consists of alternating columns of knit stitches, which create the vertical posts of the fence, and purl stitches, which create the horizontal slats. The result is a textured design that adds visual interest and depth to your knitting.
One of the great things about the knit fence pattern is its versatility. It can be used in a variety of knitting projects, from scarves and hats to blankets and sweaters. You can also experiment with different yarn weights and colors to achieve different effects. For a classic look, you can use a worsted weight yarn in a neutral color such as white or beige. If you want to add a pop of color, you can choose a vibrant yarn in your favorite shade.
Types of Knit Fence Patterns

When it comes to knit fence patterns, there are several different options to choose from. Each pattern has its own unique look and style, allowing you to find the perfect design for your knitting project. Here are some popular types of knit fence patterns:
1. Cable Knit Fence Pattern
The cable knit fence pattern is one of the most classic and timeless designs. This pattern features interconnected cables that create a textured and raised surface. Cable knit fences often have a sophisticated and elegant look, making them perfect for adding a touch of luxury to any knitting project.
2. Lace Knit Fence Pattern
The lace knit fence pattern is delicate and intricate, resembling the look of lace fabric. This pattern typically includes openwork stitches and intricate motifs, resulting in a fence with a light and airy appearance. Lace knit fences are often used for creating beautiful and feminine garments or accessories.
3. Ribbed Knit Fence Pattern

The ribbed knit fence pattern is characterized by its raised vertical ridges. This pattern is created by alternating knit and purl stitches in a specific sequence. Ribbed knit fences are known for their elasticity and texture, making them great for projects that require stretch and flexibility, such as hats, scarves, and sweaters.
- 4. Garter Stitch Knit Fence Pattern
- 5. Fair Isle Knit Fence Pattern
- 6. Intarsia Knit Fence Pattern
These are just a few examples of the many different types of knit fence patterns that you can explore. Whether you’re a beginner or an experienced knitter, there is a pattern out there that will suit your skill level and desired aesthetic. So get your knitting needles ready and start experimenting with different knit fence patterns to create beautiful and unique projects!
Classic Cable Knit Fence Pattern

The classic cable knit fence pattern is a traditional and timeless design that adds a charming and elegant touch to any space. This popular knitting pattern features interlocking, raised cables that mimic the look of a traditional wooden fence. It is a versatile pattern that can be used to create a variety of knit items, including blankets, scarves, and even sweaters.
The cable knit fence pattern is created by crossing stitches over one another, creating the appearance of intertwined cables. This pattern requires a basic knowledge of knitting techniques, such as knitting and purling, as well as the ability to work cable stitches. The interlocking cables give the knitted fabric a luxurious and textured look, making it a popular choice for those who want to add a touch of sophistication to their projects.
How to Knit the Classic Cable Knit Fence Pattern
- Start by casting on an even number of stitches.
- Work a few rows of ribbing, alternating between knit and purl stitches, to create a border for the pattern.
- Begin the cable pattern by working a set number of purl stitches.
- Next, place a cable needle or stitch holder in front of the work.
- Take the next set of stitches and hold them to the back of the work.
- Knit the set of purl stitches.
- Next, knit the set of stitches held to the back.
- Continue repeating these steps until the desired length is reached.
- To finish, work a few more rows of ribbing and bind off the stitches.
The classic cable knit fence pattern is a fun and challenging project for knitters of all skill levels. With its intricate design and timeless appeal, this pattern is sure to impress. Whether you choose to knit a cozy blanket or a stylish scarf, the cable knit fence pattern is guaranteed to add a touch of elegance to any knitting project.
Ribbed Knit Fence Pattern

The ribbed knit fence pattern is a popular choice for creating a textured and visually appealing fence design. This pattern involves alternating rows of knit stitches and purl stitches to create a ribbed effect. The knit stitches create raised columns, while the purl stitches create recessed columns, giving the fence a three-dimensional look.
To create a ribbed knit fence pattern, start by casting on an even number of stitches. Begin the first row by knitting one stitch, then purling one stitch. Repeat this sequence of knit one, purl one until the end of the row. On the next row, reverse the pattern by purling one stitch and knitting one stitch. Continue alternating these two rows to create the ribbed effect.
- Materials needed: Knitting needles (size may vary depending on the desired gauge), yarn (of your choice), tapestry needle.
- Difficulty level: Intermediate.
- Benefits: The ribbed knit fence pattern adds visual interest and texture to any fence design. It is relatively easy to learn and can be customized to fit various fence sizes and styles.
- Drawbacks: This pattern requires some knitting experience and may be more time-consuming compared to simpler fence patterns. It may also require more yarn due to the ribbed texture.
To achieve the desired width and height for your ribbed knit fence, you may need to adjust the number of stitches and rows. Experiment with different yarn weights and needle sizes to find the right combination for your project. Once you have completed the knitting portion, secure the edges and attach the fence to posts or stakes using tying wire or other appropriate fasteners.
In conclusion, the ribbed knit fence pattern is a great option for those looking to add a unique and textured design to their fences. With some knitting skills and patience, you can create a visually appealing fence that will stand out in any outdoor space.
Basket Weave Knit Fence Pattern

The basket weave knit pattern is a classic design that adds texture and interest to any knitting project. It is particularly popular for creating beautiful and sturdy fences. The pattern consists of a series of woven squares that resemble the pattern of a basket, hence its name.
To create a basket weave knit fence, you will need a thick and durable yarn, such as cotton or wool, and appropriately sized knitting needles. The pattern is relatively easy to knit, but some basic knitting knowledge is required.
To start, cast on an even number of stitches on your knitting needle. The number of stitches will depend on the desired width of your fence. Additionally, you may want to add a few extra stitches at the beginning and end of each row for a border.
The basic stitch pattern for a basket weave knit fence involves knitting and purling. The rows are worked in blocks of four stitches. For the first block, knit four stitches. For the second block, purl four stitches. Repeat these two blocks until the end of the row.
When you start the second row, reverse the stitch pattern. If the previous row started with knitting, start the new row by purling. Likewise, if the previous row started with purling, start the new row by knitting. Repeat these two rows until you reach the desired length of your fence.
For added interest, you can experiment with different color combinations or even incorporate cables or other stitch patterns into your basket weave knit fence. The pattern creates a dense and sturdy fabric, making it ideal for outdoor use.
Lace Knit Fence Pattern

Knitting lace fence patterns can add a touch of elegance and beauty to any knitting project. Lace designs are delicate and intricate, featuring openwork and decorative elements. A lace knit fence pattern can be used to create a unique and stylish fence or boundary for your garden or home.
Materials:
- Knitting needles suitable for lace knitting
- Lace weight yarn in the desired color(s)
- Tape measure or ruler
- Yarn needle
Instructions:
- Start by choosing the lace knit fence pattern you want to use. There are various patterns available online or in knitting pattern books.
- Make a swatch to determine your gauge. This will help you determine the number of stitches and rows you need to cast on for your desired fence size.
- Using the lace pattern and your gauge, cast on the desired number of stitches for your fence width.
- Continue knitting the lace pattern, following the instructions provided. Pay attention to any increases, decreases, or yarn overs needed to create the lace design.
- Once you have reached the desired height for your fence, bind off all stitches.
- Weave in any loose ends using a yarn needle.
Tips:
- Blocking your lace knit fence pattern will help open up the lace and create a more defined design. Wet block your finished knitting piece by immersing it in water, gently squeezing out the excess water, and then pinning it to a blocking board or towel to dry in the desired shape.
- If you want to incorporate the lace fence pattern into a larger project, such as a blanket or shawl, you can repeat the lace pattern multiple times or combine it with other stitch patterns for a truly unique design.
With a lace knit fence pattern, you can add a touch of elegance to your garden or home. Whether you choose a simple or intricate design, the delicate openwork of a lace pattern will create a beautiful and unique fence that will be sure to impress.
Seed Stitch Knit Fence Pattern

The seed stitch knit fence pattern is a simple yet stylish design for creating a textured fence. It is perfect for adding a touch of charm and character to your outdoor space. The seed stitch, also known as moss stitch, creates a tight, raised pattern that resembles tiny seeds. This pattern can be easily adapted to various sizes and can be used for creating fence panels, gates, or even decorative accents.
To create the seed stitch knit fence pattern, you will need to have basic knitting skills and a basic understanding of seed stitch. Seed stitch is created by alternating between knit and purl stitches in a specific pattern. The pattern typically consists of knitting one stitch and purling one stitch, then repeating this pattern across the row or round.
To start the seed stitch knit fence pattern, you will need to cast on an even number of stitches. You will then begin by knitting one stitch, purling one stitch, and repeating this pattern until the end of the row. For the next row, you will purl one stitch, knit one stitch, and repeat this pattern until the end of the row. Repeat these two rows until you reach the desired height for your fence.
When working on a larger project, such as a fence panel, you may need to join multiple panels together. To do this, simply knit the desired number of panels and stitch them together using a yarn needle and yarn. This will create a seamless and continuous fence.
The seed stitch knit fence pattern is versatile and can be customized to fit your specific preferences. You can experiment with different yarn colors and textures to create unique and eye-catching fences. Additionally, you can add decorative elements such as buttons, ribbons, or even small hanging planters to further enhance the design.
In conclusion, the seed stitch knit fence pattern is a wonderful option for adding a touch of elegance to your outdoor space. It is an easy and enjoyable knitting project that can be customized to suit your style. Whether you are a beginner or an experienced knitter, this pattern is a great choice for creating a beautiful and functional fence.
Chevron Knit Fence Pattern

The chevron knit fence pattern is a popular choice for adding a stylish and modern touch to any knitting project. The pattern creates a zigzag design that resembles the shape of a chevron, giving it a unique and eye-catching look. It can be used to create a variety of items, including blankets, scarves, hats, and even clothing.
To create the chevron knit fence pattern, you will need to have basic knitting skills and familiarity with common knitting techniques such as knitting and purling. The pattern typically involves alternating rows of knit and purl stitches to create the chevron pattern. Depending on the desired outcome, the pattern can be worked with a single color or multiple colors for added visual interest.
One of the great things about the chevron knit fence pattern is its versatility. It can be easily modified to create different sizes and variations of the chevron design. For example, you can increase or decrease the number of stitches in each row to adjust the width of the chevron. Additionally, you can experiment with different yarn weights and needle sizes to achieve different textures and drapes.
When working on a project with the chevron knit fence pattern, it is important to maintain a consistent tension to ensure that the pattern remains even throughout. Blocking the finished piece can also help to enhance the pattern and give it a more polished look. Overall, the chevron knit fence pattern is a fun and exciting way to add a touch of creativity and modernity to your knitting projects.
Key phrases:
- popular choice
- stylish and modern touch
- zigzag design
- eye-catching look
- knit and purl stitches
- single color or multiple colors
- versatility
- different sizes and variations
- adjust the width
- different yarn weights and needle sizes
- consistent tension
- blocking the finished piece
- fun and exciting
- creativity and modernity
Fair Isle Knit Fence Pattern
The Fair Isle knit fence pattern is a classic design that incorporates multiple colors and intricate stitchwork. It is named after the Fair Isle, one of the Shetland Islands in Scotland, where this traditional knitting technique originated. The pattern is characterized by its use of stranded colorwork, where two colors of yarn are carried across the row and alternated to create a beautiful, geometric motif.
To create the Fair Isle knit fence pattern, knitters typically use fine yarn and small needles to achieve a tight and even tension. The pattern consists of repeating motifs that are often inspired by nature, such as flowers, animals, or geometric shapes. Each color change is worked by dropping one color and picking up the next, resulting in a seamless transition between colors.
The Fair Isle knit fence pattern requires some level of skill and concentration, as it involves managing multiple yarns and following a complex chart or pattern. However, once mastered, it can be a rewarding project for knitters who enjoy intricate designs and colorwork. The finished fence pattern is not only visually stunning but also warm and cozy, making it a popular choice for sweaters, hats, scarves, and other knitted garments.
Argyle Knit Fence Pattern
The argyle knit fence pattern is a classic and timeless design that adds a touch of elegance to any space. This pattern is characterized by its diamond-shaped motifs and interlocking lines, creating a sense of movement and depth. It originated from the Scottish tartan pattern, but has since become popular in various forms of knitwear and home decor.
To recreate the argyle knit fence pattern, you will need to have a good understanding of basic knitting techniques such as casting on, knit and purl stitches, and colorwork. The pattern typically involves using multiple colors, making it perfect for adding a pop of color to your fence.
The key to achieving a successful argyle knit fence pattern is careful planning and attention to detail. Begin by creating a grid that represents the size of your fence, and then sketch out the diamond motifs within the grid. Each diamond should consist of diagonal lines that intersect at the center, with some lines filled in with color. This creates the illusion of a woven fabric.
Once your design is finalized, you can start knitting. Follow the grid pattern you created, knitting the colorwork sections with your chosen colors. Remember to carry the unused colors along the back of your work to avoid excessive loose strands. This will ensure a neat and tidy finished pattern.
- Materials needed for an argyle knit fence pattern:
- – Knitting needles of appropriate size for your chosen yarn
- – Worsted weight yarn in various colors
- – Scissors and tapestry needle for finishing
- – Grid paper and colored pencils for planning
The argyle knit fence pattern is not only visually appealing, but also a great way to showcase your knitting skills. Whether you choose to incorporate it into a small section of your fence or create an entire argyle knit fence, this pattern is sure to impress.
Intarsia Knit Fence Pattern

Intarsia knitting is a technique that allows you to create intricate designs and patterns on your knitted projects. One popular pattern is the fence pattern, which adds a charming and rustic touch to any knitted item. The fence pattern is created using multiple yarn colors and is worked using the intarsia technique, where each color is worked as a separate block of color. This pattern is perfect for adding visual interest to blankets, scarves, or even sweaters.
To create the intarsia knit fence pattern, you will need multiple colors of yarn, knitting needles, and a chart or pattern to follow. Begin by casting on the desired number of stitches in your main color. Then, using the intarsia technique, start adding in the additional colors to create the fence pattern. Each color block will be worked in a separate section of the knitting, with the yarn carried along the back of the work when not in use.
Here is a step-by-step guide on how to create the intarsia knit fence pattern:
- Choose your colors: Decide on the colors you want to use for your fence pattern. Typically, a combination of brown for the fence posts and white or green for the rails is used, but feel free to get creative with your color choices.
- Create a chart: Draw out a chart or use a pattern that illustrates where each color block should be placed. This will help guide you as you work on your project.
- Cast on stitches: Start by casting on the desired number of stitches in your main color. This will be the base for your fence pattern.
- Introduce additional colors: As you reach a section in the chart or pattern that indicates a different color, start working with that color. You’ll need to twist the old color and new color together at the beginning of the row to prevent any gaps or holes in your knitting.
- Work color blocks: Follow the chart or pattern, working each color block as a separate section of the knitting. When switching colors, twist the old and new colors together to prevent gaps.
- Carry yarn: When you’re not using a particular color, carry it along the back of the work. Make sure to twist the yarns together at the beginning of each row to prevent holes.
- Continue knitting: Keep following the chart or pattern until you’ve completed the entire fence pattern.
- Finish off: Once you’ve completed the fence pattern, finish off your knitting as desired, whether that’s binding off the stitches or continuing with another section of your project.
Overall, the intarsia knit fence pattern is a fun and creative way to add visual interest to your knitting projects. With a little practice, you’ll be able to create stunning and unique designs that are sure to impress.
Bobble Knit Fence Pattern

The bobble knit fence pattern is a unique and charming design that adds texture and visual interest to any knitted project. With its raised bobbles resembling little fence posts, this pattern is perfect for creating decorative borders, panels, or even entire garments.
To create the bobble knit fence pattern, you will need to be familiar with basic knitting techniques such as casting on, knitting, purling, and binding off. The pattern is typically worked over a multiple of stitches, so you can easily adjust it to fit your desired width.
Materials:
- Worsted weight yarn in your choice of color
- Knitting needles appropriate for your yarn (check the label for recommended size)
- Tapestry needle for weaving in ends
Pattern:
- Cast on the desired number of stitches. The pattern is typically worked over a multiple of 4 stitches.
- Row 1: Knit all stitches.
- Row 2: Purl all stitches.
- Row 3: *Knit 3, make a bobble. Repeat from * to the end of the row.
- Row 4: Purl all stitches.
- Repeat Rows 1-4 until your work measures the desired length.
- Bind off all stitches.
Creating the Bobble:
The bobble stitch is what gives the bobble knit fence pattern its distinctive look. Here’s how to make a bobble:
| Step | Instructions |
|---|---|
| 1 | Knit into the front, back, and front again of the next stitch. This increases one stitch to four stitches. |
| 2 | Turn your work. |
| 3 | Knit the next four stitches. |
| 4 | Turn your work. |
| 5 | Purl the next four stitches. |
| 6 | Turn your work. |
| 7 | Knit the next four stitches together to decrease back down to one stitch. |
Repeat these steps for each bobble in the pattern, spacing them evenly across your row. The bobbles will create the appearance of mini fences throughout your project, adding a playful touch to your knitting.
Garter Stitch Knit Fence Pattern

The garter stitch knit fence pattern is a popular choice for those looking to add a decorative touch to their knitting projects. This pattern creates a textured fabric that resembles a picket fence, making it perfect for baby blankets, scarves, and even home decor items.
To create the garter stitch knit fence pattern, you will need to have a basic understanding of knitting techniques such as casting on, knitting, purling, and casting off. The pattern is worked in rows, alternating between knit and purl stitches to create the garter stitch texture.
To start the garter stitch knit fence pattern, you will first need to cast on an even number of stitches. This will ensure that the fence pattern is symmetrical. Once you have cast on your stitches, begin working the pattern by knitting the first row.
On the next row, you will purl all of the stitches. Continue alternating between knitting and purling each row until you have reached your desired length. Once you are ready to finish the pattern, cast off your stitches and weave in any loose ends.
The garter stitch knit fence pattern can be customized by using different colors of yarn or adding embellishments such as buttons or appliques. It is a versatile pattern that can be adapted to suit any knitting project, whether you are a beginner or an experienced knitter.
If you are new to knitting, the garter stitch knit fence pattern is a great place to start. It is an easy pattern that can be easily memorized, allowing you to focus on perfecting your knitting technique. With practice, you will be able to create beautiful garter stitch knit fences that add a unique touch to your handmade items.
Conclusion:
In conclusion, the entrelac knit fence pattern is a versatile and visually stunning technique that can be used to create unique and eye-catching decorative pieces. With its interlocking diamond-shaped blocks, this pattern adds a sense of depth and texture to any design. Whether you are knitting a blanket, scarf, or even a wall hanging, the entrelac technique is sure to impress.
By following the step-by-step instructions and practicing the different stitches involved, anyone can master the art of entrelac knitting. With a bit of patience and perseverance, you can create intricate and beautiful projects that showcase your knitting skills.
Remember to choose the right yarn and knitting needles for your project, as well as to practice tension consistency to ensure the best results. Additionally, experimenting with different color combinations can add an extra dimension to your work.
Whether you are a beginner knitter or an experienced one, the entrelac knit fence pattern is a technique worth exploring. It offers endless possibilities for creating unique and visually appealing pieces that are sure to stand out.
So, pick up your knitting needles and give the entrelac knit fence pattern a try. Unleash your creativity and enjoy the process of creating beautiful and highly textured knitted projects!