
Knitting is a popular crafting hobby that allows you to create beautiful and unique pieces of clothing, home decor, and accessories. One of the great things about knitting is that it can be as simple or as complex as you want it to be. If you’re a beginner knitter or simply looking for some easy projects, knitting square patterns can be a great way to get started.
Knitting squares, also known as blocks, are a versatile and practical choice for any knitter. They are simple to make and can be combined in various ways to create larger projects, such as blankets, scarves, or even garments. Plus, knitting squares is a great way to practice different stitch patterns and learn new techniques.
Whether you prefer working with simple garter stitch, classic stockinette stitch, or more intricate lace or cable patterns, there is a knitting square pattern out there for you. You can start with basic squares and gradually move on to more intricate designs as you gain confidence and experience. The possibilities are endless!
In this article, we will explore some easy knitting square patterns that are perfect for beginners and experienced knitters alike. So grab your knitting needles and let’s get started on creating some stunning squares!
Basic knitting techniques for square patterns

When it comes to knitting square patterns, there are a few basic techniques that every knitter should know. These techniques will help you create beautifully crafted squares that can be used for a variety of projects such as blankets, scarves, and cushions. Whether you are a beginner or an experienced knitter, mastering these techniques will enhance your knitting skills and allow you to create square patterns with ease.
1. Casting on: The first step in knitting a square pattern is casting on. This is the process of creating the initial stitches on your knitting needle. There are various methods of casting on, such as the long-tail cast on or the knit cast on. Choose a method that you find comfortable and practice it until you can easily create a row of evenly spaced stitches.
2. Knit and purl stitches: The knit and purl stitches are the building blocks of knitting. These two stitches create different textures and patterns in your square. The knit stitch is created by inserting the needle from left to right into the loop on the left needle, wrapping the yarn around the right needle, and pulling the stitch through. The purl stitch is similar, but the needle is inserted from right to left into the loop on the left needle. Practice these stitches to create smooth and even fabric for your square.
3. Increasing and decreasing: To shape your square, you will need to know how to increase and decrease stitches. Increasing involves adding stitches to your work, while decreasing involves eliminating stitches. Common methods of increasing stitches include knitting or purling into the front and back of a stitch or creating yarn overs. Decreasing can be achieved by knitting or purling two stitches together or by slipping a stitch and passing it over the next stitch. These techniques will help you create squares with interesting shapes and patterns.
Additional tips:
- Use stitch markers to keep track of your increases or decreases.
- Experiment with different colors and yarn weights to create unique square patterns.
- Practice tension control to ensure your stitches are even and consistent.
- Block your finished squares to give them a polished and professional look.
By mastering these basic knitting techniques, you will be able to create beautiful square patterns that can be used for a variety of projects. With practice and patience, you will soon be able to create intricate square designs that showcase your knitting skills.
Choosing the right yarn for your square pattern
When it comes to knitting square patterns, selecting the right yarn is key to achieving the desired texture and finish. With so many different options available, it can be overwhelming to choose the perfect yarn for your project. However, by considering a few key factors, you can make an informed decision that will result in a beautiful square.
Fiber content: The fiber content of the yarn will greatly impact the final look and feel of your square. Wool yarns provide warmth and elasticity, making them an excellent choice for squares that will be used in cold weather garments or accessories. Cotton yarns, on the other hand, are cooler and more breathable, making them ideal for squares that will be used in warm weather items. Synthetic fibers such as acrylic are often more affordable and easy to care for, making them a great choice for beginners or those on a budget.
Yarn weight: The weight of the yarn, often identified by a number on the yarn label, determines the thickness and heaviness of the square. A yarn with a higher weight number (such as bulky or super bulky) will result in a thicker and heavier square, while a yarn with a lower weight number (such as lace or fingering) will create a lighter, more delicate square. Consider the intended purpose of your square when selecting the yarn weight, as a heavier square may be more suitable for blankets or home decor, while a lighter square may be better for garments or accessories.
Color and texture: Finally, the color and texture of the yarn can greatly enhance the visual appeal of your square. Consider the overall aesthetic you wish to achieve and select a yarn color that complements your design. Additionally, the texture of the yarn, whether smooth and sleek or fuzzy and textured, can add an extra dimension to your square. Experiment with different yarn options to find the perfect combination of color and texture for your project.
By considering these factors, you can ensure that the yarn you choose for your square pattern is the right fit for your project. Remember to also check the recommended gauge and needle size for your pattern, as this will further guide your yarn selection. With the right yarn in hand, you’ll be ready to create beautiful and cozy squares that will bring joy and warmth to your knitting projects.
Recommended needle sizes for knitting square patterns
When starting a knitting project, it’s important to choose the right needle size to achieve the desired outcome. This is especially true when knitting square patterns, as the size of the needle will determine the final measurements of the squares.
For most square patterns, it is recommended to use a medium-sized needle, typically between US size 7 (4.5mm) and US size 9 (5.5mm). This size range is ideal for creating squares that are not too tight or too loose. However, it’s important to consider the weight and thickness of the yarn being used as well.
If you are using a bulky yarn, such as a super chunky or bulky weight yarn, you may want to use a larger needle size, such as US size 10 (6mm) or even US size 13 (9mm). This will create a looser and larger square, perfect for cozy blankets or cushions.
On the other hand, if you are using a fine yarn, such as a fingering or sport weight yarn, you may want to use a smaller needle size, such as US size 3 (3.25mm) or US size 5 (3.75mm). This will create a tighter and smaller square, ideal for intricate patterns or lightweight projects like baby blankets or scarves.
Understanding gauge and tension in square knitting

Knitting gauge and tension are essential concepts to understand when knitting squares. Gauge refers to the number of stitches and rows per inch in a knitted fabric, while tension refers to how tightly or loosely the yarn is knit. Both gauge and tension can greatly impact the final size and appearance of a square.
To achieve the desired gauge and tension, it is important to use the recommended yarn weight and needle size specified in the pattern. Using a different yarn weight or needle size can result in a square that is either too small or too large. Knitting a test swatch before starting the square can help determine if the gauge and tension are accurate.
When measuring gauge, it is important to measure over a large enough area to ensure accuracy. A 4×4 inch square is commonly used for gauge measurements. To measure gauge, count the number of stitches and rows within the 4×4 inch area and compare it to the gauge specified in the pattern. If the stitch and row count is off, adjusting the needle size or tension may be necessary to achieve the correct gauge.
Proper tension is also important to achieve an even and consistent fabric. If the tension is too tight, the square may be smaller and have a denser texture. If the tension is too loose, the square may be larger and have a more open and airy texture. Experimenting with different tension techniques, such as holding the yarn more tightly or loosely, can help achieve the desired tension.
Understanding gauge and tension is crucial for creating well-fitting and visually appealing squares. By following the recommended yarn weight and needle size, knitting a test swatch, and adjusting tension as needed, knitters can ensure that their squares turn out as intended.
Knitting a Simple Garter Stitch Square Pattern

The garter stitch is one of the most basic and versatile knitting stitches, making it an ideal choice for beginners and experienced knitters alike. This simple pattern creates a square that can be used for various projects, such as dishcloths, blankets, and even scarves.
To start knitting a garter stitch square, you will first need to gather the necessary materials, including a pair of knitting needles and a ball of yarn. Choose a needle size that is appropriate for the yarn you are using, and make sure to have enough yarn to complete the desired size of your square.
Here is a step-by-step guide on how to knit the garter stitch square pattern:
- Cast on the desired number of stitches onto one of the knitting needles. For a small square, you can start with 20 stitches, but you can adjust this number based on your preference.
- Hold the knitting needles with the cast-on stitches in your right hand and the empty needle in your left hand.
- Insert the tip of the left needle into the first stitch on the right needle, going from left to right.
- Wrap the yarn around the right needle counterclockwise, creating a loop.
- Using the right needle, pull the loop through the stitch, transferring the stitch from the right needle to the left needle.
- Repeat steps 3-5 for each stitch until you have completed one row.
- Continue knitting each row in the same manner until your square reaches the desired size.
- Once you have reached the desired size, bind off the stitches by knitting two stitches, then pulling the first stitch over the second stitch on the right needle, repeating this process until only one stitch remains. Cut the yarn, leaving a tail, and pull it through the last stitch to secure it.
With this simple garter stitch square pattern, you can create beautiful and functional items while improving your knitting skills. Experiment with different yarn colors and textures to add variety to your projects. Happy knitting!
Creating a Stockinette Stitch Square Pattern

If you’re looking for a simple and versatile knitting pattern, the stockinette stitch square is a great option. This pattern is perfect for beginners as it only requires two basic stitches: knit and purl. By alternating rows of knitting and purling, you can create a smooth and textured square that can be used for various projects.
To create a stockinette stitch square, start by casting on an even number of stitches. This will ensure that you can maintain the pattern consistently throughout the project. Once you have cast on, begin by knitting the first row. This will serve as the right side of the square.
On the next row, purl all of the stitches. This will create a row of bumps on the surface of the square, giving it a unique texture. Continue alternating between knitting and purling rows until the square reaches the desired size. Remember to always knit the right side and purl the wrong side to maintain the stockinette stitch pattern.
A stockinette stitch square can be used for a variety of projects, such as afghans, scarves, and even clothing items like sweaters or cardigans. You can also experiment with different colors and yarn weights to customize your square to fit your desired project. With its simplicity and versatility, the stockinette stitch square pattern is a go-to option for knitters of all skill levels.
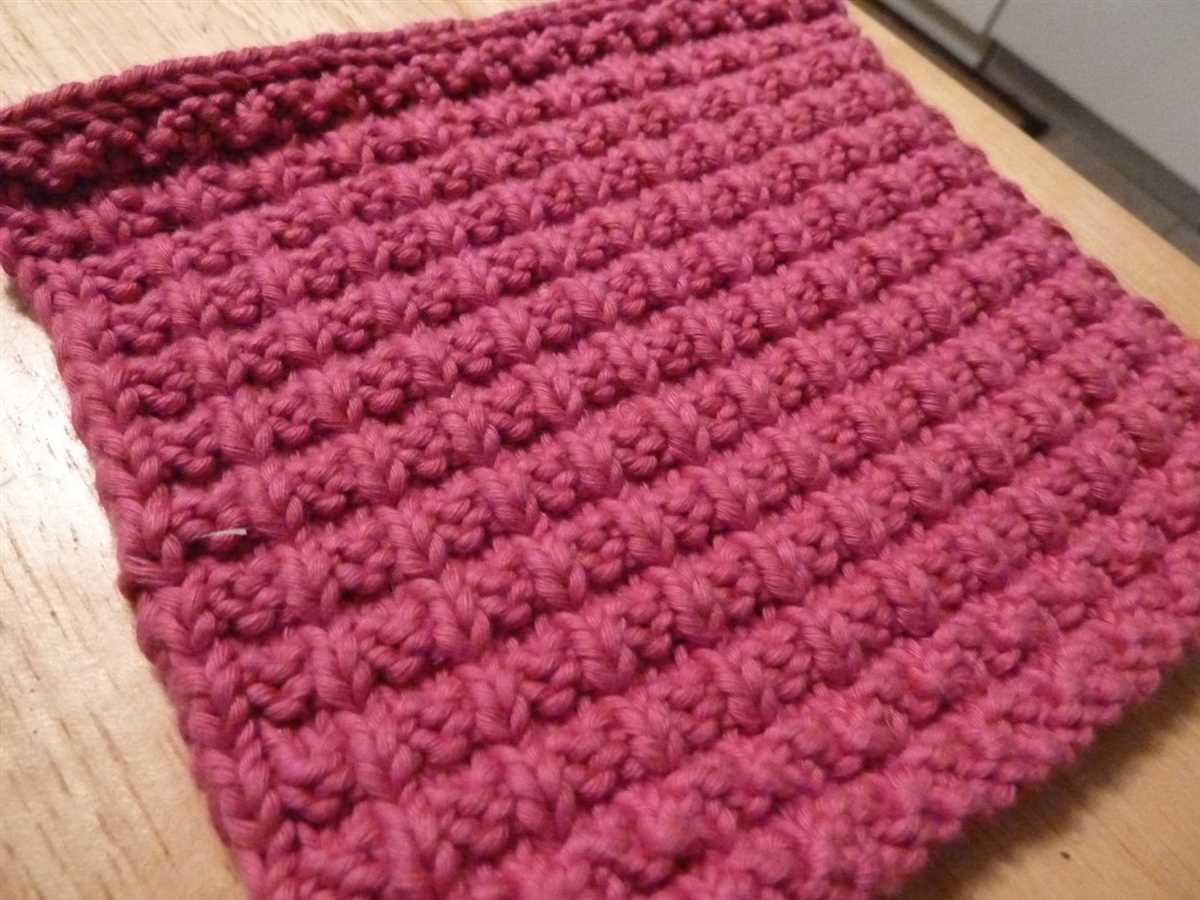
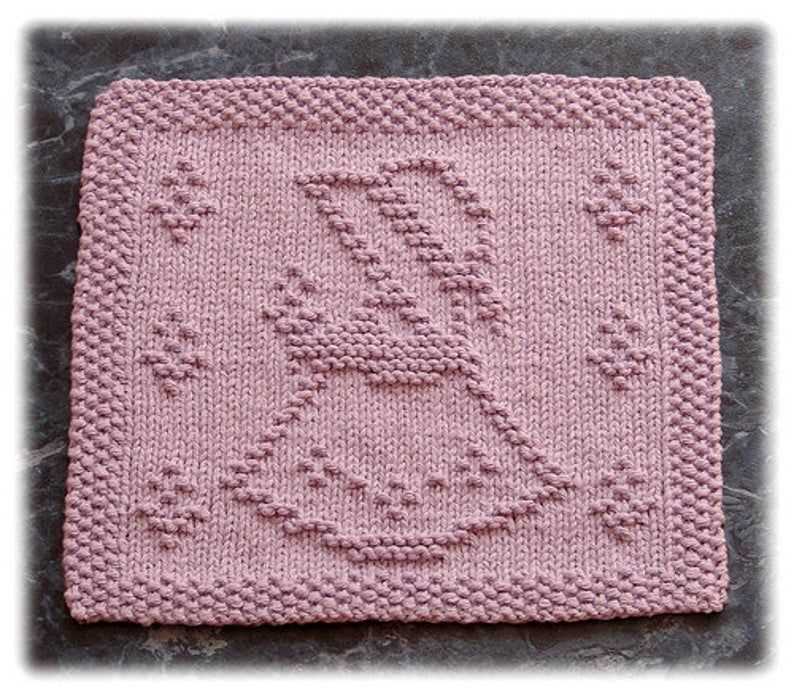
Adding Texture with a Seed Stitch Square Pattern
When it comes to creating beautiful knitted squares, adding texture can make a big difference in the overall look and feel of your finished project. One popular way to add texture is by using the seed stitch pattern. This simple yet effective pattern alternates knit and purl stitches in a way that creates a bumpy, textured surface.
The seed stitch pattern is perfect for adding visual interest to your knitted squares. By alternating knit and purl stitches in a specific sequence, you can create a unique texture that adds depth and dimension to your project. The seed stitch is also reversible, which means that both sides of your knitted square will have an attractive pattern.
To knit a seed stitch square, you will need to follow a specific pattern. Start by casting on an even number of stitches. Then, in the first row, knit one stitch, purl one stitch, and repeat this sequence until the end of the row. In the next row, purl the first stitch, knit the next stitch, and repeat this sequence until the end of the row. Continue alternating these two rows until you have reached the desired length for your square.
The seed stitch pattern is not only visually appealing but also adds a nice texture that can be felt. This makes it a great choice for items such as dishcloths or baby blankets, where both aesthetics and functionality are important. Whether you are a beginner or an experienced knitter, the seed stitch pattern is easy to learn and can be used to create beautiful squares that will impress everyone!
Introducing color with a striped square pattern

Are you looking to add some color to your knitting projects? Look no further than a striped square pattern! By incorporating different colors into your knitting, you can create eye-catching designs and add visual interest to your projects.
Why choose a striped square pattern?
If you’re new to colorwork or simply want an easy way to introduce color into your knitting, a striped square pattern is a great choice. With only two colors per row, it’s a simple and manageable way to practice color changes and get comfortable working with multiple yarns. Plus, the repetitive nature of the pattern makes it a relaxing and enjoyable project to work on.
How to knit a striped square pattern
To begin knitting a striped square, you’ll first need to choose your two colors. Decide on the order and width of your stripes, and make sure to have enough yarn of each color to complete the pattern. Start by casting on the desired number of stitches using the first color. Then, simply follow the pattern, alternating between the two colors for each row. To create crisp, clean stripes, make sure to carry the yarn not in use tightly along the edge of your work, weaving it in every few stitches.
Customizing your striped square
The beauty of a striped square pattern is its versatility. You can customize the width of each stripe, experiment with different color combinations, or even incorporate different stitch patterns within each stripe. This allows you to create unique and personalized pieces that showcase your creativity. Whether you’re knitting a blanket, a scarf, or a cushion cover, a striped square pattern is sure to add a pop of color and a touch of excitement to your project.
So why not give a striped square pattern a try? With endless color possibilities and endless design options, you’ll have a blast incorporating color into your knitting projects.
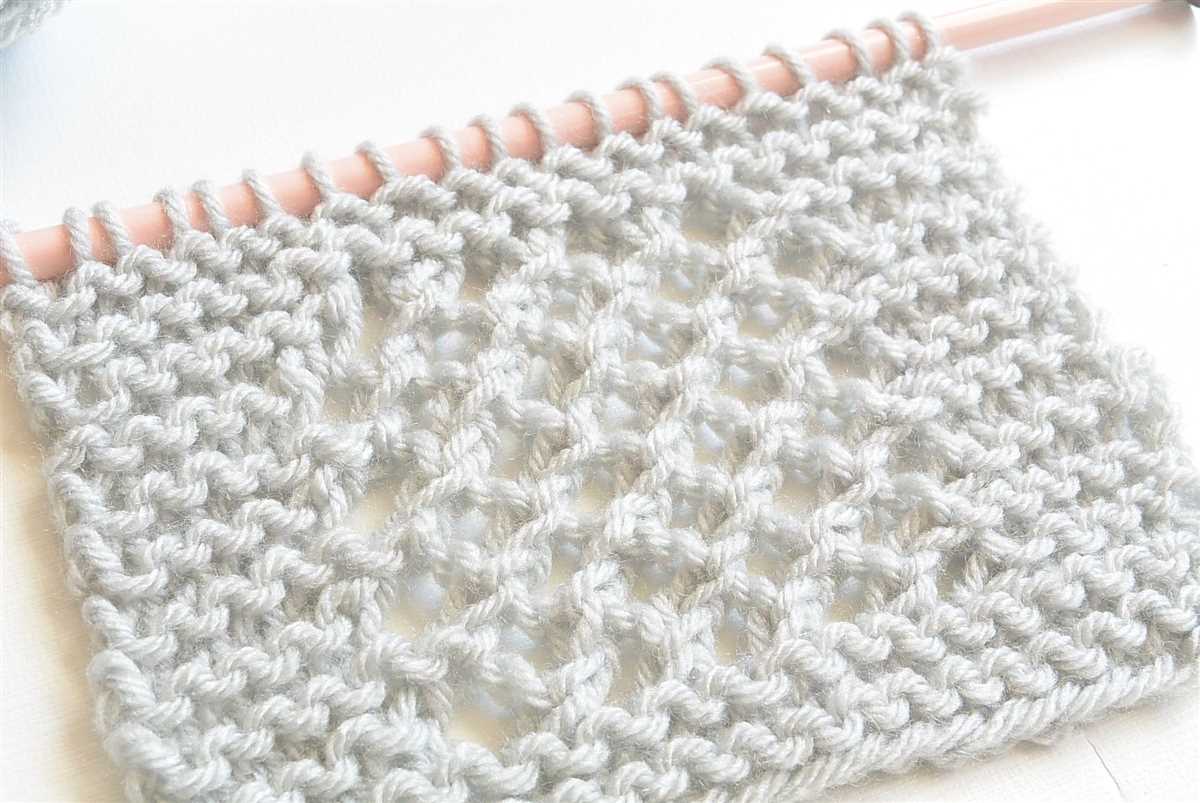
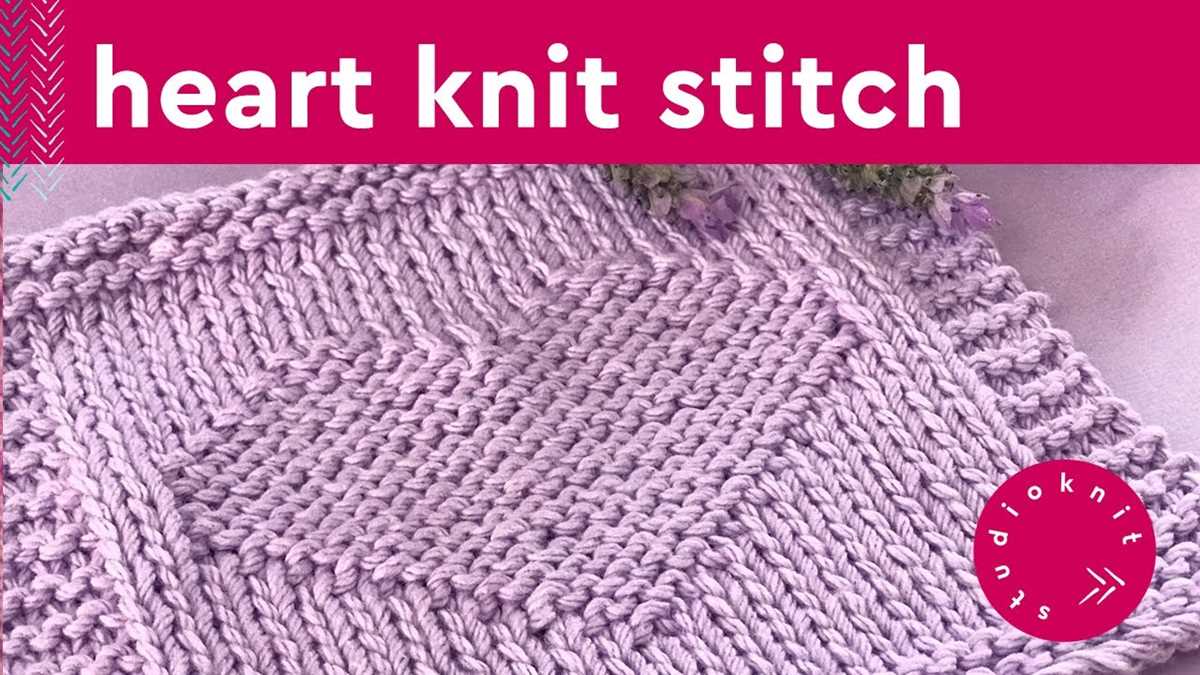
Incorporating lace into your square patterns
If you’re looking to add some delicate and intricate details to your knitting square patterns, incorporating lace is a great option. Lace patterns can elevate the overall aesthetic of your squares and create beautiful and eye-catching designs. Whether you’re a beginner or an experienced knitter, there are various lace techniques that you can experiment with to achieve different looks and textures.
One way to incorporate lace into your square patterns is by using lace stitch patterns. There are countless lace stitch patterns available, ranging from simple to complex. Some popular options include the diamond lace pattern, the leaf lace pattern, and the chevron lace pattern. These patterns typically involve yarn overs, decreases, and other knitting techniques to create the lace effect.
Choosing the right yarn and needles

When incorporating lace into your square patterns, it’s important to choose the right yarn and needles. Fine, lightweight yarns, such as lace weight or fingering weight yarns, are often preferred for lace knitting as they highlight the delicate nature of the lace. Similarly, using smaller needles, such as US size 2 or 3, can help create tighter stitches and emphasize the lace pattern.
Blocking your lace squares
After completing your lace square, it’s important to properly block it to enhance the lace pattern and ensure that the square maintains its shape. Blocking involves gently stretching and shaping the knitted piece using water or steam. This helps to even out the stitches, open up the lace pattern, and give the square a crisp and polished look.
Incorporating lace into your square patterns is a wonderful way to add elegance and complexity to your knitting projects. Whether you’re creating a blanket, a scarf, or any other item, lace can make your squares stand out and add a touch of sophistication. So grab your needles, choose a lace pattern, and start creating beautiful and unique square designs!
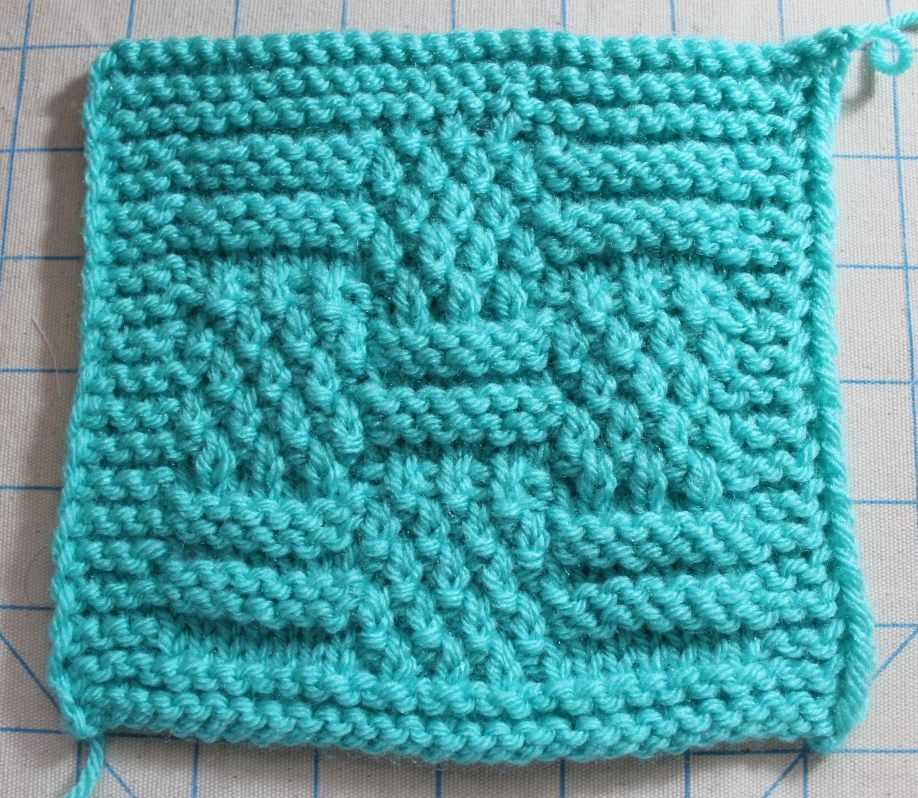
Designing your own cable knit square pattern
Knitting squares is a popular way to practice new stitch patterns and create beautiful projects. Cable knit squares are especially charming and add a touch of elegance to any project. If you’re interested in designing your own cable knit square pattern, follow these steps to create a unique and personalized design.
Step 1: Choose your cable stitch pattern
The first step in designing your cable knit square pattern is to choose the cable stitch pattern you want to incorporate. There are countless cable stitch patterns to choose from, ranging from simple to intricate designs. Browse through stitch pattern books or online resources to find the perfect cable stitch pattern that catches your eye.
Step 2: Determine the size of your square
Before you start knitting, decide on the size of your square. This will depend on the type of project you’re planning to make or the intended use of the square. For example, if you want to create a set of coasters, a smaller square size of around 4 inches may be suitable. If you’re making a blanket, a larger square size of around 8 inches or more would be appropriate.
Step 3: Plan the layout of your cable stitches
Now it’s time to plan the layout of your cable stitches within the square. You can create a simple design by placing a single cable stitch in the center of the square, or you can get creative and combine multiple cable stitches to form intricate patterns. Use graph paper or a design software to sketch out your desired cable stitch layout before you start knitting.
Step 4: Knit a gauge swatch

Before you dive into your cable knit square, it’s important to knit a gauge swatch to ensure that your stitches are the correct size. This will help you determine the number of stitches and rows needed to achieve your desired square size, as well as the correct tension for your cable stitches. Make any necessary adjustments to your needle size or tension to achieve the desired gauge.
Step 5: Start knitting your square

Once you have your cable stitch pattern, square size, layout, and gauge determined, it’s time to start knitting your square. Follow your cable stitch pattern chart or written instructions, making sure to incorporate the cables as planned in your layout. Pay attention to any specific stitch counts or repeats to ensure accuracy and consistency throughout your knitting.
Designing your own cable knit square pattern allows you to unleash your creativity and make a truly unique piece. Whether you’re making a blanket, pillow, or any other project, your cable knit square will add a beautiful touch to your knitting.
Making a Diagonal Square Pattern with Decreases and Increases

Knitting a diagonal square pattern can add an interesting visual element to your knitting project. By incorporating decreases and increases, you can create a diagonal line that moves across the square. This pattern can be used to make dishcloths, blankets, or even scarves.
To start, cast on a multiple of three stitches. For example, you could cast on 27 stitches for a small square or 45 stitches for a larger square.
Row 1: Knit all stitches.
Row 2: Purl all stitches.
Row 3: Knit the first two stitches, then knit two together (K2tog). Continue knitting two stitches together until two stitches remain. Knit the last two stitches.
Row 4: Purl all stitches.
Repeat Rows 1-4 until your square measures the desired length.
When decreasing on Row 3, a slanted line will start to form, creating the diagonal pattern. You can continue knitting the square with this decrease pattern until you have reached the desired size.
Remember to always knit the first stitch and purl the last stitch on every row to maintain a neat edge.
Once you’re finished knitting the diagonal square, you can bind off and weave in any loose ends. This pattern is highly customizable and can be adapted to different yarn weights and needle sizes. Experiment with different color combinations and variations to create unique diagonal square patterns.
Joining Square Patterns to Create Blankets and Other Projects
Once you have mastered knitting square patterns, you can start combining them to create larger projects such as blankets, scarves, and even sweaters. Joining the squares together requires basic sewing skills, but it is a straightforward process that anyone can learn.
To join the squares, you will need a yarn needle and the same yarn you used for knitting the squares. Start by laying out the squares in the desired pattern or arrangement. This will help you visualize how they will look when joined together.
Here are a few common methods for joining knitted squares:
- Whipstitch method: Align the edges of two squares and thread your yarn needle with a long length of yarn. Starting at one corner, insert the needle through both pieces of fabric and bring it up to the front. Continue whipstitching along the edge, going through both pieces of fabric at regular intervals. Repeat this process for each side of the square until all squares are joined.
- Slip stitch method: With this method, you will be picking up stitches along the edges of the squares and joining them as you go. Insert your needle into the edge stitch of the first square and bring it through, then insert it into the corresponding stitch on the second square. Repeat this process, working your way along the edge of the squares. This method creates a neater join but may require more time and precision.
- Mattress stitch method: This method creates an invisible seam by weaving the yarn through the edge stitches of each square. Begin by aligning the squares with the right sides facing up. Insert the needle under the horizontal bar between the first and second stitches on one square, and then do the same on the second square. Continue weaving the yarn back and forth, alternating squares, until you reach the end of the seam. This method gives a seamless appearance to the finished project.
Remember to weave in any loose ends of yarn when you finish joining the squares to create a neat, finished look. Trim excess yarn if necessary.
By combining various square patterns, you can create unique and personalized projects. Experiment with different color combinations, stitch patterns, and arrangements to achieve the desired effect. Whether you are knitting a cozy blanket for yourself or a thoughtful gift for a loved one, joining square patterns opens up a world of creative possibilities in the world of knitting.