
A cable knit vest is a classic piece of clothing that never goes out of style. It is not only fashionable, but also functional and versatile. Whether you are dressing up for a formal occasion or dressing down for a casual day out, a cable knit vest adds a touch of sophistication and warmth to any outfit.
Making a cable knit vest may seem like a daunting task, but with the right pattern and some basic knitting skills, it can be a rewarding and enjoyable project. There are countless cable knit vest patterns available, ranging from simple and straightforward designs to more intricate and intricate patterns.
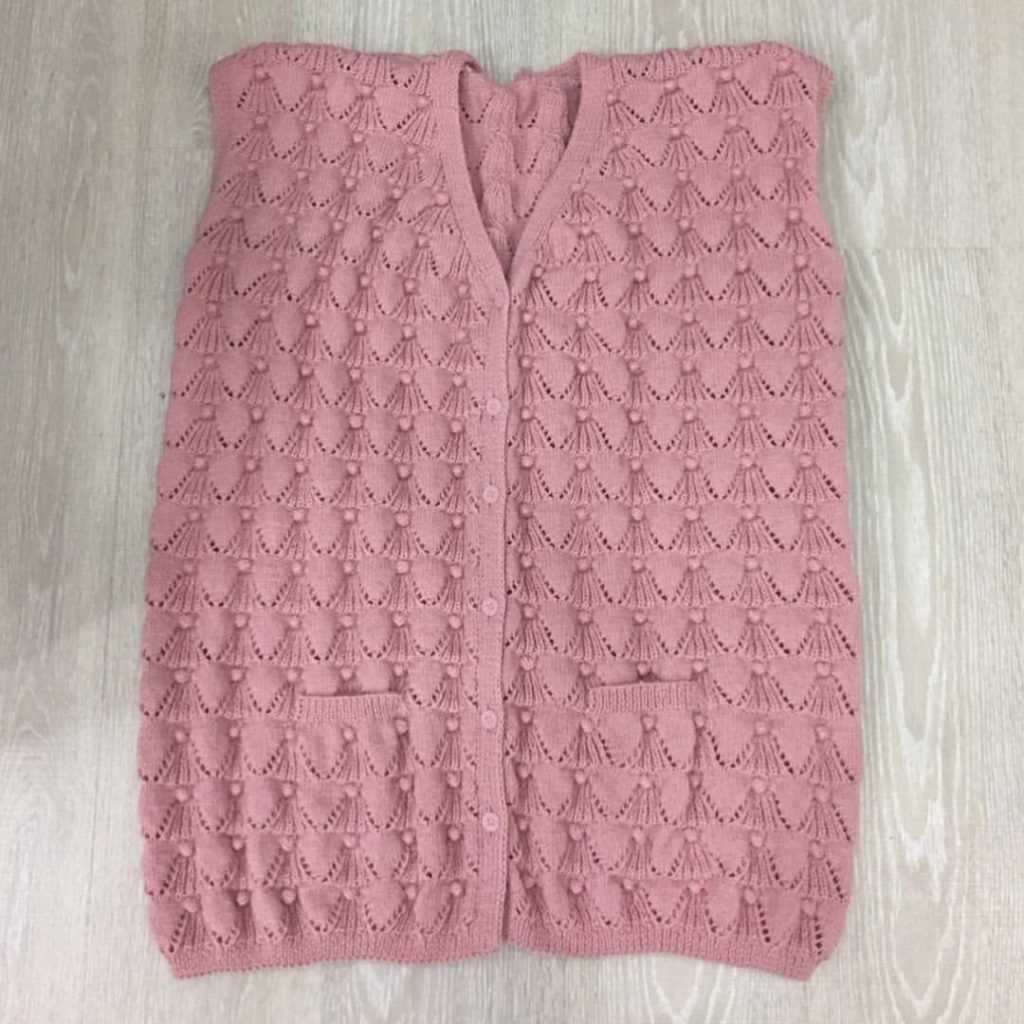
The cable knit vest pattern typically consists of a combination of knit and purl stitches, as well as various cable stitching techniques. These stitches create the beautiful intertwined cables that give the vest its distinctive look. The pattern may also include other design elements such as ribbing, buttons, and a collar.
Whether you are a beginner or an experienced knitter, there is a cable knit vest pattern available for you. With the right pattern and a little patience, you can create a timeless and stylish garment that will be cherished for years to come. So grab your knitting needles and start on your cable knit vest journey today!
Cable Knit Vest Pattern
Cable knit vests are a stylish and cozy addition to any wardrobe. Whether you’re knitting for yourself or for a loved one, a cable knit vest is a classic and timeless piece that can be worn year-round. With its intricate braided patterns and warm texture, it’s no wonder that cable knitting is a popular technique among knitters.
To create your own cable knit vest, you will need a cable knitting pattern. There are many patterns available online or in knitting books that provide instructions on how to create various cable designs. These patterns typically include a list of required materials, such as yarn and knitting needles, as well as step-by-step instructions on how to create each cable stitch.
- Materials: To make a cable knit vest, you will need a size-specific knitting pattern, typically available for purchase or found for free online. You’ll also need a suitable yarn, preferably a medium-weight yarn that is warm and soft. The knitting needles typically used for this project are size 8 or 9.
- Skills: Cable knitting requires some intermediate knitting skills, such as casting on, knitting, purling, and decreasing stitches. Most cable knit vest patterns assume that you already have a basic understanding of these techniques, so it’s helpful to have some prior knitting experience.
Once you have gathered all the necessary materials, you can begin knitting your cable knit vest. Start by following the pattern’s instructions on how to cast on the appropriate number of stitches and create the ribbing for the bottom hem. From there, you will progress to knitting the main body of the vest, incorporating cable stitches as indicated by the pattern.
As you knit each cable stitch, be sure to follow the pattern’s chart or written instructions carefully, as cable knitting involves crossing stitches over each other to create the braided effect. This technique can be a bit tricky at first, but with practice, you’ll become more comfortable with it.
Once you have completed all the required sections of the pattern, you will finish off your cable knit vest by seaming any remaining edges and adding any necessary finishing touches, such as buttons or a collar. Finally, block your finished vest to help it maintain its shape and give it a professional finish.
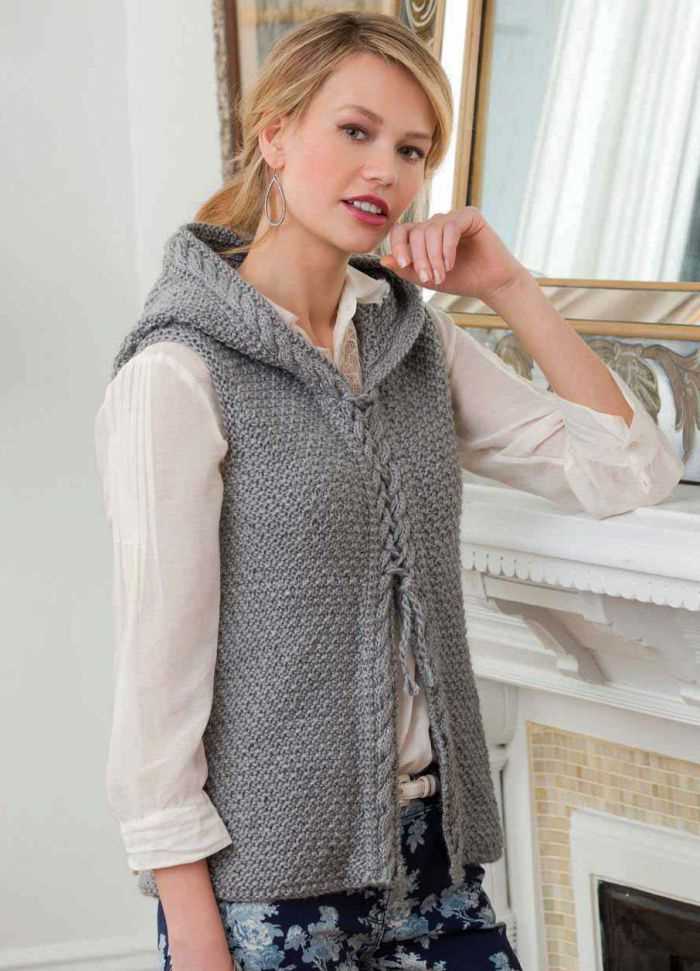
Cable knit vests are versatile garments that can be worn with a variety of outfits. They can be layered over long-sleeved shirts or turtlenecks for extra warmth or paired with a simple t-shirt for a more casual look. Additionally, they can be dressed up or down depending on the occasion. With their classic design and cozy texture, cable knit vests are sure to become a staple in your wardrobe.
Why Choose a Cable Knit Vest
When it comes to knitwear, cable knit vests are a timeless and versatile option that can provide warmth, style, and functionality. Whether you are looking for a cozy layering piece or a statement accessory, a cable knit vest is a perfect choice.
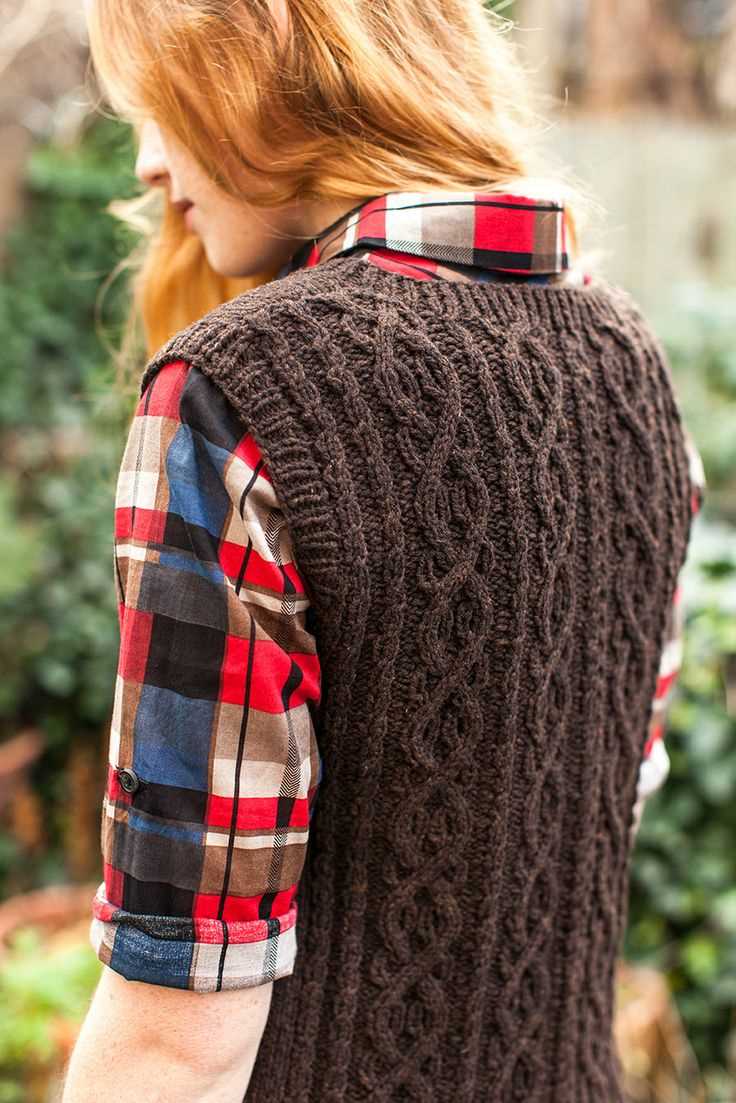
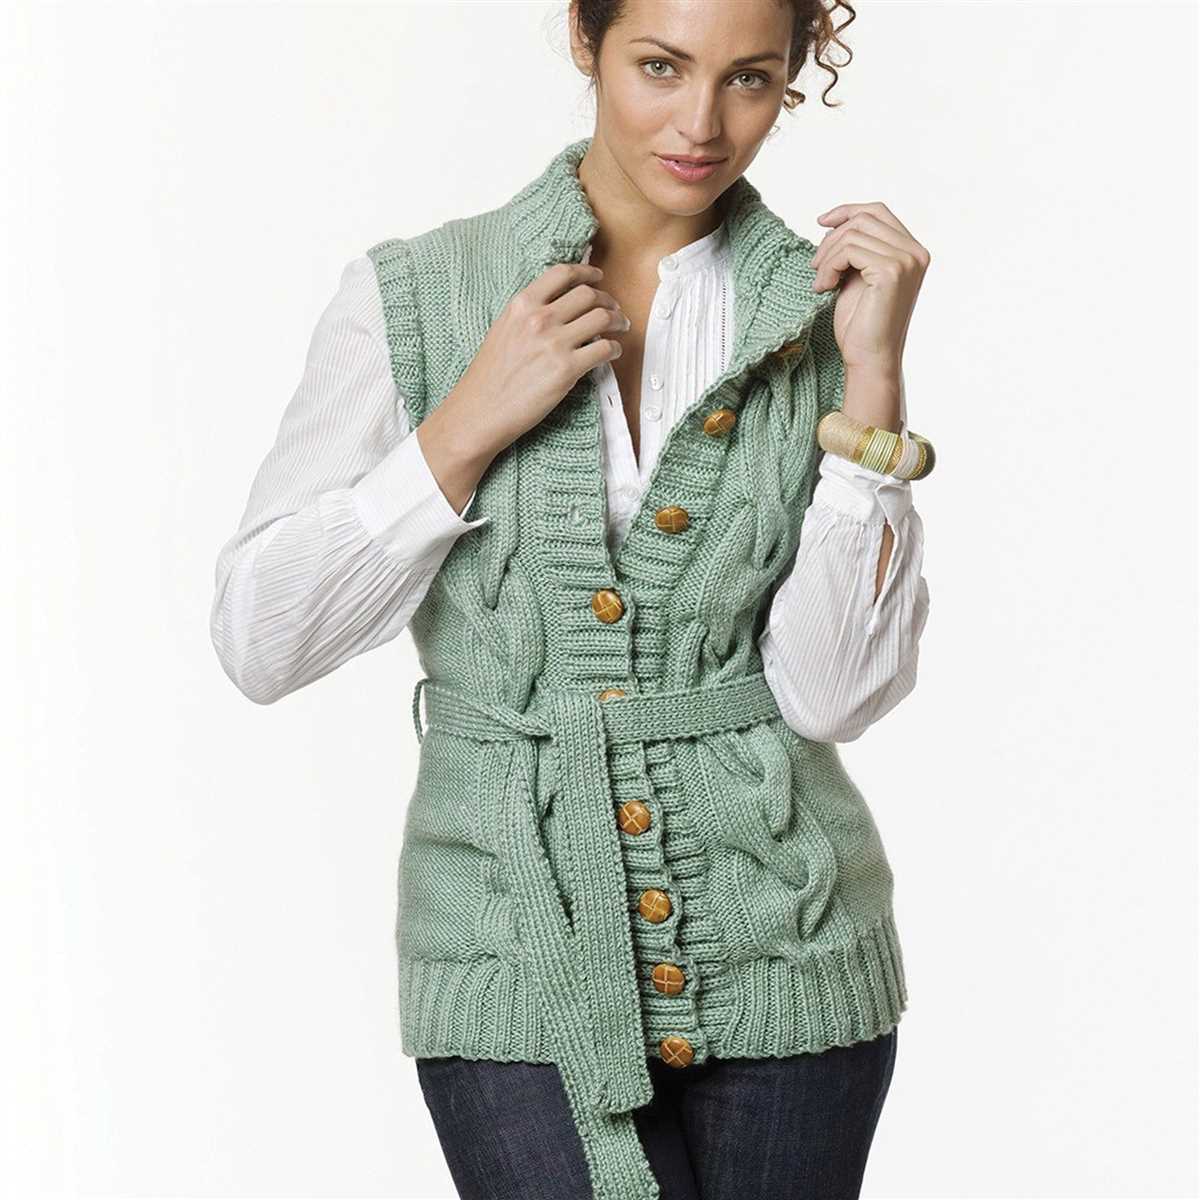
Classic and stylish: Cable knit vests have been a fashion staple for decades, offering a classic and sophisticated look. The unique cable patterns add texture and visual interest to any outfit, making it a stylish addition to your wardrobe.
Warm and comfortable: Cable knit vests are made from thick and cozy yarns, providing excellent insulation and warmth. The cable knit design helps to trap heat, making it an ideal garment for colder weather. Whether you wear it over a long-sleeved shirt or a lightweight sweater, a cable knit vest will keep you warm and comfortable all day long.
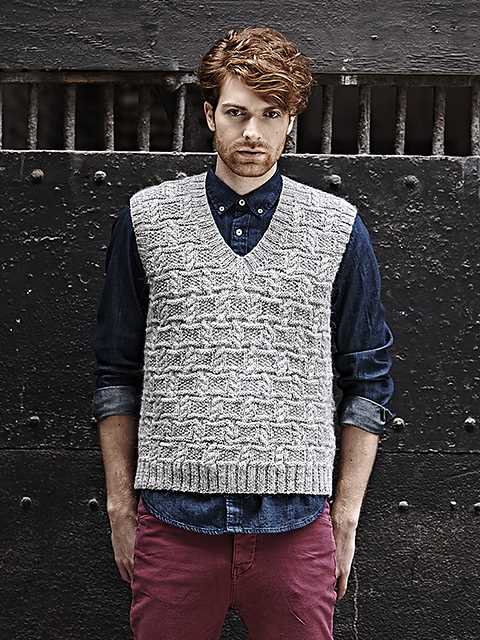
Versatile and adaptable: Cable knit vests can be easily dressed up or down, making them suitable for various occasions and styling options. You can wear it casually with jeans and boots for a relaxed weekend look, or pair it with a skirt and heels for a more polished outfit. The versatility of cable knit vests makes them a go-to choice for both casual and formal settings.
- Layering essential: Cable knit vests are perfect for layering. They can be worn over a shirt, blouse, or even a lightweight sweater, adding an extra layer of warmth and style to your outfit. The sleeveless design allows for easy layering without adding bulk or restricting movement.
- Timeless investment: A well-made cable knit vest is a timeless investment that will never go out of style. Its classic design and durability ensure that it can be worn season after season, making it a valuable addition to your wardrobe.
- DIY project: Whether you are an experienced knitter or just starting, a cable knit vest can be a rewarding DIY project. There are plenty of patterns available for all skill levels, allowing you to create a personalized and unique piece of knitwear.
In conclusion, cable knit vests are a versatile and fashionable choice that offers warmth, style, and functionality. Whether you choose to wear it casually or dress it up, a cable knit vest is a classic and timeless garment that will never go out of style. So why not add one to your wardrobe today?
Choosing the Perfect Yarn
When it comes to knitting a cable-knit vest, choosing the right yarn for your project is crucial. The yarn you choose will affect the overall look, feel, and durability of your finished garment. Here are some factors to consider when selecting the perfect yarn:
Fiber content: The fiber content of the yarn will determine the warmth, softness, and drape of your cable-knit vest. Common options include wool, cotton, acrylic, and blends of different fibers. Wool is known for its warmth and elasticity, while cotton provides breathability and is great for warmer climates. Acrylic is a budget-friendly option that is often machine washable, making it easy to care for. Consider the desired qualities and practicality of the fiber content for your vest.
Weight: The weight of the yarn, also known as its thickness, is another important consideration. Cable-knit vests typically require a medium to bulky weight yarn to showcase the intricate cable patterns. However, you can experiment with different weights to achieve different effects. Keep in mind that the weight of the yarn will also affect the time it takes to complete your project.
Color: The color of the yarn will play a significant role in the overall design of your cable-knit vest. You can opt for classic neutrals, vibrant hues, or even variegated yarns for added visual interest. Consider how the color will complement your wardrobe and personal style. It’s also a good idea to choose a color that will highlight the intricate cables in your design.
Texture: The texture of the yarn can add depth and character to your cable-knit vest. Chunky or boucle yarns can create a more textured and cozy look, while smoother yarns will accentuate the cable patterns. Consider the desired texture of your vest and how it will enhance the overall aesthetic.
Quality: Lastly, consider the quality of the yarn. Look for yarns that are well-spun, free from knots or breaks, and have good stitch definition. Investing in a higher-quality yarn will ensure that your cable-knit vest stands the test of time and looks beautiful for years to come.
By carefully considering these factors and taking the time to choose the perfect yarn, you’ll set yourself up for knitting success and end up with a cable-knit vest that you’ll love to wear.
Essential Knitting Tools
When it comes to knitting, having the right tools is essential for a successful project. Whether you’re a beginner or an experienced knitter, there are a few key items that you’ll need in your knitting toolkit.
1. Knitting Needles
Knitting needles are the most important tool for any knitter. They come in a variety of materials such as wood, metal, and plastic, and in different sizes. It’s a good idea to have a range of needle sizes on hand, as different projects require different gauges. Circular needles are also a great investment, as they can be used for both flat and circular knitting.
2. Yarn
Of course, you’ll also need yarn for your knitting projects. Yarn comes in different weights, colors, and fibers, so it’s important to choose the right yarn for your project. It’s also a good idea to have a variety of yarns in your stash, so you’ll always have the right yarn on hand for any project.
3. Stitch Markers
Stitch markers are small rings or clips that are used to mark specific stitches in your knitting. They can be very helpful, especially when working on more complex patterns or when shaping garments. You can use different colored markers to indicate different types of stitches or different sections of your project.
4. Row Counter
A row counter is a small device used to keep track of the number of rows you’ve knit. It can be especially useful when knitting patterns that require a specific number of rows or when working on projects with intricate stitch patterns. Some row counters can be worn on your finger like a ring, while others can be attached to your knitting needles.
5. Tapestry Needles
Tapestry needles are large-eyed needles that are used for weaving in yarn ends and sewing seams. They are essential for finishing off your knitting projects and giving them a polished look. It’s a good idea to have a few different sizes of tapestry needles in your toolkit to accommodate different yarn weights.
These are just a few of the essential knitting tools that every knitter should have. With the right tools, you’ll be well-prepared to tackle any knitting project and create beautiful garments and accessories.
Tips for Getting Started
When you’re ready to start knitting your cable knit vest, it’s important to have all the necessary materials and tools on hand. Here are some tips to help you get started:
Gather Your Materials
Before you begin, make sure you have all the materials you need for your cable knit vest. This includes the appropriate yarn and needles, as well as any additional tools such as cable needles or stitch markers. Choose a high-quality yarn that is suitable for your pattern and desired end result.
Read the Pattern

Take the time to thoroughly read and understand the cable knit vest pattern before you begin. Make sure you understand all of the instructions and techniques involved, as well as any special stitches or abbreviations used. Highlight or make note of any sections that may require extra attention or clarification.
Practice the Cable Stitch
Cable knitting requires a different technique than regular knitting, so it’s a good idea to practice the cable stitch before you start on your vest. Use some scrap yarn and practice creating different types of cables, following the instructions in your pattern. This will help you become familiar with the technique and ensure that you’re comfortable with it before moving on to your project.
Take Your Time
Knitting a cable knit vest can be a complex and time-consuming project, so it’s important to take your time and not rush through it. Break the project down into smaller, manageable sections and set goals for yourself. Remember to take breaks when needed and give yourself plenty of time to enjoy the process of creating your vest.
- Gather all necessary materials, including yarn and needles
- Read and understand the pattern
- Practice the cable stitch before starting
- Take your time and enjoy the process
Understanding Cable Knitting Techniques
Cable knitting is a technique commonly used in creating intricate and beautiful patterns in knitted garments. It involves crossing stitches over each other to create twisting, braided-like designs. Cable knitting adds texture and depth to a piece of clothing, making it an appealing choice for many knitters.
One of the key techniques used in cable knitting is the “crossing” of stitches. This is done by transferring a certain number of stitches onto a cable needle or double-pointed needle, holding it in front or in back of the work, and then working the next set of stitches. The stitches on the cable needle are then worked, either by knitting or purling them, before continuing with the rest of the row.
Cable knitting patterns often include charts or written instructions to guide the knitter in creating the desired design. These patterns typically indicate the number of stitches needed for each cable, the direction of the twist, and any other specific details. It is important to carefully follow these instructions to ensure the cable pattern is created correctly.
There are various types of cable knitting techniques, including simple cables, twisted stitch cables, and complex cables. Simple cables involve crossing a few stitches over each other, creating a basic twist. Twisted stitch cables involve knitting into the back of certain stitches to create a sharper twist. Complex cables can involve multiple crossing points and intricate designs, requiring more advanced knitting skills.
When knitting cables, it is important to maintain an even tension to ensure the cables stand out properly. It is also helpful to use cable needles or double-pointed needles with a similar size to your main knitting needles, to avoid creating loose or tight stitches. With practice and patience, cable knitting can be a rewarding technique to master, allowing knitters to create stunning and unique garments.
Preparing Your Pattern
Before starting your cable knit vest, it’s important to make sure you have all the necessary materials and tools at hand. This includes your chosen cable knit vest pattern, which will serve as a guide throughout the knitting process. Whether you’re using a printed pattern or an online digital one, it’s necessary to have a clear and readable version before proceeding.
1. Gather the materials: Take stock of all the materials you’ll need for your cable knit vest. This typically includes yarn, knitting needles, stitch markers, and a cable needle. Make sure you have enough yarn to complete the project and pick a needle size that matches the gauge specified in your pattern.
2. Print out or download your pattern: If you have a printed pattern, make sure it’s legible and free from any damages or missing pages. If you’re using a digital pattern, ensure that it’s downloaded and saved in a format that you can easily access and read on your preferred device.
3. Familiarize yourself with the pattern: Take a few minutes to read through the cable knit vest pattern from start to finish. Pay attention to the instructions, stitch patterns, and any special techniques or abbreviations used. This will give you an overview of the project and help you understand the construction and the steps involved.
4. Make any necessary adjustments: If you’re an experienced knitter, you may want to customize the pattern to fit your specific measurements or preferred style. Take note of any measurements or modifications you’d like to make and adjust the pattern accordingly. This could include changing the length, adding or subtracting stitches, or altering the neckline.
5. Organize your pattern: Keep your cable knit vest pattern and any accompanying notes or modifications in a safe and accessible place. Consider using a binder or folder to keep all the materials together. This will help you stay organized and prevent any loss or damage to your pattern throughout the knitting process.
By properly preparing your cable knit vest pattern, you’ll set yourself up for success and ensure a smoother knitting experience. Taking the time to gather your materials, familiarize yourself with the pattern, and make any necessary adjustments will help you stay organized and confident as you embark on this knitting project.
Casting On and Setting Up
When starting a cable knit vest project, the first step is to cast on the required number of stitches. This will depend on the size of the vest and the desired fit. The pattern should specify the number of stitches needed for the chosen size. It is important to cast on using a method that provides a stretchy edge, such as the long tail cast on. This will ensure that the vest is comfortable to wear and easy to put on.
After casting on, it is important to set up the stitches for the cable pattern. The pattern will typically specify the stitch multiples and the number of stitches required for each cable twist. It is important to carefully read the pattern instructions to understand how to set up the stitches correctly.
One common method of setting up stitches for a cable pattern is to work a few rows in a rib stitch pattern before starting the cable twists. This can be a simple knit 1, purl 1 rib or a more complex rib pattern depending on the design of the vest. Working the rib stitch pattern helps to create a neat and tidy edge for the cables to be worked on.
Alternatively, the pattern may instruct to work a few rows in a stockinette stitch before starting the cable pattern. This creates a smooth background for the cables to stand out. It is important to follow the pattern instructions carefully to ensure that the stitches are set up correctly for the cable pattern.
Once the stitches are cast on and set up, the cable knit vest is ready for the next stage of the pattern, which is usually working the cable twists. This is where the intricate cable patterns and textures are created, giving the vest its unique style and design.
Knitting the Cable Pattern
If you are looking to add some texture and interest to your knitting, cable patterns are a great way to do so. Cable patterns involve crossing stitches over each other, creating a twist effect. This can add a beautiful element to your knitting project, whether it’s a sweater, hat, or in this case, a cable knit vest.
To begin knitting the cable pattern for your vest, you will need to have an understanding of basic knitting techniques such as casting on, knitting, purling, and binding off. You will also need cable needles, which are usually smaller and shorter than regular knitting needles, to hold the stitches as you cross them over.
Instructions:
- Start by casting on the required number of stitches for your cable knit vest.
- Knit the first few rows in a ribbing pattern, such as K1, P1, to create a neat border.
- Begin the cable pattern by following the chart or written instructions provided in the pattern you are using. Most cable patterns will involve a combination of knitting and purling stitches, as well as crossing stitches over each other.
- Use cable needles to hold the stitches you need to cross over. Slip the designated number of stitches onto the cable needle and hold it in front or back of your work, depending on the pattern instructions.
- Knit or purl the stitches that are not on the cable needle, then knit or purl the stitches from the cable needle.
- Continue following the cable pattern until you have completed the required number of rows or until the pattern instructs you to end the cable section.
- Finish the rest of the vest according to the pattern instructions, whether it’s adding shaping, working in a different stitch pattern, or binding off.
- Weave in any loose ends and block your cable knit vest to give it a polished and professional look.
Knitting the cable pattern for your cable knit vest may require some practice and concentration, especially if you are new to cable knitting. However, with patience and persistence, you will soon master the technique and be able to create stunning cable patterns in your knitting projects.
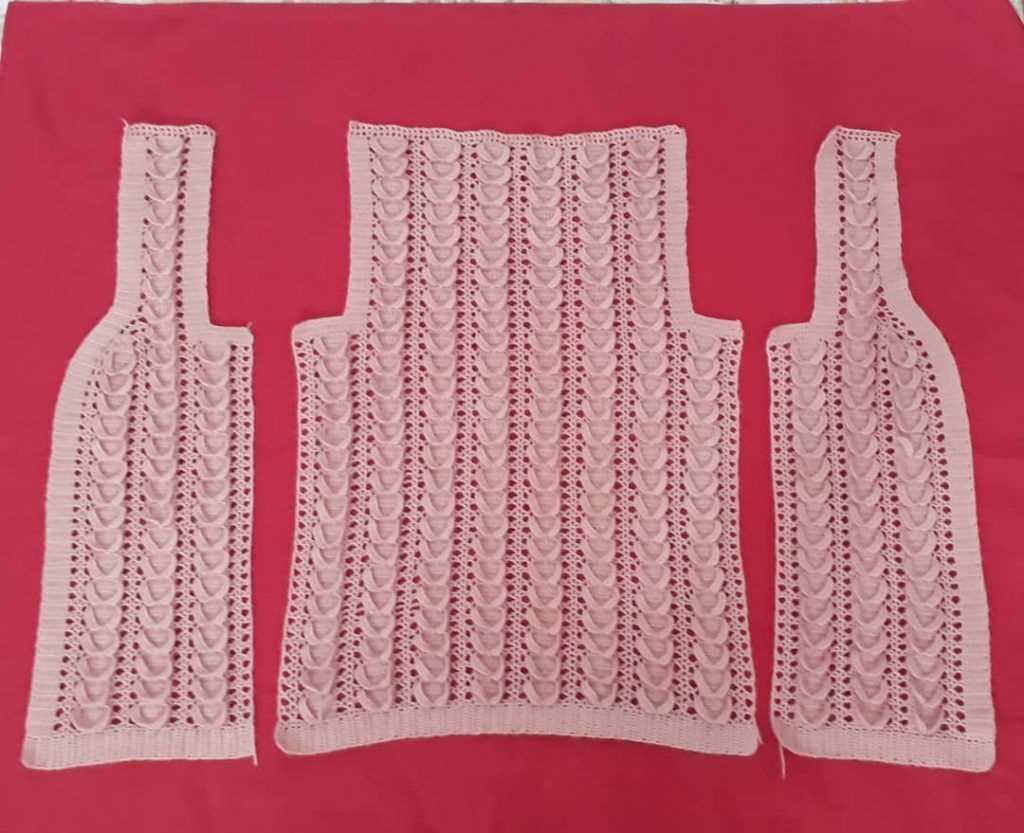
Shaping the Neckline and Armholes
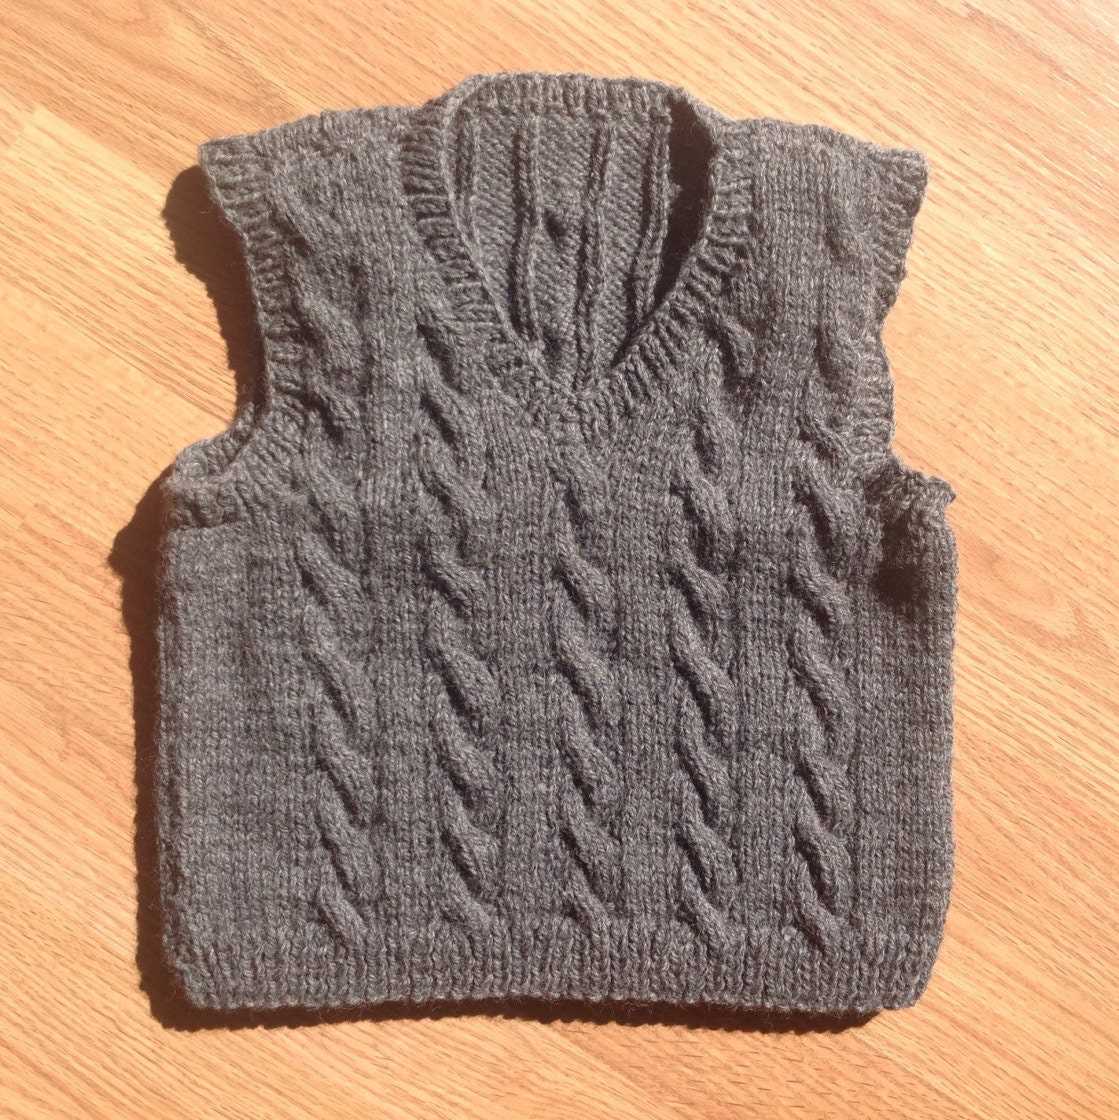
When knitting a cable knit vest, shaping the neckline and armholes is an important step to ensure a proper fit. This can be achieved by decreasing or increasing stitches in specific areas of the pattern.
To shape the neckline, you will typically begin by dividing the stitches into front and back sections. This can be done by placing stitch markers or using a contrasting color yarn. Once divided, you can then work on each section separately. For example, you may start decreasing stitches evenly across the front section to create the desired neckline shape.
When shaping the armholes, you may need to remove stitches to create a curved edge. This is often done by decreasing stitches on both sides of the armhole. The number of decreased stitches will depend on the pattern and size of the vest. It is important to follow the instructions provided in the pattern to ensure accurate shaping.
In some cable knit vest patterns, the shaping may be done using short rows or other techniques to create more intricate designs. These techniques can add visual interest to the garment while maintaining a proper fit. It is important to carefully read and understand the instructions provided in the pattern to successfully shape the neckline and armholes.
- Divide the stitches into front and back sections to shape the neckline.
- Decrease stitches evenly across the front section to create the desired neckline shape.
- Remove stitches to shape the armholes.
- Decrease stitches on both sides of the armhole for a curved edge.
- Follow the pattern instructions for accurate shaping.
- Consider using techniques like short rows for more intricate designs.
Finishing touches and finalizing the vest are crucial steps in completing your cable knit project. These steps ensure that your vest looks polished and professional, and that all loose ends and seams are securely fastened.
Blocking and Shaping
Before moving on to the finishing touches, it is important to block and shape your cable knit vest. This process helps to set the shape of the garment and improve the overall drape and fit. To block your vest, you will need to lay it flat on a padded surface and gently stretch and shape it to the desired dimensions. Use blocking pins to secure the edges and allow the vest to dry completely. This will help to relax the fibers and let the stitches settle into place.
Once your vest is blocked and shaped, you can move on to the final steps of finishing. These steps involve weaving in any loose ends, seaming any remaining openings, and adding any desired closures or embellishments.
Weaving in Loose Ends
One of the first finishing touches is weaving in any loose ends from joining new yarn or changing colors. To do this, thread the loose end onto a tapestry needle and carefully weave it into the surrounding stitches. Make sure to weave in the end securely, taking care to avoid pulling too tightly and distorting the fabric. Trim any excess yarn once the end is woven in.
When weaving in loose ends from separate skeins or balls of yarn, it is important to perform a Russian join or a spit splice to create smooth and invisible joins. This will help to maintain the continuity of the cable pattern and prevent any unwanted bumps or gaps.
Seaming and Closure Option
After weaving in the loose ends, you may have some remaining openings that need to be seamed. Use the mattress stitch or a technique that is suitable for the specific pattern and stitch used in your cable vest. Take care to align the edges of the opening and seam them together neatly and securely.
Finally, consider adding closure options such as buttons, toggles, or a zipper to your cable knit vest. These closures can add functionality and style to your garment. Choose closures that complement the design and color of your vest, and sew them on securely.
By following these steps to block, shape, and finalize your cable knit vest, you can achieve a professional-looking and well-finished garment. Take your time and pay attention to detail, and you will be rewarded with a beautiful and cozy vest that you can wear with pride.
Blocking and Care Instructions
Care and blocking are essential steps in maintaining the quality and longevity of your cable knit vest. Follow these instructions to keep your vest in its best condition and to ensure it fits properly.
Blocking:
To block your cable knit vest, you will need to wash it first. Fill a basin or sink with lukewarm water and add a mild detergent. Gently submerge your vest in the water, making sure it is fully saturated. Let it soak for about 15 minutes.
Remove the vest from the water and press out the excess water by gently squeezing it. Avoid wringing or twisting it, as this can stretch the stitches. Lay the vest flat on a clean, dry towel and gently roll the towel, pressing to remove more moisture.
Once the vest is no longer dripping wet, lay it flat on a blocking board or a clean towel. Use rust-proof pins to shape the vest to the desired dimensions and smooth out any wrinkles or uneven edges. Allow the vest to dry completely before unpinning.
Care Instructions:

To care for your cable knit vest, it is recommended to hand wash it with a mild detergent and lukewarm water. Avoid using bleach or harsh chemicals, as they can damage the fibers.
Gently squeeze out the excess water, then roll the vest in a clean, dry towel to remove even more moisture. Lay it flat to dry on a clean towel or a drying rack, away from direct sunlight or heat sources.
When storing the vest, fold it neatly and place it in a drawer or on a shelf. Avoid hanging it, as this can cause the garment to stretch and lose its shape. To prevent moth damage, you can place a sachet of dried lavender or cedar chips with the vest.
By following these blocking and care instructions, you can ensure that your cable knit vest remains beautiful and cozy for years to come.
Inspiration and Customization Ideas
Looking for some inspiration to spice up your cable knit vest? Here are some ideas to help you customize your pattern and make it unique:
1. Color Choices:
Experiment with different color combinations to give your cable knit vest a personalized touch. You can opt for classic neutrals like gray, black, or cream for a timeless look, or go bold with vibrant hues like red, blue, or green. Don’t be afraid to mix and match colors to create interesting patterns and motifs.
2. Cable Variations:
While traditional cable patterns are beautiful, you can make your cable knit vest stand out by incorporating unique cable variations. Try experimenting with different cable stitches, such as twists, braids, and honeycombs, to add visual interest and create a truly one-of-a-kind design.
3. Length and Fit:
Customize the length and fit of your cable knit vest to suit your preferences. You can make it longer for a cozy, oversized look, or shorten it for a cropped, trendy style. Adjust the shaping to ensure the vest flatters your body shape and accentuates your best features.
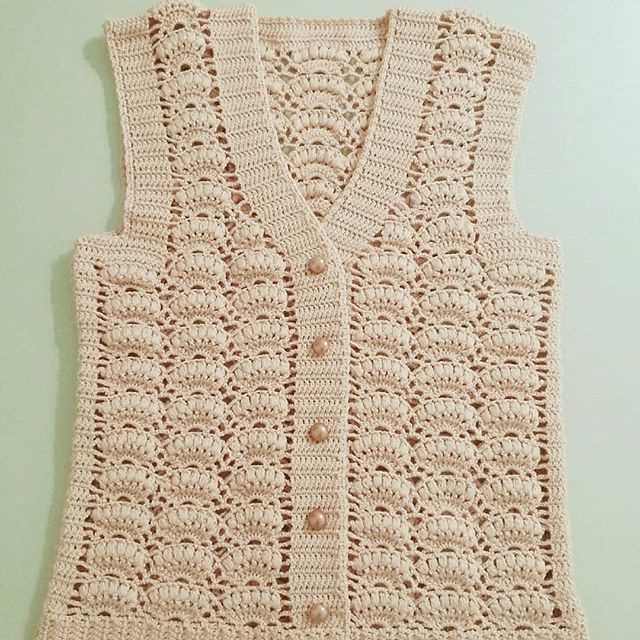
4. Embellishments:
Add some charm to your cable knit vest by embellishing it with buttons, patches, or embroidery. This will give your vest a personalized touch and make it truly unique to you. Consider adding decorative elements to the collar, pockets, or hem for an extra touch of flair.
- Experiment with different color combinations
- Incorporate unique cable variations
- Customize the length and fit
- Add embellishments like buttons or embroidery
Remember, the cable knit vest pattern is just a starting point. Feel free to get creative and make it your own. Whether you stick to a classic design or try something more adventurous, your cable knit vest is sure to be a cozy and stylish addition to your wardrobe.