
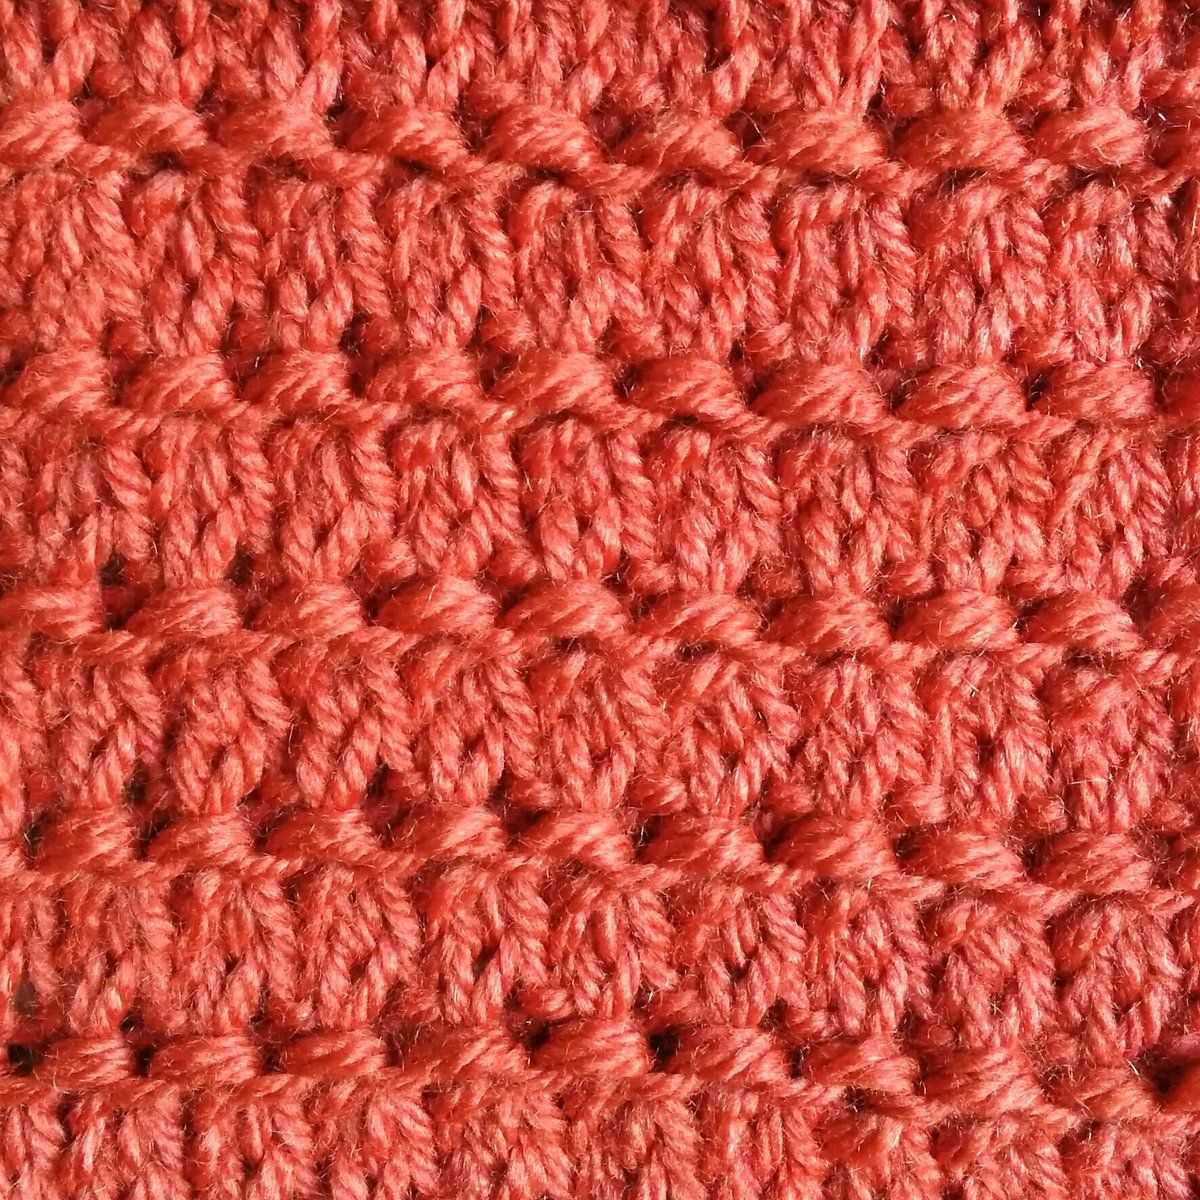
Increasing in knitting is a technique used to add stitches to a project, creating a wider or larger fabric. It is commonly used in patterns to shape garments, create decorative motifs, or increase the size of an item. Understanding how to properly increase stitches is essential for knitters of all skill levels.
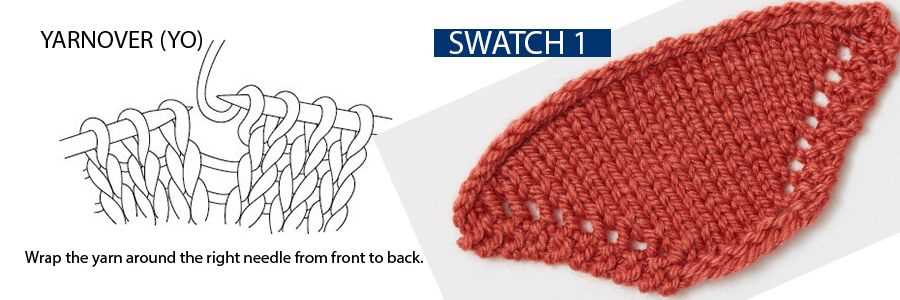
There are several methods to increase stitches in knitting, each with its own unique effect on the fabric. The most basic and commonly used method is the yarn over (YO) increase, where a new stitch is created by wrapping the yarn around the needle. This increase creates an eyelet or decorative hole in the fabric.
Another common method is the knit front and back (KFB) increase, where a new stitch is made by working into the front and back loops of the same stitch. This increase creates a visible horizontal bar on the fabric.
When increasing in a knitting pattern, it is important to carefully follow the instructions provided. The pattern will specify when and where to increase, as well as the specific method to use. By understanding and practicing different increasing techniques, knitters can confidently tackle patterns that require shaping or size adjustments.
How to Increase a Knitting Pattern
If you are an experienced knitter looking to take your projects to the next level, learning how to increase a knitting pattern is an essential skill. Increasing stitches in a knitting pattern allows you to add width or shape to your project, giving you greater design flexibility and the opportunity to create unique and customized pieces.
Here are a few steps to help you increase a knitting pattern:
- Identify where and how many stitches you need to increase. This will depend on the pattern and the desired outcome. Look for instructions such as “increase evenly” or “increase at the beginning and end of the row.”
- Choose the method of increasing stitches that best fits your project. There are several techniques to choose from, including knitting into the front and back of a stitch, using a make-one stitch, or making a yarn over.
- Follow the instructions for the chosen method and work the necessary increases in the designated areas of the pattern. Make sure to keep track of your stitch count to ensure accuracy.
- Continue working the pattern, incorporating the increases as instructed, until you have achieved the desired width or shape.
- Check your work regularly to make sure the increases are evenly distributed and that the overall pattern is maintaining its intended design. Adjust your tension or knitting technique if necessary.
- If you are working with a complex pattern, consider creating a swatch to practice the increases before incorporating them into your main project. This will help you familiarize yourself with the technique and ensure that you are comfortable executing the increases accurately.
Remember, increasing stitches in a knitting pattern requires attention to detail and practice. Take your time, follow the instructions closely, and don’t be afraid to experiment and make adjustments along the way. With practice, you will become more confident in your ability to increase stitches and create beautiful and customized knitted items.
Start with a Basic Knitting Pattern
When first learning to knit, it’s important to start with a basic knitting pattern. This will allow you to practice the fundamental stitches and techniques that are the building blocks of all knitting projects. Whether you’re interested in knitting scarves, hats, or sweaters, a basic pattern will provide you with the skills and confidence you need to tackle more complex projects in the future.
One of the most popular basic knitting patterns for beginners is the garter stitch scarf. This simple pattern involves knitting every stitch on every row, creating a classic textured fabric. By repeating this pattern over and over again, you’ll be able to practice your tension, learn how to hold the knitting needles, and become more comfortable with the repetitive motions of knitting.
Another great option for beginners is the stockinette stitch hat. This pattern alternates between knitting one row and purling the next, creating a smooth, flat fabric that is perfect for hats. As you work through the pattern, you’ll gain experience with both the knit and purl stitches, and learn how to switch between them seamlessly.
Remember, starting with a basic knitting pattern doesn’t mean you have to sacrifice creativity or style. You can always add your own personal touches to these simple patterns by incorporating different colors, textures, or stitch patterns. The important thing is to start with a pattern that is within your skill level, and gradually work your way up to more challenging projects as your skills improve.
So whether you’re a complete beginner or an experienced knitter looking to refresh your skills, don’t underestimate the power of starting with a basic knitting pattern. It’s the perfect way to build a strong foundation and set yourself up for knitting success in the future.
Choose the Right Yarn and Needles
When it comes to knitting, choosing the right yarn and needles is crucial to achieving the desired outcome of your project. The type and weight of yarn you select will ultimately determine the drape, texture, and warmth of your finished piece. It’s important to consider factors such as fiber content, color, and yardage when making your yarn choice.
Fiber content: Different fibers have different properties, so consider the purpose of your project when selecting yarn. For example, if you’re knitting a cozy sweater, you might opt for a wool or alpaca blend for added warmth. For a lightweight and breathable summer top, you might choose cotton or linen. Synthetic fibers like acrylic can be a more affordable and easy-care option.
Color: The color of your yarn can greatly impact the overall look of your knitted item. Consider whether you want a solid color, variegated, or self-striping yarn. Solid colors can be versatile and highlight stitch patterns, while variegated yarns can add depth and visual interest. Self-striping yarns create stripes automatically as you work, which can be a fun and easy way to incorporate color into your project.
Additionally, the size and type of needles you use will affect the tension and stitch gauge of your knitting. The needle size recommended in your pattern is a good starting point, but it’s important to swatch and adjust as needed to achieve the correct gauge. Circular needles are often preferred for larger projects such as sweaters or blankets, as they distribute the weight of the project more evenly and provide ample room for stitches.
In conclusion, taking the time to carefully select the right yarn and needles for your project will greatly contribute to your knitting success. Consider the fiber content, color, and yardage of the yarn, and experiment with different needle sizes and types to achieve the desired tension and gauge. With the right materials, you’ll be on your way to creating beautiful and functional knitted items.
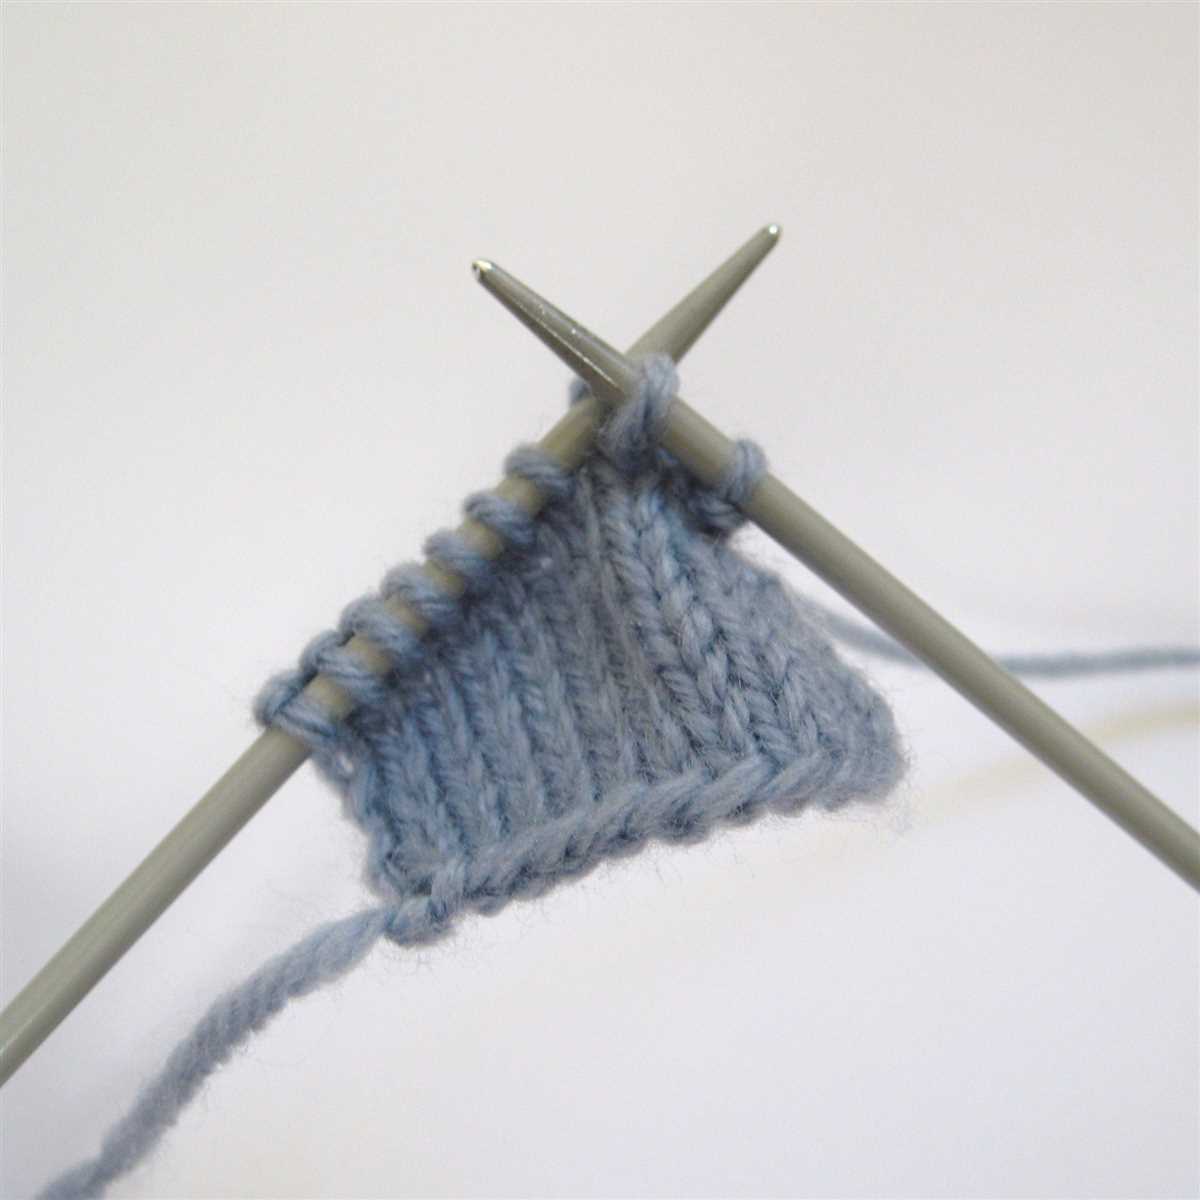
Understanding Gauge and Swatching
When it comes to knitting patterns, understanding gauge is crucial. Gauge refers to the number of stitches and rows per inch that you achieve when knitting with a specific yarn and needle size. It determines the size of your finished project and ensures that it matches the measurements provided in the pattern. To ensure the success of your project, it is important to swatch before starting.
Swatching involves knitting a small sample using the chosen yarn and needle size, and measuring the gauge achieved. This allows you to determine if your gauge matches the gauge provided in the pattern. If your gauge is different, it means that you may need to adjust your needle size to achieve the correct gauge and ensure that your finished project turns out the right size.
When swatching, it is important to follow the pattern instructions for stitch pattern and needle size. Start with the recommended needle size and knit a sample using the stitch pattern specified in the pattern. After completing the swatch, measure the number of stitches and rows within a 4-inch square using a ruler or a gauge tool. Compare these measurements to the gauge provided in the pattern to determine if any adjustments need to be made.
Remember that small differences in gauge can result in significant differences in the finished size of your project. Swatching allows you to make any necessary adjustments before starting the actual project, saving you time and frustration in the long run. So, take the time to understand gauge and swatch before diving into your knitting project to ensure the best results.
Increasing Stitches in Knitting
When knitting, increasing stitches is a necessary technique for shaping your project. Whether you are adding stitches to create a wider garment or to create shaping for sleeves or other design elements, understanding how to increase stitches properly is essential for achieving the desired fit and appearance.
There are several methods you can use to increase stitches in knitting, depending on the desired effect and the pattern you are working with. One common method is the knit front and back (kfb) increase, where you knit into the front of a stitch, then into the back of the same stitch to create two stitches from one. This increase is often used in patterns to create a subtle and tidy increase.
If you are looking for a more pronounced increase or want to add stitches in a specific location, you can use the yarn over (yo) or make one (m1) increase. A yarn over increase involves simply wrapping the yarn around the needle once, creating a new stitch. This increase is often used for decorative lace patterns. On the other hand, the make one increase involves picking up the horizontal strand of yarn between stitches and knitting into it, creating a new stitch.
It is important to carefully read the pattern instructions and understand which increase method is called for. Each method has its own unique effect and can impact the overall look and fit of your project. Additionally, it is crucial to count your stitches after each increase to ensure the correct number of stitches is maintained throughout your knitting.
Common methods for increasing stitches in knitting:
- Knit front and back (kfb) increase
- Yarn over (yo) increase
- Make one (m1) increase
By mastering different methods for increasing stitches in knitting, you can confidently take on more complex projects and create beautifully shaped garments and accessories.
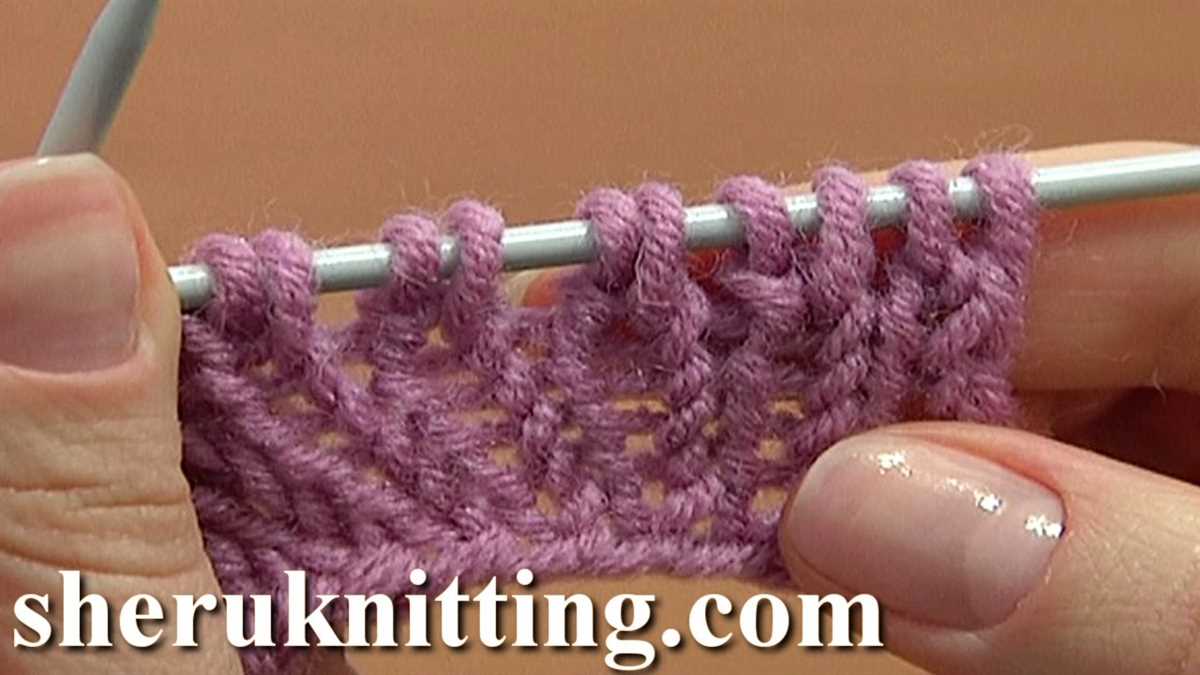
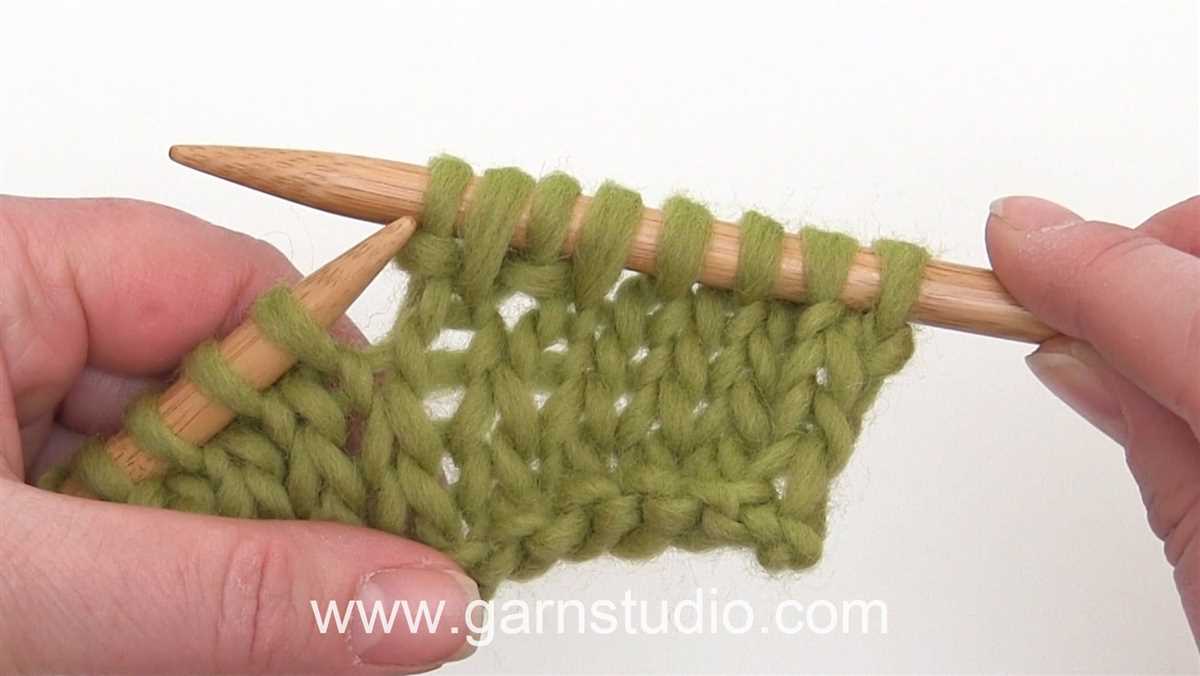
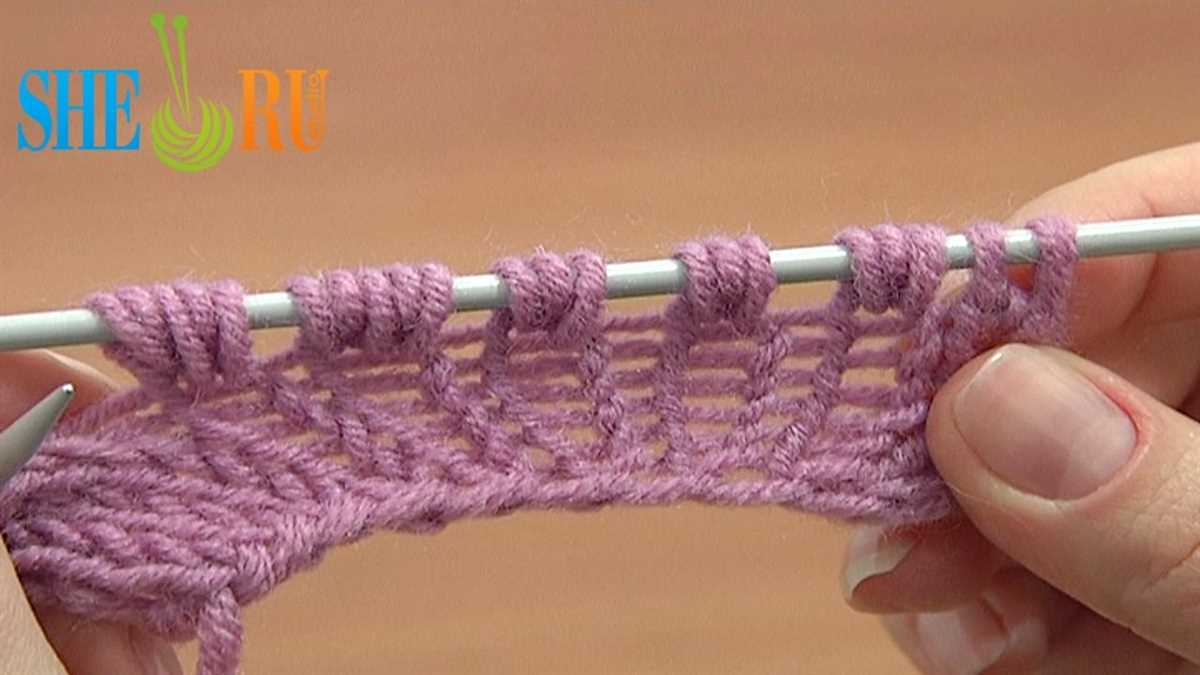
Increasing Stitches by Yarn Over
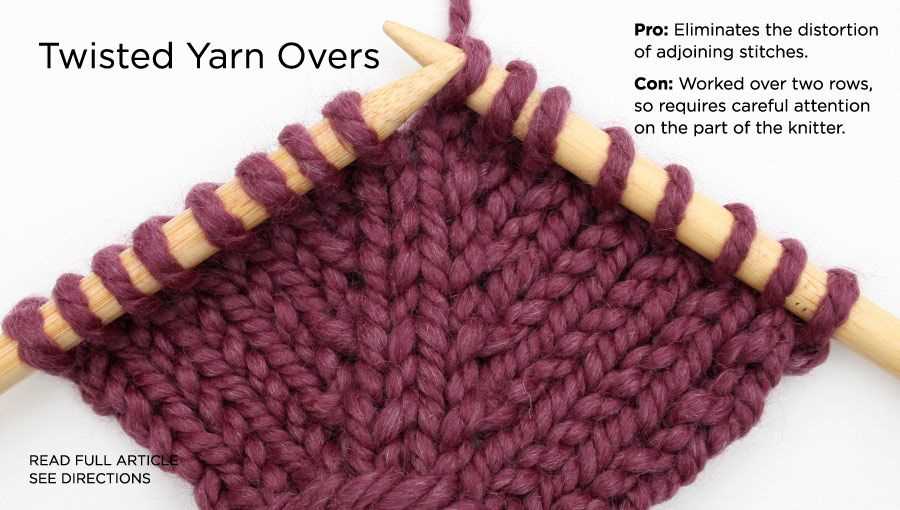
When working on a knitting project, you may come across the need to increase stitches. There are several methods for increasing stitches, such as knitting into the front and back of a stitch or using a make one (M1) increase. One simple and commonly used method is increasing stitches by yarn over. This technique involves creating a new stitch by wrapping the yarn around the needle.
To increase stitches by yarn over, bring the yarn to the front of the work between the needles. Then, simply wrap the yarn over the right-hand needle from back to front and continue with the next stitch as usual. This creates an extra loop on the needle, effectively increasing the stitch count by one.
The yarn over increase is commonly used in lace knitting patterns to create decorative eyelet holes. It can also be used to add shaping to a garment, such as increasing stitches for a sleeve or creating a decorative pattern. If you are following a knitting pattern that includes yarn overs, make sure to carefully read the instructions and count the yarn overs as stitches in your stitch count.
Increasing Stitches by Knitting Front and Back
When following a knitting pattern, you may come across instructions to “increase stitches by knitting front and back” or “kfb.” This technique is commonly used to add stitches to your work and create a larger piece. It is a simple method that involves knitting into the front and then the back of the same stitch, resulting in two new stitches.
To perform the knit front and back increase, start by inserting your right-hand needle into the front of the designated stitch as if to knit. Instead of completing a regular knit stitch, leave the stitch on the left-hand needle. Next, without removing the right-hand needle, insert it into the back of the same stitch, again as if to knit. Complete the knit stitch by pulling the yarn through both the front and back loops of the stitch, creating two new stitches on the right-hand needle.
This increase method is typically used in patterns that require shaping, such as sleeves, hats, or garments with a flared shape. It creates a subtle bump or raised stitch, and when worked consistently, these increases can form a decorative pattern. It is important to note that increases should be evenly distributed throughout the work to maintain a balanced shape.
When using the knit front and back increase, keep in mind the tension of your yarn and the desired appearance of your project. This increase method can create a slightly tighter stitch and may affect the overall gauge of your work. It is always helpful to make a gauge swatch before starting your project to ensure that your tension and stitch count are accurate.
Increasing Stitches by Lifted Increase
When knitting a project that requires an increase in stitches, there are various methods you can use. One common method is the lifted increase. This increase is often used when you want to create a neat and barely visible increase in your knitting. The lifted increase involves picking up the horizontal strand between two stitches and knitting into it to create a new stitch.
To perform a lifted increase, start by identifying the horizontal strand between two stitches. Insert the tip of the right-hand needle from front to back under the horizontal strand, lifting it onto the left-hand needle. Then, knit into the lifted strand as you would a regular stitch. This creates a new stitch, effectively increasing the number of stitches on your needle.
One advantage of the lifted increase is that it doesn’t leave a visible hole or gap in your knitting, making it ideal for projects where a seamless appearance is desired. It is also a relatively simple increase method that can be easily mastered by beginners.
When following a knitting pattern, make sure to carefully read the instructions to determine when and how to perform the lifted increase. Some patterns may specify a specific type of increase, while others may leave it up to your discretion. Regardless, the lifted increase is a versatile stitch that can be used to increase stitches in various knitting projects.
Remember to practice the lifted increase before incorporating it into your project. By mastering this technique, you’ll be able to confidently increase stitches in your knitting and create beautiful, seamless projects.
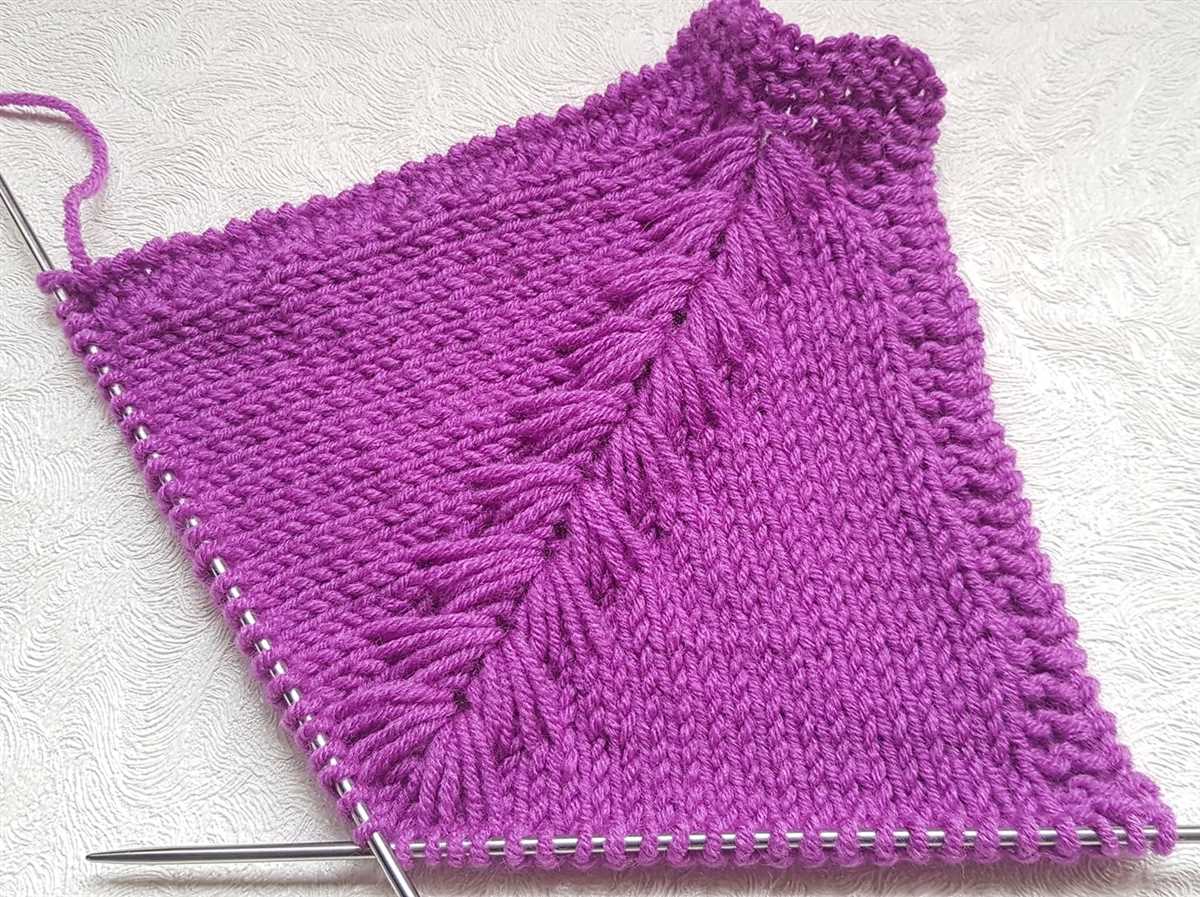
Increasing Stitches in Lace Knitting

When working on a lace knitting project, increasing stitches is an essential technique to create beautiful and intricate lace patterns. Increasing stitches in lace knitting allows you to add more openwork and create a larger fabric. This technique is often used to shape the lace or create motifs within the pattern.
There are several methods for increasing stitches in lace knitting. One common method is the yarn over (YO) increase, where you simply wrap the yarn around the needle before knitting the next stitch. This creates a new stitch and an eyelet hole in the fabric. YO increases are often used in lace patterns to create decorative motifs and add texture.
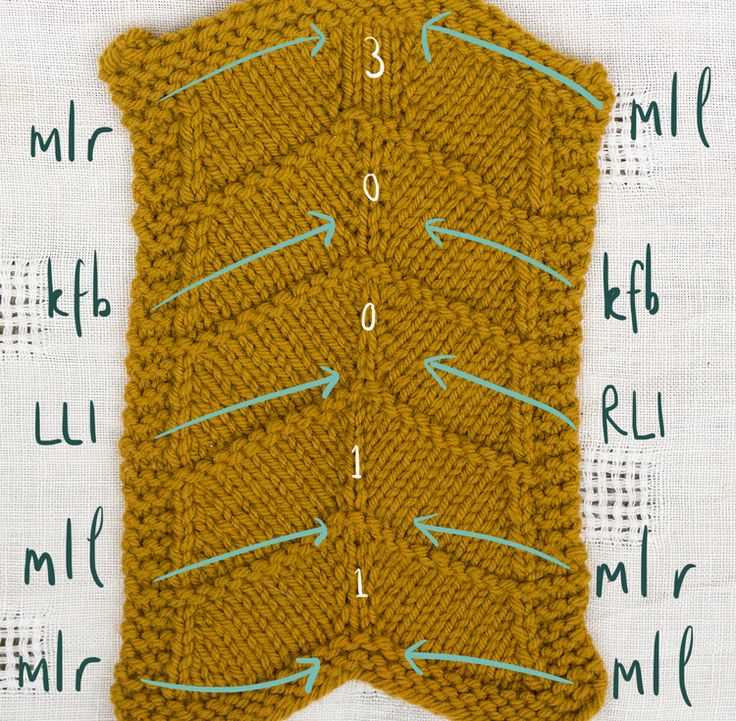
1. Make One (M1) Increase:
Another common method for increasing stitches in lace knitting is the make one (M1) increase. This increase is created by picking up the horizontal strand between stitches and knitting into it, which creates a new stitch. M1 increases are commonly used in lace patterns to maintain the continuity of the pattern and create a smoother appearance.
2. Knit Front and Back (KFB) Increase:
The knit front and back (KFB) increase is another method for increasing stitches in lace knitting. With this increase, you knit into the front loop of the stitch as usual and then without taking the stitch off the needle, knit again into the back loop of the same stitch. This creates a new stitch and adds volume to the fabric. KFB increases are often used in lace patterns to create an undulating or scalloped effect.
Overall, increasing stitches in lace knitting allows you to expand your knitting repertoire and create intricate, delicate lace designs. It’s important to choose the appropriate increase method for your specific lace pattern to ensure that the increases blend seamlessly into the overall design. By mastering the art of increasing stitches in lace knitting, you can take your projects to the next level and create stunning lace masterpieces.
Increasing Stitches in Cable Knitting
Cable knitting is a technique that involves crossing stitches over each other to create intricate patterns. However, when increasing stitches in cable knitting, you need to be mindful of maintaining the integrity of the cable pattern. Here are some tips to help you increase stitches in cable knitting without disrupting the design.
1. Increase within the cable pattern: To maintain the continuity of the cable pattern, it’s important to increase stitches within the existing cables. This can be done by working the increases in the purl sections or between the cable twists. By doing so, the new stitches will seamlessly blend in with the existing cables.
2. Use make-one increases: When increasing stitches in cable knitting, it’s best to use make-one increases. Make-one (M1) increases are created by picking up the strand between two stitches and knitting into it, creating a new stitch. This type of increase is less noticeable and won’t disrupt the cable pattern.
3. Plan ahead for increases: Before starting a cable knitting project, it’s important to plan where you want to increase stitches. This will help you determine the placement of the increases and ensure that the cable pattern remains symmetrical. By planning ahead, you can incorporate the increases seamlessly into the design.
4. Double-check your stitch count: As you increase stitches in cable knitting, it’s essential to keep track of your stitch count. Make sure to count your stitches regularly to ensure that you’re adding the correct number of stitches in the right places. This will help you maintain the balance and proportion of the cable pattern.
5. Practice and experiment: Increasing stitches in cable knitting may require some trial and error, especially if you’re working with a complex cable pattern. Don’t be afraid to practice and experiment with different techniques and stitch placements. This will help you gain confidence and find the best method for increasing stitches while preserving the beauty of the cable design.
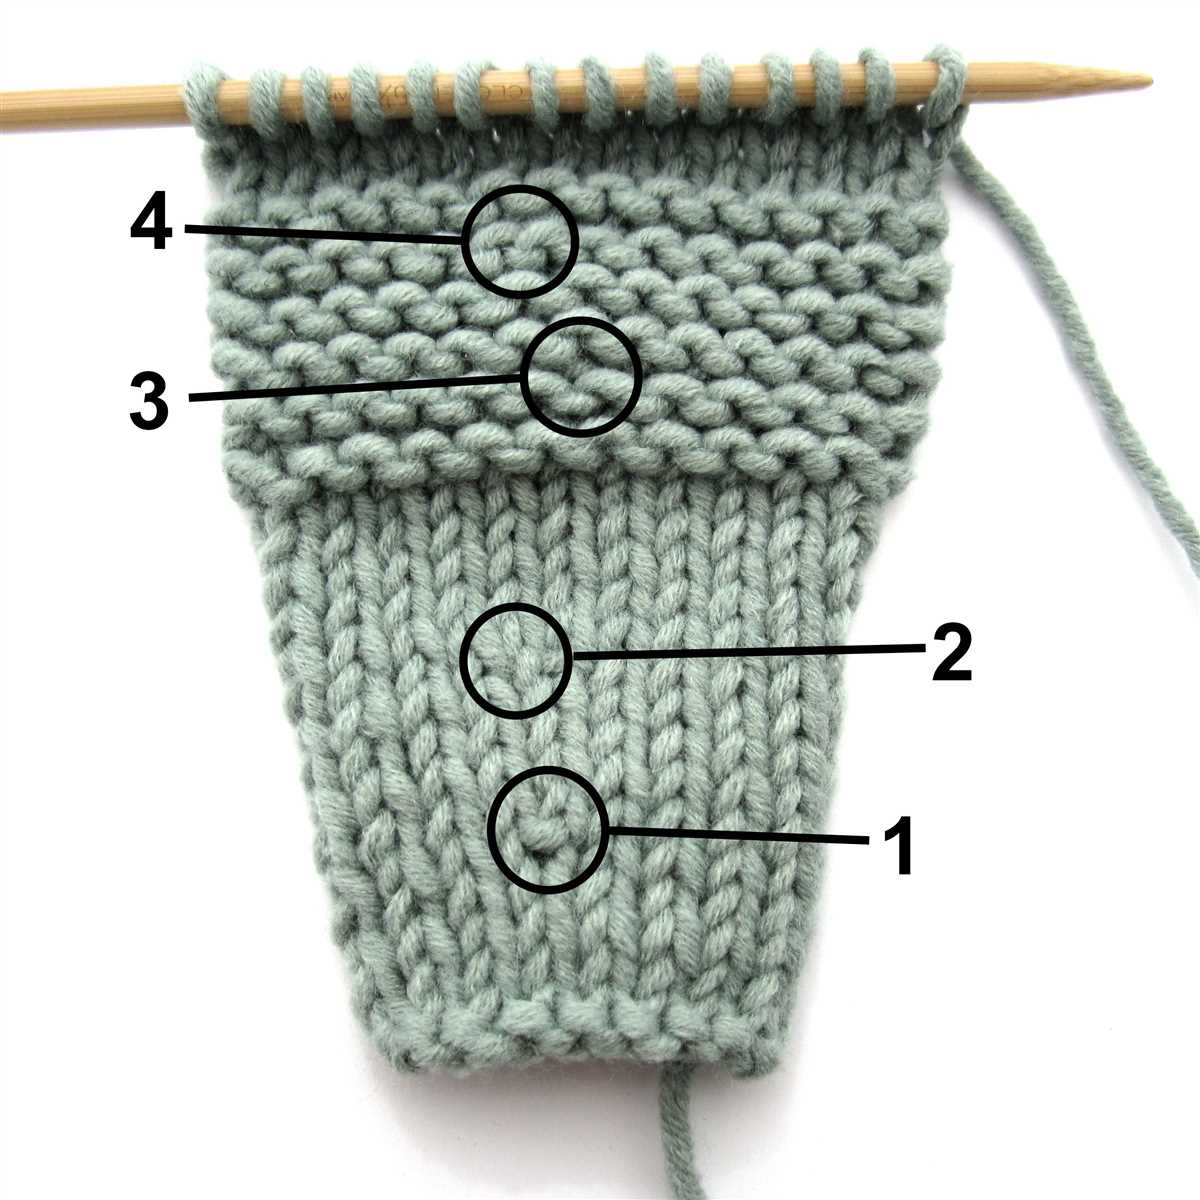
Increasing Stitches in Ribbing
In knitting, ribbing is a common stitch pattern used for cuffs, collars, and hems. The ribbing creates a stretchy fabric that hugs the body and adds texture to the finished piece. When working with ribbing, it is important to know how to increase stitches while maintaining the pattern.
There are several methods for increasing stitches in ribbing, depending on the design and desired effect. One common method is to work a knit one front and back (k1fb) increase. This increase involves knitting into the front and back of the same stitch, creating a new stitch. This increase is nearly invisible and is often used in ribbing to maintain the pattern.
Another method for increasing stitches in ribbing is to work a make one (M1) increase. The make one increase involves picking up the horizontal strand of yarn between two stitches, twisting it, and knitting into it. This increase creates a slightly raised stitch, which can add visual interest to the ribbing.
When increasing stitches in ribbing, it is important to place the increases evenly throughout the row to maintain the pattern. It is also important to consider the type of ribbing being used. For example, if working a twisted rib, the increases should be worked into the back loops of the stitches to maintain the twisted effect.
By understanding and practicing different methods of increasing stitches in ribbing, knitters can confidently modify patterns to create garments that fit perfectly and showcase their knitting skills.
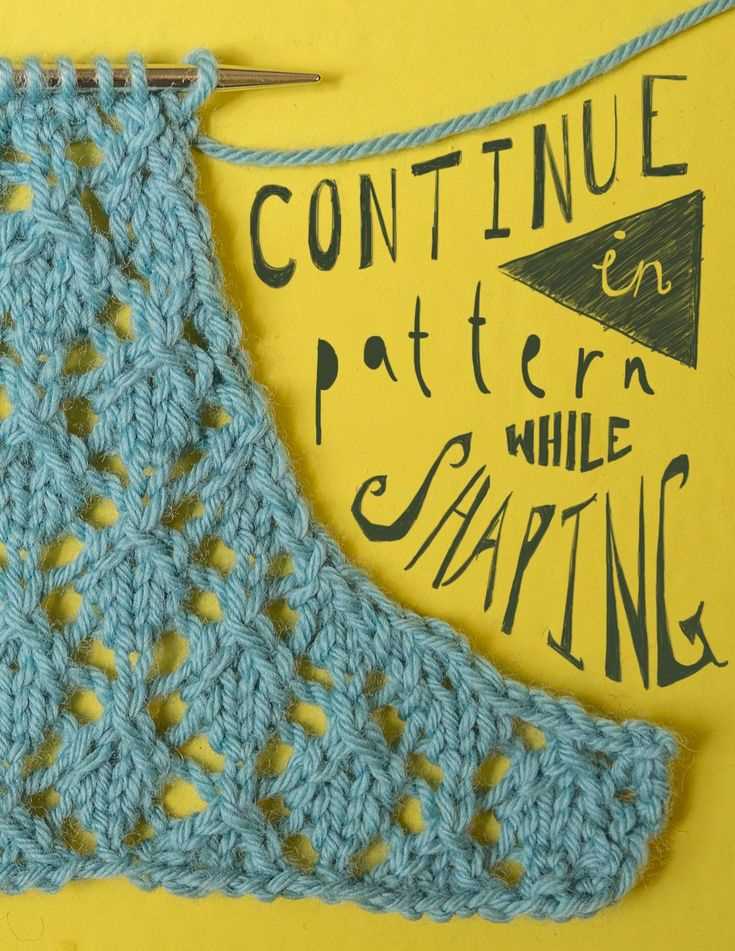
Increasing Stitches in Shaping Garments

When knitting garments, it is often necessary to increase stitches in order to shape the piece. Increasing stitches can be done in a variety of ways, depending on the desired outcome and the pattern instructions. In this article, we will explore some commonly used techniques for increasing stitches in shaping garments.
1. Make One (M1)
The “make one” increase is a simple and versatile technique that can be used to add a stitch to your knitting. To make a knitwise M1 increase, insert the left needle under the horizontal strand between the stitches from front to back, and then knit into the back loop of this strand. To make a purlwise M1 increase, insert the left needle under the horizontal strand between the stitches from back to front, and then purl into the front loop of this strand. This increase is nearly invisible and leaves no holes.
2. Knit Front and Back (KFB)
The “knit front and back” increase is another commonly used technique. To make a KFB increase, knit into the front of the stitch as usual, but do not remove it from the left needle. Instead, bring the right needle around to the back of the stitch, insert it into the back loop, and knit into the back loop. This creates an extra stitch and leaves a small bump or purl stitch on the front of the work.
3. Yarn Over (YO)
The “yarn over” increase is a decorative and decorative increase that creates an eyelet in your knitting. To make a YO increase, simply bring the yarn over the right needle (from back to front) between two stitches. On the next row, this will create a new stitch. YO increases are commonly used in lace patterns and can add a delicate touch to your garment.
4. Increasing in Pattern
When increasing stitches in a pattern, it is important to consider how the increase will affect the overall design. You may need to work the increase in a specific stitch pattern or follow a specific sequence of increases to maintain the integrity of the pattern. Following the pattern instructions carefully and paying attention to any charts or diagrams can help ensure that your increases are done correctly.
5. Keeping Track of Increases
As you increase stitches, it is important to keep track of the number and placement of the increases. This can be done by using stitch markers, counting rows or repeats, or making notes on the pattern. Keeping track of your increases will help ensure that the shaping is done evenly and symmetrically, resulting in a well-fitting garment.
Overall, increasing stitches in shaping garments requires attention to detail and careful execution. By using techniques such as M1, KFB, YO, and following pattern instructions, you can successfully shape your garment and create a flattering fit.
Finishing the Increased Knitting Pattern

After completing all the necessary increases in your knitting pattern, it’s time to finish up your project. Here are a few final steps to consider:
Blocking

Blocking is an essential step in finishing any knitting project. It helps to shape and even out the stitches, making the final piece look more polished. To block your increased knitting pattern, simply soak it in cool water for about 15 minutes and then gently squeeze out the excess water. Lay it flat on a clean towel and shape it to the desired dimensions. Allow it to dry completely before moving on to the next step.
Seaming
If your increased knitting pattern consists of multiple pieces, such as a sweater or a blanket, you’ll need to seam them together. Use a tapestry needle and matching yarn to stitch the pieces together, following the pattern’s instructions. Take your time to ensure that the seams are neat and secure for a professional-looking finish.
Weaving in Ends

During the increasing process, you may have created additional yarn ends that need to be woven in. Use a tapestry needle to carefully weave these ends into the back of your work, following the existing stitches. Make sure to weave in the ends securely to prevent them from coming undone.
Final Touches
Once your increased knitting pattern is blocked, seamed, and all the ends are woven in, take a close look at your project and make any final adjustments. This is the time to fix any loose stitches, tidy up the edges, or add any decorative elements, such as buttons or embroidery.
By following these finishing steps, you’ll be able to complete your increased knitting pattern with confidence. Take your time and enjoy the final stages of your project, knowing that all your hard work has paid off!