
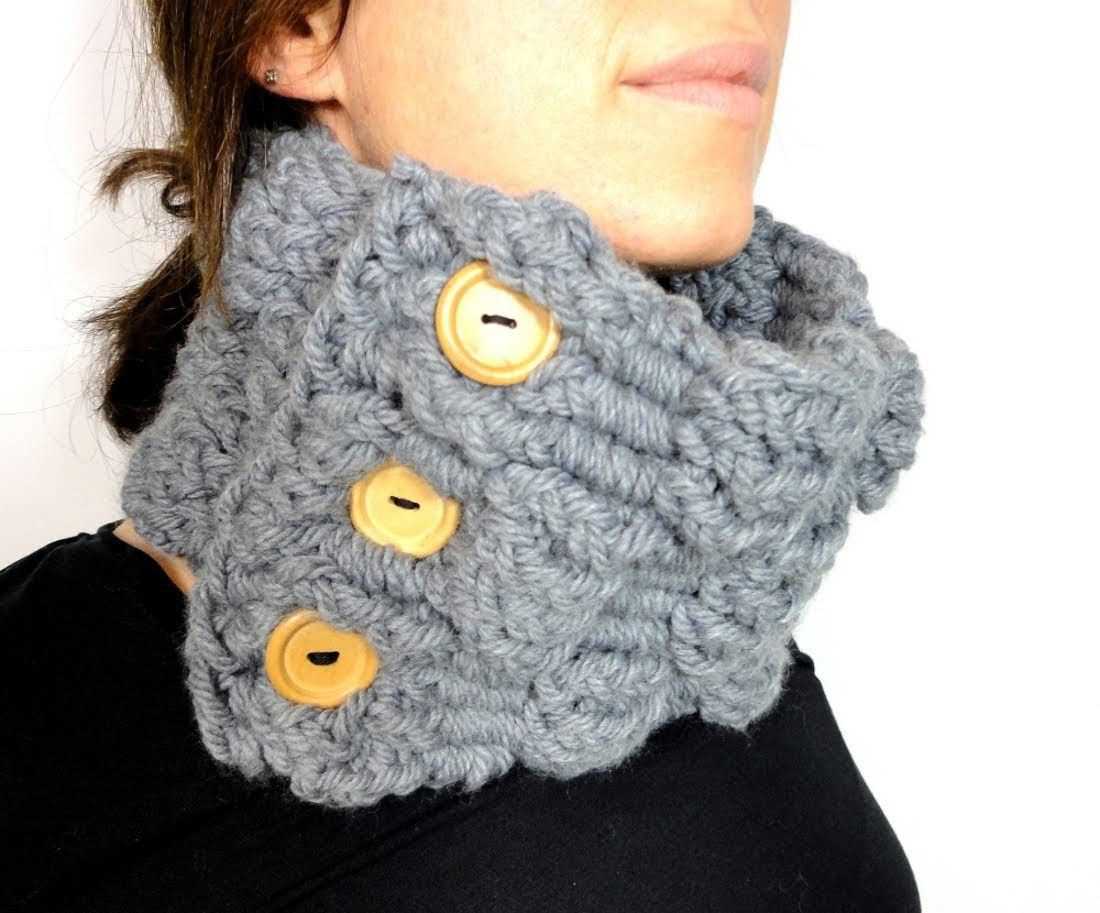
If you’re looking for a knitting project that is both stylish and cozy, look no further than the basket weave cowl. This beautiful and versatile accessory is perfect for keeping warm during the colder months, and its unique texture is sure to turn heads.
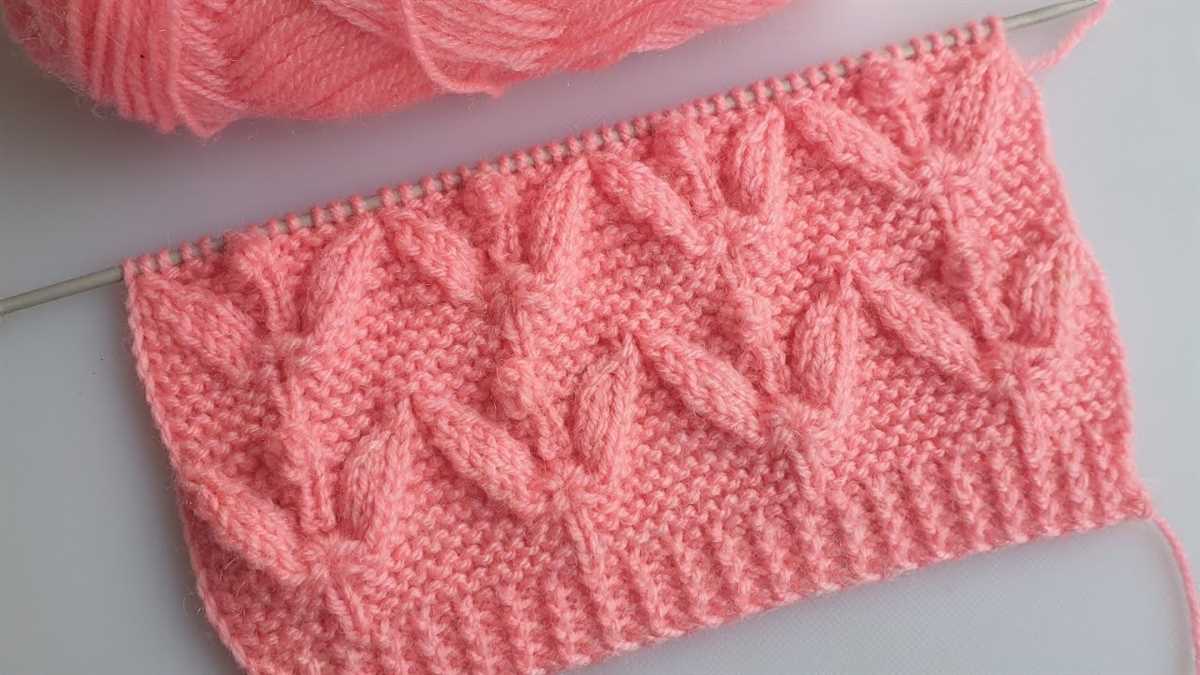
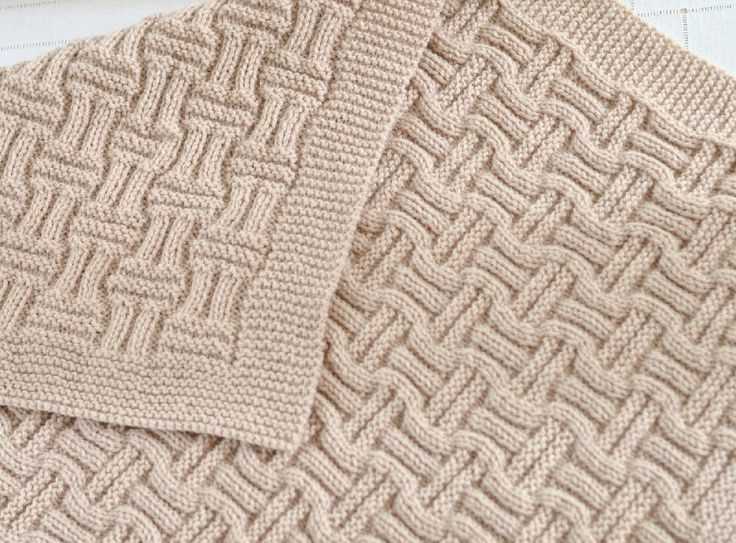
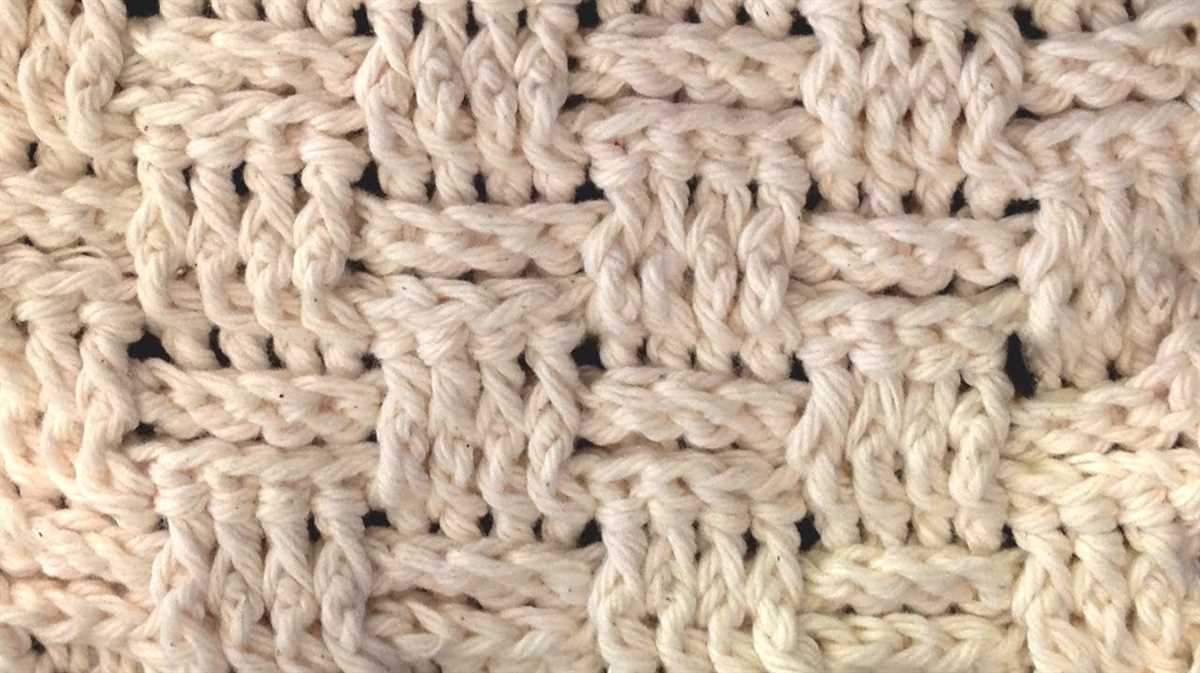
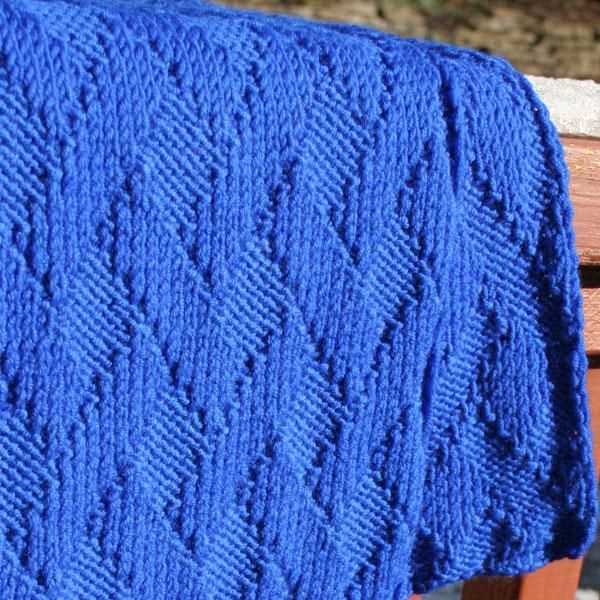
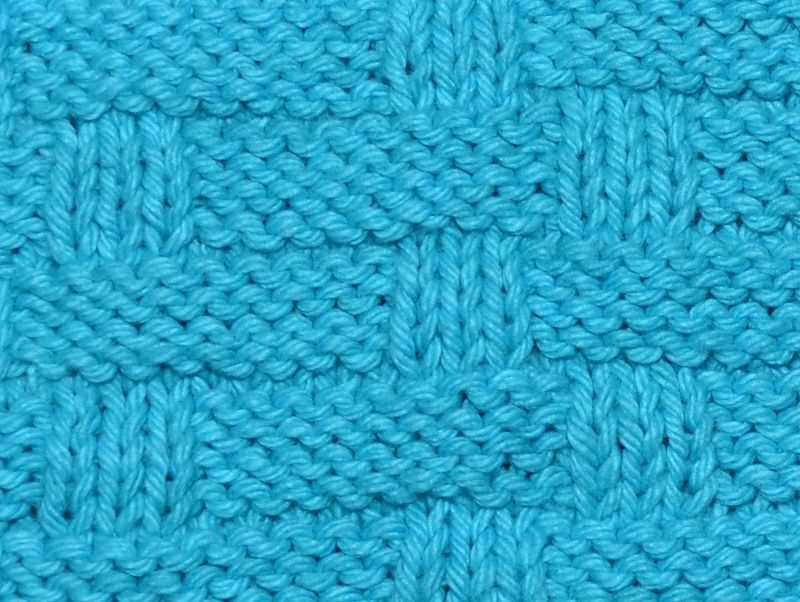
The basket weave stitch pattern creates a woven, textured effect that resembles the traditional weave of a basket. This pattern is achieved by alternating knits and purls in a specific sequence, resulting in a visually appealing design that adds interest and dimension to your finished cowl.
Not only does the basket weave cowl look great, but it is also a practical accessory. This cowl is designed to be worn around the neck, providing extra warmth and insulation on those chilly days. The chunky yarn used in this pattern adds to its coziness, while the stretchiness of the stitch pattern ensures a comfortable fit.
Whether you’re a beginner knitter or have years of experience, this basket weave cowl knitting pattern is a fun and rewarding project to take on. The pattern is easy to follow and allows for customization, allowing you to create a cowl that is uniquely yours. Once you finish knitting this cowl, you’ll have a stylish and functional accessory that’s perfect for both casual and dressier occasions.
Basket Weave Cowl Knitting Pattern
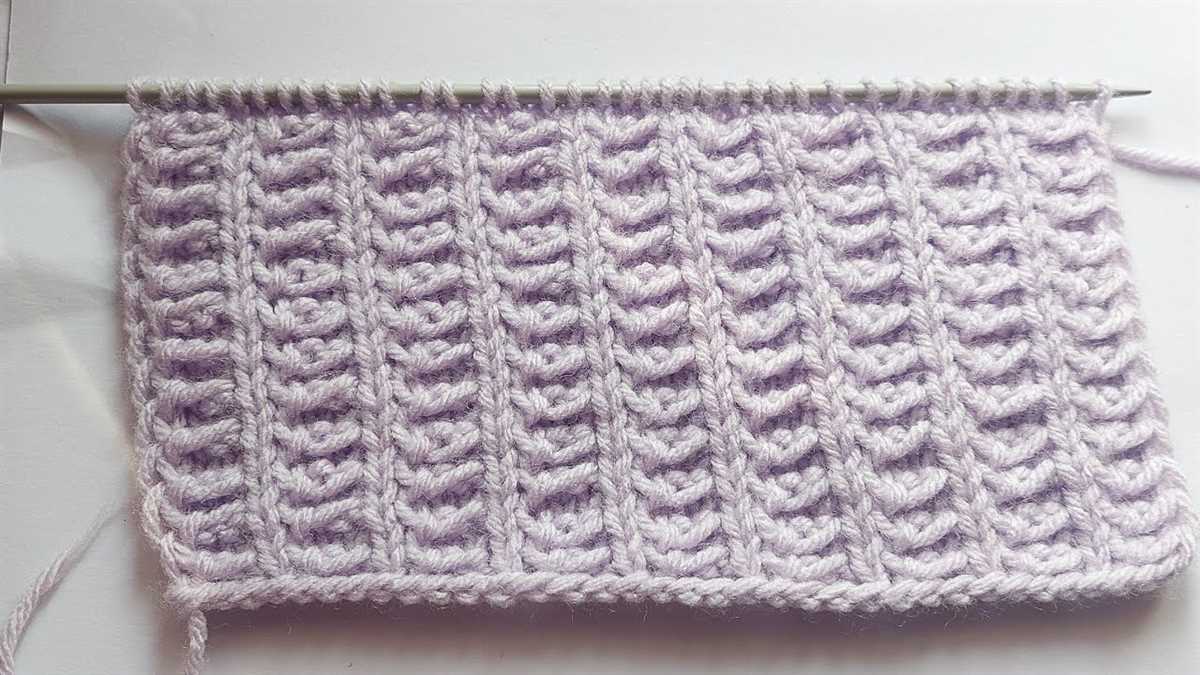
The basket weave cowl knitting pattern is a classic design that creates a beautiful textured fabric. The pattern involves alternating knits and purls in specific sequences to create the basket weave pattern. This pattern is perfect for both beginners and experienced knitters, and it can be easily customized to different sizes and lengths.
To start knitting the basket weave cowl, you will need a set of knitting needles, yarn of your choice, and basic knitting skills. The pattern typically starts with casting on an even number of stitches, and then following a repeat sequence of knitting and purling rows. The number of rows and stitches you cast on will determine the size and width of the cowl.
Materials:
- Size 8 knitting needles
- 200 yards of worsted weight yarn
Pattern:
- Cast on 60 stitches.
- Row 1: Knit all stitches.
- Row 2: Purl all stitches.
- Rows 3-10: Repeat Row 1 and Row 2 four more times.
- Row 11: Knit 3 stitches, *purl 3 stitches, knit 3 stitches; repeat from * to end of row.
- Row 12: Purl 3 stitches, *knit 3 stitches, purl 3 stitches; repeat from * to end of row.
- Rows 13-20: Repeat Row 11 and Row 12 four more times.
- Repeat Rows 3-20 until desired length is reached.
- Bind off all stitches.
You can customize the pattern by adjusting the number of stitches cast on or the number of rows repeated. By using different types of yarn and needle sizes, you can also create different textures and sizes of cowls. The basket weave cowl is a versatile and timeless pattern that is sure to keep you warm and stylish in any season.
What is a Basket Weave Cowl?
A basket weave cowl is a type of knitted accessory that features a distinctive woven texture. It is typically worn around the neck to provide warmth and add a stylish touch to any outfit. The basket weave pattern is created by alternating knit and purl stitches in a specific sequence, which gives the cowl its unique look.
The basket weave pattern is named after its resemblance to the traditional weaving technique used to create baskets. The pattern consists of blocks of knit and purl stitches that are arranged in a grid-like pattern. This creates a textured fabric with a three-dimensional effect, similar to the interwoven strands of a basket. The basket weave cowl can be knitted in various yarn weights and colors, allowing for endless customization options.
The basket weave cowl is a popular choice among knitters due to its versatility and timeless appeal. It can be easily adapted to different sizes and lengths, making it suitable for both adults and children. The cowl can be worn snugly around the neck for added warmth or draped loosely for a more casual look. It can also be paired with other accessories, such as hats or gloves, to create a coordinated winter ensemble.
Knitting a basket weave cowl requires basic knitting skills, including casting on, knitting, purling, and binding off. The pattern is relatively simple and can be easily mastered by beginners. With the right yarn and needle size, the basket weave cowl can be completed in a short amount of time, making it a rewarding and enjoyable project for knitters of all skill levels.
Materials Needed
Before you begin knitting the basket weave cowl, make sure you have the following materials:
- Yarn: You will need approximately 200-250 yards of bulky weight yarn. Choose a soft and warm yarn that you love.
- Knitting Needles: Use a pair of size US 10 or 6mm knitting needles. You can use straight needles or circular needles, depending on your preference.
- Cable Needle: A cable needle is necessary for creating the basket weave pattern. Make sure it matches the size of your knitting needles.
- Tapestry Needle: This needle is used for weaving in loose ends and sewing the cowl together at the end.
- Stitch Markers: Stitch markers can be helpful for keeping track of the pattern and ensuring accuracy.
- Scissors: A pair of sharp scissors is essential for cutting the yarn and trimming any excess.
With these materials and your knitting skills, you will be ready to create a beautiful and cozy basket weave cowl. Enjoy the process and happy knitting!
Choosing the Right Yarn
When knitting a basket weave cowl, it is important to choose the right yarn that will complement the pattern and provide the desired level of warmth and comfort. Yarns come in a variety of materials, weights, and textures, so it is important to consider these factors when making your selection.
Material: One of the first things to consider when choosing yarn is the material it is made of. Common options include wool, acrylic, cotton, and blends of these materials. Each material has its own unique qualities, so consider factors such as warmth, breathability, and softness when making your decision. For a cozy and warm cowl, wool or wool blends may be the best choice, while cotton or acrylic may be better for warmer climates or for those with sensitivities to animal fibers.
- Weight: Yarns come in different weights, which determines the thickness of the yarn strand. This can affect the overall look and feel of the cowl. Consider the weight of the yarn recommended in the pattern, as using a different weight could alter the gauge and fit of the finished cowl. Heavier weights will generally result in a chunkier cowl, while lighter weights will create a more delicate and lightweight fabric.
- Texture: The texture of the yarn can add visual interest and dimension to your basket weave cowl. You can choose yarns with smooth, even textures for a more polished look, or opt for yarns with varying textures such as bouclé or tweed for a more textured and rustic appearance. Consider the stitch definition and how the yarn will showcase the basket weave pattern.
- Color: Finally, consider the color of the yarn. The color can greatly impact the overall look of the cowl and how it matches with your wardrobe. You can choose a neutral color for a versatile cowl that will go with many outfits, or opt for a bold, vibrant color to make a statement. Alternatively, you could also choose a variegated yarn or yarn with a subtle gradient for added visual interest.
By considering these factors and selecting the right yarn for your basket weave cowl, you can ensure that your finished piece is not only beautiful but also suits your style and needs.
Getting Started: Casting On
Before you can start knitting the basket weave cowl, you need to cast on your stitches. Casting on is the process of creating the foundation row of stitches that you will work with throughout your project. There are several different methods for casting on, but for this pattern, we will be using the long tail cast on method.
Materials:
- Yarn of your choice
- Knitting needles in the appropriate size for your yarn
- Tape measure
- Tapestry needle
- Scissors
Instructions:
- Start by measuring out a long enough tail of yarn to cast on the required number of stitches. A good rule of thumb is to measure the tail to be about three times the width of your finished project.
- Make a slip knot at the end of the yarn. To do this, form a loop with the yarn, then pull the end of the yarn through the loop and tighten.
- Hold the knitting needle in your right hand and the slip knot in your left hand.
- With your right hand, insert the needle into the slip knot from front to back, making sure the working yarn is behind the needle.
- Using your right hand, wrap the working yarn around the needle from back to front.
- With your right hand, pull the wrapped yarn through the slip knot, bringing it up and over the needle and creating a new loop on the needle.
- Continue this process of inserting the needle into the new loop, wrapping the yarn around the needle, and pulling it through to create new loops until you have cast on the required number of stitches.
- Once you have cast on all of your stitches, you can begin knitting the first row of your basket weave cowl pattern.
By following these instructions and using the long tail cast on method, you will be well on your way to starting your basket weave cowl project.
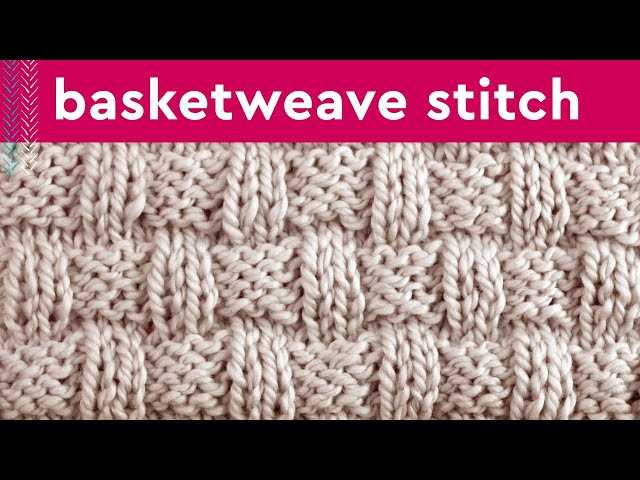
The Basket Weave Stitch

The basket weave stitch is a classic knitting pattern that creates a textured fabric resembling a woven basket. It is often used in various projects, including scarves, blankets, and cowls, adding both visual interest and warmth to the finished piece. This stitch pattern is created by alternating groups of knit and purl stitches over a set number of rows.
To create the basket weave stitch, you will need to have a basic knowledge of knitting techniques, including how to knit and purl. The pattern is typically worked over a multiple of 4 stitches, with a repeat of 4 rows. This allows for an easy memorization of the pattern and makes it suitable for both beginner and intermediate knitters.
Instructions:
To start, cast on a multiple of 4 stitches, such as 32 or 48 stitches, depending on the width desired for your project. Then, follow these simple instructions:
- Row 1: *Knit 4, purl 4*. Repeat from * to * across the row.
- Row 2: *Purl 4, knit 4*. Repeat from * to * across the row.
- Row 3: Repeat row 1.
- Row 4: Repeat row 2.
- Repeat rows 1-4 until your project reaches the desired length.
Once you have completed the desired number of rows, you can bind off the stitches to finish your project.
The basket weave stitch is versatile and can be modified to suit your preferences. For example, you can change the number of knit and purl stitches within each group or adjust the number of rows in the repeat for a different effect. You can also experiment with different yarn weights and needle sizes to achieve a variety of textures and densities in your fabric.
Whether you are a beginning knitter looking for a simple yet impactful stitch pattern or an experienced knitter wanting to add a classic touch to your project, the basket weave stitch is a wonderful choice. Its timeless design and versatility make it a favorite among knitters of all skill levels.
Increasing and Decreasing
In knitting, increasing and decreasing are techniques used to change the number of stitches in a row or round. By increasing, you add stitches to your work, and by decreasing, you remove stitches. These techniques are often used to shape your knitting or create decorative patterns.
There are several ways to increase and decrease in knitting. Some common methods of increasing include yarn overs, make one (M1), and knit front and back (KFB). Yarn overs create an eyelet and are often used in lace knitting. M1 is a common method for increasing without leaving a visible hole. KFB is a simple way to increase by knitting into the front and back of the same stitch.
When it comes to decreasing, common methods include knit two together (K2tog), slip slip knit (SSK), and purl two together (P2tog). K2tog and SSK are often used for shaping and creating slanting decreases. P2tog is typically used when working in purl stitches. These decrease methods can be used to create symmetrical or asymmetrical shaping, depending on the pattern.
It is important to pay attention to the pattern instructions and use the specified increase and decrease methods to achieve the desired result. Practice and experimentation with different increasing and decreasing techniques will help you become more comfortable with these skills and allow you to create unique and beautiful knitting projects.
Finishing Touches: Binding Off
When you finish knitting your basket weave cowl, one of the final steps is binding off. Binding off is the process of securing the stitches on your needle so that they don’t unravel when you remove them. There are several different methods for binding off, but the one you choose will depend on the pattern and the desired finish of your cowl.
The simplest method for binding off is the traditional bind off. To do this, knit the first two stitches as normal. Then, using the left needle, lift the first stitch over the second stitch and off the right needle, leaving one stitch on the right needle. Knit the next stitch and repeat the process of lifting the first stitch over the second stitch. Continue this process until you have one stitch left on the right needle. Cut the yarn, leaving a tail, and pull it through the final stitch to secure it.
Stretchy Bind Off
If you want a bind off that has a bit more stretch, you can try the stretchy bind off. This bind off technique creates a looser edge, making it easier to pull the cowl over your head. To do the stretchy bind off, knit the first two stitches. Then, insert the left needle into the front of the first stitch on the right needle and knit it together with the second stitch. Slide the resulting stitch back onto the right needle. Repeat this process until you have one stitch left. Cut the yarn, leaving a tail, and pull it through the final stitch to secure it.
Once you have bound off all of the stitches, you can weave in any loose ends of yarn with a tapestry needle. This will give your cowl a clean, finished look. If desired, you can also block your cowl to help it maintain its shape and drape. Follow the instructions for blocking provided in the pattern to ensure that your cowl turns out as planned.
Add Some Fringe
Looking to give your basket weave cowl a little extra flair? Why not add some fringe! Fringe is a fun and playful addition to any knitted accessory, and it’s easy to do. By adding fringe to your cowl, you can create a boho-chic look or add a touch of whimsy to your style.
To add fringe to your basket weave cowl, you’ll need a few extra supplies. First, you’ll need some yarn in a coordinating color. You can use the same yarn as your cowl or choose a contrasting color for a pop of color. You’ll also need a pair of scissors to cut the yarn into the desired length for your fringe.
To begin, decide on the length of your fringe. You can make it as long or as short as you like, but a good starting point is to cut your yarn into strands that are about twice the desired length of your fringe. For example, if you want your fringe to be 4 inches long, cut your yarn into 8-inch strands.
Next, take one strand of yarn and fold it in half. Insert the folded end through a stitch on the edge of your cowl, creating a loop. Then, pull the loose ends of the yarn through the loop, creating a knot. Continue this process, spacing the fringe strands evenly along the edge of your cowl.
Once you have attached all of your fringe strands, use your scissors to trim them to your desired length. You can make them all the same length, or you can create a layered effect by trimming some shorter than others.
Adding fringe to your basket weave cowl is a simple yet stylish way to elevate your knitting project. Whether you’re looking to add a bohemian vibe or just want to try something new, fringe is a fun and versatile option. Give it a try and see how it transforms your cowl into a unique and eye-catching accessory!
Styling and Wearing Your Cowl

Once you have finished knitting your basket weave cowl, it’s time to think about how you can style and wear it. Whether you’re looking to add a cozy touch to your everyday outfit or accessorize for a special occasion, the cowl offers versatility and warmth.
To achieve a casual look, you can simply drape the cowl around your neck once or twice, letting it hang loosely. This style works well with a plain t-shirt or a sweater for a relaxed vibe. For a more polished look, you can loop the cowl around your neck multiple times, creating a snug and layered effect. This style pairs nicely with a tailored coat or a dress.
Here are some additional styling ideas for your basket weave cowl:
- Knotted: Instead of looping the cowl, you can tie it in a loose knot to add an element of interest. This style looks great with a basic top and jeans.
- Knotted in the Front: For a chic twist, try knotting the cowl in the front. This is a great way to showcase the basket weave pattern and can be paired with a blouse or a dress.
- Pulled Through: You can also pull one end of the cowl through the loop to create a unique and modern look. This style adds dimension to your outfit and works well with a coat or a sweater.
Remember to consider the color and yarn of your cowl when styling it. Neutral colors can easily be paired with any outfit, while vibrant colors can add a pop of color to a more monochromatic look. Experiment with different ways of wearing your cowl to find the style that suits you best!
Happy knitting and styling!