
Are you looking for a way to keep your home warm and cosy during the colder months? A draught excluder is a simple but effective solution to prevent cold air from entering your home through gaps under doors and windows. While there are many types of draught excluders available on the market, why not try making your own with this free knitting pattern?
Knitting your own draught excluder is not only a cost-effective option, but it also allows you to customize the design to match your home’s decor. Whether you prefer a classic, chunky knit or something more modern and colourful, this knitting pattern provides endless possibilities.
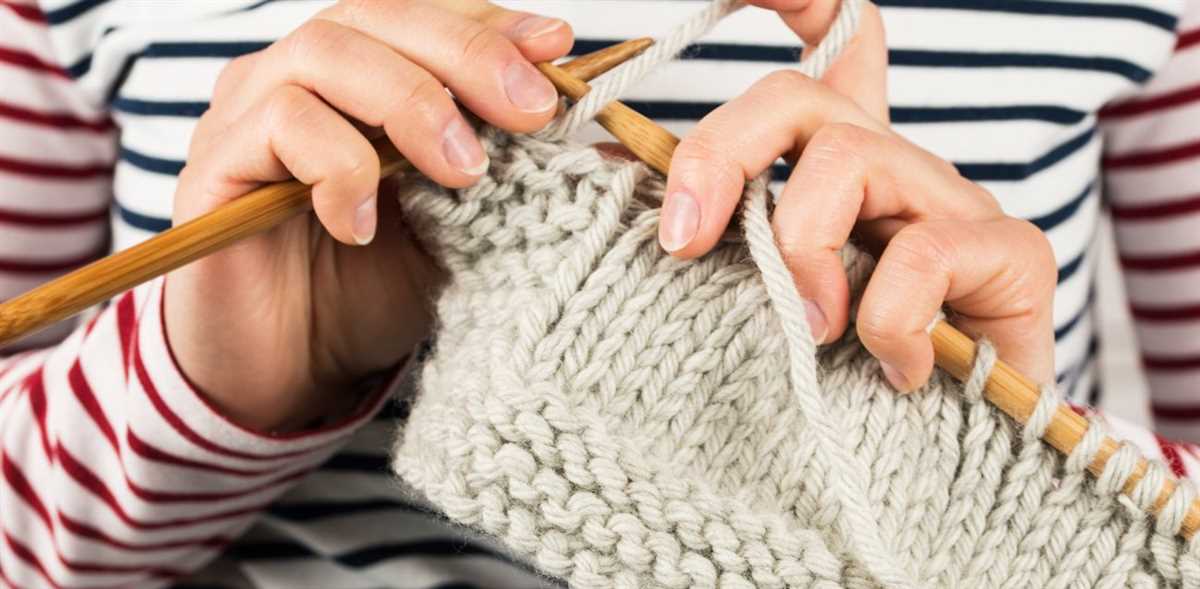
With this free knitting pattern, you can create a draught excluder that not only keeps cold air out but also adds a touch of style to your home. So grab your knitting needles, choose your favourite yarn colour, and let’s get started on this fun and practical project!
How to Knit a Draught Excluder: Free Pattern and Step-by-Step Guide
If you are looking for a practical and decorative way to keep the cold air out of your home, a knitted draught excluder is the perfect solution. In this step-by-step guide, we will provide you with a free knitting pattern and detailed instructions on how to create your own draught excluder.
Materials You Will Need:
- Yarn: Choose a thick and durable yarn, such as chunky wool, to ensure that your draught excluder is both effective and long-lasting.
- Knitting Needles: Use a pair of needles that are appropriate for the yarn you have chosen. For chunky yarn, a size 10 or 12 needle should work well.
- Tapestry Needle: This will be used for seaming the edges of your knitted pieces together.
- Filling: Opt for a firm filling material, such as polyester stuffing or foam, to give your draught excluder the necessary structure.
- Scissors: You will need scissors to cut the yarn and trim any excess.
Knitting Pattern:
Cast on 40 stitches to begin your draught excluder. This will create a width of approximately 10 inches.
Row 1: Knit across all stitches.
Row 2: Purl across all stitches.
Repeat Rows 1 and 2 until your draught excluder measures your desired length, typically around 30 inches.
Bind off all stitches and cut the yarn, leaving a long tail for sewing.
Note: Feel free to adjust the number of stitches and rows to accommodate a different width or length for your draught excluder.
Assembly:

Using your tapestry needle, seam the edges of your knitted rectangle together, leaving one end open for filling.
Stuff the draught excluder with your chosen filling material, making sure to distribute it evenly for a firm and supportive result.
Once filled, seam the open end closed using the same technique as before.
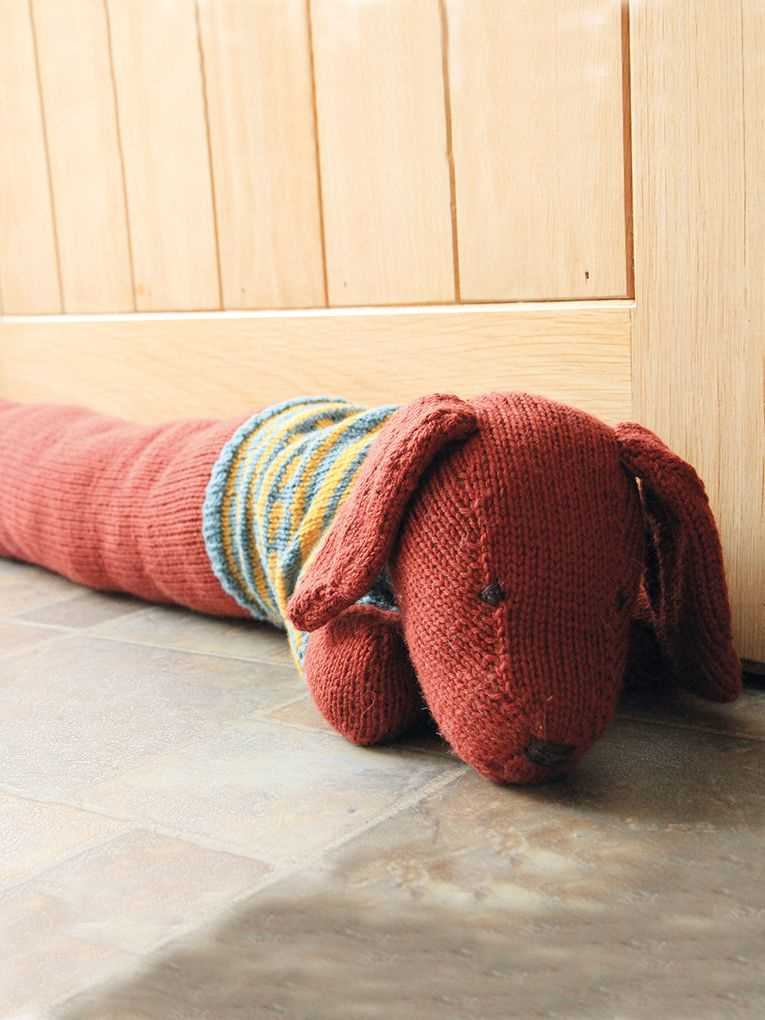
And there you have it – your handmade knitted draught excluder is complete! Place it in front of doors or windows to keep the chilly air at bay and add a cozy touch to your home decor.
Materials You Will Need for the Draught Excluder Knitting Project
In order to successfully complete the draught excluder knitting project, you will need a few materials. These materials are essential for creating a functional and effective draught excluder that will help keep your home warm and cozy. Here is a list of the materials you will need:
1. Yarn:

You will need a suitable yarn for knitting the draught excluder. It is recommended to use a bulky or chunky weight yarn, as it will provide the necessary thickness and insulation. Choose a yarn that is durable and easy to work with. Depending on the size of your draught excluder, you will need around 200-300 grams of yarn.
2. Knitting Needles:
Select a pair of knitting needles that are appropriate for the chosen yarn. The size of the needles will depend on the thickness of the yarn. It is suggested to use larger-sized needles, such as 8 mm or 10 mm, to create a looser knit that will trap the air and provide better insulation.
3. Tapestry Needle:
A tapestry needle will be needed for weaving in loose ends and sewing any seams or sections together. Choose a needle with a large eye and a blunt tip for easier maneuvering through the knitted fabric.
4. Stuffing:
To give your draught excluder its desired shape and firmness, you will need some stuffing material. This can be polyester pillow stuffing, recycled materials like shredded fabric or foam, or even rice or dried beans. The amount of stuffing needed will depend on the size and density you want to achieve.
5. Decorative Accessories (Optional):
If desired, you can add some decorative elements to your draught excluder. This could include buttons, ribbons, pom-poms, or appliques. These accessories can add a personal touch and make your draught excluder unique and stylish.
Once you have gathered all the necessary materials, you will be ready to start your draught excluder knitting project. Follow a reliable knitting pattern and enjoy the process of creating a practical and cozy home accessory.
Choosing the Right Yarn for Your Draught Excluder
When it comes to knitting a draught excluder, choosing the right yarn is essential. The yarn you select will determine not only the look and feel of your finished product, but also its effectiveness in blocking out those pesky draughts.
Weight: It is important to choose a yarn that is heavy enough to provide a dense and sturdy fabric. Opt for a DK (Double Knit) or Aran weight yarn, which will give you the desired thickness and insulation for your draught excluder.
Fiber: For a draught excluder, it is best to choose a yarn that has some natural fiber content. Wool or wool blends are excellent choices, as they have excellent insulation properties and can effectively block out draughts. Acrylic or synthetic yarns, on the other hand, may not provide the same level of insulation.
Texture: Consider the texture of the yarn as well. A smooth yarn may be easier to work with and give your draught excluder a clean, polished look. Alternatively, a textured or boucle yarn can add interest and depth to your design.
Color: When selecting the color of your yarn, think about the overall aesthetic you want to achieve. You can choose a yarn that matches the color scheme of your home or opt for a bold, contrasting color to make a statement. The choice is yours!
Quantity: Lastly, make sure to calculate the quantity of yarn you will need for your project. Most draught excluders will require around 200-300 grams of yarn, depending on the size and pattern you choose.
In conclusion, by carefully considering the weight, fiber, texture, color, and quantity of yarn, you can ensure that your draught excluder turns out exactly as desired. Remember to have fun with your yarn selection and let your creativity shine!
Getting Started: Casting On and Setting Up the Pattern
Before you can start knitting your draught excluder, you’ll need to cast on your stitches and set up the pattern. Follow these steps to get started:
1. Gather Your Materials
First, gather all the materials you’ll need for this project. This includes your chosen yarn, knitting needles in the appropriate size, a tapestry needle for finishing, and any additional embellishments you’d like to add to your draught excluder, such as buttons or pom-poms.
2. Choose Your Pattern and Size
Select a draught excluder knitting pattern that suits your style and preferences. Make sure to consider the size of your door or window where the excluder will be placed to ensure it fits properly. Many patterns are available for free online, offering various stitch patterns and design options.
3. Cast On
To start your draught excluder, cast on the specified number of stitches as indicated in your chosen pattern. Use the knitting needles and yarn specified in the pattern or adjust accordingly if you prefer a different yarn weight or needle size. Make sure to cast on loosely to ensure your stitches are easy to work with later on.
4. Set Up the Pattern
Once you have cast on, it’s time to set up the pattern. This may involve knitting a few rows in a specific stitch pattern or following instructions to create a decorative edging. Be sure to read the pattern carefully and follow the instructions provided to establish the desired design for your draught excluder.
By following these steps, you’ll be well on your way to knitting a cozy and functional draught excluder using your chosen pattern. Remember to take your time and enjoy the process of creating this useful home accessory. Happy knitting!
Knitting the Body of the Draught Excluder
Once you have completed the base of the draught excluder, it is time to move on to knitting the body. This is where you will create the long, cylindrical shape that will block any drafts from entering your home.
Materials: To knit the body of the draught excluder, you will need your chosen yarn in the desired color, knitting needles in the appropriate size, and a tapestry needle.
Step 1: Start by casting on a certain number of stitches, depending on how long you want your draught excluder to be. You can refer to the knitting pattern for the exact number of stitches to cast on.
Step 2: Begin knitting in the round, using either circular needles or double-pointed needles, depending on your preference. Continue to knit in a continuous spiral, without turning the work or creating any seams.
Step 3: As you knit, be sure to periodically check the length of your draught excluder to ensure it is progressing as desired. You can simply hold it up against the door or window you are trying to block the draft from to gauge its length.
Step 4: Keep knitting until you have reached the desired length for your draught excluder. This can vary depending on your personal preference and the size of the area you are trying to cover.
Step 5: Once you are satisfied with the length, bind off your stitches to secure the end. Cut the yarn, leaving a long tail for sewing up the ends.
Adding Patterns and Designs to Your Draught Excluder
When it comes to creating a draught excluder, not only does it serve a practical purpose, but it also gives you the opportunity to showcase your creativity and personal style. Adding patterns and designs to your draught excluder can transform a simple item into a unique and eye-catching accessory for your home. Here are a few ideas for adding patterns and designs to your draught excluder.
1. Knitted Cable Patterns:
If you’re an avid knitter, incorporating cable patterns into your draught excluder can add a touch of elegance and complexity. Cable patterns create beautiful twists and braids, making your draught excluder visually interesting and appealing. Consider using different cable stitch combinations and arranging them in unique ways to create a one-of-a-kind design.
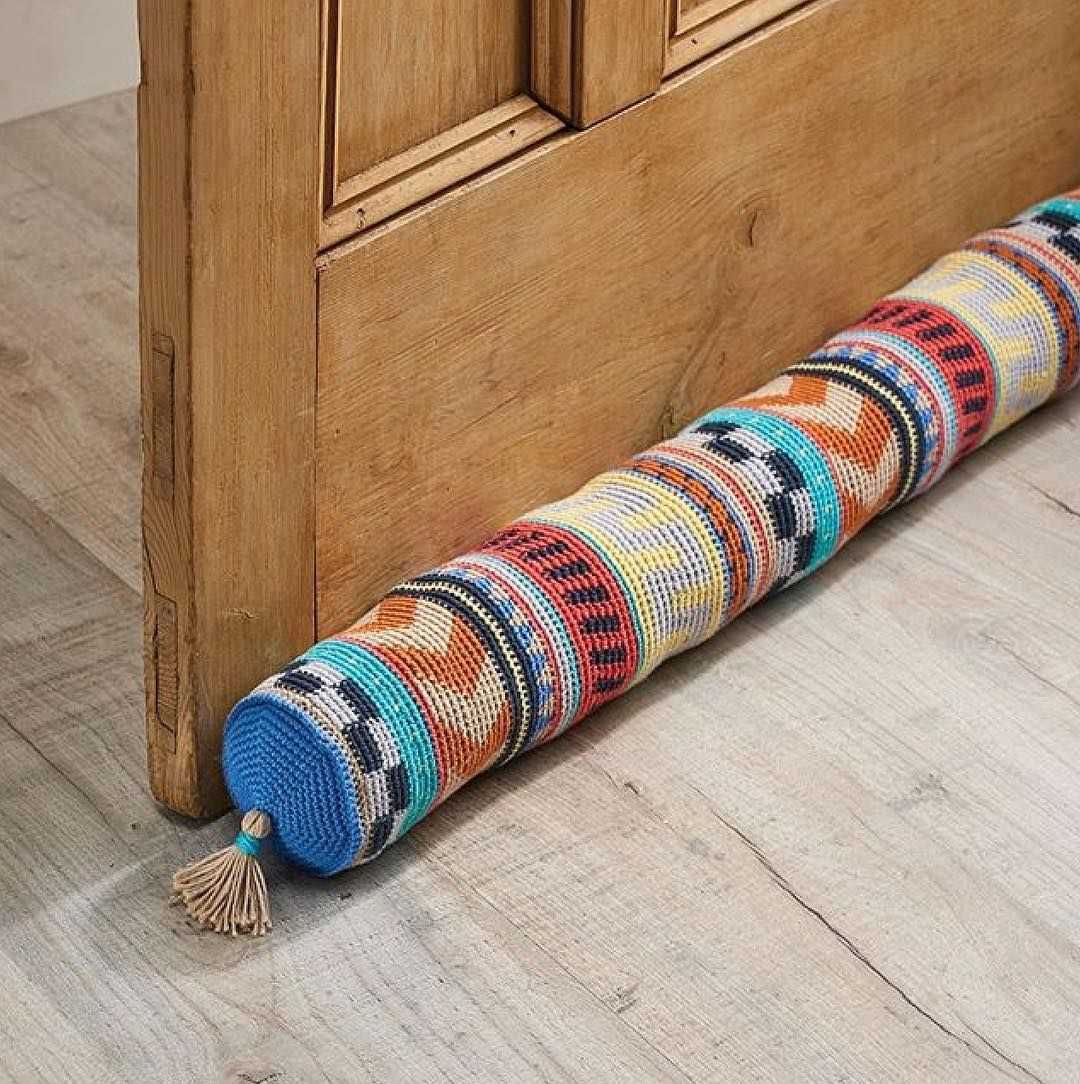
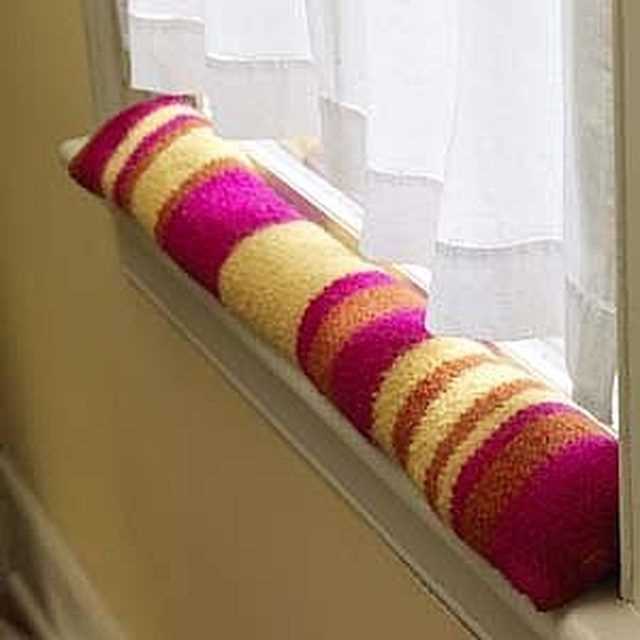
2. Colorful Stripes:
Adding colorful stripes to your draught excluder can brighten up your space and bring a pop of color to your decor. Play around with different color combinations and stripe widths to create a visually appealing pattern. You can use solid colors or even incorporate variegated yarn to add depth and texture to your draught excluder.
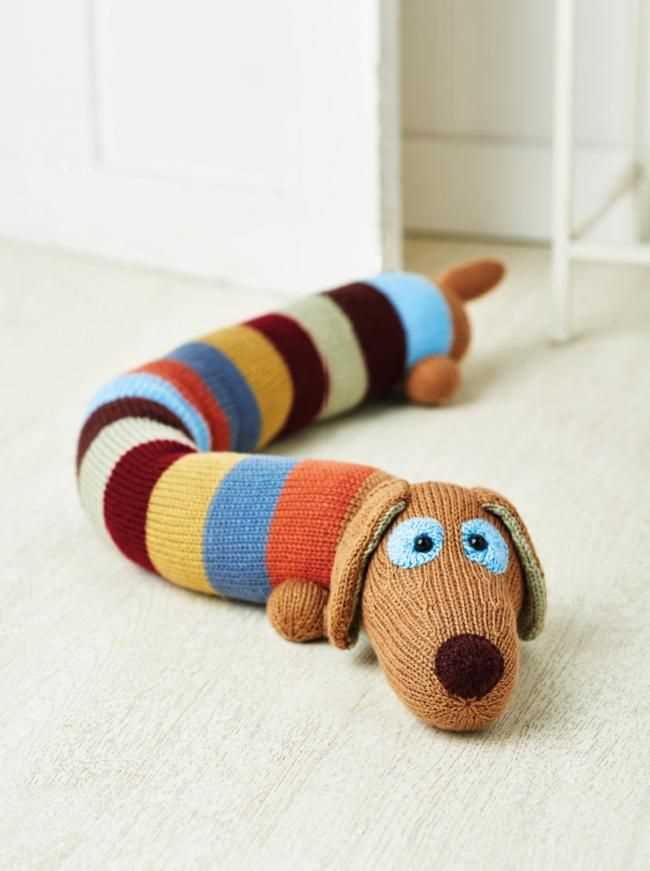
3. Embroidery Details:

If you enjoy embroidery, why not add some intricate details to your draught excluder? You can embellish it with flowers, leaves, or geometric shapes using embroidery stitches such as satin stitch, chain stitch, or French knots. These detailed designs can add a unique and personalized touch to your draught excluder.
4. Appliqué Techniques:
Another way to add patterns and designs to your draught excluder is through the use of appliqué. You can create appliqué shapes using fabric or felt and attach them to your knitted or crocheted fabric. This technique allows you to incorporate different patterns and textures into your draught excluder, making it even more visually appealing.
With these ideas in mind, you can turn a simple draught excluder into a statement piece for your home. Get creative and experiment with different patterns, designs, and techniques to make your draught excluder truly unique and reflective of your personal style.
Creating the Shaping and Tapering for a Perfect Fit

When knitting a draught excluder, it’s important to consider the shape and size of the door or window gap that you want to cover. By creating the right shaping and tapering, you can ensure a perfect fit that will effectively block any cold air from entering the room.
To begin, measure the width of the door or window gap and determine how long you want your draught excluder to be. This will help you calculate the number of stitches you need to cast on. Once you have the right number of stitches, you can start working on the shaping.
Shaping: To shape your draught excluder, you will need to decrease or increase stitches at specific intervals to achieve a gradually tapered shape. This can be done through simple decreases or increases, such as knitting two stitches together or knitting into the front and back of a stitch. By decreasing or increasing a set number of stitches on each row or round, you can create a gentle taper that will fit snugly against the door or window.
Tapering: Tapering your draught excluder involves gradually reducing the number of stitches as you reach the top or bottom of the pattern. This will give the excluder a pointed or rounded shape that will fit neatly into the gap. For example, you can decrease a set number of stitches on each row or round until you reach the desired shape.
- Remember to keep track of your stitch count and row or round numbers as you shape and taper your draught excluder.
- You can refer to a knitting pattern or chart for guidance on how to shape and taper your draught excluder, or you can experiment with different techniques to achieve the desired fit.
- Once you have completed the shaping and tapering, make sure to securely fasten off any loose ends and give your draught excluder a final gentle stretch to ensure a snug fit.
In conclusion, creating the shaping and tapering for a perfect fit in your draught excluder requires careful calculation and attention to detail. By following these steps and techniques, you can knit a draught excluder that will effectively block out any cold air and keep your room cozy and warm.
Finishing Techniques: Binding Off and Weaving in Ends
When you’ve finished knitting your draught excluder, it’s important to properly finish off your work. This involves two key techniques: binding off and weaving in ends. These techniques ensure that your project is secure and tidy, giving it a polished and professional finish.
Binding Off
Binding off, also known as casting off, is the process of taking the live stitches off the needle to create a finished edge. To bind off, simply knit the first two stitches as normal. Then, using the left needle, lift the first stitch over the second stitch and off the right needle. Repeat this process until you have one stitch left on the right needle. Cut the yarn, leaving a tail of several inches, and pull it through the last stitch to secure. This creates a neat edge that won’t unravel.
Weaving in Ends
Weaving in ends is the process of securing and hiding loose yarn tails within the finished piece. To do this, thread the tail onto a tapestry needle. Starting on the wrong side of the work, insert the needle under a few stitches for about an inch, following the natural path of the yarn. Then, without pulling too tightly, reverse direction and weave the needle back through the stitches in the opposite direction. Repeat this process at least twice to ensure the tail is securely woven in. Finally, trim any excess yarn, taking care not to cut too close to the stitches to avoid unraveling.
By following these finishing techniques, you can ensure that your draught excluder has a professional look and feel. Binding off and weaving in ends are essential steps in completing your knitting project and will give you confidence in the durability of your work. Take the time to master these techniques and enjoy the satisfaction of a beautifully finished draught excluder.
How to Block Your Finished Draught Excluder
Blocking your finished draught excluder is an important step in the knitting process. It helps to shape and smooth out the fabric, giving it a professional finish. Follow these steps to block your draught excluder and ensure that it looks its best:
1. Gather your materials: To block your draught excluder, you’ll need a blocking mat or towels, rustproof blocking pins, a tape measure, and a spray bottle filled with water. These tools will help you shape and stretch the fabric.
2. Lay out your draught excluder: Start by laying your knitted draught excluder flat on the blocking mat or towels. Make sure it is laid out in the desired shape and size, with any decorative stitches or patterns facing up.
3. Measure and adjust: Use a tape measure to ensure that your draught excluder is the correct length and width. If necessary, gently stretch or manipulate the fabric to achieve the desired measurements. Take care not to distort any stitch patterns or cables.
4. Secure with pins: Once you’re happy with the shape and measurements, use rustproof blocking pins to hold the draught excluder in place. Start by pinning the corners, then work your way around, adding pins every few inches. This will help to keep the fabric in place as it dries.
5. Mist with water: Fill a spray bottle with water and mist the entire draught excluder. The water will help to relax the fibers and help them hold their shape. Be careful not to saturate the fabric, as excessive moisture can cause it to stretch or lose its shape.
6. Let it dry: Allow the draught excluder to dry completely before removing the pins. This may take several hours or overnight, depending on the humidity in your area. Once dry, gently remove the pins and admire your beautifully blocked draught excluder.
Blocking your finished draught excluder is a simple but essential step that can make a big difference in the overall look and quality of your knitting project. By taking the time to shape and smooth out the fabric, you’ll create a finished product that is not only functional but also visually appealing.
Adding Weight and Filling Materials to Your Draught Excluder
When making a draught excluder, it is important to ensure that it has enough weight to effectively seal gaps and prevent drafts from entering your home. There are several ways to add weight to your draught excluder, depending on your preference and the materials you have available.
One option is to use small weights, such as fishing sinkers or metal nuts, as filling materials. These can be placed along the length of the draught excluder to provide added weight and help keep it in place. Make sure to securely sew the weights into the fabric to prevent them from shifting or falling out.
If you prefer a more eco-friendly option, you can also use filling materials such as rice or lentils. These materials are inexpensive and readily available. Simply fill a fabric bag with rice or lentils and sew it into the draught excluder. This will add weight and allow the draught excluder to effectively block drafts.
If you want to add some extra insulation to your draught excluder, consider using filling materials such as polyester fiberfill, wool, or foam. These materials provide excellent insulation properties and can help keep your home warm in the winter and cool in the summer. Simply stuff the filling material into the fabric casing of the draught excluder until it reaches the desired thickness.
By adding weight and filling materials to your draught excluder, you can ensure that it is effective in blocking drafts and keeping your home comfortable. Whether you choose to use small weights, rice or lentils, or insulating materials, make sure to securely sew them into the fabric to prevent any shifting or leakage. With the right materials and techniques, you can create a draught excluder that is both functional and stylish.
Optional Embellishments: Buttons, Tassels, and Pom Poms

Adding optional embellishments to your draught excluder can not only enhance its appearance but also make it more functional. Here are some ideas for adding buttons, tassels, and pom poms to your knitting project:
Buttons:
Buttons can be used to secure the ends of your draught excluder, preventing it from unraveling or coming apart. Simply sew a button on each end of the excluder and create corresponding buttonholes on the opposite side. This will allow you to easily open and close the excluder when needed.
Tassels:
Tassels can be a fun and decorative addition to your draught excluder. You can create tassels using yarn in a complementary color or different texture. Attach the tassels to the corners or along the length of the excluder using a crochet hook or by sewing them on. The tassels will add movement and flair to your knitted piece.
Pom Poms:
Pom poms are another popular embellishment that can add a playful and whimsical touch to your draught excluder. Use a pom pom maker or make them by hand using cardboard circles. Attach the pom poms to the excluder by sewing them on or by tying them securely. You can place them evenly along the length of the excluder or concentrate them in specific areas for a unique look.
By adding buttons, tassels, or pom poms to your draught excluder, you can personalize it to match your style or the décor of your home. These embellishments also serve a functional purpose, ensuring that your excluder stays securely in place and operates efficiently. Get creative with your designs and have fun experimenting with different embellishments!
Troubleshooting Common Issues in Draught Excluder Knitting

Knitting a draught excluder can be a fun and rewarding project, but sometimes you may encounter common issues that can hinder your progress. Here are some troubleshooting tips to help you overcome these challenges and create a beautiful draught excluder.
Problem: Uneven tension
One common issue in knitting a draught excluder is achieving an even tension. Uneven tension can result in an inconsistent appearance and affect the overall size of your project. To avoid this problem, make sure to maintain a consistent tension throughout your knitting. This can be achieved by practicing even knitting and using the same amount of pressure when working your stitches.
Problem: Twisted stitches
Twisted stitches can occur when knitting a draught excluder if you accidentally wrap your yarn in the wrong direction or twist your stitches while working. This can lead to a distorted fabric and affect the overall fit and appearance. To prevent twisted stitches, pay close attention to the direction in which you wrap your yarn and ensure that your stitches are not twisted when working them.
Problem: Yarn overs or dropped stitches
Yarn overs or dropped stitches can create holes in your draught excluder and disrupt the pattern. To fix this issue, carefully inspect your work as you go, especially after completing a yarn over or working a decrease. If you notice any mistakes, gently unravel the stitches back to the error and fix it by knitting or purling the correct stitch.
Problem: Gauge issues
Gauge issues can arise if your stitches per inch do not match the gauge specified in the pattern for the draught excluder. This can lead to a finished product that is either too small or too large. To address gauge issues, it is recommended to make a gauge swatch before starting your project and adjust your needle size accordingly. This will help you achieve the correct tension and ensure that your draught excluder turns out the desired size.
By being aware of these common issues and using the troubleshooting tips provided, you can overcome any challenges that may arise while knitting a draught excluder. Remember to take your time, stay patient, and enjoy the process of creating a cozy and functional piece for your home.
Final Thoughts: Displaying and Using Your Handmade Draught Excluder
Now that you have finished knitting your draught excluder, it’s time to display it and put it to good use. This homemade excluder will not only help keep your home warm and cozy, but it will also add a touch of charm and personalization to your space. Here are some final thoughts on displaying and using your handcrafted draught excluder:
1. Choose a prominent spot
Find a place in your home where the draught excluder can be easily seen and appreciated. It could be placed on a windowsill, on a mantelpiece, or at the bottom of a door. By selecting a prominent spot, you’ll ensure that your hard work gets the attention it deserves.
2. Coordinate with your décor
Consider the color and pattern of your draught excluder when choosing its display spot. Coordinate it with your existing décor to create a cohesive look. Whether you opt for a bold statement or a subtle blend, harmonizing your excluder with the surrounding colors and textures will make it seamlessly blend into the overall aesthetic of the room.
3. Make it functional
Remember that the primary purpose of a draught excluder is to block out cold air. Pay attention to the placement of your excluder and ensure it’s placed securely against the gaps to prevent drafts. This will help maximize its effectiveness and keep your home warm and energy-efficient.
4. Maintain and clean regularly
To keep your draught excluder looking fresh and maintaining its functionality, make sure to clean it regularly. Depending on the material you used, it can be spot cleaned or hand washed. Be sure to check the care instructions for the specific yarn or fabric you used to ensure proper cleaning and maintenance.
Final Words: Crafting a draught excluder can be a rewarding and enjoyable project. Not only does it add a personal touch to your home, but it also serves a practical purpose of keeping your living space warm and cozy. So, go ahead and display your creation proudly, and enjoy the benefits of a handmade draught excluder.