
If you’re a fan of knitting and love creating beautiful accessories, then this parallelogram scarf knitting pattern is just for you! Scarves are a classic and versatile addition to any wardrobe, and this pattern will help you create a unique and eye-catching piece.
The best part about this knitting pattern is that it’s completely free! With just a few skeins of your favorite yarn and some basic knitting skills, you can create a stunning scarf that will keep you warm and stylish all winter long.
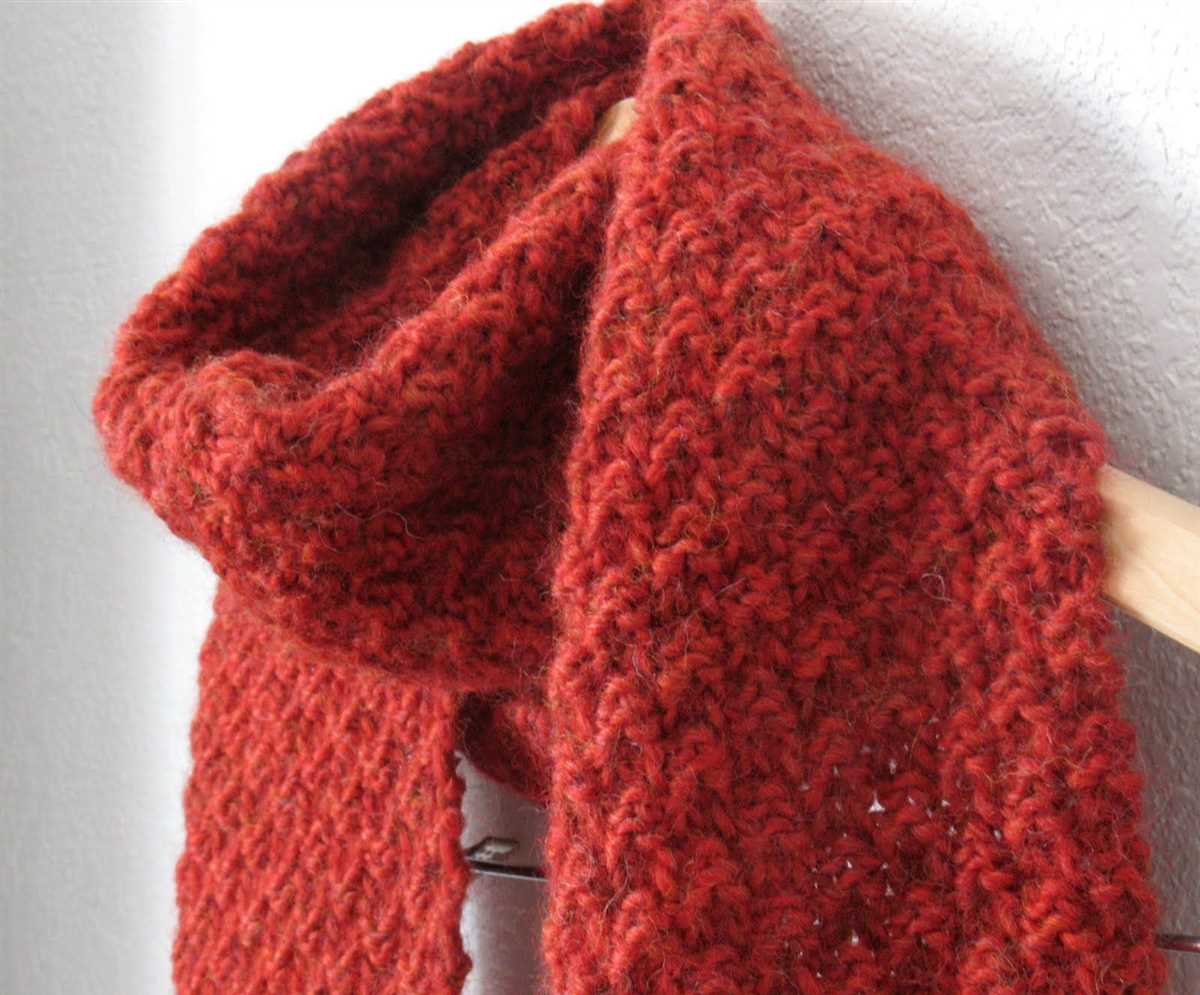
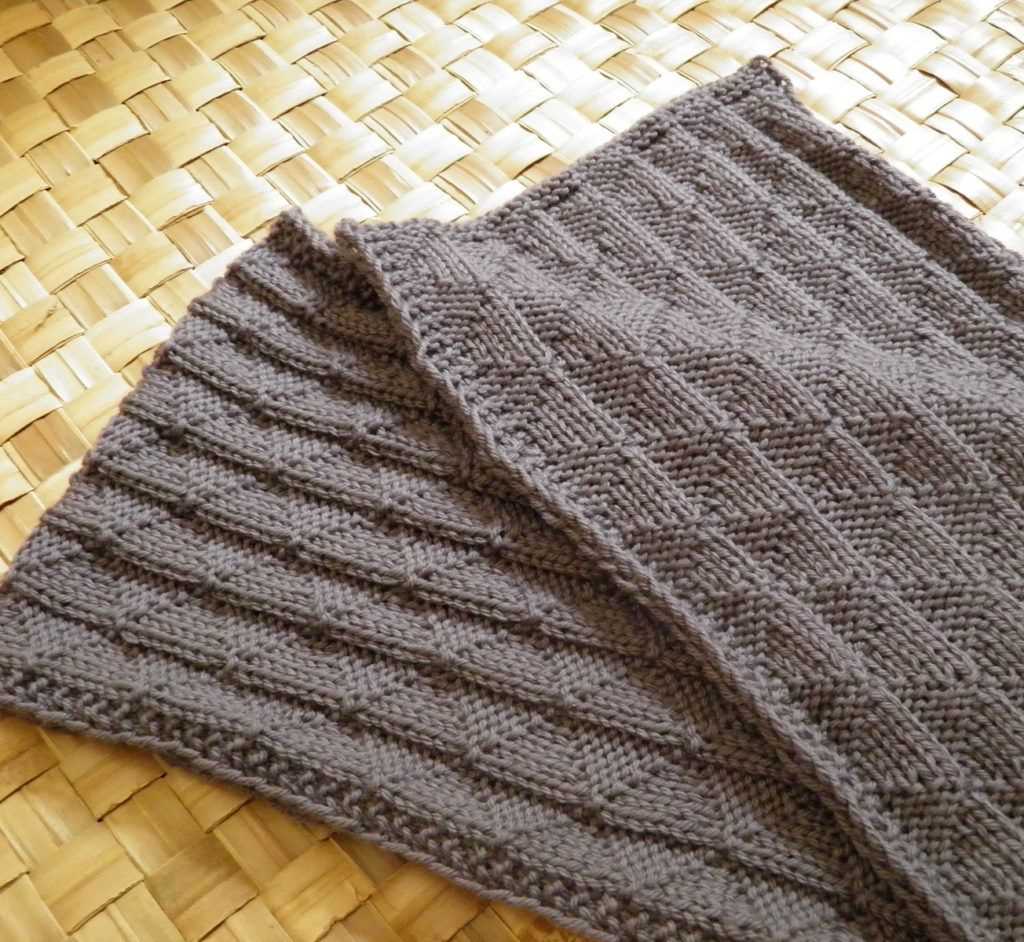
What makes this scarf pattern special is its parallelogram shape. Instead of the traditional rectangular scarf, this pattern creates a scarf with diagonal edges, giving it a modern and geometric look. The parallelogram shape also allows for different styling options – you can wrap it around your neck or drape it over your shoulders for a chic and fashionable look.
Whether you’re an experienced knitter or just starting out, this pattern is suitable for all skill levels. The instructions are clear and easy to follow, and the repetitive stitch pattern makes it a relaxing and enjoyable knitting project. So grab your knitting needles and yarn, and get ready to create a beautiful parallelogram scarf that will be the envy of all your friends!
Parallelogram Scarf Knitting Pattern: Your Ultimate Guide to Knitting a Free Scarf

Are you a fan of knitting and looking for a new project? Look no further! In this guide, we will walk you through the steps to knit a beautiful parallelogram scarf using a free pattern. This stylish and versatile scarf is the perfect addition to your winter wardrobe, and it also makes a great gift for your loved ones.
What is a parallelogram scarf?
A parallelogram scarf is a unique and eye-catching accessory that adds a touch of sophistication to any outfit. Unlike traditional rectangular scarves, a parallelogram scarf has two parallel sides of equal length and two pairs of opposite angles that are also equal. This geometric shape gives the scarf an interesting and modern look.
Choosing the right yarn and needles
Before you start knitting your parallelogram scarf, it’s important to choose the right yarn and needles. For this pattern, you can use any worsted weight yarn in your favorite color. As for the needles, a pair of US size 8 (5mm) straight or circular needles will work perfectly.
Knitting the scarf
To begin knitting your scarf, cast on the desired number of stitches using the long-tail cast-on method. The number of stitches will depend on how wide you want your scarf to be. Follow the pattern instructions to create the parallelogram shape by increasing and decreasing stitches as needed.
Finishing touches
Once you have reached the desired length of your scarf, bind off all the stitches to secure your work. You can choose to add fringe or tassels to the ends of the scarf for a decorative touch. Weave in any loose ends and give your scarf a gentle blocking to ensure it keeps its shape.
Final thoughts
With this free parallelogram scarf knitting pattern, you can create a stylish and unique accessory that will keep you warm and cozy during the colder months. Whether you’re a beginner or an experienced knitter, this pattern is a great way to challenge yourself and expand your knitting skills. So grab your yarn and needles, and start knitting your very own parallelogram scarf today!
What is a Parallelogram Scarf?
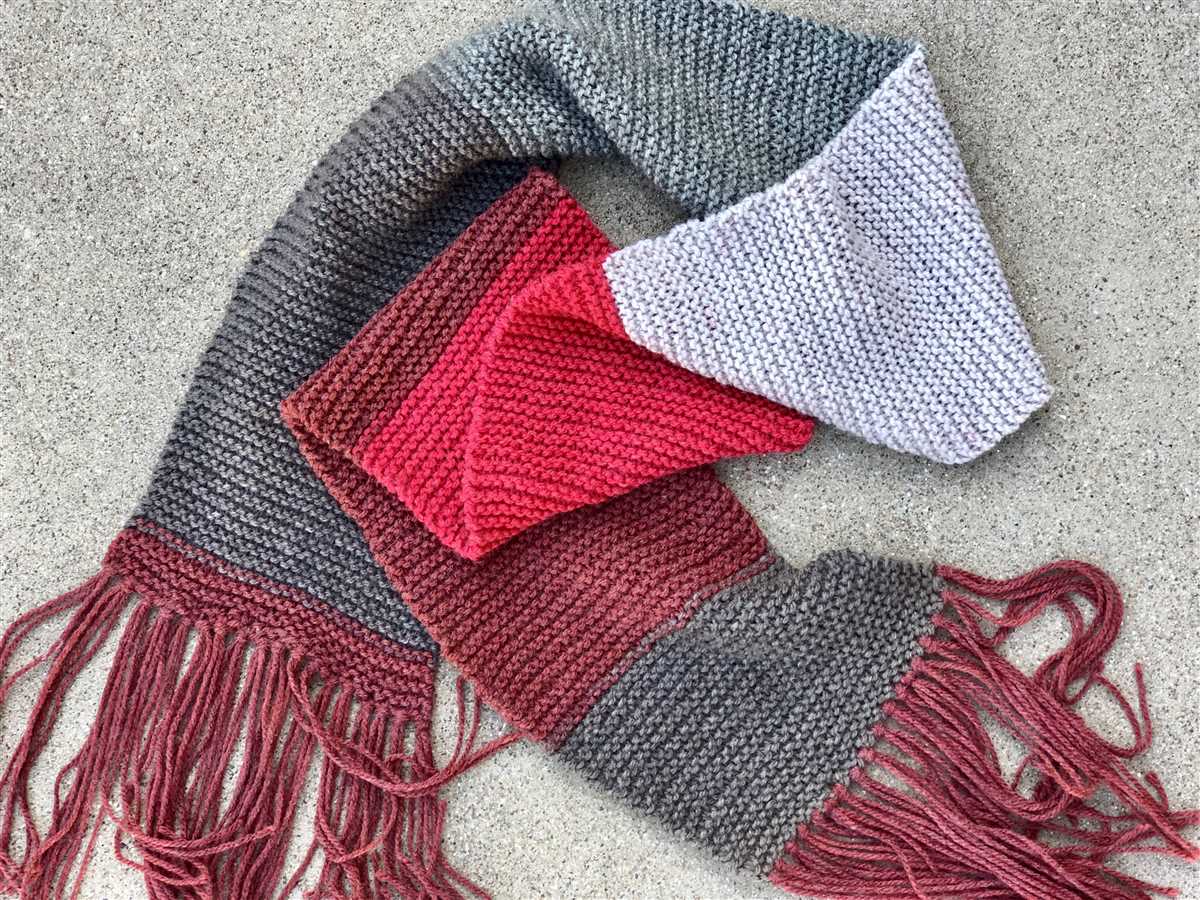
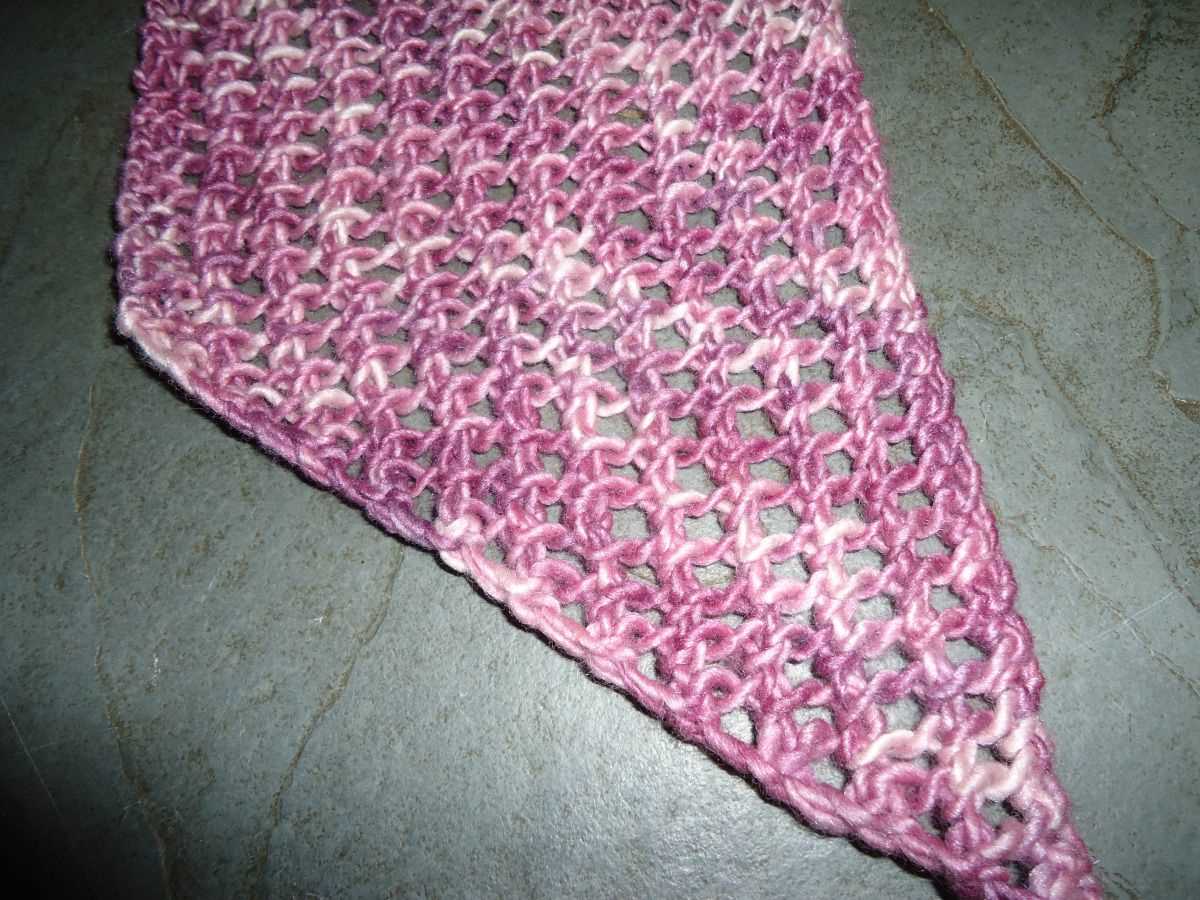
A parallelogram scarf is a type of scarf that is knitted or crocheted in the shape of a parallelogram. It is named after the geometric shape because it has four sides with opposite sides that are parallel to each other. The scarf is wider at one end and gradually tapers towards the other end, creating a unique and stylish shape.
Parallelogram scarves are a popular choice among knitters and crocheters because of their versatility. The unique shape allows the scarf to be worn in a variety of ways, making it a versatile accessory for any outfit. Whether draped over the shoulders, wrapped around the neck, or worn as a shawl, the parallelogram scarf adds a touch of elegance and style to any ensemble.
Materials Needed for Knitting a Parallelogram Scarf

Knitting a parallelogram scarf requires a few specific materials to ensure a successful and comfortable end result. Here is a list of the materials you will need:
- Yarn: Choose a yarn that is soft and warm, preferably in a color or texture that you love. The amount of yarn needed will depend on the desired length and width of your scarf.
- Knitting Needles: Use a pair of knitting needles that are appropriate for the thickness of your chosen yarn. The size of the needles will affect the tension and overall look of the scarf.
- Tape Measure: You will need a tape measure to accurately measure the length and width of your scarf as you knit. This will help in achieving the desired dimensions.
- Scissors: Keep a pair of scissors handy for cutting the yarn at the beginning and end of your knitting project.
- Stitch Markers: Stitch markers can be used to mark specific stitches or sections of your scarf. They can be especially useful if you are following a pattern or need to keep track of a particular design element.
- Tapestry Needle: A tapestry needle will come in handy for weaving in the loose ends of yarn once you have finished knitting.
Having these materials on hand will ensure that you have everything you need to successfully knit a parallelogram scarf. It is always a good idea to gather all your materials before you start your project, so you can fully focus on the knitting process.
Choosing the Right Yarn for Your Scarf
When it comes to knitting a scarf, one of the most important decisions you’ll make is choosing the right yarn. The yarn you choose will not only affect the look and feel of your finished scarf, but it will also impact how easy or challenging it is to work with. Here are some factors to consider when selecting yarn for your scarf:
1. Fiber Content
The fiber content of the yarn can greatly influence the characteristics of your scarf. Popular options include wool, acrylic, cotton, silk, and blends. Wool is known for its warmth and elasticity, while acrylic is a great choice for those with allergies or sensitivity to natural fibers. Cotton and silk yarns are lightweight and breathable, making them perfect for spring or summer scarves.
2. Weight and Thickness
The weight and thickness of the yarn will determine the drape and bulkiness of your scarf. Yarns are typically categorized into weights, such as lace, fingering, sport, worsted, and bulky. Lace and fingering weight yarns will result in a lightweight and delicate scarf, while worsted and bulky weight yarns will create a warmer and more substantial scarf.
3. Color and Texture

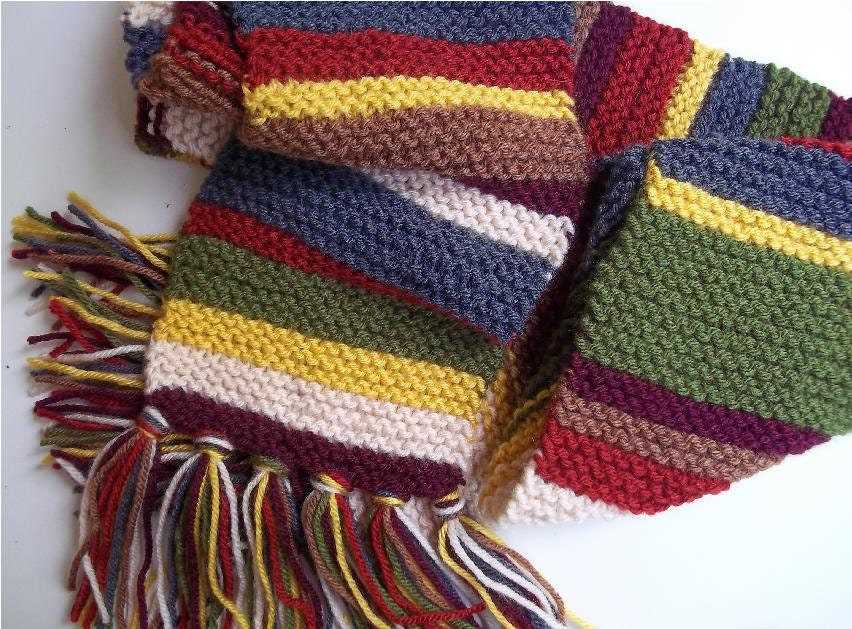
The color and texture of the yarn can add interest and personality to your scarf. Solid colors will showcase stitch patterns and textures, while variegated or self-striping yarns can create beautiful color gradients. Additionally, consider the texture of the yarn, such as smooth, fluffy, or textured, and how it will affect the overall look and feel of your scarf.
4. Care Instructions
Before making a final decision, check the care instructions for the yarn. Some yarns may require special care, such as hand washing or laying flat to dry, while others can be machine washed and dried. It’s important to choose a yarn that aligns with your desired level of maintenance.
By considering these factors and doing some research, you can find the perfect yarn for your scarf knitting project. Whether you’re aiming for warmth, style, or a combination of both, the right yarn will help you create a beautiful and functional accessory to keep you cozy throughout the seasons.
Getting Started: Casting on Stitches

Before you can begin knitting your parallelogram scarf, you’ll need to cast on stitches. This is the first step in starting any knitting project and involves creating a foundation row of stitches on your knitting needle.
There are several different methods for casting on stitches, but for this pattern, we’ll be using the long-tail cast-on method. This method is perfect for creating a neat and stretchy edge, which is ideal for scarves.
To begin, you’ll need to calculate how many stitches you want to cast on. This will depend on the width of your scarf and the desired stitch pattern. Once you have determined the number of stitches, you’ll need to measure out a tail of yarn that is approximately three times the width of your scarf.
Hold the working end of the yarn in your right hand and the tail in your left hand. Create a slipknot by making a loop with the yarn in your right hand, crossing it over the tail, and pulling it through the loop. Place this slipknot onto your knitting needle and tighten it by pulling on the tail.
Now you’re ready to cast on your first stitch. Hold the needle in your right hand and use your thumb and index finger to create a “V” shape with the yarn in your left hand. Insert the needle into the “V” from front to back and wrap the working yarn over the needle and behind it.
Next, bring the needle back through the “V” and pull the loop of yarn through to create a new stitch on the needle. Repeat this process until you have cast on the desired number of stitches. Make sure to keep the tension even and not too tight or loose.
Once you have cast on all the stitches, you’re ready to begin knitting your parallelogram scarf. Follow the pattern instructions for the stitch pattern and enjoy the process of creating a beautiful and cozy accessory!
Knitting the Body of the Scarf

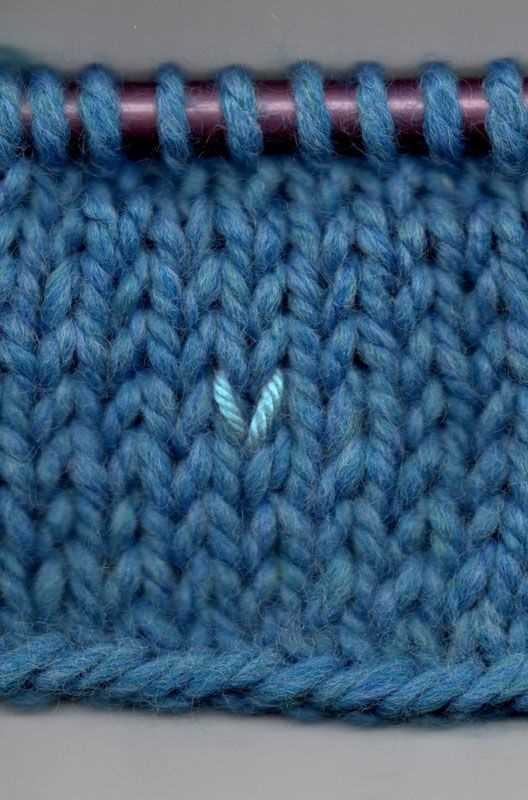
The body of the parallelogram scarf is worked in a simple knit stitch pattern, creating a textured fabric. To begin, cast on your desired number of stitches using a size-appropriate needle. This will depend on the width you want for your scarf and the gauge of your yarn. You can use a different needle size for the cast-on if you prefer a looser or tighter edge.
Once you have cast on, you will begin knitting each row in the knit stitch. The knit stitch is created by inserting your right-hand needle into the stitch on the left-hand needle, from left to right, and wrapping the working yarn around the right-hand needle counterclockwise. Then, pull the needle through the stitch, slipping the original stitch off the left-hand needle. Repeat this process for each stitch across the row until you reach the end.
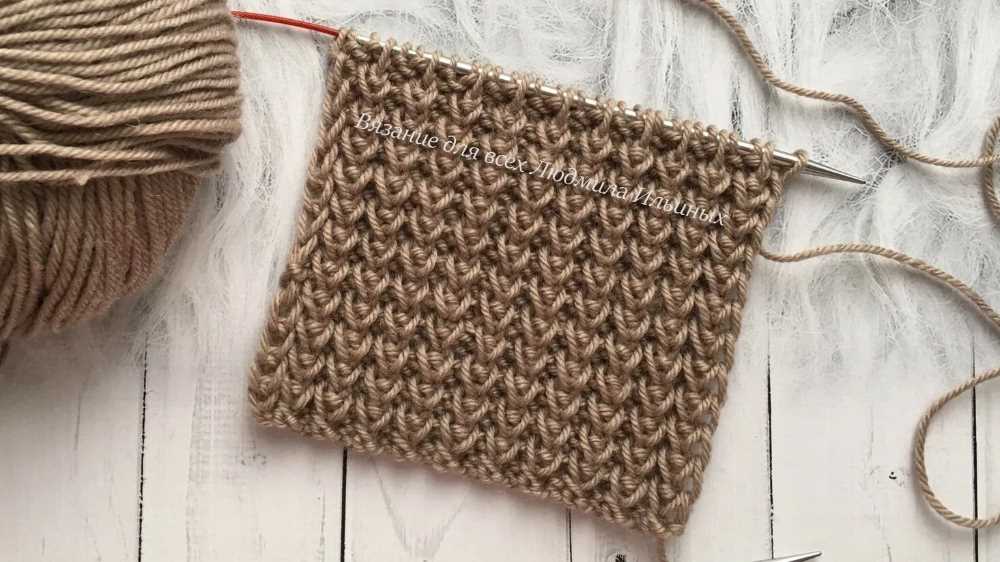
Continue knitting each row in the knit stitch pattern until your scarf reaches the desired length. You can use a tape measure or simply estimate based on the size of your needle and the number of inches or centimeters you want your scarf to be. Note that the length of the scarf will be longer than the width due to the parallelogram shape.
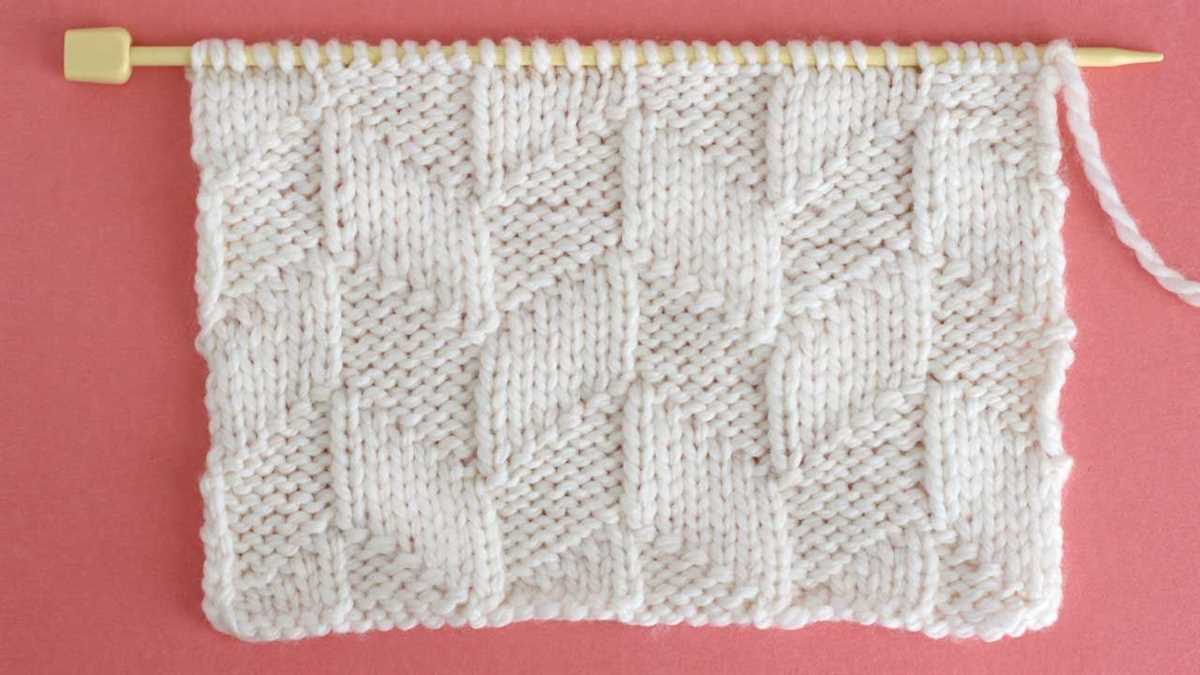
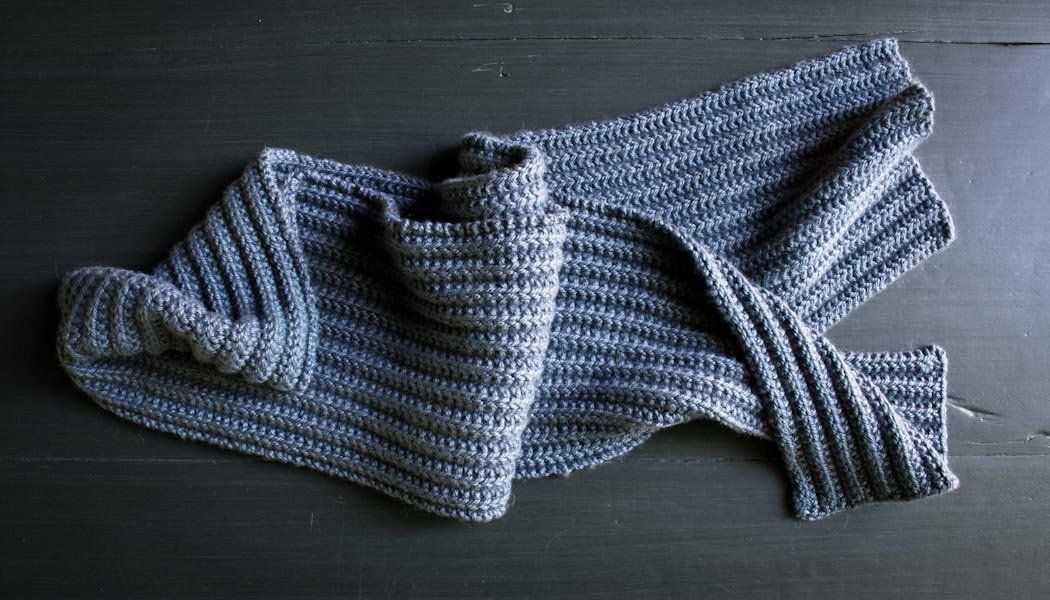
Tip: To add some variation to the body of your scarf, you can experiment with different stitch patterns, such as ribbing, seed stitch, or a simple lace pattern. Just make sure to adjust your stitch count accordingly and keep track of your pattern repeats, if applicable.
Creating the Parallelogram Shape

The parallelogram shape is a versatile and interesting design element that can be incorporated into various knitting projects, such as scarves. To create the parallelogram shape in your knitting, you will need to follow a specific pattern and make certain adjustments to your stitches.
1. Cast on: Start by casting on the desired number of stitches. The number of stitches you cast on will determine the width of your parallelogram scarf.
2. Knit the first row: Once you have cast on, knit the first row of stitches. This will form the foundation of your scarf.
3. Increase stitches on one side: To create the parallelogram shape, you will need to increase stitches on one side of your work. This can be done by knitting into the front and back of certain stitches or by using other increasing techniques. Repeat this increase row every few rows to gradually create the desired shape.
4. Knit the remaining rows: After the initial increase rows, continue knitting the remaining rows of your scarf using your chosen stitch pattern. The number of rows you knit will determine the length of your parallelogram scarf.
5. Decrease stitches on the opposite side: Once you have reached the desired length, you will need to decrease stitches on the opposite side of your work to create the tapering effect of the parallelogram. This can be done by knitting two stitches together or using other decreasing techniques. Repeat this decrease row every few rows until you have decreased enough stitches to create the desired shape.
By following these steps and adjusting your stitches accordingly, you can create a beautiful and unique parallelogram-shaped scarf. Experiment with different stitch patterns and color combinations to make your scarf truly one-of-a-kind.
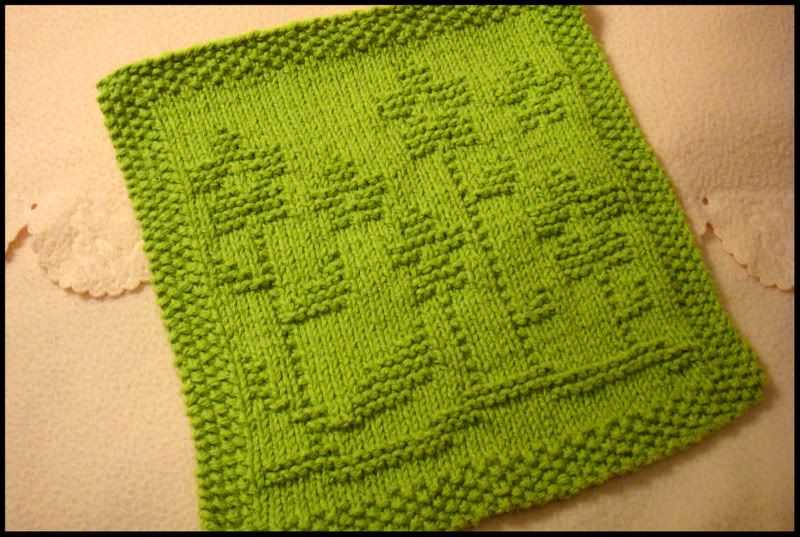
Adding Color and Texture to Your Scarf

Adding color and texture to your scarf can enhance its overall appearance and make it more visually appealing. There are several ways to achieve this, whether you’re using a free parallelogram scarf knitting pattern or creating your own design.
One way to add color to your scarf is by incorporating different shades or hues of yarn. You can choose complementary colors that work well together or create a gradient effect by using yarns that transition from one color to another. This can create a beautiful visual effect and make your scarf stand out.
Another way to add texture to your scarf is by using different stitch patterns. You can experiment with different knitting stitches such as cables, bobbles, or lace patterns to create interesting textures. These stitches can give your scarf a unique look and feel, making it more visually interesting and enjoyable to wear.
You can also add color and texture by incorporating embellishments such as beads, sequins, or embroidery. Adding these details can give your scarf a touch of glamour and make it truly one-of-a-kind. You can sew on beads or sequins in a specific pattern or use embroidery threads to create intricate designs. These embellishments can add pops of color and visual interest to your scarf.
Summary
- Incorporate different shades or hues of yarn to add color.
- Experiment with different knitting stitches to add texture.
- Add embellishments such as beads or embroidery for extra visual interest.
Finishing Touches: Binding Off Stitches
When you have finished knitting your parallelogram scarf, the final step is to bind off the stitches. This is an important finishing touch that gives your scarf a neat and polished edge. There are several different methods for binding off stitches, but we will focus on one simple and commonly used technique.
To begin, knit the first two stitches of your row as usual. Then, using your left-hand needle, lift the first stitch over the second stitch and off the right-hand needle. This essentially binds off one stitch. Next, knit another stitch and repeat the process of lifting the previous stitch over the new stitch and off the needle. Continue in this manner, binding off one stitch at a time, until you have only one stitch remaining on your right-hand needle.
This binding off technique creates a clean, even edge that matches the appearance of the cast-on edge. It is important to maintain an even tension while binding off to prevent the edge from becoming too tight or too loose. If your scarf has a pattern or stitch design, make sure to bind off in a way that maintains the integrity of the pattern.
Once all the stitches have been bound off, cut the yarn, leaving a tail that is long enough to weave in later. Thread the tail through the final stitch and pull tight to secure it. You can then weave in the ends of the yarn to hide them and create a seamless finish. With the stitches bound off and the ends woven in, your parallelogram scarf is complete and ready to be worn or gifted!
Blocking Your Parallelogram Scarf
Blocking is an important step in finishing your parallelogram scarf. It helps to shape and define the stitches, giving your scarf a polished and professional look. Here are some steps to guide you through the blocking process.
Gather Your Materials
Before you begin blocking, make sure you have all the necessary materials. You will need a clean flat surface, such as a blocking board or a towel-covered table. Gather some rust-proof pins or blocking wires to hold your scarf in place. You may also need a spray bottle filled with water or a steam iron for steam blocking.
Pin or Shape Your Scarf
Begin by gently soaking your scarf in lukewarm water for about 20 minutes. Gently squeeze out the excess water, making sure not to wring or twist the fabric. Lay your scarf out on the blocking surface, and use rust-proof pins or blocking wires to gently stretch and shape it into the desired dimensions. Make sure to straighten any edges or corners and smooth out any wrinkles or bumps.
For steam blocking, hold the steam iron a few inches above the scarf and allow the steam to penetrate the fibers. Be careful not to touch the iron directly to the fabric, as this can cause damage. Use your hands to reshape the scarf as the steam is applied.
Allow Your Scarf to Dry
After you have pinned or shaped your scarf, allow it to dry completely before removing the pins or wires. This may take several hours or even overnight, depending on the thickness of the yarn and the humidity of your environment. Avoid moving or disturbing the scarf while it is drying to maintain its shape.
Once your scarf is completely dry, carefully remove the pins or blocking wires. Your parallelogram scarf is now ready to be worn or gifted! Blocking helps to give your scarf a professional finish and ensures that the stitches are showcased to their full potential. Enjoy your beautiful, blocked parallelogram scarf!
Styling and Wearing Your Parallelogram Scarf
Once you have completed your parallelogram scarf, you may be wondering how best to style and wear it. Here are some tips and ideas to help you make the most of your scarf:
1. Traditional Wrap: Simply drape the scarf around your neck and let it hang loosely, allowing both ends to fall naturally. This classic style is perfect for adding warmth and a pop of color to any outfit.
2. Belted Shawl: For a more fashion-forward look, wear your scarf as a shawl by draping it across your shoulders and securing it with a belt around your waist. This creates a chic and cozy layering effect, especially when paired with a sleek dress or high-waisted pants.
- Pro tip: Experiment with different belt styles and colors to change up the look.
3. Knotted Infinity: If you prefer a more structured look, you can transform your parallelogram scarf into an infinity scarf by tying the ends together. Wrap it around your neck twice for a cozy and stylish accessory that will keep you warm all winter long.
4. Head Wrap: Get creative and use your parallelogram scarf as a head wrap or turban for a bohemian-inspired look. Fold the scarf into a triangle and place the folded edge at your forehead, then wrap it around your head, tucking the loose ends in at the back. This style is perfect for adding a touch of flair to a casual outfit or for keeping your hair in place on a windy day.
- Pro tip: Use bobby pins or hair clips to secure the scarf in place for extra hold.
Conclusion: The parallelogram scarf is a versatile and stylish accessory that can be worn in a variety of ways to suit your personal style and the occasion. Whether you choose to wear it as a traditional wrap, a belted shawl, a knotted infinity, or a head wrap, the options are endless. Don’t be afraid to experiment and have fun with different styles and looks!