
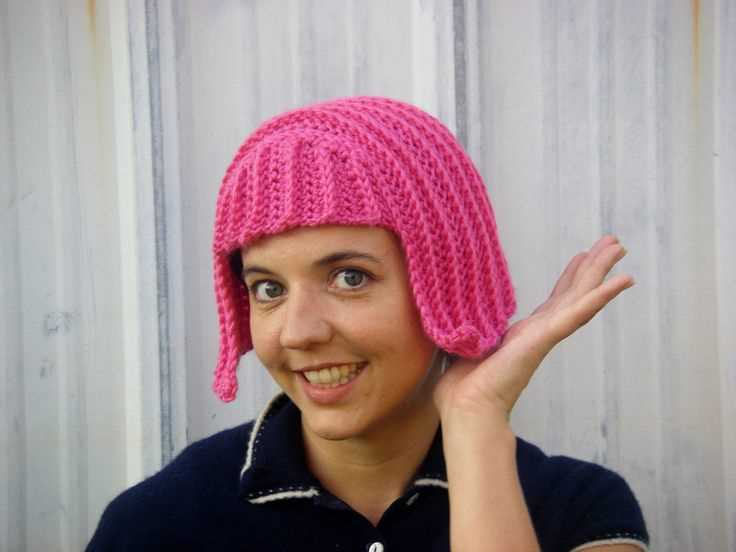
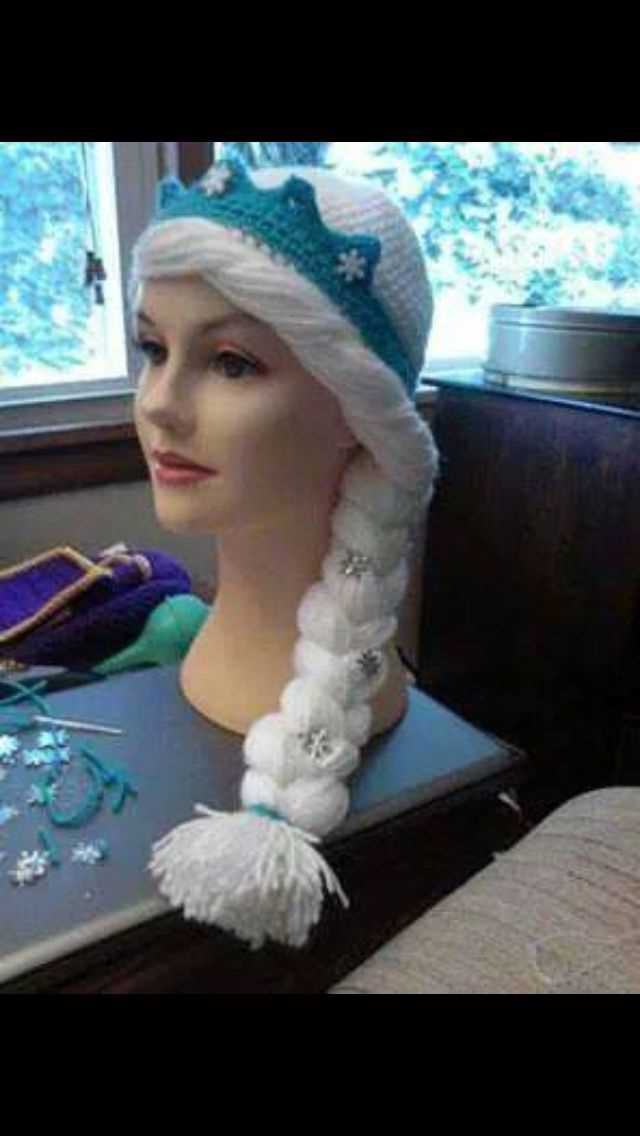
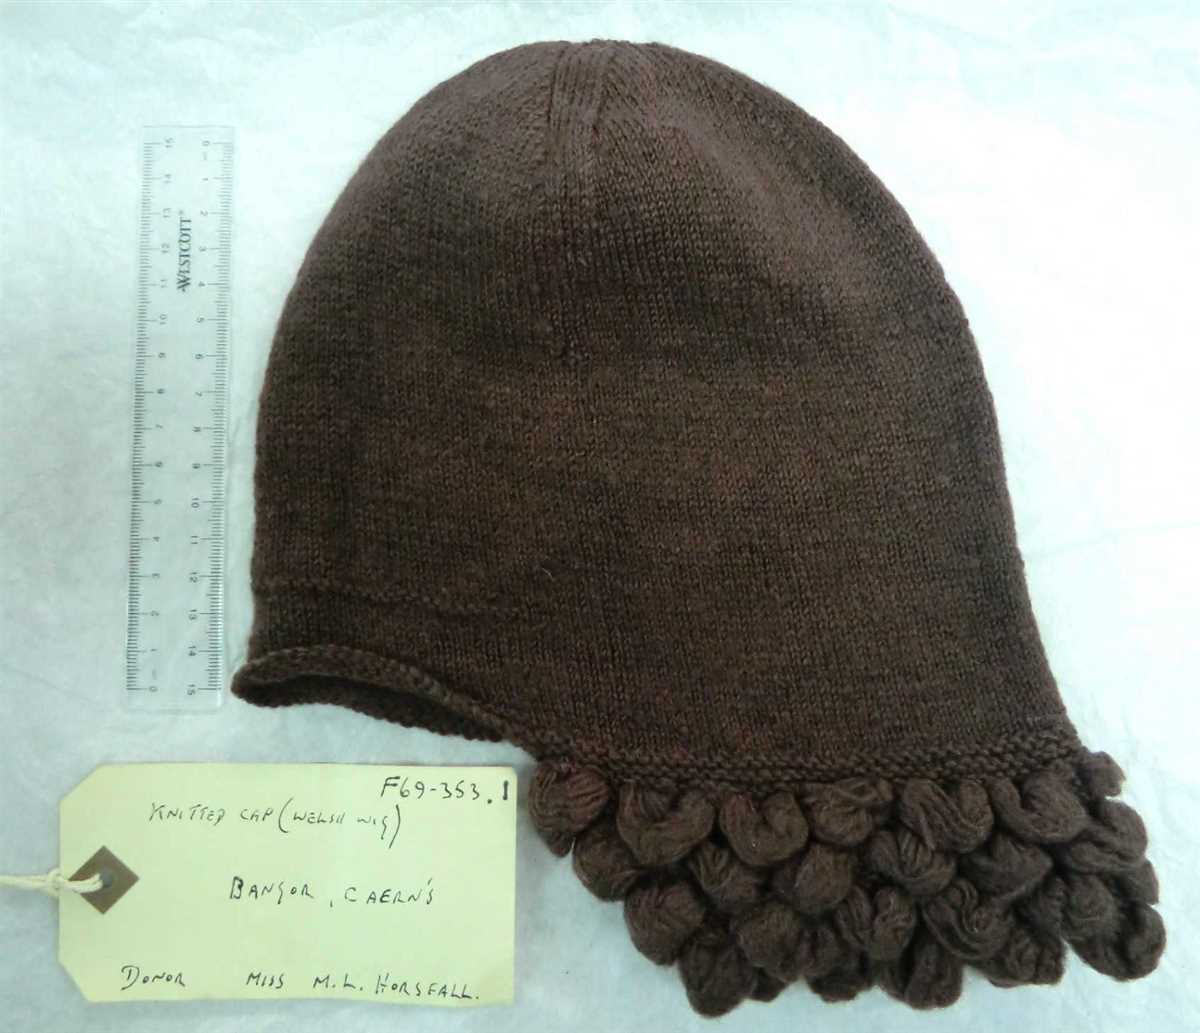
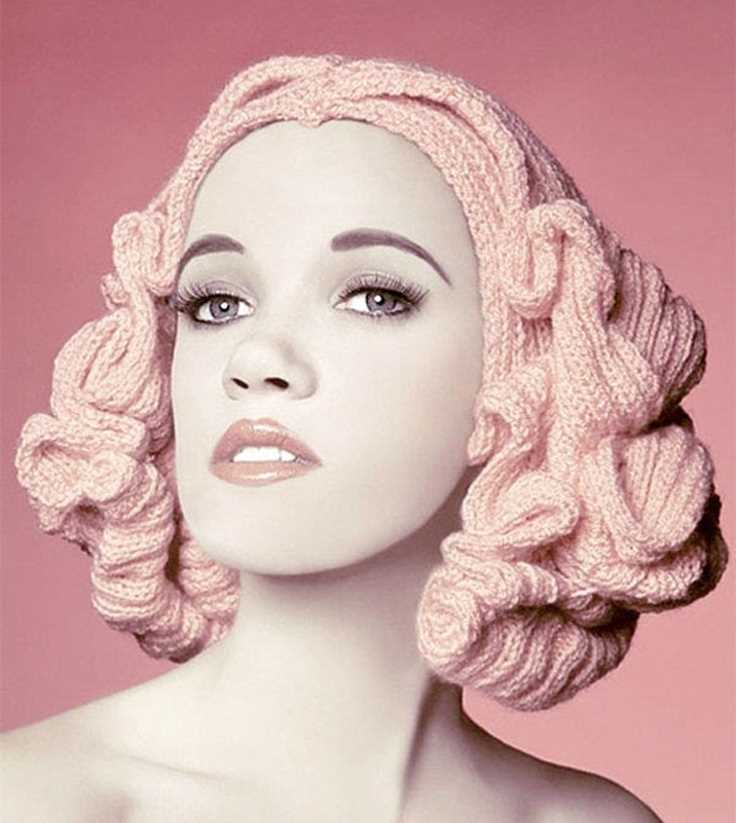
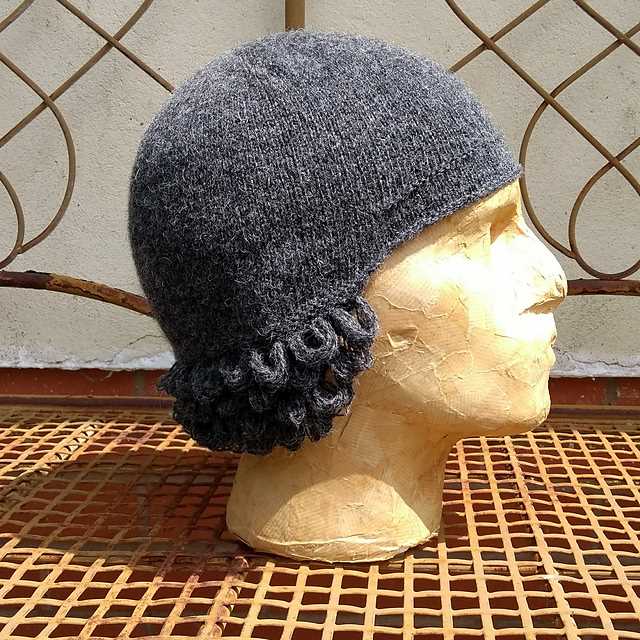
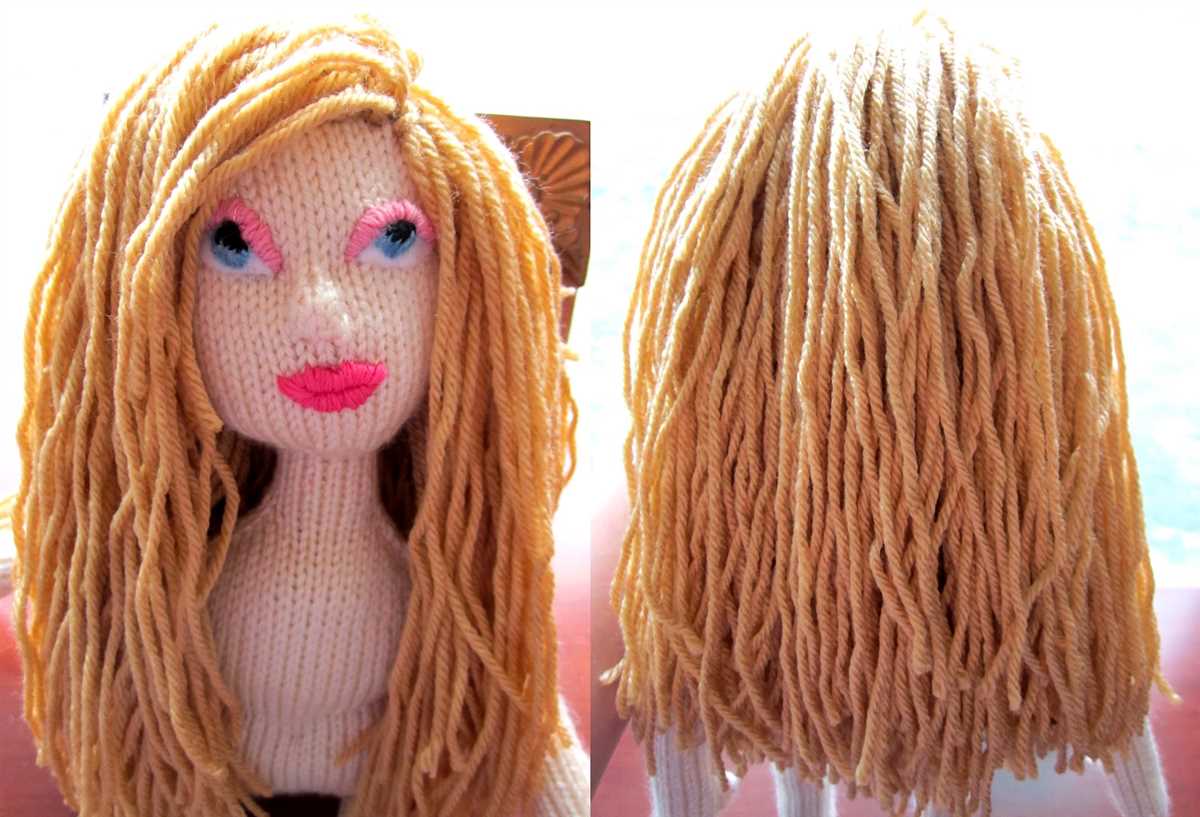
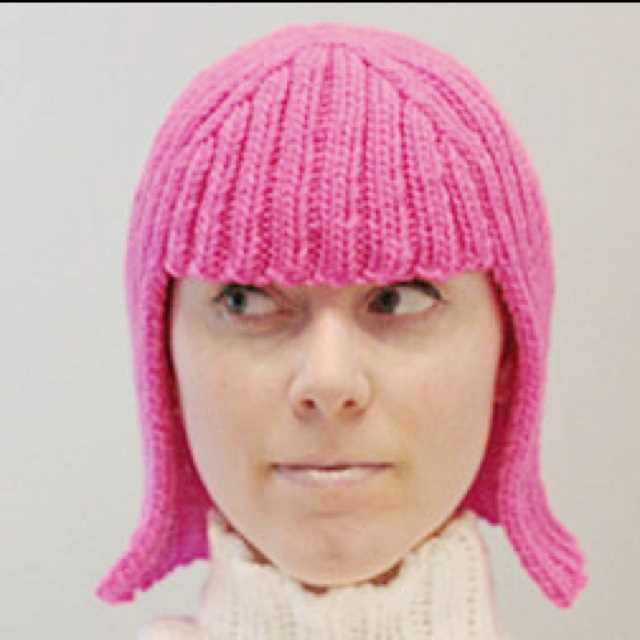
If you’re looking for a fun and unique knitting project, then look no further than the Welsh wig knitting pattern. This pattern is inspired by the traditional Welsh wig, which is a unique and distinctive part of Welsh culture. Knitting your own Welsh wig allows you to create a one-of-a-kind piece that is both stylish and whimsical.
The Welsh wig knitting pattern is suitable for knitters of all skill levels. Whether you’re a beginner looking for a new challenge or an experienced knitter looking for a fun project, this pattern has something for everyone. With detailed instructions and step-by-step photos, you’ll be able to easily follow along and create your own Welsh wig.
Not only is knitting a Welsh wig a fun and creative project, but it also allows you to explore the rich history and culture of Wales. The Welsh wig is a symbol of Welsh pride and tradition, and by knitting your own wig, you can connect with this history in a meaningful and personal way. Whether you choose to wear your wig or display it as a piece of art, it will surely be a conversation starter and a unique addition to your knitting collection. So grab your knitting needles and get ready to embark on a knitting adventure with the Welsh wig pattern!
Why Welsh wig knitting is a popular craft
Welsh wig knitting has been a popular craft for many years, with its roots going back centuries. The tradition of knitting wigs originated in Wales, where it became a vital part of the cultural heritage. The art of wig knitting has been passed down from generation to generation, and continues to be celebrated and practiced today.
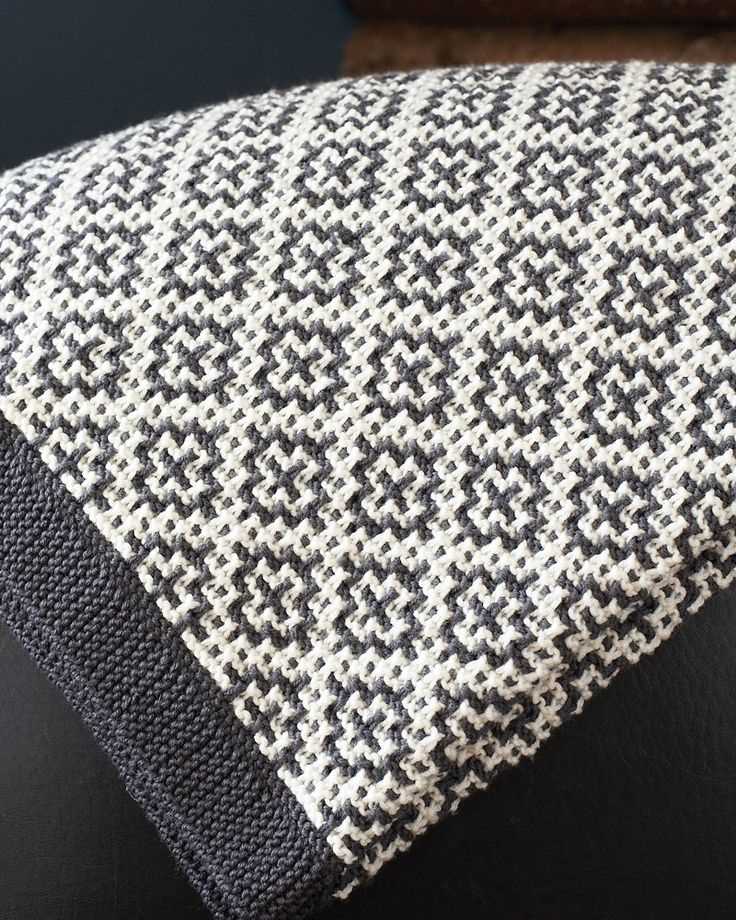
One of the reasons why Welsh wig knitting has remained popular is its unique and intricate patterns. Knitting a Welsh wig requires skill and precision, as each strand of yarn is carefully woven together to create a beautiful and realistic wig. The patterns used in Welsh wig knitting are often inspired by nature, with designs that mimic the look and texture of natural hair.
Additionally, Welsh wig knitting is a craft that offers a sense of connection to the past. By practicing this traditional craft, individuals can tap into the rich history and heritage of Wales. It allows them to not only create a beautiful piece of art, but also to honor their ancestors and preserve a cultural tradition.
Moreover, Welsh wig knitting is a highly versatile craft. While it has its roots in creating wigs, the skills and techniques used can also be applied to other knitting projects. Knitters who have mastered the art of wig knitting can easily adapt their skills to create other intricate and detailed knitted items, such as lacework or delicate garments.
In conclusion, Welsh wig knitting continues to be a popular craft due to its unique patterns, connection to heritage, and versatility. Whether it is for creating a traditional wig or exploring other knitting projects, Welsh wig knitting offers a creative outlet for individuals to express their love for knitting and celebrate the rich cultural heritage of Wales.
What you need to know before starting your Welsh wig knitting project
Knitting a Welsh wig can be a fun and challenging project for experienced knitters. Before you dive into this unique knitting pattern, here are a few things you should know:
1. Familiarize yourself with the pattern
The Welsh wig knitting pattern is unlike traditional knitting patterns. It features intricate lacework and requires careful attention to detail. Take the time to thoroughly read and understand the pattern before starting. Note any special stitches or techniques that might be required.
2. Choose the right yarn
Yarn selection is crucial when knitting a Welsh wig. You’ll want to choose a lightweight yarn that has a good drape and will create delicate lacework. Look for yarns made from natural fibers, such as silk or bamboo, that will enhance the beauty of the finished wig. Consider the color as well, as it should complement the style and era of the Welsh wig.
3. Gather the necessary tools
In addition to yarn, you’ll need a few knitting tools to complete your Welsh wig project. Make sure you have the right size knitting needles for the yarn you’ve chosen, as well as a set of stitch markers to help keep track of your progress. You might also find it helpful to have a row counter, a tapestry needle for finishing, and a blocking mat and pins to shape and set the lacework.
4. Practice your lace knitting skills
If you’re new to lace knitting, it’s worth practicing your skills before diving into the Welsh wig pattern. Lace knitting involves knitting and purling stitches together and creating yarn overs, which can be tricky at first. Start with a small lace project to get comfortable with the techniques and build your confidence.
5. Take your time
Knitting a Welsh wig is a time-consuming process that requires patience and attention to detail. Embrace the journey and take your time with each stitch. Knitting is meant to be a relaxing and enjoyable activity, so don’t rush through the process. Each stitch contributes to the beauty of the final wig, so savor the experience.
By considering these key points before starting your Welsh wig knitting project, you’ll be well-prepared to tackle this unique and rewarding endeavor. Enjoy the process and create a beautiful wig that showcases your knitting skills!
Choosing the right yarn for your Welsh wig

When it comes to knitting a Welsh wig, choosing the right yarn is crucial. The yarn you select will determine the overall look and feel of the wig, as well as how comfortable it is to wear. Here are a few factors to consider when choosing the perfect yarn for your Welsh wig.
1. Fiber Content
The fiber content of the yarn is an important consideration. For a traditional Welsh wig, a natural fiber like wool is often used. Wool is warm, breathable, and has excellent shape retention, making it an ideal choice for a wig that needs to hold its shape. Other natural fibers like alpaca or mohair can also be suitable options for a Welsh wig.
However, if you’re looking for a more modern twist on the Welsh wig or want a different texture, you can also consider synthetic fibers like acrylic or nylon. These fibers are often more affordable and easier to care for, but they may not have the same natural look and feel as wool.
2. Weight and Thickness

The weight and thickness of the yarn are important factors to consider when knitting a Welsh wig. A thicker yarn will create a fuller wig, while a lighter weight yarn will result in a more delicate and airy wig. Consider the desired look and style of your wig when selecting the weight and thickness of the yarn.
Additionally, think about the season or occasion for which you plan to wear the wig. A heavier yarn may be suitable for colder weather or a more formal occasion, while a lighter yarn may be more comfortable for warmer weather or casual wear.
3. Color and Texture

The color and texture of the yarn can also significantly impact the final appearance of your Welsh wig. Consider the desired color and texture when selecting the yarn. Traditional Welsh wigs often have a natural or neutral color like brown, black, or gray, but you can also choose to go bold with vibrant or pastel shades.
Additionally, consider the texture of the yarn. A smooth and even yarn will create a sleek and polished wig, while a yarn with more texture or variation can add interest and depth to the wig.
Overall, choosing the right yarn for your Welsh wig is a personal choice that depends on your preferences and the desired look of the wig. By considering factors like fiber content, weight and thickness, and color and texture, you can select the perfect yarn to create a beautiful and comfortable Welsh wig.
Getting the right knitting needles for your Welsh wig
When it comes to knitting a Welsh wig, it is important to choose the right knitting needles for the task. The type and size of needles you use can greatly impact the overall look and feel of your wig.
Material: First and foremost, consider the material of the knitting needles. While there are different options available, such as metal, bamboo, and plastic, it is recommended to choose a pair of needles that are smooth and sturdy. This will ensure that your wig knitting goes smoothly and that your stitches are consistent.
Size: The size of the needles is another important factor to consider. The size of the needles will determine the gauge of your stitches and ultimately the size of your wig. It is recommended to use a needle size that matches the recommended gauge for your pattern. This will help you achieve the desired size and fit for your wig.
Length: The length of the needles is also worth considering. While shorter needles may be more portable and easier to handle, longer needles can be beneficial for larger projects like a Welsh wig. They provide more space for the stitches and make it easier to work with a large number of stitches in a row.
Tips: When choosing knitting needles for a Welsh wig, consider the weight and thickness of the yarn you will be using. Thicker yarns may require larger needles, while thinner yarns may require smaller needles. Additionally, it is always a good idea to have a set of extra needles on hand, as they can be useful for holding stitches or for when you need to switch to a different needle size for different sections of the wig.
Step-by-step instructions for knitting a Welsh wig
In this tutorial, we will walk you through the process of knitting a traditional Welsh wig. These wigs are a popular accessory in Welsh cultural events and can be a fun and unique project to take on. Whether you are a beginner or an experienced knitter, this pattern is suitable for all skill levels.
Materials needed:
- Yarn in the desired color
- Knitting needles (size may vary depending on the desired thickness)
- Tape measure
- Scissors
Instructions:
- Start by casting on the desired number of stitches, depending on the size of the wig you want to create. It is recommended to cast on an even number of stitches.
- Once you have cast on your stitches, begin knitting in the stockinette stitch. This means you will knit one row and purl the next, repeating this pattern until you have reached the desired length.
- Measure the circumference of the wig wearer’s head. This will help you determine how long you need to knit the wig. Keep in mind that the wig should fit snugly but not be too tight.
- Continue knitting in the stockinette stitch until the length matches the measurement of the head circumference.
- Once you have reached the desired length, bind off the stitches. Cut the yarn, leaving a long tail for sewing the ends together.
- Fold the knitted piece in half, with the right sides facing each other. Use the long tail to sew the ends together, creating a tube-like shape for the wig.
- Turn the wig right side out, and shake it a bit to fluff up the knitted fabric and give it volume. You can also use a brush to gently comb through the yarn and create a more natural-looking wig.
- Your Welsh wig is now ready to be worn! Adjust the fit on the wearer’s head and style as desired.
With these step-by-step instructions, you can now create your own Welsh wig and add a touch of tradition to your next Welsh event or costume party. Have fun knitting!
Casting on and beginning your Welsh wig
If you’re ready to start knitting your very own Welsh wig, the first step is to cast on. Casting on is the process of creating the foundation row of stitches on your knitting needle. There are various methods you can use, but for this Welsh wig pattern, we recommend using the long-tail cast on method. This method provides a nice, stretchy edge that is perfect for the wig.
To begin the long-tail cast on, you’ll need to estimate the amount of yarn you’ll need for your foundation row. A good rule of thumb is to measure out a length of yarn that is approximately four times the width of your finished wig. This will give you enough yarn to create the necessary stitches while also leaving a tail for weaving in later.
Step 1: Make a slipknot by creating a loop with the yarn, leaving a long tail. Insert your knitting needle through the loop and tighten the knot around the needle.
Step 2: Hold the knitting needle with the slipknot in your right hand. With your left hand, use your thumb and index finger to hold the tail of the yarn against the needle, creating a “V” shape in the yarn.
Step 3: With your right hand, bring the needle over the top of the yarn tail, then tuck it under the yarn and back through the loop on the needle. This creates a new loop on the needle.
Step 4: Continue repeating step 3, bringing the needle over the top of the yarn, tucking it under, and back through the loop, until you have cast on the desired number of stitches for your wig.
Once you have successfully cast on your stitches, you’re ready to begin knitting your Welsh wig! Follow the pattern instructions for the specific stitch pattern and shaping details. Happy knitting!
Creating the base of the Welsh wig
When creating a Welsh wig, it is important to start with a sturdy base that will provide structure and support for the wig. This base is typically made from a wire frame that is shaped to fit the wearer’s head.
To create the base of the Welsh wig, you will need a few materials including a wire frame, wire cutters, and needle-nose pliers. Start by measuring the wearer’s head to determine the size and shape of the wire frame. Cut a piece of wire that matches these measurements, leaving some extra length for securing the ends together.
Once you have the wire cut to the correct size, use the needle-nose pliers to bend and shape the wire into the desired shape. This may involve bending the wire into a circle for the main part of the base, and adding additional loops or curves for any specific design elements. The pliers can be used to create smooth bends and curves, ensuring that the wire is shaped exactly as desired.
After shaping the wire frame, use the needle-nose pliers to twist the ends together securely. This will create a closed loop that forms the base of the wig. It is important to make sure that the ends are twisted tightly to prevent any movement or shifting of the wire frame.
Once the base is complete, it is ready to be covered with the chosen material. This can be a fabric or yarn that matches the desired look of the wig. The material can be sewn or wrapped around the wire frame, creating a smooth and finished appearance. The choice of material will depend on the specific design of the wig and the desired outcome.
Adding the main body of the wig
Now that you have completed the crown of the wig, it’s time to move on to the main body. This part of the pattern will create the bulk of the wig, giving it its fullness and volume.
To start, you will need to cast on the desired number of stitches, which will depend on the size of the wig you are making. The pattern will specify how many stitches to cast on, typically in multiples of 10. You can use a circular needle or double-pointed needles for this step.
- Row 1: Knit all stitches.
- Row 2: Purl all stitches.
- Row 3: Knit all stitches.
- Row 4: Purl all stitches.
Repeat these 4 rows for the desired length of the main body. You can refer to the pattern for the recommended number of rows. Make sure to keep track of your rows by using a stitch marker or counting as you go.
Once you have reached the desired length, you can proceed to the next step in the pattern. This may involve shaping the wig or adding any additional details. Follow the instructions carefully to ensure that you achieve the desired result.
Finishing and shaping your Welsh wig
After completing the knitting of your Welsh wig, it is time to finish and shape it to give it the desired look. This final step is crucial in achieving the authentic Welsh wig appearance, so proper attention and technique must be applied.
Firstly, you will need to sew the back seam of the wig using a strong thread and a needle. This will give the wig its structure and ensure that it sits securely on the head. Make sure to sew the seam tightly and evenly, as any loose stitching may result in an ill-fitting wig.
Shaping the wig
- Blocking: To shape your wig, you will need to block it. This involves wetting the wig and then stretching and pinning it onto a blocking board or a wig form. Leave it to dry completely before removing the pins. This process will help smooth out any wrinkles and give the wig a more streamlined shape.
- Trimming: Once the wig is dry, you can trim the excess yarn or any uneven edges to neaten up the appearance. Use sharp scissors and trim carefully, making sure not to cut any of the knitted stitches.
- Styling: To add more volume and shape to your Welsh wig, you can use a curling iron or hot rollers to create soft curls or waves. Be cautious not to use too much heat, as it can damage the yarn. Alternatively, you can use bobby pins or hair clips to create different hairstyles and secure the wig firmly in place.
Remember that each Welsh wig is unique, and the final look may vary depending on the yarn, needle size, and individual knitting technique. Experiment with different shaping methods and styles to find the one that suits your preferences and enhances the wig’s overall appearance.
Tips and Tricks for Perfecting Your Welsh Wig Knitting Skills

Knitting a Welsh wig can be a fun and rewarding project, but it can also be quite challenging. With its unique construction and intricate patterns, it requires precision and attention to detail. Here are some tips and tricks to help you perfect your Welsh wig knitting skills.
1. Choose the Right Yarn
When knitting a Welsh wig, it’s essential to choose the right yarn. Opt for a yarn that is soft and lightweight, as it will ensure that the finished wig is comfortable to wear. Additionally, consider the texture and color of the yarn to achieve the desired effect. Mohair or angora blends can be excellent choices for achieving a realistic and fluffy look.
2. Master the Basic Stitches
To create a beautiful Welsh wig, you need to master the basic knitting stitches. These include the knit stitch, purl stitch, and various increase and decrease techniques. Practice these stitches until they become second nature to you. This will make it easier for you to follow the intricate patterns and create a seamless and professional-looking wig.
3. Use Stitch Markers
Stitch markers are invaluable tools when knitting a Welsh wig. Place them strategically to mark key points in the pattern, such as the location of increases and decreases. This will help you keep track of your progress and prevent mistakes. Additionally, it can be helpful to use different colored stitch markers to indicate different types of stitches or pattern repeats.
4. Pay Attention to Gauge
Gauge is crucial when knitting a Welsh wig. Make sure to check your gauge before starting the project and adjust your needle size if necessary. This will ensure that your wig turns out the right size and fits properly. Keep in mind that different yarns and knitting styles can result in variations in gauge, so it’s important to check and adjust as needed.
5. Block Your Wig
Blocking is the process of shaping and setting your finished knitting project. When it comes to a Welsh wig, blocking is particularly important to help give it the desired shape and structure. Follow the instructions for your specific wig pattern to determine the best blocking method. Generally, this involves wetting the wig and pinning it into the desired shape, then allowing it to dry completely.
6. Embrace Mistakes
Finally, remember that knitting is not always about perfection. Mistakes happen, and they can even add character and uniqueness to your Welsh wig. Embrace any imperfections or unexpected variations in your knitting, as they can make your wig truly one-of-a-kind. Remember, knitting is a creative endeavor, so enjoy the process and have fun with it!
With these tips and tricks, you’ll be well on your way to perfecting your Welsh wig knitting skills. Keep practicing, experimenting, and exploring new patterns to continue honing your craft. Happy knitting!
Creating different styles and looks with your Welsh wig

The Welsh wig has become a popular accessory for those looking to add a touch of glamour and style to their outfits. With its unique design and intricate knitting pattern, it offers endless possibilities for creating different looks and styles. Whether you prefer a classic, elegant look or a trendy, modern style, the Welsh wig can be easily customized to suit your individual taste.
1. Classic Elegance: For a timeless and sophisticated look, pair your Welsh wig with a tailored suit or an elegant dress. The natural color tones and exquisite knitting details of the wig will add a touch of refinement to your outfit, making you stand out in any formal occasion. Complete the look with a pair of statement earrings or a delicate pearl necklace for an extra touch of elegance.
2. Boho Chic: If you’re aiming for a more relaxed and bohemian style, the Welsh wig can also be styled to achieve the desired effect. Pair it with a flowy maxi dress, layered jewelry, and a pair of suede boots to create a free-spirited look. You can even incorporate some floral accessories, such as a crown or a hair clip, to enhance the boho vibe.
3. Edgy and Modern: For those who prefer a more edgy and modern style, the Welsh wig can be the perfect accessory to make a bold fashion statement. Pair it with a leather jacket, ripped jeans, and a pair of ankle boots to create a rocker-chic look. Experiment with different colors and textures of the wig to achieve a unique and eye-catching style that reflects your personality.
4. Vintage Glamour: If you’re a fan of vintage fashion, the Welsh wig can be styled to achieve a glamorous retro look. Pair it with a fitted pencil skirt, a tucked-in blouse, and a pair of high heels to create a classic 1950s-inspired look. Add some red lipstick and cat-eye sunglasses to complete the vintage vibe and transport yourself back to a bygone era.
With its versatile design and intricate knitting pattern, the Welsh wig offers endless possibilities for creating different styles and looks. Whether you prefer a classic, elegant look or a trendy, modern style, this unique accessory can elevate your outfits and make a fashion statement. So go ahead and experiment with different combinations to find your perfect Welsh wig style!
Fixing common mistakes in Welsh wig knitting
Knitting a Welsh wig can be a fun and challenging project, but sometimes mistakes happen along the way. Here are some common mistakes that may occur during the process and how to fix them:
- Dropped stitches: It’s not uncommon to accidentally drop a stitch while knitting. To fix this, use a crochet hook or a knitting needle to pick up the dropped stitch. Carefully insert the hook or needle into the loop of the dropped stitch and lift it back onto the needle. Then continue knitting as usual.
- Twisted stitches: Twisting stitches can happen when you accidentally cross your knitting needle in the wrong direction. To fix this, carefully insert the tip of the knitting needle into the back loop of the twisted stitch and knit or purl as instructed. This will untwist the stitch and bring it back to its correct position.
- Uneven tension: Sometimes the tension of your knitting may vary, resulting in uneven stitches. To fix this, try adjusting your grip on the yarn and experiment with different needle sizes. Additionally, make sure to consistently pull the yarn to the same tension after each stitch to create a more uniform look.
- Miscounted stitches: It’s easy to lose track of your stitch count, especially in complex patterns. If you realize you have miscounted and have too few or too many stitches, carefully unravel the row back to the mistake and re-knit the stitches correctly. Use stitch markers to help keep track of your stitch count as you go.
- Uneven edges: Uneven edges can occur if you’re not consistently maintaining the same tension along the sides of your work. To fix this, make sure to always insert your needle into the first stitch of each row in the same way and maintain an even tension. You can also try using a smaller needle size for the first and last few stitches of each row to create a neater edge.
Remember, mistakes are a normal part of the knitting process, and with some patience and practice, they can be easily fixed. Don’t be afraid to unravel and rework your stitches if needed, as it’s all part of the learning experience. Happy knitting!
Showcasing your completed Welsh wig knitting projects

Congratulations on completing your Welsh wig knitting project! Now it’s time to showcase your beautiful creation and share it with the world. Whether you’re a beginner or an experienced knitter, displaying your finished projects can inspire and encourage others to take up this wonderful craft.
Here are a few ideas to showcase your completed Welsh wig knitting projects:
- Photographs: Take clear and well-lit photographs of your finished Welsh wig. Capture the intricate details and unique colors of your creation. You can display these photographs on social media platforms, knitting forums, or create a dedicated blog or website to showcase your knitting projects.
- Sharing on social media: Share your completed Welsh wig knitting projects on platforms like Instagram, Pinterest, or Facebook. Use relevant hashtags to reach a wider audience of fellow knitters and enthusiasts. Engage with the knitting community by liking and commenting on other people’s projects.
- Joining knitting groups: Join local knitting groups or online communities dedicated to knitting. These groups provide an excellent opportunity to share your completed projects, seek feedback, and connect with fellow knitters. You may even find knitting competitions or exhibitions where you can showcase your Welsh wig knitting projects.
- Create a portfolio: Consider creating a physical or digital portfolio of your knitting projects. Include high-quality photographs, project details, and any unique techniques or patterns used. This portfolio can be a great reference for future projects and also impress potential clients if you’re considering selling your Welsh wig knitted creations.
- Organize a knitting exhibition: If you’re passionate about knitting and want to showcase your completed Welsh wig projects on a larger scale, consider organizing a knitting exhibition or participating in local craft fairs. This will give you an opportunity to meet like-minded individuals and raise awareness about the art of knitting.
By showcasing your completed Welsh wig knitting projects, you not only demonstrate your skills and creativity but also contribute to the vibrant knitting community. Inspire others to try their hand at knitting and share the joy that comes with creating something beautiful with your own hands.