
Looking to add a touch of elegance to your dining table? A knitted table runner is the perfect solution! Whether you’re hosting a formal dinner party or simply want to spruce up your everyday meals, a table runner adds a beautiful and cozy touch to any table. Plus, knitting your own table runner allows you to customize the design, color, and size to perfectly match your personal style and decor.
When it comes to choosing a knitting pattern for your table runner, the options are endless. You can opt for a simple and classic design, such as a garter stitch or stockinette stitch pattern, or you can get creative with more intricate lace or cable patterns. The choice is yours! Knitting a table runner also provides a great opportunity to practice new knitting techniques and stitches, making it a fun and rewarding project for knitters of all skill levels.
In addition to being a beautiful addition to your table, a knitted table runner also offers practical benefits. It helps protect your table from scratches and spills, acting as a barrier between your dishes and the table surface. It’s also easy to clean – simply throw it in the washing machine when it needs a refresh. Plus, since table runners are smaller than tablecloths, they’re quicker to knit and require less yarn, making them a budget-friendly project.
Table Runner Knitting Pattern
A table runner is a perfect way to add a touch of warmth and charm to your dining table. If you love knitting and want to create a beautiful and unique table runner, then you’re in the right place. Here, we have a knitting pattern that will guide you through the process of making a stylish table runner that will impress your guests and enhance the look of your table.
To start, you will need some basic knitting skills and knowledge of common knitting stitches such as knit and purl. This pattern is suitable for intermediate knitters, but beginners can also give it a try with some practice. The pattern uses medium weight yarn and a pair of size 7 knitting needles.
MATERIALS
- Medium weight yarn in your desired color
- Pair of size 7 knitting needles
- Tapestry needle
- Scissors
INSTRUCTIONS
- Cast on 120 stitches to create the base of your table runner.
- Row 1: Knit all stitches.
- Row 2: Purl all stitches.
- Repeat rows 1 and 2 for a total of 20 rows.
- Switch to a different stitch pattern of your choice or continue with knit and purl rows to add texture to your table runner.
- Continue knitting until your table runner reaches your desired length. Remember to leave enough yarn for binding off.
- Bind off all stitches and weave in any loose ends.
- Block your table runner by gently washing it and laying it flat to dry. This step will help even out the stitches and give your table runner a polished look.
- Once your table runner is dry, place it on your dining table and enjoy the cozy and elegant touch it adds to your home.
With this knitting pattern, you can create a table runner that matches your style and decor. You can experiment with different stitch patterns, colors, and yarns to make it truly unique. Whether you’re hosting a dinner party or enjoying a family meal, your handmade table runner will be a conversation starter and a source of pride.
Materials Needed for Table Runner Knitting
Knitting a table runner can be a fun and rewarding project. To get started, you will need a few essential materials. Here is a list of items you will need:
1. Yarn
The main material you will need for knitting a table runner is yarn. Choose a yarn that is suitable for table runners, such as a cotton or linen blend. Consider the color and texture of the yarn to match your desired aesthetic.
2. Knitting Needles
Next, you will need knitting needles. The size of the needles will depend on the type of yarn you choose and the desired tension of your knitting. It’s a good idea to have a range of needle sizes on hand to accommodate different yarns and patterns.
3. Scissors
You will also need a pair of scissors for cutting the yarn. Make sure you have a sharp pair of scissors that are dedicated for your knitting projects.
4. Tapestry Needle
A tapestry needle is essential for weaving in loose ends and sewing pieces together. Choose a needle with a large eye and a blunt tip for ease of use.
5. Stitch Markers
If you plan to use stitch markers to keep track of your progress or mark specific sections, make sure to have a few on hand. Stitch markers can be helpful for complex patterns or when knitting in the round.
6. Measuring Tape
To ensure your table runner is the desired length, a measuring tape will come in handy. Use it to measure the length as you progress or to check the overall size once you have finished knitting.
With these materials, you will be ready to start knitting your table runner. Choose a pattern, gather your supplies, and enjoy the process of creating a beautiful and functional piece for your table.
Choosing the Right Yarn for Your Table Runner
When it comes to knitting a table runner, choosing the right yarn is essential to ensure that your project turns out beautiful and functional. There are several factors to consider when selecting the perfect yarn for your table runner, including the fiber content, weight, and color.
Fiber Content: The fiber content of the yarn will greatly affect the overall look and feel of your table runner. For a more classic and elegant table runner, you may want to choose a natural fiber like cotton or linen. These fibers have a smooth texture and provide a crisp finish to your project. If you’re looking for a cozier and warmer table runner, you might opt for a yarn with wool or alpaca blend. These fibers add softness and warmth to the finished piece.
Weight: The weight of the yarn will determine the thickness and drape of your table runner. A lighter weight yarn, such as lace or fingering weight, will create a delicate and airy table runner, perfect for a more delicate table setting. On the other hand, a thicker yarn like worsted or bulky weight will result in a more substantial and cozy table runner, ideal for a casual or rustic table setting.
Color: The color of your yarn plays a significant role in the overall aesthetic of your table runner. Consider the color scheme of your dining room or the occasion for which you are knitting the table runner. If you want your table runner to be a statement piece, you might choose a bold and vibrant color. If you prefer a more subtle and versatile option, you can opt for a neutral or pastel shade that complements your existing tableware.
By carefully considering the fiber content, weight, and color of your yarn, you can ensure that your table runner not only looks stunning but also meets your functional needs. So, take your time and choose the perfect yarn that will make your table runner a true work of art.
Getting Started: Casting On and Knitting the First Rows
If you’re new to knitting or just starting out with a table runner project, this guide will help you get started. Casting on is the first step in any knitting project, and it’s essential to get it right to ensure a neat and even edge. To cast on, hold the yarn in your right hand and create a slipknot by making a loop with the yarn. Insert the needle into the loop and tighten it. Then, holding the needle with the slipknot in your right hand, insert the left needle into the loop and bring the yarn over the needle, creating a new loop. Repeat this process until you have the desired number of stitches on your needle.
Once you have successfully cast on, it’s time to start knitting the first rows of your table runner. In this pattern, we will be using a simple garter stitch pattern, which means you will knit every row. Hold the needle with the cast-on stitches in your right hand and insert the left needle into the first stitch on the right needle, from front to back. Wrap the yarn around the right needle from back to front, and pull it through the stitch, slipping the old stitch off the left needle. This will create a new stitch on the right needle. Repeat this process for every stitch on the left needle until you have completed the first row.
Continue knitting every row in this manner until your table runner has reached the desired length. Make sure to keep your tension even and consistent to ensure a uniform look. As you progress, you may find it helpful to use stitch markers to mark the beginning and end of each row. This will help you keep track of your progress and make it easier to count your stitches.
Creating the Main Pattern for Your Table Runner
When it comes to knitting a table runner, the main pattern you choose can greatly impact the overall look and feel of the finished piece. Whether you prefer a simple and timeless design or a more intricate and detailed pattern, there are endless possibilities to explore. Here are some steps to help you create the main pattern for your table runner:
1. Decide on the Style:
Before diving into the knitting process, it’s important to decide on the style of table runner you want to create. Consider the overall aesthetic of your home and the specific design elements you want to incorporate. You can choose a classic and traditional pattern or go for a more modern and contemporary look.
2. Select the Stitch:
Next, select a stitch pattern that aligns with your chosen style. This can be a simple knit and purl combination or a more complex lace or cable stitch. You can also consider using colorwork techniques to add visual interest to your table runner. Take into account the skill level required for each stitch pattern and choose one that suits your level of expertise.
3. Determine the Dimensions:
Once you have chosen the main pattern and stitch, determine the dimensions of your table runner. Measure the length and width of your table and decide how much overhang you want on each side. This will help you calculate the number of stitches and rows needed to achieve the desired size.
4. Chart or Written Instructions:
Depending on your preference, you can either create a chart or use written instructions to guide your knitting. A chart can be helpful for visualizing the pattern and keeping track of the stitches, while written instructions provide a step-by-step guide. Choose the format that makes the most sense to you and follow the pattern as you knit.
5. Add Finishing Touches:
Once you have completed the main pattern for your table runner, consider adding any finishing touches to enhance its appearance. This could include adding decorative borders, edging, or embroidery. Be creative and personalize your table runner to match your unique style and taste.
By following these steps and putting your own creative twist on the main pattern, you can knit a beautiful table runner that will be a focal point in your home decor. Happy knitting!
Adding Decorative Stitches and Patterns
When knitting a table runner, adding decorative stitches and patterns can enhance the overall design and make it more visually appealing. There are numerous options to choose from, allowing you to create unique and intricate patterns that will impress your guests.
Cable stitches are a popular choice for adding texture and depth to a table runner. By crossing stitches over each other, you can create the appearance of twisted ropes or cables. This technique adds visual interest and can be used to create patterns, such as braids or diamonds.
Lace stitches are another option for creating decorative patterns. These delicate stitches often include yarnovers and decreases, resulting in a light and airy design. Lace patterns can range from simple and elegant to complex and intricate, allowing you to customize your table runner to match your personal style.
If you prefer a more geometric look, colorwork patterns might be the perfect choice. Using different colored yarns, you can create patterns, such as stripes, checks, or even intricate motifs. Colorwork can be done using intarsia, fair isle, or slip stitch techniques, each offering their own unique effect.
Textured stitches like seed stitch or basketweave can also add visual interest to a table runner. These stitches create a raised or textured surface that adds dimension and tactile appeal. A combination of different textured stitches can be used to create patterns and designs that look intricate but are relatively simple to knit.
Regardless of the pattern or stitch you choose, adding decorative elements to your table runner can elevate its appearance and make it a standout piece on your dining table. Whether you opt for cables, lace, colorwork, or textured stitches, the result will be a beautiful and unique table runner that will impress your guests.
Changing Colors and Adding Stripes
When knitting a table runner, one way to add visual interest is by changing colors and adding stripes. This technique allows you to create unique designs and patterns, making your table runner truly one-of-a-kind.
To change colors, simply choose a new yarn color and join it to your work. This can be done by leaving a tail of the new color when switching from the previous color and knitting the next stitch with the new color yarn. To secure the yarn, you can tie a small knot or weave in the ends later. This method works well for adding stripes or creating color blocks.
In addition to changing colors, you can also experiment with different stripe patterns. One popular method is alternating between two colors, creating a classic striped look. To achieve this, simply knit a certain number of rows or stitches with one color, then switch to the other color and repeat the pattern. You can also try different widths for your stripes, such as knitting one wide stripe followed by several narrow stripes. The possibilities are endless!
If you’d like to keep track of your stripe pattern, you may find it helpful to create a chart or write down the pattern row by row. This will ensure that you maintain consistency and achieve the desired design. You can also use stitch markers to separate sections and easily identify where to switch colors.
By changing colors and adding stripes, you can transform a simple table runner into a visually stunning piece. Whether you prefer bold and vibrant colors or a more subtle and elegant look, this technique allows you to personalize your knitting project and showcase your creativity.
Creating Borders and Edgings
When it comes to knitting table runners, borders and edgings play an important role in adding the finishing touch to your project. They not only enhance the overall aesthetic appeal but also provide a neat and polished look. Whether you prefer a simple and classic design or something more intricate and unique, there are countless options to choose from.
Basic Garter Stitch Border: One of the simplest and most common border patterns is the garter stitch border. It involves knitting every stitch on every row, resulting in a ridge-like texture that adds a touch of elegance to your table runner. This border works well with a variety of patterns and can be easily customized to match your desired width.
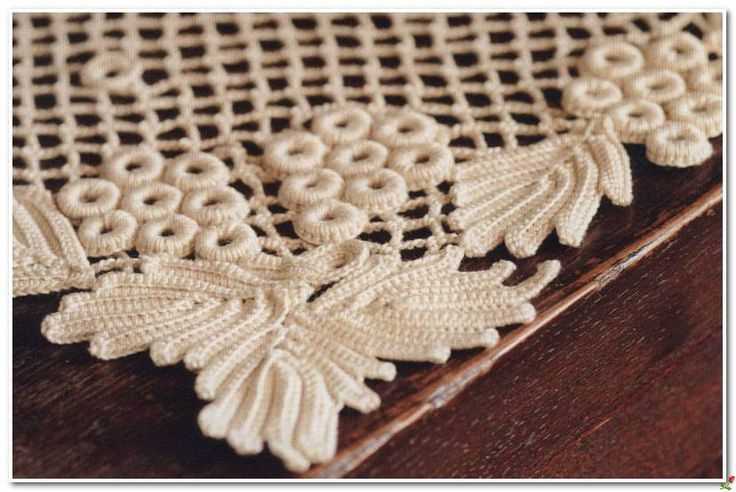
Lace Edging: For those who want to add a delicate and feminine touch to their table runner, lace edging is the way to go. Lace patterns are often created using yarn overs and various decreases, resulting in intricate and airy designs. Whether you prefer a classic lace pattern or something more modern, the possibilities are endless.
Ribbed Border: If you’re looking for a border pattern that adds texture and depth, a ribbed border is a great option. Ribbing involves alternating knit and purl stitches in a specific pattern, creating a stretchy and visually appealing border. You can customize the width and pattern of the ribbing to fit your table runner design.
- Cable Edging: If you want to make a bold statement with your table runner, consider adding a cable edging. Cable patterns involve crossing stitches over each other, creating a twisted and intricate design. This edging adds a touch of sophistication and can be paired with a variety of table runner patterns.
- Scallop Border: For a playful and whimsical touch, a scallop border is a great choice. This border pattern involves creating a series of loops and curves, resembling the shape of scallops. It adds a charming and decorative element to your table runner, perfect for special occasions or festive gatherings.
Remember, the border or edging you choose depends on your personal style and the overall design of your table runner. Experiment with different patterns and techniques to find the one that best suits your vision. With a little creativity and skill, you can create a beautiful and unique table runner that will be the centerpiece of any table setting.
Tips and Tricks for a Professional Finish
When knitting a table runner, achieving a professional finish can make all the difference in the final product. Here are some tips and tricks to help you create a polished and elegant piece:
1. Choose the right yarn:
Choosing the right yarn for your table runner is essential for achieving a professional finish. Opt for a high-quality yarn that is durable and has a smooth texture. Avoid yarns that are prone to pilling or that have an uneven thickness. A yarn with a subtle sheen can also add an extra touch of elegance to your finished project.
2. Use the right needle size:
The needle size you use can greatly impact the overall look of your table runner. If you want a more delicate and lacy appearance, use a smaller needle size. Conversely, if you prefer a chunkier and more textured look, opt for a larger needle size. Experiment with different needle sizes until you achieve the desired effect.
3. Pay attention to tension:
Maintaining consistent tension throughout your knitting is crucial for a professional finish. Ensure that your stitches are neither too tight nor too loose. To achieve an even tension, take your time and knit slowly. If necessary, use stitch markers to help you keep track of your progress.
4. Block your work:
Blocking your table runner after knitting can help even out any inconsistencies and give your project a polished appearance. Follow the blocking instructions for your chosen yarn to ensure the best results. Blocking can also help to open up lacework and highlight intricate stitch patterns.
5. Pay attention to finishing details:
Lastly, paying attention to finishing details can truly elevate the professional finish of your table runner. Take the time to weave in ends neatly, ensuring that they are securely hidden. Use a steam iron or steamer to gently press your table runner, removing any wrinkles or creases. Adding details such as tassels or fringe can also add a decorative touch to your finished piece.
By following these tips and tricks, you can create a table runner that boasts a professional finish. Remember to take your time, pay attention to detail, and enjoy the process of creating a beautiful and elegant piece for your home.
Blocking and Finishing Your Table Runner

Once you have completed knitting your table runner, the next step is to block and finish it. Blocking will help ensure that your table runner has a professional and polished look. Here are some steps to follow:
1. Washing and Soaking
Before blocking your table runner, it is important to wash it. Fill a basin or sink with lukewarm water and a mild detergent. Gently submerge the table runner in the soapy water, making sure it is fully saturated. Allow it to soak for about 10-15 minutes.
2. Blocking Board or Mat
After washing, gently squeeze out the excess water from the table runner. Lay it flat on a blocking board or mat. Smooth out any wrinkles or ripples using your hands to gently stretch the fabric. You can use T-pins to secure the edges in place.
3. Shaping and Measurements
If your table runner has a specific shape or design, use a measuring tape or ruler to ensure that it is blocked to the correct dimensions. Measure the length, width, and any other important dimensions specified in the knitting pattern. Adjust the fabric accordingly by stretching or pinning it in place.
4. Drying and Setting

Allow the table runner to dry completely before removing it from the blocking board or mat. This may take several hours or even overnight. Once dry, carefully remove the T-pins and admire your finished project. The blocking process will have helped to even out the stitches and give the table runner a professional appearance.
With the blocking complete, your table runner is now ready for use or for gifting. Enjoy the satisfaction of a beautifully finished knitting project!
Table Runner Knitting FAQs
When it comes to knitting table runners, there are often many questions that arise. Whether you’re a beginner or an experienced knitter, it’s always helpful to have some answers to common queries. Here are some frequently asked questions about knitting table runners:
1. What size should my table runner be?
The size of your table runner will depend on the dimensions of your table and your personal preference. Typically, a table runner should be about one-third the width of your table and long enough to hang over the ends slightly. However, you can adjust the size to fit your specific needs.
2. What type of yarn should I use?
The type of yarn you use will depend on the desired look and feel of your table runner. For a more elegant and delicate runner, you may want to use a fine yarn such as lace weight or fingering weight. If you’re looking for a sturdier and more textured runner, a heavier yarn such as worsted weight or bulky weight would be more suitable.
3. What stitch pattern should I use?
The stitch pattern you choose for your table runner will depend on the style and level of difficulty you’re looking for. Some popular stitch patterns for table runners include garter stitch, ribbing, lace patterns, and cable patterns. You can also combine different stitch patterns to create a unique design.
4. How do I care for my knitted table runner?
It’s important to follow the care instructions for the specific yarn you used, as different yarns may require different care. In general, hand washing in cool water with a gentle detergent and laying flat to dry is recommended. Avoid wringing or twisting the runner to prevent stretching or damaging the stitches.
5. Can I make adjustments to the pattern?
Yes, you can definitely make adjustments to the pattern to customize it to your liking. You can modify the size, yarn, stitch pattern, or even add embellishments such as tassels or buttons. Just keep in mind that making significant changes may require adjusting the number of stitches or rows to maintain the overall balance of the design.
With these FAQs, you should feel more prepared to take on your table runner knitting project. Remember to have fun and enjoy the process of creating a beautiful and functional piece for your table!
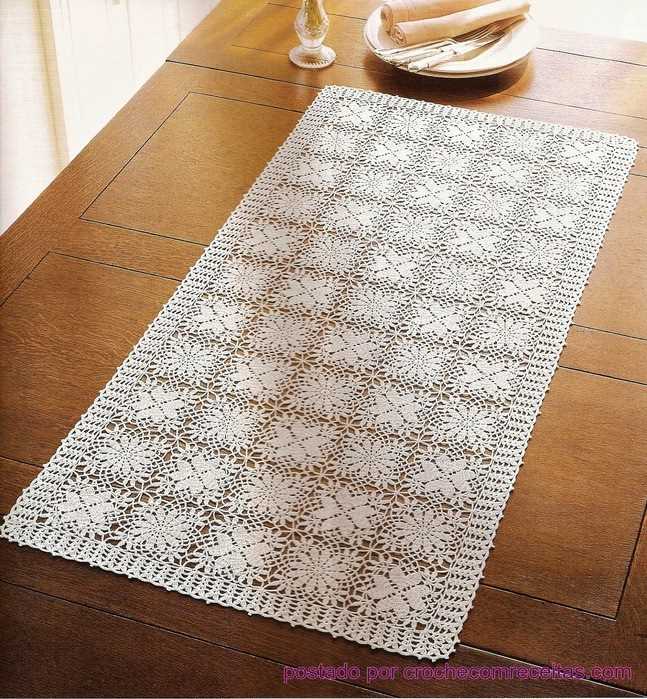
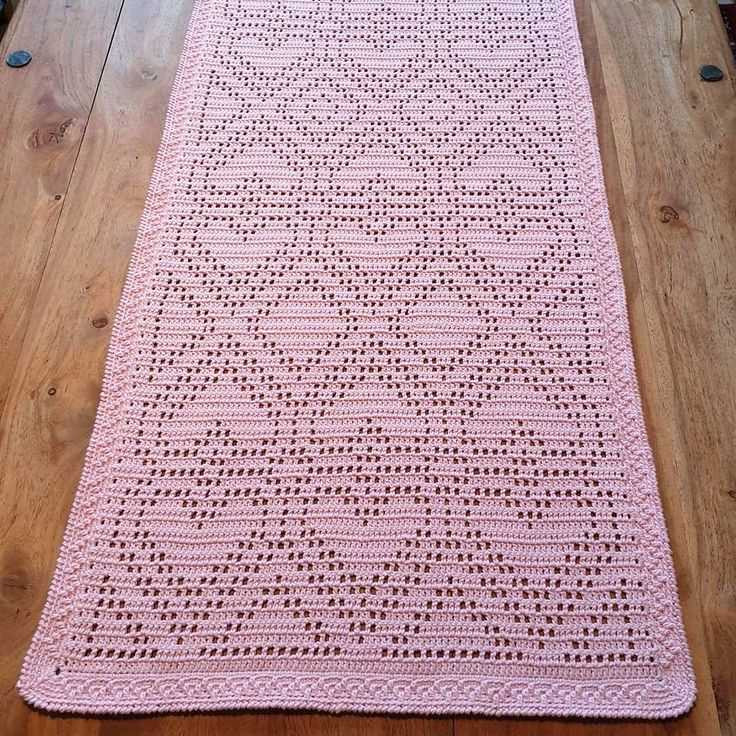
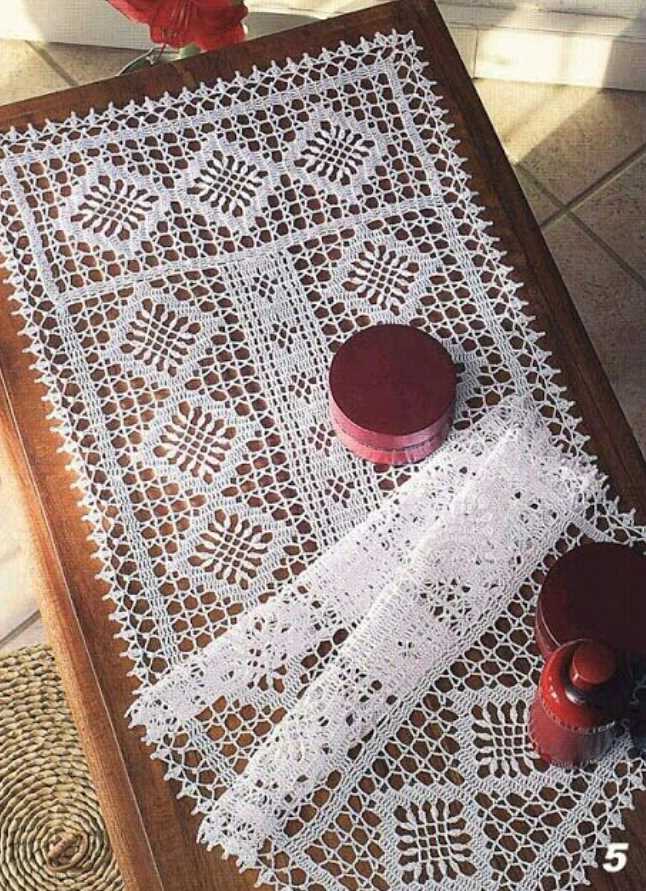
Examples of Beautiful Table Runner Knitting Patterns
A table runner is a fantastic way to add a touch of elegance and style to any dining table. Knitting your own table runner allows you to customize the design and colors to match your home decor perfectly. Here are some stunning examples of table runner knitting patterns that will elevate your table setting:
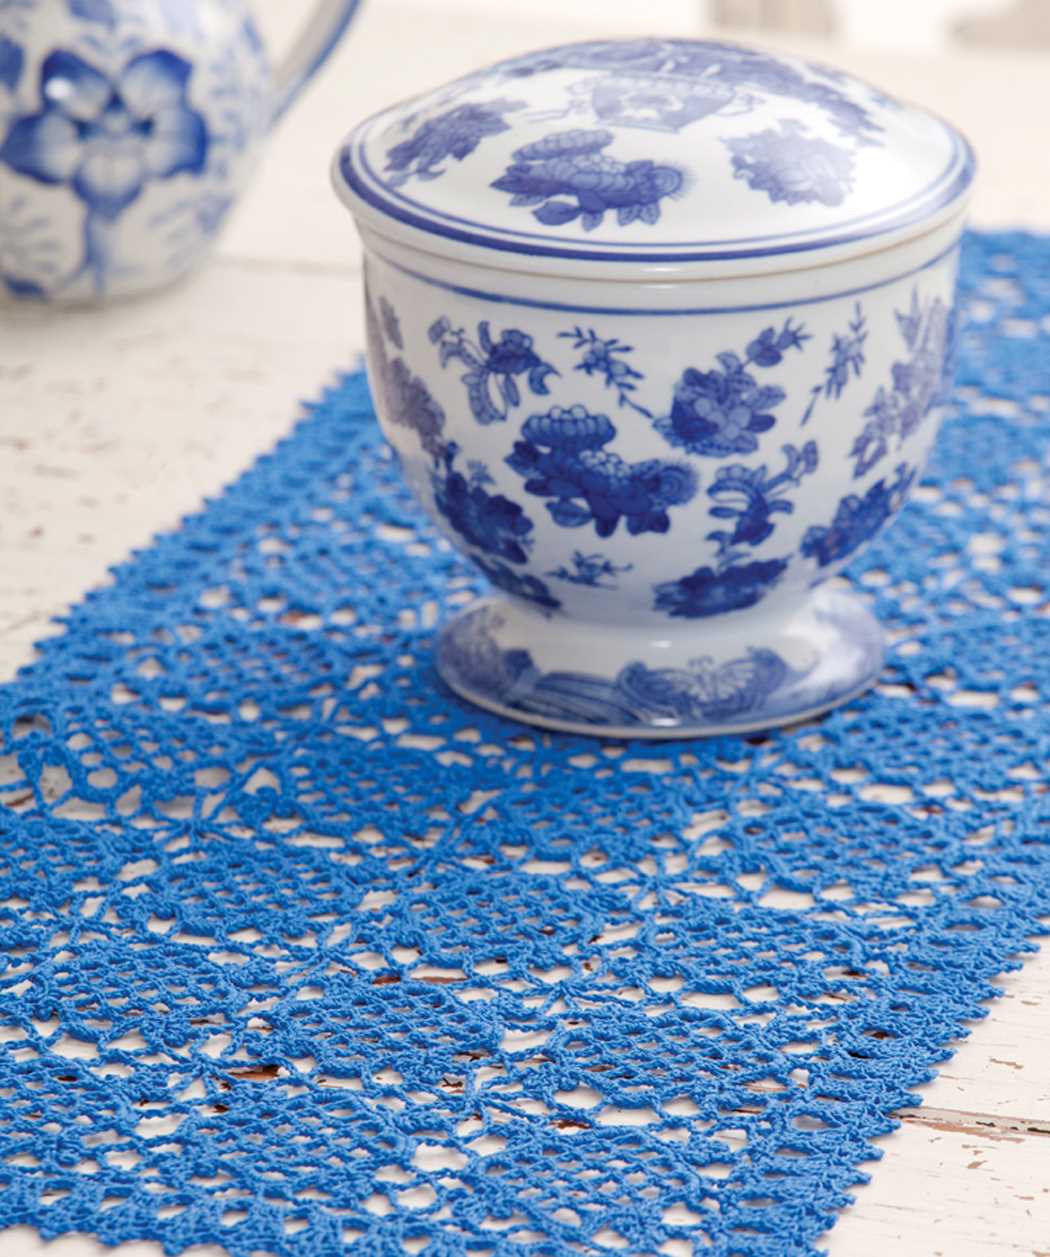
1. Lace Table Runner:
This exquisite lace table runner pattern features intricate lace stitches that create a delicate and feminine look. Knitted with a fine yarn, the openwork design adds a touch of elegance to any table. The pattern may include various lace motifs, such as flowers or leaves, which add visual interest. Knit in a neutral color, it will complement any tableware, or use a bold color for a statement piece.
2. Cable Knit Table Runner:
A cable knit table runner is a classic choice that adds texture and warmth to your dining area. The cable stitches create a beautiful braided pattern, making it a timeless and sophisticated option. Choose a chunky yarn for a more rustic look, or a finer yarn for a more delicate appearance. The versatility of this pattern allows you to create a table runner that suits any style or occasion.
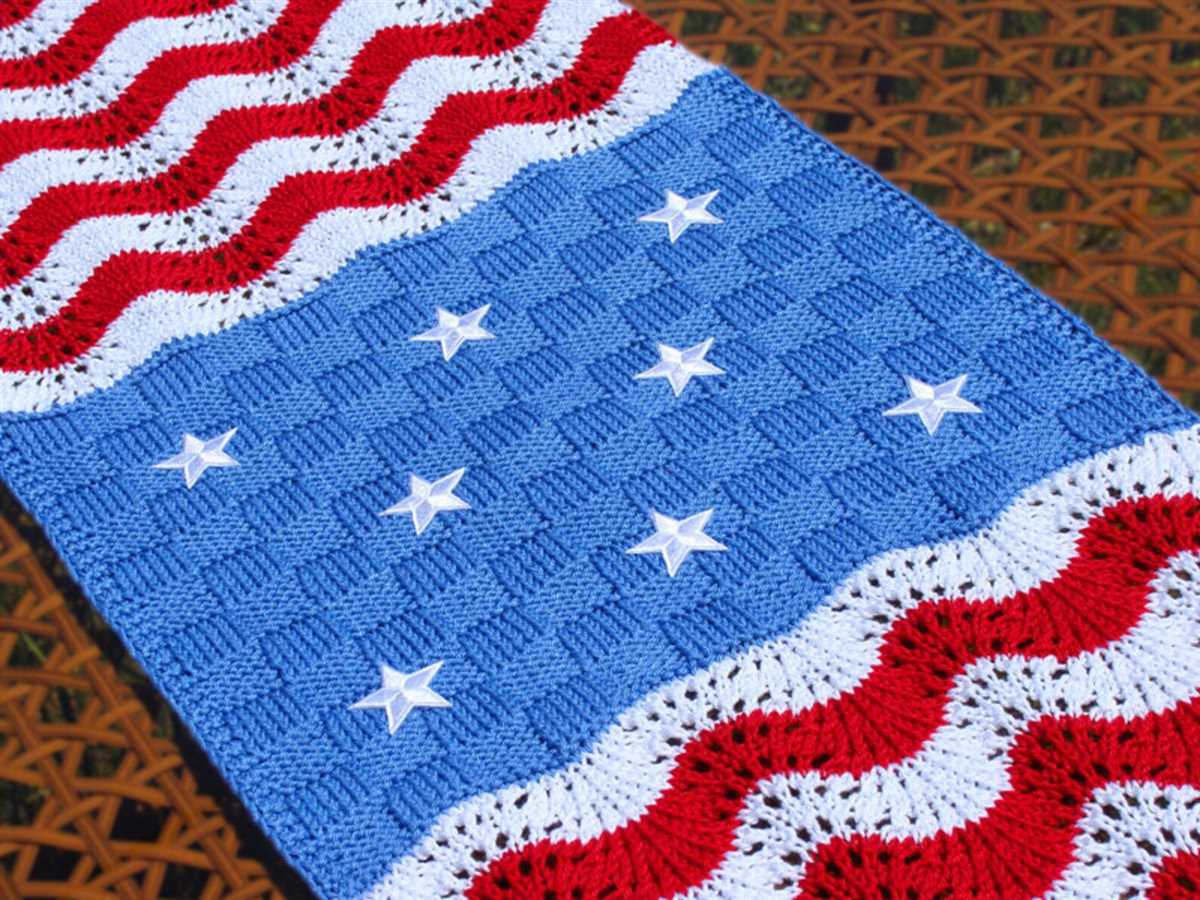
3. Colorful Striped Table Runner:
If you’re looking to brighten up your table, a colorful striped table runner is the way to go. Knit with multiple colors, this pattern allows you to create vibrant and eye-catching designs. You can choose to knit the stripes in a regular pattern or mix different widths and colors for a more eclectic look. Whether you prefer a rainbow of colors or a more coordinated palette, a striped table runner is sure to make a statement.
4. Fair Isle Table Runner:
A Fair Isle table runner showcases the traditional colorwork technique that originated in the Shetland Islands. This pattern typically features intricate patterns and motifs in multiple colors. Knitting in the Fair Isle technique requires working with two yarn colors on each row, creating a stunning and intricate design. Opt for a neutral background color to let the Fair Isle pattern shine or choose bold and contrasting colors for a vibrant and modern look.
These are just a few examples of the beautiful table runner knitting patterns available. Whether you prefer a delicate lace design, a cozy cable knit, a colorful striped pattern, or an intricate Fair Isle motif, there is a table runner pattern out there to suit your style and enhance your table setting.
Inspiration for Creating Your Own Unique Table Runner

Knitting a table runner is not only a practical way to protect and decorate your table, but it also allows you to unleash your creativity and make something truly unique. Here are some ideas and inspiration to help you get started on creating your own table runner.
1. Color combinations: Play around with different color combinations to give your table runner a vibrant and eye-catching look. You can choose contrasting colors for a bold and dramatic effect, or opt for a more subtle and harmonious combination. Take inspiration from nature, fashion, or your personal favorite color palette.
2. Textures and patterns: Experiment with different knitting stitches and patterns to add texture and interest to your table runner. From simple garter stitch to intricate lace patterns, the options are endless. Mix and match different stitches to create a unique design that reflects your style and taste.
3. Embellishments: Consider adding embellishments to your table runner to make it even more special. You can sew on buttons, attach beads, or incorporate other decorative elements. These small details can elevate the overall look of your table runner and make it a true conversation piece.
4. Personalization: Make your table runner truly unique by adding personal touches. You could knit in your initials or a special symbol that holds meaning to you. You can also incorporate your favorite quotes or phrases into the design. This personalization will make your table runner not only a beautiful decoration but also a reflection of your own story and personality.
5. Theme-inspired: Draw inspiration from a specific theme or motif to create a cohesive and themed table runner. For example, you could knit a table runner with a floral pattern for a garden-inspired table setting, or a geometric pattern for a modern and minimalist aesthetic. Let your imagination run wild and create a table runner that sets the perfect atmosphere for your desired theme.
- Color combinations
- Textures and patterns
- Embellishments
- Personalization
- Theme-inspired
With these ideas and inspiration, you have the freedom to create a table runner that is truly one-of-a-kind. Whether you’re looking to add a pop of color, incorporate intricate details, or showcase your personal style, knitting your own table runner allows you to express your creativity and create a piece that you can be proud of. So gather your yarn and needles, and let your imagination guide you to create a table runner that will enhance any dining experience.