
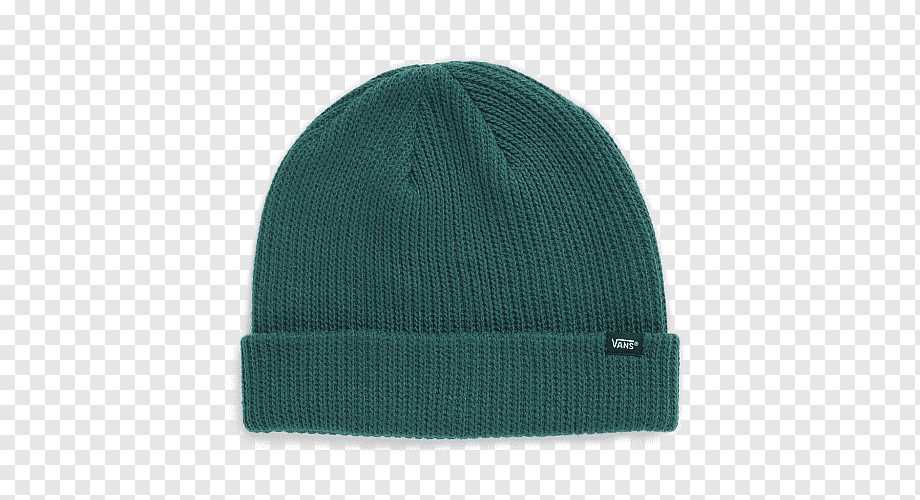
Knitting is a popular craft that allows you to create beautiful and functional items. One of the most common projects for beginners is a knit cap. This simple and versatile accessory is perfect for keeping your head warm during the chilly winter months.
Whether you’re new to knitting or an experienced crafter, this basic knit cap pattern is a great project to try. It’s easy to follow and customize to your liking. With just a few simple stitches, you’ll have a cozy and stylish cap in no time.
To get started, you’ll need some yarn and knitting needles. You can choose any color and weight of yarn you like, depending on the look and feel you want for your cap. Thicker yarn will create a warmer and chunkier cap, while thinner yarn will result in a lighter and more delicate cap.
This pattern uses basic knitting techniques, such as casting on, knitting, purling, and decreasing. If you’re new to knitting, don’t worry! There are plenty of tutorials and videos available online to help you learn these stitches. Soon enough, you’ll be on your way to creating beautiful knit caps for yourself and your loved ones.
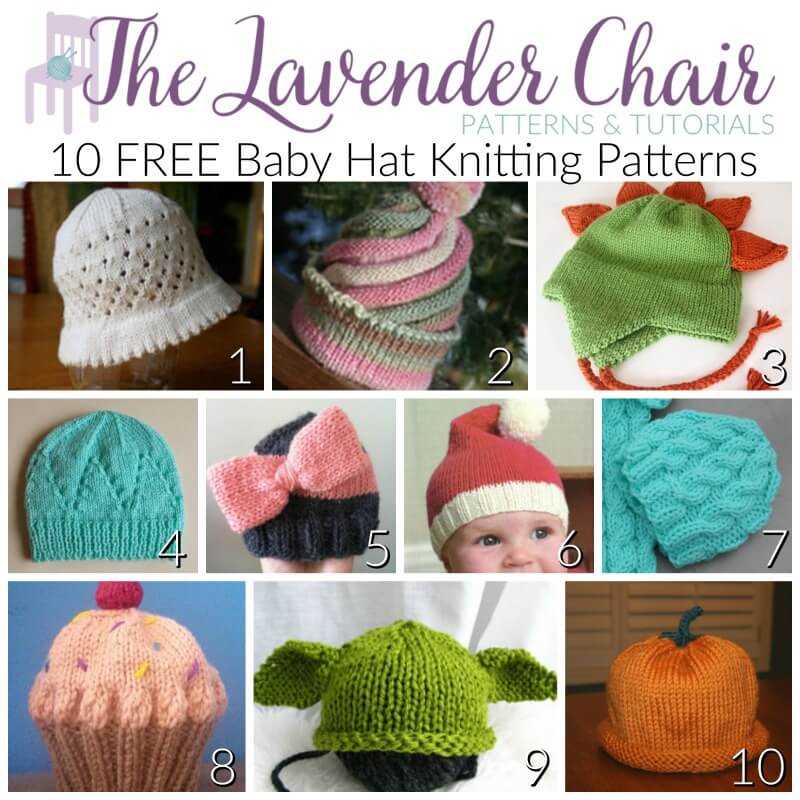
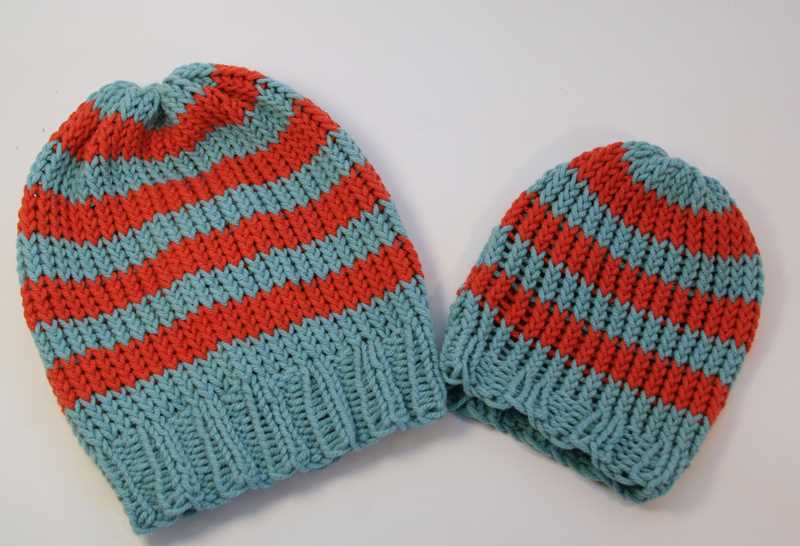
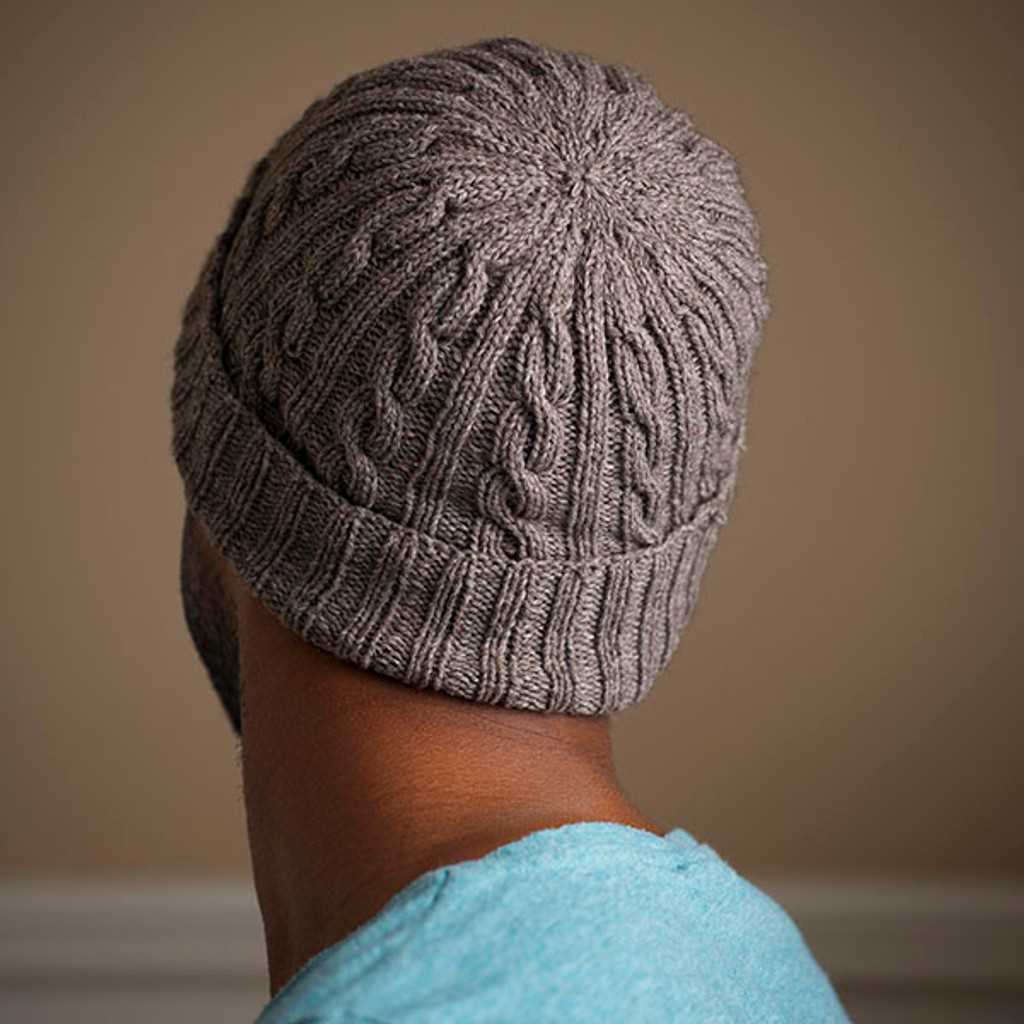
Basic Knit Cap Pattern
Knitting a basic cap is a great project for beginners who want to practice their knitting skills and create a functional and stylish accessory. This pattern is simple and easy to follow, making it perfect for beginners or experienced knitters looking for a quick and satisfying project.
To get started, you will need a set of knitting needles and a ball of yarn in your chosen color. The recommended needle size will depend on the thickness of the yarn you are using. It is always a good idea to check the yarn label for recommended needle sizes and tension information.
Instructions:
- Cast on the desired number of stitches, usually around 70-80 stitches, depending on the size of the cap and your gauge.
- Begin knitting in the round, using either circular needles or double-pointed needles if your stitches don’t fit comfortably on the circular needles.
- Continue knitting in the round until the cap reaches the desired length, usually around 6-8 inches from the cast-on edge.
- To create the ribbed brim, switch to a smaller needle size and work in a knit 2, purl 2 rib pattern for about 2 inches.
- Switch back to the larger needle size and knit every round until the cap reaches the desired length.
- Once the cap is long enough, start decreasing to shape the crown. You can do this by knitting two stitches together at regular intervals, such as every 6th or 8th stitch, until you have a small enough number of stitches to easily close the crown.
- When you have a few stitches left, cut the yarn, leaving a long tail. Thread the tail through the remaining stitches and pull tight to close the crown.
- Weave in any loose ends of yarn and your basic knit cap is complete!
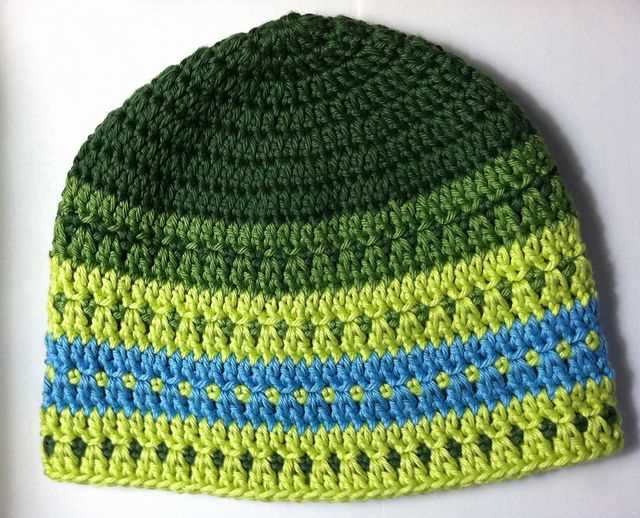
This basic knit cap pattern can be customized in many ways to suit your preferences. You can experiment with different stitch patterns, add stripes or other embellishments, or even knit a pom-pom to attach to the top. Feel free to get creative and make this pattern your own!
Materials Needed
In order to knit a basic cap, you will need the following materials:
- Yarn: Choose a soft, medium-weight yarn in the color of your choice. Make sure the yarn is suitable for knitting and will provide enough warmth.
- Knitting Needles: Use a pair of size 8 or 9 knitting needles, or the appropriate size recommended on the yarn label. These needles should be long enough to comfortably hold all of the stitches.
- Tapestry Needle: This needle will be used for weaving in the loose ends of yarn and finishing the cap.
- Stitch Markers: These small, removable markers will help you keep track of your stitches and any pattern repeats.
- Scissors: You’ll need a pair of sharp scissors for cutting the yarn, trimming loose ends, and any necessary modifications.
- Measuring Tape: Use a flexible measuring tape to measure the circumference of your head, ensuring the cap will fit properly.
- Stitch Holder or Spare Yarn: This will be used to hold stitches while you work on other parts of the cap, or for any necessary modifications.
With these materials on hand, you’ll be ready to start knitting your basic cap. Remember to choose high-quality materials that will provide both comfort and durability.
Choosing Yarn and Needles
When it comes to knitting a basic knit cap, choosing the right yarn and needles is essential to achieve the desired look and fit. Yarn plays a vital role in determining the warmth and texture of the cap, while needles determine the gauge and size of the stitches.
Yarn: There are various types of yarn that can be suitable for knitting a basic knit cap. One popular choice is wool yarn, which is known for its warmth and durability. Wool blends that include fibers like acrylic or nylon can add softness and strength to the yarn. Another option is acrylic yarn, which is a synthetic fiber known for its affordability and wide range of colors. Acrylic yarn is also easy to care for, as it is machine washable. Additionally, cotton yarn can be a great choice for lightweight and breathable caps, especially for warmer climates.
When selecting yarn for a knit cap, it’s important to consider the weight of the yarn. Bulky or chunky yarns can create a thick and cozy cap, while finer yarns can result in a more lightweight and delicate cap. The pattern should specify the recommended yarn weight, but it can also be adjusted according to personal preference.
Needles: The size of the needles determines the tension and gauge of the stitches, which directly affects the size of the cap. The pattern should specify the recommended needle size, which is typically indicated in millimeters (mm) or US sizes. It’s important to follow the pattern’s instructions for needle size to ensure the cap turns out the correct size.
Circular needles are often used for knitting caps, as they allow for seamless construction and easy maneuverability. The length of the circular needles should correspond to the circumference of the cap, ensuring that the stitches can comfortably fit on the needles. Double-pointed needles can also be used, especially for working on the crown of the cap.
Overall, selecting the right yarn and needles is crucial for the success of a basic knit cap. By considering the desired warmth, texture, and size of the cap, knitters can choose the perfect yarn and needles to create a cozy and well-fitting accessory.
Gauge
When knitting any project, including a basic knit cap, it is important to pay attention to the gauge. Gauge refers to the number of stitches and rows per inch in a knitted fabric, and it determines the size and fit of the finished project.
To obtain the correct gauge for your knit cap, it is essential to choose the right yarn and needles. The pattern for the basic knit cap will specify the recommended yarn weight and needle size. It is important to follow these recommendations to achieve the desired gauge.
Why is gauge important?
Gauge is crucial because it ensures that the finished project will match the intended size and fit. If your gauge is too tight, meaning you have more stitches and rows per inch than specified, your knit cap will turn out smaller than expected. Conversely, if your gauge is too loose, with fewer stitches and rows per inch than recommended, your cap will be larger than desired.
How to measure gauge?
To measure gauge, you will need to knit a swatch using the recommended yarn and needle size. The pattern will indicate the number of stitches and rows to cast on for the swatch. Once the swatch is complete, lay it flat on a smooth surface and use a ruler or gauge tool to measure the number of stitches and rows per inch. If your measurement matches the recommended gauge, you can proceed to knit the cap. If not, you will need to adjust your needle size and try again until you achieve the correct gauge.
Why does gauge vary?
Gauge can vary from person to person, even when using the same yarn and needle size. Factors such as tension, knitting style, and individual differences in knitting can all affect gauge. It is therefore important to take the time to knit a swatch and measure the gauge before starting the project. This extra step will ensure that your knit cap turns out the right size and fits perfectly.
Cast On
Before you can start knitting your basic knit cap, you’ll need to cast on the stitches. Casting on is the process of creating a foundation row of stitches on your knitting needles. There are several different methods you can use to cast on, but one of the most common methods for a basic knit cap is the long-tail cast on.
Long-Tail Cast On
The long-tail cast on is a versatile method that creates a neat and stretchy edge. To begin, you’ll need to estimate the amount of yarn you’ll need for your cast on. Start by making a slipknot and placing it on one of your knitting needles. Hold the yarn in your right hand, with the tail end over your thumb and the working yarn over your index finger.
Next, insert your needle through the slipknot from left to right, and then use your thumb and index finger to wrap the yarn around the needle in a counter-clockwise direction. This creates a loop on the needle. Repeat this process, inserting the needle through the loop and wrapping the yarn around the needle, until you have cast on the desired number of stitches. Remember to leave a long tail of yarn, as this will be used later to tighten the cast on edge.
Once you have finished casting on, you can begin knitting your basic knit cap following the pattern instructions. The cast on edge will serve as the bottom hem of the cap, providing a clean and professional finish. Take your time and practice the long-tail cast on until you feel comfortable with the technique. With a little practice, you’ll be able to cast on confidently and start knitting your own cozy knit caps!
Knitting the Body of the Cap
Once you have completed the ribbing, it’s time to start knitting the body of the cap. This is where the cap really starts to come together and take shape.
To begin, switch to the larger needles and start knitting in the round. You can use a circular needle or double-pointed needles, whichever you prefer.
Row 1: Knit all stitches in the round.
Row 2: Purl all stitches in the round.
Continue alternating between knitting and purling each row until the body of the cap reaches your desired length. This can vary depending on the size of the cap and the fit you prefer.
If you want a slouchy cap, you can continue knitting for a longer length. For a more fitted cap, you can knit for a shorter length. It’s up to you!
Tip: Measure the length of the cap as you go to ensure it’s reaching the desired length. You can try it on occasionally to see how it’s fitting and make any adjustments if needed.
Once you are happy with the length of the body, you can move on to shaping the crown of the cap.
Shaping the Crown
Once you have completed the ribbing section of the hat, it’s time to start shaping the crown. This is where the hat begins to take its distinctive shape and fit snugly on the head. The shaping process involves decreasing the number of stitches in each round until you reach the desired size for the top of the hat.
To shape the crown, you will need to use knitting techniques such as decreasing stitches and creating evenly spaced decreases. This will create a seamless transition from the body of the hat to the top. The specific shaping instructions will depend on the pattern you are following, but generally, you will start by decreasing a certain number of stitches in each round.
You can use various decreasing techniques, such as knit two together (K2tog), slip slip knit (SSK), or a combination of both, to achieve the desired shaping. It’s important to follow the pattern instructions carefully to ensure that the crown is shaped correctly and the decreases are evenly spaced around the hat.
A common method for shaping the crown involves dividing the total number of stitches evenly into sections and decreasing a set number of stitches in each section. This creates a symmetrical decrease pattern that maintains the overall shape of the hat. You may need to repeat this decrease round several times, gradually decreasing the number of stitches, until you are left with a small number of stitches at the top.
Once you have completed the shaping process, you will usually be instructed to cut the yarn, leaving a long tail. This tail will be used for closing the top of the hat and securing any remaining stitches. You can use a yarn needle to thread the tail through the remaining stitches, pulling them tight to close the crown. Finally, weave in any loose ends and your hat is complete!
Finishing and Blocking
Once you have completed knitting the basic cap pattern, it is important to properly finish and block the hat to achieve the desired shape and fit. Finishing refers to the process of sewing any remaining seams and weaving in ends, while blocking involves reshaping the knitted fabric to ensure it lays flat and evenly.
Before finishing, carefully inspect your work for any mistakes or loose stitches that may need to be corrected. Use a tapestry needle or crochet hook to sew up any seams, making sure to align the edges of the fabric and maintain a consistent stitch tension. Next, weave in any loose ends by threading them onto a tapestry needle and sewing them into the fabric, being mindful to hide the ends so they are not visible on the finished hat.
Blocking can be done using various methods, depending on the type of yarn and desired outcome. One common method is wet blocking, where the knitted piece is soaked in lukewarm water and gently squeezed to remove excess moisture. Lay the damp hat flat on a clean towel, shaping it to the desired size and gently stretching or pinning it in place to ensure even dimensions. Allow the hat to dry completely before removing it from the blocking surface.
If you prefer a more gentle blocking method, you can steam block the hat. Use a steam iron on a low heat setting, hovering the iron above the fabric without touching it directly. Allow the steam to penetrate the fibers, reshaping the hat as desired. Be careful not to apply too much heat or pressure, as this can damage the yarn or cause the hat to shrink.
Blocking your finished knit cap pattern will give it a professional and polished look, ensuring that it fits comfortably and maintains its shape over time. Take the time to properly finish and block your hat, and you will be rewarded with a beautiful and well-fitting accessory that you can be proud of.
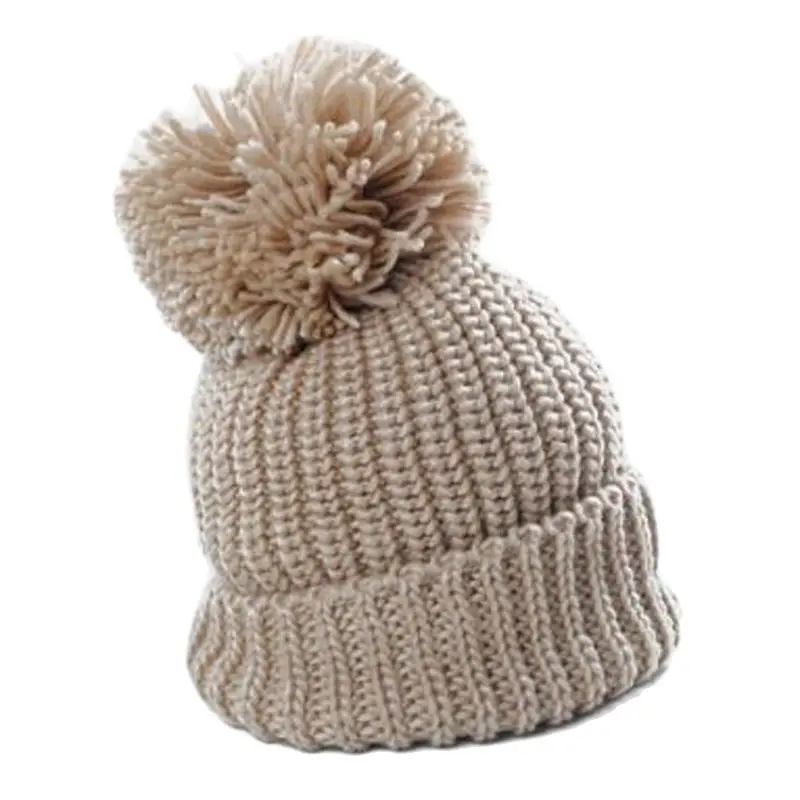
Adding a Pom Pom (optional)
Adding a pom pom to your knit cap is a fun and playful way to personalize your creation. Here are step-by-step instructions on how to add a pom pom:
Materials Needed:

- Yarn in desired color(s)
- Pom pom maker or cardboard
- Scissors
- Yarn needle
Step 1: Make the pom pom
To make the pom pom, you can either use a pom pom maker or create your own using cardboard. If using a pom pom maker, follow the instructions provided. If making your own, cut two cardboard circles with a diameter of your desired pom pom size. Cut a smaller circle in the center of each cardboard circle. Place the two cardboard circles together and wrap yarn around them, going through the center cutout. Continue wrapping until the circles are completely covered. Carefully cut the yarn along the edge of the circles, between the two pieces of cardboard. Insert a separate piece of yarn between the cardboard circles and tie tightly around the wrapped yarn. Remove the cardboard and fluff the pom pom.
Step 2: Attach the pom pom to the cap
Thread a yarn needle with a length of yarn. Insert the needle from the inside of the cap to the outside, near the top center. Loop the yarn around the base of the pom pom and insert the needle back through the same hole. Repeat this process a few times to securely attach the pom pom to the cap. Tie a knot with the yarn inside the cap to secure it in place. Trim any excess yarn.
And there you have it! By adding a pom pom to your knit cap, you can add a touch of whimsy and style to your finished project.
Styling and Wearing
Once you have finished knitting your basic cap, you can start thinking about how to style and wear it. The versatility of a knit cap allows you to experiment with different looks and match it with various outfits. Here are some ideas on how to style your cap:
- Casual and Cool: Pair your knit cap with jeans, a t-shirt, and a leather jacket for an effortlessly cool look. The cap adds a touch of laid-back style to your outfit.
- Winter Chic: Dress up your knit cap by pairing it with a long coat, a cozy sweater, and boots. This combination is perfect for a fashionable winter look.
- Sporty and Active: Wear your cap with athletic wear such as leggings, sneakers, and a hoodie. This look is not only comfortable but also demonstrates an active and sporty lifestyle.
- Color Coordination: Consider the color of your cap and find ways to coordinate it with other accessories or pieces in your outfit. For example, if your cap is a neutral color, you can match it with gloves or a scarf in a similar shade.
When it comes to wearing your knit cap, there are several options to consider:
- Classic Fit: Pull the cap down over your ears for a traditional and snug fit. This style is perfect for colder weather as it provides extra warmth and protection.
- Slouchy Look: Push the cap back slightly to create a slouchy effect. This relaxed and casual style adds an element of laid-back charm to your outfit.
- Single Fold: Fold the bottom edge of the cap once to create a clean and polished look. This style is great for those who prefer a more structured appearance.
- Double Fold: For additional warmth or a different look, you can fold the bottom edge of the cap twice. This creates a thicker band and can make the cap fit snugly against your head.
Remember, the most important thing is to feel comfortable and confident in your knit cap. Experiment with different styles and find what works best for you!
Tips and Troubleshooting
Knitting a basic cap may seem simple, but there are some tips and troubleshooting techniques that can help ensure your project turns out just right.
Tips:

- Choose a yarn that is suitable for the cap you want to make. Depending on your desired warmth and thickness, you can go for a chunky yarn for a thicker cap or a finer yarn for a lighter cap.
- Make sure to check your gauge before starting the project. Measure your gauge swatch and adjust your needle size if needed to match the pattern gauge.
- Use stitch markers to keep track of your rounds. This can be especially handy when working on intricate stitch patterns or decreases.
- If you’re new to knitting in the round, using circular needles or double-pointed needles can be easier than trying to maneuver long straight needles.
- Take breaks and stretch your hands and wrists to prevent strain or fatigue.
Troubleshooting:
If you encounter any issues while knitting your cap, here are some common problems and solutions:
- Twisted stitches: Make sure that your stitches are not twisted when joining in the round. Take a moment to double-check and untwist any twisted stitches before continuing.
- Uneven tension: If you notice that your stitches are unevenly tensioned, try adjusting your grip on the needles or using a larger/smaller needle size to achieve a more consistent tension.
- Holes or gaps: Holes or gaps in your knitting can occur when transitioning from one needle to another or when making decreases. Make sure to snugly pull each stitch to minimize any gaps.
- Too small/too big: If your cap turns out too small or too big, check your gauge and adjust your needle size accordingly. You may also need to add or remove stitches during the pattern to achieve the desired fit.
Remember, practice makes perfect! If you encounter any difficulties, don’t be discouraged. Knitting is a skill that improves with time and experience. Enjoy the process and have fun creating your own cozy knit cap!