
Knitting gloves can be a fun and rewarding project for knitters of all skill levels. Whether you’re a beginner looking to expand your skills or an experienced knitter in search of a new project, a pair of gloves can be a great way to keep warm and stylish during the colder months.
If you’re in need of a free gloves knitting pattern, we’ve got you covered. In this article, we’ll share a step-by-step guide to knitting gloves, as well as some tips and tricks to help you along the way.
One of the best things about knitting your own gloves is the ability to customize the design and fit. With so many yarn options and stitch patterns to choose from, you can create a pair of gloves that is truly unique to you. Additionally, knitting gloves allows you to practice new techniques and experiment with different knitting styles.
Top 12 Free Gloves Knitting Patterns
Looking for a new knitting project? Why not try your hand at making a pair of gloves? Knitting gloves can be a fun and rewarding project, and with the right pattern, you can create a stylish and comfortable accessory for yourself or someone else. To help you get started, we’ve compiled a list of the top 12 free gloves knitting patterns.
1. Classic Mittens Pattern
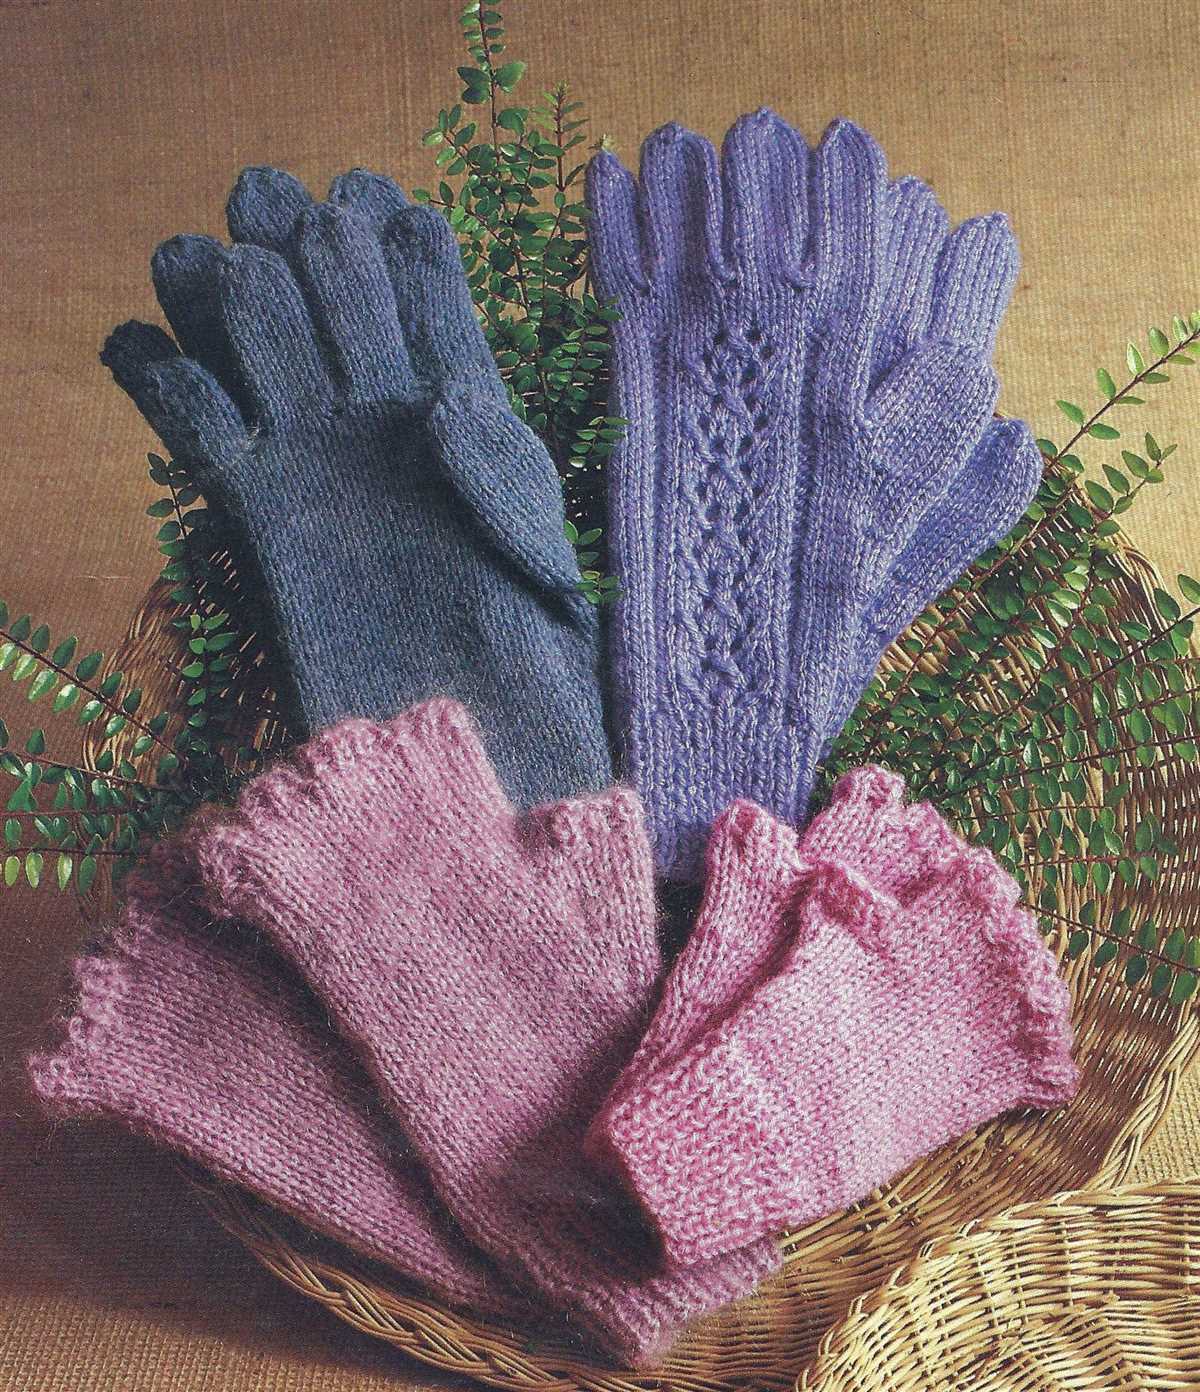
If you’re new to knitting gloves, this classic mittens pattern is a great place to start. The pattern is simple and easy to follow, making it perfect for beginners. These mittens will keep your hands warm and cozy during the colder months.
2. Lace Gloves

If you’re looking for something more elegant and delicate, try knitting a pair of lace gloves. This pattern features a beautiful lace design that adds a touch of femininity to any outfit. These gloves are perfect for special occasions or when you want to add a bit of glamour to your everyday look.
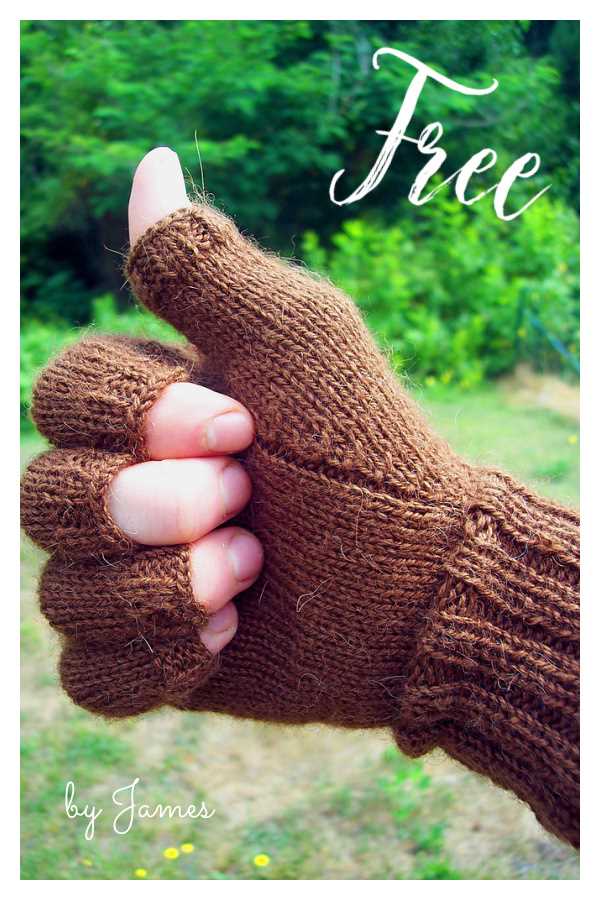
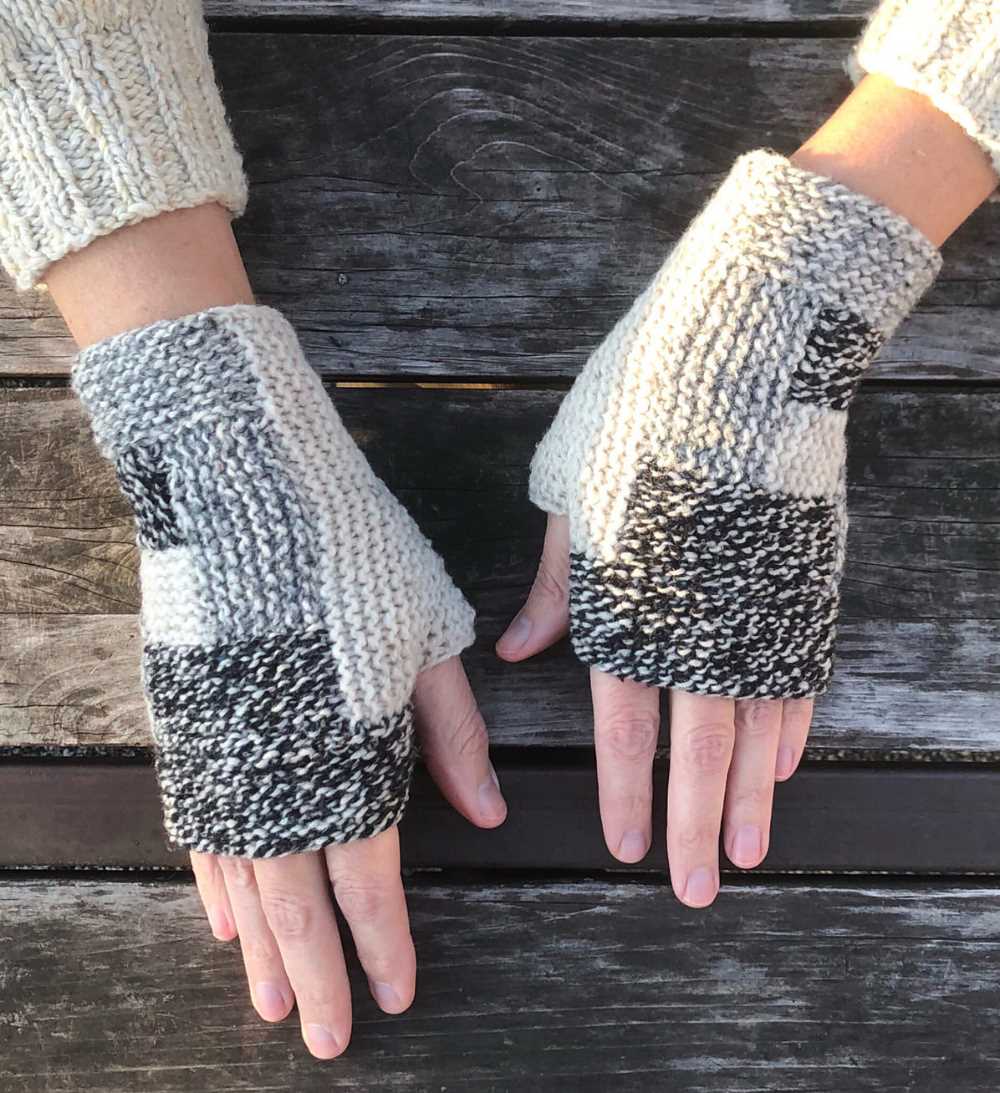
3. Fingerless Mitts
Fingerless mitts are a great option if you still want to keep your hands warm but need your fingers free. This pattern allows you to create stylish and functional fingerless gloves that are perfect for typing, texting, or any activity that requires dexterity.
4. Fair Isle Gloves
If you’re looking to add some color and pattern to your gloves, try knitting a pair of Fair Isle gloves. This traditional knitting technique allows you to create intricate and colorful designs. These gloves are a great way to showcase your knitting skills and create a unique accessory.
5. Cable Knit Gloves
Cable knit gloves are a classic and timeless option. The beautiful cable pattern adds texture and interest to the gloves, making them not only warm but also stylish. This pattern will guide you through creating the perfect pair of cable knit gloves.
6. Chunky Arm Warmers
If you’re looking for a quick and cozy project, try knitting a pair of chunky arm warmers. These gloves are perfect for keeping your arms and hands warm during those chilly winter days. The chunky yarn creates a thick and insulating fabric that will keep you toasty all day long.
7. Convertible Gloves
Convertible gloves are a versatile option that allows you to switch between fingerless gloves and mittens. This pattern will guide you through creating a pair of gloves that can be easily transformed to suit your needs. Say goodbye to cold fingers and hello to flexible and functional gloves.
8. Children’s Gloves
If you’re looking to knit gloves for the little ones in your life, this pattern is perfect. It features a simple and adorable design that is sure to keep their hands warm and cozy. Knitting gloves for children can be a fun and rewarding project that will make them feel special.
9. Ribbed Gloves
Ribbed gloves are a classic choice that never goes out of style. The ribbed design creates a stretchy and snug fit that will keep your hands warm and comfortable. This pattern will guide you through creating a pair of ribbed gloves that are perfect for everyday wear.
10. Felted Gloves
If you’re looking for a unique and textured look, try knitting a pair of felted gloves. This pattern uses felting techniques to create a dense and durable fabric. The felted gloves will keep your hands warm and add a rustic charm to your winter wardrobe.
11. Striped Gloves
Add some color and fun to your gloves with a striped design. This pattern will guide you through creating a pair of striped gloves that are perfect for adding a pop of color to your outfit. Choose your favorite colors and create a unique accessory that reflects your personal style.
12. Long Gloves
If you’re looking to make a statement, try knitting a pair of long gloves. These gloves extend past the wrist and add drama and elegance to any outfit. This pattern will guide you through creating a pair of long gloves that are perfect for a special occasion or when you want to make a bold fashion statement.
Chunky Knit Gloves Pattern
If you’re feeling crafty and want to keep your hands cozy during the colder months, why not try knitting your own chunky knit gloves? With this free pattern, you can create a pair of stylish and warm gloves that are perfect for chilly days.
Materials:
- Chunky yarn in your preferred color or colors
- Size 10 knitting needles
- Tapestry needle
- Scissors
Instructions:
- Start by casting on 32 stitches.
- Knit 2, purl 2 for 10 rows to create a ribbed cuff.
- Continue knitting in stockinette stitch (knit one row, purl one row) for 30 rows.
- Next, start shaping the thumb gusset. Knit 15 stitches, place marker, make one stitch, knit 1, make one stitch, place marker, knit to the end of the row.
- Knit all stitches for the next row.
- Repeat steps 4 and 5 until you have a total of 9 stitches between the markers.
- Continue knitting all stitches for 15 more rows.
- Bind off 9 stitches, knit to the end of the row.
- Knit 2, purl 2 for 10 rows to create the second ribbed cuff.
- Bind off all stitches.
- Using the tapestry needle, sew the side seams together, leaving a hole for the thumb.
These chunky knit gloves make a great project for beginners, and they also make wonderful gifts. Experiment with different colors and yarns to create a unique pair of gloves that will keep your hands warm and stylish all winter long.
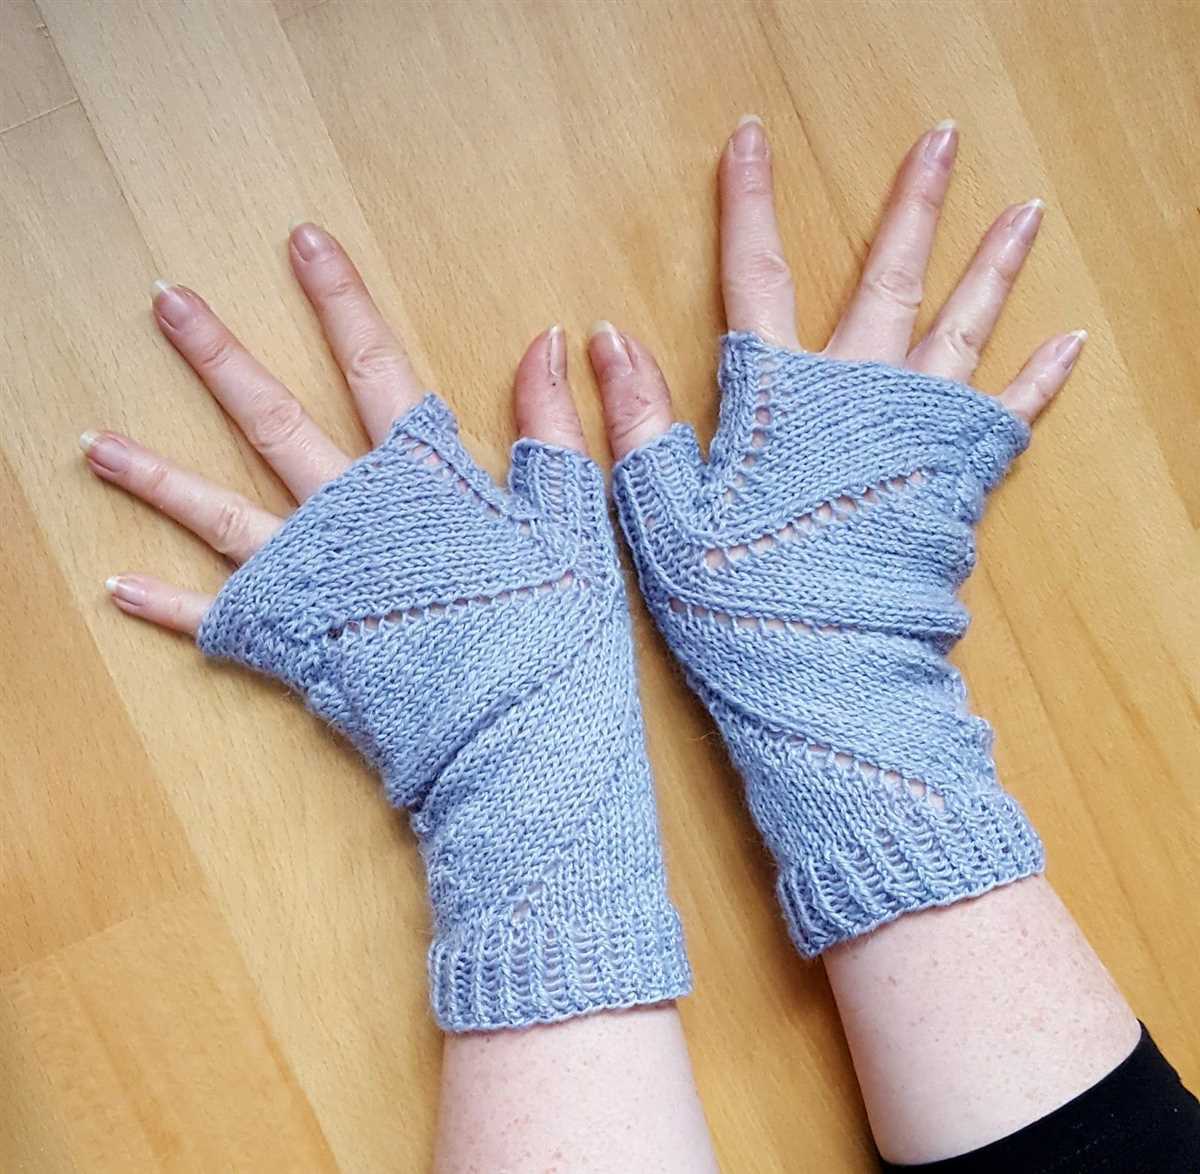
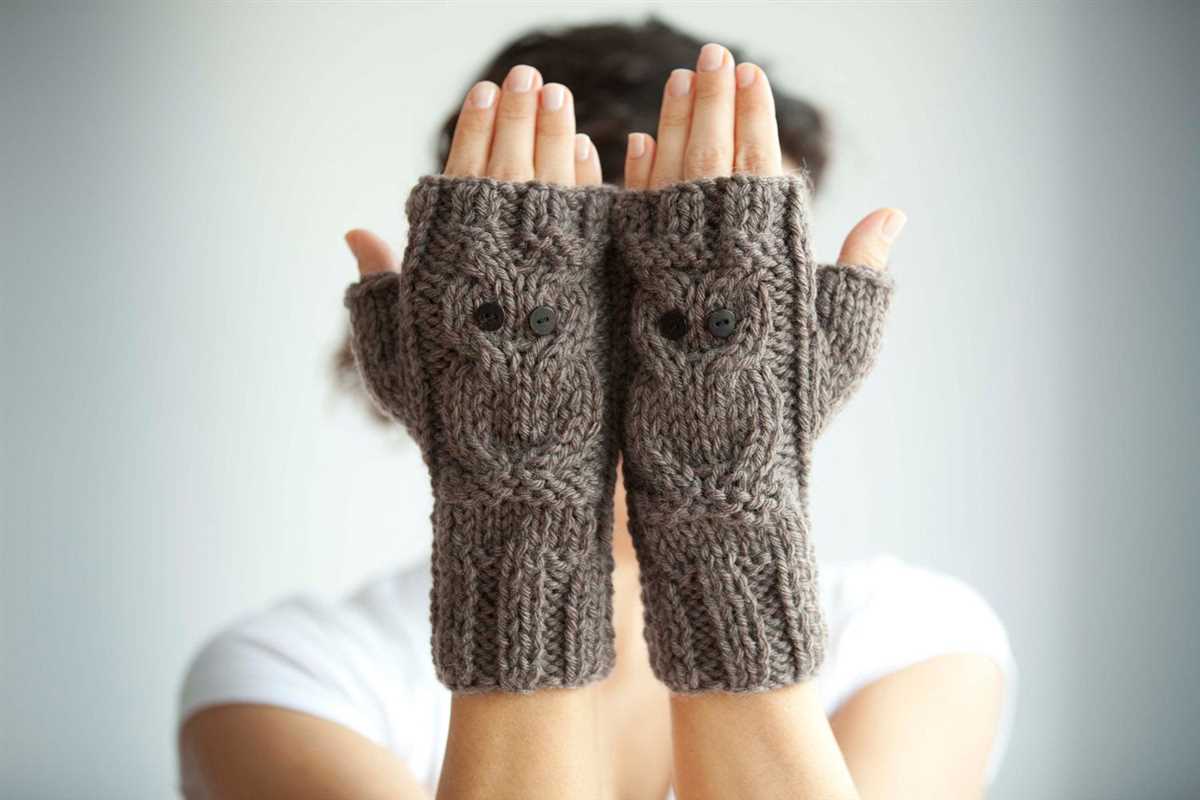
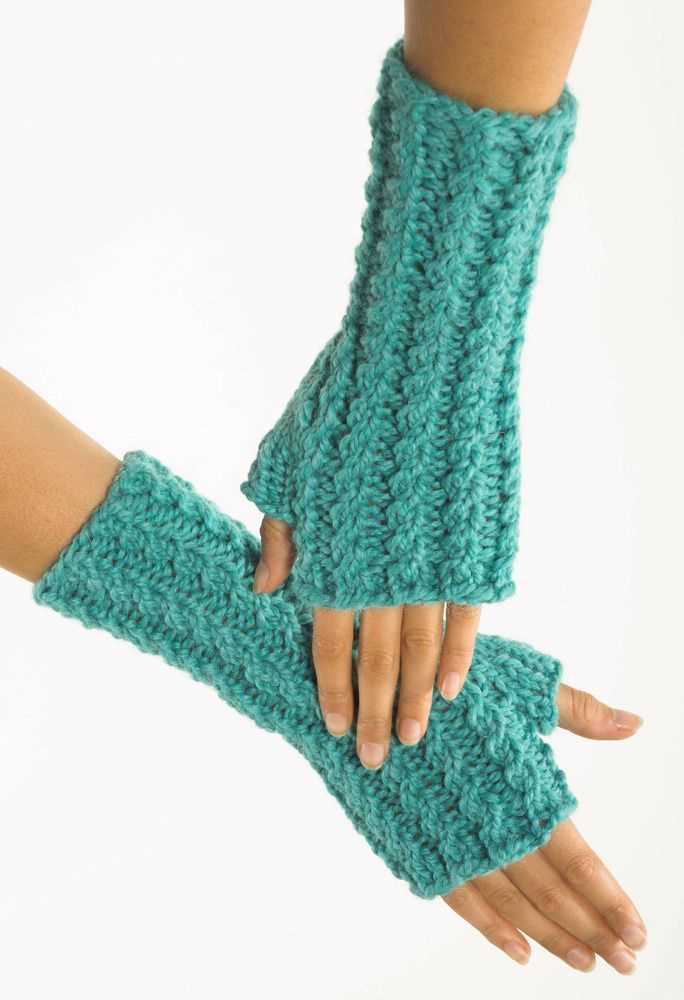
Fingerless Gloves Pattern
Looking for a versatile and trendy accessory to keep your hands warm during the colder months? Fingerless gloves are the perfect solution! Whether you’re typing on your computer, using your smartphone, or just want to add a stylish touch to your outfit, fingerless gloves are a must-have item. And the best part is, you can easily knit your own pair using a simple and free pattern.
To get started, you’ll need some basic knitting skills and a set of double-pointed knitting needles. Choose your favorite yarn color and weight to customize your gloves to your liking. The fingerless gloves pattern typically involves knitting in the round and creating a ribbed cuff for a snug fit. You can also experiment with different stitch patterns and embellishments to add some extra flair.
Materials:
- Double-pointed knitting needles
- Yarn in your preferred color and weight
- Tapestry needle for weaving in ends
Instructions:
- Cast on the desired number of stitches, usually around 40-50 stitches, to fit an average-sized adult hand.
- Join the round, being careful not to twist the stitches.
- Knit in a rib stitch pattern (such as k2, p2) for the cuffs, working until the cuffs reach the desired length.
- Switch to a stockinette stitch or your desired stitch pattern for the hand section, knitting until the gloves reach the desired length.
- Finish off the gloves by binding off all stitches and weaving in any loose ends.
- Repeat the above steps to create a second glove.
Once you’ve mastered the basic fingerless gloves pattern, you can easily adjust it to fit different sizes or experiment with different yarns and stitch patterns. Get creative and make a unique pair of fingerless gloves that reflect your personal style. And remember, knitting your own fingerless gloves not only allows you to showcase your craftsmanship, but also provides you with a cozy and practical accessory to keep your hands warm all winter long.
Cable Knit Gloves Pattern
When it comes to knitting gloves, a cable knit pattern can add a touch of elegance and uniqueness. Whether you are knitting gloves for yourself or as a gift, the cable knit design can make them stand out from the rest. With its interlocking twists and turns, cable knitting creates a beautiful texture that adds depth and character to any knitted item.
To start knitting cable gloves, you will need a set of double-pointed knitting needles and yarn of your choice. You can choose a soft and warm wool yarn for winter gloves or a lightweight yarn for spring and fall gloves. The cable knitting technique involves crossing stitches over one another, creating intricate patterns. Don’t worry if you have never knit cables before – it’s easier than it looks!
To get started, cast on the desired number of stitches for your glove size. Divide the stitches evenly onto four double-pointed needles, joining in the round. Begin the cable pattern by following the chart or written instructions. Typically, cable patterns involve knitting and purling stitches in a specific order, crossing stitches over one another using a cable needle or by knitting them out of order.
As you work your way through the cable knit pattern, you will see the beautiful twists and turns develop. It’s important to pay attention to the instructions and count your stitches to ensure accuracy. Once you have completed the cable pattern section, continue knitting in the round for the desired length.
When you reach the last few rounds, it’s time to create the thumb opening. You can follow the pattern instructions to place the thumb stitches on a holder or scrap yarn while you continue knitting the hand section of the glove. After completing the hand section, you can go back and knit the thumb using the same cable pattern.
Finally, bind off the remaining stitches and weave in any loose ends. Don’t forget to try on your cable knit gloves to ensure they fit properly. If you want to add an extra touch, you can embellish your gloves with buttons, beads, or embroidery. With this cable knit gloves pattern, you can create beautiful and cozy gloves that will keep your hands warm and stylish.
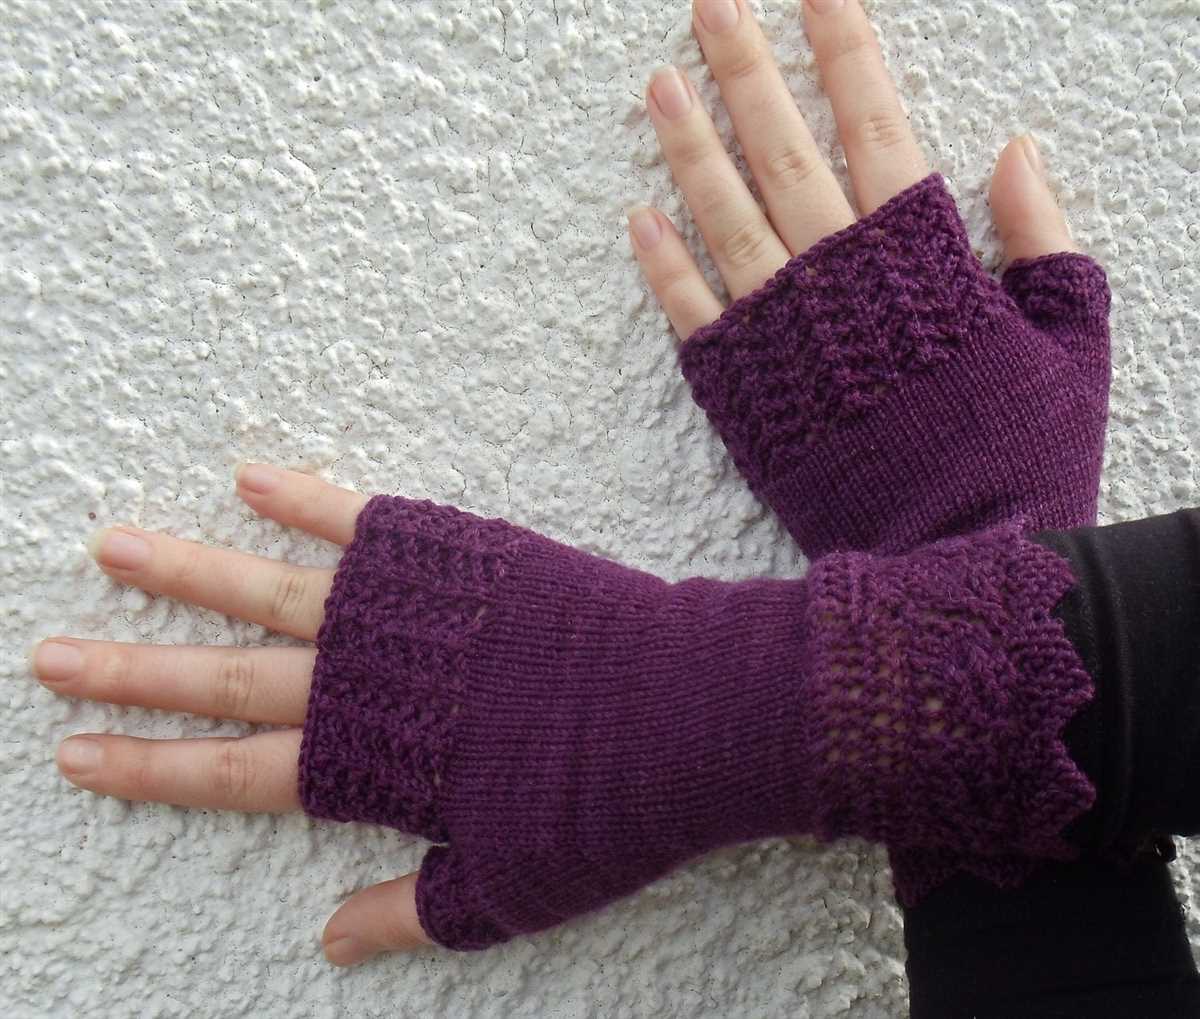
Lace Knit Gloves Pattern
Knitting lace gloves can add a touch of elegance and sophistication to any outfit. With their delicate and intricate patterns, lace gloves are a beautiful accessory for special occasions or even everyday wear. If you’re looking for a free gloves knitting pattern that incorporates lace, you’re in luck. Here, we’ll walk you through the steps to create a pair of stunning lace knit gloves.
To start, you’ll need a set of double-pointed knitting needles and lace weight yarn in the color of your choice. We recommend using a lace weight yarn to achieve the delicate look that lace gloves require. Begin by casting on the desired number of stitches, typically around 40 to 48 stitches, depending on the size of your hand.
Once you have your stitches cast on, you’ll start working the lace pattern. This typically involves a combination of yarn overs and knit or purl stitches. The lace pattern can be as simple or complex as you like, depending on your skill level and preference. You can find a variety of lace patterns online or in knitting pattern books. Choose one that suits your style and follow the instructions carefully.
As you knit your lace gloves, you’ll notice the delicate lace pattern begin to take shape. It’s important to maintain an even tension throughout your knitting to ensure that the lace pattern is consistent and cohesive. If you’re new to lace knitting, it may take some practice to get the hang of it, but with patience and perseverance, you’ll soon be knitting lace like a pro.
Once you’ve completed the lace pattern, you’ll finish off your gloves by binding off the stitches. Then, simply sew up the side seams and weave in any loose ends. You can choose to leave the fingertips open or add a lace border for added detail. The possibilities are endless when it comes to customizing your lace gloves.
Whether you’re knitting lace gloves for yourself or as a gift for a loved one, this free gloves knitting pattern is sure to result in a beautiful and unique pair of gloves. So grab your knitting needles and some lace weight yarn, and get ready to create a stunning accessory that will elevate any outfit.
Fair Isle Gloves Pattern
Looking for a stylish and cozy pair of gloves to keep your hands warm this winter? Look no further than the Fair Isle Gloves pattern. Fair Isle, also known as stranded knitting, is a popular technique used to create beautiful colorwork designs. These gloves feature a classic Fair Isle pattern, with intricate motifs and contrasting colors that will make them stand out.
The Fair Isle Gloves pattern is suitable for intermediate knitters who are familiar with basic knitting techniques, such as casting on, knitting, purling, and decreasing. It incorporates both knit and purl stitches, as well as color changes. The pattern includes a detailed stitch chart and written instructions, making it easy to follow along and create your own pair of stunning Fair Isle gloves.
To knit these gloves, you will need:
- Yarn in two contrasting colors
- Double-pointed knitting needles in the appropriate size
- A yarn needle for weaving in ends
Start by casting on the required number of stitches and joining them in the round. Work the ribbing pattern for the cuffs, then begin the Fair Isle pattern for the main part of the gloves. As you knit, you’ll alternate between the two colors to create the intricate colorwork design.
Once you’ve completed the main part of the gloves, it’s time to shape the fingers. Follow the pattern instructions for the specific number of stitches to decrease and how to distribute them across the double-pointed needles. Continue knitting and decreasing until you’ve reached the desired length for each finger.
Finish off by binding off the stitches and weaving in any loose ends. Your Fair Isle Gloves are now ready to wear and show off! Whether you’re knitting them for yourself or as a gift for a loved one, these gloves are sure to be a hit. Stay warm and stylish all winter with the Fair Isle Gloves pattern.
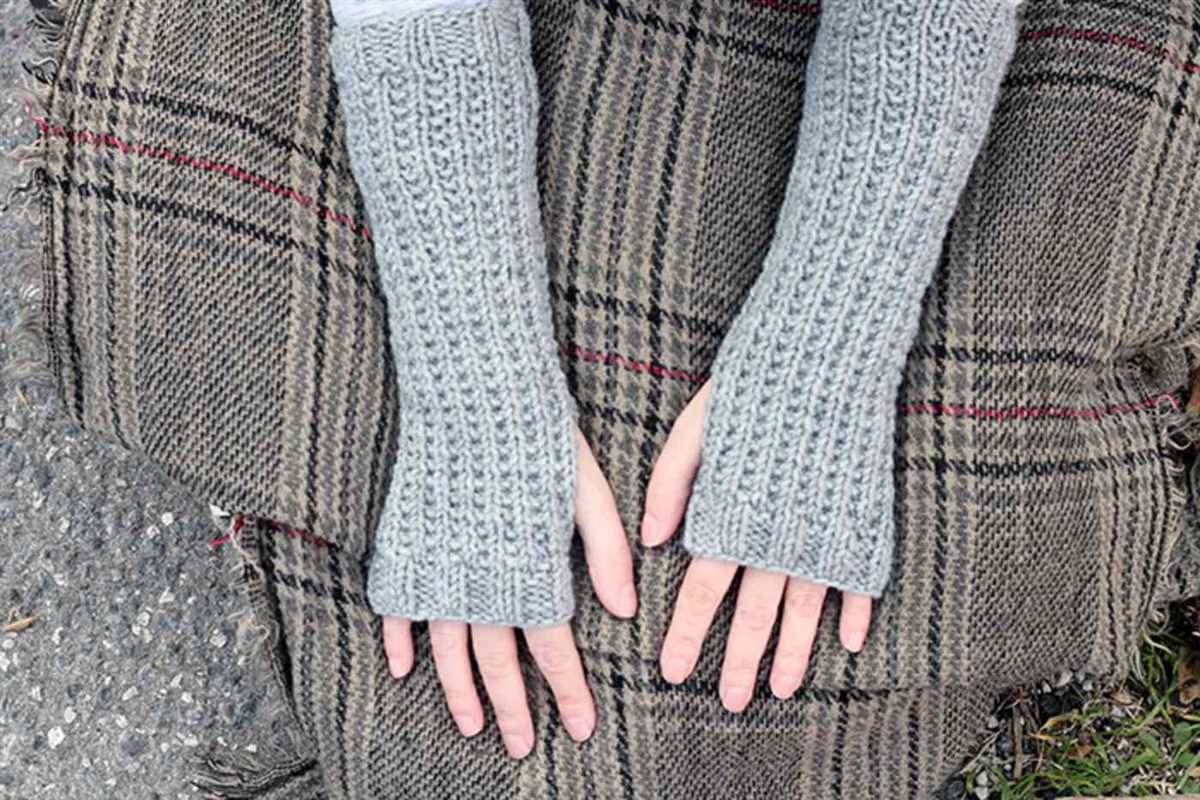
Rib Stitch Gloves Pattern
Knitting gloves can be a great project to showcase your skills and create a practical accessory for the colder months. The rib stitch pattern is a popular choice for gloves as it creates a stretchy and snug fit. Here is a pattern for rib stitch gloves that you can try.
Materials:
- Size 8 (5.0 mm) knitting needles
- Worsted weight yarn
- Tapestry needle
Instructions:
- Cast on 36 stitches.
- Work in a K1, P1 rib stitch pattern for the entire glove. This means you will knit one stitch, purl one stitch, and repeat this pattern across every row.
- Continue knitting in the rib stitch pattern until the work measures approximately 2 inches from the cast-on edge.
- Next, create the thumb opening. Knit 6 stitches, slip the next 6 stitches onto a stitch holder or scrap yarn, and then continue knitting in the rib stitch pattern across the remaining stitches.
- Continue working in the rib stitch pattern for the hand section of the glove, until it measures approximately 6 inches from the cast-on edge.
- Now, it’s time to create the fingers. Split the stitches into three equal sections: 12 stitches for the thumb, 12 stitches for the index and middle fingers, and 12 stitches for the ring and pinky fingers.
- For each finger, knit in the rib stitch pattern for approximately 2 inches, or until the desired length is reached.
- Bind off all stitches loosely.
- With the tapestry needle, sew the glove seams and weave in any loose ends.
- Repeat the steps for the second glove.
Important Tips:
- To ensure a snug fit, measure your hand before knitting the gloves. Adjust the number of cast-on stitches as needed.
- If you want a longer or shorter glove, you can modify the length of the hand and fingers accordingly.
- Experiment with different yarn colors and textures to customize your gloves.
- Don’t forget to block your gloves after completing them to give them a polished look.
Colorwork Gloves Pattern
Colorwork gloves are a great way to add some creativity and style to your winter accessories. With a variety of color options and patterns to choose from, you can create unique gloves that match your personal style. Whether you’re an experienced knitter or just starting out, this colorwork gloves pattern is a fun and rewarding project.
To start, you’ll need two different colors of yarn, preferably in a medium weight. You’ll also need a set of double-pointed knitting needles in the appropriate size for your yarn. This pattern uses a simple stranded colorwork technique, where two colors of yarn are used on each row to create the pattern. Don’t worry if you’re new to colorwork knitting, this pattern is beginner-friendly with clear instructions.
Begin by casting on the desired number of stitches for your glove size. The pattern will provide a guide for sizes small, medium, and large. Once you have your stitches cast on, you’ll begin working the ribbed cuff using one of the colors. The ribbing gives the gloves a snug fit and helps keep out the cold.
Next, you’ll transition to the colorwork section. This is where the fun begins! Follow the colorwork chart provided in the pattern to create the desired pattern on the back of the gloves. As you work each row, be sure to carry the unused color across the back of your work, twisting the two colors every few stitches to prevent long floats.
Once you’ve completed the colorwork chart, it’s time to shape the fingers. The pattern will guide you through the decreases and increases needed to create the five finger sections. Work each finger section separately, following the instructions for increasing and decreasing stitches to create the proper shape.
Finally, finish off your gloves with a few rounds of ribbing and bind off. Weave in any remaining ends, and your colorwork gloves are complete! Now you can bundle up in style and enjoy the warmth and comfort of your handmade gloves.
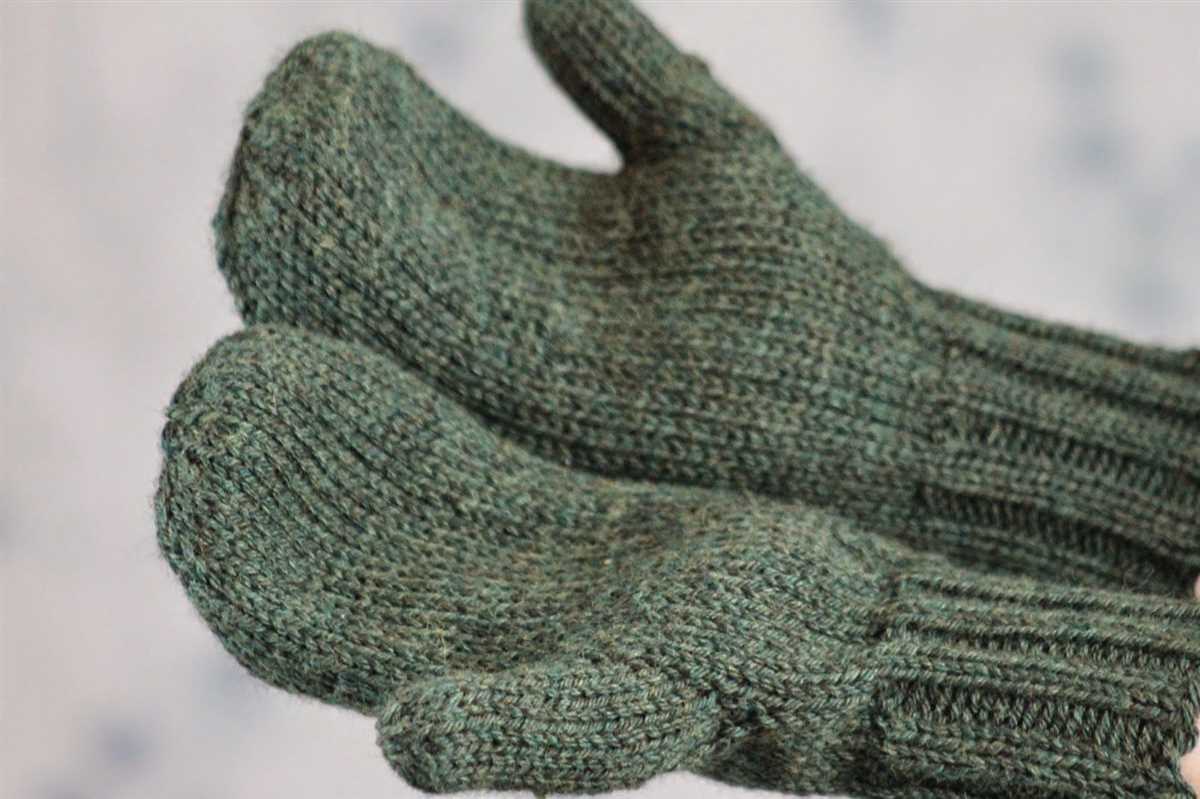
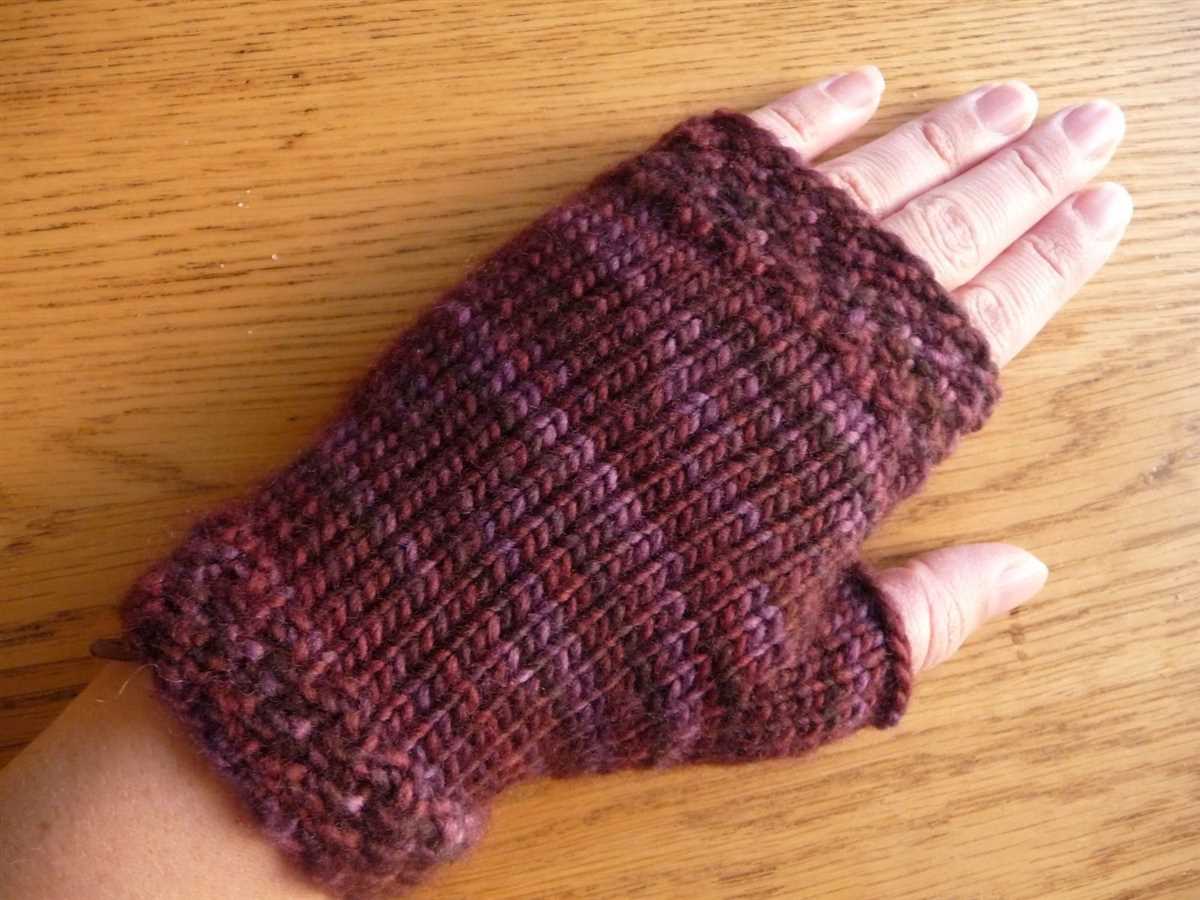
Mittens with Thumb Hole Pattern
If you’re looking for a warm and cozy pair of mittens to keep your hands toasty during the cold winter months, look no further than this mittens with thumb hole pattern. This pattern is perfect for intermediate knitters and will result in a stylish and functional pair of mittens that you’ll love to wear.
To start, you’ll need to gather your materials. You’ll need a set of double-pointed knitting needles in a size that gives you the correct gauge, as well as your chosen yarn. The pattern calls for a worsted weight yarn, but feel free to experiment with different yarn weights to achieve the desired thickness and warmth.
Once you have your materials ready, you can begin knitting the mittens. The pattern starts with the cuff, which is knit in a ribbing pattern to ensure a snug fit around your wrist. Then, you’ll move on to the hand section, which is knit in a simple stockinette stitch. The thumb hole is created by placing a few stitches on a stitch holder and then continuing to knit the hand section.
After completing the hand section, you’ll come to the thumb. The thumb is created by picking up stitches around the thumb hole and knitting in a circular pattern. This creates a seamless thumb that is both comfortable and practical. Finally, you’ll finish off the mittens by closing up the thumb and weaving in any loose ends.
Once you’ve finished knitting the mittens, you can try them on to ensure they fit properly. If needed, you can make any adjustments by adding or removing rows in the hand or thumb sections. Once you’re satisfied with the fit, you can block the mittens to give them a polished and professional look.
Overall, this mittens with thumb hole pattern is a great project for knitters who want to try something new and create a practical and stylish accessory. Whether you choose to knit them for yourself or as a gift for a loved one, these mittens are sure to be a hit!
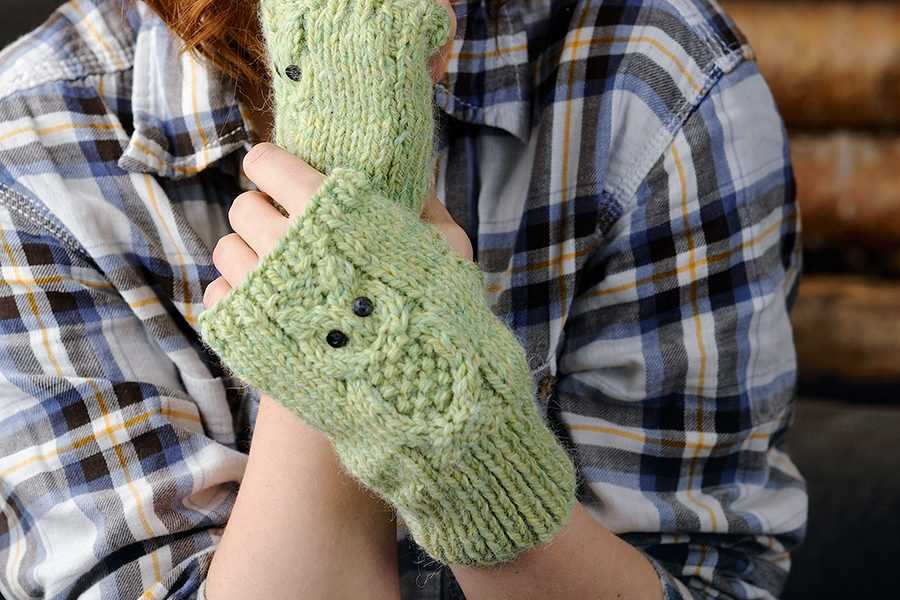
Convertible Gloves Pattern
Are you looking for a versatile and practical accessory to keep your hands warm during the cold winter months? Look no further than the Convertible Gloves Pattern. These gloves are not only stylish, but also functional, allowing you to easily switch between fingerless gloves and mittens with a simple flip.
The Convertible Gloves Pattern is perfect for those who value convenience and flexibility. Whether you need to use your fingers for texting, typing, or any other task, simply fold back the mitten flap and secure it with a button or a loop to expose your fingertips. When you need more warmth, just flip the flap back over and secure it in place to transform the gloves into cozy mittens.
This knitting pattern is suitable for experienced knitters who are familiar with basic stitches and techniques such as knitting in the round and increasing/decreasing. The pattern includes detailed instructions, as well as a chart for the mitten flap, making it easy to follow along and create your own pair of convertible gloves.
To knit these gloves, you will need a set of double-pointed knitting needles, yarn in your desired color, stitch markers, a tapestry needle, and buttons or loops for securing the mitten flaps. The pattern allows for customization, so you can choose your preferred yarn weight and needle size to achieve the desired gauge.
With the Convertible Gloves Pattern, you can stay warm and stylish while enjoying the convenience of fingerless gloves and the added warmth of mittens. Whether you’re running errands, commuting, or just need an extra layer of warmth, these gloves are the perfect accessory for any winter wardrobe.
Popcorn Stitch Gloves Pattern
Knitting your own gloves is a great way to keep warm during the colder months, and the popcorn stitch pattern adds a fun and playful touch to these cozy accessories. Whether you’re a beginner or an experienced knitter, you can easily create a pair of popcorn stitch gloves using this free pattern.
To start, you’ll need a set of double-pointed knitting needles and a skein of your favorite worsted weight yarn. Choose a color that will complement your winter wardrobe or make a bold statement. The popcorn stitch pattern will help to showcase the color and add texture to the gloves.
Materials:
- Size 8 double-pointed knitting needles
- 1 skein of worsted weight yarn
- Tapestry needle for weaving in ends
- Stitch markers
- Scissors
Pattern:
- Cast on 40 stitches and divide evenly onto 4 needles.
- Join in the round, being careful not to twist the stitches.
- Work in a K2, P2 rib for 2 inches.
- Begin popcorn stitch pattern:
- Round 1: *K1, P1, K1, popcorn stitch; repeat from * to end of round.
- Round 2: *P1, K1, P1, K1; repeat from * to end of round.
- Repeat rounds 1 and 2 until the glove measures the desired length.
- Continue in K2, P2 rib for 1 inch.
- Bind off stitches in pattern.
- Weave in any loose ends using a tapestry needle.
Now you’re ready to show off your new popcorn stitch gloves! They make a great accessory to any winter outfit and also make for a thoughtful handmade gift. Experiment with different yarn colors and variations of the popcorn stitch pattern to create unique and personalized gloves.
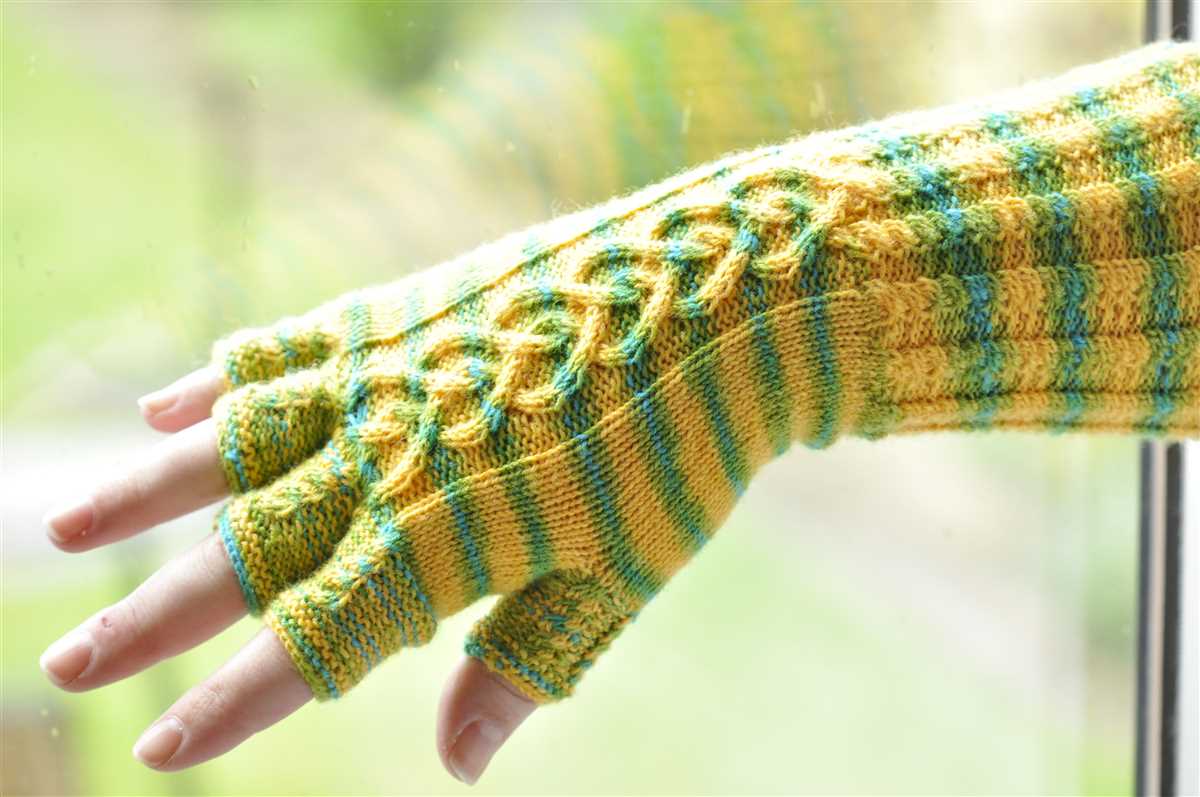
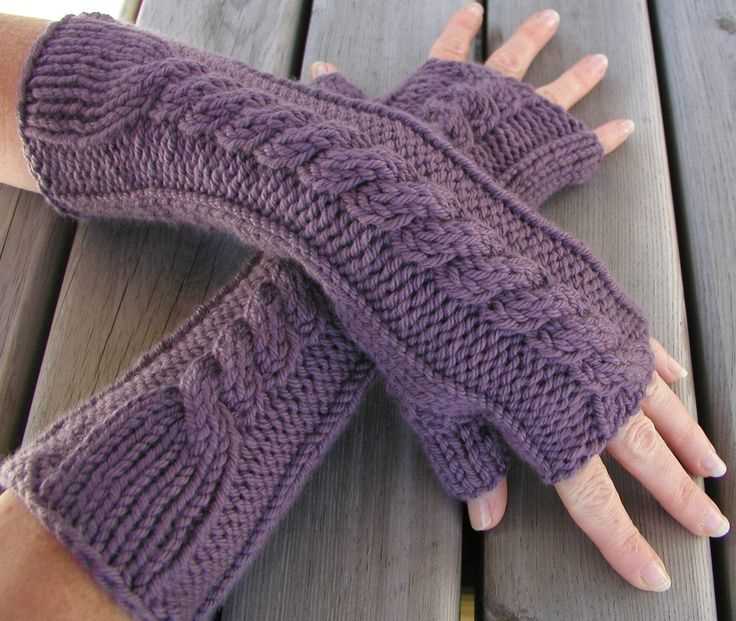
Cabled Fingerless Gloves Pattern
Stay cozy and stylish with these cabled fingerless gloves. This knitting pattern is perfect for intermediate knitters looking to add some texture and interest to their hand-knit accessories. The gloves feature a beautiful cable design that adds warmth and sophistication to any outfit. Plus, the fingerless style allows for easy use of electronic devices and freedom of movement.
To create these gloves, you will need to use a set of double-pointed knitting needles and a cable needle. The pattern calls for a medium weight yarn, and it’s recommended to use a wool or wool-blend yarn for added warmth and comfort. You’ll also need basic knitting skills, including knitting in the round, increasing, and decreasing stitches.
The cabled fingerless gloves pattern is worked in a ribbed cuff, followed by the cable design on the back of the hand. The thumb is then created by picking up stitches and working in the round. The gloves are finished off with a stretchy bind-off to ensure a snug fit.
This pattern provides detailed instructions and a chart for the cable design, making it easy to follow along and create your own pair of cabled fingerless gloves. The finished gloves make a great gift or a stylish addition to your own winter wardrobe. So grab your knitting needles and get started on this fun and rewarding project!
Two-Color Gloves Pattern
In this article, we have explored a simple and versatile knitting pattern for two-color gloves. This pattern allows you to create unique and stylish gloves by combining different colors of yarn. Whether you are a beginner or an experienced knitter, this pattern is accessible and fun to follow.
By using two contrasting colors, you can create beautiful color combinations and patterns on your gloves. The pattern includes clear and detailed instructions for knitting the cuff, hand, thumb, and fingers of the gloves. It also provides guidance on sizing and adjusting the pattern to fit your hand.
One of the advantages of this two-color gloves pattern is its versatility. You can experiment with different color combinations and stitch patterns to create gloves that match your personal style or reflect the season. The pattern also allows for customization, so you can add additional embellishments or details to make your gloves truly unique.
To get started with this pattern, you will need basic knitting skills and materials such as yarn, knitting needles, and a tapestry needle. The pattern is suitable for both men and women and can be adjusted to fit different hand sizes.
In conclusion, the two-color gloves pattern provides a great opportunity to explore your creativity and create personalized gloves. With its clear instructions and flexibility, this pattern is suitable for knitters of all skill levels. So grab your knitting needles and get ready to make a stylish pair of gloves that will keep your hands warm and fashionable!