
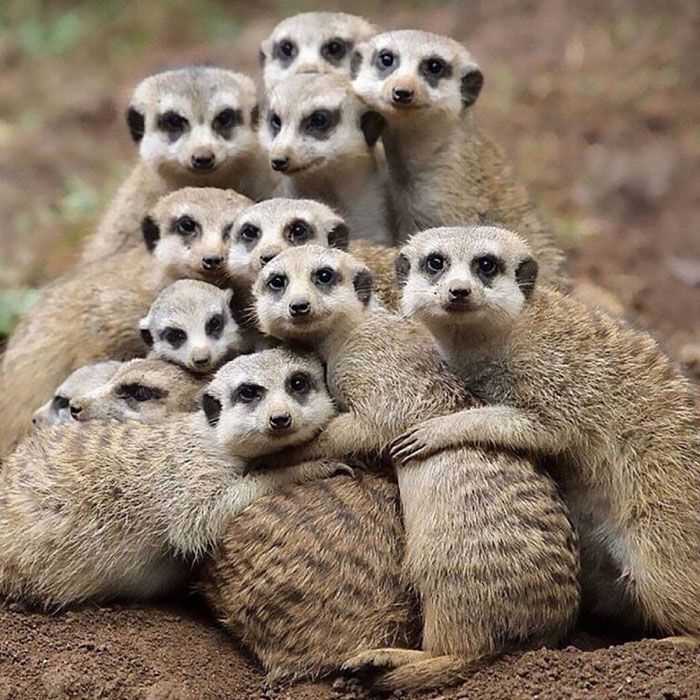
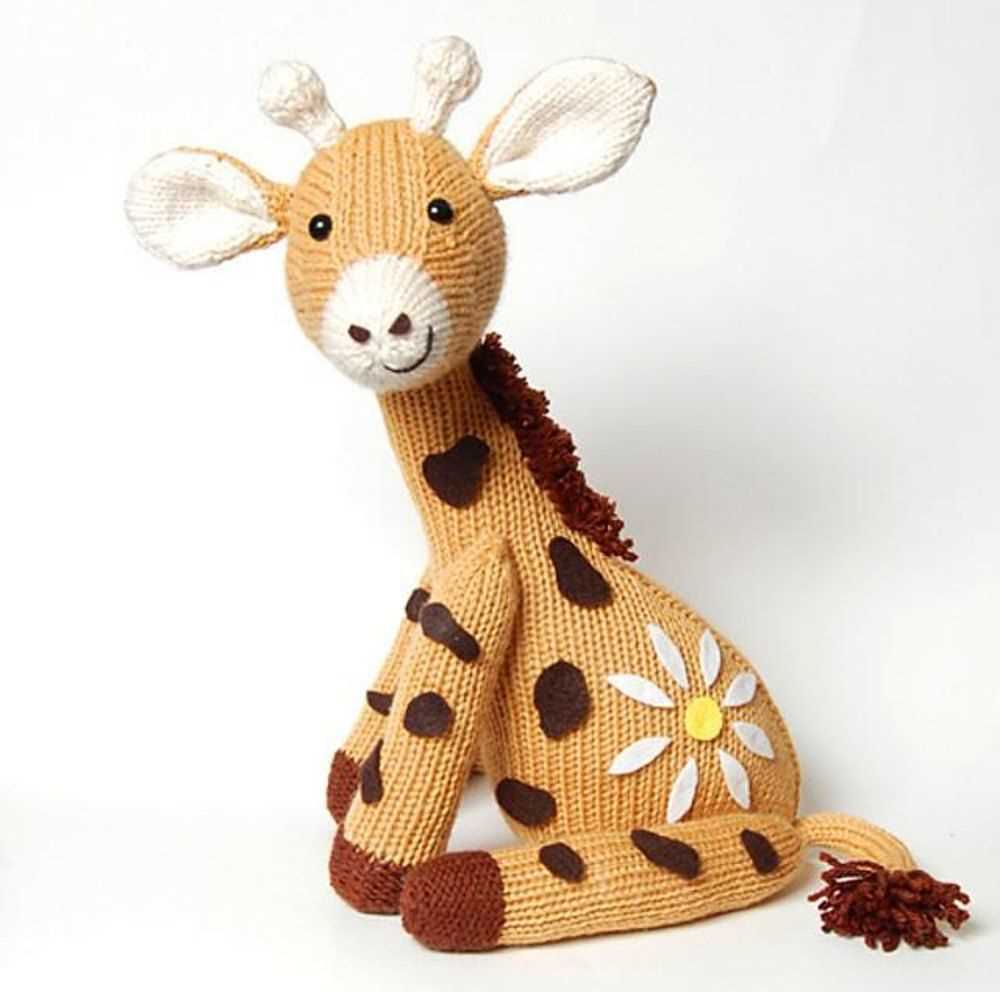
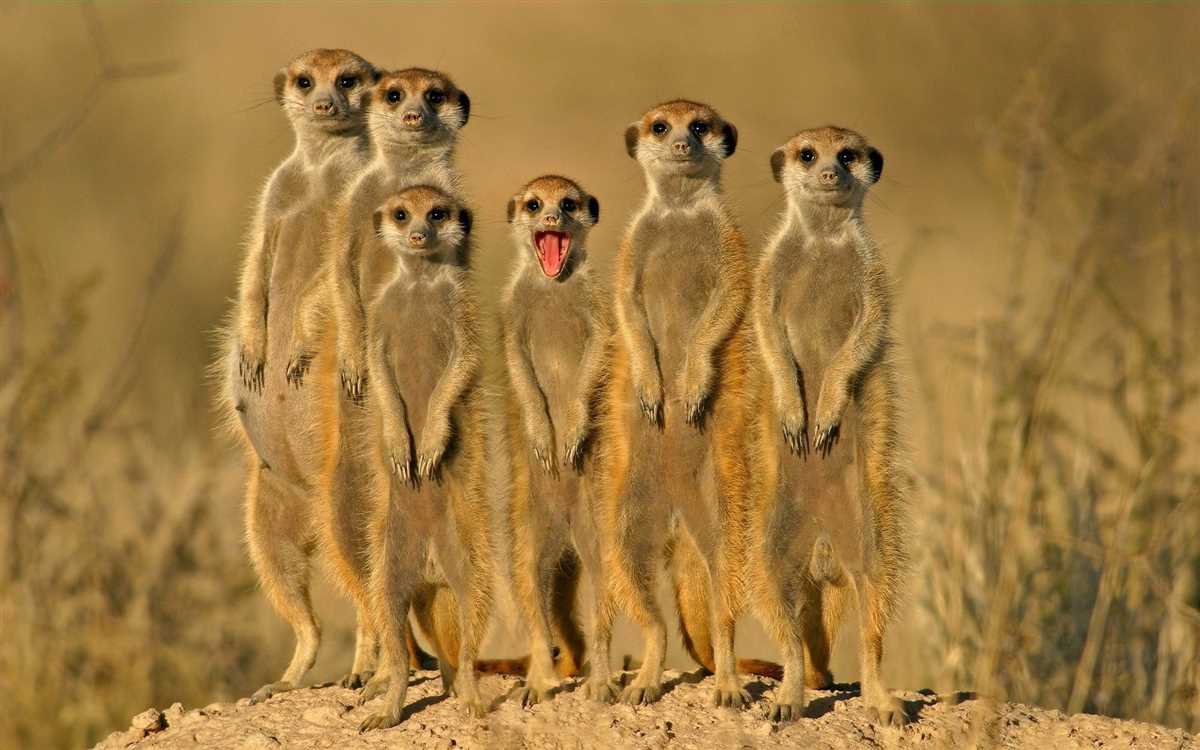
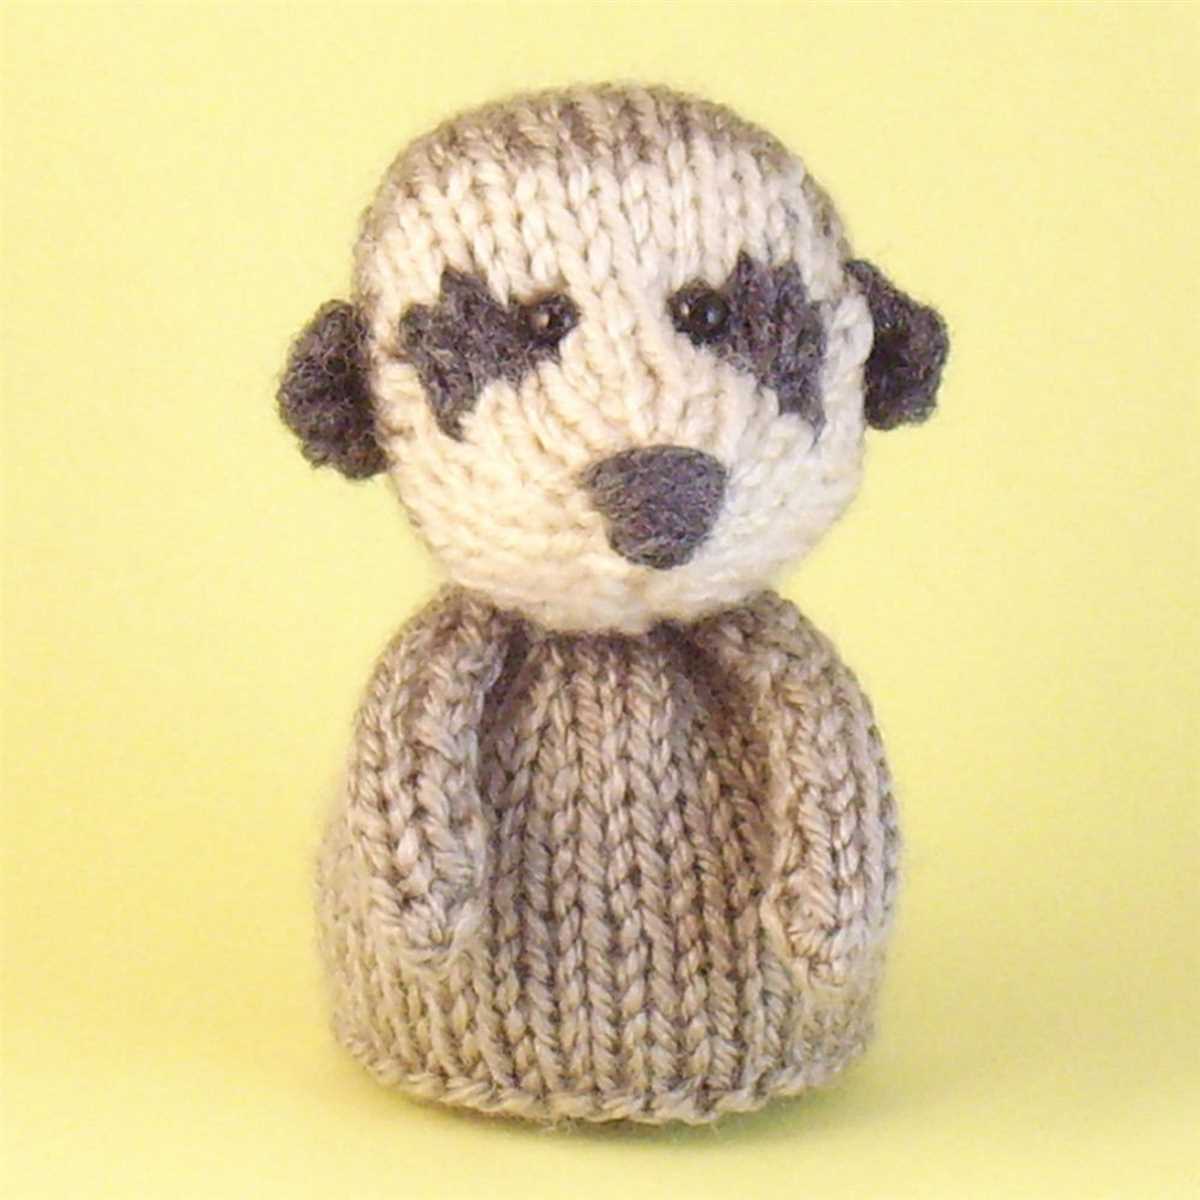
Knitting has become a popular hobby for many people around the world. From creating scarves and sweaters to making unique stuffed animals, knitting offers endless opportunities for creativity. One adorable creature that has captured the hearts of many knitters is the meerkat. With their curious nature and distinctive appearance, meerkats make the perfect subject for a knitting project.
If you’re a knitting enthusiast looking for your next challenge, a meerkat knitting pattern may be just what you need. These patterns provide step-by-step instructions for creating your own meerkat plushie. Whether you’re a beginner or an experienced knitter, there are patterns available for all skill levels.
Knitting a meerkat can be a fun and rewarding experience. Not only will you end up with a charming handmade toy, but you’ll also be able to showcase your knitting skills and creativity. Plus, a meerkat plushie can make a great gift for friends or family members who appreciate unique and handmade items.
Meerkat Knitting Pattern: Create Your Own Adorable Meerkat with this Step-by-Step Guide
To begin, gather your materials. You will need a set of knitting needles, yarn in various colors (such as brown, white, and black), stuffing for the body, and safety eyes or buttons for the eyes. Once you have all your materials ready, it’s time to get started on knitting.
Start by casting on the required number of stitches for the body of the meerkat. Follow the pattern instructions to knit the body in the desired colors, using different stitches to create texture and detail. Don’t worry if you’re new to knitting – the pattern will guide you through each step, making it easy for beginners to follow along.
Once the body is complete, it’s time to move on to the head and limbs. Follow the pattern instructions to knit these separately, paying attention to shaping and details. You can add small touches like embroidered facial features or yarn whiskers to give your meerkat a unique personality.
After all the individual pieces are knit, it’s time to assemble your meerkat! Sew the limbs and head onto the body, making sure to securely attach them. Stuff the body with the stuffing material to give your meerkat a soft and cuddly feel.
Finally, add the finishing touches to your meerkat. Attach the safety eyes or buttons for the eyes, and weave in any loose ends of yarn. Give your meerkat a well-deserved fluff and shape, and voila – your adorable meerkat toy is complete!
Whether you’re an experienced knitter looking for a fun new project or a beginner looking to improve your skills, this meerkat knitting pattern is perfect for you. Not only will you create a beautiful toy, but you’ll also have the satisfaction of making something with your own hands. Get started today and bring a little piece of the meerkat world into your home!
Getting Started with Meerkat Knitting: Materials and Tools
Meerkat knitting is a delightful craft that allows you to create adorable meerkat toys and accessories. To get started, you will need a few essential materials and tools. Here is a list of everything you’ll need:
Materials:
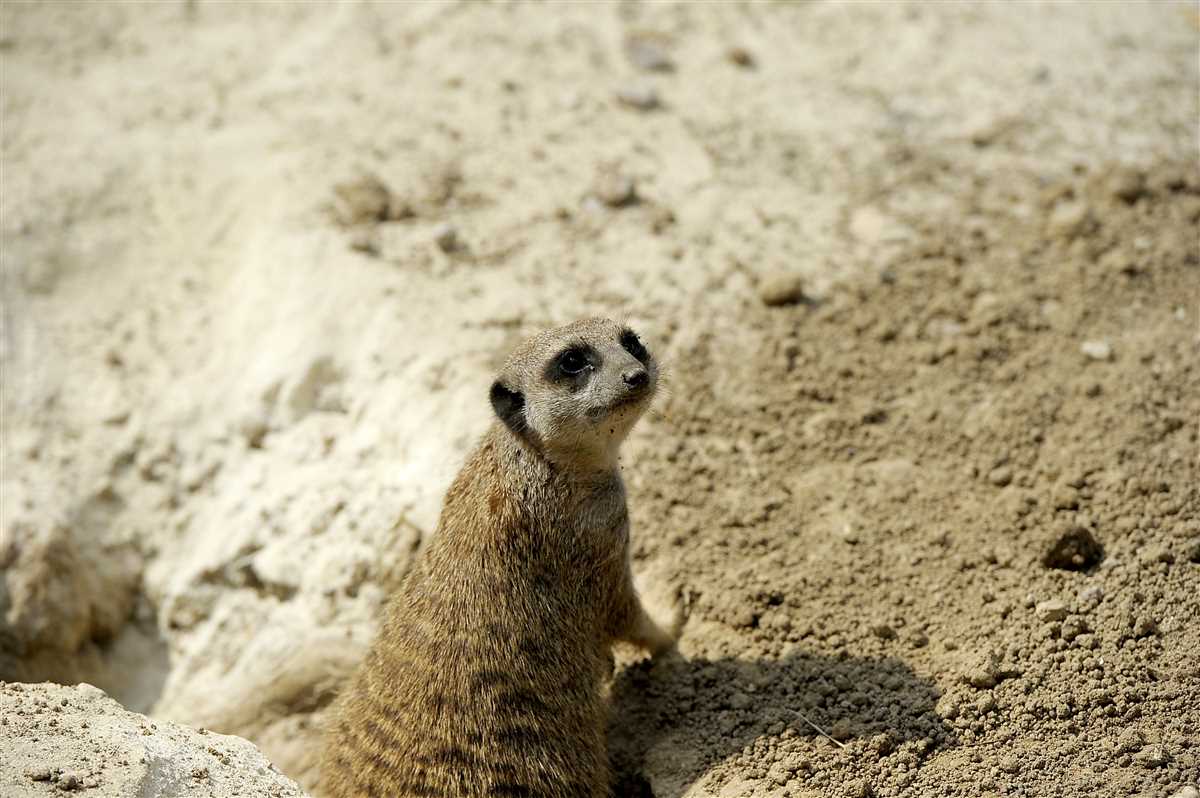
- Yarn: Choose a soft, medium-weight yarn in the color of your choice. Meerkats are typically brown with lighter shades on their underbellies.
- Knitting Needles: Use a pair of knitting needles that match the recommended size for your chosen yarn. Typically, a size US 6-8 (4-5 mm) circular or straight needles will work well.
- Stuffing: You’ll need a soft, lightweight stuffing material to fill your knitted meerkat and give it a plump shape. Polyester fiberfill or cotton batting are common options.
- Embroidery Floss: Get a few skeins of embroidery floss in various colors for stitching details on your meerkat’s face and limbs. Black, white, and brown are usually used.
- Buttons or Safety Eyes: These are optional, but you can add some personality to your meerkat by using buttons or safety eyes for the eyes. Choose colors and sizes that suit your design.
Tools:
- Tapestry Needles: These blunt-ended, large-eye needles are essential for sewing together the different parts of your knitted meerkat. Get a few sizes to accommodate various yarn weights.
- Scissors: You’ll need a pair of sharp scissors for cutting yarn and trimming loose ends.
- Stitch Markers: These small, colorful rings or clips are useful for marking specific stitches or sections in your knitting pattern.
- Measuring Tape: A flexible measuring tape or a ruler will come in handy for measuring your finished work and ensuring it meets the desired dimensions.
- Pattern Guide: Lastly, you’ll need a meerkat knitting pattern to follow. You can find free patterns online or purchase them from craft stores or independent designers.
Once you have gathered all the necessary materials and tools, you’ll be ready to dive into the world of meerkat knitting. Take your time selecting the perfect yarn and enjoy the process of bringing these adorable creatures to life through your knitting skills.
Meerkat Knitting Pattern: Choosing the Right Yarn
When it comes to knitting a meerkat, choosing the right yarn is crucial to achieve the desired look and feel of the finished project. The yarn you select will determine the texture, color, and overall appearance of your meerkat, so it is important to consider a few key factors when making your decision.
1. Type of Yarn: There are various types of yarn available, including acrylic, wool, cotton, and blends. Consider the characteristics of each type and how they will suit your meerkat project. Acrylic yarns are often more affordable and easy to care for, while wool can provide a natural, cozy look. Cotton yarns are lighter and breathable, while blends can offer a combination of different qualities.
2. Weight and Thickness: The weight and thickness of the yarn will affect the size and appearance of your meerkat. Thicker yarns will create a larger, chunkier meerkat, while finer yarns will produce a smaller, more delicate one. Consider the size you want your meerkat to be and choose a yarn weight that will achieve that result.
3. Color and Texture: The color and texture of the yarn will play a significant role in the final look of your meerkat. Decide whether you want a solid-colored meerkat or one with a variegated or textured design. Look for yarns that have the right color palette and texture to match your vision for the project.
4. Yarn Care Instructions: Before making your final yarn choice, make sure to check the care instructions. Some yarns may require special care, such as hand-washing or dry cleaning, which may affect the longevity and practicality of your meerkat. Consider the level of maintenance you are willing to provide for your finished project.
By considering these factors and taking the time to choose the right yarn for your meerkat knitting pattern, you can ensure that your finished project is not only visually appealing but also meets your expectations in terms of texture and durability. Experimenting with different yarns can also add a unique touch to your meerkat, making it truly one-of-a-kind.
Meerkat Knitting Pattern: Understanding Knitting Abbreviations
When it comes to knitting, understanding the abbreviations used in patterns is essential. If you’re planning to knit a meerkat using a knitting pattern, it’s important to familiarize yourself with the common abbreviations that are often used. These abbreviations make the pattern more concise and easier to read.
Here are some of the common knitting abbreviations you may come across in a meerkat knitting pattern:
- K: Stands for “knit.” This is the most basic knitting stitch, where you insert the needle into the front of the stitch, wrap the yarn around it, and pull the new loop through.
- P: Stands for “purl.” This stitch is used to create a textured fabric and is the reverse of the knit stitch. You insert the needle into the back of the stitch, wrap the yarn around it, and pull the new loop through.
- YO: Stands for “yarn over.” This abbreviation indicates that you should wrap the yarn around the needle to create an extra stitch.
- SSK: Stands for “slip, slip, knit.” It’s a decrease stitch that is used to create a left-leaning decrease. You slip two stitches individually from the left needle to the right needle, then insert the left needle into the front of these two slipped stitches and knit them together.
- K2TOG: Stands for “knit two together.” It’s another decrease stitch that is used to create a right-leaning decrease. You insert the right needle into the front of two stitches on the left needle and knit them together.
These are just a few examples of the many abbreviations you may encounter in a meerkat knitting pattern. It’s important to refer to the pattern’s instructions or a knitting abbreviation guide for any abbreviations you’re unfamiliar with. By understanding these abbreviations, you’ll be able to knit your meerkat with ease and confidence.
Meerkat Knitting Pattern: Casting On and Creating the Base
When it comes to creating your own meerkat using a knitting pattern, one of the first steps is to cast on and create the base of the toy. This is the foundation on which you’ll build the rest of the meerkat’s body and features, so it’s important to get it right.
To start, you’ll need your knitting needles and the appropriate yarn for your chosen meerkat pattern. Make sure you have the correct gauge to ensure that your finished toy will be the right size. Once you have your supplies ready, you can begin casting on.
Step 1: Hold one knitting needle in your dominant hand, and with your non-dominant hand, make a slipknot by creating a loop with the yarn and pulling the end through.
Step 2: Insert the knitting needle through the slipknot loop and tighten the knot by pulling on the yarn tail.
Now that you have your slipknot, it’s time to start casting on stitches to create the base of the meerkat. The number of stitches you cast on will depend on the pattern you’re using. Typically, you will cast on enough stitches to create a rectangular-shaped base.
Step 3: Take the working yarn (the yarn connected to the ball) and bring it over the top of the knitting needle, creating a loop.
Step 4: Insert the knitting needle through the loop from the front to the back.
Step 5: Tighten the loop around the knitting needle by pulling on the working yarn.
Repeat Steps 3-5 until you have cast on the required number of stitches. This is known as the long-tail cast-on method and will create a neat and sturdy base for your meerkat.
Once you have finished casting on, you can start knitting the base of the meerkat according to the pattern instructions. Remember to follow the pattern closely, making any necessary increases or decreases as indicated. With each row, you’ll be one step closer to creating a cute and cuddly meerkat using your knitting skills.
Meerkat Knitting Pattern: Working on the Body
Once you have completed the head of your meerkat knitting project, it’s time to move on to working on the body. This is where the meerkat starts to really take shape and come to life!
First, you will need to continue knitting in the round using the same size needles and yarn that you used for the head. The body of the meerkat is typically longer than the head, so you will need to cast on additional stitches to achieve the desired length.
It’s important to keep track of your stitches as you work on the body, especially if you are incorporating any colorwork or stitch patterns. You can use stitch markers to help you keep track of the beginning and end of each round, and to mark any increases or decreases that you need to make.
As you knit the body, you can also start shaping it by gradually decreasing the number of stitches. This will give the meerkat a tapered look and create a more realistic shape. You can use a variety of decrease stitches, such as knit two together (k2tog) or slip, slip, knit (ssk), to achieve the desired shaping.
Once you have reached the desired length and shape for the body, you can then bind off your stitches to secure the knitting. Make sure to leave a long tail of yarn so that you can use it later to sew up any openings or attach the body to the head.
Overall, working on the body of a meerkat knitting project is an exciting step that brings your creation to life. With careful attention to detail and the use of shaping techniques, you can create a realistic and adorable meerkat that is sure to impress. Happy knitting!
Meerkat Knitting Pattern: Creating the Head and Facial Features
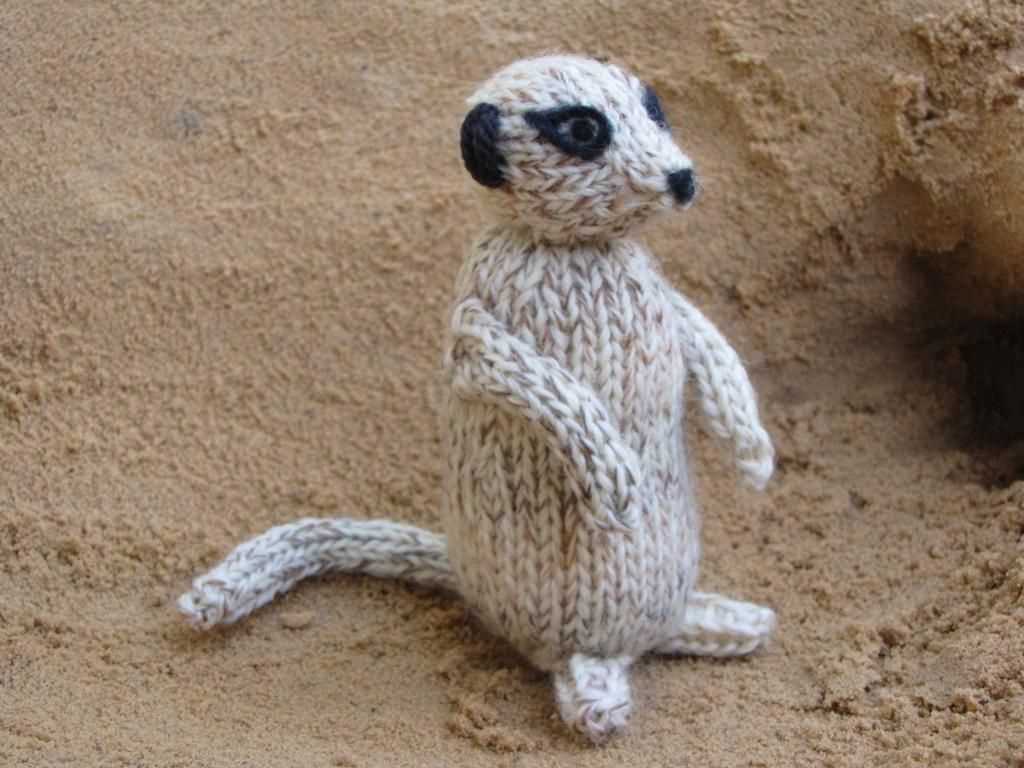
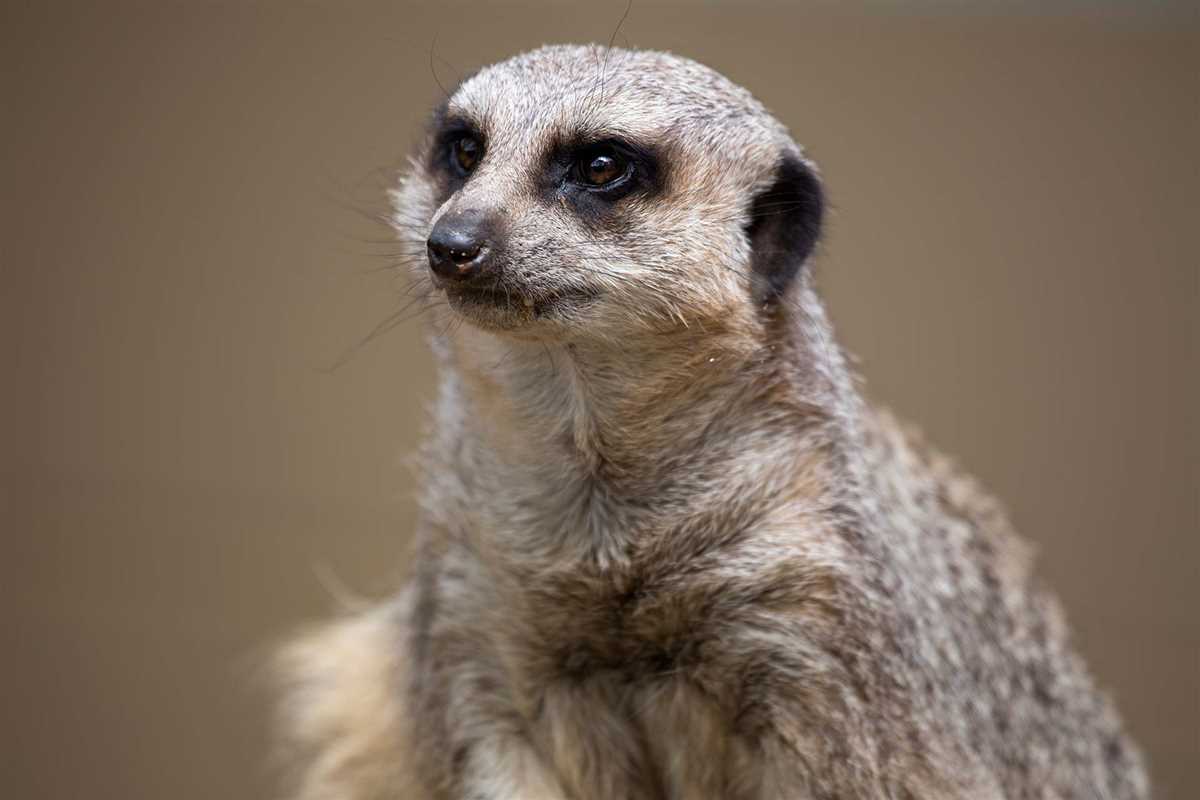
When it comes to creating a meerkat knitting pattern, one of the most important parts to focus on is the head and facial features. These details will bring your knitted meerkat to life and give it its signature adorable look. In this guide, we will walk you through the steps to create a head that captures the essence of a meerkat, complete with its characteristic eyes and nose.
Step 1: Start with the head: Begin by casting on the required number of stitches and knitting in the round to create the basic shape of the head. Be sure to choose a yarn color that matches the light brown color of a meerkat’s fur. You can use double-pointed needles or circular needles, whichever you prefer.
Step 2: Shaping the face: Once you have knitted the basic shape of the head, it’s time to start shaping the face. To create the distinctive meerkat snout, you will need to decrease stitches at specific intervals. You can follow a pattern or create your own by decreasing a stitch on either side of the face every few rows to create a tapered effect.
Step 3: Adding the eyes and nose: To give your knitted meerkat its characteristic facial expression, it’s important to add the eyes and nose. Using black or dark brown yarn, embroider two small circular eyes onto the face, positioning them in the upper part of the head. For the nose, you can either embroider a small triangle shape or use a small black pompom attached firmly to the snout.
Step 4: Finishing touches: Finally, complete the head by adding any additional details you desire. This could include embroidering tiny whiskers or attaching small ears made from brown yarn. Be creative and make your meerkat’s head unique!
By following these steps, you will be well on your way to creating a meerkat knitting pattern with a head and facial features that truly capture the charm of these adorable creatures. Remember to take your time, follow the pattern or your own design, and have fun with the process. Soon enough, you’ll have a knitted meerkat that will make everyone smile!
Meerkat Knitting Pattern: Adding Arms and Legs
When creating a meerkat knitting pattern, adding arms and legs is an essential step to bring your adorable meerkat to life. These limbs add a sense of movement and personality to your knitted creation, making it even more lovable and playful.
Arms: To knit the meerkat’s arms, you can use double-pointed needles or magic loop technique. Start by casting on the required number of stitches, usually between 8 and 12, depending on the size of your meerkat. Divide the stitches equally among the needles and join in the round.
Note: It’s always a good idea to use a stitch marker to indicate the beginning of the round, especially when working with double-pointed needles.
Legs: To add legs to your meerkat, you can either knit them separately and sew them onto the body later or knit them directly onto the body using the technique known as “pick up and knit.” This technique involves picking up stitches along the edge of the body where you want the legs to be and then knitting them.
Tip: Make sure to leave a small gap between the legs for the meerkat’s tail to fit through. This will help with the overall stability and balance of your knitted meerkat.
- For each leg, cast on the required number of stitches, usually between 8 and 12, using double-pointed needles or magic loop technique.
- Pick up and knit stitches along the edge of the body where you want the legs to be.
- Continue knitting in the round until the legs reach the desired length.
- For added detail, you can create small paws by knitting a few rows in a different color or adding embroidery stitches.
As you add arms and legs to your meerkat knitting pattern, remember to stuff them lightly with polyester fiberfill or your preferred stuffing material. This will give them shape and make them more dimensional. Additionally, you can sew small beads or buttons for the meerkat’s eyes and embroider details such as a nose and mouth.
Meerkat Knitting Pattern: Incorporating Details and Texture
Knitting patterns allow crafters to create unique and personalized items, adding their own touch to each project. When it comes to knitting a meerkat, incorporating details and texture can bring this adorable animal to life.
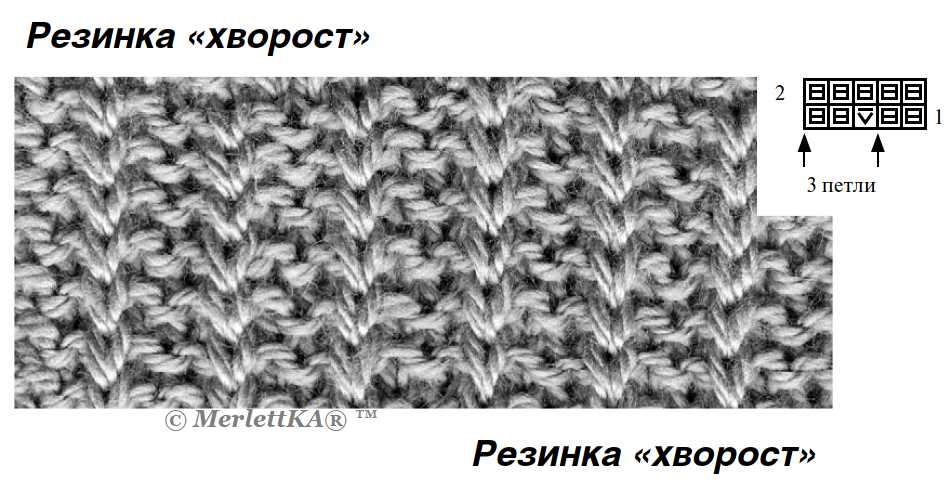
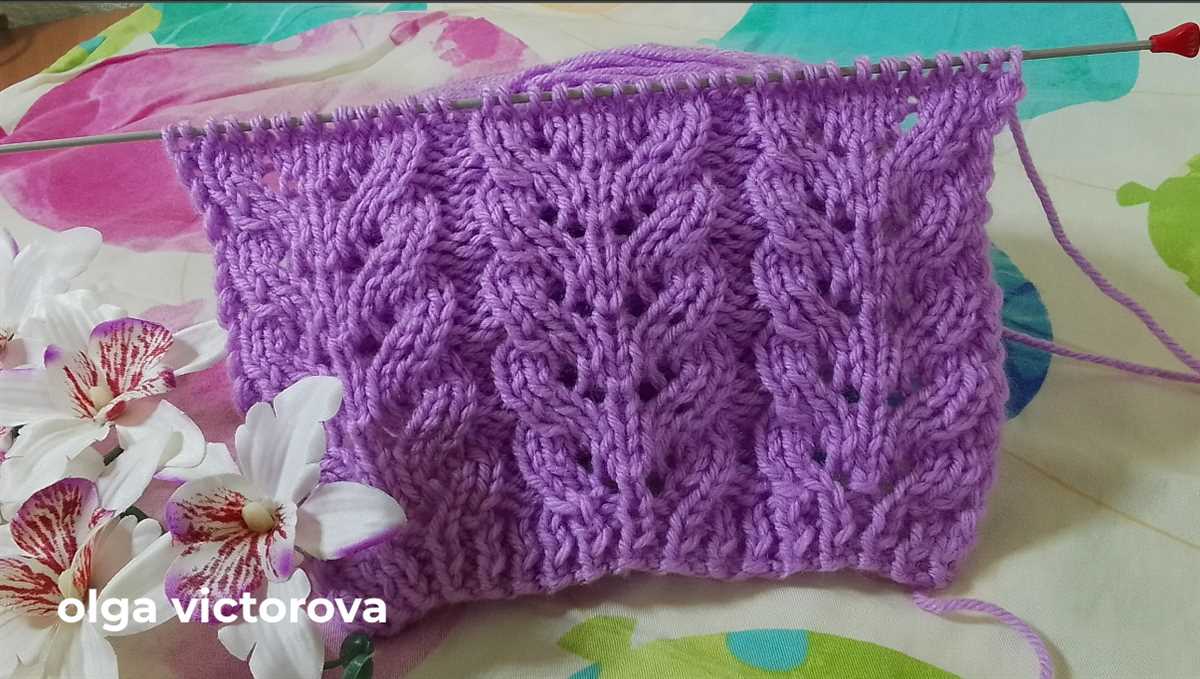
One way to add details to a meerkat knitting pattern is by using different stitch patterns. For the body, you can use a basic stockinette stitch to create a smooth texture, while adding garter stitch or seed stitch to the face and limbs can give them a more textured appearance. Using these different stitch patterns throughout the project can help differentiate between the different parts of the meerkat and make them stand out.
In addition to stitch patterns, incorporating small details like facial features and clothing can also enhance the meerkat knitting pattern. Using embroidery techniques, you can embroider eyes, nose, and mouth on the face, giving the meerkat a more realistic look. Adding a small knitted hat or scarf can also add charm to the finished meerkat, making it appear even more adorable.
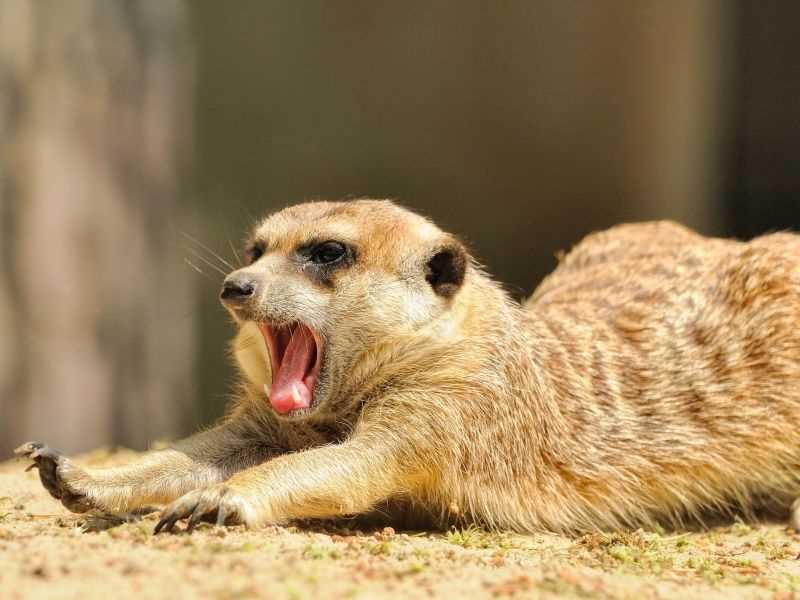
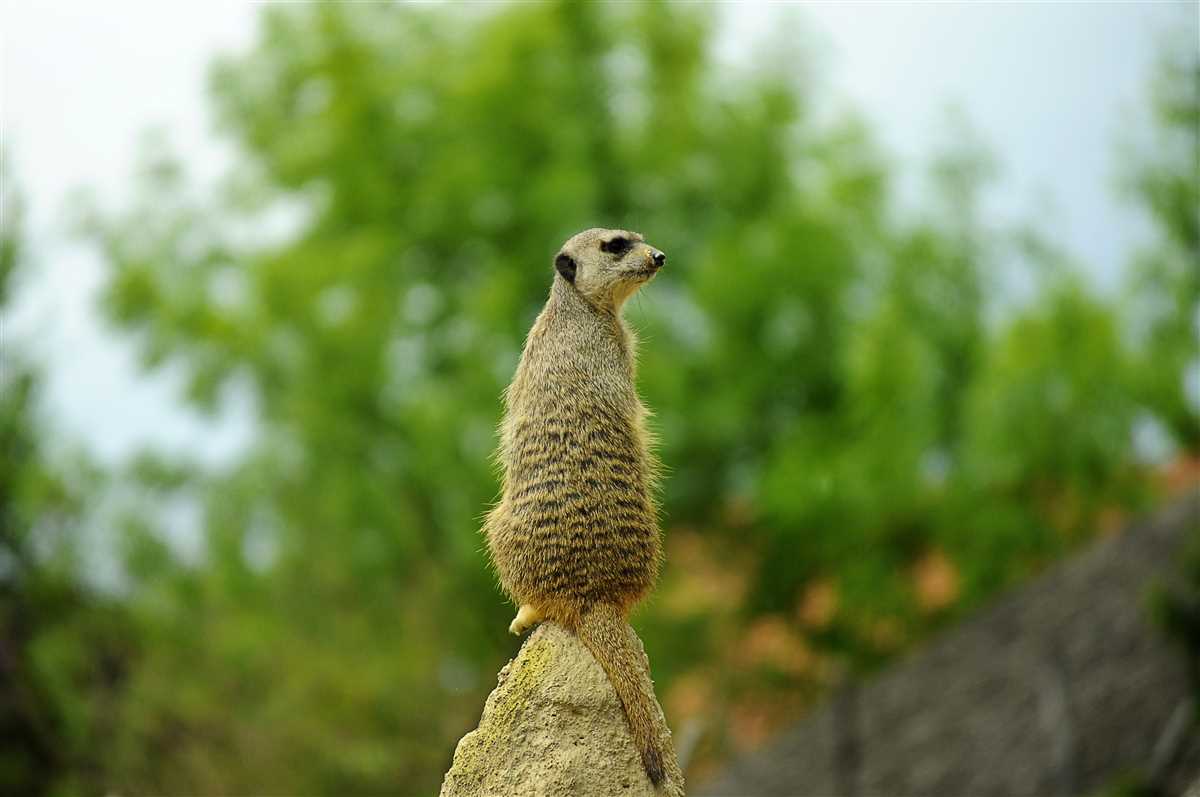
When knitting a meerkat, it’s also important to pay attention to the color choices. Meerkats are known for their distinct fur pattern, with dark bands on their back and a lighter color on their belly. By using different shades of the same color yarn, you can create this distinctive fur pattern, adding depth and visual interest to your knitted meerkat.
In summary, by incorporating details and texture into a meerkat knitting pattern, crafters can create a unique and charming stuffed animal. Using different stitch patterns, adding small details like facial features and clothing, and carefully selecting colors can bring the meerkat to life, making it a delightful project for any knitter.
Meerkat Knitting Pattern: Filling and Shaping the Body
When it comes to creating a meerkat using a knitting pattern, the filling and shaping of the body are crucial steps in bringing the adorable creature to life. In order to achieve a realistic and cuddly meerkat, attention to detail and precision are key.
Filling: To start, gather the necessary materials such as stuffing or fiberfill. It is important to choose a filling that is soft and pliable, allowing you to shape the body easily. Begin by stuffing the head of the meerkat, using small amounts of filling at a time to ensure an even distribution. Take care not to overstuff, as it may result in a misshapen head. As you progress down the body, continue to stuff each section lightly, ensuring a smooth and consistent shape.
Shaping: The shaping of the meerkat’s body is what gives it its distinctive stance and posture. Pay attention to the knitting pattern instructions for shaping, which often involve increases and decreases to shape the body. Make sure to follow these instructions carefully, as they will determine the final look of your meerkat. When shaping the torso, take extra care to define the meerkat’s small waist and slightly rounded belly.
Another important aspect of shaping is creating the meerkat’s limbs. Use wire or pipe cleaners to add stability and allow for posing the meerkat in different positions. Remember to attach the limbs securely to the body, ensuring they are evenly spaced and positioned symmetrically.
By carefully filling and shaping the body according to the knitting pattern, you will be able to create a meerkat that is not only adorable but also true to its real-life counterpart. Take your time and enjoy the process of bringing this fascinating creature to life through the art of knitting.
Meerkat Knitting Pattern: Finishing Touches and Assembly
After completing all the individual parts of your meerkat knitting pattern, it’s time to put them all together and add the finishing touches. This final stage is where you can truly bring your meerkat to life, adding personality and character to your creation.
Assembly:
Start by sewing the body pieces together. Match the front and back pieces together, aligning the edges, and use a whip stitch or back stitch to sew them together. Leave a small opening for stuffing. Once the body is sewn, stuff it firmly with polyester fiberfill or your preferred stuffing material. Make sure to shape the body as you go, making it round and plump.
Next, sew the head pieces together in the same manner as the body. Leave an opening for stuffing and shape the head by adding stuffing. Once the head is stuffed, attach it to the body, ensuring that it is securely sewn in place. This is where you can add safety eyes or sew on button eyes, as well as embroider a nose and mouth if desired.
Finishing Touches:
To complete your meerkat, you can add some additional features such as arms, legs, and a tail. These can be separately knitted or crocheted, depending on your preference. Attach the limbs and tail to the body using the same sewing method mentioned earlier. Consider the pose of your meerkat and position the limbs accordingly to give it a realistic appearance.
Lastly, don’t forget to add any final details such as ear tufts or a crown, if you’re creating a special meerkat with unique characteristics. These can be knitted separately and sewn onto the head with a few small stitches. Once all the finishing touches are complete, your meerkat knitting project will be ready to showcase and delight.
Meerkat Knitting Pattern: Adding Eyes and Final Details
Now that you have completed the main body and limbs of your meerkat, it’s time to add the eyes and final details to bring your knitting project to life. Adding the eyes is an important step as it gives your meerkat its characteristic expression and adds a touch of personality.
1. Embroidering the Eyes
To embroider the eyes, you will need two small black buttons or black yarn. Place the buttons or stitch the yarn in position on the face, slightly below the center of the head. Make sure they are evenly spaced and symmetrical. Use a contrasting thread or yarn to stitch around the buttons or yarn to create the iris of the eyes. This will give your meerkat a realistic look.
2. Adding Facial Features
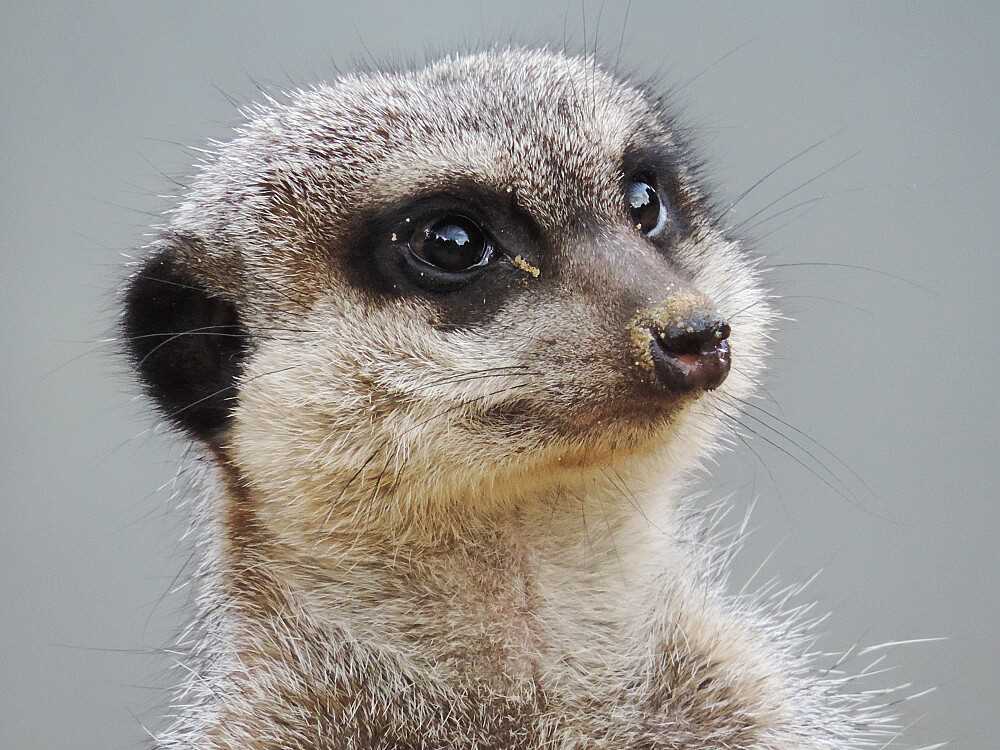
Aside from the eyes, you can also add other facial features to enhance the expression of your meerkat. Use embroidery thread or yarn to embroider a small triangular-shaped nose on the muzzle. You can also add a tiny mouth by stitching a small horizontal line or a small smile shape.
If you want to make your meerkat look even more lifelike, you can create whiskers by attaching thin pieces of yarn or thread to the sides of the muzzle. Cut several short pieces and stitch them in place, ensuring they are evenly spaced.
3. Final Touches
After adding the eyes and facial features, it’s time to add the final touches to complete your meerkat knitting project. You can sew on tiny paws by attaching small felt or fabric pieces to the ends of the limbs. This will give your meerkat a more realistic look and add extra cuteness.
Additionally, you can use embroidery thread or yarn to embroider the meerkat’s claws on the paws. Simply stitch small vertical lines at the tips of the paws to represent claws. This small detail can make a big difference in the overall appearance of your meerkat.
Once you have completed all these steps, your meerkat is ready to be displayed or given as a gift. The eyes and final details bring your knitting project to life and make it truly unique. Enjoy your adorable meerkat creation!
Conclusion

In conclusion, knitting a meerkat using a knitting pattern can be a fun and rewarding project. By following the tips and tricks mentioned in this article, you can ensure that your finished meerkat has a perfect result.
Remember to choose the right yarn and knitting needles, as well as take your time to gauge your tension. Pay attention to the details, such as the facial features and the posture of the meerkat, to make it look authentic.
- Start with smaller, easier knitting projects before attempting the meerkat pattern.
- Use stitch markers to help keep track of your stitches.
- Take breaks and stretch your hands and fingers to avoid strain.
- Don’t be afraid to experiment with different yarn colors and textures to personalize your meerkat.
- Join online knitting communities or forums to get inspiration and seek help if needed.
With practice and patience, you can create a beautiful meerkat that will be a unique addition to your knitting collection or a special gift for someone. Enjoy the process and happy knitting!