
If you’re a fan of knitting and love to create adorable creatures, then this free rooster knitting pattern is perfect for you! Whether you’re a beginner or an experienced knitter, this pattern will guide you through the process of making a charming rooster toy.
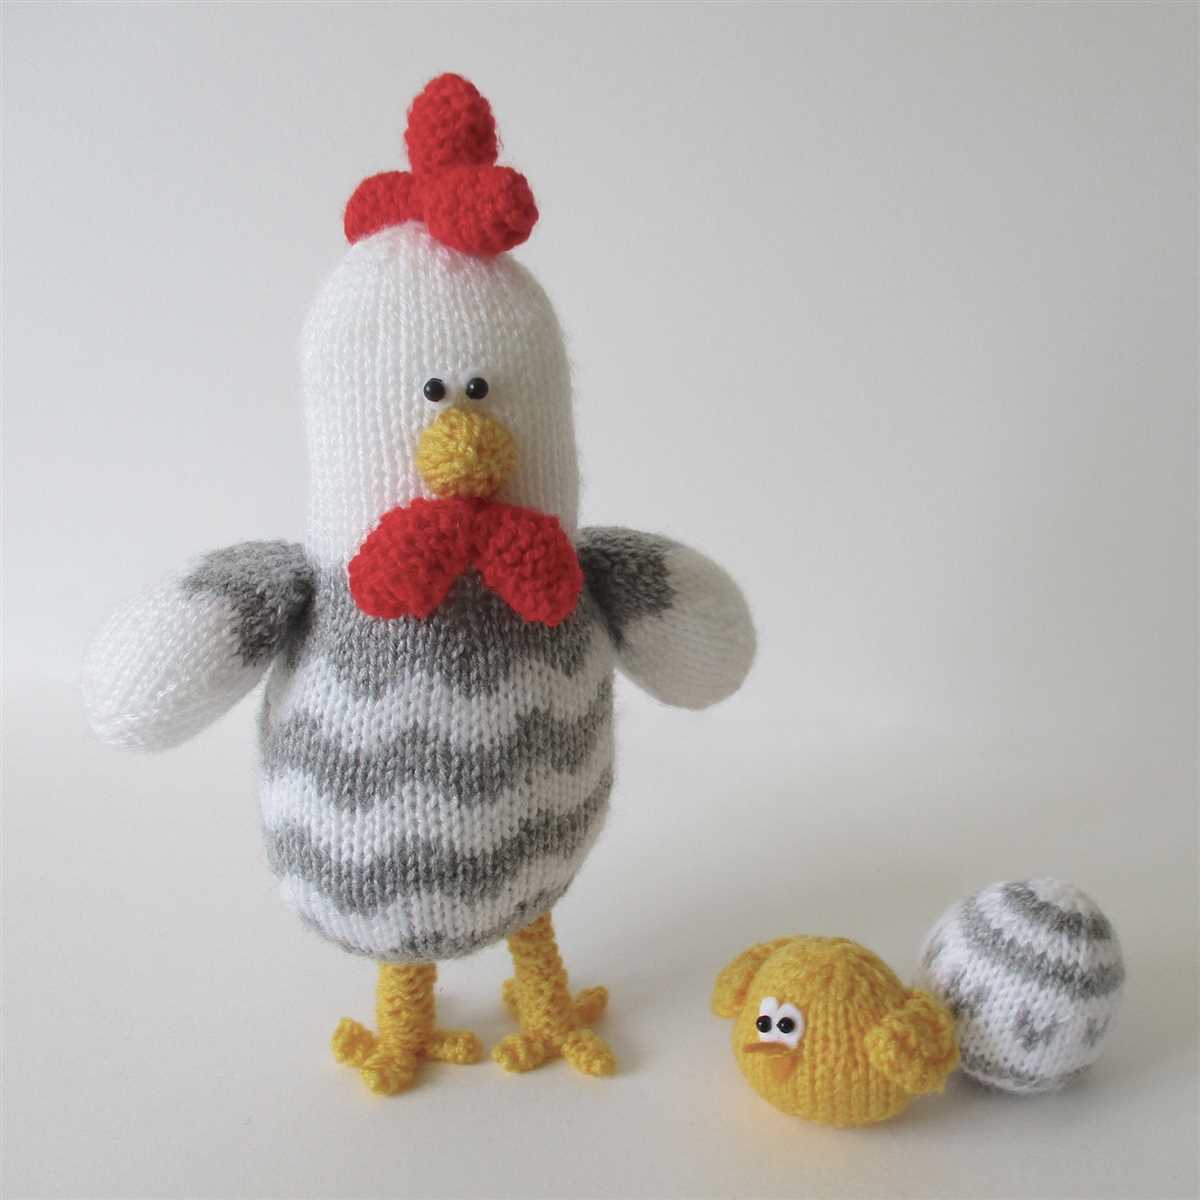
With this pattern, you can create a rooster that is approximately 10 inches tall. The pattern is easy to follow and includes step-by-step instructions, detailed photos, and a list of materials you’ll need. All you need is some yarn, knitting needles, stuffing, and a few basic knitting skills.
The finished rooster will make a wonderful addition to your home decor or a delightful gift for a loved one. You can use different colors of yarn to create a unique and personalized rooster. This pattern is also a great way to practice new knitting techniques and expand your skills.
Free Rooster Knitting Pattern

Are you looking for a fun and unique knitting project? Look no further than this free rooster knitting pattern! Whether you are a beginner or an experienced knitter, this pattern is sure to delight and challenge you. With its vibrant colors and intricate details, the finished rooster will make a perfect addition to your home decor or a thoughtful gift for a loved one.
The pattern includes step-by-step instructions and a list of materials needed. You will need basic knitting skills, such as casting on, knitting, purling, and basic shaping techniques. The pattern also includes tips and tricks to help you achieve the best results, so don’t worry if you are new to knitting roosters.
Materials needed:
- Worsted weight yarn in various colors (red, yellow, black, and white)
- Knitting needles (size will depend on the desired gauge)
- Stuffing material
- Tapestry needle
- Scissors
Instructions:
- Begin by knitting the body of the rooster in the main color. Use a combination of knit and purl stitches to create texture and dimension.
- Next, knit the head and tail feathers separately. These can be made using different colors to add visual interest.
- Once you have completed the individual pieces, seam them together using the tapestry needle. Make sure to stuff the body and feathers lightly as you go.
- Finally, add the finishing touches, such as the beak, comb, and eyes, using embroidery thread or small buttons.
Remember to take your time and enjoy the process of knitting this unique rooster. Feel free to customize the colors and details to suit your personal style. Once you have finished, proudly display your knitted rooster and admire your knitting skills!
Overview

Creating your own knitted rooster can be a fun and rewarding project. With a free rooster knitting pattern, you can customize the colors and details to make it unique to your style. Whether you’re an experienced knitter or just starting out, this pattern is suitable for all skill levels.
The free rooster knitting pattern typically includes step-by-step instructions and detailed diagrams to help you along the way. You’ll need basic knitting skills such as casting on, knit stitches, purl stitches, and simple increases and decreases. The pattern may also require some more advanced techniques, depending on the design and level of detail desired.
Materials


- Yarn in various colors (typically red, yellow, black, and white)
- Knitting needles in the appropriate size (usually US 4 or 5)
- Stuffing material (polyester fiberfill or similar)
- Yarn needle
- Scissors
- Optional: safety eyes or beads for embellishments
Once you have gathered all your materials, you can begin the knitting process. The pattern will usually start with knitting the various parts of the rooster’s body separately, such as the head, body, wings, and tail. These parts are typically knit flat, back and forth in rows.
After all the body parts are complete, you will then sew them together using the yarn needle. The pattern will usually provide instructions on how to attach each section to create the rooster’s body. Once the body is assembled, you can stuff it with the chosen stuffing material to give it shape and dimension. Finally, you will add any remaining details, such as the beak, comb, and eyes, to bring your knitted rooster to life.
Feel free to get creative with your color choices and embellishments to make your knitted rooster truly unique. Once you’re finished, yo
Materials

Before you start knitting your free rooster, make sure you have all the necessary materials. Here is a list of what you will need:
- Yarn: Choose a yarn that matches the desired color for your rooster. You will need a medium weight yarn, preferably in bright and vibrant colors.
- Knitting Needles: You will need a pair of knitting needles in the appropriate size for your chosen yarn. Check the yarn label for recommended needle size.
- Yarn Needle: A yarn needle will be necessary for weaving in ends and sewing different parts of the rooster together.
- Scissors: Make sure you have a pair of scissors handy for cutting the yarn and trimming any excess.
- Stuffing: For the rooster’s body, you will need some stuffing material to give it a fluffy and three-dimensional look.
These are the basic materials you will need to get started with your free rooster knitting pattern. Make sure you have everything prepared before you begin, so you can enjoy a smooth and enjoyable knitting process.
Gauge

Gauge is an important concept to understand when knitting a project. It refers to the number of stitches and rows per inch that you achieve using a specific yarn and needle size. Following the recommended gauge ensures that your finished project will have the correct measurements and fit as intended.
To determine your gauge, you will need to knit a swatch using the yarn and needles specified in the pattern. The swatch should be large enough to measure accurately, usually around 4 inches square. The number of stitches and rows in this swatch will give you an idea of your gauge.
When knitting a project, it is crucial to match the gauge given in the pattern. If your gauge is too loose, meaning you have fewer stitches and rows per inch than the pattern calls for, your project will turn out larger than anticipated. Conversely, if your gauge is too tight, with more stitches and rows per inch than specified, your project will end up smaller.
Achieving the correct gauge requires selecting the appropriate yarn and needle size combination. If your gauge is off, you may need to adjust your needle size to achieve the desired measurements. It’s worth taking the time to knit a gauge swatch before starting your project to ensure a successful outcome.
Abbreviations

When working with knitting patterns, you may come across various abbreviations that represent specific knit stitches or techniques. Familiarizing yourself with these abbreviations is essential in order to accurately follow the pattern and create the desired result.
Here are some common knitting abbreviations you may encounter:
- K: Knit
- P: Purl
- YO: Yarn Over
- SSK: Slip, Slip, Knit
- K2tog: Knit Two Together
- P2tog: Purl Two Together
- PM: Place Marker
- SM: Slip Marker
- RS: Right Side
- WS: Wrong Side
Using these abbreviations in knitting patterns allows for a concise and standardized way of conveying instructions. Keep a reference guide handy or familiarize yourself with these abbreviations to make your knitting journey smoother and more enjoyable.
Instructions

Follow these step-by-step instructions to knit your own free rooster using the provided knitting pattern. Make sure you have all the necessary materials before you begin.
Materials
- Yarn: Choose any color yarn of your choice. The recommended yarn weight is medium (worsted) and you will need approximately 100g.
- Knitting needles: Use size 4mm (US 6) knitting needles or the appropriate size to achieve the desired gauge.
- Scissors: A pair of sharp scissors will be needed to cut the yarn.
- Tapestry needle: This type of needle with a large eye will be used for sewing and weaving in ends.
- Toy stuffing: You will need stuffing to give your rooster shape and make it soft to the touch.
- Stitch markers: These will help you keep track of your stitches and marker rounds.
Instructions

- Cast on: Start by casting on 20 stitches using your preferred cast-on method.
- Body: Knit in the round for 10 rows to create the body of the rooster.
- Wings: Decrease stitches on each side to shape the wings. Follow the pattern for the specific number of rows and decreases.
- Beak: Knit a small triangle in a different color yarn and sew it onto the rooster’s head to create the beak.
- Comb: Knit a small rectangular piece and sew it onto the top of the rooster’s head to create the comb.
- Eyes: Embroider or use small beads to create the rooster’s eyes.
- Finishing: Stuff your rooster with toy stuffing and sew the bottom closed. Weave in any remaining ends.
- Enjoy: Your free rooster knitting pattern is complete! Display your beautiful creation or give it as a unique handmade gift.
Body

The body is the central and largest part of the rooster knitting pattern. It is where the majority of the stitches will be worked and it forms the base for the rest of the rooster’s features. To create the body, you will need to follow the instructions for casting on and knitting in the round. Make sure to pay attention to the stitch count and any shaping that may be required.
Start by casting on the required number of stitches onto your knitting needles. This will typically be done using the long tail cast on method. Once the stitches are cast on, join in the round by knitting the first stitch and bringing the working yarn to the back of the work. This will create a continuous loop.
To create the body, you will be working in stockinette stitch, which means knitting every round. This will create a smooth and even fabric, perfect for the rooster’s body. Continue knitting in the round until the body measures the desired length, as specified in the knitting pattern. Make sure to periodically check your gauge to ensure that the body is being knit to the correct size.
Once the body is complete, it is important to bind off the stitches to secure the fabric and prevent any unraveling. This is typically done by knitting two stitches, then passing the first stitch over the second stitch and off the needle. Repeat this process until all stitches are bound off. Cut the yarn, leaving a long tail for seaming and weaving in ends.
Head

The head is an important part of the rooster knitting pattern. It is where you will create the distinctive features of the rooster, such as the comb and the wattle. The head should be knit using a larger needle size to give it a bit of extra structure and dimension.
To start knitting the head, you will need to cast on a certain number of stitches, depending on the size of the rooster you want to create. The pattern will typically provide you with specific instructions for casting on and knitting the head.
Once you have cast on, you can begin shaping the head by increasing or decreasing stitches as needed. This will help to create the rounded shape of the rooster head. You can also incorporate color changes at this stage to add additional detail and character to the head.
The comb and the wattle are two key features of the rooster’s head. These can be knit separately and then sewn onto the head, or they can be created as part of the head itself by knitting them in a different color yarn. Either way, the comb and the wattle should be knit using a smaller needle size to make them stand out and add texture to the head.
Once the head is complete, you can attach it to the body of the rooster and continue knitting the rest of the pattern. The head is an essential component of the rooster knitting pattern, as it brings the character and personality of the rooster to life.
Wings

The wings are an essential part of the rooster knitting pattern. They add depth and texture to the overall design, giving the finished product a more realistic and detailed look.
To create the wings, start by casting on the required number of stitches using the specified yarn and needle size. Work in the designated stitch pattern, following the instructions carefully to create the desired shape and size of the wings.
To make the wings stand out, consider using a contrasting color yarn or adding embellishments such as feathers or beads. This will add an extra touch of visual interest and make the wings pop.
Once the wings are complete, carefully sew them onto the body of the rooster using a tapestry needle and the same yarn used to create the wings. Make sure to position them symmetrically and securely attach them to ensure they stay in place.
By adding wings to your knitted rooster, you can elevate the overall design and create a more dynamic and lifelike finish. Experiment with different yarns, colors, and stitch patterns to customize the wings and make them uniquely yours.
Legs

The legs are an important part of the rooster’s anatomy, providing support and enabling movement. In this free rooster knitting pattern, the legs are created using a combination of knitting and crochet techniques to achieve the desired shape and functionality.
To create the legs, start by knitting a long rectangle using the main color yarn. This rectangle will be folded in half and sewn together to form the leg. Make sure to leave a small opening at the top of the leg to attach it to the body later.
Next, use a contrasting color yarn to crochet the toes. Start with a magic circle and work single crochet stitches into it, gradually increasing the stitch count to create a rounded shape. Repeat this process four times to make the four toes for each leg.
Once the toes are completed, sew them onto the bottom of the leg, evenly spaced apart. This will give the rooster’s legs a realistic look. Use a tapestry needle and matching yarn to securely attach the toes to the leg.
To finish the legs, stuff them lightly with fiberfill to give them a plump and rounded appearance. Then, sew the opening at the top of the leg closed using the same yarn color. Make sure the stitches are tight and secure to prevent any stuffing from coming out.
Once the legs are completed, they can be attached to the body of the rooster using a tapestry needle and matching yarn. Sew the legs onto the body at the desired position, making sure they are evenly spaced and securely attached.
Finishing Touches
Once you have finished knitting your rooster, it’s time to add some finishing touches to bring it to life. Here are a few final steps to complete your project:
1. Sewing the Pieces Together: Use a yarn needle to sew the various pieces of the rooster together. Start by sewing the back and front body pieces together, leaving an opening for stuffing. Attach the wings and tail feathers to the body, and sew the head and comb onto the top. Finally, sew on the eyes and beak to give the rooster a face.
2. Stuffing: Once the pieces are sewn together, stuff the rooster firmly with polyester fiberfill or a similar stuffing material. Make sure to fill all the areas evenly to give the rooster a rounded shape.
3. Embroidery Details: Use embroidery floss or yarn in contrasting colors to add details to your rooster. You can embroider the feathers, beak, and eyes to give them more definition and bring out the rooster’s features.
4. Final Touches: Give your rooster a final inspection and make any necessary adjustments. Check for loose threads, uneven stuffing, or any other imperfections. Once you are satisfied with the overall look, trim any excess yarn and secure the ends.
With these finishing touches, your knitted rooster is ready to make a statement as a charming decoration or a gift for someone special. Enjoy the process of creating your own unique rooster and have fun experimenting with different colors and patterns!