
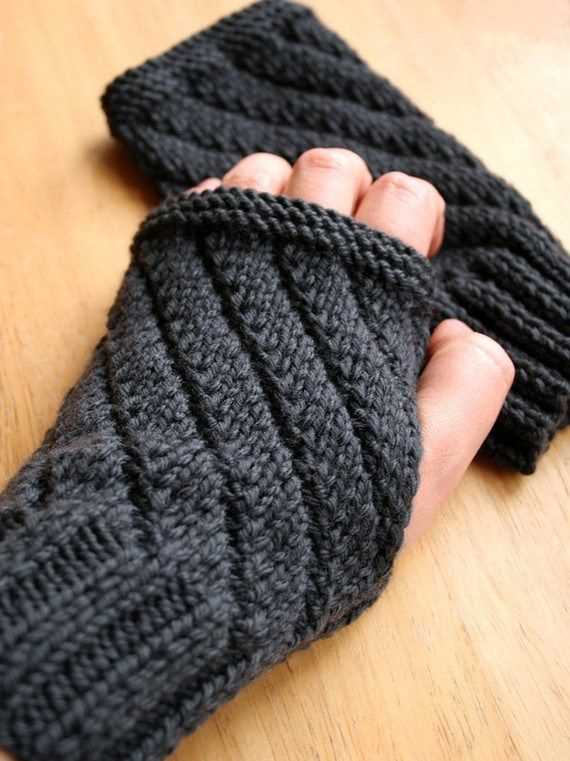
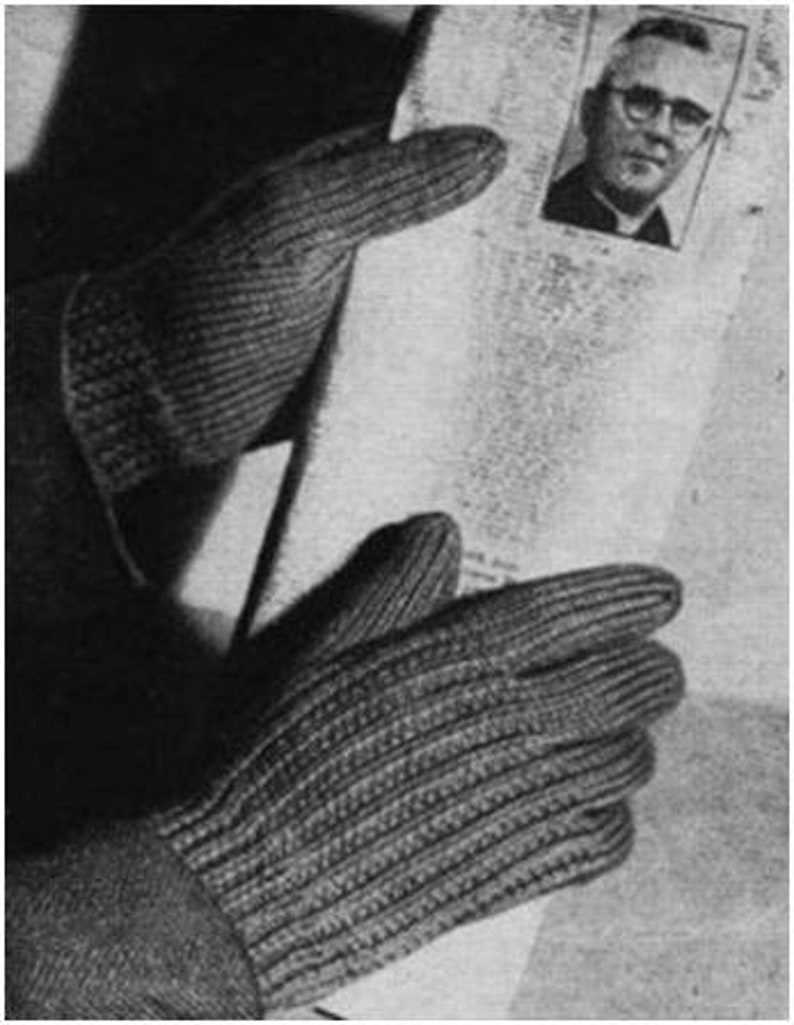
Knitting is a timeless craft that provides both relaxation and creativity. One of the most popular projects for knitters is creating gloves. Fingerless gloves, in particular, have become a popular accessory for both men and women, offering warmth and freedom of movement. With this free knitting pattern, you can create a stylish and functional pair of fingerless gloves specifically designed for men.
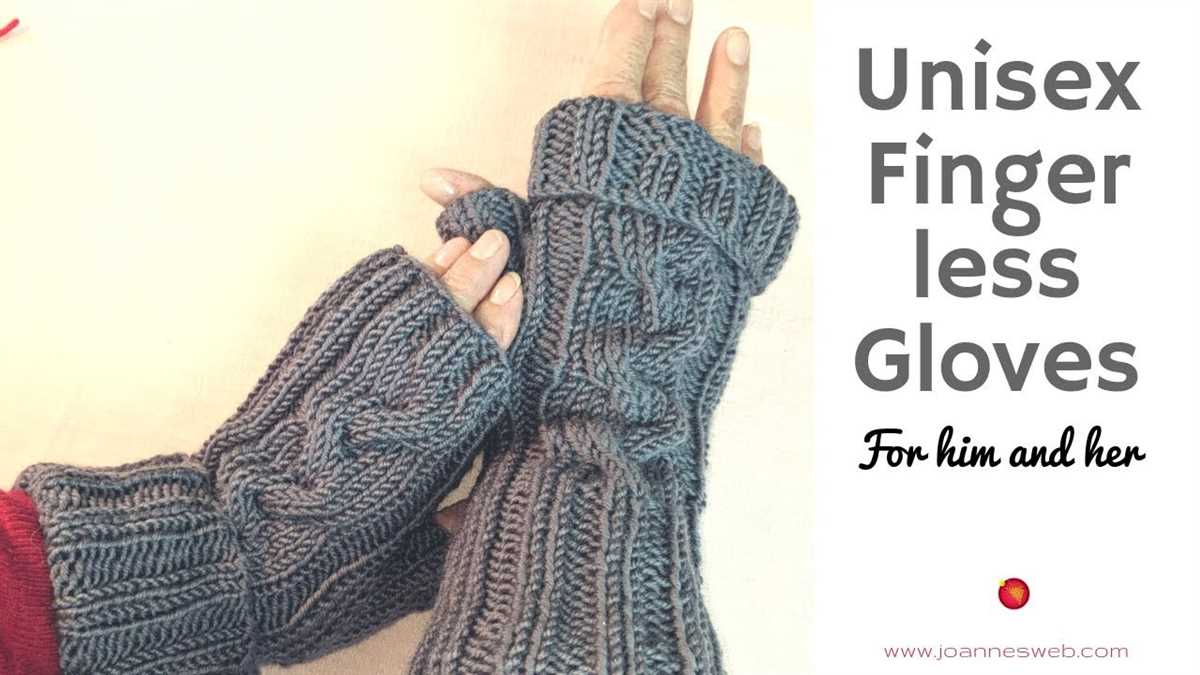
These men’s fingerless gloves are perfect for outdoor activities or simply keeping warm during the colder months. The pattern is designed to be simple and easy to follow, making it suitable for knitters of all skill levels. With just a few basic stitches, you can create a pair of gloves that are not only stylish but also practical.
The pattern includes instructions for two sizes, allowing you to customize the gloves to fit your hands perfectly. Whether you prefer a snug fit or a looser style, you can easily adjust the pattern to suit your needs. Additionally, the pattern includes tips on how to add extra warmth to the gloves, such as adding a lining or using a bulkier yarn.
So, if you’re looking for a fun and practical knitting project, why not give this free pattern a try? You’ll be able to create a pair of fingerless gloves that are not only stylish but also provide warmth and comfort during the colder months. Start knitting today and enjoy the satisfaction of creating something with your own two hands.
Free Knitting Pattern for Men’s Fingerless Gloves
If you’re looking for a knitting pattern for men’s fingerless gloves, you’ve come to the right place. Fingerless gloves are a great accessory for men, providing warmth and comfort while allowing the fingers to remain free for tasks that require dexterity. With this free knitting pattern, you’ll be able to create a stylish and practical pair of fingerless gloves for the men in your life.
To get started, you’ll need the following materials:
- Yarn: Choose a soft and warm yarn in a color of your choice.
- Needles: Use a set of double-pointed needles in a size appropriate for your yarn.
- Tapestry needle: This will be used for weaving in ends and sewing up the gloves.
- Stitch markers: These will help you keep track of your stitches.
Once you have your materials ready, it’s time to cast on and get knitting! Follow the instructions below:
- Cast on 40 stitches, distributing them evenly across 4 needles.
- Join in the round, being careful not to twist your stitches.
- Knit all stitches for 2 inches to create the ribbed cuff.
- Switch to stockinette stitch and continue knitting until the glove measures 6 inches from the cast on edge.
- Start shaping the thumb gusset by knitting across the first 20 stitches, placing a stitch marker, and then increasing 1 stitch. Knit to the end of the round.
- Continue knitting in stockinette stitch until the glove measures 7 inches from the cast on edge.
- Create the thumb opening by placing half of the stitches (20 stitches) on a stitch holder or scrap yarn.
- Knit across the remaining 20 stitches, continuing in stockinette stitch for another 1 inch.
- Bind off all stitches and weave in any loose ends.
Once you’ve finished knitting both gloves, you can sew up any open seams using the tapestry needle. And there you have it – a pair of fingerless gloves that are perfect for men!
Remember, this is just one example of a knitting pattern for men’s fingerless gloves. Feel free to customize the pattern to suit your preferences, whether it’s changing the yarn color, adding a cable pattern, or adjusting the size. Happy knitting!
Choosing the Right Yarn and Needles
When it comes to knitting fingerless gloves for men, choosing the right yarn and needles is key to creating a comfortable and stylish finished product. The type of yarn you select will determine the overall look and feel of the gloves, while the needles you use will impact the gauge and size of the stitches.
Yarn: Opt for a yarn that is not only soft and comfortable, but also durable and warm. Natural fiber yarns such as merino wool or alpaca are excellent choices as they provide warmth without being too heavy. Additionally, these fibers have moisture-wicking properties, which makes them ideal for fingerless gloves that may be exposed to sweat or moisture.
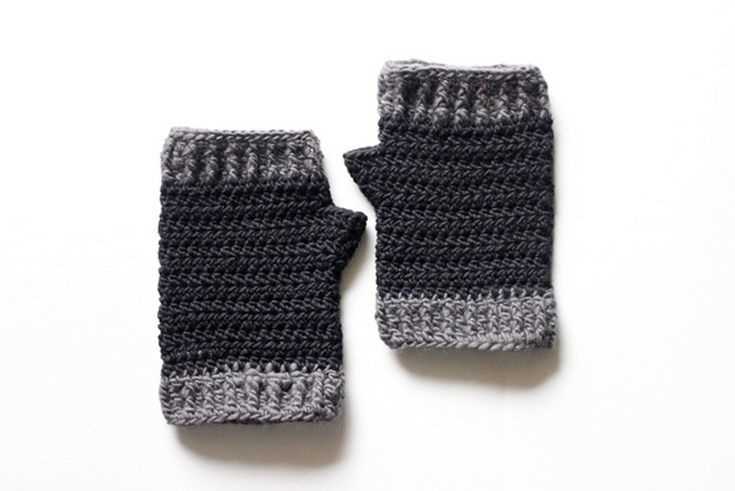
When it comes to color, consider the recipient’s personal style and preference. Solid, neutral tones like black, gray, or navy are versatile and timeless, while bold or variegated colors can add a pop of personality to the gloves.
Needles: The size of the needles you use will determine the gauge and overall size of the gloves. Look for a pair of needles that match the recommended gauge for the pattern you are following. Typically, fingerless gloves are knit with smaller gauge needles such as US size 5 or 6 (3.75mm – 4mm). These smaller needles will create a tighter fabric, which is ideal for keeping warmth in and wind out.
In addition to the size, consider the material of the needles. Metal or plastic needles are popular choices due to their smoothness and durability. Some knitters prefer wooden or bamboo needles for their warmth and light weight. Ultimately, the choice of needle material comes down to personal preference and knitting style.
Remember, finding the right yarn and needles is an important step in ensuring the success of your fingerless gloves. Take the time to choose materials that not only meet the requirements of the pattern but also align with the recipient’s preferences and needs.
Getting Started with the Cuff
When starting to knit men’s fingerless gloves, it is important to begin with the cuff. The cuff is the part of the glove that goes around the wrist and helps to keep it snug and secure. To ensure a comfortable fit, it is recommended to measure the circumference of the wearer’s wrist and adjust the number of stitches accordingly.
Once you have determined the appropriate number of stitches for the cuff, cast them onto your knitting needles. It is common to use a smaller needle size for the cuff to create a tighter, more secure fabric. Secure the yarn end and begin knitting in the round, either using circular needles or double-pointed needles.
Pattern Tip: To create a stretchy cuff, it is common to use a rib stitch pattern, such as a 1×1 rib or a 2×2 rib. These patterns involve alternating knit and purl stitches to create a textured fabric that has elasticity. It is important to maintain the rib pattern throughout the cuff to ensure a consistent look and fit.
If you prefer a simpler cuff, you can also choose to work in a basic stockinette stitch. This stitch involves knitting every round and creates a smooth, uniform fabric. However, keep in mind that stockinette stitch is less stretchy than rib stitch and may result in a looser fit.
Continue knitting the cuff until it reaches the desired length. The length of the cuff can vary depending on personal preference, but generally, it should be long enough to cover the wrist and provide a comfortable fit. Once the cuff is complete, you can proceed to the next section of the glove pattern, which may involve shaping the hand or adding additional stitch patterns.
Knitting the Hand Section
Once you have finished knitting the cuff of your men’s fingerless gloves, it’s time to move on to the hand section. This is where you will continue to knit in the round, shaping the gloves to fit your hand perfectly.
To begin, make sure you have enough stitches on your needles from the cuff. If you need to, you can increase or decrease the number of stitches to ensure a snug fit. Remember that fingerless gloves should be slightly tighter than regular gloves to keep them in place during wear.
Next, you can start working the hand section of the gloves. You can choose to continue with the same stitch pattern as the cuff, or mix it up with a different stitch pattern for some variety. Knit several rounds in the desired stitch pattern until the hand section measures the desired length.
Don’t forget to periodically try on your gloves as you knit to ensure they fit properly. Adjustments can be made by increasing or decreasing stitches as needed. Also, keep in mind that the hand section should be slightly wider than the cuff to accommodate for the wider part of your hand.
Once you have reached the desired length for the hand section, it’s time to shape the fingers. You can do this by separating the stitches for each finger using stitch markers. This will allow you to knit each finger separately, creating a more customized fit.
Continue knitting each finger separately, decreasing stitches gradually to shape the fingers. You can choose to make full fingers or fingerless tips, depending on your preference. Once all the fingers are complete, you can finish off the gloves by casting off and weaving in any loose ends.
Remember to follow the knitting pattern you are using for more specific instructions and stitch counts. With a little patience and practice, you’ll soon have a pair of cozy fingerless gloves that are perfect for keeping your hands warm during the colder months!
Adding Ribbing for a Snug Fit
One of the key elements to consider when knitting fingerless gloves for men is ensuring a snug and comfortable fit. Adding ribbing to the cuffs can help achieve this desired fit. Ribbing creates a stretchy and flexible band that molds to the wrist and prevents the gloves from slipping off. It also provides a polished and professional finish to the gloves.
To add ribbing to the fingerless gloves, you can use a simple rib stitch pattern such as knit 1, purl 1 (K1, P1) or knit 2, purl 2 (K2, P2). The rib stitch creates alternating columns of knit and purl stitches, giving the cuffs elasticity. This flexibility allows the gloves to fit a range of hand sizes comfortably.
Step 1: Before starting the ribbing, make sure to cast on the required number of stitches for the cuff section. This will depend on the pattern or desired width of the cuffs.
Step 2: Begin the ribbing by working the first row in the desired rib stitch pattern. For example, if using K1, P1, knit the first stitch, then purl the next stitch, and continue this pattern across the row.
Step 3: Continue working the rib stitch pattern for the desired length of the cuffs. This can vary depending on personal preference, but a common length is around 2-3 inches (5-7.5 cm) for men’s fingerless gloves.
Step 4: After completing the desired length of ribbing, you can then switch to the main stitch pattern for the hand section of the gloves. This can be a plain knit stitch or any other stitch pattern of your choice.
By adding ribbing to the cuffs of men’s fingerless gloves, you can ensure a snug and comfortable fit that will stay in place during wear. Experiment with different rib stitch patterns and cuff lengths to achieve the perfect fit for your knitting project.
Creating the Thumb Opening

The thumb opening is an essential feature of fingerless gloves to allow for ease of movement and practicality. Follow these steps to create the thumb opening in your knitted gloves:
1. Divide the Stitches
To create the thumb opening, you will need to divide the stitches on your needles. Take your working yarn and knit the specified number of stitches for the thumb opening onto a separate piece of waste yarn. This will keep them secure while you continue knitting the rest of the glove.
2. Join New Yarn
Once you have securely placed the thumb stitches on waste yarn, join a new ball of yarn to begin knitting the remaining stitches. Ensure that you leave a long enough tail for weaving in later. Although the yarn will be split for the thumb, it is important to maintain tension and consistency throughout the glove.
3. Continue Knitting
With the new yarn, continue knitting the remaining stitches in the desired pattern, whether it is ribbing, stockinette stitch, or any other. Make sure to follow the pattern instructions precisely to ensure a consistent look throughout the glove.
4. Return to Thumb Stitches
Once you have completed knitting the main body of the glove, it is time to return to the thumb stitches. Carefully remove the waste yarn and transfer the stitches back onto your needles. You may need to rearrange the stitches to ensure they are in the correct order.
5. Knit the Thumb
With the thumb stitches back on your needles, pick up the working yarn again. Follow the pattern instructions to knit the thumb section, whether it involves knitting in the round or knitting flat and seaming later. Pay attention to any shaping or decreases that may be required to create a snug and comfortable fit.
- Make sure to try on the gloves as you go to check the fit and make any necessary adjustments.
- Remember to weave in any loose ends and trim excess yarn before wearing your finished fingerless gloves.
Knitting the Thumb Section
Once you have completed the hand section of the fingerless gloves, it’s time to move on to knitting the thumb section. The thumb section is an integral part of the gloves, as it provides flexibility and functionality for the wearer.
To begin knitting the thumb section, you will need to pick up stitches along the side of the hand section where the thumb will be located. This can be done by using a crochet hook or your knitting needles to pull up a loop of yarn through the edge stitches.
Tip: Make sure to pick up enough stitches to create a thumb opening that is comfortable for the wearer. You can adjust the number of stitches you pick up depending on the size of the wearer’s thumb.
Once you have picked up the stitches, you can begin knitting the thumb section. This can be done in the round or back and forth, depending on your preference. If knitting in the round, you will continue knitting in the established pattern until the thumb section reaches the desired length.
If knitting back and forth, you will knit one row, then purl the next row, repeating this pattern until the thumb section reaches the desired length. This will create a stretchy and comfortable thumb section.
Tip: To ensure a snug fit, you can decrease a few stitches towards the top of the thumb section. This will create a tapered shape that hugs the thumb comfortably.
Once the thumb section is complete, you can bind off the stitches and weave in any loose ends. Congratulations, you have now finished knitting the thumb section of the fingerless gloves!
Shaping the Fingers
When knitting fingerless gloves, one of the important steps is shaping the fingers to ensure a comfortable fit. This involves creating individual spaces for each finger, allowing for freedom of movement while keeping the hands warm.
To begin shaping the fingers, you’ll need to divide the stitches from the hand portion of the glove onto multiple double-pointed needles or use the magic loop method. This will allow you to work on each finger separately.
For each finger, you’ll typically decrease the number of stitches gradually to create a tapered shape. This can be done by working a series of decrease rounds every few rows or by using a specific finger-shaping pattern. The specific instructions for shaping the fingers may vary depending on the knitting pattern you are following.
It’s important to pay attention to the sizing and measurements provided in the pattern to ensure a proper fit. You may need to adjust the number of stitches or the length of the finger section to accommodate your specific hand size.
Once the finger shaping is complete, you can continue knitting the rest of the glove pattern, such as the wristband or cuff. After completing all the knitting, you’ll typically finish off the glove by seaming any remaining gaps and weaving in loose ends.
Shaping the fingers in fingerless gloves can be a fun and rewarding process. With the right pattern and careful attention to detail, you can create a pair of gloves that not only look stylish but also provide optimal comfort and functionality.
Working the Finger Openings

Once you have completed the ribbed cuff and the main body of the fingerless gloves, it’s time to work on the finger openings. This is where you will create the spaces for the fingers to protrude, allowing for maximum dexterity while keeping the hands warm.
To begin, you will need to switch to double-pointed needles or use the magic loop method if you prefer. This will allow you to work in a smaller circumference for the finger openings.
Step 1: Divide the stitches evenly onto three or four double-pointed needles, depending on your preference. Make sure to maintain the established stitch pattern as you distribute the stitches.
Step 2: Using your preferred method for working in the round, continue knitting in the established stitch pattern until you reach the desired length for the finger openings. Typically, this is around 1-2 inches, but feel free to adjust according to your preference.
Step 3: Once you have reached the desired length, it’s time to create the finger openings. Begin by knitting the first stitch on the next needle, then slip the second stitch onto the right needle without knitting it. Pass the first stitch over the slipped stitch to create a bind off. Repeat this process for all the stitches on the needle.
Step 4: Continue working in this manner, knitting one stitch and binding off the next, until you reach the end of the needle. Then, move on to the next needle and repeat the process until all the stitches on all the needles have been bound off. Cut the yarn, leaving a long tail for weaving in later.
Step 5: To finish the finger openings, thread the yarn tail onto a tapestry needle and sew the remaining live stitches closed. Weave in any loose ends and trim excess yarn.
And there you have it! Your fingerless gloves with perfectly sized finger openings are ready to keep your hands warm while allowing for easy movement and functionality. Now you can enjoy your favorite activities without compromising on comfort.
Finishing Off the Gloves
Once you have completed knitting the fingerless gloves according to the pattern instructions, you will need to finish off the gloves to give them a polished and professional look. This involves several steps, including weaving in the loose ends, blocking the gloves, and adding any desired embellishments.
Weaving in the Loose Ends: To start, use a yarn needle to carefully weave in the loose ends of yarn that were created during the knitting process. Thread the needle with the loose end of yarn and sew it into the knitted fabric, making sure to follow the existing stitches to ensure the end is securely fastened. Repeat this process for any remaining loose ends.
Blocking the Gloves: Blocking is an important step in finishing knitted items, as it helps to even out the stitches and shape the gloves. To block the gloves, soak them in lukewarm water with a mild detergent for about 15 minutes. Gently squeeze out the excess water, then carefully reshape the gloves to the desired size and shape. Lay them flat on a towel to dry, making sure to smooth out any wrinkles or kinks in the fabric as they dry.
Adding Embellishments: If desired, you can add embellishments to your fingerless gloves to personalize them or add extra flair. This could include buttons, beads, or embroidery. Sew on any desired embellishments using a needle and thread, taking care to secure them firmly in place. This is a great opportunity to get creative and make your fingerless gloves truly unique.
By following these finishing steps, you can ensure that your fingerless gloves are completed to a high standard and are ready to be enjoyed. Take your time with the finishing touches, as they can really make a difference in the overall appearance of the gloves. Once finished, your fingerless gloves will be both functional and fashionable, keeping your hands warm while adding a stylish touch to your outfit.
Blocking and Care Instructions

After completing your men’s fingerless gloves, it’s important to properly block and care for them to ensure they maintain their shape, fit, and durability. Here are some instructions to follow:
Blocking:
- Before blocking, gently wash your fingerless gloves in lukewarm water using a mild detergent.
- Do not twist or wring the gloves, but carefully squeeze out excess water.
- Lay the gloves flat on a clean towel and smooth them out to their desired shape and size.
- Pin the edges of the gloves to the towel, ensuring they stay in place while drying.
- Leave the gloves to air dry completely, away from direct sunlight or heat sources.
Care Instructions:
- Hand wash your fingerless gloves using a gentle detergent and lukewarm water.
- Do not bleach or use harsh chemicals on the gloves.
- Gently squeeze out excess water and lay the gloves flat to dry.
- Avoid hanging the gloves, as this can stretch them out of shape.
- If necessary, reshape the gloves while damp and lay them flat again to dry.
- Store the gloves in a clean, dry place to prevent any damage or unwanted odors.
Following these blocking and care instructions will help keep your men’s fingerless gloves looking and feeling great for years to come. Enjoy the warmth and style they bring to your winter outfits!
Adding Personalized Touches
When it comes to knitting men’s fingerless gloves, adding personalized touches can make them even more special. Whether you are making them as a gift for someone or for yourself, customizing the gloves allows you to create something unique and tailored to your preferences.
Choosing the Right Yarn: One way to add a personalized touch is by selecting the right yarn. Consider the color, texture, and weight of the yarn. If you’re knitting for someone else, think about their favorite colors or their wardrobe style. You can go for a classic and neutral color, or you can opt for a bold and vibrant shade to make a statement.
Embroidery and Appliques: Another way to personalize fingerless gloves is by adding embroidery or appliques. You can use a contrasting color of yarn to stitch initials, names, or even small designs onto the gloves. This adds a personal touch and makes the gloves truly one-of-a-kind. Consider using duplicate stitch or surface crochet techniques to achieve the desired effect.
Special Cuffs or Ribbing: Customizing the cuffs or ribbing of the gloves can also add a personalized touch. You can change the stitch pattern, add a different color, or even incorporate a different yarn weight to create a unique look. Experiment with different textures and designs to make the cuffs stand out and reflect your personal style.
Overall, adding personalized touches to men’s fingerless gloves allows you to create a thoughtful and customized accessory. Whether it’s through yarn choice, embroidery, or unique cuffs, these small details can make a big impact. Have fun experimenting with different techniques and make the gloves truly yours or create a cherished gift for someone else.
Sharing Your Finished Gloves
Once you have completed knitting your men’s fingerless gloves using the free pattern, you may be eager to show off your finished product. Sharing your work can be a fun and rewarding way to connect with other knitters and inspire them to try the pattern themselves.
There are several ways you can share your finished gloves:
- Social media: Take a photo of your gloves and post it on social media platforms like Instagram, Facebook, or Twitter. Use relevant hashtags such as #knitting #fingerlessgloves #handmade to reach a wider audience.
- Ravelry: Ravelry is a popular online community for knitters and crocheters. You can create a project page for your gloves, upload photos, and share your experience with others who may be interested in the pattern.
- Knitting forums: Participate in knitting forums and threads to showcase your finished gloves. Share your insights, modifications, and any challenges you faced while knitting the gloves.
- Local knitting group: If you belong to a local knitting group, bring your gloves to a meeting and share them with fellow knitters. They can provide valuable feedback and appreciate your craftsmanship.
- Gifts: If you know someone who would love a pair of fingerless gloves, consider giving them as a gift. Your recipient is sure to appreciate the thought and effort you put into knitting them.
Remember, sharing your finished gloves is not only about flaunting your skills but also about inspiring and connecting with others who share your passion for knitting. Happy knitting and happy sharing!
