
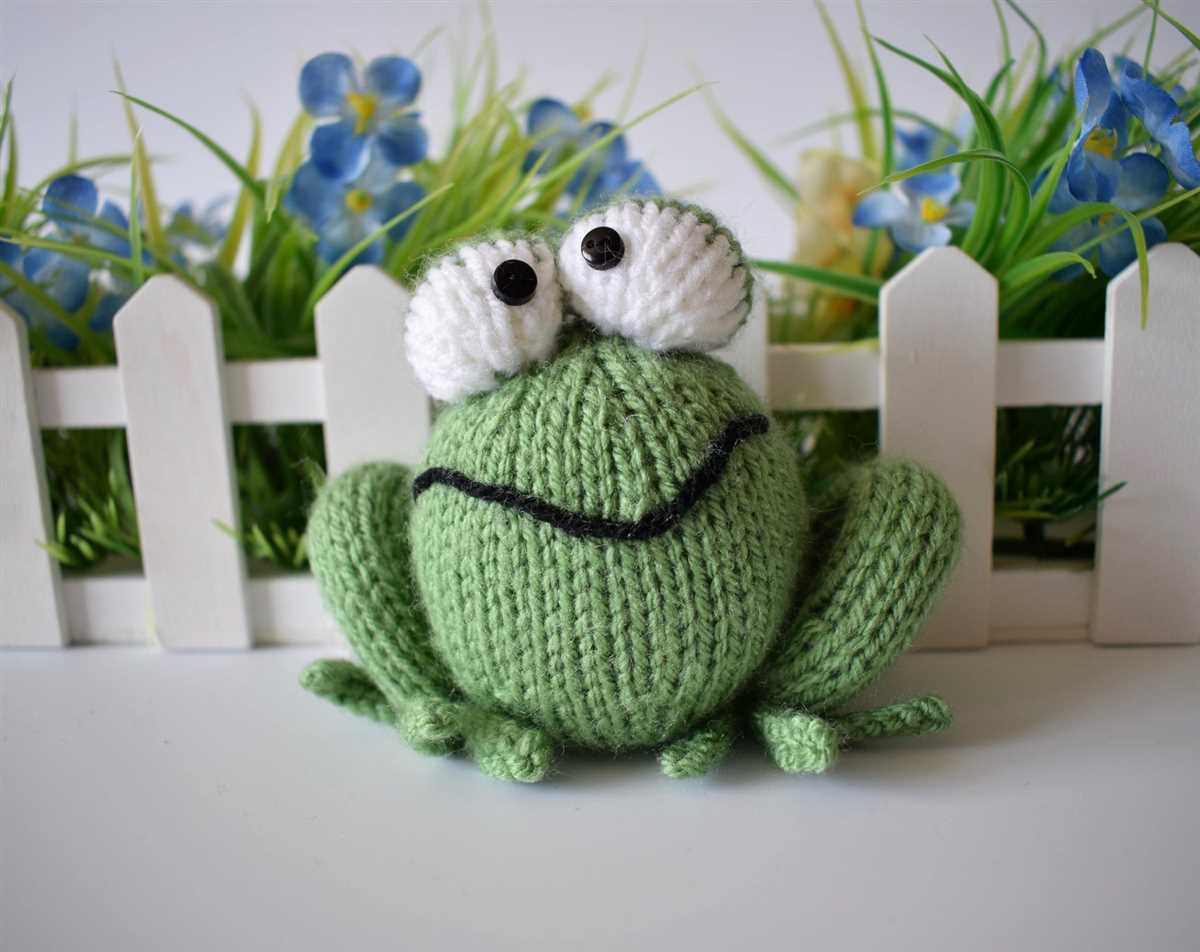
Knitting has become a popular hobby over the past few years, with people of all ages and skill levels picking up needles and yarn to create beautiful and unique items. One of the most popular knitted items to make is stuffed animals, and frogs have become a favorite choice among knitters. Frog knitting patterns allow crafters to create their own cute and cuddly frogs, either as toys for children or as decorative pieces for their home.
There are many different frog knitting patterns available, ranging from simple and beginner-friendly to more advanced designs for experienced knitters. These patterns typically include detailed instructions and diagrams, making it easy for knitters to follow along and create their own frog. Some patterns even include variations, allowing knitters to customize their frog by choosing different yarn colors or adding accessories like hats or scarves.
One of the great things about knitting a frog is that it allows knitters to experiment with different stitches and techniques. From basic knit and purl stitches to more advanced techniques like increases and decreases, knitting a frog can be a fun and educational project for knitters of all skill levels. It’s a great way to practice new skills and create something cute and cuddly at the same time.
How to Knit a Frog: A Complete Knitting Pattern
Knitting toys is a great way to practice your knitting skills and create adorable handmade gifts. If you’re looking for a fun and charming project, why not try knitting a frog? With this complete knitting pattern, you’ll be able to make your very own cuddly frog friend.
Materials:
- Yarn in green, white, and black
- Knitting needles (size determined by the yarn)
- Stuffing
- Tapestry needle
- Scissors
Instructions:
- Body: Start with the green yarn and cast on 30 stitches. Knit in stockinette stitch for about 6 inches.
- Legs: With the green yarn, cast on 8 stitches and knit in stockinette stitch for about 2 inches. Repeat for the remaining 3 legs.
- Arms: With the green yarn, cast on 6 stitches and knit in stockinette stitch for about 1 inch. Repeat for the remaining 2 arms.
- Eyes: With the white yarn, cast on 4 stitches and knit in stockinette stitch for about 1 inch. Repeat for the second eye.
- Mouth: With the black yarn, cast on 6 stitches and knit in stockinette stitch for about 1 inch.
- Assembly: Sew the legs onto the bottom of the body, evenly spaced. Attach the arms to the sides of the body. Sew the eyes and mouth onto the face of the frog.
- Finishing: Stuff the frog firmly with the stuffing. Sew up the open end of the body to close it off.
Once you’ve completed these steps, you’ll have a cute knitted frog toy ready to be enjoyed or gifted to a loved one. This pattern is suitable for knitters of all skill levels and can be customized with different colors or embellishments to make each frog unique. Happy knitting!
Materials Needed
Before you begin knitting your frog, make sure you have all the necessary materials. Here is a list of items you will need:
- Yarn: Choose a soft, medium-weight yarn in green, as this will be the base color of your frog. You may also need small amounts of other colors for details.
- Knitting Needles: Use a pair of size 8 (5 mm) knitting needles, or the appropriate size to achieve the gauge mentioned in the pattern.
- Tapestry Needle: This needle is used for sewing and weaving in yarn ends. Make sure it has a large enough eye to accommodate your yarn.
- Stuffing: You will need a soft stuffing material, such as polyester fiberfill or wool, to stuff your frog and give it shape and volume.
- Scissors: A pair of sharp scissors is essential for cutting yarn and trimming any excess.
- Stitch Markers: These small, removable markers are useful for keeping track of stitches and distinguishing different parts of your knitting.
It’s a good idea to gather all these materials before you start your knitting project. This way, you can ensure that you have everything you need and won’t have to stop in the middle of your knitting to run out and buy something.
Frog Knitting Pattern: Step-by-Step Instructions

Are you ready to start knitting an adorable frog toy? Follow these step-by-step instructions to create your very own knitted frog.
Materials:
- Green yarn
- Needles (size may vary depending on your preferred tension)
- Stuffing
- Black yarn or thread for eyes
- Sewing needle
- Scissors
Step 1: Making the Body
Start by casting on 32 stitches using the green yarn. Knit every row in garter stitch for 10 cm, or your desired length for the frog’s body.
Step 2: Shaping the Arms
Next, decrease 1 stitch at the beginning and end of every row for the next 8 rows. This will shape the frog’s arms. 16 stitches will remain.
Step 3: Creating the Legs
Continue knitting in garter stitch for 5 cm. Then, bind off 3 stitches at the beginning of the next 2 rows. Knit the remaining 10 stitches for 10 rows to create the frog’s legs.
Step 4: Finishing Touches
Bind off all stitches and cut the yarn, leaving a long tail. Fold the body in half and sew the sides together using the sewing needle and yarn tail.
Now it’s time to stuff the frog. Use the stuffing to fill the body and legs until they are firm. Make sure to leave the top of the head unstuffed.
To finish off your knitted frog, sew on the eyes using the black yarn or thread. You can embroider them or attach small buttons for a different look. Trim any excess yarn, and your adorable knitted frog is complete!
Choosing the Right Yarn and Needles
When starting a frog knitting project, one of the most important decisions to make is choosing the right yarn and needles. The yarn you choose will determine the overall look and feel of the finished frog, while the needles will play a role in achieving the desired tension and stitch definition.
Yarn: It’s essential to select a yarn that is both soft and durable. Since frogs are often handled and played with, a yarn that can withstand some wear and tear is crucial. Additionally, consider the color of the yarn. Depending on your personal preference, you may want to go with a natural green shade to make your frog look realistic, or opt for a more vibrant color for a fun and whimsical effect.
Needles: The size of the needles you choose will depend on the thickness of your yarn and desired tension. Thicker yarns will require larger needles, while thinner yarns will need smaller ones. It’s important to check the label of your chosen yarn for recommended needle sizes. Additionally, consider the material of the needles. Some knitters prefer metal needles for their smoothness, while others prefer bamboo or wooden needles for their grip and warmth.
Overall, when choosing the right yarn and needles for your frog knitting project, consider the durability, color, thickness, and material. Taking time to select the perfect combination will ensure that your finished frog is not only adorable but also made to last.
Tips for Beginners
When you are just starting out with knitting, it can be overwhelming to learn all the techniques and stitches. But don’t worry, with a little practice and patience, you will soon be able to create beautiful frog knittings! Here are some tips to help you get started:
1. Gather the Right Supplies

Before you begin your frog knitting project, make sure you have all the necessary supplies. You will need knitting needles, yarn, a tape measure, and a pair of scissors. It’s also a good idea to have a stitch marker and a yarn needle for finishing touches.
2. Start with Simple Patterns
As a beginner, it’s best to start with simple knitting patterns. Look for patterns that are labeled as “beginner-friendly” or “easy.” These patterns usually involve basic stitches and techniques, making them perfect for practicing your knitting skills.
3. Learn the Basic Stitches

Before you dive into a knitting project, it’s important to learn the basic stitches. The most common stitches you will come across in frog knitting patterns are knit stitch and purl stitch. Take some time to practice these stitches until you feel comfortable with them.
4. Practice Tension Control
Tension control is one of the most important aspects of knitting. It refers to how tightly or loosely you hold the yarn as you knit. Practice maintaining a consistent tension throughout your project to ensure that your stitches are even and your finished piece looks neat and professional.
5. Take Breaks and Relax
Knitting can be a relaxing and enjoyable activity, but it’s important to take breaks and rest your hands and eyes. If you find yourself getting tired or frustrated, put your project down for a while and come back to it later. Remember, knitting is supposed to be fun!
6. Don’t Be Afraid to Make Mistakes
As a beginner, it’s normal to make mistakes. Don’t be afraid to unravel your work and start again if you are not happy with the results. Mistakes are an opportunity to learn and improve, so embrace them as part of the learning process.
With these tips in mind, you are ready to embark on your frog knitting journey. Remember to be patient with yourself and enjoy the process. Happy knitting!
Advanced Techniques for Experienced Knitters
For knitters who have mastered the basics and are looking to take their skills to the next level, there are a variety of advanced techniques available to explore. These techniques can add intricate details, unique textures, and professional finishes to your knitting projects.
Cable Knitting: One technique that often appeals to experienced knitters is cable knitting. This technique involves crossing stitches over each other, creating beautiful twists and braids in the fabric. Cable knitting can be done with a cable needle or without, depending on your preference.
Intarsia Knitting: Another advanced technique is intarsia knitting, which allows knitters to create detailed pictures and designs in their projects. This technique involves using different colors of yarn and working with bobbins or small balls of yarn to create the color blocks.
- Lace Knitting: Lace knitting involves creating delicate and intricate patterns using yarn overs and decreases. This technique produces lightweight and airy fabrics, perfect for shawls, scarves, or delicate garments.
- Entrelac Knitting: Entrelac knitting is a technique that creates a textured fabric that resembles woven strips. This technique involves working in small sections, picking up stitches along the edges of previous sections, and creating a pattern of triangles and squares.
- Fair Isle Knitting: Fair Isle knitting is a popular technique that involves working with multiple colors in a single row to create intricate patterns. This technique requires carrying the unused yarn behind the work and creating floats to prevent long strands from snagging.
These advanced techniques require patience, practice, and attention to detail, but they can elevate your knitting projects to a whole new level. Whether you want to challenge yourself with intricate cable patterns or create stunning colorwork designs, exploring these advanced techniques can open up a world of creative possibilities.
Alternative Stitch Patterns
In addition to the classic stitch pattern used in the frog knitting pattern, there are several alternative stitch patterns that can be used to create unique and interesting designs. These alternative stitch patterns can help add texture, color, and intricate detail to your frog knitting projects. Whether you’re a beginner or an experienced knitter, experimenting with different stitch patterns can help take your knitting skills to the next level.
One popular alternative stitch pattern is the seed stitch. This pattern creates a bumpy texture by alternating knit and purl stitches within the same row. The seed stitch can be used as a border or as the main stitch pattern for the entire frog knitting project. It adds a beautiful texture and is perfect for creating small details like eyes or spots on the frog.
Here are a few other alternative stitch patterns you can try:

- Rib stitch: This stitch pattern creates vertical columns of knit and purl stitches, creating a stretchy and textured fabric. It is commonly used for cuffs, collars, and hems.
- Cable stitch: This stitch pattern involves crossing stitches over each other, creating twisted cables. It adds depth and richness to any knitting project.
- Lace stitch: This stitch pattern creates an openwork design with decorative holes. It is perfect for creating delicate and airy fabrics for shawls or summer garments.
- Mosaic stitch: This stitch pattern involves knitting with multiple colors, creating geometric patterns and designs. It is a great way to add color and visual interest to your frog knitting projects.
These alternative stitch patterns can be combined with the classic frog knitting pattern to create unique and personalized designs. Don’t be afraid to experiment and try new stitch patterns to add your own creative twist to your knitting projects.
Adding Details and Embellishments

Once the basic frog shape is complete, you can add various details and embellishments to make your knitted frog even more unique and adorable. Here are a few ideas to get you started:
1. Eyes:
One of the key features of a frog is its large, bulging eyes. You can use small plastic or glass safety eyes, or you can embroider them with black yarn or thread. Position the eyes on the top of the head, slightly towards the sides, for a cute and playful look.
2. Mouth:
Add a small mouth to your frog by stitching a curved line with pink or red yarn or thread. You can sew it just below the eyes, creating a smiling expression. Alternatively, you can use a small piece of felt or fabric to create a tongue sticking out of the mouth for a fun and playful touch.
3. Limbs:
Your frog needs limbs to hop around! Knit four small tubes for the legs and arms using a contrasting color of yarn. Attach them to the body by sewing them firmly in place. You can also add some stuffing to make the limbs more dimensional and lifelike.
4. Crown or Hat:
If you want to add a royal touch to your frog, you can knit a tiny crown using metallic or sparkly yarn. Attach it to the top of the frog’s head using the same yarn. Alternatively, you can knit a small hat or cap in a different color and sew it securely onto the head for a more casual and playful look.
5. Embroidery Details:
To have more control over the facial expressions and additional details, you can use embroidery techniques. You can embroider a smile or any other desired expressions on the frog’s face using different colors of yarn. You can also add small details, such as freckles, by using French knots or straight stitches.
Remember to have fun and be creative with the details and embellishments you add to your knitted frog. Personalizing your creation will make it even more special and unique.
Common Mistakes to Avoid when Knitting a Frog

Knitting a frog can be a delightful and fun project for knitters of all skill levels. However, there are a few common mistakes that can easily be made when working on this project. By being aware of these mistakes and taking steps to avoid them, you can ensure that your frog turns out just right.
1. Incorrect Gauge: One of the most important aspects of any knitting project is getting the gauge right. It determines the size and shape of the finished item. When knitting a frog, make sure to check your gauge before you start. Using the wrong needle size or yarn weight can result in a frog that is either too small or too large.
2. Not Following the Pattern: To achieve the desired outcome, it’s essential to follow the frog knitting pattern carefully. Don’t assume that you can skip steps or make changes without affecting the final result. Pay attention to details such as stitch count, increases, and decreases, as well as any specific techniques mentioned in the pattern.
3. Lack of Tension Control: Knitting tension is crucial for creating an even and attractive fabric. Inconsistent tension can lead to a frog that looks lumpy or uneven. Practice maintaining an even tension and pay attention to your knitting as you go along to ensure consistent results.
4. Neglecting to Check for Mistakes: It’s easy to make mistakes while knitting, such as dropping a stitch or unintentionally adding an extra one. It’s important to regularly check your work for any mistakes and fix them as soon as possible. Catching mistakes early on will save you time and frustration later.
5. Rushing the Finishing Process: The finishing touches can make or break the overall appearance of your knitted frog. Take your time when sewing up seams, attaching limbs, and embroidering details. Neat and careful finishing will give your frog a polished and professional-looking finish.
By being mindful of these common mistakes and taking the necessary precautions, you can ensure that your knitted frog turns out as cute and perfect as you imagined. Happy knitting!
Finishing and Assembly
Once you have finished knitting all the pieces of your frog, it’s time to start the finishing and assembly process. This is where you bring all the individual parts together to create your completed toy.
1. Blocking: Before you start assembling, it’s a good idea to block all the knitted pieces. This will help to even out the stitches and give your frog a more polished look. Gently wet the pieces, squeeze out the excess water, and lay them flat on a towel to dry. Use pins to shape them into the desired size and let them dry completely.
2. Sewing: Start by sewing the legs and arms onto the body. Use a tapestry needle and matching yarn to carefully stitch the pieces in place. Make sure to secure the ends securely to ensure that they don’t come apart. Next, sew the eyes onto the head, positioning them where you prefer. You can use safety eyes or embroider them using small stitches.
3. Stuffing: Before closing up the body, stuff it firmly with polyester fiberfill or your preferred stuffing material. Make sure to fill all the corners and curves, but be careful not to overstuff, as it can distort the shape. Once the body is properly stuffed, sew the opening closed using a whipstitch or mattress stitch.
4. Embellishments: To give your frog some personality, you can add any additional embellishments or details. For example, you can sew on a small felt tongue, create a flower crown, or attach a bowtie. Get creative and customize your frog to make it stand out.
5. Finishing touches: Lastly, trim any excess yarn and weave in all the loose ends to ensure a neat and tidy finish. Check all the seams and attachments to make sure everything is secure. Your frog is now ready to be enjoyed or gifted to someone special!
Resources for Further Inspiration
To continue your journey into the world of frog knitting patterns, here are some resources that can provide you with further inspiration:
- Ravelry: This popular knitting community website has a wide selection of free frog knitting patterns. You can search for patterns based on specific criteria, such as skill level and project type.
- Etsy: On this online marketplace, you can find a variety of frog knitting patterns created by independent designers. Many of these patterns are available for purchase in digital format.
- Pinterest: This visual discovery platform is a great source for finding knitting patterns, including frog designs. You can browse through numerous boards and pins to find inspiration for your next frog knitting project.
Remember that these resources should serve as a starting point for your creativity. Feel free to modify existing patterns or create your own unique designs. Happy knitting!