
Knitting cable patterns may seem daunting to beginners, but with a little patience and practice, anyone can master this beautiful technique. Cable knitting creates a textured design by twisting stitches over each other, resulting in a braided or woven appearance. It adds incredible depth and interest to your projects, making them stand out from the crowd.
Before diving into cable knitting, it’s essential to have a solid understanding of basic knitting stitches. Once you have the basics down, learning cables is just a matter of understanding a few new techniques and following a pattern. The key is to start with simple cable patterns that are specifically designed for beginners.
In this article, we will guide you through the process of knitting cable patterns for beginners. We will provide step-by-step instructions and tips to help you get started. By the end, you’ll be well on your way to creating beautiful cable designs and taking your knitting skills to the next level.
Knitting Cable Patterns for Beginners
If you’re a beginner knitter looking to level up your skills, cable patterns are a great way to add texture and interest to your projects. While they may look complex, cable patterns are actually quite simple once you understand the basics. With a little practice, you’ll be able to create beautiful cable designs that will impress your friends and family.
Understanding the Basics
Before diving into cable patterns, it’s important to be familiar with the basic knitting techniques. You should have a good grasp of how to cast on, knit, purl, and bind off. Additionally, you’ll need to learn how to work with a cable needle, which is a specialized tool used to manipulate the stitches in cable patterns.
Choosing the Right Yarn and Needles
When it comes to knitting cable patterns, it’s important to choose the right yarn and needles. A medium-weight yarn, such as worsted or aran, is a good choice for beginners. These yarns are easier to work with and will give your cables a nice, defined look. As for needles, a pair of 8mm or 9mm straight or circular needles will work well for most cable patterns.
Starting with Simple Cables
To ease into cable knitting, start with simple cable patterns that only involve a few stitches. The most basic cable pattern is the 2-stitch cable, which involves crossing one stitch over another. As you gain confidence and skill, you can move on to more complex cable patterns with multiple crossing stitches and different types of cables.
Following a Cable Chart or Written Instructions
Cable patterns are often presented in the form of charts or written instructions. Charts are visual representations of the cable stitches, while written instructions outline the steps you need to take to create the cables. It’s important to carefully read and follow the instructions, keeping track of which row you’re on and where you need to place your cable needle.
Practicing and Patience
As with any new skill, practicing and patience are key when learning to knit cable patterns. Start with small swatches before tackling larger projects like scarves or sweaters. Take your time and don’t get discouraged if your cables don’t look perfect at first. With practice, you’ll become more comfortable and confident with cable knitting.
Adding Cable Patterns to Your Projects
Once you’ve mastered the basics of cable knitting, you can start incorporating cable patterns into your projects. Whether it’s a cozy hat, a warm blanket, or a stylish sweater, cable patterns can add an extra touch of elegance and sophistication to your knitted items. Don’t be afraid to experiment with different cable designs and combinations to create unique pieces.
In conclusion, knitting cable patterns for beginners is an exciting and rewarding skill to develop. With the right tools, patience, and practice, you’ll soon be creating beautiful cable designs that will impress everyone around you. So grab your yarn and needles and get started on your cable knitting journey today!
What are cable patterns?
Cable patterns are a type of knitting pattern that create intricate designs by crossing stitches over each other. They are commonly used to add texture and interest to knitted garments and accessories. Cable patterns are created by manipulating the order of stitches on the knitting needles, usually by using a cable needle or by knitting stitches out of order. These patterns can be simple with just a few cables or more complex with multiple cables and twists.
Cable patterns usually consist of groups of stitches that are crossed over each other in a specific sequence. The stitches are typically worked in a set number of rows or rounds, and then the cable crossing is performed to create the desired design. The cables can be worked over a specific number of stitches, such as a two-stitch or four-stitch cable, or they can be worked over larger groups of stitches to create more intricate designs. Additionally, cable patterns can be combined with other stitch patterns, such as ribbing or lace, to create unique and visually appealing knitted items.
Key Features of Cable Patterns:
- Crossing of stitches to create a twisted or braided effect
- Manipulation of stitch order to create texture and design
- Can be simple or complex, depending on the number and arrangement of cables
- Can be combined with other stitch patterns for added interest
- Require the use of a cable needle or knitting stitches out of order
Overall, cable patterns are a versatile and creative way to enhance your knitting projects. With just a few basic techniques, beginners can begin to experiment with cables and create stunning designs that will impress and inspire.
Essential knitting tools for cable patterns
Knitting cable patterns can be a fun and rewarding challenge for beginners. To successfully create these intricate designs, it is important to have the right tools at your disposal. Here are some essential knitting tools you will need:
1. Cable needles: Cable needles are specially designed tools that help you create the twists and turns in cable patterns. They come in different shapes and sizes, but most commonly they are short, double-pointed needles. It is recommended to have a variety of cable needles in different sizes to accommodate various cable patterns.
2. Stitch markers: Stitch markers are small, circular or clip-on markers that help you keep track of your stitches. When working on cable patterns, it is important to mark the beginning and end of each cable section to ensure accuracy. Stitch markers are especially useful when working on complex cable patterns with multiple cables.
3. Tapestry needle: A tapestry needle is a large, blunt needle with a large eye. It is used for sewing in loose ends and finishing touches on your knitting projects. When working with cable patterns, you may need to use a tapestry needle to weave in the loose ends of your cables for a clean and polished finish.
4. Row counter: A row counter is a handy tool that helps you keep track of the number of rows you have worked. This is particularly important when following cable patterns, as it is crucial to keep track of the cable twists and turns. A row counter can be attached to your knitting needle or kept separately.
5. Cable pattern instructions: Last but not least, it is essential to have the cable pattern instructions handy. Cable patterns can be complex and detailed, so having a clear and well-written set of instructions is crucial for successful knitting. Make sure to read through the instructions before starting your project and keep them close by for reference as you work.
By equipping yourself with these essential knitting tools, you will be well-prepared to take on cable patterns and create beautiful and intricate designs. Happy knitting!
How to read a cable knitting pattern
When starting out with cable knitting, reading a cable knitting pattern may seem overwhelming at first. However, with a little practice and understanding of the symbols and abbreviations used, you will soon be able to decipher and follow any cable knitting pattern with ease.
Symbols and Abbreviations: Cable knitting patterns use various symbols and abbreviations to represent different cable stitches and techniques. Some common symbols and abbreviations include:
- C: Cable stitch
- K: Knit stitch
- P: Purl stitch
- Sl: Slip stitch
- YO: Yarn over
- Dec: Decrease
Reading the Cable Chart: Cable knitting patterns are often presented in the form of a cable chart, which is a grid that represents each stitch and its corresponding symbol or abbreviation. Each square on the chart represents a stitch, and the symbols indicate the type of stitch to be used.
Following the Pattern: To read a cable knitting pattern, start at the bottom-right corner of the chart and read from right to left. Each row of the chart represents a row of knitting, and you will follow the symbols and abbreviations in the corresponding row of the pattern instructions.
Keeping track: It can be helpful to use a row counter or place markers on the chart to keep track of your progress and ensure that you don’t miss or repeat any stitches.
By familiarizing yourself with the symbols and abbreviations used in cable knitting patterns and practicing reading and following the charts, you will soon become comfortable with cable knitting and be able to create beautiful and intricate cable patterns.
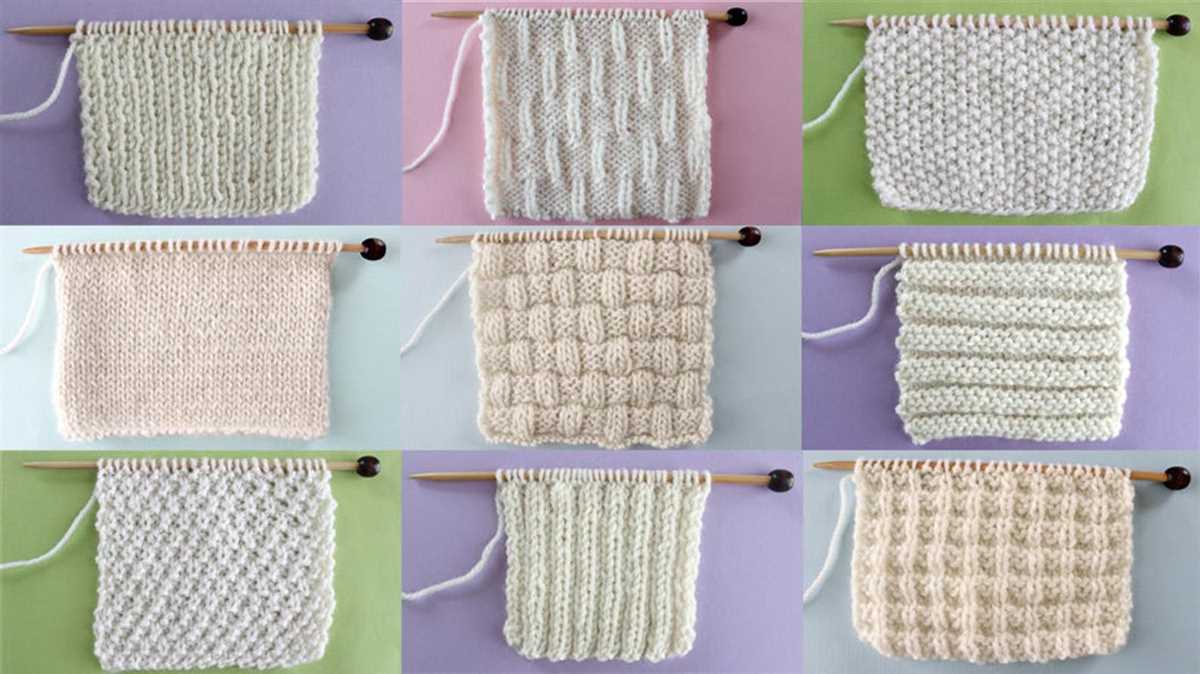
Basic Cable Stitches for Beginners
Knitting with cable stitches can seem intimidating for beginners, but with a few basic stitches, you can create beautiful and intricate patterns. Cable stitches involve crossing stitches over each other, which creates a twisting effect in your knitting. Here are some basic cable stitches that are perfect for beginners to try:
1. C4F (Cable 4 Front)
This cable stitch involves crossing the first two stitches over the last two stitches. To create this stitch, you will need a cable needle. Slip the first two stitches onto the cable needle and hold it in front of your work. Knit the next two stitches, and then knit the stitches from the cable needle. This creates a twist in the fabric, with the crossed stitches in front of the work.
2. C4B (Cable 4 Back)
This cable stitch is similar to the C4F, but instead of holding the cable needle in front of your work, you hold it in the back. Slip the first two stitches onto the cable needle and hold it in the back of your work. Knit the next two stitches, and then knit the stitches from the cable needle. This creates a twist in the fabric, with the crossed stitches in the back of the work.
3. C6F (Cable 6 Front)
This cable stitch involves crossing the first three stitches over the last three stitches. It is similar to the C4F, but with more stitches. Slip the first three stitches onto the cable needle and hold it in front of your work. Knit the next three stitches, and then knit the stitches from the cable needle. This creates a larger twist in the fabric, with the crossed stitches in front of the work.
These basic cable stitches are a great way for beginners to get started with knitting cable patterns. They create beautiful textures and add interest to your knitting projects. With a little practice, you’ll be able to tackle more complex cable stitches and create stunning knitted pieces.
Tips for knitting cables with multiple stitches

Knitting cables with multiple stitches can seem intimidating at first, but with a few tips, you’ll be able to master this technique and create beautiful cable patterns.
1. Use a cable needle: When working with multiple stitches for a cable, it’s essential to use a cable needle to hold the stitches that will be crossed. A cable needle is a short, double-pointed needle that will keep your stitches secure while you work on other stitches.
2. Read the cable pattern carefully: Before you begin working on the cable, make sure to read the cable pattern carefully. Look for instructions on how many stitches you need to cross and in which direction. This will help you visualize the final cable pattern and ensure you don’t make any mistakes.
3. Keep track of your stitches: Knitting cables with multiple stitches requires you to keep track of where you are in the pattern. To make this easier, use stitch markers to mark the beginning and end of each cable section. This will help you maintain the correct stitch count and avoid any confusion.
4. Practice with smaller cable patterns: If you’re new to knitting cables with multiple stitches, it can be helpful to practice with smaller cable patterns first. Start with patterns that only require a few stitches to be crossed and gradually work your way up to more complex designs. This will allow you to build your confidence and improve your cable knitting skills.
5. Take your time: Knitting cables with multiple stitches can be a bit slower compared to regular knitting. Take your time and work at a pace that feels comfortable for you. This will help you maintain accuracy and produce neat, even stitches in your cable patterns.
By following these tips, you’ll soon be creating stunning cable patterns with multiple stitches. Remember to be patient with yourself as you learn, and don’t be afraid to practice and experiment with different cable designs.
Common mistakes to avoid when knitting cable patterns

Knitting cable patterns can be a fun and rewarding challenge for beginners, but it’s important to watch out for some common mistakes that can affect the final result. By being aware of these mistakes, you can ensure that your cable patterns turn out beautifully.
1. Using the wrong cable needle size
One of the most common mistakes beginners make when knitting cable patterns is using the wrong size of cable needle. It’s important to choose a cable needle that matches the size of your knitting needles. Using a cable needle that is too small or too big can result in uneven cable stitches and a distorted pattern.
2. Not following the cable chart correctly

Cable patterns often come with a chart that indicates the order and direction of the cables. It’s important to follow this chart carefully and to read it correctly. Beginners often make the mistake of misinterpreting the symbols on the chart or skipping a step, which can result in a completely different pattern or a cable that doesn’t look right.
3. Not using a stitch marker
When knitting cable patterns, it’s important to use stitch markers to mark the beginning and end of each cable repeat. This helps you keep track of your progress and ensures that your cables are evenly spaced. Beginners often forget to use stitch markers and end up with cables that are misplaced or unevenly distributed.
4. Not checking tension
One of the key factors in knitting cable patterns is maintaining consistent tension throughout your work. Beginners often forget to check their tension while knitting cables, resulting in tight or loose stitches that can affect the overall appearance of the pattern. Remember to regularly check your tension and adjust your knitting technique if needed.
5. Not blocking the finished project

Blocking is an essential step in finishing any knitting project, including cable patterns. Beginners often skip this step, thinking it’s not necessary or not knowing how to do it. Blocking helps to even out the stitches, relax the fibers, and enhance the definition of the cables. It’s important to block your finished cable project to achieve the desired result.
By avoiding these common mistakes, beginners can successfully knit cable patterns and create beautiful, intricate designs. With practice and attention to detail, you’ll be able to master cable knitting and create stunning projects to be proud of.
Adding cables to simple knitting projects
Knitting cables can add a beautiful and intricate detail to even the simplest knitting projects. Whether you’re a beginner or an experienced knitter, cables can be a fun and rewarding technique to learn and incorporate into your projects.
Choosing the right project
When adding cables to simple knitting projects, it’s important to choose a project that will showcase the cables well. Scarves, hats, and headbands are great options for beginners, as they are small and can be completed relatively quickly. Sweaters and blankets are more advanced projects that can also be enhanced with cables.
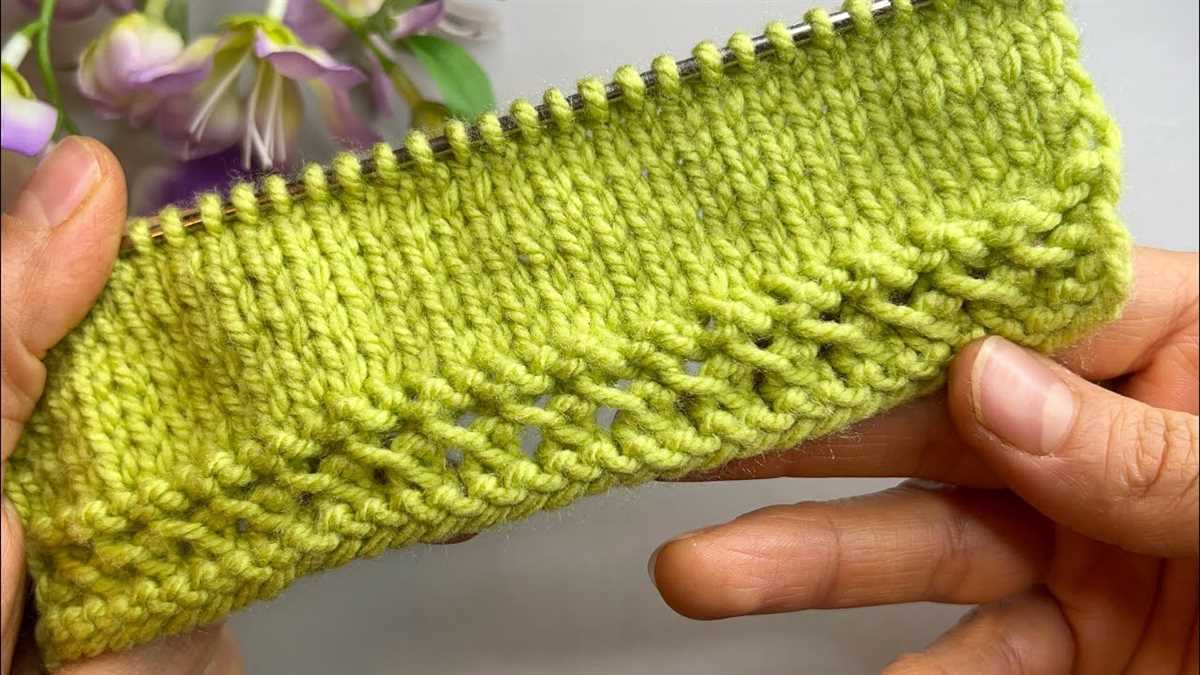
Starting with simple cable patterns
As a beginner, it’s best to start with simple cable patterns that only involve a few stitches. This will help you get comfortable with the technique before moving on to more complex patterns. The most basic cable stitch is the 1/1 RC (right cross), where you cross one stitch over another. Once you’ve mastered this, you can move on to more intricate patterns like the 2/2 LC (left cross) or the 4/4 RC (right cross) cables.
Using cable needles or without
When knitting cables, you have the option to use cable needles or to cable without them. Cable needles are small, double-pointed needles that hold the stitches while you work the cable. They can be helpful for beginners who are just learning the technique. However, more experienced knitters may prefer to cable without cable needles, as it can be faster and more efficient. This involves using your knitting needles to hold the stitches while you work the cable.
Adding cables to basic stitch patterns
A great way to incorporate cables into simple knitting projects is to add them to basic stitch patterns, such as ribbing or garter stitch. This can add dimension and interest to an otherwise plain piece. You can also experiment with different cable placements, such as adding cables along the edges or in the center of a project.
Experimenting with yarn and needle sizes
Another fun aspect of adding cables to simple knitting projects is experimenting with different yarn and needle sizes. Thicker yarns and larger needles can create bold and chunky cables, while thinner yarns and smaller needles can create delicate and intricate cables. Don’t be afraid to try different combinations to see what works best for your project.
Finishing touches
After completing your cable knitting, it’s important to block your project to ensure that the cables are well-defined and the stitches are even. You can also add additional details, such as buttons or embellishments, to further enhance the finished piece. Finally, don’t forget to admire your work and show off your beautiful knitted creation!
Knitting cables in the round
Cables are a popular knitting technique that add texture and visual interest to any project. While many cable patterns are worked flat, it is also possible to knit cables in the round. Knitting cables in the round can be a bit more challenging than working them flat, but with the right techniques and tools, it is definitely achievable for beginners.
Using cable needles or a cable needle-less technique
In order to create cables in the round, you will need to use either cable needles or a cable needle-less technique. Cable needles are short double-pointed needles or straight needles with a bend in the middle. They are used to hold stitches while you work the cable pattern. Alternatively, you can use a cable needle-less technique called “cabling without a cable needle.” This technique involves rearranging the stitches on your knitting needle to create the cable pattern.
If you choose to use cable needles, you will need to have at least one cable needle that is the same size as your main knitting needles. This ensures that the stitches won’t be stretched or distorted when you transfer them onto the cable needle. If you prefer to use the cable needle-less technique, you will need to practice a bit to get the hang of it, but many knitters find it to be quicker and easier than using cable needles.
Working the cables in the round
When knitting cables in the round, you will need to adjust the cable pattern slightly to accommodate for the lack of turning rows. Unlike when working cables flat, where every other row is a resting row, when working cables in the round, you will need to continue working the pattern on every round. This means that you will need to be mindful of where the cable crosses and make sure to follow the cable chart or written instructions accordingly.
In order to keep track of where you are in the cable pattern, you may find it helpful to use stitch markers. Place a stitch marker before and after the cable section to help you keep track of the stitches that are involved in the cable. This will make it easier to see where the cable is meant to cross and keep the pattern consistent throughout your project.
Knitting cables in the round can be a fun and rewarding challenge for beginners. With the right tools and techniques, you can create beautiful and intricate cable patterns in your knitting projects. Whether you choose to use cable needles or the cable needle-less technique, be sure to take your time, follow the instructions, and enjoy the process of creating your own unique cables.
Advanced cable patterns to challenge yourself
Once you have mastered the basics of knitting cable patterns, you may find yourself wanting to tackle more advanced designs that incorporate complex twists and turns. These patterns will truly test your skills and provide you with a rewarding knitting experience.
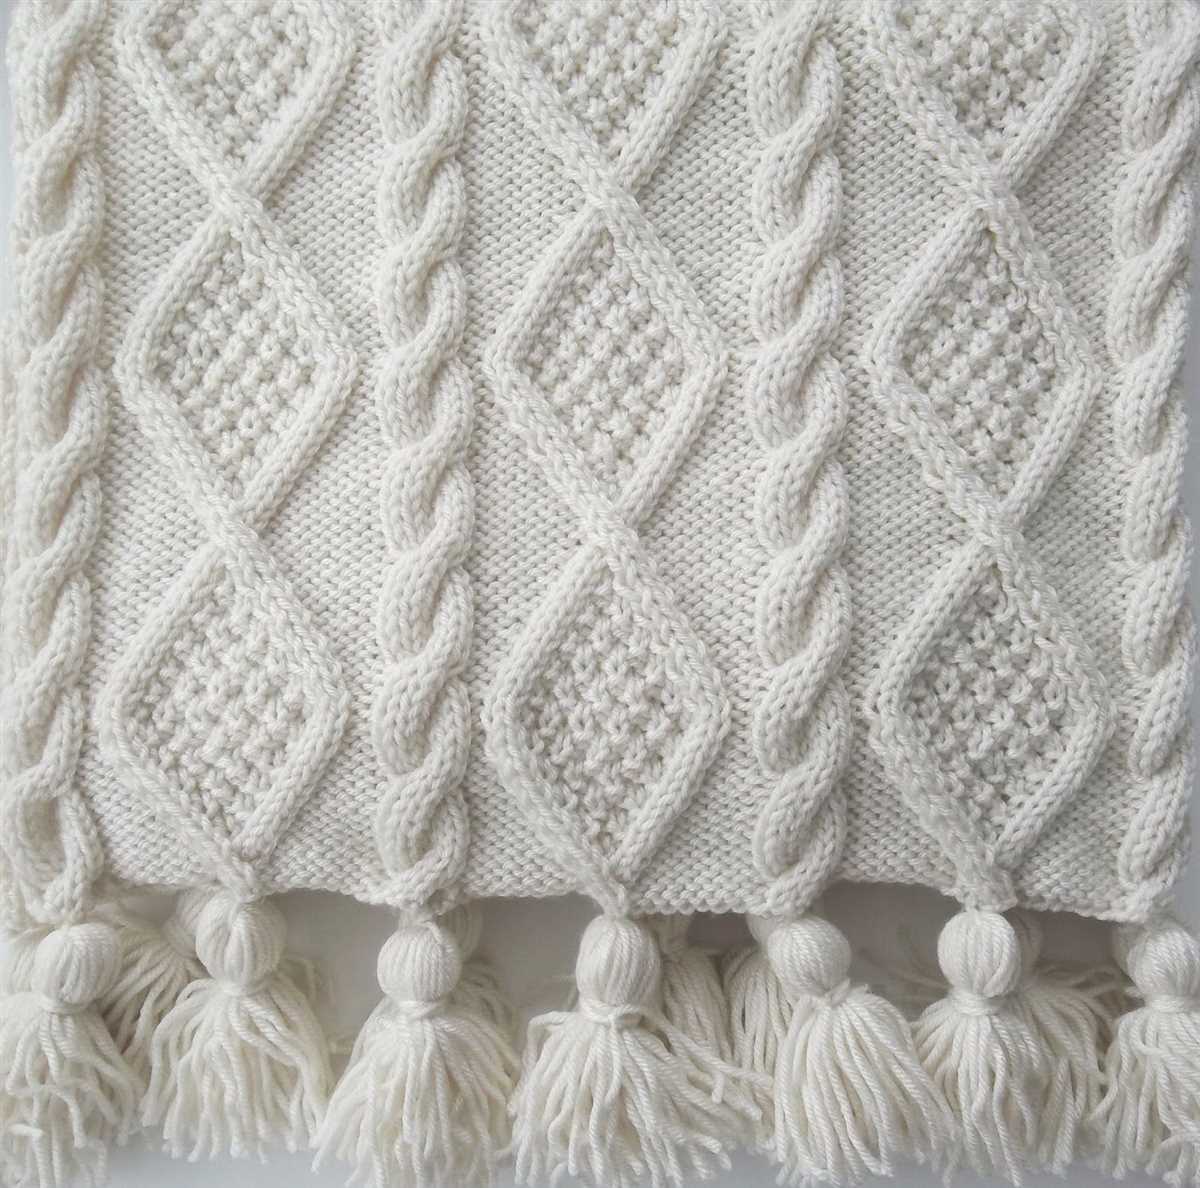
1. Aran Sweater: The Aran sweater is a traditional Irish knit pattern that features intricate cable designs. This pattern typically includes a combination of large and small cables, as well as other textured stitches. Knitting an Aran sweater is a great way to challenge yourself and create a timeless piece of clothing.
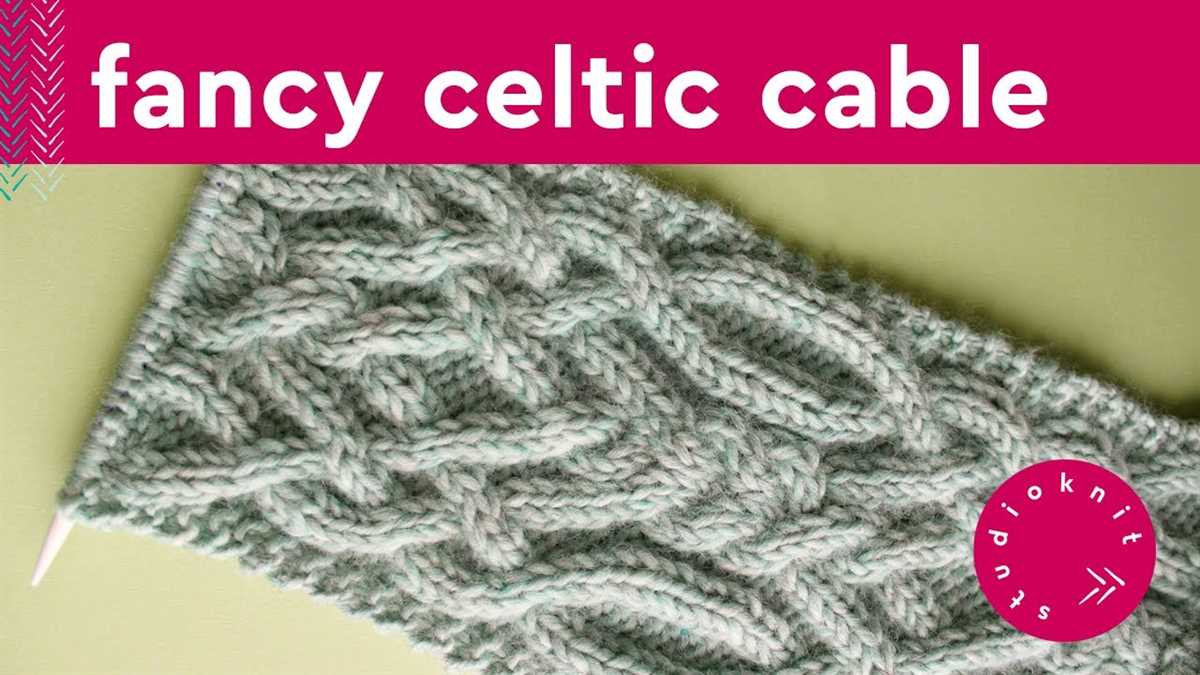
2. Celtic Knot Scarf: The Celtic knot is a classic symbol that represents infinity and eternal love. Knitting a scarf with Celtic knot cable patterns is a great way to showcase your skills and create a stunning accessory. You can choose from various knot designs and incorporate them into your scarf to create a unique and visually striking piece.
- 3. Tree of Life Blanket: Knitting a Tree of Life blanket is a truly ambitious project that will push you to your limits. This pattern features a large, intricate cable design that resembles a tree with sprawling branches. The blanket will require patience and precision, but the end result will be a truly stunning and heirloom-quality piece.
- 4. Twisted Stitch Socks: If you’re an experienced sock knitter looking for a challenge, try knitting socks with twisted stitch cable patterns. The twisted stitches create a beautiful texture and add an extra layer of interest to your socks. Plus, they are sure to impress anyone who sees them!
- 5. Lace Sweater with Cable Accents: Combine the delicate beauty of lace with the boldness of cable patterns by knitting a lace sweater with cable accents. This pattern will require you to work with both lace and cable stitches, creating a truly unique and eye-catching garment.
Remember, when taking on advanced cable patterns, it’s important to take your time and have patience. These designs may be more challenging, but the end result will be well worth the effort. So grab your knitting needles and embark on a knitting adventure that will test and expand your skills!
Resources for finding cable knitting patterns
There are several resources available for beginners to find cable knitting patterns. Whether you prefer online platforms or physical books, these options can help you explore and practice different cable knitting techniques. Below are some suggested resources:
1. Knitting Websites and Blogs
Many knitting websites and blogs offer a wide range of cable knitting patterns. Some popular ones include:
- Ravelry: This online knitting community has a vast collection of cable knitting patterns. You can search using filters like difficulty level, project type, and more.
- Lion Brand Yarn: Lion Brand’s website features many cable knitting patterns for beginners. You can filter the patterns by skill level and yarn weight.
- Knitty: Knitty is an online knitting magazine that publishes free knitting patterns, including cable designs. They have an extensive archive of patterns available.
2. Knitting Books
Investing in knitting books can be an excellent way to build your library of cable knitting patterns. Look for books that specifically focus on cables and include beginner-friendly projects. Some popular options include:
- “Cables Untangled: An Exploration of Cable Knitting” by Melissa Leapman: This book offers detailed explanations of cable knitting techniques and includes various cable patterns to practice. It’s suitable for both beginners and more experienced knitters.
- “The Cable Knitter’s Guide: 50 Patterns, 25 Projects, Countless Tips and Ideas” by Denise Samson: This book provides a collection of cable patterns along with project ideas. The author also shares helpful tips and tricks for knitting cables.
- “Stitchionary: Cables: 250 Designs for Knitting” by Vogue Knitting Magazine: This stitch dictionary features a wide range of cable patterns categorized by complexity. It’s a valuable resource for cable knitting enthusiasts.
Overall, finding cable knitting patterns for beginners has never been easier. With the abundance of online platforms and knitting books available, you can explore different cable designs and gradually enhance your skills in this beautiful knitting technique.