
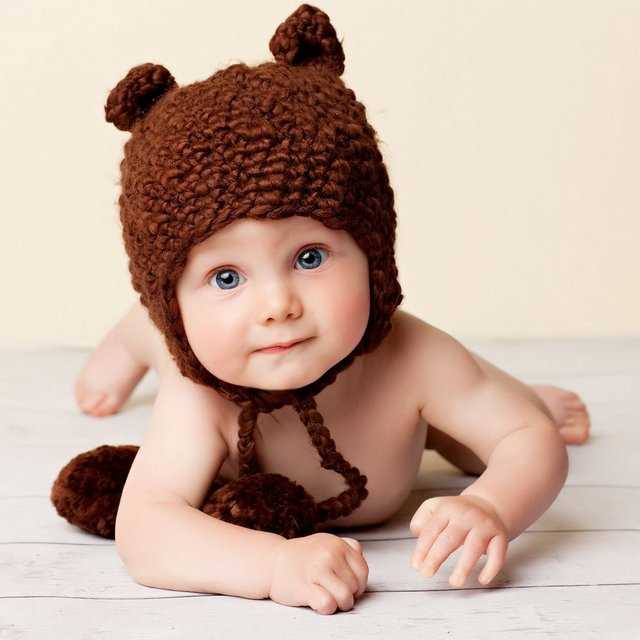
Knitting is a popular hobby that allows people to create unique and personalized items. One beloved knitting project is hats, which can be customized in various styles and designs. One particularly cute and cozy option is a bear hat. This pattern creates a hat that resembles a bear’s face, complete with ears and a snout. It’s a perfect accessory for children and adults alike, adding a touch of whimsy and warmth to any outfit.
This bear hat knitting pattern is suitable for knitters of all skill levels. It uses basic knitting techniques, such as knitting in the round and decreasing. The pattern provides step-by-step instructions and includes clear and detailed explanations of each stitch and technique used. Even if you’re a beginner, you can successfully create this adorable bear hat with just a little patience and practice.
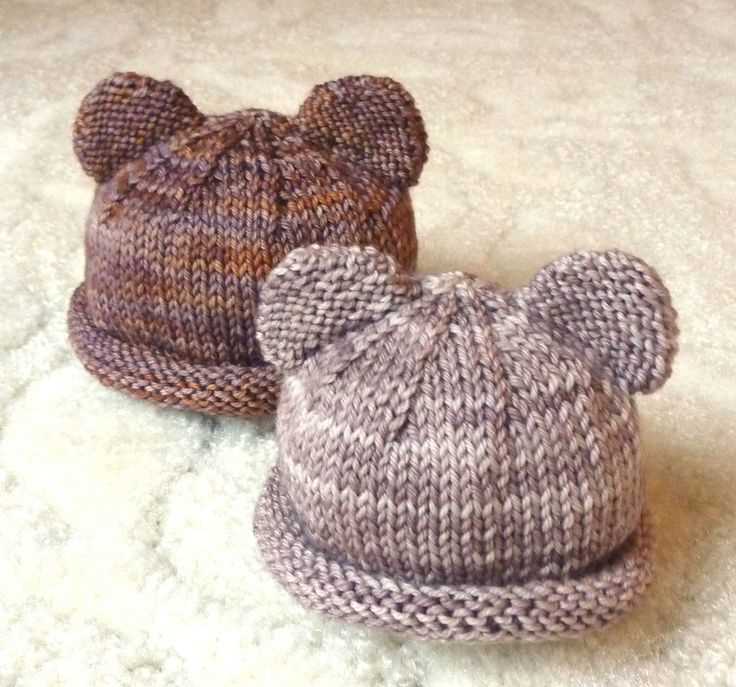
One of the best aspects of knitting is the ability to choose your own materials and colors. With this bear hat pattern, you have the option to use any yarn weight and color of your preference. You can experiment with different combinations to achieve the desired look. Whether you want a soft and fuzzy bear hat or a sleek and modern one, the choice is entirely up to you.
Bear Hat Knitting Pattern
Knitting a bear hat is a fun and adorable project that can be enjoyed by knitters of all skill levels. Whether you’re knitting for a child or for yourself, this hat pattern is sure to bring a smile to everyone’s face.
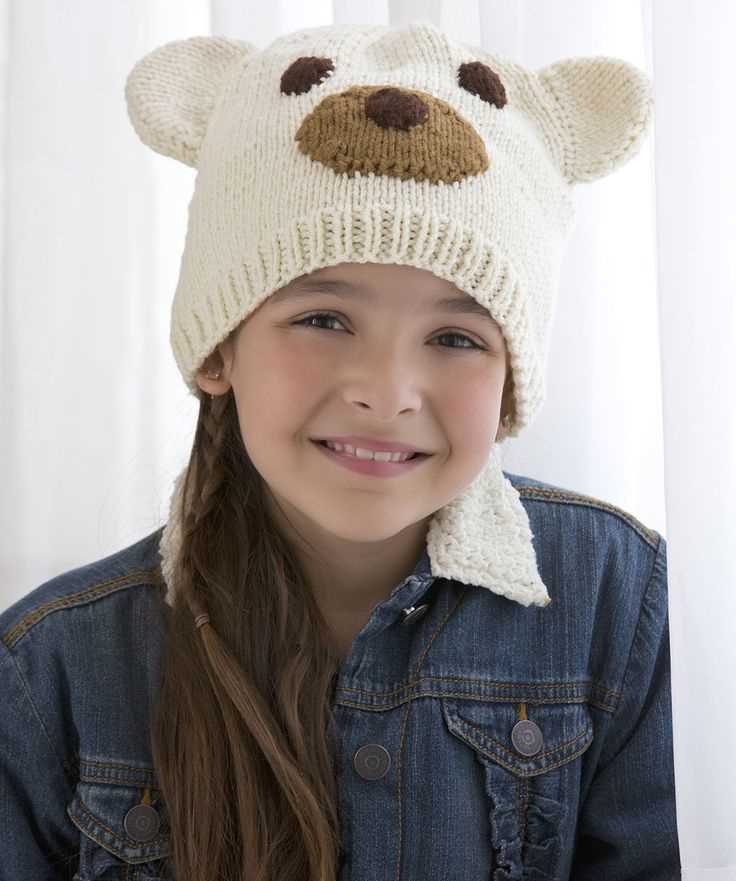
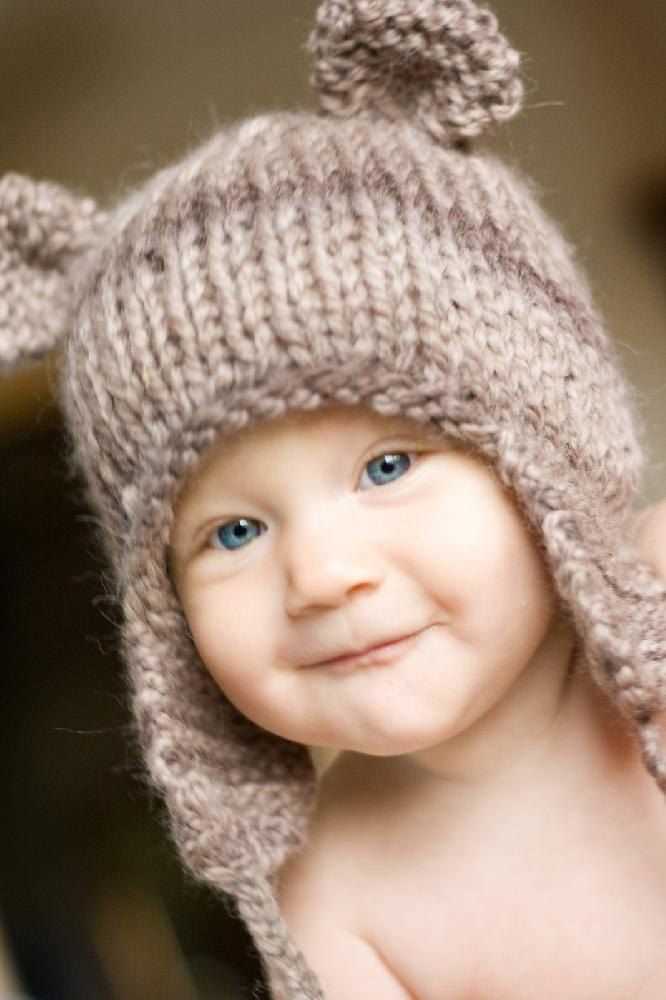
This bear hat knitting pattern is perfect for keeping warm during the cold winter months. The hat features a cute bear face on the front and cozy ear flaps to keep your ears warm. The pattern uses basic knitting stitches such as knit, purl, and decrease, making it a great project for beginners.
Materials Needed:

- Worsted weight yarn in two colors (main color for the hat and contrasting color for the bear face)
- Size 8 (5mm) knitting needles
- Yarn needle
- Crochet hook (for creating the bear face)
Instructions:
- Cast on the required number of stitches using the main color yarn. The number of stitches will depend on the size of the hat.
- Knit in a rib stitch pattern (alternating knit and purl stitches) for about 2 inches.
- Switch to stockinette stitch (knit one row, purl one row) until the hat measures the desired length.
- Begin decreasing stitches to shape the crown of the hat. Follow the specific instructions for decreasing based on the size of the hat.
- Once the crown is complete, finish off the hat by knitting the ear flaps. You can either knit them separately and sew them onto the hat, or pick up stitches along the sides of the hat and knit them directly.
- To create the bear face, use the contrasting color yarn and a crochet hook to embroider or stitch on the eyes, nose, and mouth. You can also add some optional embellishments like ears or pom-poms.
- Weave in any loose ends and your bear hat is ready to wear!
Whether you’re knitting this bear hat as a gift or for yourself, it’s sure to be a cozy and cute accessory for the winter season. Have fun with different color combinations and customizations to make it truly unique. Happy knitting!
Overview
This article provides an overview of a knitting pattern for a bear hat. The pattern includes instructions for making a cute animal-themed hat in the shape of a bear’s head. It is a fun and creative project for knitting enthusiasts of all skill levels. Whether you are a beginner or an experienced knitter, this pattern will guide you through the steps of creating a unique and adorable bear hat.
The bear hat knitting pattern is designed to be versatile and customizable. It allows you to choose different yarn colors and textures to personalize your hat. You can create a traditional brown bear hat or experiment with other colors to make a more playful and whimsical version. The pattern provides detailed instructions for different sizes, so you can make a bear hat for a baby, child, or adult.
To make the bear hat, you will need basic knitting skills, including casting on, knitting, purling, decreasing, and seaming. The pattern provides step-by-step instructions, as well as helpful tips and techniques to make the knitting process easier. It also includes a list of materials and tools required, such as knitting needles, yarn, and a tapestry needle.
Materials and Tools
- Knitting needles: size 8 (5mm) or size needed to obtain gauge
- Yarn: medium weight (worsted) yarn in brown or desired color
- Tapestry needle
- Stitch markers
- Scissors
- Measuring tape
The bear hat pattern consists of several sections, including the brim, earflaps, bear ears, face, and finishing touches. Each section is clearly explained with written instructions and some visual diagrams or charts. The pattern also includes a guide for abbreviations and special stitches used, ensuring clarity and ease of understanding for knitters of all levels.
Once you have completed the bear hat, it can be worn as a fun and cozy accessory during colder months or used as a cute costume for dress-up parties. It also makes a great gift for children or anyone who loves playful and unique knitwear. With this bear hat knitting pattern, you can unleash your creativity and enjoy the process of making a one-of-a-kind hat that is sure to bring smiles and warmth.
Materials Needed
Knitting a bear hat requires several materials to get started. Here is a list of the necessary items:
- Yarn: Choose a soft and cozy yarn in your desired color for the hat. Worsted weight yarn is commonly used for this pattern.
- Knitting Needles: You will need a set of double-pointed knitting needles in the appropriate size for your yarn. The size will depend on your desired gauge and the yarn label recommendations.
- Stitch Markers: Stitch markers will help you keep track of your stitches and any pattern repeats.
- Tapestry Needle: A tapestry needle is necessary for weaving in the ends of your yarn and finishing your project.
- Scissors: A pair of sharp scissors will come in handy for cutting your yarn.
- Pom-pom maker (optional): If you want to add a pom-pom to your bear hat, a pom-pom maker can make the process quick and easy.
Make sure you have all of these materials before you begin knitting your bear hat. It’s always a good idea to double-check your supplies to avoid any interruptions during your knitting process. Once you have everything ready, you can start creating a cute and cozy bear hat for yourself or someone special.
Gauge
When knitting a bear hat, it is important to pay attention to the gauge. The gauge refers to the number of stitches and rows per inch in a knitted fabric. It is essential to achieve the correct gauge in order to ensure that the hat will fit properly.
To determine the gauge for the bear hat, it is recommended to make a gauge swatch. This involves knitting a small square of fabric using the specified yarn and needle size. The swatch is then measured to determine the number of stitches and rows per inch. If the gauge is too loose, meaning there are fewer stitches and rows per inch than specified, the hat will turn out larger than intended. Conversely, if the gauge is too tight, with more stitches and rows per inch, the hat will be smaller.
It is important to follow the instructions provided in the bear hat knitting pattern regarding gauge. This will ensure that the finished hat fits the intended wearer correctly. Making a gauge swatch before starting the hat is an extra step that may seem tedious, but it can save a lot of time and frustration in the long run. Remember, everyone’s knitting tension is different, so even if using the same yarn and needle size as the pattern suggests, the gauge may still differ.
When making the gauge swatch, be sure to measure it when it is flat and not stretched. Using a ruler or measuring tape, count the number of stitches and rows within a 1-inch area. If the measurements differ from the gauge specified in the pattern, adjust the needle size accordingly. It may take a few swatches to achieve the correct gauge, but it is worth the effort to ensure a well-fitting bear hat.
Size Options
When knitting a bear hat, it’s important to consider the size options to ensure the perfect fit. Whether you’re making a hat for a newborn baby or an adult, there are different sizes to choose from.
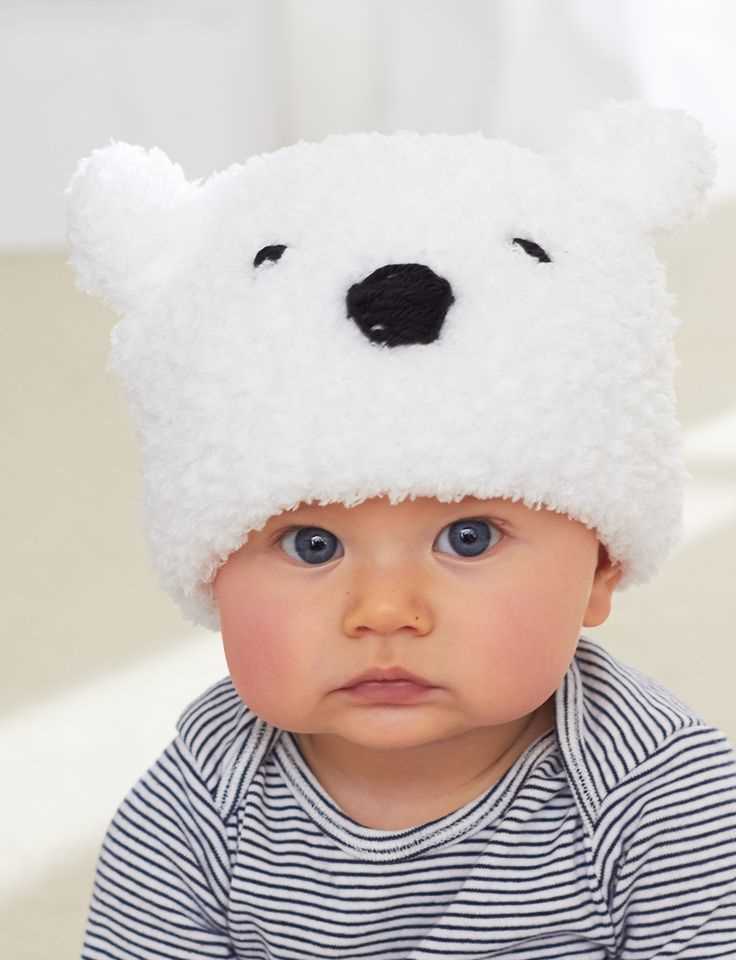
1. Baby Size
If you’re knitting a bear hat for a newborn or an infant, you’ll want to make sure you select the baby size option. This size is designed to fit snugly on a baby’s head, keeping them warm and comfortable. The baby size pattern usually has instructions for different age ranges, such as 0-3 months, 3-6 months, and 6-12 months, allowing you to customize the fit based on the baby’s age.
2. Child Size
If you’re knitting a bear hat for a toddler or a child, the child size option is ideal. This size is slightly larger than the baby size and provides a comfortable fit for children of different ages. The child size pattern may have instructions for different age ranges, such as 1-3 years, 4-6 years, and 7-10 years, allowing you to choose the size that best suits the child you’re knitting for.
3. Adult Size
If you’re knitting a bear hat for an adult, you’ll want to select the adult size option. This size is larger than the baby and child sizes, ensuring a comfortable fit for adults of different head sizes. The adult size pattern usually includes instructions for measuring the head circumference and adjusting the pattern accordingly, so you can create a hat that fits perfectly.
Abbreviations
Here are some commonly used abbreviations you may come across in a bear hat knitting pattern:
- K: Knit
- P: Purl
- sts: Stitches
- K2tog: Knit two stitches together
- P2tog: Purl two stitches together
- YO: Yarn over
- RS: Right side
- WS: Wrong side
- BO: Bind off
These abbreviations may appear in the instructions for different stitches or techniques. It’s important to familiarize yourself with them before starting a knitting project. You’ll often find a list of abbreviations at the beginning or end of a pattern, so you can refer to it as needed.
Using abbreviations in a knitting pattern can save space and make it easier to follow along. Once you get the hang of the common abbreviations, you’ll be able to read and understand patterns more efficiently. Happy knitting!
Instructions
In order to knit a bear hat, you will need the following materials:
- Size 8 knitting needles
- Worsted weight yarn in brown and black
- Tapestry needle
- Stitch markers
- Scissors
To start, cast on 80 stitches using the brown yarn. Place a stitch marker at the beginning of the round to mark the start of each round. Join the ends of the row together to form a circle.
Next, work in a 2×2 rib stitch for 2 inches, knitting two stitches and purling two stitches in each round. This will create a stretchy brim for the hat.
Once the rib stitch is complete, switch to the black yarn. Begin knitting in stockinette stitch, working in rounds. Knit one round, then purl one round, repeating these two rounds until the hat measures 5 inches from the brim.
At this point, it’s time to shape the crown of the hat. Decrease stitches evenly across each round until there are 10 stitches remaining. Cut the yarn, leaving a long tail. Thread the tail through a tapestry needle, and slip each remaining stitch onto the needle, removing the stitch markers as you go. Pull tight to close the top of the hat, and secure the yarn.
Finally, use the black yarn to embroider the bear’s face onto the hat. You can create the eyes, nose, and mouth with a few simple stitches. Once the embroidery is complete, weave in any loose ends and trim them.
Your bear hat is now ready to wear or give as a gift! Enjoy the cozy warmth and cute bear design.
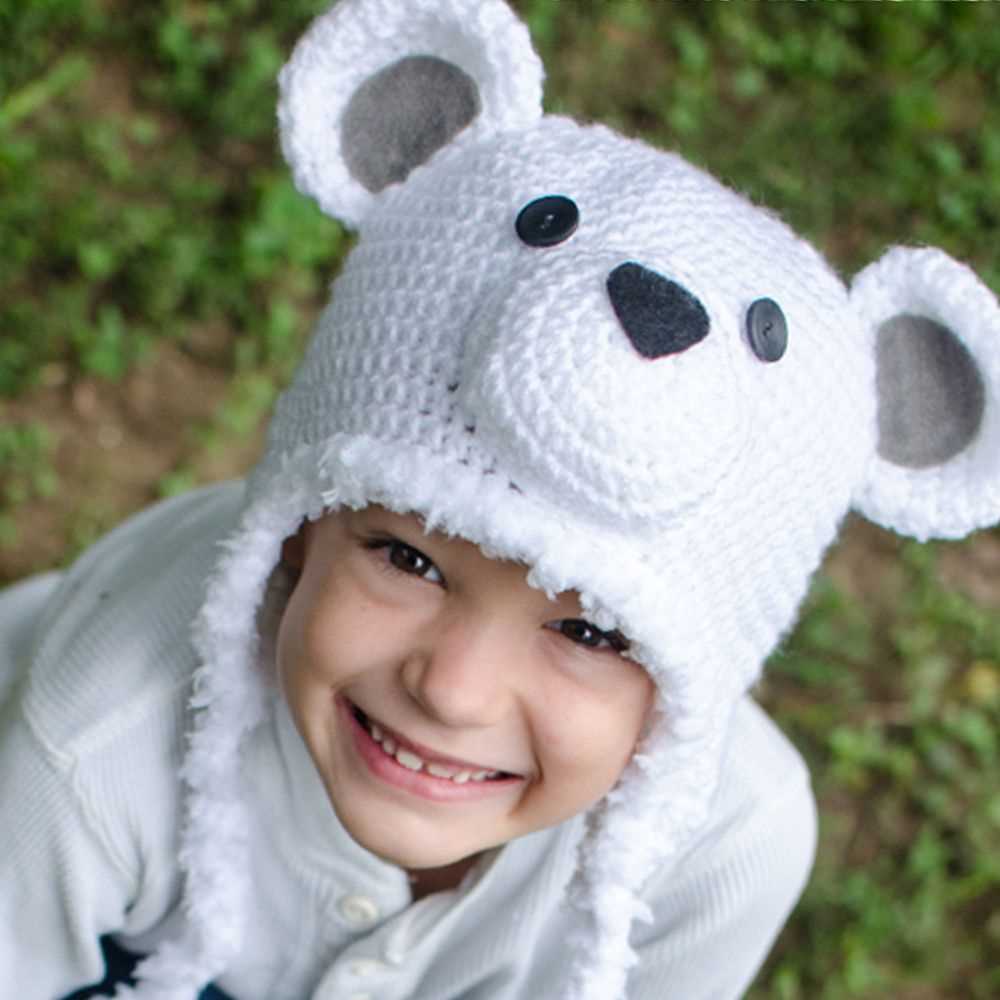
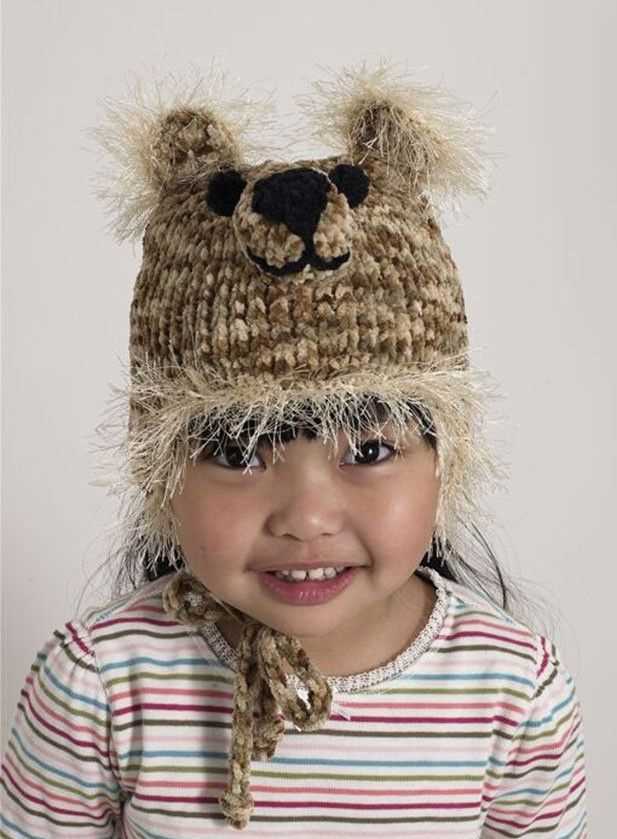
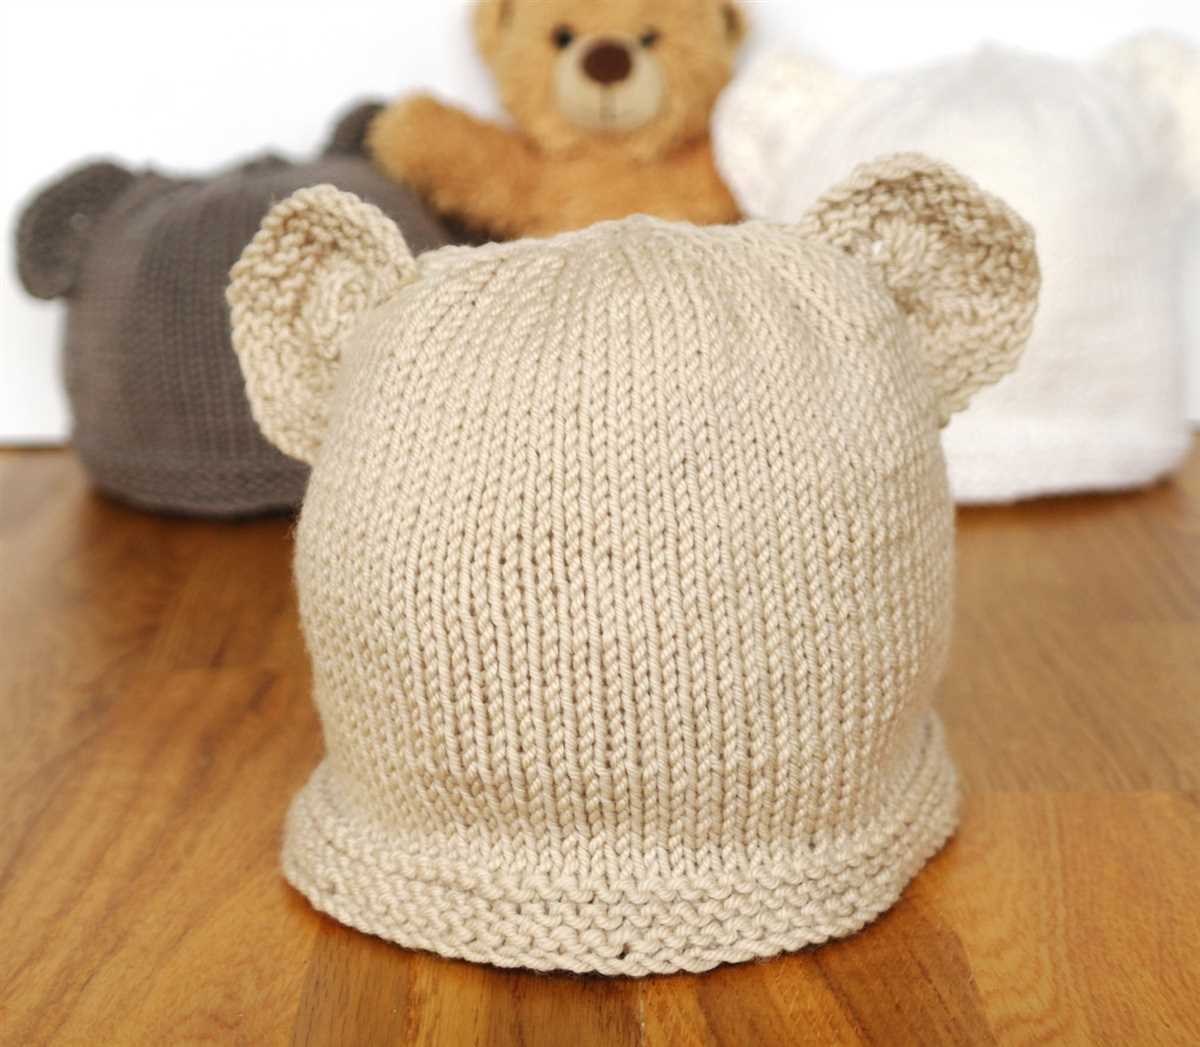
Ear Flaps
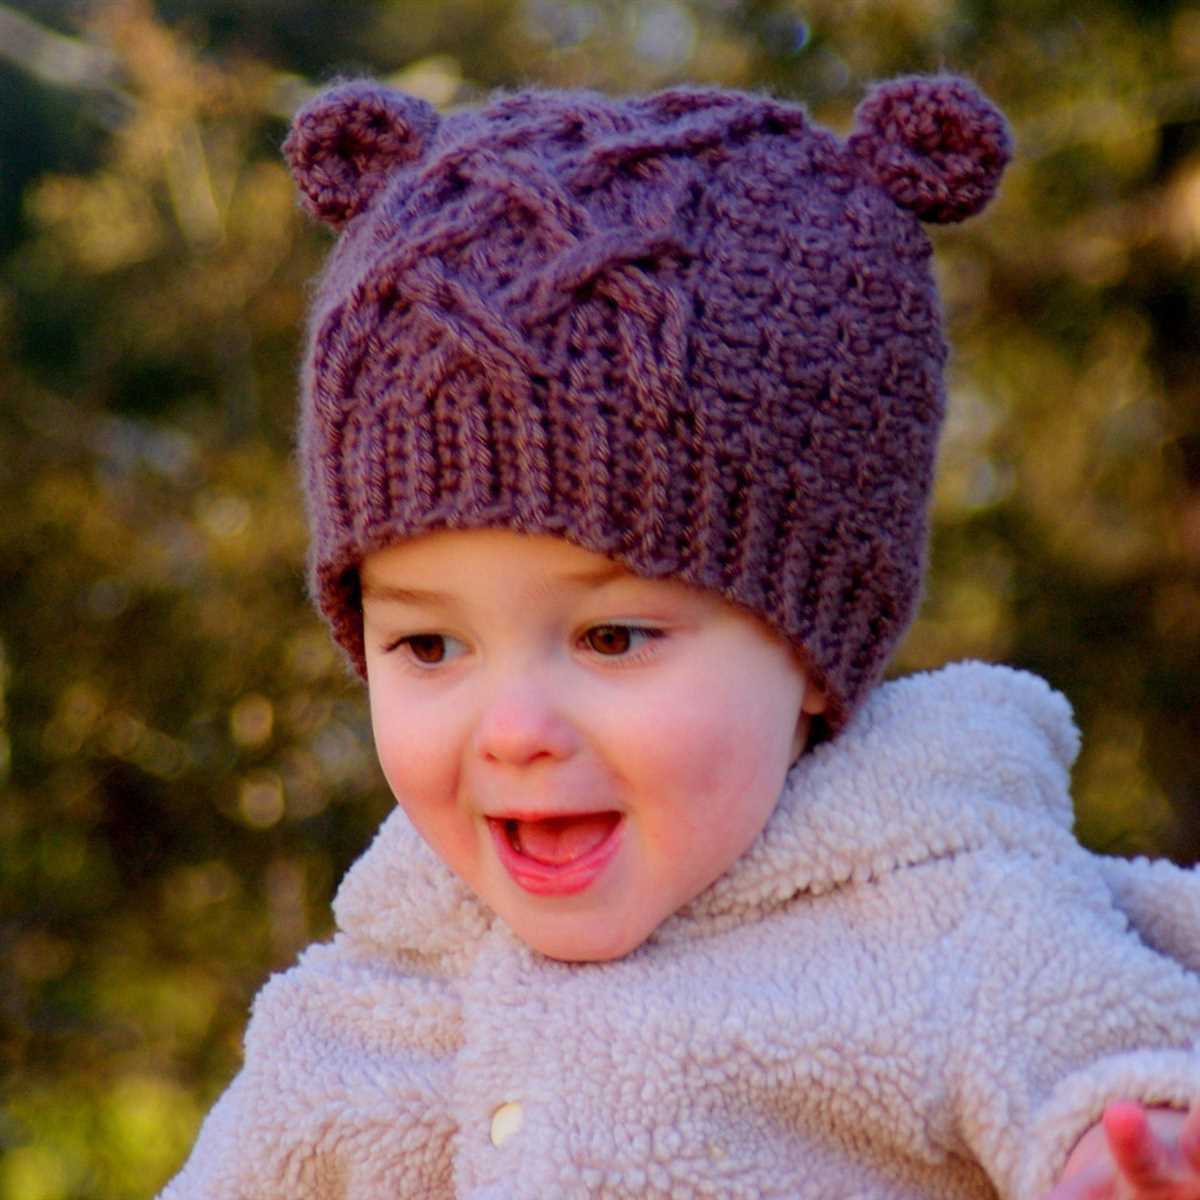
The ear flaps are an essential part of a bear hat knitting pattern. They not only provide extra warmth and protection for the ears but also add a cute and playful element to the overall design. When knitting ear flaps, it is important to consider the size and shape of the hat to ensure a proper fit.
To start knitting the ear flaps, cast on the required number of stitches onto a double-pointed needle or a circular needle, depending on your knitting preference. It is recommended to use a smaller needle size than the one used for the hat body to achieve a denser and more secure fabric. Additionally, you can use a contrasting color of yarn to create a visually appealing contrast.
To create the ear flaps, you will need to work in rows rather than rounds. Knit the first row, then turn the work and purl the second row. Repeat this process until you have reached the desired length for the ear flaps. Make sure to keep an eye on your stitch count and follow the pattern instructions carefully to maintain the correct shaping.
Once the ear flaps are complete, you will need to attach them to the hat body. This can be done by sewing or by picking up stitches along the edges of the ear flaps and continuing to knit in the round. If sewing, use a yarn needle and the same yarn used for the ear flaps to secure them in place. If picking up stitches, carefully align the edges of the ear flaps with the corresponding points on the hat body and use a smaller needle size to minimize any gaps.
After attaching the ear flaps, you can add additional embellishments if desired, such as braided cords or tassels. These can be easily attached to the corners of the ear flaps or the sides of the hat. Remember to weave in any loose ends and block the hat to shape before wearing or gifting. With the ear flaps in place, your bear hat will not only keep you warm but also make a charming fashion statement!
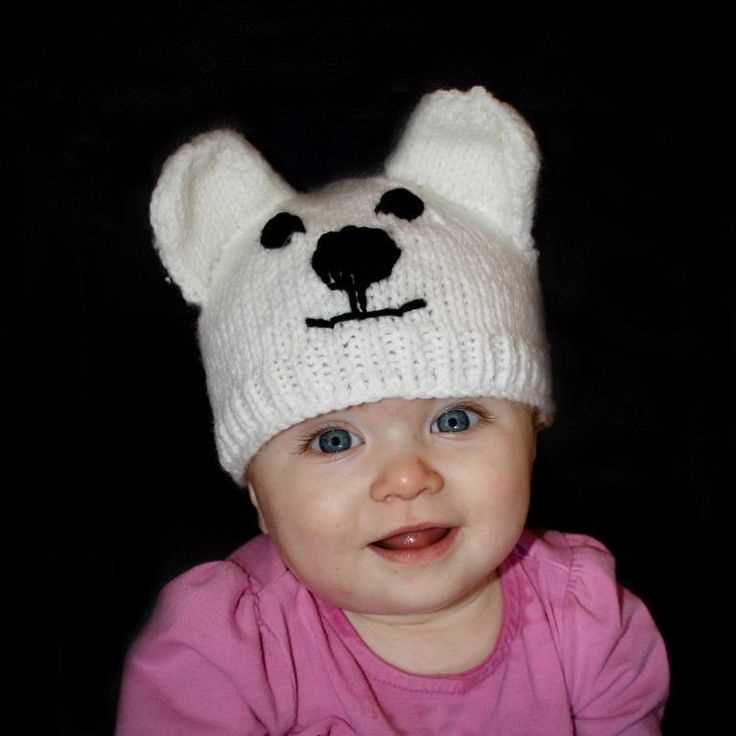
Face Detailing
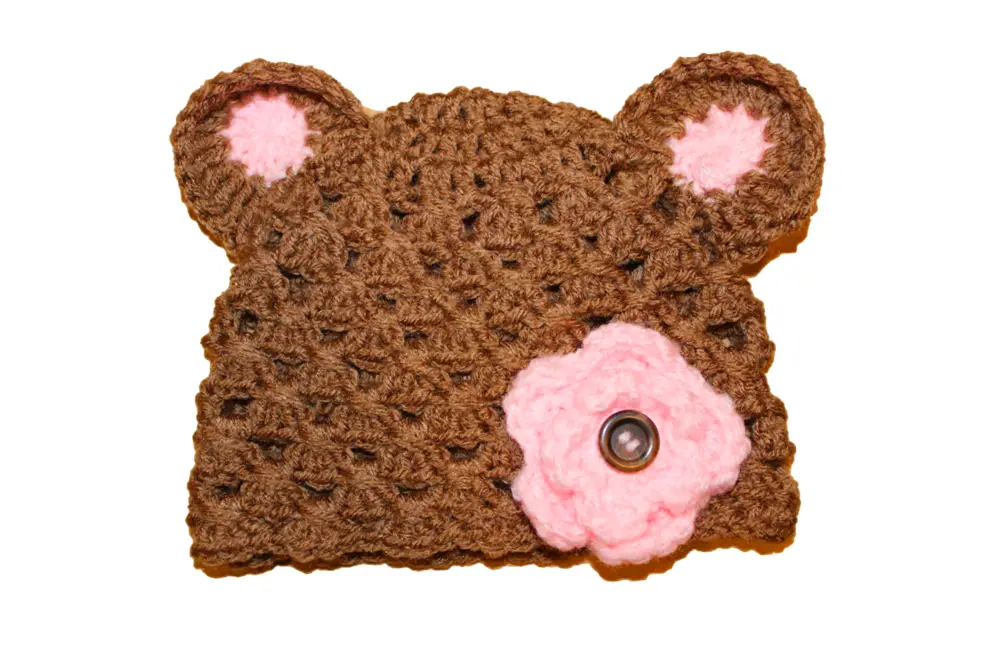
When knitting a bear hat, one of the most important elements is the face detailing. The face detailing brings the hat to life and adds personality to the finished product. There are several key features that can be included in the face detailing, such as the eyes, nose, mouth, and ears.
Eyes: The eyes of the bear hat can be made using buttons or embroidered stitches. Buttons can add a cute and playful touch to the hat, while embroidered stitches can create a more realistic look. The size and placement of the eyes can vary depending on the desired aesthetic.
Nose: The nose is another important element of the bear hat’s face. It can be created using different techniques, such as knitting a small triangle shape and sewing it onto the hat, or by using felt or fabric to make a separate nose piece and attaching it securely.
Mouth: The mouth of the bear hat can be created using yarn or embroidery thread. It can be a simple smile or a more complex shape, depending on the desired expression. The mouth can be stitched directly onto the hat or made separately and then sewn on.
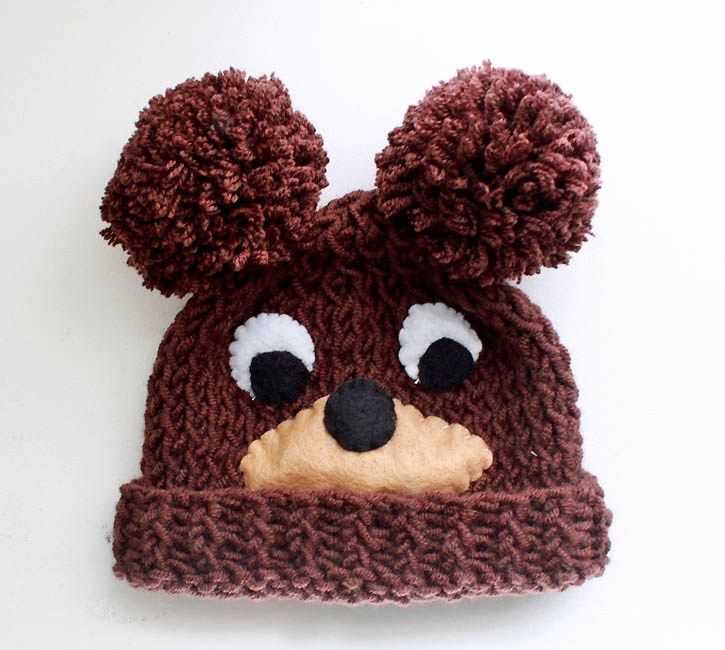
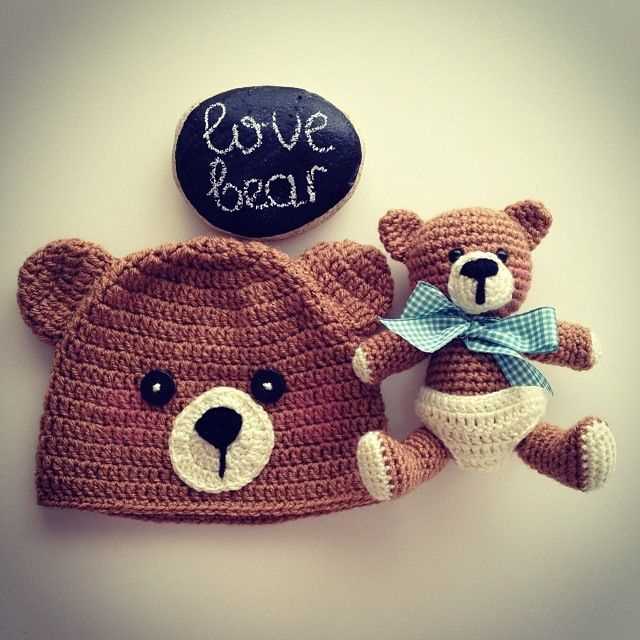
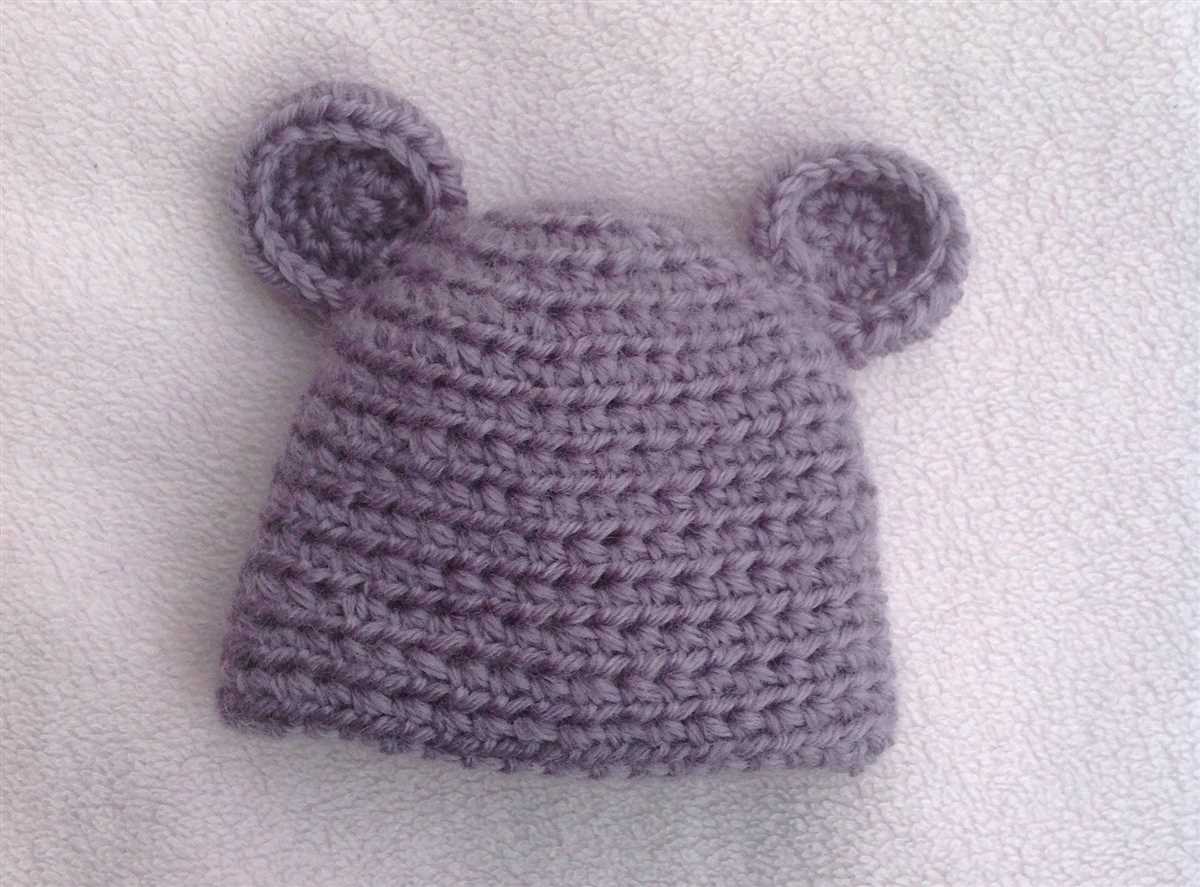
Ears: The ears of the bear hat can be knitted separately and then attached to the sides of the hat, or they can be created by shaping and folding the existing fabric of the hat. Adding ear flaps or pom-pom accents can also enhance the overall look of the hat.
Combining these details: The placement and combination of these face detailing elements can greatly impact the overall appearance of the bear hat. Careful consideration should be given to the size, shape, and position of each feature to ensure a well-balanced and visually appealing result.
Nose
A bear hat is not complete without a cute and adorable nose. The nose is one of the most important features that bring the bear to life. It adds character and charm to the hat, making it perfect for children and adults alike.
When knitting a bear hat, there are different options for creating the nose. You can use the traditional knit or crochet method to create a small circular shape that resembles a bear’s nose. This can be done using a contrasting color of yarn to make the nose stand out.
If you want to add more dimension to the nose, you can use embroidery techniques to create a realistic nose shape. This can be done by embroidering small stitches in a triangular shape to resemble a bear’s nose. You can also use embroidery thread to add details such as nostrils or a stitched mouth.
Another option for the nose is to use a button or a bead. This can be a simple and quick way to give the bear hat a cute and playful look. You can sew a button or bead securely onto the hat to create the nose, making sure it is placed in the center for symmetry.
Regardless of the method you choose, the nose is an essential part of a bear hat. It adds character and personality to the finished product, making it a fun and playful item for both children and adults.
Eyes
Eyes are an essential part of any bear hat knitting pattern. They add personality and charm to the finished product. There are several options for how to incorporate eyes into your bear hat design.
One option is to use safety eyes. These are small plastic eyes with a metal washer on the back that you can attach to the hat. Safety eyes come in a variety of sizes and colors, allowing you to choose the perfect look for your bear hat. They are easy to attach and give the hat a professional finish.
If you prefer a more handmade look, you can embroider the eyes onto the hat. This technique requires a bit more skill and patience, but it allows for more customization. You can choose the size, shape, and color of the eyes, and even add eyelashes or other details to make the eyes stand out.
Another option is to use buttons for the eyes. This gives the hat a whimsical and playful look. You can choose buttons in different shapes, sizes, and colors to create a unique and eye-catching design. Just make sure to securely sew the buttons onto the hat so they don’t come loose and pose a choking hazard.
- Safety eyes: plastic eyes with a metal washer on the back.
- Embroidered eyes: hand-stitched eyes for a more personalized look.
- Button eyes: buttons of different shapes, sizes, and colors.
Whichever method you choose, the eyes are sure to bring your bear hat to life. They are a fun and creative way to add character and personality to your knitting projects.
Finishing Touches
After you have completed knitting your bear hat, it’s time to add some finishing touches to make it even more adorable and unique. These final details will truly bring your hat to life and make it stand out from the crowd.
Embroidering the Face: Whether you are making the bear hat for yourself or as a gift, adding facial features is an essential step in bringing your bear to life. Embroider the eyes using black yarn or thread, creating small circles that can be sewn onto the hat. For the nose, choose a contrasting color and create a triangular shape at the center of the face. Finally, use the same contrasting color to stitch a smiling mouth below the nose.
Adding Ears: To give your bear hat an extra touch of cuteness, attach ears to the sides of the hat. You can knit or crochet small triangular ear shapes using the same yarn as the main part of the hat. Attach these ears to the sides by sewing them securely in place. Position them slightly forward, near the top of the hat, to achieve an adorable bear-like look.
Finishing the Edges: To give your bear hat a polished look, it’s important to finish the edges neatly. You can do this by using the same yarn or a coordinating color and knitting or crocheting a narrow border around the bottom edge of the hat. This will help to prevent the edges from curling and give the hat a more finished appearance.
Accessories: If you want to add some extra flair to your bear hat, consider attaching small accessories such as bows, pom-poms, or even a small flower. These additional details can add a touch of personality to your hat and make it even more unique. Get creative and experiment with different colors and styles to find the perfect embellishments for your bear hat.
Final Finishing Touches: Once you have completed all the above steps, take a moment to check for any loose threads or uneven stitches. Trim any excess yarn and make any necessary adjustments to ensure that your bear hat looks neat and tidy. Now you are ready to showcase your adorable bear hat and enjoy the compliments that come your way.
Optional Variations
If you want to add some personal touch to your bear hat, here are a few optional variations you can try:
- Color variations: Instead of using traditional brown or black yarn for the bear hat, you can experiment with different colors. Try using shades of gray, white, or even a mix of multiple colors to create a unique and whimsical look.
- Ear variations: While the pattern suggests knitting simple oval-shaped ears, you can get creative with the shape and size of the ears. Consider making round or triangular ears, or even adding furry tufts to make them look more realistic.
- Embellishments: Once you’ve finished knitting the basic hat, you can add some embellishments to make it even more special. Consider sewing on buttons, ribbons, or even small fabric patches to create a personalized touch.
- Earflaps: If you want to make the hat more practical for colder weather, you can add earflaps to keep the ears warm. Simply knit two additional pieces in the shape of elongated triangles and sew them onto the sides of the hat.
These optional variations allow you to customize your bear hat to your liking and make it stand out from the crowd. Have fun experimenting and creating your own unique bear hat masterpiece!