
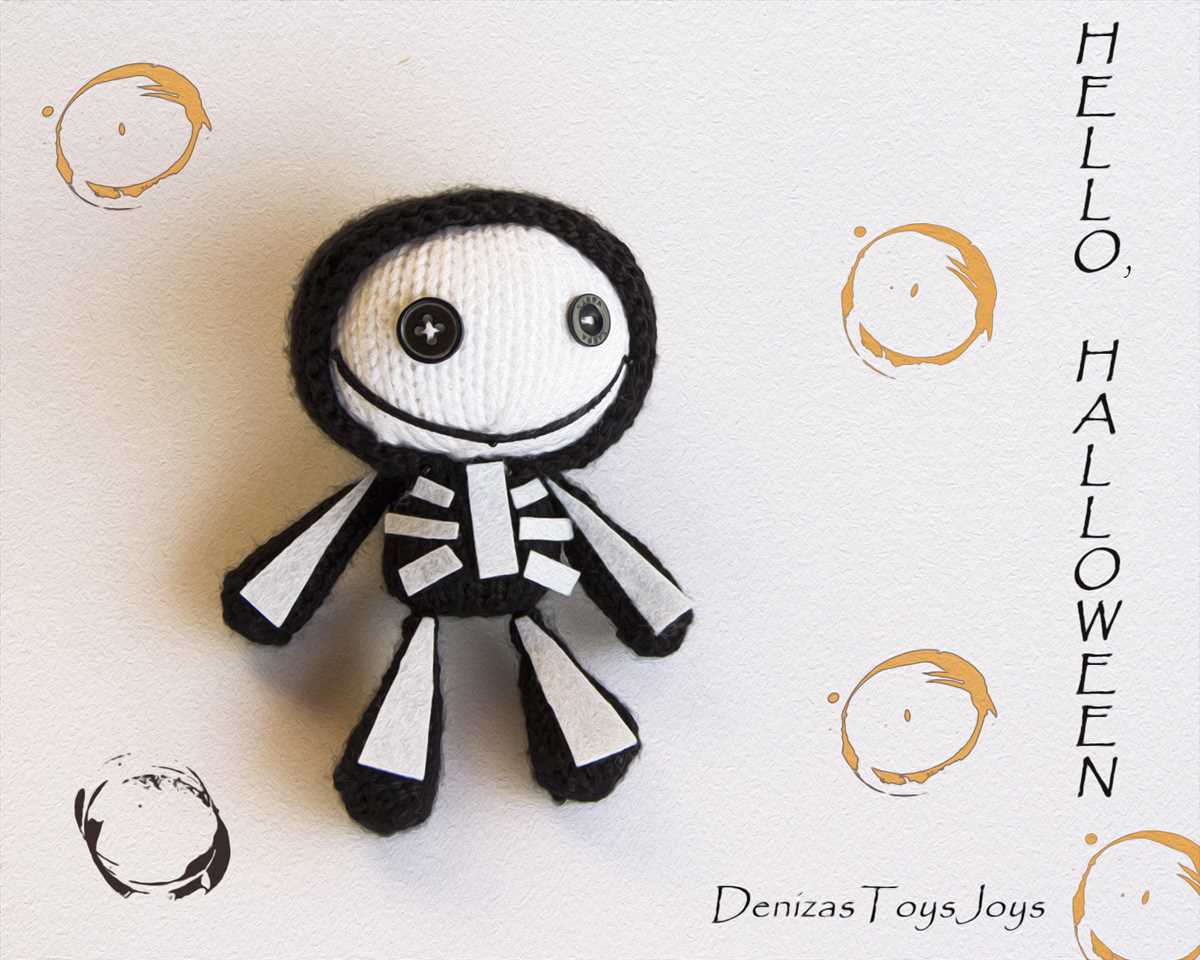
If you’re looking to add a little Halloween spirit to your knitting projects, a skeleton knitting pattern is just what you need. Whether you’re a beginner knitter or have years of experience, you can create a cute and creepy skeleton design to decorate your home or add to your costume. From small and simple projects like finger puppets to larger ones like sweaters or blankets, there are endless possibilities when it comes to knitting a skeleton.
A skeleton knitting pattern typically involves incorporating a simple skeleton motif into your knitting project. This could be done using a combination of different stitches and techniques, such as intarsia or stranded knitting, to create the bone structure of the skeleton. You can also add details like eyes, a nose, and a mouth using embroidery or other embellishments.
There are many different types of skeleton knitting patterns available, ranging from beginner-friendly to more advanced designs. If you’re new to knitting or just want a quick and easy project, you might consider starting with a small project like a skeleton keychain or a pair of fingerless gloves. These projects can be completed in just a few hours and are a great way to practice your knitting skills while creating something fun and festive.
Skeleton Knitting Pattern
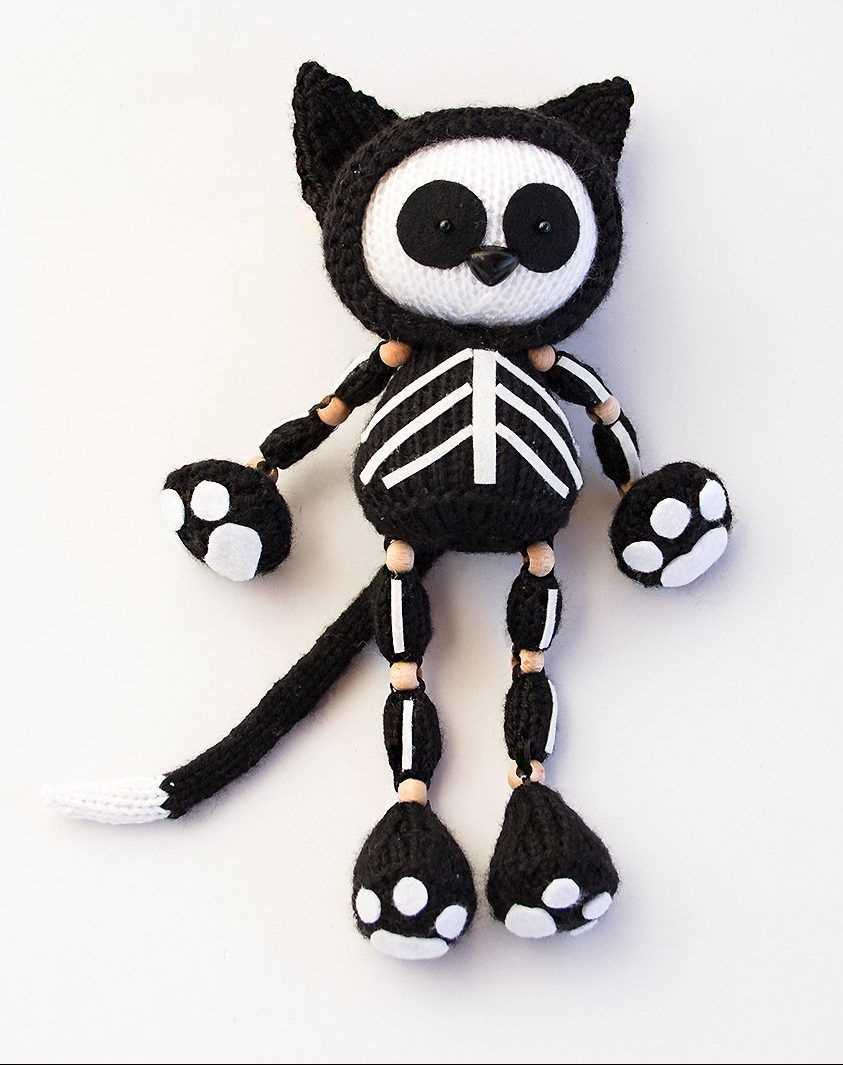
If you’re looking for a creative and unique knitting project, why not try your hand at a skeleton knitting pattern? This fun and spooky design is perfect for Halloween or any time you want to add a touch of whimsy to your knitting. With its intricate bone details and playful design, a skeleton pattern is sure to delight both children and adults alike.
To start knitting a skeleton, you will need some basic knitting skills and materials. This pattern typically uses small double-pointed needles and a medium-weight yarn in black or white, although you can experiment with different colors if you prefer. You will also need a tapestry needle for finishing touches.
Steps to Knit a Skeleton:
- Head: Begin by casting on stitches for the head using the desired color yarn. Follow the pattern instructions to knit the head and shape it into a round shape. Use the tapestry needle to sew on any additional features, such as eyes or a mouth.
- Body: After completing the head, you will move on to knitting the body. This typically involves knitting the torso, arms, and legs separately and then sewing them together. The pattern should provide instructions on how to knit each body part and how to attach them together.
- Bone Details: Once the main body is complete, you can add detailing to create the skeleton’s bones. This may involve knitting smaller pieces or using techniques like embroidery or duplicate stitching to create the bone shapes. Follow the pattern instructions to add these details.
- Finishing Touches: Once all the pieces are knitted and assembled, take the time to add any finishing touches or embellishments. This could include sewing on additional details like rib cages or joints, or even adding accessories like a tiny knitted top hat or bowtie for a whimsical touch.
Knitting a skeleton pattern can be a fun and challenging project for knitters of all skill levels. Not only will you end up with a unique and eye-catching finished piece, but you’ll also enjoy the process of bringing your skeleton to life stitch by stitch. Whether you choose to knit a small ornament or a larger toy, a skeleton knitting pattern is a great way to showcase your creativity and add a touch of Halloween fun to your knitting projects.
Choosing the right yarn
When it comes to knitting a skeleton pattern, choosing the right yarn is essential for achieving the desired result. The type of yarn you select will determine the overall look and feel of the finished project.
1. Consider the fiber content: There are various types of yarn available, each with different fiber content. For a skeleton pattern, it is recommended to choose a yarn that has a good amount of stretch and bounce, such as wool or a wool blend. This will help the finished skeleton hold its shape and give it a more lifelike appearance.
2. Choose the right weight: The weight of the yarn refers to how thick or thin it is. For a skeleton pattern, a medium weight yarn, also known as worsted weight or aran weight, is usually the most suitable. This weight allows for enough detail in the stitches without making the skeleton too bulky.
3. Consider the color: While traditional skeletons are white, there is room for creativity when it comes to color choice. You may opt for a more vibrant color for a fun and whimsical effect, or you can stick to a natural shade for a traditional skeleton look. It’s all about personal preference and the atmosphere you want to create.
4. Test the yarn: Before starting your project, it’s always a good idea to test the yarn. Knit up a small swatch to see how the yarn feels and behaves. This will give you an idea of the gauge and how the finished skeleton will look. It’s better to make adjustments before diving into the full project.
By considering these factors and taking the time to choose the right yarn, you can ensure that your skeleton knitting pattern turns out just as you envision it, with the right texture, shape, and overall appearance. Happy knitting!
Choosing the Right Needles for Your Skeleton Knitting Pattern
When it comes to knitting a skeleton pattern, choosing the right needles is crucial for achieving the desired results. The type and size of needles you use can greatly affect the overall appearance and durability of your knitted skeleton.
Type of Needles: The most common type of needles used for knitting skeleton patterns are straight needles, also known as single-pointed needles. These needles have a pointed end on one side and a knob or stopper on the other, allowing you to hold and manipulate the yarn while knitting. Straight needles are ideal for beginners as they are easy to handle and provide good control over the knitting process.
Size of Needles: The size of needles you choose will depend on the thickness of the yarn you are using and the desired tension of your knitted fabric. When knitting a skeleton pattern, it is recommended to use smaller-sized needles to create a tight fabric with defined stitches. This will help to enhance the skeleton’s structure and make the pattern more visible. However, it is essential to check the gauge or tension recommendations provided in the pattern to ensure that your finished skeleton will match the intended size.
Material of Needles: Needles can be made from various materials, such as metal, bamboo, or plastic. Each material has its own advantages and characteristics. Metal needles are durable and slide easily, making them suitable for faster knitting. Bamboo needles are lightweight and have a natural grip, making them comfortable for long knitting sessions. Plastic needles are flexible and gentle on the hands, making them a good choice for people with arthritis or sensitive hands.
Additional Considerations: Besides the type, size, and material of the needles, it is also important to consider your knitting style and personal preference. Some knitters may prefer circular needles for knitting the skeleton, while others may prefer double-pointed needles for working on specific parts, such as the arms and legs. Ultimately, it is essential to choose needles that you feel comfortable using and that allow you to achieve the desired outcome for your skeleton knitting pattern.
Basic Knitting Stitches
When starting out with knitting, it is important to learn the basic stitches. These stitches form the building blocks for more complex patterns and projects. Here are a few of the essential stitches every knitter should know:
1. Knit Stitch

The knit stitch is the most fundamental stitch in knitting. It is created by inserting the right needle into the loop on the left needle, wrapping the yarn around the right needle, and pulling it through the loop to create a new stitch. This stitch creates a smooth, V-shaped pattern on the fabric.
2. Purl Stitch
The purl stitch is the reverse of the knit stitch. It is created by inserting the right needle from right to left into the loop on the left needle, wrapping the yarn counter-clockwise around the right needle, and pulling it through the loop to create a new stitch. This stitch creates a bumpy, horizontal line pattern on the fabric.
By combining these two basic stitches, various patterns and textures can be achieved. The knit and purl stitches can be worked in different combinations, such as ribbing, garter stitch, and stockinette stitch, to create different effects and designs.
3. Yarn Over
A yarn over is commonly used to create an increase in knitting. It is created by bringing the yarn to the front of the work, then taking it over the right needle to the back of the work. This creates an extra loop on the needle, which is then worked as a regular stitch in the next row or round.
4. Slip Stitch
A slip stitch is created by transferring a stitch from the left needle to the right needle without working it. It is often used to create decorative effects, such as colorwork or shaping. Slip stitches can be worked in various ways, such as slipping a stitch knitwise or purlwise, or slipping multiple stitches at once.
These basic knitting stitches are the foundation for learning more advanced techniques and patterns. Practice them until you feel comfortable and confident with each stitch, and then you’ll be ready to take on more challenging knitting projects.
Instructions for creating the skeleton body
Making a skeleton body for knitting can be a fun and challenging project. Follow these instructions to create your own unique skeleton body.
Materials:
- Knitting needles (size may vary depending on your desired skeleton body size)
- Black yarn
- Scissors
- Tapestry needle
Step 1: Cast on

Begin by casting on the desired number of stitches, depending on the width of your skeleton body. Use the long-tail cast on method or any other cast on method of your choice.
Step 2: Knit the body

Once you have cast on, start knitting in stockinette stitch with the black yarn. Knit every row for the desired length of the skeleton body. The length will depend on your preference and the size of the knitting needles used.
Step 3: Shape the body
To give the skeleton body a more realistic shape, you can add shaping to create the narrower waist and wider hips. Decrease stitches gradually on both sides to create the waist, then increase stitches again to create the hips. Repeat this shaping process if desired.
Step 4: Bind off
Once you are satisfied with the shape and length of your skeleton body, bind off all stitches. Cut the black yarn, leaving a long tail for sewing the different body parts together.
With these instructions, you can create a skeleton body for your knitting project. Feel free to get creative and customize the design to match your personal preferences. Happy knitting!
Instructions for creating the skeleton head
The skeleton head is an essential part of any skeleton knitting pattern. It adds a spooky touch and completes the overall look of the finished project. Follow these instructions to create your own skeleton head:
Materials:
- White yarn
- Knitting needles (size may vary depending on desired size of the head)
- Black yarn or embroidery floss
- Yarn needle
- Scissors
Step 1: Cast on and knit the base
Start by casting on the desired number of stitches, depending on the size of the head you want to create. Use white yarn and the appropriate size of knitting needles. Knit several rows using the stockinette stitch, which means knitting one row and purling the next row. This will create a smooth and even base for the head.
Step 2: Shape the head

To shape the head, begin decreasing stitches gradually. This can be done by knitting two stitches together at regular intervals. Continue decreasing until only a few stitches remain.
Step 3: Finishing touches
Use the black yarn or embroidery floss to embroider the eye sockets and nose onto the head. You can also add any other details, such as a stitched mouth or additional decorations, to personalize your skeleton head. Once you are satisfied with the appearance, cut the yarn and weave in any loose ends.
Now your skeleton head is complete! You can attach it to the rest of your skeleton knitting project as desired, or use it as a standalone decoration for Halloween or other spooky occasions.
Instructions for creating the skeleton arms
If you are looking to create a spooky skeleton for Halloween or a creepy decoration, then making skeleton arms is a must. These instructions will guide you through the process of knitting and assembling the arms, ensuring that you have a realistic and bone-chilling addition to your project.
Materials needed:
- Knitting needles (size 5)
- Black yarn
- White yarn
- Tapestry needle
Step 1: Knitting the bones
Start by casting on 20 stitches using black yarn. Knit each row using a simple garter stitch until the piece measures approximately 10 inches in length. This will create the main “bone” for the skeleton arm.
Step 2: Creating the joints

Next, switch to white yarn and continue knitting in a garter stitch for about 4 inches. This section will represent the joint of the arm. Once you reach the desired length, switch back to black yarn and continue knitting for another 10 inches to complete the second bone.
Step 3: Assembling the arm
Once both bones are complete, use a tapestry needle to secure the ends of each bone together, ensuring that they are aligned correctly. Leave a small opening at the top of the arm for stuffing, if desired. You can also add additional details, such as knitted fingers, by sewing them onto the ends of the bones using black yarn.
Congratulations! You have now successfully created a pair of skeleton arms. Repeat these steps to make as many arms as needed for your project. Now you can attach them to your skeleton body or use them as standalone decorations for a spooky touch.
Instructions for creating the skeleton legs

Knitting skeleton legs requires precision and attention to detail. The following instructions will guide you through the process of creating the perfect skeleton legs for your knitting project.
Materials Needed:
- A set of double-pointed knitting needles
- Black yarn
- Tapestry needle
- Scissors
Step 1: Cast on and knit the first leg
- Choose the size of the double-pointed knitting needles depending on the yarn weight you are using.
- Cast on the required number of stitches using the long-tail cast-on method.
- Divide the stitches evenly onto three needles to begin knitting in the round.
- Continue knitting in the round using the stockinette stitch until the leg reaches the desired length.
- Bind off the stitches to finish the first leg.
Step 2: Knit the second leg
- Repeat steps 1 through 4 to knit the second leg. Make sure to match the length of the first leg for symmetry.
- Bind off the stitches to finish the second leg.
Step 3: Attach the legs to the body
- Using the tapestry needle, weave in any loose ends on the legs.
- Position the legs on the body of your knitting project, ensuring they are evenly spaced.
- Secure the legs to the body by sewing them in place using the same black yarn and tapestry needle.
- Weave in any remaining loose ends to complete the skeleton legs.
With these instructions, you will be able to create realistic and detailed skeleton legs for your knitting project. Remember to take your time and pay attention to the details to achieve the desired outcome. Happy knitting!
Assembly of the skeleton

Once you have completed knitting all the individual pieces of the skeleton, it is time to assemble them together to create the final product. Assembly is an important step in the knitting process as it ensures that all the different parts of the skeleton fit together correctly and give the finished piece its proper shape and structure.
To begin the assembly, lay out all the individual pieces of the skeleton in front of you. Take a moment to familiarize yourself with each piece and its corresponding placement within the overall structure. It can be helpful to refer back to the knitting pattern or instructions to ensure that you are assembling the skeleton correctly.
First, attach the head to the neck by carefully stitching the two pieces together using a tapestry needle and the same yarn that was used to knit the pieces. Make sure to securely fasten the stitches to ensure that the head is firmly attached to the neck. Next, continue by attaching the arms and legs to the corresponding parts of the body. Again, use the tapestry needle to stitch the pieces together, making sure to create strong and secure connections.
Once all the body parts are attached, it is time to focus on the finer details of the skeleton. Use the yarn to embroider the facial features onto the head, such as the eyes, nose, and mouth. This will give the skeleton a more realistic and expressive appearance. Additionally, you can use yarn or embroidery thread to add any other desired details, such as rib cages or skeletal patterns on the limbs.
Finally, take a step back and examine the assembled skeleton to ensure that everything is in place and looks as desired. Make any necessary adjustments or additional stitches as needed. Once you are satisfied with the final product, your knitted skeleton is ready to be displayed or used for Halloween decorations or any other spooky occasions.
Adding details and finishing touches
Once you have completed the main body of the skeleton using the knitting pattern, it’s time to add the details and finishing touches that will bring your creation to life. These small additions can make a big difference in the final appearance of your knitted skeleton.
1. Embroidering the facial features
One of the most important details to add is the facial features of the skeleton. Using embroidery thread in contrasting colors, carefully sew on the eyes, nose, and mouth. You can use small, neat stitches to create a realistic or quirky expression, depending on the style you are going for.
2. Creating the skeleton’s joints
To give your knitted skeleton a more authentic look, consider adding joint details. This can be achieved by using a contrasting yarn or thread to create lines or crosses at the elbows, knees, and other areas where joints would be present. This will give the impression of bones connecting together.
3. Adding accessories
To further personalize your knitted skeleton, you can add accessories such as a top hat, a bowtie, or even a small cape. These extra touches can enhance the overall character of your creation and make it truly unique.
4. Finishing off with blocking and shaping

Once all the details have been added, it’s time to give your knitted skeleton its final shape. You can do this by lightly wetting the piece and blocking it to ensure that the stitches are even and the overall shape is well-defined. This step will also help to remove any wrinkles or creases that may have formed during the knitting process.
By paying attention to these small details and taking the time to add the finishing touches, you can create a beautifully crafted knitted skeleton that is sure to impress. Whether you’re making it as a Halloween decoration or as a unique piece of artwork, the extra effort will be well worth it in the end.
Tips and Tricks
In this section, we will provide you with some tips and tricks to make your skeleton knitting pattern experience more enjoyable and successful.
1. Use the right yarn: When knitting a skeleton, it is important to choose a yarn that is lightweight and has good stitch definition. A light-colored yarn will help the details of the skeleton stand out.
2. Experiment with stitch patterns: While the basic stockinette stitch works well for a skeleton, you can also try different stitch patterns to add texture and interest. Ribbing, cables, or lace patterns can all be incorporated into a skeleton design.
3. Pay attention to gauge: Maintaining an accurate gauge is crucial for a well-fitted skeleton. Make sure to check your gauge before starting and adjust your needle size if necessary. Remember, a tight gauge will result in a smaller skeleton, while a loose gauge will make it larger.
4. Don’t be afraid to customize: Feel free to add your own personal touch to your skeleton knitting pattern. You can embellish it with beads, sequins, or embroidery to make it unique to your style.
5. Keep track of your progress: It’s helpful to keep notes as you work on your skeleton. This will make it easier to reproduce the pattern in the future or make adjustments if needed.
6. Blocking is key: Blocking your finished skeleton will help to even out the stitches and give it a polished look. Follow the instructions on your yarn label for the best blocking method.
7. Join a knitting community: If you’re new to knitting or just looking for support and inspiration, consider joining a knitting community online or in your local area. You can find valuable tips, advice, and even meet fellow skeleton knitting enthusiasts.
By following these tips and tricks, you’ll be able to create a beautiful and unique skeleton knitting pattern. Happy knitting!