
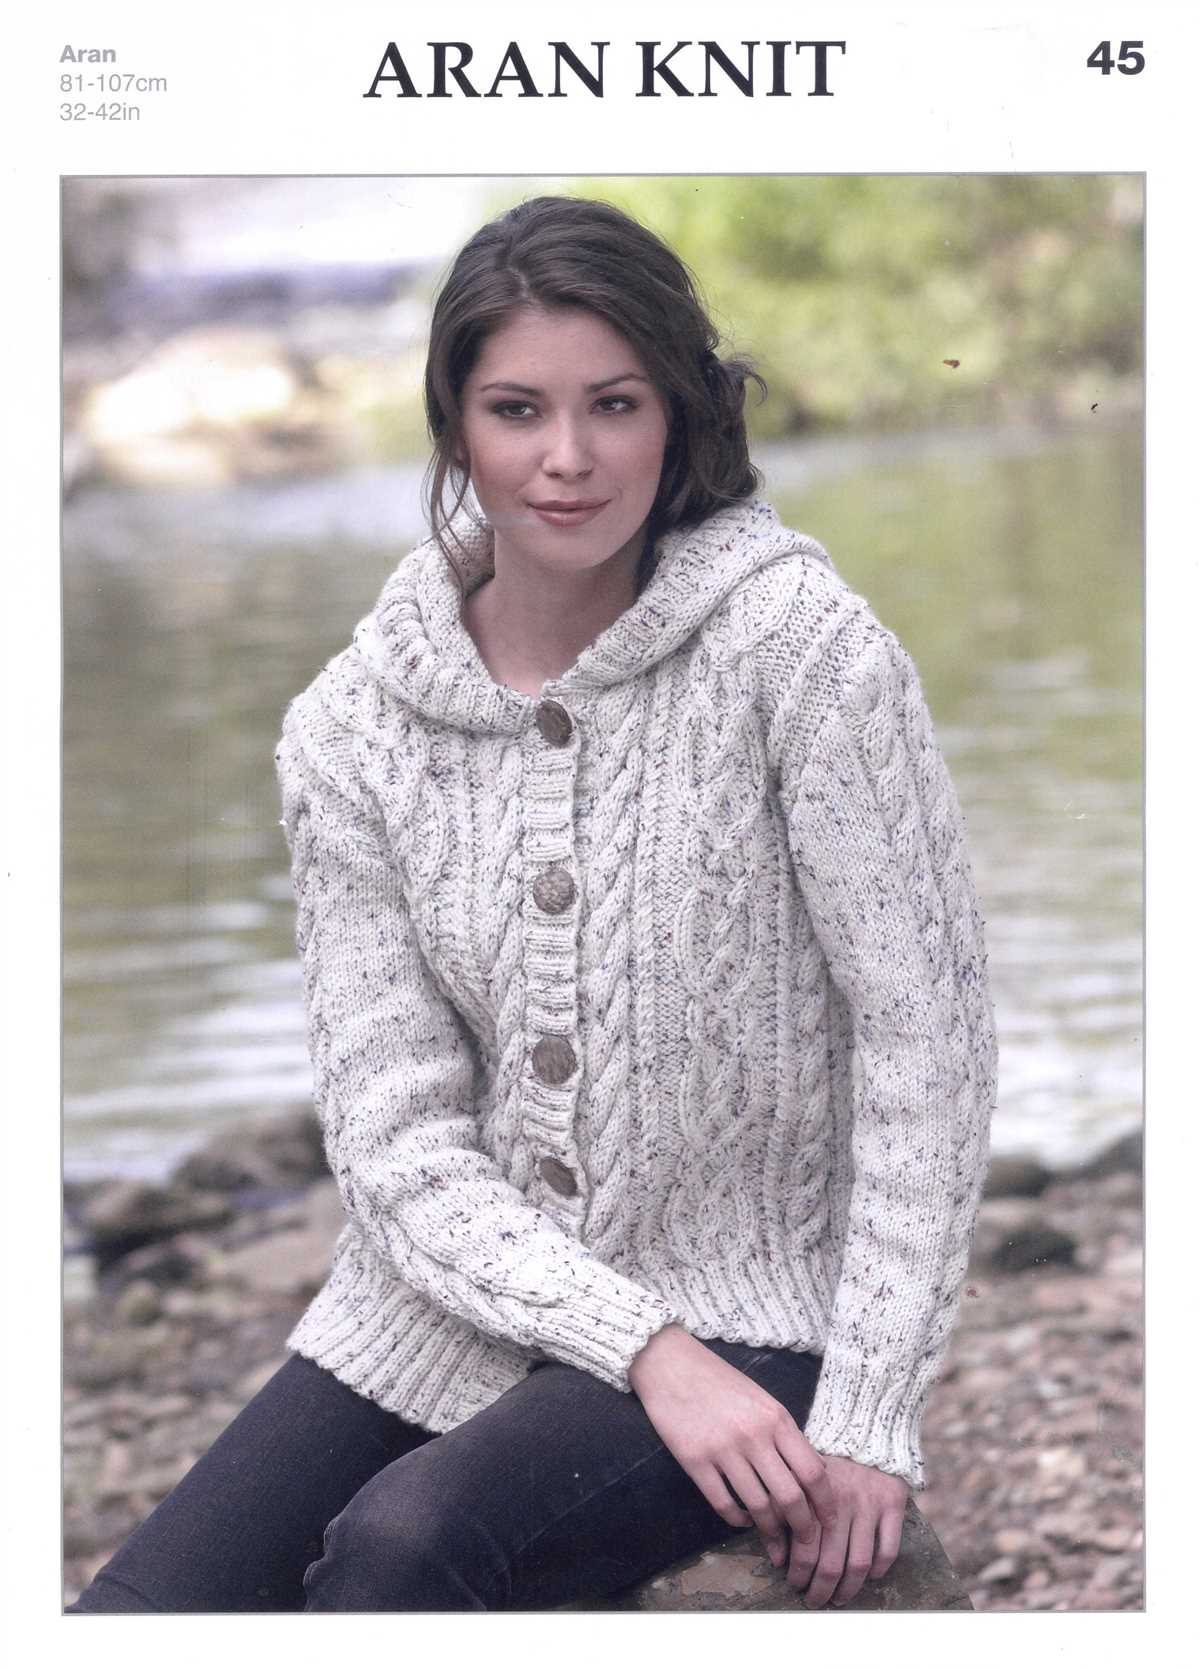
Are you a knitter looking for your next project? Look no further! We have the perfect knitting pattern for you – a women’s hooded cardigan. This cozy and fashionable cardigan is a must-have addition to your wardrobe, and it’s perfect for chilly fall and winter days.
This knitting pattern is suitable for knitters of all skill levels. Whether you’re a beginner or an experienced knitter, you can easily follow the step-by-step instructions to create this beautiful cardigan. The pattern includes detailed diagrams and measurements, making it easy for you to customize the cardigan to fit your specific size and style preferences.
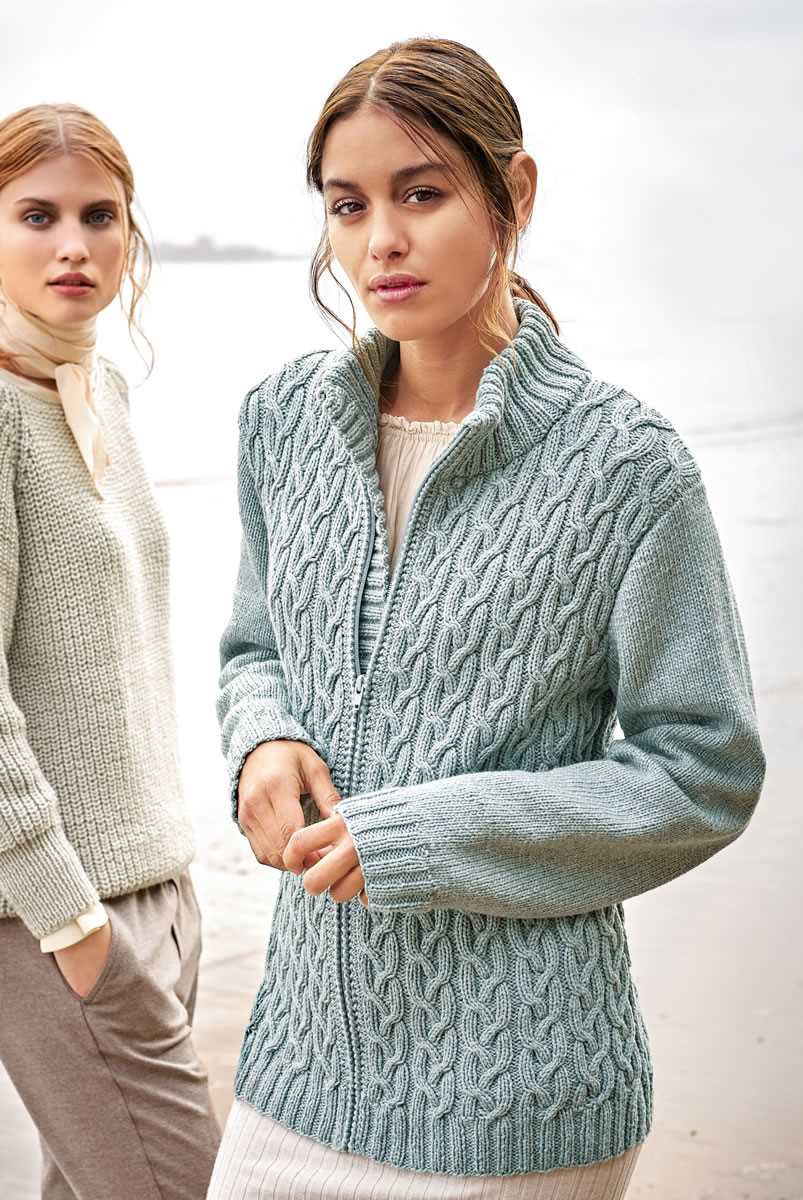
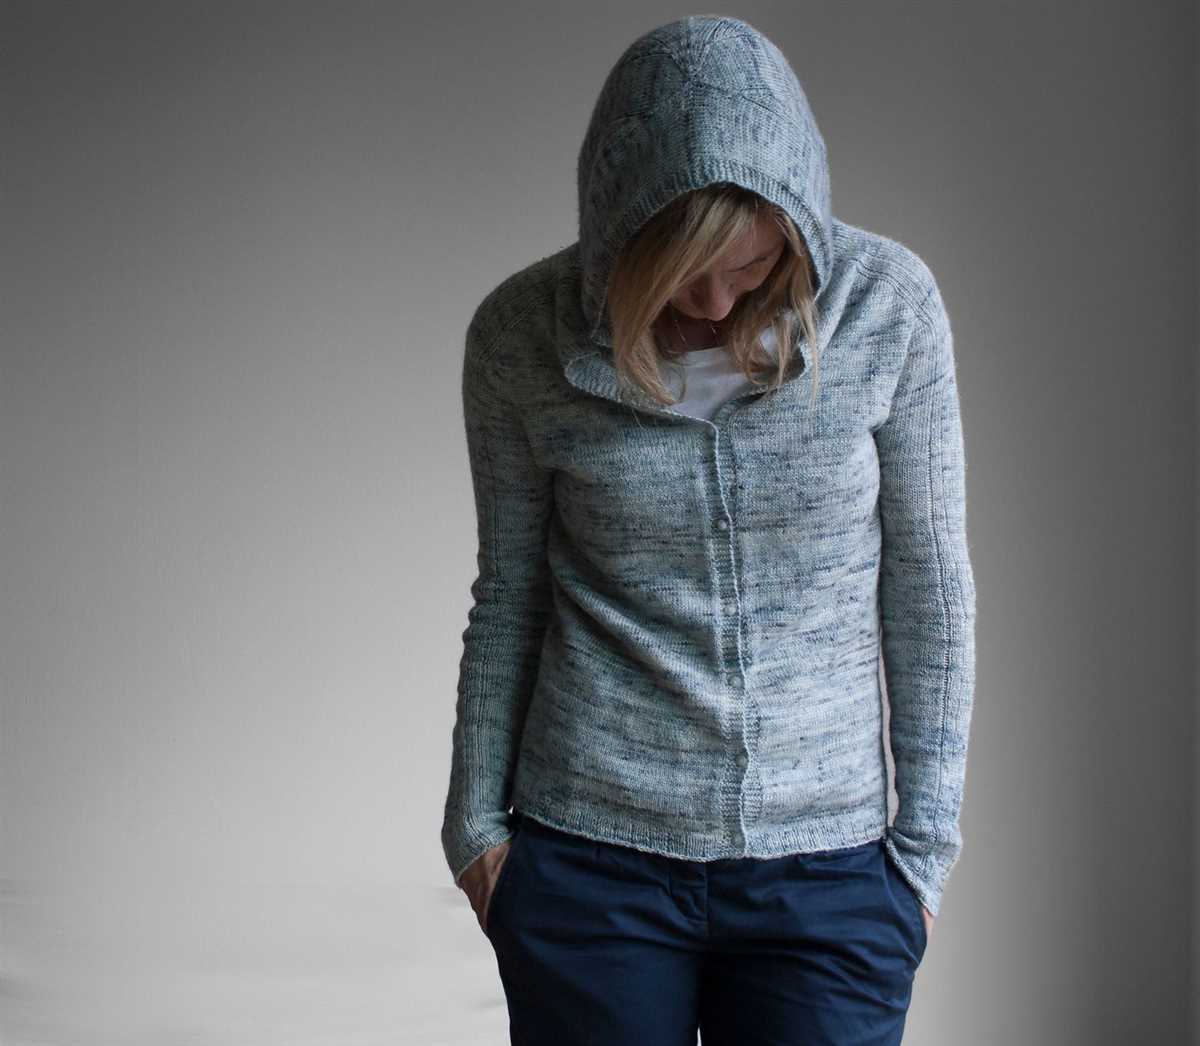
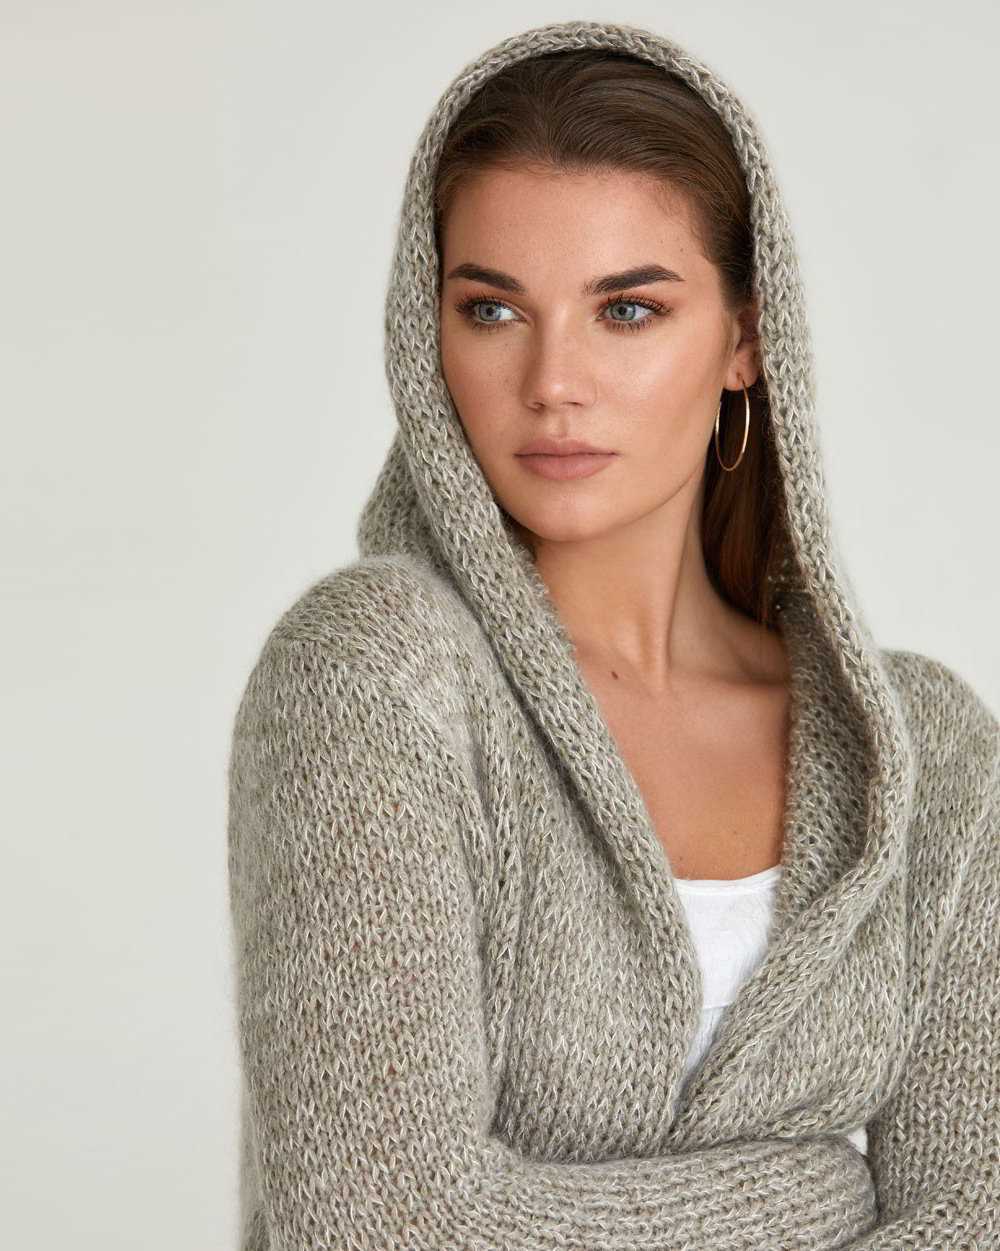
What makes this cardigan even more special is its hood. The hood adds an extra layer of warmth and coziness, making it perfect for those blustery days when you need a little extra protection from the elements. Plus, the hood adds a stylish and trendy touch to the cardigan, making it a fashionable choice for any occasion.
How to Knit a Womens Hooded Cardigan: Step-by-Step Guide
Knitting a women’s hooded cardigan is a fun and rewarding project that allows you to create a cozy and stylish garment. Whether you’re a beginner knitter or have more experience, this step-by-step guide will help you create your own women’s hooded cardigan.
Materials: Before you begin, gather the necessary materials. You will need a set of knitting needles suitable for the yarn you’ve chosen, a crochet hook, stitch markers, a tapestry needle, and of course, the yarn of your choice in the desired color.
Step 1: Gauge Swatch
It’s important to start by making a gauge swatch to ensure that your finished cardigan will fit properly. Follow the pattern instructions to create a sample swatch using the specified stitch and yarn. Measure the swatch with a ruler to verify that it matches the given gauge. Adjust your needle size if needed to achieve the correct gauge.
Step 2: Cast On and Ribbing
With the correct needle size and gauge, it’s time to cast on the required number of stitches. Follow the pattern instructions to cast on and begin knitting the ribbing. The ribbing typically consists of knit and purl stitches to create a stretchy and attractive edging. Continue knitting the ribbing until the desired length is reached.
Step 3: Body and Sleeves
After completing the ribbing, you’ll move on to knitting the body of the cardigan. Follow the pattern instructions to knit the required number of rows or inches to reach the desired length. Pay attention to any shaping instructions such as increases or decreases for a more customized fit.
Once the body is complete, it’s time to knit the sleeves. Follow the pattern instructions to pick up stitches at the armhole and begin knitting the sleeves. You may need to knit in the round or use double-pointed needles to create the seamless sleeve. Continue knitting the sleeves until the desired length is reached.
Step 4: Hood
Now it’s time to add the hood to your cardigan. Follow the pattern instructions to pick up stitches along the neckline and begin knitting the hood. You may need to increase or decrease stitches to shape the hood, as specified in the pattern. Continue knitting until the hood reaches the desired length, then bind off the stitches to secure the hood in place.
Step 5: Finishing
Finally, you’ll need to finish your cardigan by weaving in any loose ends, sewing any seams if necessary, and blocking the finished garment. Use a tapestry needle to weave in any yarn tails, making sure to secure them tightly. If your cardigan has button bands or pockets, sew them on using a tapestry needle and matching yarn. Once all the finishing touches are complete, wet block or steam block your cardigan to give it a professional finish.
Congratulations! You’ve successfully knitted your own women’s hooded cardigan. Now you can enjoy wearing your cozy and stylish creation.
Choosing the Right Yarn and Knitting Needles
When choosing the right yarn for your womens hooded cardigan, it is important to consider both the fiber content and the weight of the yarn. The fiber content will determine the warmth, breathability, and durability of the finished garment, while the weight of the yarn will affect the drape and overall appearance of the cardigan. It is recommended to choose a soft and cozy yarn that will provide the desired level of warmth and comfort for the cooler seasons.
For a womens hooded cardigan, you will need to use knitting needles that are appropriate for the yarn weight you have chosen. The pattern you are following will typically specify the recommended needle size, but it is also important to consider your personal knitting tension. If you tend to knit tightly, you may need to use larger needles to achieve the correct gauge, while if you knit loosely, you may need to use smaller needles. Knitting needles can be made from various materials, such as aluminum, bamboo, or plastic, each providing a different knitting experience and resulting in a different appearance of the stitches.
- Choose a soft and cozy yarn that will provide warmth and comfort for the cooler seasons.
- Consider the fiber content to determine the warmth, breathability, and durability of the finished garment.
- The weight of the yarn will affect the drape and overall appearance of the cardigan.
- Use knitting needles appropriate for the yarn weight and consider your personal knitting tension.
- Knitting needles can be made from various materials, such as aluminum, bamboo, or plastic.
Understanding the Knitting Pattern and Gauge
When it comes to knitting a women’s hooded cardigan, understanding the knitting pattern and gauge is essential. The pattern provides the instructions on how to create the cardigan, while the gauge determines the size and fit of the finished garment.
Knitting Pattern: The knitting pattern for a women’s hooded cardigan may include various sections, such as the body, sleeves, hood, and finishing details. Each section will have specific instructions on the type of stitches to use, the number of stitches to cast on and bind off, and any shaping or special techniques required. It is important to carefully read through the entire pattern before starting to ensure you understand all the steps involved.
Gauge: The gauge is a measurement of how many stitches and rows are achieved per inch or centimeter of knitting. It is crucial to match the gauge stated in the pattern to ensure the cardigan comes out the correct size. To determine your gauge, you will need to knit a sample swatch using the recommended yarn and needle size. Measure the swatch and compare it to the gauge given in the pattern. If your gauge differs, you may need to adjust your needle size to achieve the correct gauge before starting the actual cardigan.
When working with a knitting pattern, it is also important to pay attention to any abbreviations or special stitches used. These will be explained in the pattern’s key or glossary. Additionally, keep track of your progress by using stitch markers and row counters, as this will help you stay organized and avoid mistakes. With proper understanding of the knitting pattern and gauge, you will be on your way to creating a beautiful women’s hooded cardigan.
Casting on Stitches for the Back Panel
When starting to knit the back panel of the women’s hooded cardigan, the first step is to cast on the required number of stitches. The pattern will specify how many stitches to cast on, depending on the size of the cardigan you are making. Make sure to use the recommended yarn and needle size to achieve the desired gauge.
To cast on the stitches, you can use any method you are comfortable with. One popular method is the long-tail cast on. This method creates a neat and elastic edge, which is perfect for the bottom of the cardigan.
To begin, measure a long tail of yarn, approximately three times the width of your finished piece. Make a slip knot at the end of the tail, leaving a small loop. Insert your right needle into the loop from front to back, and bring the yarn over the needle, creating a new loop. Slip the new loop onto the left needle, pulling it gently to tighten.
Repeat this process for the required number of stitches, making sure to keep the tension even throughout. Once all the stitches are cast on, you can begin the next step of the pattern, which may be a ribbing or another type of stitch pattern for the back panel of the cardigan.
Working the Ribbing for the Cuffs and Hem
Before starting the ribbing for the cuffs and hem of the women’s hooded cardigan, make sure you have the correct size needles and yarn. The ribbing is an important part of the design as it helps create a snug and comfortable fit.
To begin, cast on the required number of stitches for the cuffs using the long tail cast on method. This method creates a neat edge that blends seamlessly with the ribbing. Once you have cast on the stitches, join in the round and place a stitch marker to mark the beginning of the round.
Round 1: *K1, P1* to end of round.
Continue working in this *K1, P1* ribbing pattern for the desired length of the cuffs. The length of the ribbing can vary depending on personal preference, but a common length is around 1-2 inches. Remember to always end the round with the same stitch you started with to maintain the ribbing pattern.
Next, you will move on to the hem ribbing. This is worked in the same *K1, P1* ribbing pattern as the cuffs. At this stage, you may choose to switch to a larger needle size to create a more relaxed fit for the bottom of the cardigan.
Work the hem ribbing for the desired length, which is usually longer than the cuffs to allow for the cardigan to sit nicely at the hips. Again, the length can vary depending on personal preference, but a common length is around 2-4 inches.
Once you have completed the ribbing for the cuffs and hem, you are ready to move on to the main body of the cardigan. The ribbing adds a professional finish to the garment and creates a polished look.
Creating the Sleeves
Once you have completed knitting the back piece and the two front pieces of the hooded cardigan, it’s time to start working on the sleeves. The sleeves of the cardigan are knitted separately and then attached to the body of the cardigan.
Using the same knitting needles and yarn that you used for the body of the cardigan, cast on the required number of stitches for the sleeves. The number of stitches will depend on the size of the cardigan and the desired fit. It is recommended to use a stitch marker to mark the beginning of the round.
Knitting the sleeves in the round:
- Join the round, making sure not to twist the stitches, and knit the first round.
- Continue to knit in the round, following the stitch pattern used for the body of the cardigan.
- Work the required number of rounds or until the sleeve measures the desired length. Keep in mind that the length will depend on personal preference and the desired fit of the cardigan.
- Once the sleeve is the desired length, bind off the stitches. Make sure to bind off loosely to allow for ease of movement.
Knitting the sleeves flat:
- Using the same knitting needles and yarn, cast on the required number of stitches for the sleeves.
- Knit the first row, following the stitch pattern used for the body of the cardigan.
- Continue to work in the stitch pattern for the required number of rows or until the sleeve measures the desired length.
- Once the sleeve is the desired length, bind off the stitches.
Repeat these steps to create the second sleeve of the cardigan. Once both sleeves are completed, you can then attach them to the body of the cardigan using a stitching method of your choice, such as the mattress stitch or the whip stitch. Make sure to position the sleeves symmetrically on either side of the cardigan to ensure a balanced look.
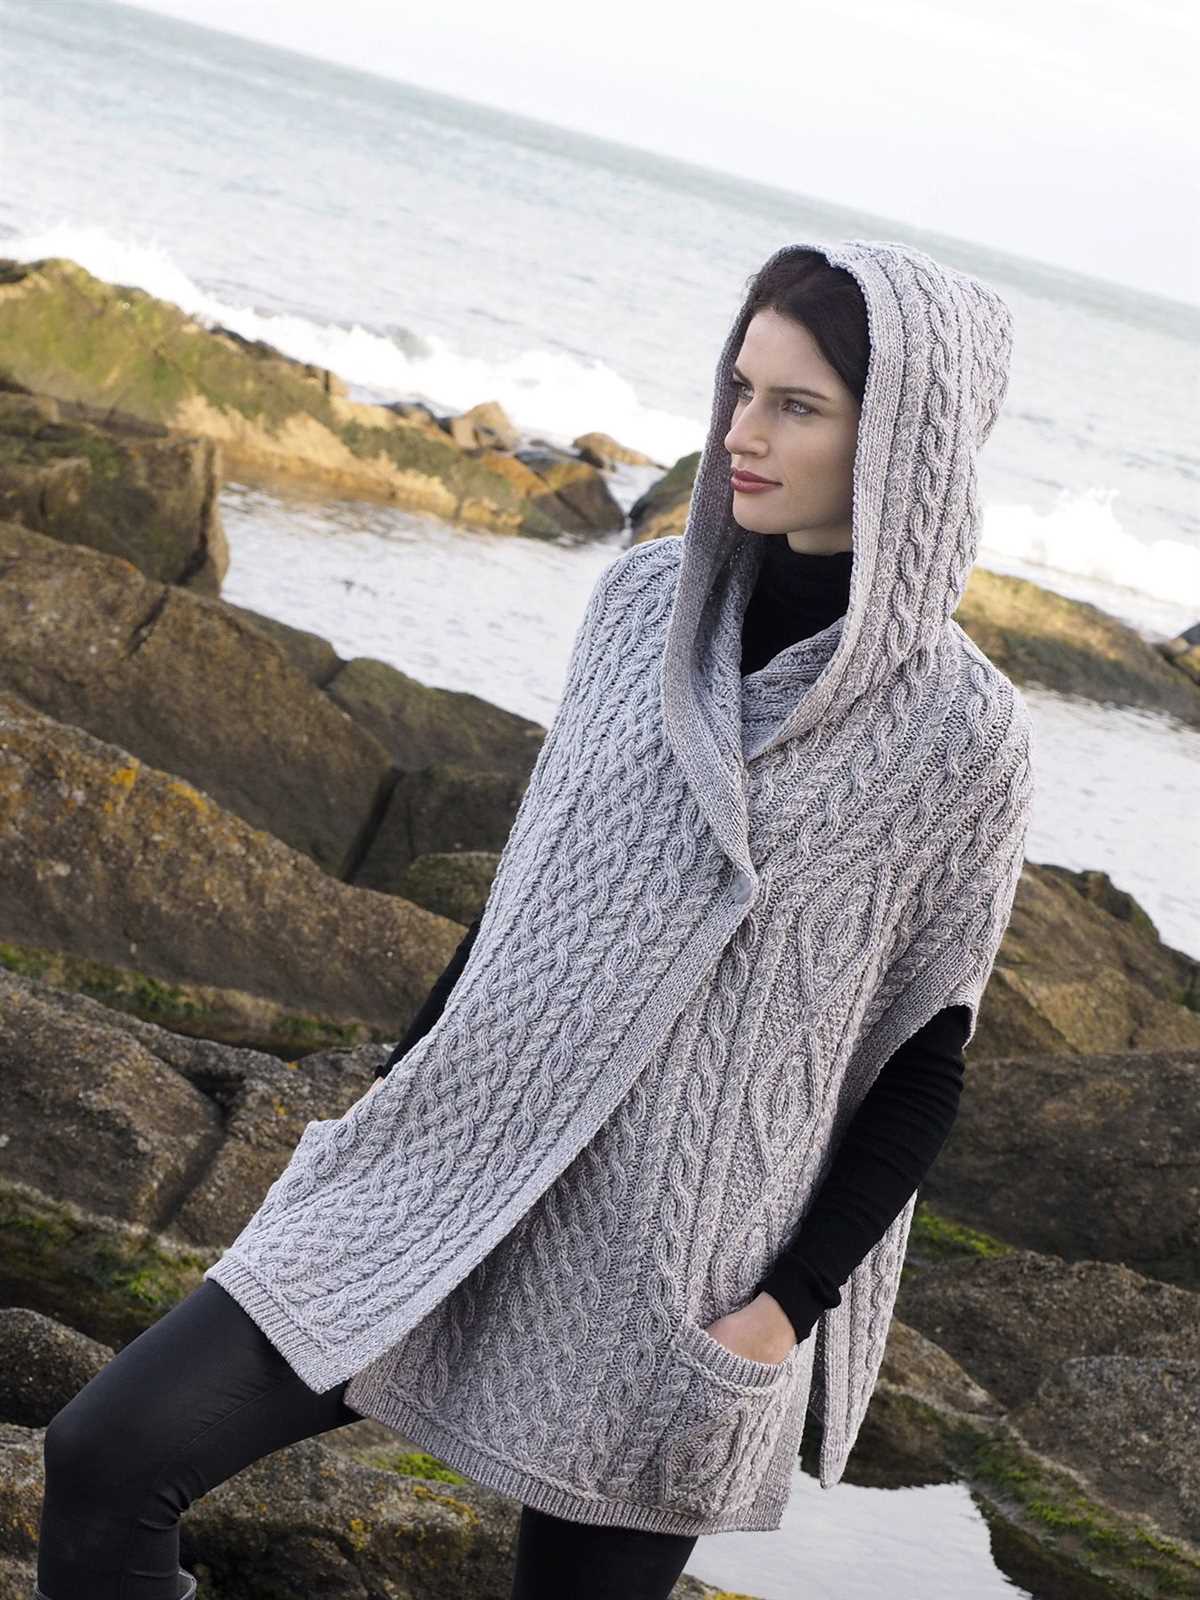
Knitting the Front Panels with Pockets
The front panels of the womens hooded cardigan are an important part of the overall design, and it’s essential to follow the knitting pattern carefully to ensure the pockets are created correctly. This section of the cardigan is where the pockets will be added, creating a functional and stylish detail.
To start knitting the front panels with pockets, you will first need to cast on the required number of stitches specified in the pattern. Make sure to use the recommended knitting needles and yarn for the best results. As you progress, you will encounter instructions on how to create the pockets, including shaping and binding off stitches.
Creating the pockets:
- Follow the pattern’s instructions carefully on when and where to begin the pocket creation. This will typically be indicated by a specific row or stitch count.
- Work the pocket stitches according to the pattern. This may involve using different stitch patterns or changing needle sizes to achieve the desired pocket size and shape.
- Take note of any additional increases or decreases that need to be made for the pocket shaping. These instructions are critical for ensuring the pockets are the right size and positioned correctly on the front panels.
- When instructed, bind off stitches to close the top of the pocket. This will create a neat and finished edge.
By carefully following the instructions for knitting the front panels with pockets, you can create a beautiful and functional womens hooded cardigan. The pockets add a practical element to the cardigan, allowing you to store small items or keep your hands warm. Enjoy the process of knitting these panels and see your cardigan come to life!
Assembling the Back and Front Panels
Once you have completed knitting the back and front panels of the hooded cardigan, it’s time to assemble them to create the finished garment. Follow these steps to ensure a successful assembly:
1. Block the panels
Before you start assembling the panels, it’s important to block them. Blocking involves gently stretching and shaping the knitted fabric to its desired dimensions. Lay the panels flat on a blocking mat or towel, making sure they are aligned correctly. Use pins to secure the edges and corners in place. Lightly mist the panels with water, and let them dry completely. Blocking will help make the assembly process easier and ensure a professional-looking finish.
2. Seam the shoulders
Start by seaming the shoulders of the back and front panels together. Place the panels with the right sides facing each other and align the shoulder edges. Thread a yarn needle with a matching yarn color and begin sewing with the mattress stitch. This stitch creates an invisible seam that gives the finished garment a polished look. Repeat the process for both shoulders, making sure to secure any loose ends.
3. Attach the sleeves
With the shoulders seamed, it’s time to attach the sleeves to the body of the cardigan. Begin by folding the panels in half, aligning the underarm seams and the center of the sleeves. Pin the sleeves in place, making sure they are evenly distributed. Use the mattress stitch to join the sleeves to the body, working from the underarm seam towards the cuff. Repeat the process for both sleeves, checking for any puckering or bunching as you go along.
4. Finish the side seams
Once the sleeves are attached, it’s time to stitch up the side seams. Fold the panels in half again, this time aligning the side edges. Use the mattress stitch to sew the side seams together, starting from the cuff and working your way up to the underarm seam. Make sure to match the pattern and tension of the stitches as closely as possible for a seamless result. Repeat the process for both side seams.
5. Attach the hood
The final step is to attach the hood to the neck edge of the cardigan. Align the hood seams with the shoulder seams and pin in place. Use the mattress stitch to sew the hood to the cardigan, working from one end to the other. Make sure to distribute the stitches evenly and secure any loose ends. Once the hood is attached, weave in any remaining loose ends and give the cardigan a final blocking if necessary.
With these steps, you can successfully assemble the back and front panels of your hooded cardigan and create a beautiful and cozy garment to enjoy. Happy knitting!
Shaping the Hood
When knitting a women’s hooded cardigan, shaping the hood is a crucial step to achieve the desired fit and style. The hood can be shaped in different ways, depending on the design of the pattern and the knitter’s preferences.
To shape the hood, the pattern usually instructs to increase or decrease stitches at specific intervals. This creates the gradual curve that forms the top of the hood. Increases are typically made by knitting or purling into the front and back of a stitch, while decreases are made by knitting or purling two stitches together.
Some patterns may include a separate piece for the hood, which is later attached to the body of the cardigan. In this case, the shaping of the hood may be done by increasing or decreasing stitches along the edge of the piece to create a curved shape.
It is important to carefully follow the instructions provided in the pattern to ensure that the shaping of the hood is done correctly. This will help to achieve the desired fit and prevent any inconsistencies in the finished garment.
Here are some key phrases related to shaping the hood:
- Increasing or decreasing stitches
- Knitting or purling into the front and back of a stitch
- Knitting or purling two stitches together
- Creating a gradual curve
- Using a separate piece for the hood
- Attaching the hood to the body of the cardigan
- Following pattern instructions
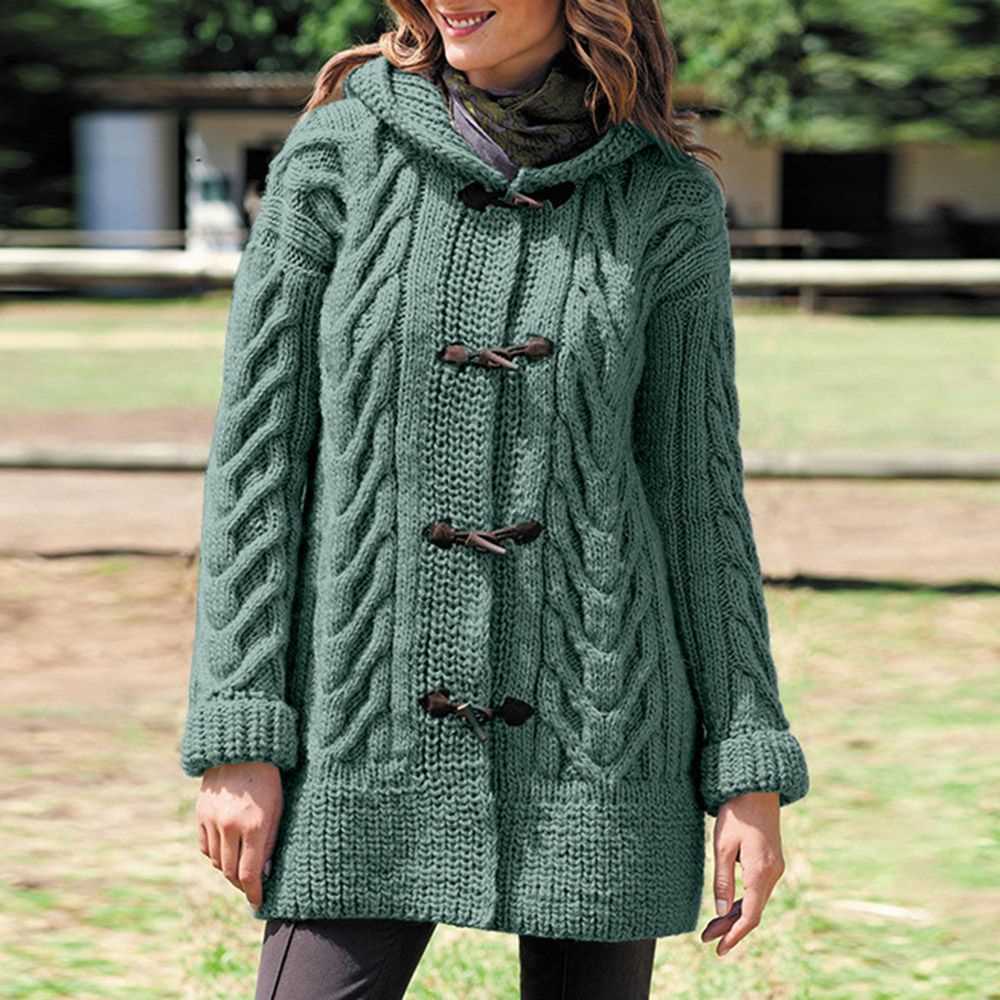
Adding the Buttonholes and Buttons
Once you have completed knitting the hooded cardigan, it’s time to add the finishing touches by including buttonholes and buttons. Buttonholes are essential for securing the garment and providing a closure. Here is a step-by-step guide on how to add buttonholes to your knitted cardigan:
Step 1: Choose the Placement
Decide where you want your buttonholes to be placed on the cardigan. Typically, they are evenly spaced on one side of the cardigan’s opening. Consider the size of the buttons and the spacing between them to ensure the buttonholes will align properly.
Step 2: Mark the Buttonhole Placement
Using a stitch marker or contrasting yarn, mark the positions where you want the buttonholes to be placed. Be sure to mark both the top and bottom edge of the cardigan to ensure consistent spacing.
Step 3: Create the Buttonhole
To create a buttonhole, you will need to bind off a few stitches in the desired location. On the right side of your work, knit to the first marked stitch. Then, knit the next two stitches together. Finally, pass the first stitch over the second stitch to bind it off. Continue knitting the remaining stitches.
Step 4: Reinforce the Buttonhole
To reinforce the buttonhole and prevent it from stretching, you can work a few extra stitches after binding off. This can be done by casting on the same number of stitches as you bound off on the next row or by picking up stitches along the edge of the buttonhole.
Step 5: Attach the Buttons
After completing the buttonholes, it’s time to attach the buttons. Choose buttons that complement the style and color of your cardigan. Sew the buttons onto the opposite side of the cardigan, aligning them with the buttonholes. Make sure they are secure and can withstand regular use.
By following these steps, you can successfully add buttonholes and buttons to your women’s hooded cardigan, giving it a polished and functional finish. Enjoy wearing your cozy and stylish creation!
Blocking and Finishing Touches
Once you have finished knitting your women’s hooded cardigan, it’s important to block it before wearing or gifting it. Blocking helps to shape and smooth out the garment, giving it a more finished look.
To block your cardigan, you will need a blocking board or mat, rustproof pins, and a spray bottle filled with water. Lay your cardigan flat on the blocking board and gently stretch it into the desired shape and size. Use the rustproof pins to secure the edges and corners in place. Lightly mist the garment with water to dampen it, but be careful not to soak it. Allow the cardigan to dry completely before unpinning.
Once your cardigan is blocked and dry, it’s time to add the finishing touches. Sew on any buttons or clasps that you have chosen for the closure of the cardigan. Make sure they are securely attached. If desired, you can add a decorative edging to the hood and sleeves using a contrasting color of yarn. This can be done using a simple crochet stitch or by knitting an additional border.
To give your cardigan a polished look, weave in any loose ends of yarn from the knitting and sewing. This will help to prevent them from unraveling and give your cardigan a neater appearance. Finally, give your cardigan a gentle steam or press with an iron on a low setting to remove any remaining wrinkles and give it a professional finish.
Tips for Customizing the Cardigan
When knitting a women’s hooded cardigan, there are several ways you can customize the pattern to make it your own and ensure the perfect fit. Here are some tips to help you along the way.
1. Adjusting the Size
One of the great things about knitting your own cardigan is that you can easily adjust the size to fit your body. If the pattern provides multiple sizes, carefully measure yourself and choose the size that best matches your measurements. If the pattern only provides one size, you can modify it by adding or subtracting stitches to achieve the desired fit. Just make sure to keep track of your modifications to ensure symmetry.
2. Choosing Yarn and Color
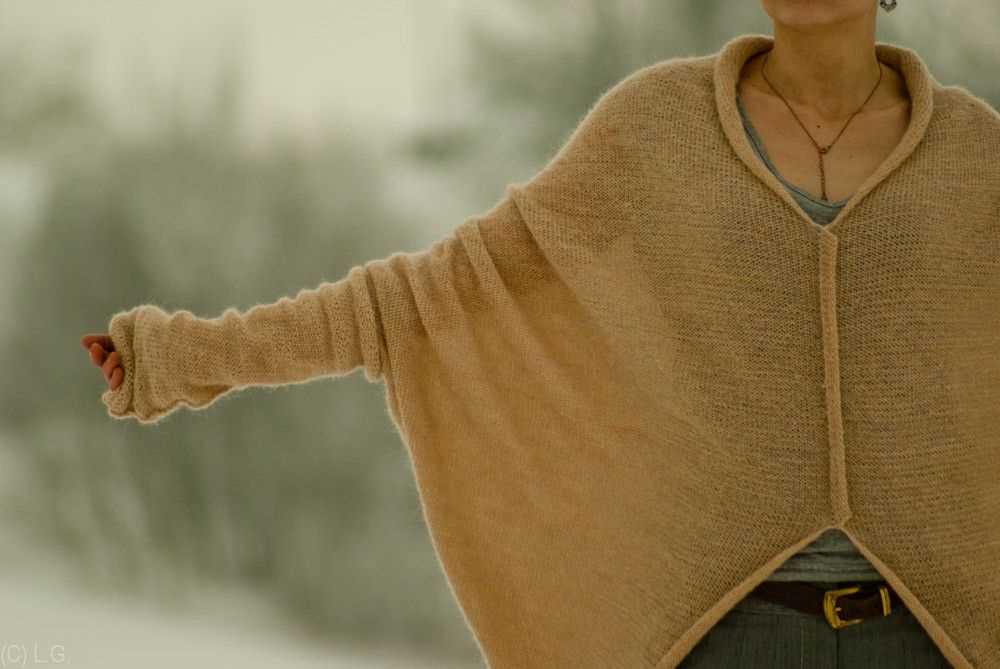
The choice of yarn and color can greatly influence the look and feel of your hooded cardigan. Consider the season and occasion you plan to wear it for. For a warm and cozy winter cardigan, opt for a bulky wool blend yarn. For a lightweight spring or summer cardigan, choose a lighter weight yarn such as cotton or linen. Select a color that complements your wardrobe and personal style, whether it’s a neutral shade for versatility or a bright pop of color for a statement piece.
3. Adding Embellishments
Take the opportunity to add your own personal touch to the cardigan by incorporating embellishments. This could include decorative buttons, ribbon trims, or even embroidery or appliqué designs. Use your creativity to make the cardigan uniquely yours.
4. Modifying Sleeve Length

If you prefer longer or shorter sleeves than the pattern provides, you can easily modify the sleeve length. To make them longer, simply knit more rows before starting the decreases, and to make them shorter, knit fewer rows. Be sure to adjust any shaping detail accordingly to maintain the correct proportions of the cardigan.
5. Customizing the Hood
The hood is a standout feature of a hooded cardigan, and you can customize it to suit your preferences. If you prefer a larger hood, simply cast on more stitches at the beginning and work more rows to achieve the desired size. For a smaller hood, cast on fewer stitches and work fewer rows. You can also experiment with different stitch patterns or add a contrasting color for a unique twist.
By following these tips, you can make your women’s hooded cardigan truly personalized and ensure that it fits you perfectly. Enjoy the process of knitting and adding your own creative flair to create a cardigan that you’ll love to wear.
Wearing and Enjoying Your Finished Hooded Cardigan

Congratulations on completing your women’s hooded cardigan! Now it’s time to wear and enjoy your masterpiece. Follow these tips to make the most out of your knitted creation:
1. Style it with different outfits: A hooded cardigan is a versatile piece that can be styled in various ways. Pair it with jeans and a t-shirt for a casual and comfortable look, or wear it over a dress for a more dressed-up ensemble. Experiment with different accessories to create unique and stylish outfits.
2. Stay cozy and warm: The hooded design of your cardigan not only adds a stylish touch but also provides extra warmth and protection. When the weather gets chilly, simply put on the hood to shield your head and neck from the cold. The wool or yarn you used for your cardigan will help to keep you cozy and comfortable during the colder months.
3. Show off your knitting skills: Your hooded cardigan is not just a garment; it’s a testament to your knitting abilities. Be proud of your work and don’t hesitate to show it off. When someone compliments your cardigan, you can proudly say that you made it yourself.
4. Care for your cardigan: To ensure your hooded cardigan lasts for a long time, it’s important to take proper care of it. Follow the care instructions specific to the yarn you used and always hand wash or use a delicate cycle when cleaning. Avoid exposing it to harsh chemicals or excessive heat, as this can damage the fibers.
5. Share your knitting experience: If you enjoyed knitting your hooded cardigan and found it to be a rewarding experience, consider sharing your knowledge and skills with others. Teach someone else to knit or join a knitting group. By sharing your passion for knitting, you can inspire others to create their own beautiful garments.
By wearing and enjoying your finished hooded cardigan, you not only get to showcase your knitting skills but also have a practical and stylish addition to your wardrobe. Take pride in your creation and cherish the comfort and warmth it provides.
Q&A:
Where can I find a women’s hooded cardigan knitting pattern?
You can find women’s hooded cardigan knitting patterns on various websites and online knitting communities. Some popular websites for knitting patterns include Ravelry, Etsy, and LoveKnitting. You can also try searching for specific patterns on search engines like Google or Pinterest.
Are there any beginner-friendly women’s hooded cardigan knitting patterns available?
Yes, there are many beginner-friendly women’s hooded cardigan knitting patterns available. Look for patterns that are labeled as “easy” or “beginner” and have detailed instructions. These patterns usually use simple stitches and techniques, making them perfect for beginners who are learning to knit.
Can I modify a women’s hooded cardigan knitting pattern to fit my size?
Yes, you can modify a women’s hooded cardigan knitting pattern to fit your size. Most knitting patterns provide instructions for multiple sizes, but if you need to make further adjustments, you can customize the pattern by adjusting the stitch count and measurements accordingly. It can be helpful to try the garment on as you go to ensure the perfect fit.
What materials do I need to knit a women’s hooded cardigan?
To knit a women’s hooded cardigan, you will need yarn, knitting needles, and other basic knitting supplies. The specific materials will depend on the pattern you choose, but generally, you will need a medium-weight yarn (such as worsted or aran), knitting needles in the recommended size for the pattern, stitch markers, tapestry needles, and buttons or other closures for the cardigan. Always check the pattern for a list of required materials before starting your project.