
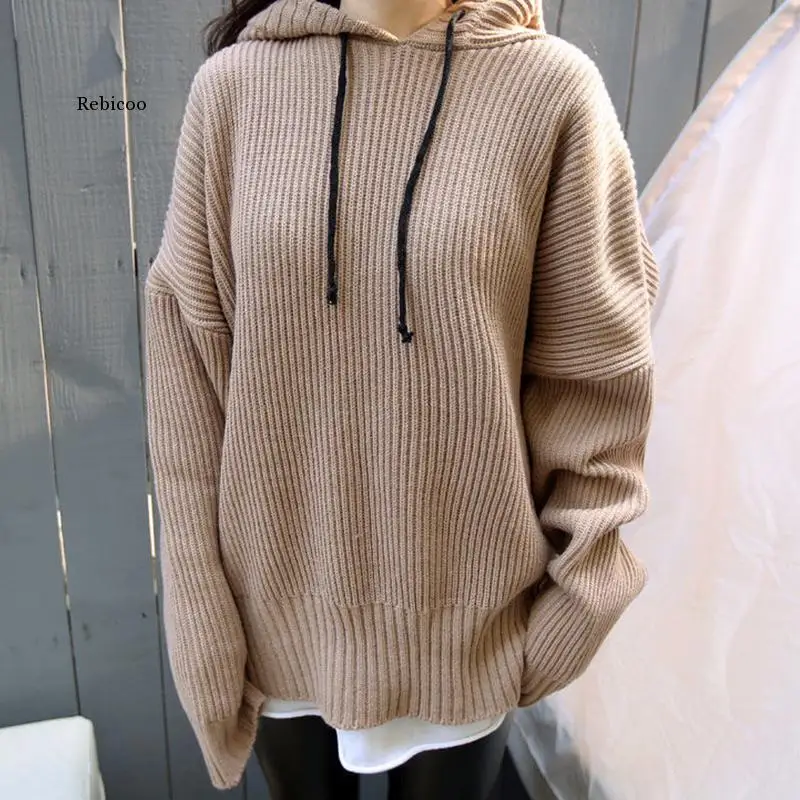
Knitting is a beloved craft that allows you to create beautiful and functional garments. If you’re a fan of cozy sweaters and want to take your knitting skills to the next level, we have a treat for you. In this article, we’re sharing a free pattern for a knitted hooded sweater.
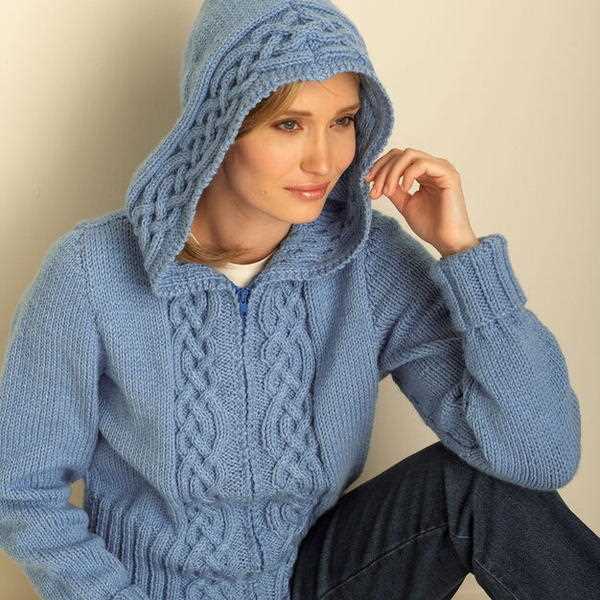
This pattern is perfect for those chilly days when you want to wrap yourself up in warmth and style. The hood adds an extra layer of coziness and makes the sweater perfect for outdoor adventures. Whether you’re a beginner knitter or have years of experience, this pattern is suitable for all skill levels.
To create this knitted hooded sweater, all you need is some soft and warm yarn, knitting needles, and a few hours of your time. The pattern includes detailed instructions and step-by-step photos to guide you through the knitting process. So, grab your knitting supplies and get ready to create a cozy masterpiece!
How to Knit a Hooded Sweater: Free Pattern

A hooded sweater is a cozy and stylish addition to anyone’s wardrobe. If you’re a fan of knitting and want to try your hand at making your own, we’ve got you covered with this free pattern. Grab your knitting needles and let’s get started!
Materials Needed:
- Yarn of your choice (preferably medium weight)
- Knitting needles suitable for your yarn size
- Tapestry needle
- Stitch markers
- Scissors
Instructions:
- Start by casting on the required number of stitches for your size, using the yarn and needle size recommended in the pattern.
- Work the ribbing for the bottom edge of the sweater, usually a few rows of knit 1 purl 1 ribbing.
- Continue knitting in your desired stitch pattern until the sweater reaches the desired length.
- Next, it’s time to shape the hood. Follow the instructions in the pattern to create the hood, which will usually involve increasing or decreasing stitches to create the desired shape.
- Once the hood is complete, continue knitting the body of the sweater until it reaches the desired length.
- For the sleeves, the pattern will typically instruct you to divide the stitches for the armholes and work each sleeve separately.
- Follow the pattern instructions to shape the sleeves, knitting until they reach the desired length.
- Finish off the sweater by working the ribbing for the cuffs and neckline, following the pattern’s instructions.
- Weave in any loose ends and block the sweater to give it a professional finish.
And there you have it! Your very own hand-knit hooded sweater. Feel free to customize the pattern by adding additional details such as cables or colorwork, or simply enjoy the cozy warmth of a basic design. Happy knitting!
Choose the Right Yarn and Needles
When it comes to knitting a hooded sweater, choosing the right yarn and needles is essential for achieving the desired result. The type of yarn you choose will greatly impact the overall look and feel of the finished sweater. Additionally, the size of your needles will determine the gauge and drape of the knitted fabric.
Yarn: It’s important to consider the weight, fiber content, and texture of the yarn when selecting the material for your knitted hoodie. A bulky or chunky yarn will create a cozy and warm sweater, perfect for colder seasons. On the other hand, a lightweight or medium weight yarn will result in a lighter and more breathable garment, suitable for transitional weather. Natural fibers like wool, alpaca, or cotton can provide warmth, softness, or breathability depending on the season and personal preference. Consider the pattern you’re using and any specific yarn recommendations it may have.
Needles: The size of your needles will affect the tension and drape of the knitted fabric. If you want a tighter and denser stitch, choose smaller needles. Conversely, larger needles will create a looser and more relaxed fabric. It’s crucial to match the needle size to the gauge specified in the pattern to ensure proper sizing and fit. Knitting needles are available in various lengths and materials, such as bamboo, metal, or plastic. The choice of material is mainly a matter of personal preference, but it’s worth noting that different materials can have slightly different properties, such as flexibility or smoothness, which may affect the knitting process.
By carefully selecting the yarn and needles for your hooded sweater, you can create a beautifully finished garment that meets your expectations in terms of warmth, comfort, and style.
Getting Started: Casting On
Before you can start knitting your hooded sweater, you will need to cast on your stitches. Casting on is the process of creating the first row of stitches on your knitting needle. There are several different methods you can use to cast on, but for this pattern, we will use the long tail cast on method.
To begin, you will need to estimate the amount of yarn you will need for your cast on. The long tail cast on method requires a tail of yarn that is longer than your desired finished length. Typically, you will need about three times the width of your sweater for the tail.
Step 1: Creating the Slip Knot
- Start by creating a slip knot at the end of your yarn. To do this, make a loop with the yarn, crossing the tail end over the working end.
- Next, bring the tail end through the loop, pulling it tight to create the slip knot.
Step 2: Positioning the Needle
- Hold the slip knot on your left hand and insert the knitting needle into the loop from right to left, with the point of the needle facing towards you.
- Hold the needle in your right hand, with the slip knot loop on your left thumb.
Once you have completed these steps, you are ready to start casting on your stitches. The long tail cast on method creates a neat and stretchy edge, making it ideal for the beginning of your sweater. Follow the next steps of your knitting pattern to continue working on your hooded sweater.
Knitting the Body of the Sweater
Once you have completed the ribbing and set up the stitch pattern for the body of the sweater, it’s time to start knitting the main section. This is where you will create the bulk of the sweater and give it its shape.
To begin, continue knitting in the stitch pattern you established in the ribbing. This will typically involve repeating a combination of knit and purl stitches, or any other stitch pattern you have chosen for your sweater. Make sure to follow the pattern carefully to maintain the desired effect.
If you are working with a pattern that includes shaping, such as increases or decreases, this is the point where you will start incorporating them. These shaping techniques will help create a more fitted or tailored look, depending on the style of the sweater.
As you knit the body, periodically try on the sweater to ensure that it fits as desired. This is especially important if you are making the sweater for yourself or someone else. Adjustments can be made by adding or subtracting stitches as needed, or by adjusting the length of the body.
Continue knitting until you reach the desired length for the body of the sweater. This will vary depending on the style and fit you are aiming for. Keep in mind that it’s always better to err on the side of caution and knit a bit longer, as you can always shorten the body if needed during the finishing stages.
Once you have completed knitting the body of the sweater to the desired length, you can move on to the next section, such as the sleeves or the neckline. Following the pattern instructions, you will continue shaping and knitting until the entire sweater is complete.
Remember to always stay patient and take your time when knitting the body of the sweater. It can be a large portion of the project, but with careful attention to detail, you will end up with a beautifully knitted garment that you can be proud of.
Working the Sleeves
When knitting a hooded sweater, one of the important aspects to consider is working the sleeves. The sleeves are an essential part of the sweater and require special attention to ensure a proper fit and finish.
1. Sleeve length: Start by determining the desired length of the sleeves. This can be done by measuring the arm length from the shoulder to the wrist. You can then adjust the pattern accordingly to achieve the desired length.
2. Sleeve increases: As you work the sleeves, it is important to gradually increase the number of stitches to create a tapered effect. This can be achieved by adding stitches at regular intervals, usually on the sides of the sleeve. You can refer to the pattern for specific instructions on when and how many stitches to increase.
3. Sleeve shaping: To shape the sleeves, you will need to decrease stitches towards the cuff to create a fitted look. This can be done by working decreases at regular intervals, usually in the form of knitting or purling two stitches together. Again, refer to the pattern for specific instructions on when and how many stitches to decrease.
4. Sleeve ribbing: To finish the sleeves, you will need to add a ribbed cuff. This can be done by working a few rows of ribbing, usually in a knit 2, purl 2 pattern. The ribbing helps to create a snug fit and adds a nice finishing touch to the sleeves.
By following these steps and carefully working the sleeves, you can ensure that your knitted hooded sweater turns out beautifully and fits comfortably. Remember to always refer to the pattern for specific instructions and measurements to achieve the desired results.
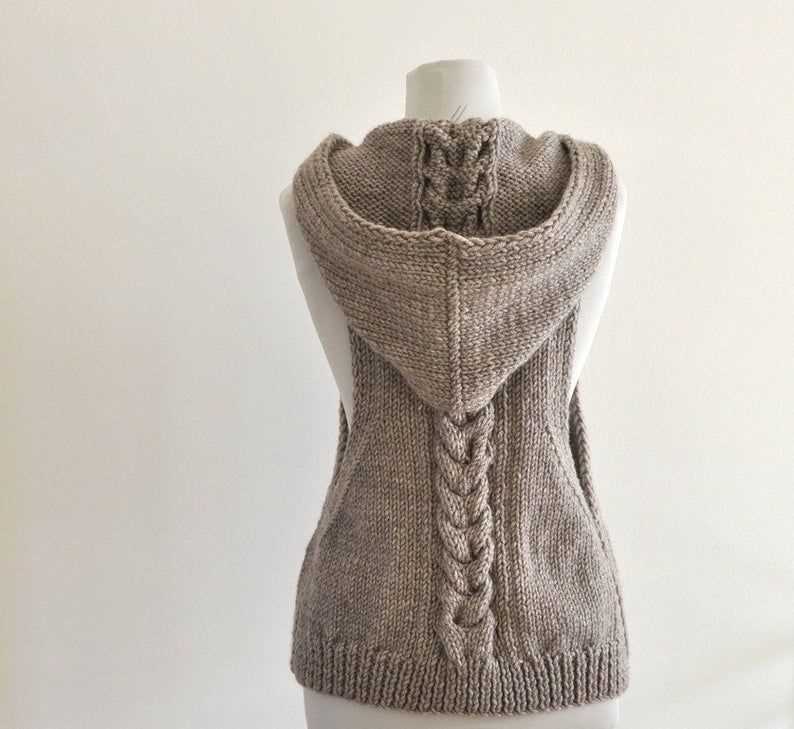
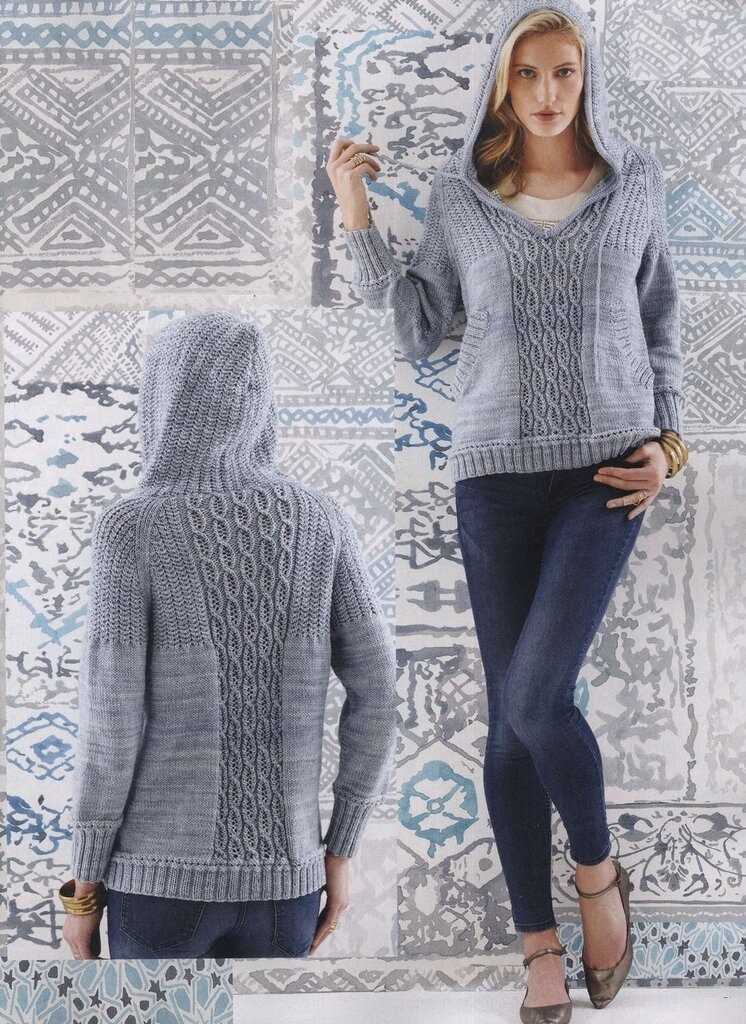
Adding the Hood
Once you have finished knitting the body of the sweater, it’s time to add the hood. Follow these steps to seamlessly incorporate the hood into your knitted sweater design.
Step 1: Prepare the Hood Section
Before you begin knitting the hood, make sure you have enough yarn to complete the project. The amount of yarn needed will depend on the size of your sweater and the type of yarn you’re using.
Start by picking up stitches along the edge of the neck opening of the sweater. The number of stitches you pick up will depend on the desired width of the hood. Use a knitting needle that is appropriate for the yarn you’re using.
Step 2: Knit the Hood
Once you have picked up the stitches, you can start knitting the hood. Follow the pattern instructions to create the desired hood shape, whether it’s a simple rectangle or a more complex design.
Continue knitting in the specified pattern until the hood reaches the desired length, making sure to maintain the necessary stitch counts and any shaping required for the design.
If the hood includes a drawstring or buttons, incorporate those elements as you go, following the pattern instructions.
Step 3: Finish the Hood
Once the hood is complete, it’s time to finish it off. This may involve weaving in any loose ends, blocking the hood to shape, and attaching any additional accessories, such as pom-poms or tassels.
Carefully sew the edges of the hood together, making sure to line up any pattern elements or shaping details. Use a yarn needle and matching yarn to create an invisible seam.
Finally, try the sweater on and adjust the hood if necessary. Make any necessary modifications to the hood by adding or removing stitches to ensure a perfect fit.
With the hood properly added, your knitted sweater is now complete and ready to be enjoyed!
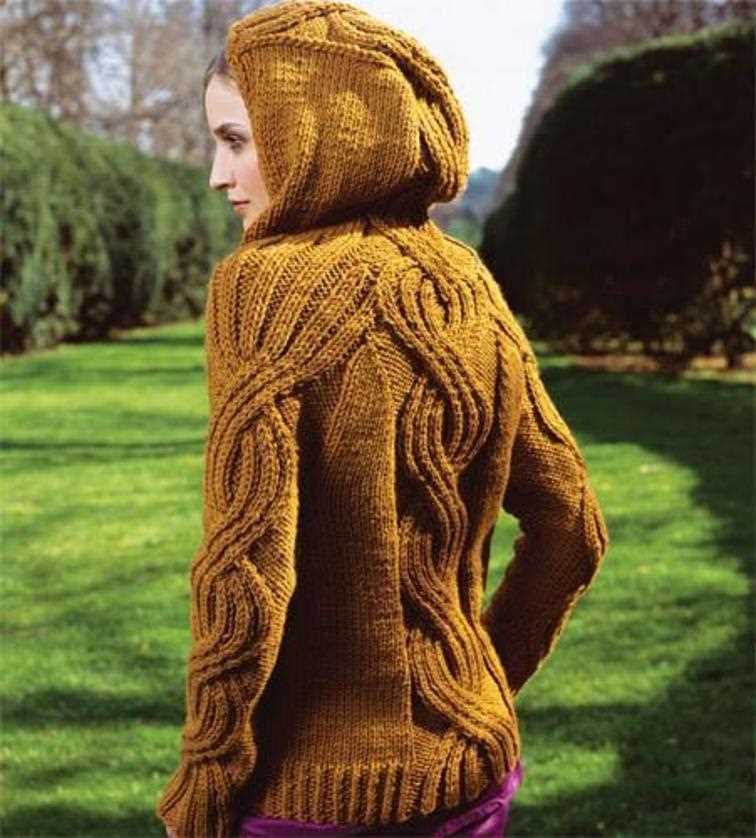
Shaping the shoulders
Shaping the shoulders is an important step in knitting a hooded sweater. It ensures that the sweater fits properly and sits comfortably on the wearer’s shoulders.
To shape the shoulders, you will need to decrease stitches gradually across the rows. This can be done using various techniques, such as knitting two stitches together, or slipping stitches. The exact method will depend on the specific pattern you are following.
Step 1: Start by identifying the center line of your sweater. This is usually indicated in the pattern. Place markers on each side of the center line to mark the shoulder shaping area.
Step 2: The next step is to decrease stitches on each side of the markers. This is typically done by knitting or purling two stitches together. The number of stitches to decrease will be specified in the pattern, and it may vary depending on the size of the sweater.
- Tip: It is recommended to place the decreases a few stitches in from the edge to create a more polished look.
Step 3: Repeat the decrease row at regular intervals, as specified in the pattern, until the desired shoulder width is reached. This will create a gradual slope that follows the natural shape of the shoulders.
Step 4: Once the shoulder shaping is complete, you can proceed with the rest of the pattern, such as knitting the sleeves or adding the hood.
By shaping the shoulders correctly, you can ensure that your knitted hooded sweater will have a professional finish and fit perfectly on the wearer. Take your time and follow the instructions in the pattern carefully to achieve the desired results.
Finishing Touches: Ribbing and Closures

When it comes to knitting a hooded sweater, one of the most important finishing touches is the ribbing. Ribbing is a technique that creates a stretchy and elastic edge to the garment, making it fit snugly and comfortably. It is typically used for cuffs, hems, and necklines.
To add ribbing to your hooded sweater, you can use a simple knit 1, purl 1 (K1, P1) ribbing pattern. This involves alternating between knitting 1 stitch and purling 1 stitch across the row. Repeat this pattern for a few inches to create the desired ribbed effect.
Additionally, you can also experiment with different ribbing patterns, such as a knit 1, purl 2 (K1, P2) ribbing, or a twisted ribbing pattern, which involves knitting into the back loop of the stitch. These variations can add texture and interest to your sweater.
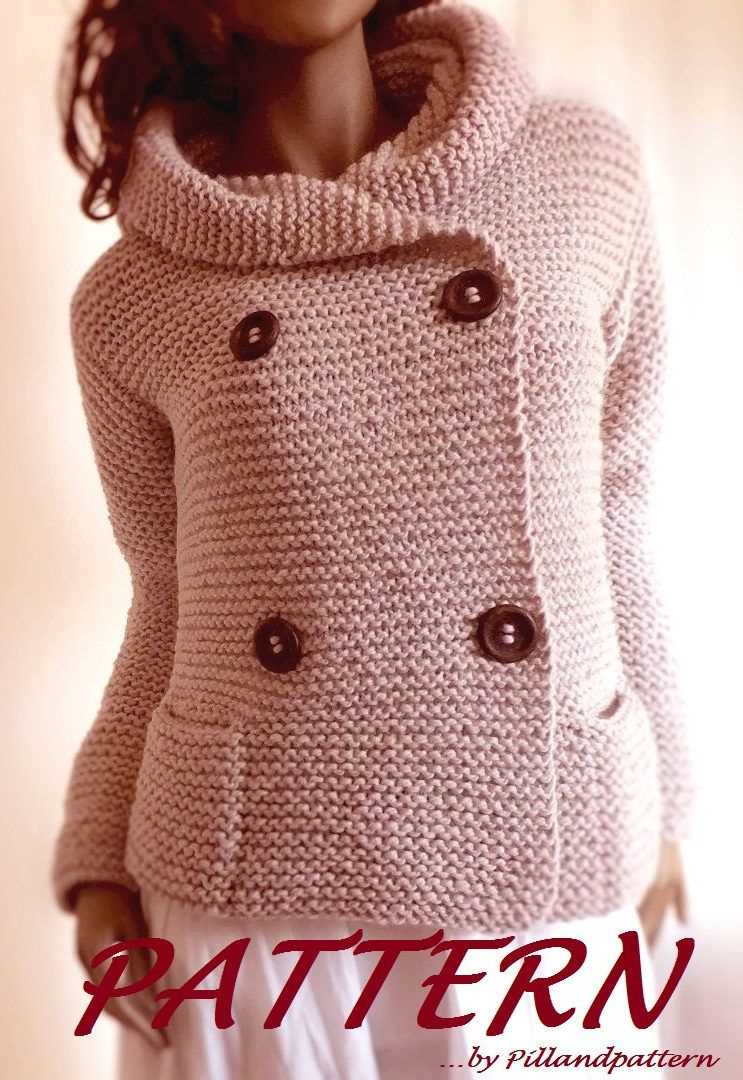
Another important aspect of finishing a hooded sweater is choosing the right closure. There are several options to consider, depending on the style and functionality you desire. One classic choice is buttons. Sewing a row of buttons along the front opening of the sweater can give it a traditional and polished look.
If you prefer a more casual and versatile closure, you can opt for a zipper. Zippers are great for hooded sweaters because they provide a secure closure and allow for easy on and off. Make sure to choose a zipper that matches the color and style of your sweater.
A third option for closures is toggles or toggles buttons. These are typically made of wood or another natural material and are attached to the front of the sweater using loops or buttonholes. They add a rustic and cozy touch to your hooded sweater.
In conclusion, adding ribbing and choosing the right closure are essential finishing touches for a knitted hooded sweater. The ribbing provides elasticity and structure to the edges of the sweater, while the closure adds style and functionality. Play around with different ribbing patterns and closure options to create a unique and personalized garment.
Blocking and Seaming the Sweater
Once you have finished knitting the hooded sweater, it is important to block it to ensure that the finished garment has the correct shape and size. Blocking involves soaking the knit piece in water and then shaping it using pins or blocking wires. This helps to even out the stitches and relax the fabric, giving it a professional and polished finish.
Blocking Instructions:
- Fill a basin or sink with lukewarm water and a small amount of gentle wool wash.
- Gently submerge the knitted sweater in the water and let it soak for about 10-15 minutes.
- After soaking, carefully remove the sweater from the water and gently squeeze out the excess moisture. Do not wring or twist the fabric.
- Lay a clean towel on a flat surface and place the sweater on top of it.
- Using blocking pins or wires, shape the sweater to the desired dimensions. Pay attention to the edges, ensuring they are straight and even.
- Leave the sweater to dry completely. This may take a day or two, depending on the thickness of the fabric.
Once the sweater is completely dry, you can move on to seaming the different pieces together. This involves using a yarn needle and the same yarn you used for knitting to join the pieces. Here is a step-by-step guide on how to seam the sweater:
- Lay the sweater pieces flat and arrange them in the correct order.
- Thread the yarn onto a yarn needle.
- Starting at the bottom edge of the sweater, insert the needle through the corresponding stitches of both pieces, working from right to left.
- Pull the yarn through, leaving a small tail on the wrong side of the fabric.
- Continue seaming the pieces together, using a whipstitch or mattress stitch. Make sure to sew with a tension that matches the elasticity of the knitted fabric.
- Once the pieces are fully seamed, weave in any loose ends and trim the excess yarn.
Blocking and seaming are important finishing steps that can really elevate the look and fit of your knitted hooded sweater. Take the time to do these steps properly, and you’ll be rewarded with a beautiful and well-finished garment.
Adding Decorative Details
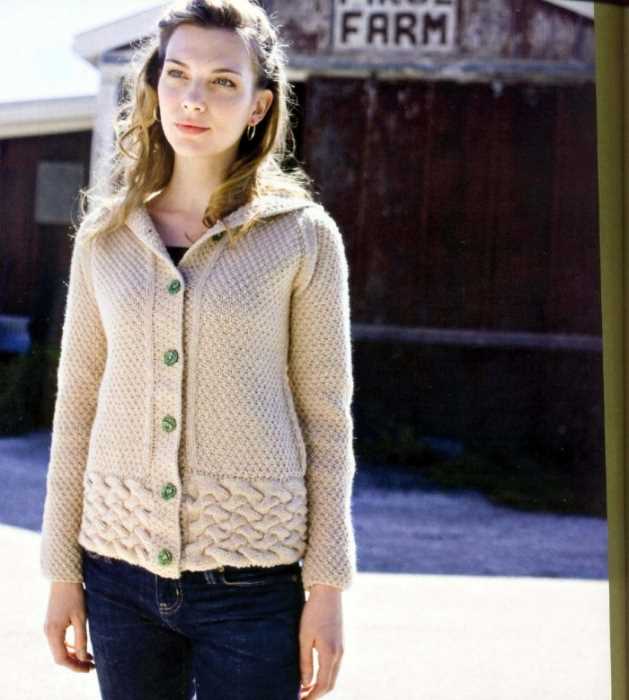
The knitted hooded sweater pattern offers endless opportunities to add decorative details that will make your sweater stand out. One way to add a unique touch to your sweater is by incorporating different stitch patterns. For example, you can try using a cable stitch for the front panel or a lace stitch for the cuffs and hem. These intricate stitch patterns will not only add visual interest to your sweater but also showcase your knitting skills.
Another way to enhance the look of your sweater is by adding decorative elements such as buttons, tassels, or pompoms. You can choose buttons in different shapes, sizes, and colors to complement your sweater’s design. Adding tassels or pompoms to the hood or the ends of the drawstrings can give your sweater a playful and stylish look.
- Experimenting with color is another great way to add decorative details to your knitted hooded sweater. You can try using a variegated yarn to create a subtle gradient effect or choose contrasting colors for different parts of the sweater. The color combinations you choose can help emphasize the stitch patterns and highlight the different sections of your sweater.
- Embroidery is yet another way to add decorative details to your sweater. You can use embroidery floss to add delicate floral motifs, geometric designs, or even your initials to the front or back of your sweater. This personalized touch will make your sweater truly one-of-a-kind.
- Lastly, you can also consider adding some beading or sequins to your sweater for a touch of glamour. Beads or sequins can be hand-stitched onto the front panel or along the edges of the hood to add a sparkly and eye-catching element to your sweater.
With these ideas in mind, you can get creative and customize your knitted hooded sweater to reflect your personal style and make it truly unique.
Tips and Tricks for Knitting Success
Knitting is a timeless craft that allows you to create beautiful and unique items. Whether you’re a beginner or an experienced knitter, there are always ways to improve your skills and achieve better results. Here are some tips and tricks to help you succeed in your knitting projects.
1. Use the Right Tools
Investing in high-quality knitting needles and yarn can make a significant difference in the outcome of your project. Choose needles with the right size and material for your yarn, and opt for yarn that suits the design and purpose of your item. Good tools can make knitting more enjoyable and help you achieve more consistent stitches.
2. Practice Proper Tension
Tension refers to how tightly or loosely you hold your yarn while knitting. Consistent tension is crucial for creating an even and professional-looking result. Practice holding your yarn in a way that feels comfortable and allows you to maintain consistent tension. If your tension is too tight or too loose, your finished project may appear uneven or distorted.
3. Take Breaks
Knitting for long periods can strain your hands, wrists, and back. Remember to take regular breaks to give your muscles a rest. Stretching and moving around can help prevent stiffness and discomfort. Additionally, taking breaks can also give you a fresh perspective on your project and help identify any mistakes or areas for improvement.
4. Read and Follow Patterns Carefully
When working on a knitting pattern, take the time to read through the instructions thoroughly and understand each step before you begin. Marking your progress on the pattern can help you stay organized and avoid mistakes. If you’re unsure about any part of the instructions, consult online resources or ask experienced knitters for clarification.
5. Embrace Mistakes

It’s inevitable to make mistakes while knitting, especially as a beginner. Instead of getting frustrated or discouraged, embrace your mistakes as learning opportunities. Mistakes can often lead to unique designs or new techniques. Don’t be afraid to experiment and try different approaches if something doesn’t turn out as planned.
6. Join Knitting Communities
Connecting with other knitters can provide inspiration, support, and valuable guidance. Join knitting communities online or in your local area to share ideas, ask questions, and learn from each other. Knitting groups often organize workshops, classes, and events that can help you expand your skills and meet fellow enthusiasts.
7. Practice Regularly
Like any skill, knitting requires practice to improve. Set aside dedicated time each week to work on knitting projects and practice different techniques. The more you knit, the more comfortable and confident you’ll become. Start with simple projects and gradually take on more challenging patterns to continuously develop your skills.
Conclusion
By following these tips and tricks, you can enhance your knitting experience and achieve better results in your projects. Remember to be patient with yourself and enjoy the process of creating something beautiful with your own hands. Knitting is not only a craft but also a way to relax, express your creativity, and connect with a community of like-minded individuals.
Q&A:
Where can I find a free knitted hooded sweater pattern?
You can find free knitted hooded sweater patterns on various websites such as Ravelry, LoveKnitting, and Lion Brand Yarn.
Are there any specific requirements or materials needed for knitting a hooded sweater?
The materials needed for knitting a hooded sweater will depend on the specific pattern you choose. Generally, you will need a certain type and weight of yarn, appropriate knitting needles, buttons or zippers if required, and other basic knitting supplies.
Can I customize the knitted hooded sweater pattern to fit my size?
Many free knitted hooded sweater patterns provide instructions for different sizes, allowing you to customize the pattern to fit your specific measurements. Make sure to check the pattern details and adjust accordingly.
Are the free knitted hooded sweater patterns suitable for beginners?
Some free knitted hooded sweater patterns may be suitable for beginners, especially if they have clear and detailed instructions. However, if you are a beginner knitter, it might be helpful to choose a pattern labeled as “easy” or “beginner-friendly” and practice your skills before attempting a more complex sweater pattern.