
Are you tired of wearing the same old hats and scarves during the winter months? Why not try something different and create your own stylish head wrap? With a free knitted head wrap pattern, you can customize your accessory to fit your personal style and stay warm at the same time.
Knitted head wraps are a trendy and versatile accessory that can be worn in many different ways. They can be styled as a traditional headband or wrapped around your head like a turban. You can even wear them as a scarf or neck warmer. The possibilities are endless!
With the right knitting skills and a passion for creativity, you can easily make your own head wrap. Whether you are a beginner or an experienced knitter, there are patterns available for every skill level. All you need is a set of knitting needles, some yarn, and a little bit of time to get started.
So why not break out of your winter fashion rut and try something new? With a free knitted head wrap pattern, you can add a touch of style and warmth to your winter wardrobe. Get ready to turn heads with your handmade accessory!
What is a Knitted Head Wrap?
A knitted head wrap is a versatile accessory that can be worn to keep your head warm and stylish. It is a rectangular piece of knitted fabric that wraps around your head, covering your ears and forehead, and can be secured in place with a knot or a button. Knitted head wraps are usually made from soft and cozy yarns, such as wool or acrylic, that provide warmth and comfort.
One of the main benefits of a knitted head wrap is that it can be customized to fit your style and preferences. You can choose from a variety of patterns, stitches, and colors to create a head wrap that reflects your personal taste. Whether you prefer a simple and classic design or a more intricate and textured look, there are endless possibilities for creating a unique head wrap.
A knitted head wrap can be worn in various ways to suit different occasions and outfits. It can be wrapped tightly around your head for extra warmth on a cold winter day or worn loosely for a more relaxed and casual look. You can also experiment with different tying techniques and positions to achieve different styles and looks.
In addition to providing warmth and style, a knitted head wrap can also be a practical accessory for keeping your hair in place. It is an excellent choice for those days when you want to keep your hair out of your face while still looking fashionable. The snug fit of a knitted head wrap ensures that it stays in place even during strenuous activities.
Overall, a knitted head wrap is a versatile and fashionable accessory that can add a touch of warmth and style to any outfit. Whether you wear it for practical reasons or as a fashion statement, a knitted head wrap is sure to become a staple in your winter wardrobe.
Benefits of Knitted Head Wraps
Knitted head wraps are an essential accessory for those seeking warmth, style, and versatility. These cozy pieces provide numerous benefits that make them a popular choice among fashion-conscious individuals.
Warmth: One of the primary benefits of knitted head wraps is their ability to keep the head and ears warm during cold weather. The thick yarn and intricate knitting patterns trap heat and provide insulation, ensuring that you stay comfortable and cozy even in the chilliest of temperatures.
Style: Knitted head wraps not only offer functionality but also add a touch of style to any outfit. Available in various colors, patterns, and designs, they can effortlessly elevate your overall look. Whether you prefer a classic cable knit, a trendy chunky style, or a delicate lace pattern, there is a knitted head wrap to suit every taste and occasion.
Versatility: Another advantage of knitted head wraps is their versatility. They can be worn in a variety of ways, allowing you to change up your look depending on your mood or outfit. Whether you prefer to wear it as a headband, as a turban-style wrap, or as a cozy ear warmer, the possibilities are endless. This adaptability makes knitted head wraps a go-to accessory for both casual and formal occasions.
Comfort: Knitted head wraps are known for their comfort. Made with soft and stretchy yarn, they provide a snug and comfortable fit, ensuring that you can wear them for extended periods without any discomfort. Additionally, the gentle pressure they exert on the forehead can help alleviate headaches and tension, making them an excellent choice for those who suffer from frequent migraines.
Protection: Aside from providing warmth and style, knitted head wraps also offer protection from the elements. They shield your hair and scalp from harsh sunlight, wind, and cold air, helping to prevent damage and keeping your hair looking its best. Whether you’re out for a winter stroll or spending a day at the beach, a knitted head wrap can be your trusty companion.
In conclusion, knitted head wraps offer a range of benefits, from providing warmth and style to offering versatility, comfort, and protection. Whether you’re braving the winter chill or simply looking to add a fashionable accessory to your outfit, a knitted head wrap is a must-have item in your wardrobe.
Materials Needed for Knitted Head Wrap
When it comes to knitting a head wrap, there are a few essential materials that you will need to get started. These materials include:
- Yarn: Choose a soft and cozy yarn that is suitable for knitting. You can opt for different colors or textures depending on your preference.
- Knitting Needles: Select the appropriate size of knitting needles for your chosen yarn. The size of the needles will determine the width and thickness of the head wrap.
- Tape Measure: This will be used to measure your head circumference and determine the length of the head wrap.
- Scissors: You will need a pair of scissors to cut the yarn and trim any excess threads.
- Yarn Needle: A yarn needle is essential for weaving in loose ends and sewing up any seams in the head wrap.
- Stitch Markers: These small, removable markers can be placed on your knitting needles to mark specific stitches or sections in your pattern.
Having these materials on hand before you start knitting will ensure that you have everything you need to create a beautiful and functional head wrap. It’s also a good idea to have a knitting pattern or instructions that you can refer to as you work through your project. With these materials and a little bit of patience, you’ll be able to knit a head wrap that is both stylish and warm.
Choosing the Right Yarn for Knitted Head Wraps

When it comes to knitting head wraps, choosing the right yarn is essential to ensure a comfortable and stylish finished product. The right yarn can make all the difference in terms of the warmth, texture, and overall look of the head wrap.
One important factor to consider when selecting the yarn for a knitted head wrap is the fiber content. Natural fibers such as wool, alpaca, and cotton are popular choices due to their warmth, breathability, and softness. These fibers also have the advantage of being available in a wide range of colors and textures, allowing knitters to customize their head wraps to their liking. Additionally, natural fibers are often more durable and long-lasting than synthetic alternatives.
Another important consideration is the thickness or weight of the yarn. For a cozy and warm head wrap, opt for a thicker yarn with a bulky or super bulky weight. These yarns will provide more insulation and make the head wrap suitable for colder weather. On the other hand, if you prefer a lightweight and breathable head wrap, choose a thinner yarn with a fingering or sport weight.
- Cotton yarn: Cotton is a popular choice for head wraps due to its breathability and softness. It is also machine washable, making it easy to care for.
- Wool yarn: Wool is an excellent choice for colder climates as it provides excellent insulation. It is also naturally moisture-wicking, keeping the head dry and comfortable.
- Alpaca yarn: Alpaca yarn is known for its softness and warmth. It is hypoallergenic and naturally water-repellent, making it a great choice for those with sensitive skin.
It’s important to consider the wearer’s preferences and any potential allergies when choosing a yarn. Additionally, swatching with different yarns can help determine the best fit and look for the head wrap pattern. Overall, selecting the right yarn will ensure a beautiful and functional knitted head wrap that will be cherished for years to come.
How to Knit a Basic Head Wrap
Knitting a basic head wrap is a great project for knitters of all skill levels. Whether you’re a beginner or an experienced knitter looking for a quick and easy project, a head wrap is a versatile accessory that can be worn in any season.
To start, you’ll need some basic knitting supplies: a pair of knitting needles (size will depend on your desired gauge), a skein of yarn in your chosen color, and a tapestry needle for finishing.
Step 1: Cast on

Begin by casting on the desired number of stitches. This will depend on the width of the headwrap you want to make. You can start with about 80 stitches for an average size head wrap, but feel free to adjust the number to fit your own head measurements.
Step 2: Knit the first row
Once you have cast on, it’s time to start knitting. In this step, you’ll simply knit across the first row. This will create the foundation for the head wrap and give it some stretch.
Step 3: Continue knitting
After knitting the first row, continue knitting each row until the head wrap reaches your desired length. You can knit in the basic garter stitch, which means knitting every row, or you can experiment with different stitch patterns to add some texture to your head wrap.
Step 4: Bind off
Once your head wrap has reached the desired length, it’s time to bind off. This will create a finished edge and secure the stitches. To bind off, knit the first two stitches, then use your left needle to lift the first stitch over the second stitch and off the needle. Continue this process until you have one stitch left, then cut the yarn and pull it through that final stitch.
And that’s it! You’ve successfully knitted a basic head wrap. Now you can enjoy wearing it or gift it to someone special.
Tips for Knitting Different Styles of Head Wraps

Knitting head wraps can be a fun and creative project for all skill levels. Whether you’re a beginner or an experienced knitter, there are several tips to keep in mind when knitting different styles of head wraps.
Choose the Right Yarn
When knitting a head wrap, it’s important to choose the right yarn for the style you want to create. For a lightweight and breathable head wrap, opt for a cotton or bamboo yarn. If you want a warmer and cozier head wrap for the winter months, choose a wool or acrylic yarn. Consider the texture and weight of the yarn to ensure it will provide the desired look and feel for your head wrap.
Select the Appropriate Needle Size
The needle size you use will also impact the final result of your head wrap. Thicker yarns generally require larger needles, while thinner yarns work well with smaller needles. Be sure to check the yarn label or pattern instructions for the recommended needle size. Using the correct needle size will help you achieve the desired tension and ensure a well-fitting head wrap.
Get Creative with Stitch Patterns
One of the best parts about knitting head wraps is the opportunity to experiment with different stitch patterns. From simple garter or stockinette stitch to more intricate cables or lace patterns, there are countless options to choose from. Consider the style and look you want to achieve, and select a stitch pattern that complements it. Don’t be afraid to try new stitches and techniques to create a unique and eye-catching head wrap.
Customize the Size
Head wraps should fit snugly and comfortably around the head. To ensure the perfect fit, it’s important to customize the size of the head wrap. Take accurate measurements of your head circumference and adjust the number of cast-on stitches accordingly. Remember that some head wraps have a stretchy nature, while others may require a ribbed or buttoned closure for added adjustability.
Consider Embellishments
Adding embellishments can elevate the style and design of your knitted head wrap. Consider adding buttons, beads, bows, or even a personalized embroidery to make your head wrap truly unique. Just make sure any embellishments are securely attached and won’t cause discomfort while wearing the head wrap.
By keeping these tips in mind, you’ll be able to knit different styles of head wraps that are not only stylish but also functional and comfortable to wear.
Adding Embellishments to Your Knitted Head Wrap
Once you have completed knitting your head wrap, you can add embellishments to give it a unique and personalized touch. There are several ways to embellish your knitted head wrap, ranging from simple to more intricate designs. Here are some ideas to get you started:
1. Embroidery
Embroidery is a great way to add decorative stitches and patterns to your head wrap. You can use colorful threads to create flowers, geometric shapes, or any design you like. Embroidery can be done using basic stitches like backstitch, satin stitch, or French knots. This technique allows you to create intricate designs that can make your head wrap stand out.
2. Beads and Sequins
If you want to add some sparkle to your head wrap, you can incorporate beads or sequins into your design. You can sew them onto the head wrap using a needle and thread, or you can also use adhesive craft glue for a no-sew option. Beads and sequins can be arranged in patterns or scattered randomly for a more whimsical look.
3. Pom-poms and Tassels

Adding pom-poms or tassels to the corners of your head wrap can add a playful and fun element to your design. You can make pom-poms using yarn and a pom-pom maker or create tassels by wrapping yarn around a piece of cardboard and then cutting the loops. Attach these embellishments securely to your head wrap, and you’ll have a stylish accessory with a touch of flair.
- Remember to consider the overall look and feel of your head wrap. If you have chosen a bold and bright color for your yarn, you may want to keep the embellishments more subtle so as not to overwhelm the design. Conversely, if you have chosen a neutral color for your head wrap, you can use embellishments to add pops of color and interest.
- Experiment with different techniques and materials. The possibilities for embellishing your head wrap are endless. Try using ribbons, fabric flowers, or even feathers to create unique and eye-catching designs. Get creative and have fun with it!
With these ideas in mind, you can take your knitted head wrap to the next level by adding your personal touch. Whether you prefer a minimalistic or more elaborate style, embellishments can enhance the overall look of your head wrap and make it truly one-of-a-kind.
Alternative Techniques for Knitting Head Wraps
Knitting head wraps can be a fun and stylish way to keep warm during the colder months. While there are many free patterns available, there are also alternative techniques that you can explore to create unique and personalized head wraps. Here are a few ideas to consider:
1. Cable Knitting
One popular alternative technique for knitting head wraps is cable knitting. Cables create beautiful and intricate patterns that add texture and visual interest to your head wraps. By using a cable needle to cross stitches over each other, you can create unique cable patterns that stand out. This technique requires a bit of practice, but once you get the hang of it, you’ll be able to create stunning cable knit head wraps.
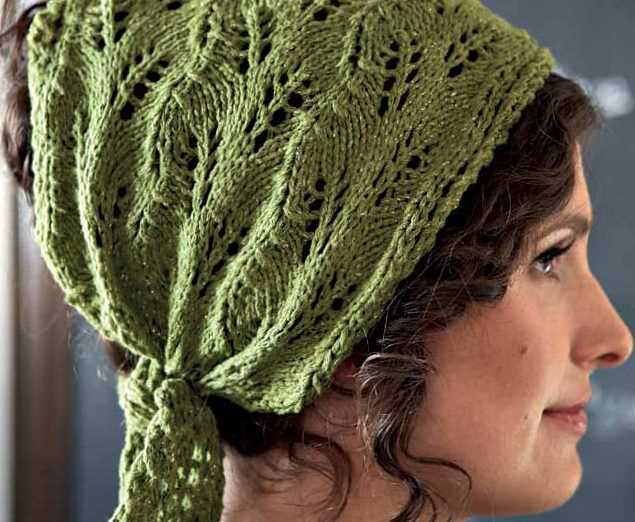
2. Lace Knitting
If you prefer a more delicate and feminine look, lace knitting is a great technique to try. By using yarn overs and decreases, you can create intricate lace patterns that are perfect for head wraps. Lace knitting can be a bit more challenging than other techniques due to the need to keep track of a pattern, but with practice, you’ll be able to create beautiful lace head wraps that are both stylish and functional.
3. Fair Isle Knitting
For those who love colorwork, Fair Isle knitting is an excellent technique to explore for head wraps. Fair Isle knitting involves working with multiple colors in a single row or round, creating intricate patterns and motifs. By combining different colors, you can create unique and eye-catching head wraps that are sure to make a statement. Fair Isle knitting requires some experience with colorwork and patience to manage the yarns, but the end result is well worth the effort.
4. Stranded Knitting
Similar to Fair Isle knitting, stranded knitting involves working with multiple colors in a single row or round. However, unlike Fair Isle, stranded knitting does not incorporate complex colorwork patterns. Instead, it creates a more subtle effect by carrying the floats of the unused color along the back of the work. Stranded knitting allows you to play with different color combinations and create bold and vibrant head wraps that are sure to turn heads.
With these alternative techniques, you can take your knitting skills to the next level and create head wraps that are truly unique and personalized. Whether you prefer cable knitting, lace knitting, Fair Isle knitting, or stranded knitting, there are endless possibilities to explore. So grab your knitting needles, choose a technique that speaks to you, and start creating beautiful head wraps that will keep you warm and stylish all winter long!
How to Size Your Knitted Head Wrap
If you’re looking to create a knitted head wrap, it’s important to make sure it fits comfortably and securely. Sizing your head wrap correctly will ensure that it stays in place and keeps your head warm without feeling too tight or too loose. Here are some steps to help you size your knitted head wrap:
1. Measure your head circumference
Start by measuring your head circumference using a measuring tape or a piece of string that you can then measure with a ruler. Wrap the measuring tape or string around the widest part of your head, just above your eyebrows and ears. This measurement will give you an idea of the size of the head wrap you need to create.
2. Adjust for stretch
Keep in mind that the head wrap will stretch slightly when worn, so you may want to subtract a small amount from your head circumference measurement to account for this. This will ensure a snug, comfortable fit without being too tight.
3. Choose the appropriate pattern

Once you have your head circumference measurement adjusted for stretch, you can choose a knitted head wrap pattern that matches the size you need. Some patterns may have specific sizing instructions or provide a range of sizes to choose from. Make sure to read the pattern carefully and select the appropriate size based on your measurements.
4. Test the fit as you go

As you knit your head wrap, it’s a good idea to periodically try it on to check the fit. If it feels too tight or too loose, you may need to make adjustments to the pattern or try a different size. By testing the fit as you go, you can ensure that the head wrap will be the perfect size for your head.
Finding the right size for your knitted head wrap is essential for both comfort and style. By following these steps and making any necessary adjustments, you’ll be able to create a head wrap that fits you perfectly and keeps you cozy all season long.
Finishing and Blocking Your Knitted Head Wrap
Finishing and blocking your knitted head wrap is an important step to ensure that your project looks clean and professional. Here are some simple steps to follow:
1. Weave in the loose ends
Start by weaving in any loose ends of yarn from your project. This will help to secure the yarn and prevent it from unraveling over time. Use a tapestry needle to carefully weave the ends into the stitches on the wrong side of the head wrap.
2. Sew the ends together
If your head wrap has a button closure, sew the button securely onto one end of the head wrap. Then, sew a small loop or a buttonhole on the other end of the head wrap, creating a functional closure. Make sure to sew the ends together neatly so that the closure is secure.
3. Block your head wrap

Blocking is an important step to even out the stitches and give your head wrap a polished look. To block your head wrap, soak it in cold water for about 15 minutes. Gently squeeze out the excess water, making sure not to wring or twist the fabric. Lay the head wrap out on a towel, shaping it into its final desired shape and size. Allow it to dry completely before wearing or storing.
4. Add any embellishments (optional)
If you want to personalize your head wrap, you can add some embellishments, such as buttons, beads, or embroidery. Use a needle and thread or yarn to securely attach the embellishments to the head wrap. Be creative and have fun with this step!
By following these steps, you can complete the finishing touches on your knitted head wrap and have a beautiful accessory to wear or gift to someone special.
Styling and Wearing Your Knitted Head Wrap

Whether you’re looking to keep warm or add a stylish accessory to your outfit, a knitted head wrap is the perfect choice. With its versatility and customizable design, you can easily style and wear it in various ways to suit your personal taste and fashion preferences.
1. Classic Wrap Style: One of the simplest ways to wear your knitted head wrap is by placing it on your head and wrapping it around to cover your ears and forehead. This classic style is perfect for keeping warm and can be easily adjusted to your desired fit.
2. Twisted Knot: For a more stylish and trendy look, try twisting your knitted head wrap before placing it on your head. This will create a twisted knot effect at the front, adding an interesting design element to your outfit.
3. Side Wrap: Another unique way to wear your knitted head wrap is by placing it slightly to the side of your head, creating a asymmetrical look. This style is perfect for adding a touch of flair to your outfit and can be paired with a side-swept hairstyle to complete the look.
4. Braided Wrap: If you’re feeling adventurous, try braiding your knitted head wrap. This can be done by dividing it into three sections, just like you would with hair, and crossing them over each other. This creates a fun and intricate look that is sure to turn heads.
5. Layered Wrap: For a cozy and warm look, try layering your knitted head wrap with a hat or beanie. Simply place the head wrap on your head and then add the hat or beanie on top. This not only adds extra warmth, but also creates a unique and stylish look.
When it comes to styling and wearing your knitted head wrap, the options are endless. Play around with different techniques and styles to find the one that suits you best. Whether you prefer a classic and simple look or a more intricate and stylish design, a knitted head wrap is sure to become a staple accessory in your wardrobe.
Creative Ways to Use Your Knitted Head Wrap
Knitted head wraps are versatile accessories that can be worn in a variety of creative ways. Whether you’re looking to add a pop of color to your outfit or keep your hair out of your face during a workout, here are some creative ways to make the most of your knitted head wrap:
1. Classic Headband
One of the simplest and most popular ways to wear a knitted head wrap is as a classic headband. Simply place the head wrap over your head and position it to your desired width. This style is perfect for keeping your hair out of your face and adding a fashionable touch to any outfit.
2. Boho Head Wrap
If you’re going for a bohemian look, try wearing your knitted head wrap as a boho head wrap. Start by placing the head wrap over your head, just like a classic headband. Then, twist the two ends together at the top of your head and secure them with bobby pins. This style is great for adding a touch of boho chic to your everyday look.
3. Turban Style
Add a touch of elegance to your outfit by wearing your knitted head wrap in a turban style. Place the head wrap over your head and position it so that it covers your hairline. Then, gather the rest of the head wrap at the nape of your neck and twist it into a secure knot. This style is perfect for adding a stylish and sophisticated element to your ensemble.
4. Ponytail Holder
For a quick and easy hairstyle, use your knitted head wrap as a ponytail holder. Start by gathering your hair into a ponytail and securing it with an elastic. Then, wrap the knitted head wrap around the base of the ponytail, covering the elastic. This style is perfect for adding a pop of color to your ponytail and keeping your hair looking neat and tidy.
5. Neck Warmer
During those chilly days, repurpose your knitted head wrap as a neck warmer. Simply wrap the head wrap around your neck and adjust it to your desired length. This style is perfect for keeping you warm and cozy while adding a fashionable touch to your winter outfit.
These are just a few creative ways to use your knitted head wrap. Experiment with different styles and techniques to find the look that best suits your personal style and occasion. Whether you’re heading to a casual brunch or a formal event, your knitted head wrap is a versatile accessory that will add warmth and style to any outfit.
Share Your Knitted Head Wrap Creations
Now that you have learned how to knit a head wrap using our free pattern, it’s time to showcase your creativity! We would love to see the beautiful head wraps you have made using our pattern. Whether you have added your personal touch by incorporating different stitches or colors, or if you have followed the pattern exactly, every creation is unique and special.
Show off your finished head wraps by sharing pictures on social media using the hashtag #KnittedHeadWrapCreations. This way, other knitters can be inspired by your work and see the different variations that can be achieved with this pattern. Don’t forget to tag us so we don’t miss your beautiful creations!
If you have made any modifications to the pattern or have any tips and tricks to share with other knitters, feel free to leave a comment below this article. Sharing your insights and experiences can help others who are just starting their knitting journey or looking to improve their skills.
Summary: Now it’s time to show off your knitted head wrap creations! Share your finished head wraps on social media using the hashtag #KnittedHeadWrapCreations and tag us to be featured. If you have any modifications or tips to share, leave a comment below. Happy knitting!