
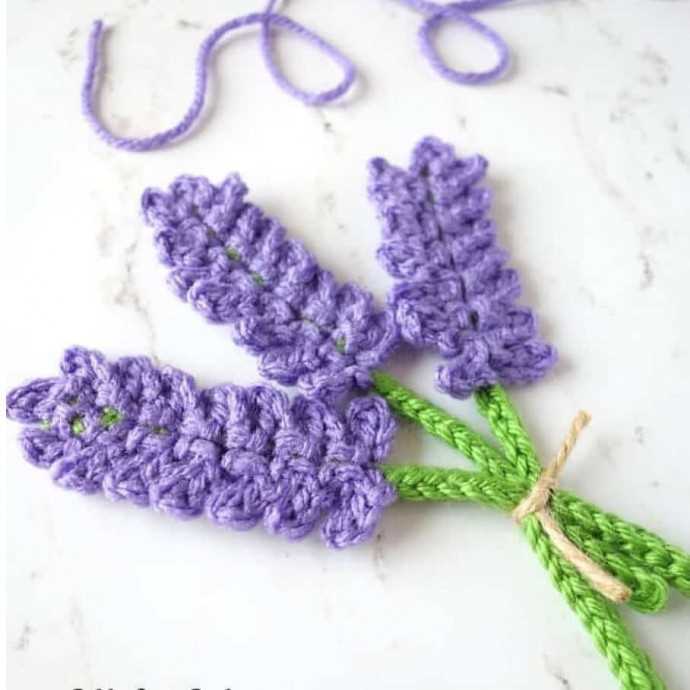
Lavender is a beautiful and versatile flower that has been used for centuries in various forms, from potpourri to essential oils. But did you know that you can also incorporate the beauty and fragrance of lavender into your knitting projects?
A lavender knitting pattern is a great way to add a touch of elegance and relaxation to your knitting. Whether you’re a beginner or an experienced knitter, there are plenty of patterns available that incorporate this lovely flower.
One popular pattern is the lavender sachet. This small, decorative bag can be filled with dried lavender buds and placed in your drawers or closets to keep your clothes smelling fresh. The sachet itself can be knit in a variety of stitch patterns, from simple garter stitch to more intricate lace designs. It’s a quick and satisfying project that can be completed in just a few hours.
If you’re looking for a larger project, you might consider knitting a lavender shawl or wrap. These cozy accessories are perfect for cool evenings or chilly days, and they make a stylish addition to any outfit. You can choose a pattern that incorporates small lavender motifs or one that uses lavender-colored yarn for a more subtle effect.
So whether you’re in need of a small, decorative project or a larger accessory, a lavender knitting pattern is a great way to add a touch of beauty and relaxation to your knitting.
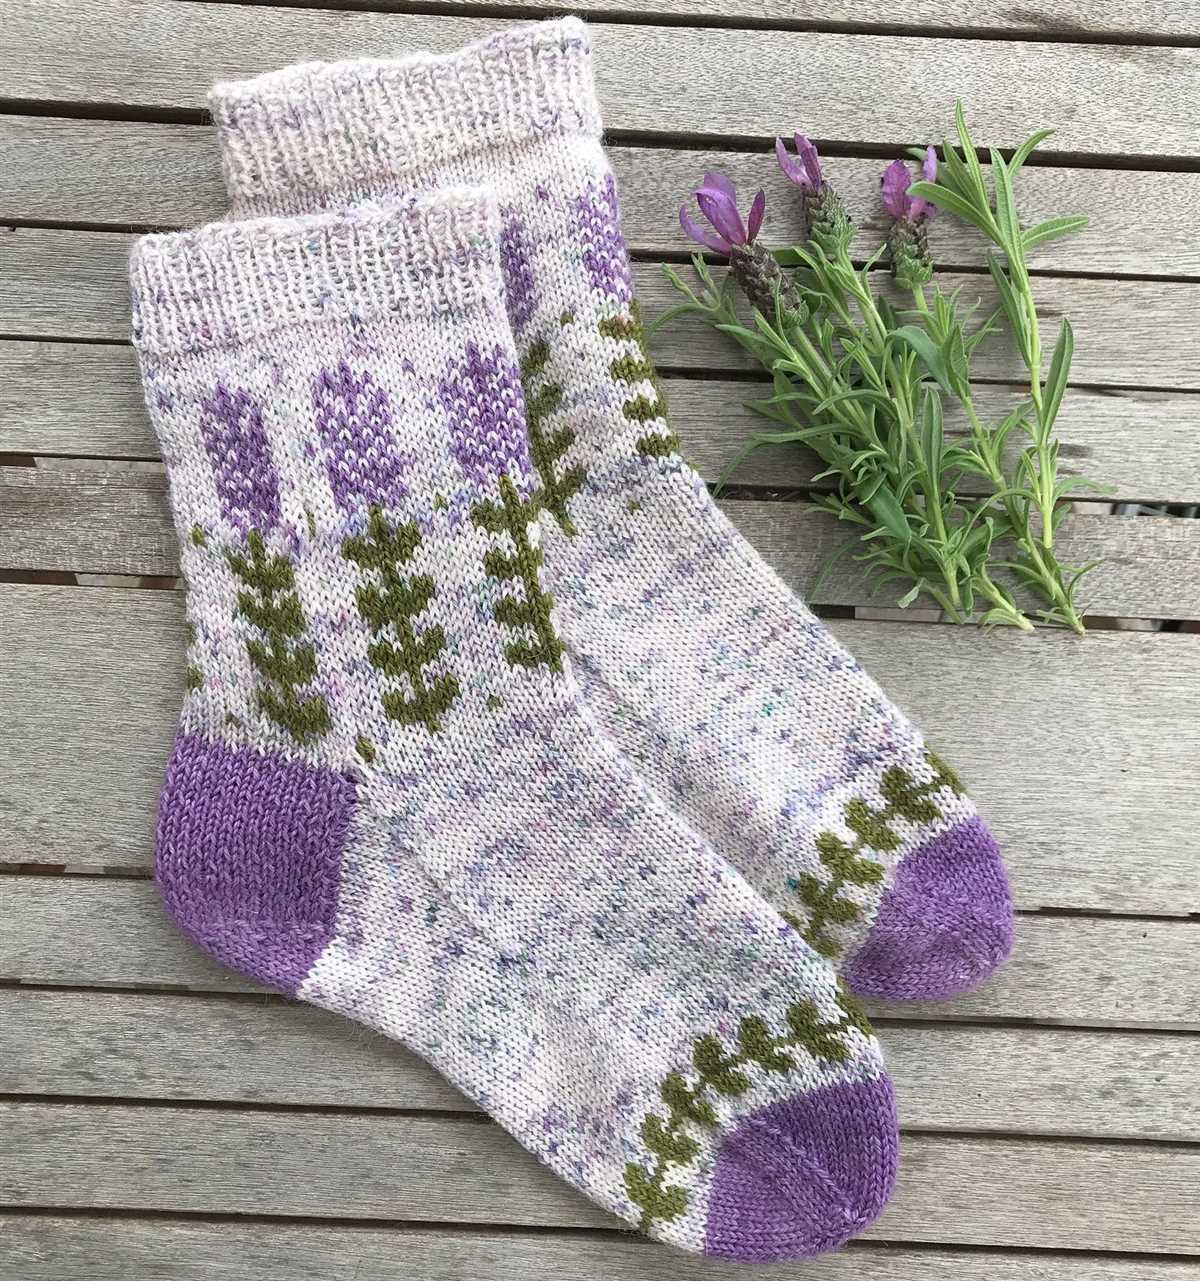
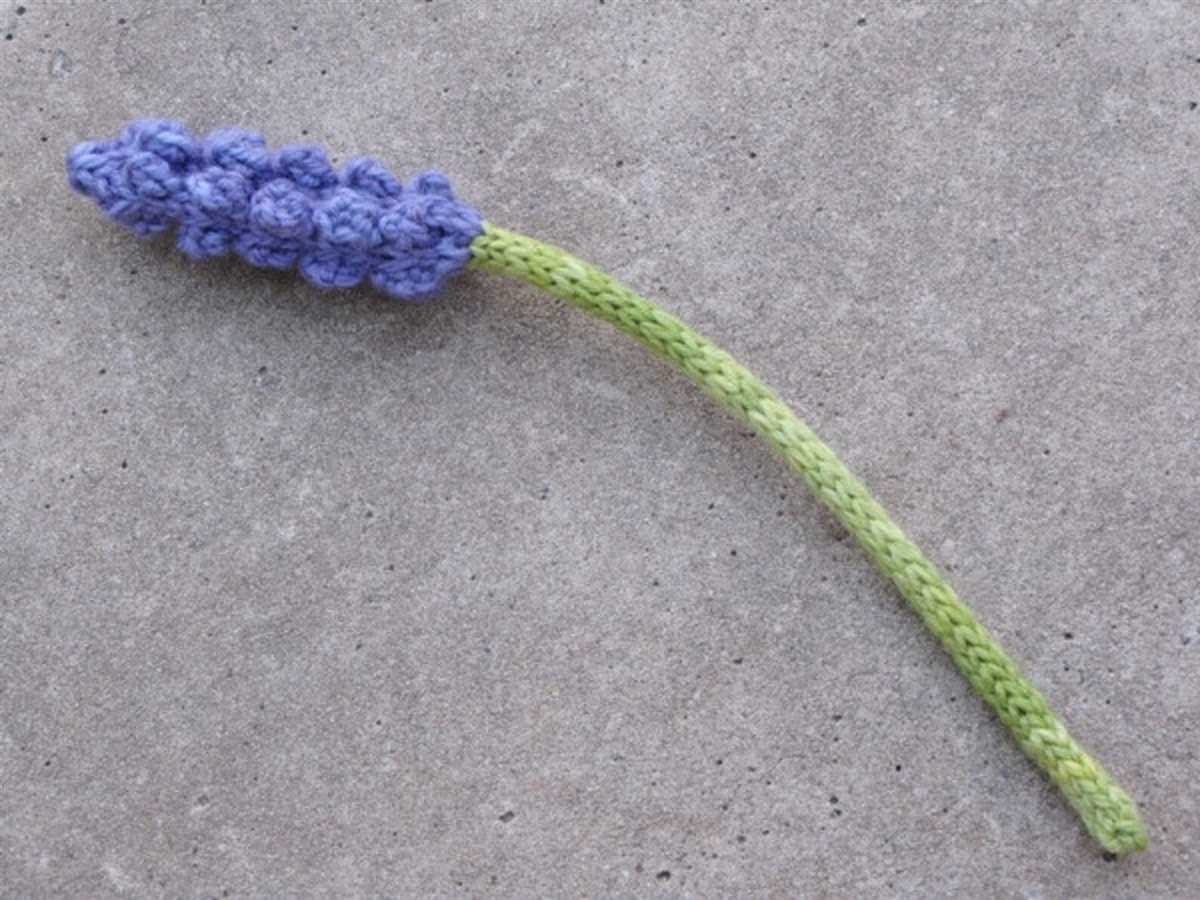
Lavender Knitting Pattern
The lavender knitting pattern is a beautiful and intricate design that is perfect for creating cozy and stylish garments. With its delicate floral motif, this pattern adds a touch of femininity to any knitted item.
To create the lavender knitting pattern, you will need basic knitting skills and some knowledge of different stitch techniques. The pattern typically involves using a combination of knit and purl stitches to create the intricate floral design. The result is a textured and visually appealing fabric that is sure to impress.
Materials Needed
- Yarn: Choose a yarn in your preferred weight and color. For a more delicate look, opt for a lighter weight yarn in shades of lavender or purple.
- Knitting Needles: Use needles that are appropriate for your chosen yarn weight. Check the yarn label for recommended needle size.
- Tapestry Needle: This will be used for weaving in ends and sewing any seams.
- Stitch Markers: Optional, but helpful for keeping track of your progress.
Instructions

- Cast on the desired number of stitches for your project.
- Begin with a few rows of garter stitch (knit every row) for the border.
- Start the lavender pattern by following the chart or written instructions. This may involve a combination of knit, purl, and yarn over stitches to create the floral design.
- Continue knitting the lavender pattern until you have reached the desired length for your project, making sure to maintain the correct stitch count.
- Finish your knitting with a few more rows of garter stitch for the border.
- Bind off all stitches to secure your work.
- Weave in any loose ends and block your finished item to give it a professional and polished look.
Once you have mastered the lavender knitting pattern, you can incorporate it into a variety of projects such as scarves, shawls, sweaters, and even blankets. The delicate floral design adds an elegant and timeless touch to any knitted piece, making it a versatile pattern to have in your repertoire.
Choosing the Right Yarn
When it comes to knitting, choosing the right yarn is crucial. The yarn you choose can greatly affect the final look and feel of your project. Whether you’re creating a Lavender knitting pattern or any other design, considering the following factors can help you make the best choice.
1. Fiber Content
The first thing to consider when choosing yarn is the fiber content. Different fibers have different properties and will behave differently when knitted. Some common fiber options include wool, cotton, acrylic, and blends. Wool is warm and elastic, making it great for cozy garments. Cotton is breathable and suitable for warmer climates. Acrylic is durable and easy to care for. Blends can combine the best properties of different fibers.
2. Weight and Gauge
The weight of the yarn refers to how thick or thin it is. The weight of the yarn you choose should match the requirements of your pattern. If you’re using a Lavender knitting pattern, it’s important to check the recommended yarn weight. The gauge of the yarn is also important, as it determines the number of stitches and rows per inch. To achieve the desired size and fit, it’s crucial to match the gauge specified in the pattern.
3. Color and Texture
The color and texture of the yarn can greatly impact the overall look of your project. Consider the color palette of the Lavender knitting pattern or any design you’re working on. Choose a yarn color that complements the pattern and enhances the final result. Texture can also add visual interest to your knitting. Whether you prefer a smooth and sleek yarn or a textured and fluffy one, make sure it aligns with your intended outcome.
In conclusion, choosing the right yarn for your knitting project is essential for achieving the desired result. Consider factors like fiber content, weight and gauge, and color and texture to make an informed decision. By selecting the perfect yarn, you’ll enhance the beauty and functionality of your Lavender knitting pattern or any other project you undertake.
Identifying the Knitting Needles
When it comes to knitting, choosing the right needles is essential. Knitting needles come in different materials, lengths, and sizes, and each type has its own advantages and characteristics. Whether you are a beginner or an experienced knitter, it is important to know how to identify the knitting needles that will work best for your project.
Materials: Knitting needles can be made from various materials, such as metal, plastic, bamboo, or wood. Each material has its own unique feel and characteristics. Metal needles are durable and have a smooth surface, making them ideal for fast knitting. Plastic needles are lightweight and flexible, perfect for delicate knitting projects. Bamboo and wood needles have a warm and natural feel, providing good grip and reducing hand fatigue.
Sizes and Lengths:
Knitting needles are available in different sizes and lengths. The size of the needle is indicated by a number or letter, with smaller numbers indicating smaller needles. The length of the needle can vary depending on the type of project you are working on. Short needles are great for small projects like socks or sleeves, while longer needles are preferred for larger projects like blankets or shawls.
Identifying Needle Sizes: To identify the size of a knitting needle, look for the number or letter engraved or printed on the needle. You can also use a needle gauge tool that measures the diameter of the needle. This will help you choose the right size of needle for your yarn and achieve the desired tension in your knitting.
Identifying Needle Lengths: The length of a knitting needle can vary from short, typically around 9 inches, to longer lengths of 14-16 inches. Circular needles can have even longer cables, allowing you to work on larger projects in the round. The length of the needle you choose will depend on your knitting style and the type of project you are working on.
Conclusion
Identifying the right knitting needles is an important step in any knitting project. Understanding the different materials, sizes, and lengths will help you select the needles that are best suited for your needs. Whether you prefer metal, plastic, bamboo, or wood, and whether you need short or long needles, there is a perfect knitting needle out there for every knitter.
Casting On Stitches
Before you can start knitting, you need to cast on stitches onto your knitting needle. Casting on is the process of creating the first row of stitches, which will form the foundation of your knitting project. There are several different methods for casting on stitches, and the one you choose will depend on the type of project you are working on and personal preference. Here are a few common methods:
Long-Tail Cast On
The long-tail cast on method is one of the most versatile and commonly used casting methods. It creates a stretchy and neat edge, making it suitable for various projects. To perform this cast on, first, leave a long tail or end of the yarn and make a slipknot. Put the slipknot on your needle and hold it in your right hand. Then, with your left hand, hold the yarn tail and wrap it around your thumb and index finger. Pass the needle under the thumb loop, over the finger loop, and back through the thumb loop. Pull the yarn to tighten the stitch on the needle. Repeat these steps until you have the desired number of stitches.
Cable Cast On
The cable cast on method is a great choice for projects that require a firm and stable edge. It creates a dense row of stitches and is often used for starting cuffs, collars, or button bands. To perform this cast on, start by making a slipknot and placing it on your needle. Hold the needle with the slipknot in your right hand and the working yarn in your left hand. With your left hand, insert the needle between the slipknot and the first stitch. Wrap the yarn around the needle and pull it through, creating a new stitch. Place the new stitch on the left needle and repeat these steps until you have the desired number of stitches.
- Knitted Cast On: This method is similar to the cable cast on, but it creates a looser edge. It is a good choice for projects that require a bit more stretch, such as scarves or blankets.
- Backward Loop Cast On: The backward loop cast on is the simplest method and is commonly used for adding stitches in the middle of a row. However, it can be difficult to control the tension, so it’s not recommended for large numbers of stitches.
These are just a few of the many casting on methods available to knitters. Each method has its own unique advantages and uses, so it’s worth experimenting with different techniques to find the ones that work best for you and your projects.
Knitting the Basic Stitch
Knitting is a popular craft that involves creating fabric by interlocking loops of yarn with knitting needles. The basic stitch in knitting is called the knit stitch. It is the foundation for all knitting patterns and is essential to master for any knitter.
To knit the basic stitch:
- Hold the knitting needle with the cast-on stitches in your left hand and the empty needle in your right hand.
- Insert the right needle through the first stitch on the left needle, from front to back.
- With the working yarn in the back, use your right hand to wrap the yarn around the right needle from right to left.
- Using the right needle, pull the loop of yarn through the stitch, sliding it off the left needle.
- Continue to repeat steps 2-4 for each stitch on the left needle until all stitches have been transferred to the right needle.
Once you have mastered the basic knit stitch, you can explore various knitting patterns and techniques to create beautiful and intricate designs. Knitting allows for endless creativity, and the possibilities are truly limitless.
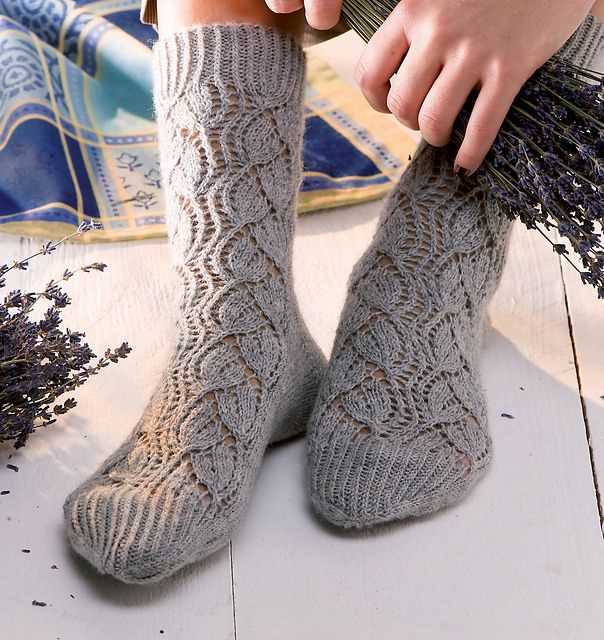
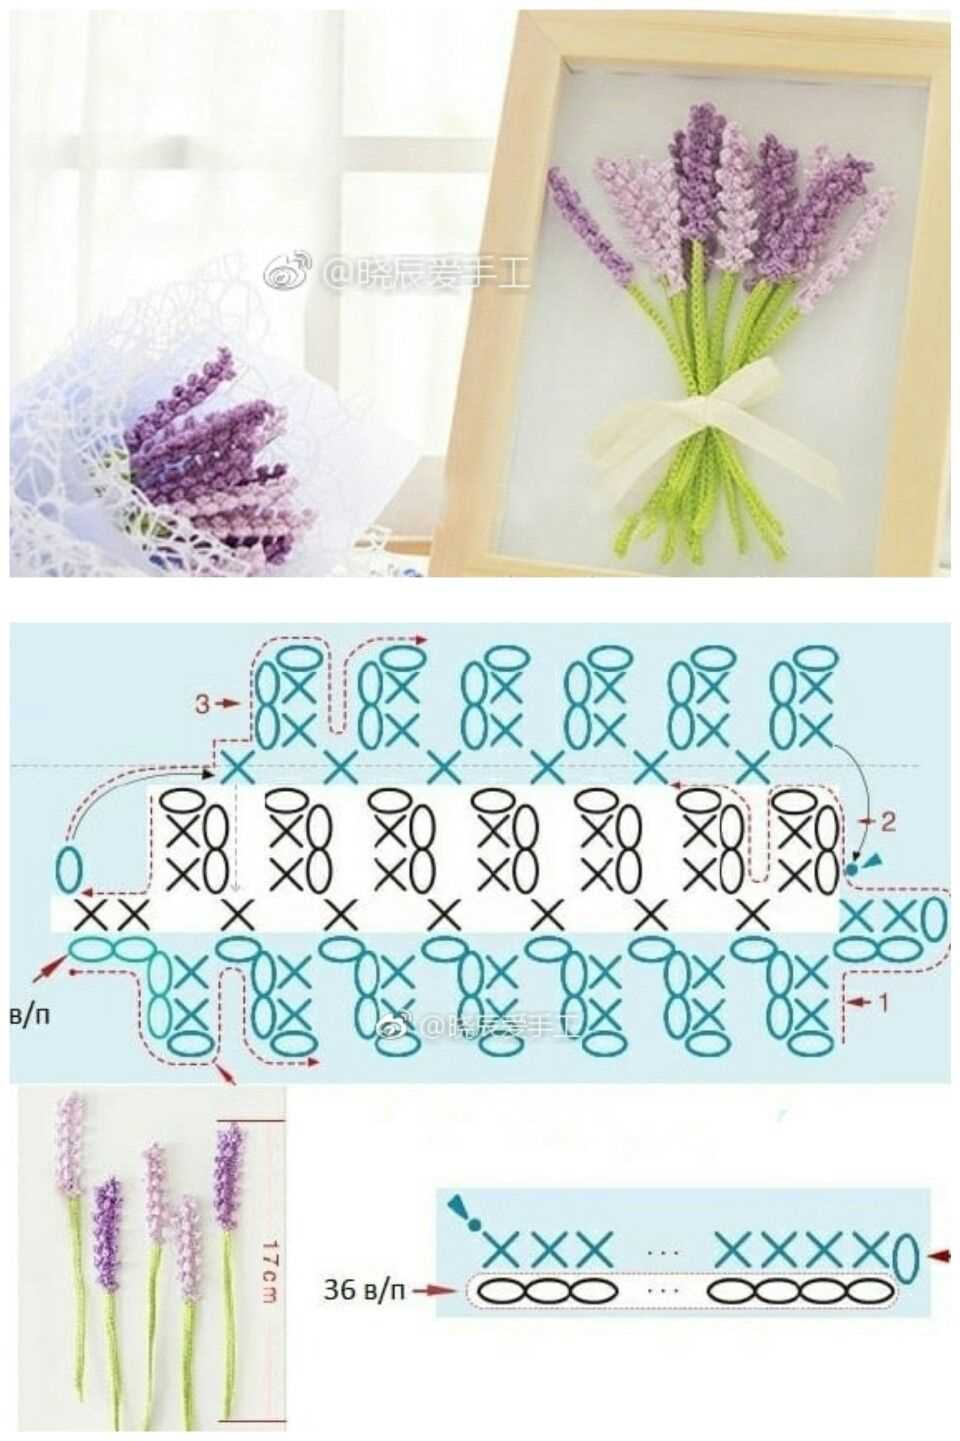
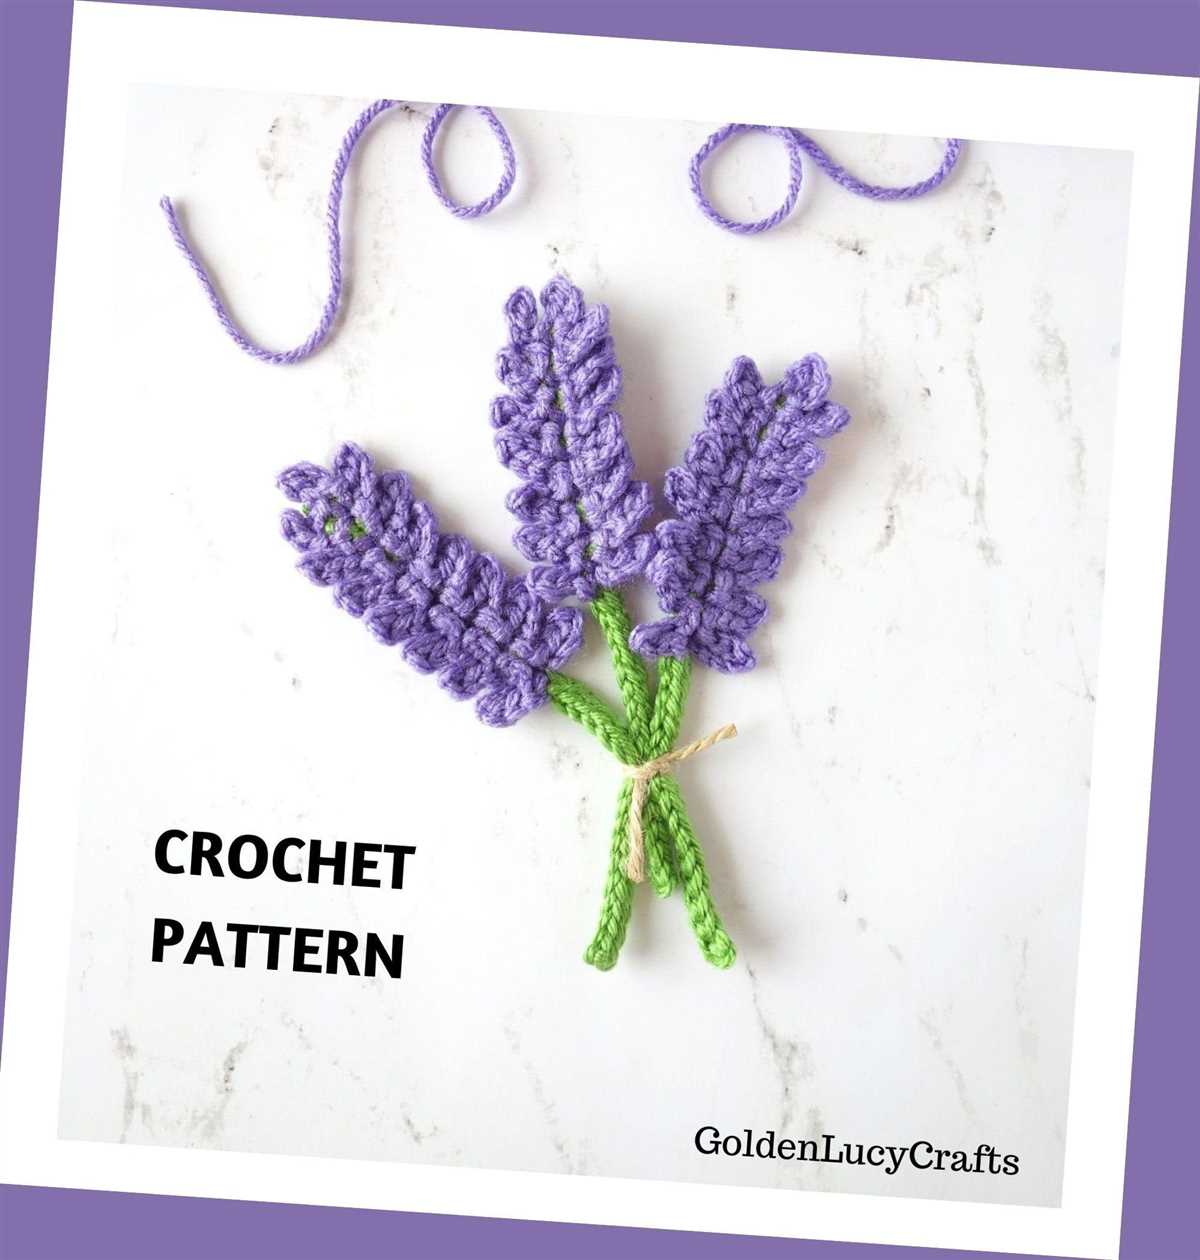
Creating the Lavender Motif
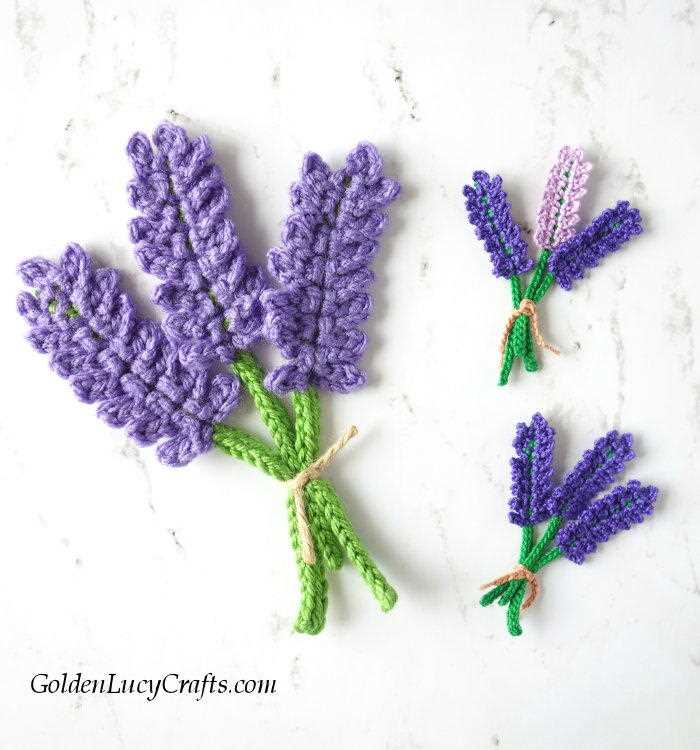
If you are a fan of lavender and knitting, you will love creating the lavender motif. This pattern incorporates the beautiful color and delicate texture of lavender into your knitting project. Whether you are making a scarf, blanket, or even a sweater, the lavender motif will add an elegant and feminine touch to your design.
To start, you will need to choose the perfect lavender yarn for your project. Look for a yarn that is soft and lightweight, as this will complement the delicate nature of the lavender motif. Consider using a variegated yarn to add some depth and dimension to your design, or opt for a solid color if you prefer a more classic and refined look.
Gauge and Needle Size
Before you begin knitting the lavender motif, it is important to determine your gauge and needle size. This will ensure that your finished motif matches the desired measurements and fits seamlessly into your project. Take the time to swatch and adjust your needle size if necessary, as even a slight variation can throw off the final result.
Once you have determined your gauge and needle size, you can start knitting the lavender motif. The pattern typically involves a combination of basic knitting stitches, such as knit, purl, and yarn over. However, there may be some additional stitch techniques or special instructions specific to the pattern you are using.
- Follow the pattern instructions carefully, ensuring that you keep track of any stitch markers, color changes, or pattern repeats.
- Pay close attention to your tension, as a loose or tight knitting can impact the final appearance of your lavender motif.
- Take breaks as needed to prevent hand and wrist fatigue, and don’t forget to enjoy the process of creating this beautiful motif.
Once you have completed the lavender motif, you can incorporate it into your knitting project. Consider using it as a central focal point or interspersing it throughout for a more subtle effect. Regardless of how you choose to use the lavender motif, it is sure to add a touch of elegance and sophistication to your knitting project.
Following the Knitting Chart
If you are an avid knitter, you may be familiar with knitting charts. These visual representations of knitting patterns provide a clear roadmap for creating intricate designs. Following a knitting chart can be a fun and challenging way to experiment with different stitches and patterns. Whether you are a beginner or an experienced knitter, understanding how to read and follow a knitting chart is an essential skill to have.
What is a knitting chart?
A knitting chart is a grid-like diagram that represents a knitting pattern. Each square on the chart corresponds to a stitch or a group of stitches. The symbols and colors used in the chart indicate different knitting techniques, such as knit, purl, yarn over, or decrease. By following the symbols and instructions on the chart, you can create a complete knitted design.
How to read a knitting chart?
Reading a knitting chart may seem intimidating at first, but with a little practice, it becomes easier. Start by familiarizing yourself with the symbols used in the chart. Most knitting charts come with a key that explains each symbol and its corresponding stitch. Once you understand the symbols, you can follow the chart row by row. Begin at the bottom right corner of the chart and read each row from right to left. Pay close attention to any instructions or notes provided alongside the chart.
Tips for following a knitting chart:
- Use stitch markers to keep track of your progress on the chart.
- Count your stitches regularly to ensure accuracy.
- Take breaks if you feel overwhelmed or tired. Knitting should be an enjoyable experience.
- Practice reading simple knitting charts before tackling more complex designs.
- Don’t be afraid to make mistakes. They can be valuable learning opportunities.
By following a knitting chart, you can create beautiful and intricate designs. It may take some time and practice to get the hang of reading charts, but with perseverance, you’ll soon be able to tackle even the most challenging patterns. So grab your knitting needles, choose a charted pattern, and start creating your own masterpiece!
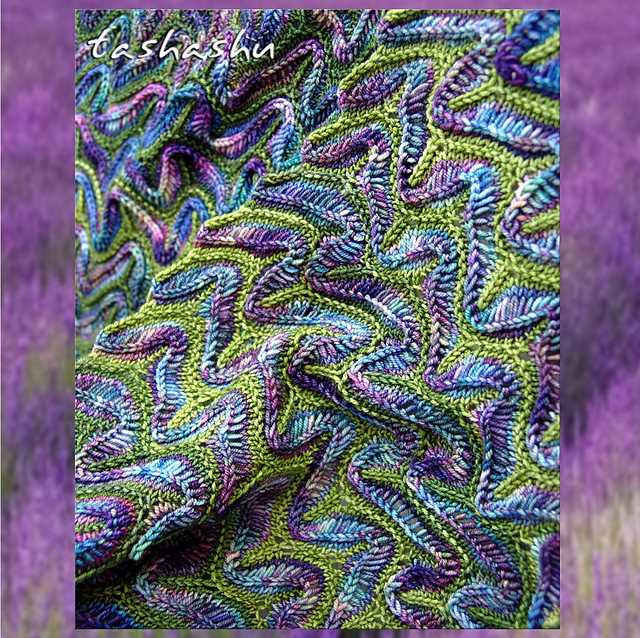
Adding Texture with Purl Stitches
Adding texture to your knitting projects can elevate them from simple and plain to visually interesting and unique. One way to achieve this is by using purl stitches, which create a bumpy texture on your fabric. By strategically placing purls amongst your knits, you can create various patterns and designs that make your knitting stand out.
The purl stitch is the reverse of the knit stitch, where the working yarn is brought to the front of the work and the stitch is worked through the back loop. This creates a raised loop on the right side of the fabric, adding depth and dimension to your knitting. Combining purl stitches with knit stitches in different patterns and sequences can create a wide range of textures, from simple ribbing to intricate cables.
As you explore the world of purl stitches, you’ll discover a variety of patterns and techniques to incorporate them into your knitting. Some common examples include seed stitch, moss stitch, and basketweave stitch. Seed stitch alternates knit and purl stitches in a checkerboard pattern, creating a subtle texture. Moss stitch is similar, but with a more pronounced texture. Basketweave stitch combines blocks of knit and purl stitches to mimic the appearance of woven baskets.
- Seed Stitch: This classic pattern is achieved by alternating one knit stitch and one purl stitch across each row and repeating the pattern on subsequent rows.
- Moss Stitch: Also known as double seed stitch, this pattern is created by alternating one knit stitch and one purl stitch on the first row, then reversing the order on the next row.
- Basketweave Stitch: This textured pattern is achieved by working blocks of knit and purl stitches in a specific sequence. For example, you might knit 8 stitches and then purl 8 stitches, repeating this sequence across the row.
By incorporating purl stitches into your knitting, you can add a touch of texture and depth to your projects, making them more visually interesting. Whether you prefer simple patterns like seed stitch or more complex designs like cable knits, experimenting with purl stitches allows you to customize your creations and bring your own unique style to your knitting.
Shaping the Lavender Knitted Piece
When knitting a lavender piece, shaping plays a crucial role in achieving the desired final result. In order to shape the piece, various techniques can be used, including increasing and decreasing stitches, as well as adding curves and texture through different stitch patterns.
Increasing stitches: One way to shape the lavender knitted piece is by increasing stitches. This can be done by working yarn overs or by picking up stitches along the edges. Yarn overs create an eyelet effect, adding an elegant touch to the design. On the other hand, picking up stitches allows for the creation of new stitches, resulting in a wider piece.
Decreasing stitches: Decreasing stitches is another technique used to shape the lavender knitted piece. This can be done by working decreases such as knit two stitches together (k2tog) or slip slip knit (ssk). These decreases slant to the right and left respectively, and when used strategically, they create beautiful shaping.
Adding curves: To add curves to the lavender knitted piece, short rows can be used. Short rows involve knitting only a portion of the stitches in a row and then turning the work. This creates an asymmetrical shape, ideal for adding curves to the design. By using short rows strategically, you can create interesting shapes and add depth to the lavender piece.
Texture: Texture can also be used to shape the lavender knitted piece. This can be achieved by incorporating different stitch patterns such as cables, bobbles, or lace. These stitches create dimension and interest to the piece, allowing for a more unique and eye-catching result.
In summary, shaping the lavender knitted piece involves various techniques such as increasing and decreasing stitches, as well as adding curves and texture through different stitch patterns. By using these techniques strategically, you can create a beautifully shaped lavender piece that is both visually appealing and satisfying to knit.
Binding Off Stitches
Binding off stitches is an essential technique in knitting, as it allows you to finish your project by creating a secure edge. When binding off, you will be working with the live stitches on your knitting needle.
To bind off, start by knitting two stitches as usual. Then, using the left needle, lift the first stitch over the second stitch and off the needle. This will leave one stitch on your right needle. Continue knitting one more stitch, and repeat the process of lifting the previous stitch over the new stitch and off the needle. Repeat this process until you have bound off all the stitches.
One common variation of the basic bind off is the stretchy bind off, which is ideal for edges that need to have some give, such as the cuffs of a sweater or the top of a sock. To work the stretchy bind off, knit the first two stitches as usual, then insert the left needle into the front of the first stitch and pull it over the second stitch and off the needle. Then, insert the left needle into the front of the second stitch and pull it over the new stitch and off the needle. Repeat this process until all stitches have been bound off.
Another option for binding off stitches is the picot bind off, which creates a decorative edge. To work the picot bind off, knit two stitches as usual, then bind off one stitch by lifting it over the second stitch. Next, cast on two new stitches using the cable cast on method. Repeat this process of binding off one stitch and casting on two stitches until all stitches have been bound off.
Binding off stitches is an important skill to master in knitting, as it helps create a finished and professional-looking edge to your projects. Whether you use the basic bind off, the stretchy bind off, or the picot bind off, practice and experiment to find the method that works best for your project.
Finishing Touches and Care Instructions

Once you have finished knitting your lavender pattern, there are a few finishing touches you can add to make it even more special. You can attach a small lavender charm or button to the corner of the pattern as a decorative accent. You can also consider adding a small satin ribbon to the edge of the pattern for an elegant touch.
When it comes to caring for your lavender knitting pattern, it is important to follow the specific care instructions for the yarn you used. Generally, it is recommended to hand wash the pattern in cold water with a gentle detergent. Avoid twisting or wringing the pattern and instead gently press out the excess water and lay it flat to dry. Avoid exposing the pattern to direct sunlight for extended periods of time to prevent fading.
With proper care, your lavender knitting pattern will stay beautiful and fragrant for years to come. It can be used as a decorative piece in your home or given as a thoughtful handmade gift. So take your time, enjoy the process of knitting, and create something truly special with this lavender pattern.