
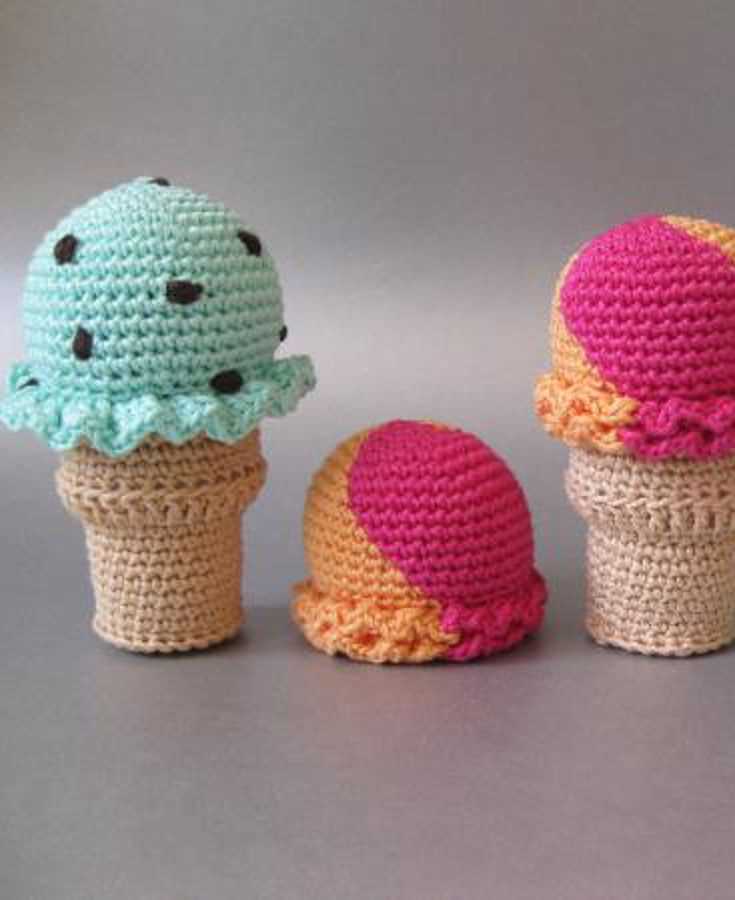
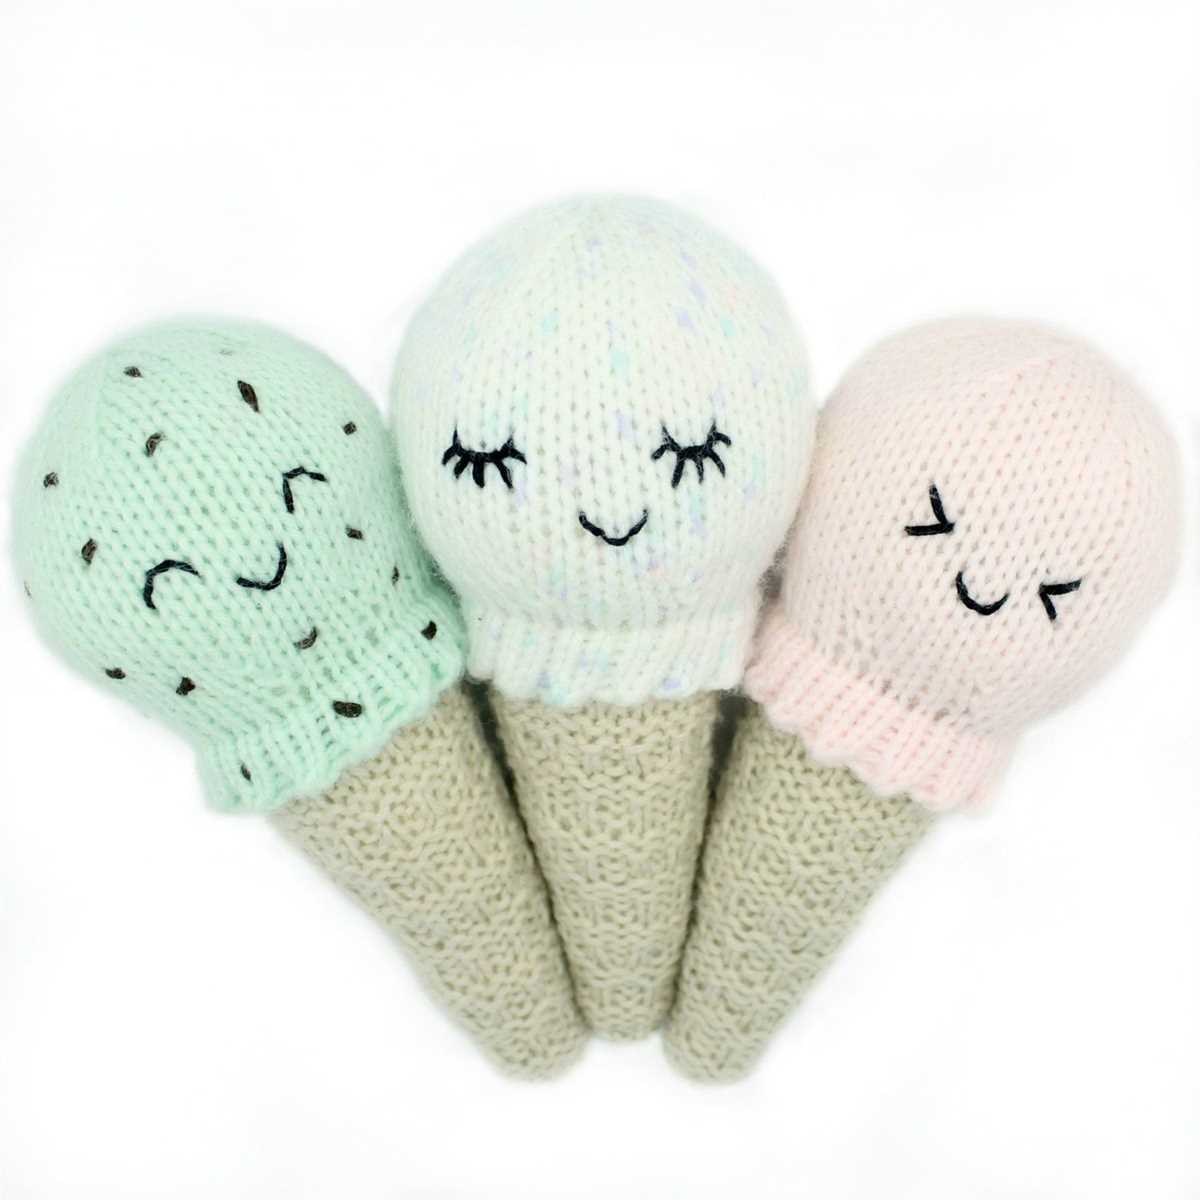
Looking for a sweet and colorful knitting project? Why not try your hand at knitting an ice cream cone? An ice cream knitting pattern is a fun and whimsical way to create a delicious treat that will never melt or drip. Whether you’re an experienced knitter or just starting out, this project is perfect for all skill levels.
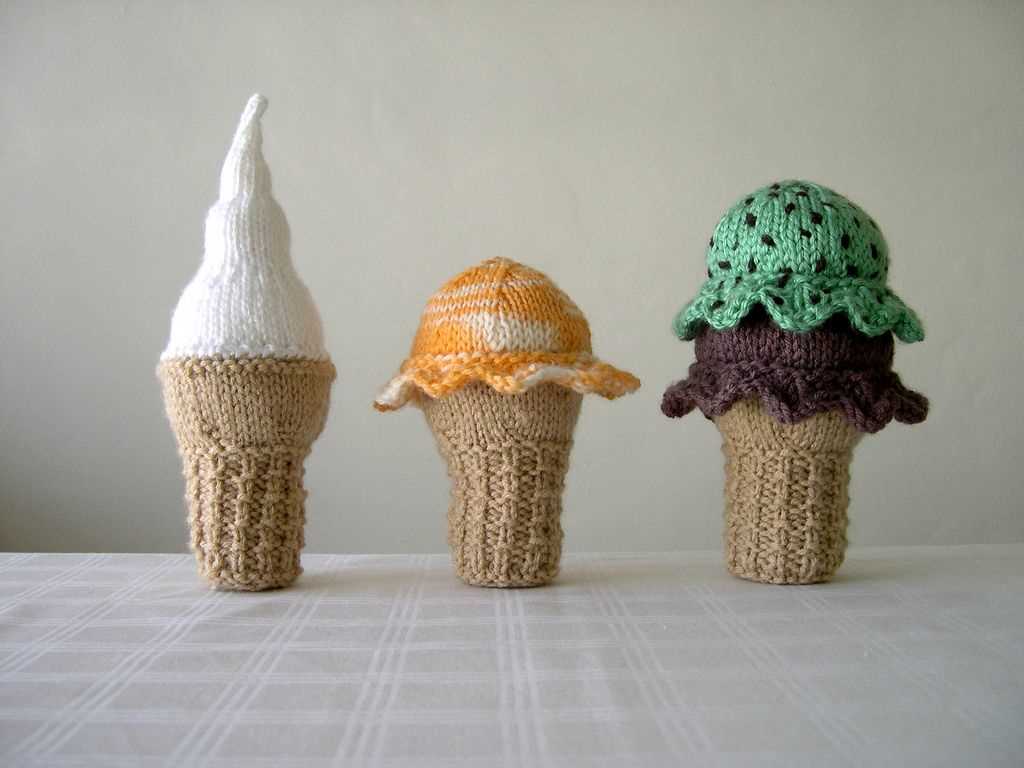
This ice cream knitting pattern allows you to get creative and experiment with different colors and flavors. You can choose your favorite combinations or even make a whole set of ice cream cones to display as home decor or give as gifts. The best part is that there are endless possibilities for customization.
Knitting an ice cream cone is a great way to practice various knitting techniques, such as working in the round, increasing and decreasing stitches, and creating texture with different stitch patterns. It’s a project that will keep you engaged and excited from start to finish.
Ice Cream Knitting Pattern
If you love knitting and ice cream, then this ice cream knitting pattern is perfect for you! With this pattern, you can create adorable knitted ice cream cones that will bring a touch of sweetness to your knitting projects. Whether you’re making them as decorations or as toys for children, these ice cream cones are sure to be a delightful addition to your creations.
Materials:
- Yarn in various colors (for the cone and the ice cream scoops)
- Knitting needles (appropriate for your chosen yarn)
- Tapestry needle
- Scissors
- Stuffing
- Optional: beads or embroidery thread (for decorating the ice cream scoops)
Instructions:
- Start by knitting the cone. Cast on the desired number of stitches, depending on how wide you want your ice cream cone to be.
- Work in the stockinette stitch pattern (knit one row, purl one row) until the cone reaches your desired length.
- Once the cone is complete, set it aside and start knitting the ice cream scoops. Choose a different color for each scoop.
- Follow a simple pattern to create the shape of the ice cream scoop. You can use increases and decreases to create a rounded shape.
- Continue knitting until the scoop reaches your desired size. Repeat this step for each scoop.
- Once all the ice cream scoops are complete, it’s time to assemble your ice cream cone. Using a tapestry needle, sew each scoop onto the cone, starting from the bottom and working your way up.
- Leave an opening at the top of the cone to stuff it with filling. Use small amounts of stuffing to create a plump and delicious-looking ice cream cone.
- Optional: Add beads or use embroidery thread to create sprinkles or other decorations on the ice cream scoops.
- Finish off by sewing the opening of the cone closed and weaving in any loose ends.
Now you have a lovely knitted ice cream cone that you can use in various creative ways. Attach it to a keychain, use it as a decoration for a bag or hat, or give it to a child as a soft toy. No matter how you choose to use your knitted ice cream cone, it will surely bring a smile to your face!
What is Ice Cream Knitting Pattern?
The Ice Cream Knitting Pattern is a popular and fun knitting design that is inspired by the sweet and colorful treat. It features a pattern that resembles the swirled texture and vibrant colors of ice cream. This pattern is perfect for knitting various items, such as scarves, hats, socks, and even sweaters, adding a touch of whimsy and playfulness to your knitting projects.
The Ice Cream Knitting Pattern utilizes different knitting techniques, including colorwork and texture stitches, to create the illusion of a delicious ice cream cone. It typically involves using multiple colors of yarn and knitting in a circular or alternating pattern to achieve the desired effect. Depending on the complexity of the design, this pattern can be suitable for knitters of all skill levels, from beginners to experienced crafters.
When knitting with the Ice Cream Knitting Pattern, you have the freedom to experiment with different color combinations to create personalized and unique projects. You can choose traditional ice cream colors like chocolate, vanilla, and strawberry, or get creative with bright and bold hues to make your knitting stand out. The possibilities are endless, allowing you to customize your creations to suit your style and preferences.
Whether you’re knitting a cozy winter accessory or a playful summer garment, the Ice Cream Knitting Pattern offers a delightful and eye-catching design. It’s a great way to showcase your knitting skills and create one-of-a-kind pieces that are sure to impress. So grab your knitting needles and yarn, and get ready to indulge in the sweet world of Ice Cream Knitting Pattern.
Materials Needed
To create your ice cream knitting pattern, you will need the following materials:
Yarn:
- Main color: Choose a color that resembles the flavor of ice cream you want to create. You will need approximately 100 grams of yarn for the main color.
- Contrasting color: Choose a color that will be used for the cone or any additional elements. You will need approximately 50 grams of yarn for the contrasting color.
Knitting Needles:
You will need a pair of knitting needles in size US 7 (4.5 mm). These needles will help you create the right tension and stitch size for your ice cream pattern.
Stitch Markers:
Stitch markers are optional but can be useful to mark specific sections or increases/decreases in your pattern. You can use small safety pins, contrasting yarn, or commercially available stitch markers.
Darning Needle:
A darning needle, also known as a yarn needle or tapestry needle, is used to weave in the loose ends of your yarn and sew any seams or attachments. Choose a needle with a large eye and a blunt tip to make it easier to work with your yarn.
Scissors:
Scissors are essential for cutting your yarn and trimming any excess. Choose a pair of small, sharp scissors that are comfortable to hold and use.
With these materials at hand, you’ll be ready to start knitting your very own ice cream pattern!
Choosing Yarn and Needles
When it comes to knitting ice cream patterns, choosing the right yarn and needles is essential to achieve the desired results. The yarn you choose will impact the texture, drape, and overall appearance of your ice cream creation.
Yarn weight: Selecting the appropriate yarn weight is crucial for the pattern to turn out as intended. In this case, it is best to choose a sport or worsted weight yarn to achieve the desired thickness and structure. These weights will help create a realistic look for your knitted ice cream.
Consider the following factors when choosing yarn:
- Color: Opt for yarn colors that closely resemble your favorite ice cream flavors. For example, pale pink or creamy white for strawberry or vanilla, light brown for chocolate, and so on.
- Fiber content: Consider the fiber content of the yarn, as it will affect the feel and durability of your knitted ice cream. Acrylic yarns may be a good choice for their affordability and ability to retain shape.
- Texture: Look for yarns that have a smooth and soft texture to mimic the appearance of creamy ice cream. Yarns with a bit of sheen can also add a nice touch.
Needle size: The needle size you use will depend on the yarn weight you’ve chosen. Check the recommended needle size on the yarn label and use that as a starting point. However, it’s always a good idea to make a gauge swatch to ensure the size and tension of your stitches match the pattern instructions. Adjust your needle size as needed to achieve the correct gauge.
With the right yarn and needles, you’ll be well on your way to creating delectable knitted ice cream treats. So, grab your needles and your favorite flavor yarn, and get ready to indulge in some sweet knitting fun!
Step-By-Step Instructions
Knitting your own ice cream cone is a fun and creative project that will have you craving for a sweet treat. With this step-by-step guide, you’ll be able to create your own adorable ice cream cone using just your knitting needles and yarn. Let’s get started!
Materials:
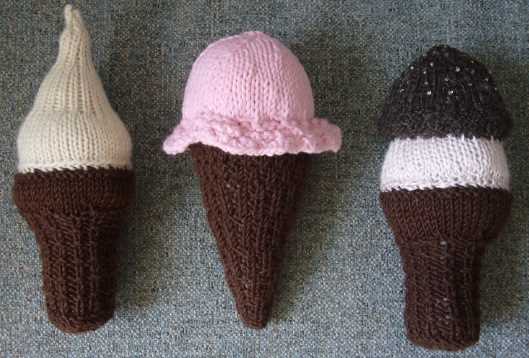
- Yarn in various colors: beige (for the cone), different shades of brown (for the chocolate syrup), and pink (for the ice cream)
- Knitting needles, size 4
- Tapestry needle
- Stitch markers
- Polyfill stuffing
- Scissors
Step 1: Casting On

Start by casting on 24 stitches using the beige yarn. This will create the base of the cone. Make sure to leave a long tail of yarn for sewing later.
Step 2: Knitting the Cone
Using a knit stitch, continue knitting every row until you have completed 14 rows. This will create the cone shape.
Step 3: Adding the Chocolate Syrup
Switch to the brown yarn and knit 2 rows, then switch to a darker shade of brown and knit 2 more rows. Repeat this pattern until you have added 6 rows of chocolate syrup to the cone.
Step 4: Making the Ice Cream
Now it’s time to add the pink yarn for the ice cream. Knit 6 rows with the pink yarn to create the ice cream scoop on top of the cone.
Step 5: Binding Off

Once you have finished the ice cream, bind off all stitches to secure your work. Cut the yarn, leaving a long tail for sewing.
Step 6: Sewing it All Together
Using the tapestry needle, sew the sides of the cone together, making sure to leave the bottom open for stuffing. Then, stuff the ice cream cone with polyfill stuffing, filling it up to your desired level of squishiness.
Step 7: Finishing Touches
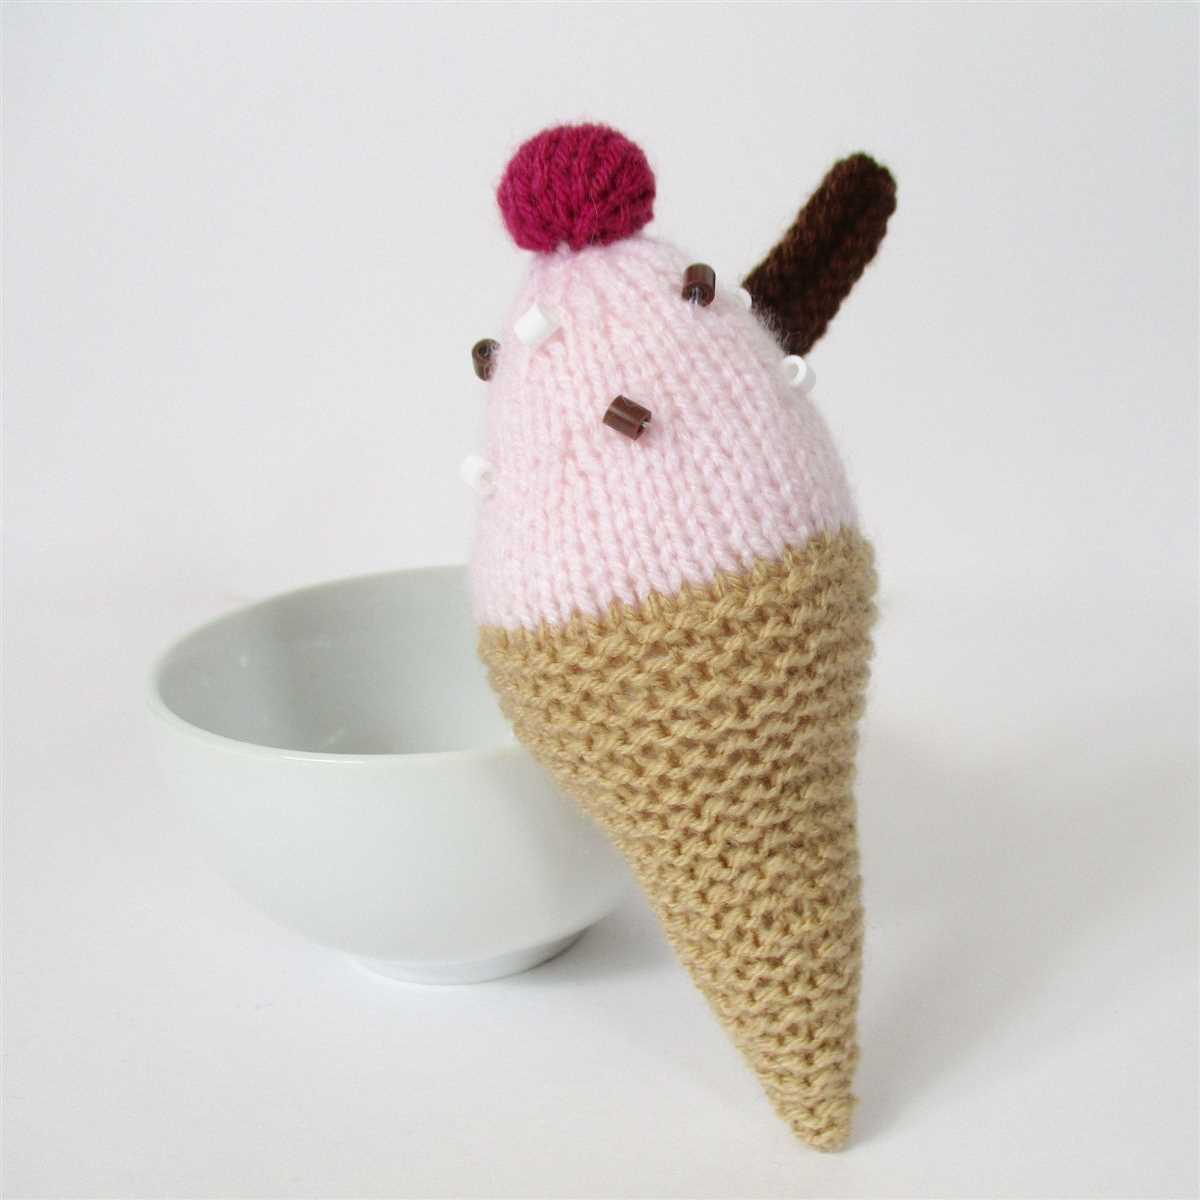
Finally, sew the bottom of the cone closed to complete your knitted ice cream cone. You can add any additional embellishments, such as a cherry on top or sprinkles, using your leftover yarn and tapestry needle.
Now you have your very own knitted ice cream cone that you can use as a cute decoration or even as a toy for children. Enjoy the process of knitting and let your creativity shine through!
Creating the Cone
When it comes to knitting an ice cream cone, one of the most important parts to get right is the cone itself. The cone is what holds the delicious ice cream, so it needs to be sturdy and well-formed. To create the cone, you will need a pair of knitting needles, yarn in a cone color of your choice, and a basic understanding of knitting stitches.
Start by casting on the required number of stitches for your chosen size of cone. This will determine the width of your cone. To give it the shape of a cone, you will gradually decrease the number of stitches as you knit. You can do this by knitting two stitches together at regular intervals, following the pattern instructions. This will give the cone a tapered shape, just like a real ice cream cone.
Once you have completed the body of the cone, it’s time to shape the top. This is done by knitting a few rows in a different stitch pattern, such as ribbing or garter stitch. This will create a clean edge and add some texture to the cone. You can also choose to add a few rows of a contrasting color for a fun twist.
To finish off the cone, bind off the stitches and weave in any loose ends. You can then stuff the cone with some filling to give it a more solid shape, or leave it as it is for a floppy cone. Either way, you now have a beautifully knitted ice cream cone that is ready to be topped with your favorite flavor of yarn “ice cream”!
Knitting the Ice Cream Scoops
When it comes to knitting the ice cream scoops, there are several techniques and patterns you can follow to create the perfect sweet treat. Whether you’re a beginner or an experienced knitter, there is a pattern out there for everyone. The key is to choose a pattern that matches your skill level and desired outcome.
One popular technique for knitting ice cream scoops is using the stranded colorwork method. This involves knitting with two colors at the same time to create intricate patterns and designs. By using different colored yarns, you can create a realistic-looking ice cream scoop with swirls and other fun details. To achieve this effect, it’s important to follow a chart or pattern that specifies when and how to switch between colors.
Another option for knitting ice cream scoops is to use the intarsia technique. This involves working with separate sections of different colored yarns to create patterns or images. With this method, you can create ice cream scoops with more detailed designs, such as ice cream cones or sprinkles. It requires careful attention to the pattern and yarn management, but the end result can be truly impressive.
For those who prefer a simpler approach, there are also patterns available for basic ice cream scoops that utilize just one color. These patterns are great for beginners or those who want a more minimalist look. By using different stitch patterns or textures, you can still create a visually interesting scoop without the need for multiple colors.
No matter which method or pattern you choose, knitting ice cream scoops can be a fun and rewarding project. Whether you want to create a whimsical accessory, a toy for a child, or simply practice your knitting skills, there is a pattern out there that will suit your needs. So grab your yarn and needles, and start knitting your way to a delicious-looking ice cream scoop!
Adding Details and Decorations
Once you have knitted the main body of your ice cream cone, it’s time to add some details and decorations to make it truly delightful. There are several options you can choose from to personalize your ice cream creation.
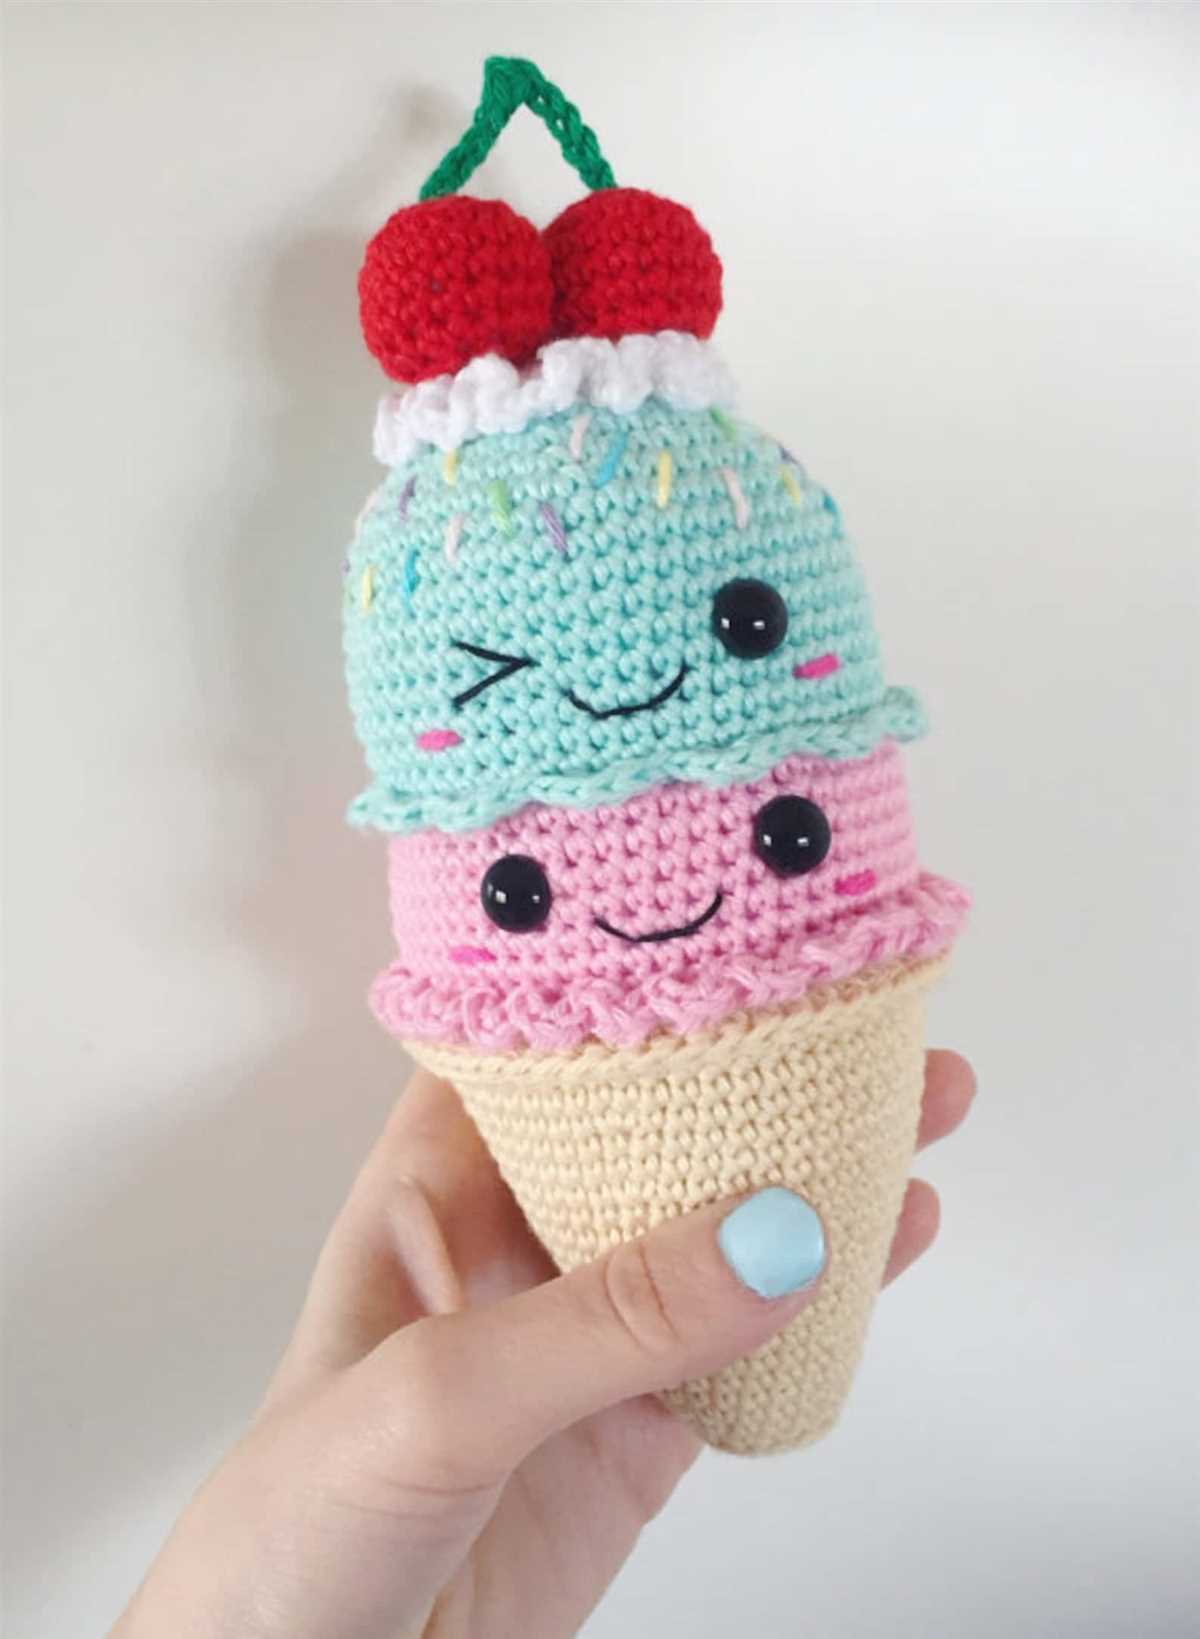
1. Toppings
Add some tasty toppings to your ice cream cone to make it even more tempting. You can use different colored yarns to create sprinkles or chocolate chips, which you can sew onto the top of your cone. You can also knit small fruits, like cherries or strawberries, and attach them as a garnish. Get creative with your toppings and make each ice cream cone unique.
2. Waffle Cone Pattern
If you want to add a realistic touch to your ice cream knitting pattern, you can incorporate a waffle cone texture. This can be achieved by using a specific stitch pattern or by adding embroidered details to mimic the pattern of a waffle cone. This will make your ice cream cone look even more authentic and appealing.
3. Embroidered Details
You can also add embroidered details to your ice cream cone to give it a special touch. Use colorful threads to embroider small designs, such as flowers or polka dots, onto the cone or the ice cream scoop. This will add a playful and whimsical element to your knitting project.
In conclusion, adding details and decorations to your ice cream knitting pattern allows you to unleash your creativity and make each ice cream cone unique. Whether it’s through toppings, a waffle cone pattern, or embroidered details, these extra touches will elevate your ice cream creation and make it even more delightful.
Finishing Touches
Once you have completed knitting your ice cream cones, it’s time to add the finishing touches to make them extra special. These small details can really make a difference in the final appearance of your knitting project.
1. Embroidery: Using a contrasting color yarn, you can add embroidered details to your ice cream cones. Stitch on some sprinkles or create a waffle cone pattern to give your cones a realistic look. You can also use embroidery to add a cherry on top.
2. Buttons and Beads: Another way to enhance the look of your knitted ice cream cones is to add buttons or beads as embellishments. Large colorful buttons can be used as sprinkles, while small beads can be stitched on to create a textured effect on the ice cream itself. This adds a playful and eye-catching element to your finished knitting project.
3. Pom-poms: To give your ice cream cones a fluffy and fun touch, you can attach small pom-poms to the tops of the cones. These can represent whipped cream or simply add a whimsical element to your knitting project. Choose colors that complement your ice cream flavor for an extra special touch.
4. Ribbons: Tying a small ribbon around the base of your knitted ice cream cones can add a charming finishing touch. Choose a ribbon color that coordinates with the colors of your ice cream and tie it into a bow. This creates a visual contrast and adds an elegant touch to your knitting project.
5. Gift Wrapping: If you are knitting ice cream cones as gifts, consider wrapping them in colorful tissue paper or cellophane to give them a festive look. This not only protects your knitting but also adds a special touch when handing them over to loved ones. Tie a bow at the top with a ribbon for an extra-special presentation.
Tips and Tricks
If you’re new to knitting or just looking for some helpful tips and tricks, you’ve come to the right place! Knitting ice cream patterns can be a fun and rewarding project, but it’s important to have a few tricks up your sleeve to ensure a successful outcome.
Choose the Right Yarn: When knitting ice cream patterns, it’s important to choose a yarn that is soft, durable, and has a good stitch definition. Look for yarns that are labeled as “worsted weight” or “medium weight” for this project.
Use Circular Needles:
- When knitting ice cream patterns, using circular needles can be more comfortable than straight needles. They distribute the weight of the project more evenly and can accommodate a larger number of stitches.
- Circular needles also allow you to knit in the round, which is essential for creating the seamless cone shape of an ice cream scoop.
Count Your Stitches:
- One of the most important tips for knitting ice cream patterns is to count your stitches regularly. It’s easy to lose track of your stitch count when knitting in the round, so be sure to use stitch markers to keep track of important sections.
- Counting your stitches will help you maintain the correct shape and size of your ice cream scoop, ensuring that it looks just like the real thing!
Block Your Finished Piece: After completing your ice cream knitting pattern, blocking is an important step to give your project a polished and professional finish. Blocking involves wetting the piece, laying it out flat, and shaping it to the desired dimensions. This step will help even out your stitches and make your ice cream scoop look neat and tidy.
With these tips and tricks, your ice cream knitting pattern is sure to turn out deliciously sweet! Happy knitting!
Common Mistakes to Avoid
When knitting an ice cream pattern, it’s important to be mindful of some common mistakes that can occur. Avoiding these mistakes will help ensure that your finished project turns out as you envisioned.
1. Incorrect Gauge
One of the most common mistakes in knitting, no matter the pattern, is not achieving the correct gauge. Gauge refers to the number of stitches and rows per inch in your knitting. If your gauge is off, the size of your ice cream cone or scoop may be different than intended. To avoid this mistake, take the time to swatch and measure your gauge before starting the project. Adjust your needle size if necessary to match the pattern’s specified gauge.
2. Misreading Instructions
Another common mistake is misreading or misinterpreting the pattern instructions. This can lead to errors in the placement of stitches or in the overall design of the ice cream. Carefully read and understand the pattern before you begin, and double-check your work as you go along. If you’re uncertain about a certain instruction, don’t hesitate to seek clarification or guidance from more experienced knitters or the pattern designer.
3. Lack of Attention to Detail
Knitting an ice cream pattern requires attention to detail to ensure that the textured cone and scoop are accurately created. Avoiding distractions and staying focused on each stitch will help you achieve the desired finished look. Take your time and check your work regularly to catch any mistakes before they become difficult to fix.
4. Ignoring Tension
Tension refers to how tightly or loosely you knit your stitches. Consistent tension throughout your project is essential for achieving a uniform appearance. In an ice cream pattern, uneven tension can impact the texture of the cone or scoop. Pay attention to your tension and make adjustments as needed to maintain a consistent and even stitch quality.
5. Skipping Blocking
Blocking is the process of shaping and stretching your finished knitted piece to ensure a professional and polished result. Skipping this step can result in an ice cream cone or scoop that doesn’t lay flat or doesn’t have the desired shape. Follow the blocking instructions provided in the pattern to achieve the best finish for your ice cream project.
Avoiding these common mistakes will help you create a beautifully knitted ice cream pattern that you can be proud of. Remember to take your time, follow the instructions carefully, and stay mindful of your gauge and tension throughout the project. Happy knitting!