
Knitting is not only a relaxing and creative hobby, but it also allows you to create beautiful and unique garments and accessories. If you’re looking for a knitting pattern that adds a touch of interest and sophistication to your projects, then the zig zag pattern is perfect for you.
The zig zag pattern is characterized by a series of diagonal lines that create a dynamic and visually appealing design. This pattern is versatile and can be incorporated into a variety of knitting projects, such as scarves, blankets, sweaters, and even socks. Whether you’re a beginner or an experienced knitter, the zig zag pattern is relatively easy to learn and can be customized to suit your personal style.
To create the zig zag pattern, you’ll need to know basic knitting stitches, such as knit and purl. The pattern is created by alternating between these stitches in specific sequences and rows, resulting in the distinctive diagonal lines. The zig zag pattern can be knit using one or multiple colors, allowing you to experiment with different color combinations and create unique designs.
Whether you’re knitting for yourself or creating a special gift for a loved one, the zig zag pattern is sure to impress. Its rhythmic and eye-catching design adds a modern twist to traditional knitting and elevates any project to a new level of style and sophistication. So pick up your knitting needles and give the zig zag pattern a try!
What is a zig zag knitting pattern?
A zig zag knitting pattern is a type of stitch pattern used in knitting to create a decorative, zig zag design. It is characterized by its alternating pattern of diagonal lines that create a continuous zig zag shape.
The zig zag knitting pattern is achieved by knitting a combination of knit and purl stitches in a specific sequence. By following the instructions of the pattern, the knitter creates a series of diagonal lines that create the zig zag design.
This type of pattern can be used to create various items, such as scarves, blankets, or even sweaters. It adds visual interest and dynamic movement to the knitted fabric, making it a popular choice for those looking to create unique and eye-catching pieces.
To create a zig zag knitting pattern, it is important to follow the specific instructions of the pattern, as the sequence of knit and purl stitches will determine the overall design. The pattern may also include other techniques, such as increases or decreases, to further enhance the zig zag effect.
Overall, the zig zag knitting pattern is a versatile and visually appealing stitch pattern that can be used to create beautiful and intricate designs in knitted items. Whether you’re a beginner or an experienced knitter, incorporating a zig zag pattern into your projects can add an extra level of interest and creativity.
How to create a basic zig zag pattern

Creating a basic zig zag pattern in knitting can add an interesting design element to your projects. It is a relatively simple pattern that can be achieved by using increases and decreases in your stitches. Here is a step-by-step guide on how to create a basic zig zag pattern:
Step 1: Cast on an even number of stitches
Start by casting on an even number of stitches onto your knitting needles. This will allow you to create an equal number of increases and decreases in each row, resulting in a balanced zig zag pattern.
Step 2: Knit the first row

For the first row, simply knit across all the stitches. This will serve as the foundation for your zig zag pattern.
Step 3: Begin the zig zag pattern
Starting with the second row, you will begin creating the zig zag pattern. To do this, you will alternate between increasing and decreasing stitches in a specific pattern.
- For the increase row, knit 2 stitches together (k2tog) at the beginning of the row, then make 1 stitch (M1) by picking up the horizontal loop between the needles and knitting into it. Repeat these two steps until the end of the row.
- For the decrease row, knit 1 stitch, then slip, slip, knit (ssk) the next 2 stitches together. Repeat this pattern until the last 2 stitches, then knit the last 2 stitches together (k2tog).
- Continue alternating between the increase and decrease rows until your desired length is reached.
Step 4: Bind off
To finish your zig zag pattern, simply bind off the stitches in the final row. Cut the yarn, leaving a tail, and weave in any loose ends to secure the stitches.
By following these steps, you can easily create a basic zig zag pattern in your knitting. Experiment with different yarn colors and textures to create unique variations of this pattern.
Tips for choosing yarn for your zig zag pattern
When choosing yarn for your zig zag knitting pattern, there are a few important factors to consider. The right yarn can make a significant difference in the final look and feel of your project, so it’s worth taking the time to choose carefully. Here are some tips to help you select the perfect yarn:
Fiber content:

One of the first things to consider when choosing yarn for your zig zag pattern is the fiber content. Different fibers have different characteristics and will affect the drape, warmth, and durability of your finished piece. For a more structured zig zag design, you may want to opt for a yarn with a higher synthetic content, such as acrylic or nylon. If you prefer a softer and more luxurious feel, natural fibers like merino wool or cashmere could be a good choice.
Yarn weight:
The weight of the yarn you choose will also play a role in the outcome of your zig zag pattern. Thicker yarns will create bolder and more pronounced zig zag motifs, while thinner yarns will result in a more delicate and subtle pattern. Consider the look you want to achieve and the intended use of the finished piece when selecting the yarn weight. A sport or DK weight yarn could be ideal for a lightweight and versatile project, while a bulky or super bulky yarn may be better suited for a cozy blanket or scarf.
Color selection:
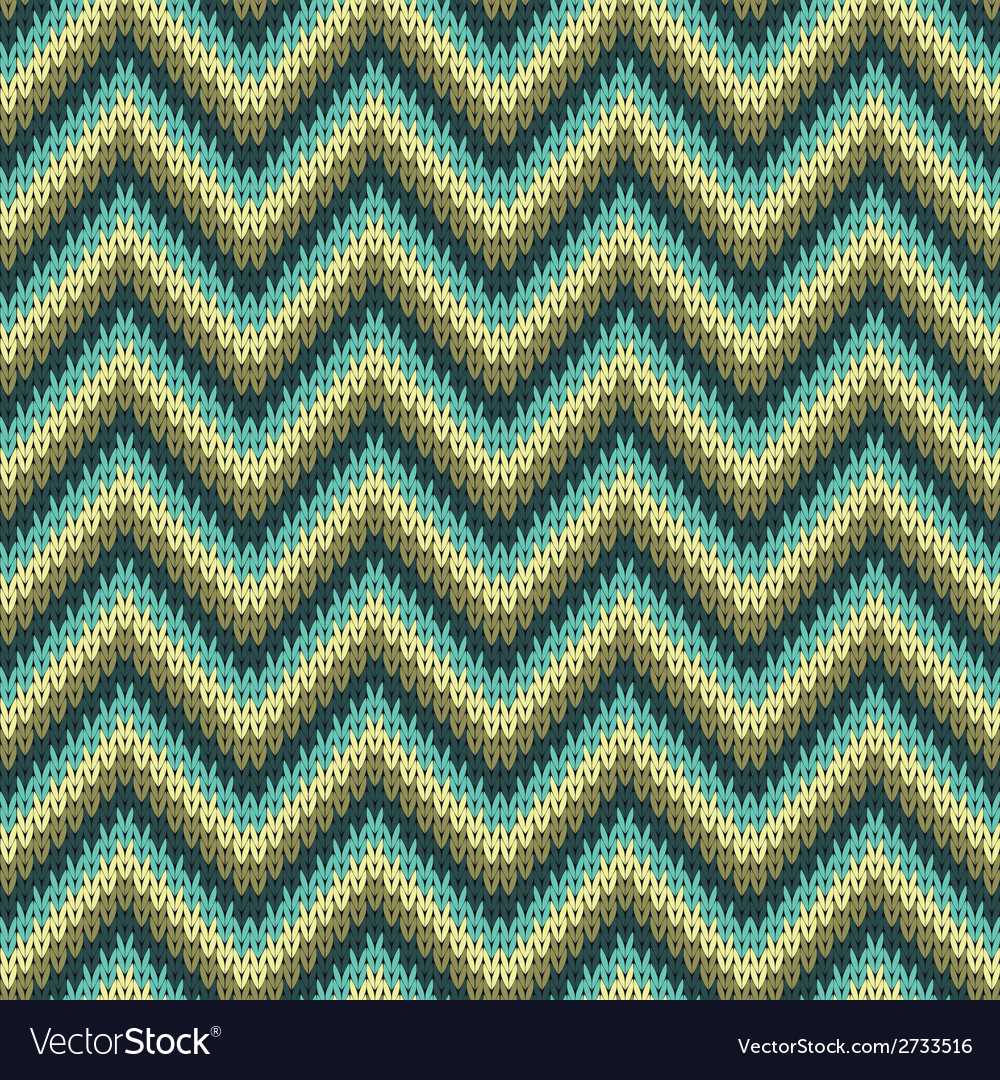
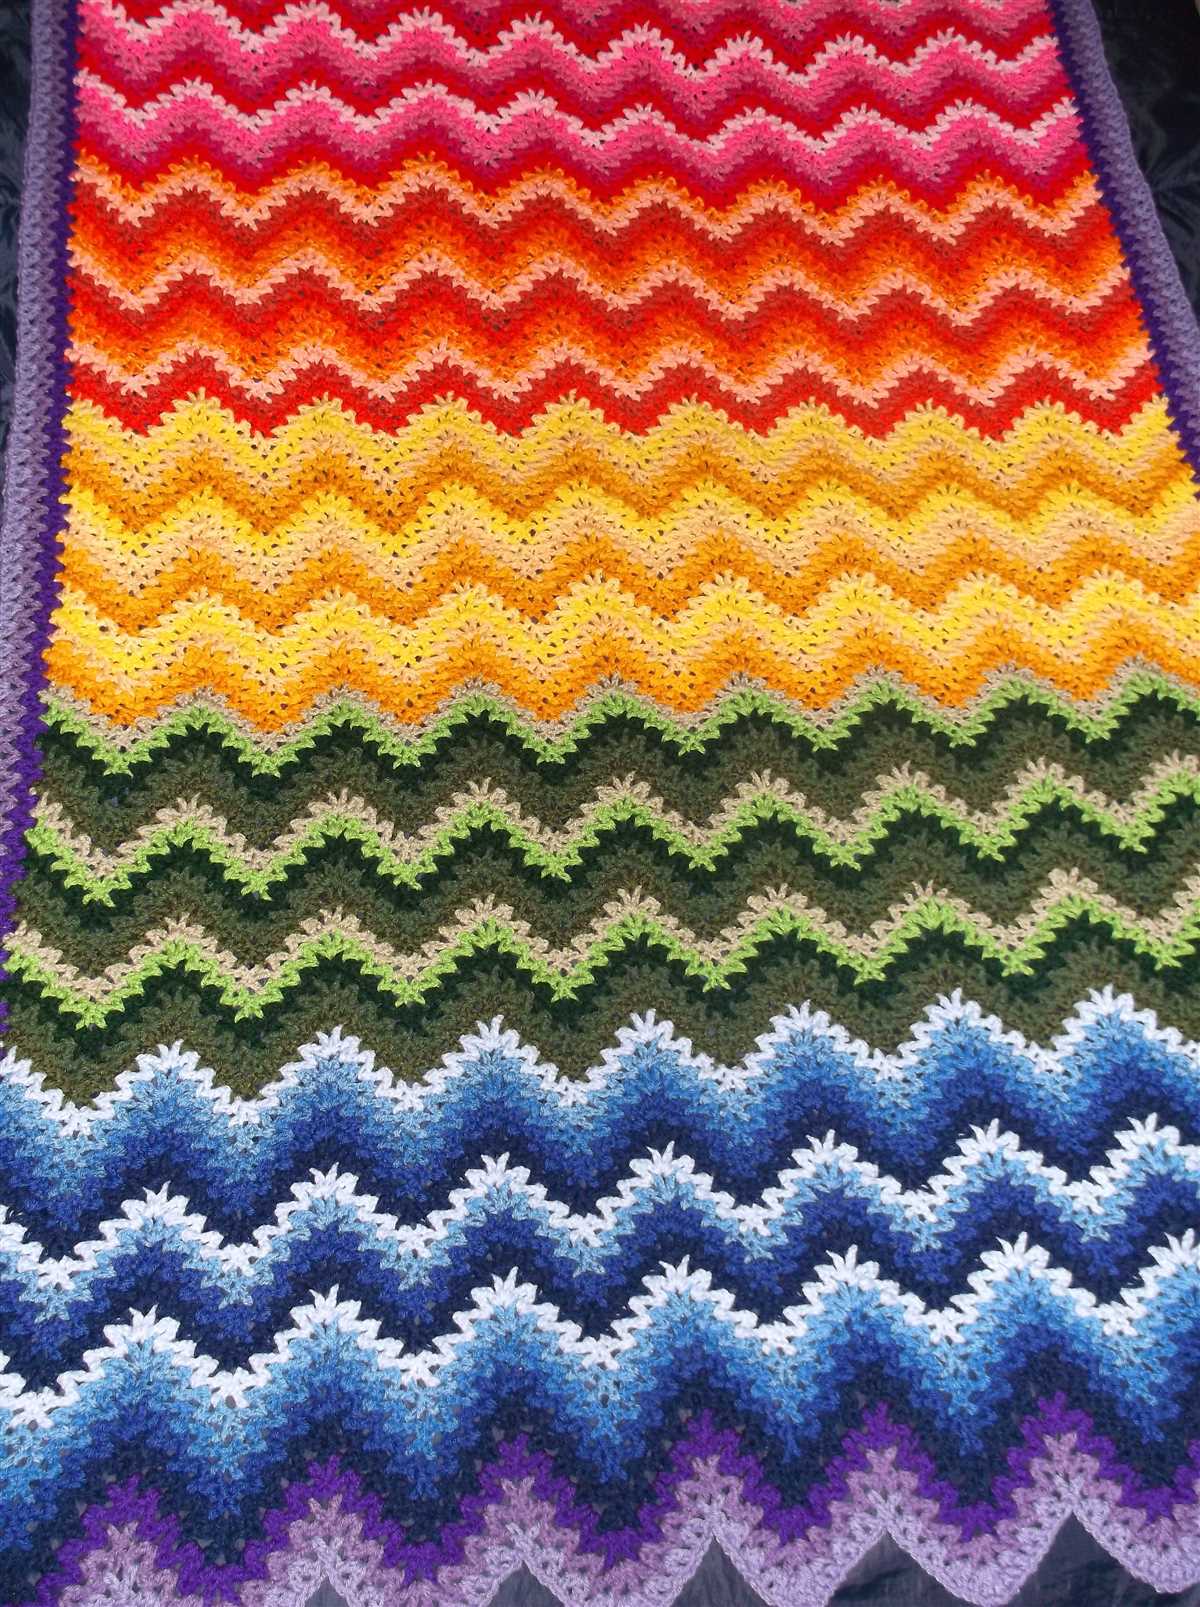
The color selection is another crucial aspect of choosing yarn for your zig zag pattern. The zig zag design can be enhanced or muted depending on the colors you select. Bold and contrasting colors will make the pattern pop, while more subtle and tonal shades will create a softer and more blended effect. Think about the overall aesthetic you want to achieve and consider how the colors will work together in your project. You can even create a gradient effect by choosing yarns in a similar color family but with varying shades.
- Consider the fiber content to determine the desired characteristics of your finished piece.
- Choose the yarn weight based on the look and use of your project.
- Experiment with different color combinations to enhance or mute the zig zag pattern.
- Don’t be afraid to mix and match yarns to add texture or visual interest.
- Always check the recommended gauge for your zig zag pattern to ensure the yarn will work well with your chosen needle size.
Using different stitch patterns in a zig zag design

When it comes to knitting, there is a wide variety of stitch patterns to choose from. One popular design element is the zig zag pattern, which adds visual interest and texture to any project. By utilizing different stitch patterns within the zig zag design, you can create even more unique and intricate patterns.
One way to incorporate different stitch patterns in a zig zag design is by alternating between knit and purl stitches. This creates a ribbed effect, adding depth and dimension to the zig zag pattern. Another option is to incorporate lace or cable stitches into the zig zag design, creating a more intricate and delicate look.
Knit and purl stitches
A simple way to incorporate different stitch patterns in a zig zag design is by alternating between knit and purl stitches. This creates a ribbed effect, adding texture to the pattern. For example, you can knit several rows in a zig zag pattern, then switch to purl stitches for the next section. This creates a visual contrast and makes the zig zag design more pronounced.
Lace and cable stitches
If you want to make your zig zag design more intricate and delicate, you can incorporate lace or cable stitches into the pattern. Lace stitches create openwork designs that add elegance and femininity to the zig zag pattern. On the other hand, cable stitches create a raised texture that adds depth and complexity to the zig zag design.
Colorwork
In addition to stitch patterns, you can also incorporate colorwork into a zig zag design. By changing colors at specific points in the zig zag pattern, you can create stripes or other geometric patterns. This adds visual interest and makes the zig zag design more dynamic.
Combining stitch patterns
For even more creativity, you can combine different stitch patterns within the zig zag design. For example, you can alternate between lace and cable stitches, creating a beautiful contrast between delicate openwork and raised texture. Or you can combine knit and purl stitches with colorwork, adding both texture and color to the zig zag pattern.
How to incorporate color into your zig zag design

Zig zag knitting patterns are a fun and versatile way to add visual interest to your knitted projects. While the classic zig zag design is often done in a single color, incorporating multiple colors can take your project to the next level. Here are some tips on how to incorporate color into your zig zag design:
- Choose a color palette: Before you start knitting, think about the colors you want to use in your zig zag design. Consider whether you want a bold and bright palette or a more muted and subtle one. You can also look for inspiration in nature, fashion, or artwork.
- Create a gradient effect: One way to incorporate color into your zig zag design is to create a gradient effect. Start with one color at the beginning of your project and gradually transition to another color as you work through the zig zag pattern. This can create a beautiful ombre effect.
- Use contrasting colors: Another option is to use contrasting colors for your zig zag design. For example, if you’re knitting with a light-colored yarn, you can choose a dark color for the zig zag pattern to make it stand out. This creates a striking and eye-catching effect.
- Experiment with different color placements: Don’t be afraid to play around with different color placements in your zig zag design. You can try alternating colors for each zig zag section, or you can create a more random and eclectic pattern by mixing up the colors throughout.
- Add texture with different yarns: To enhance the visual impact of your zig zag design, consider using different yarns with varying textures. You can use a soft and smooth yarn combined with a fluffy or sparkly yarn to create an interesting contrast and add depth to your project.
Remember, the key to incorporating color into your zig zag design is to have fun and be creative. Don’t be afraid to experiment and try new things. With a little bit of practice and imagination, you can create a stunning and unique zig zag pattern that will make your knitting project truly stand out.
Creating texture with different stitch combinations

In knitting, texture refers to the variation in appearance and feel of the fabric created by different stitch combinations. By strategically selecting and combining different stitches, knitters can add depth and visual interest to their projects. This allows for endless possibilities in creating unique and textured designs.
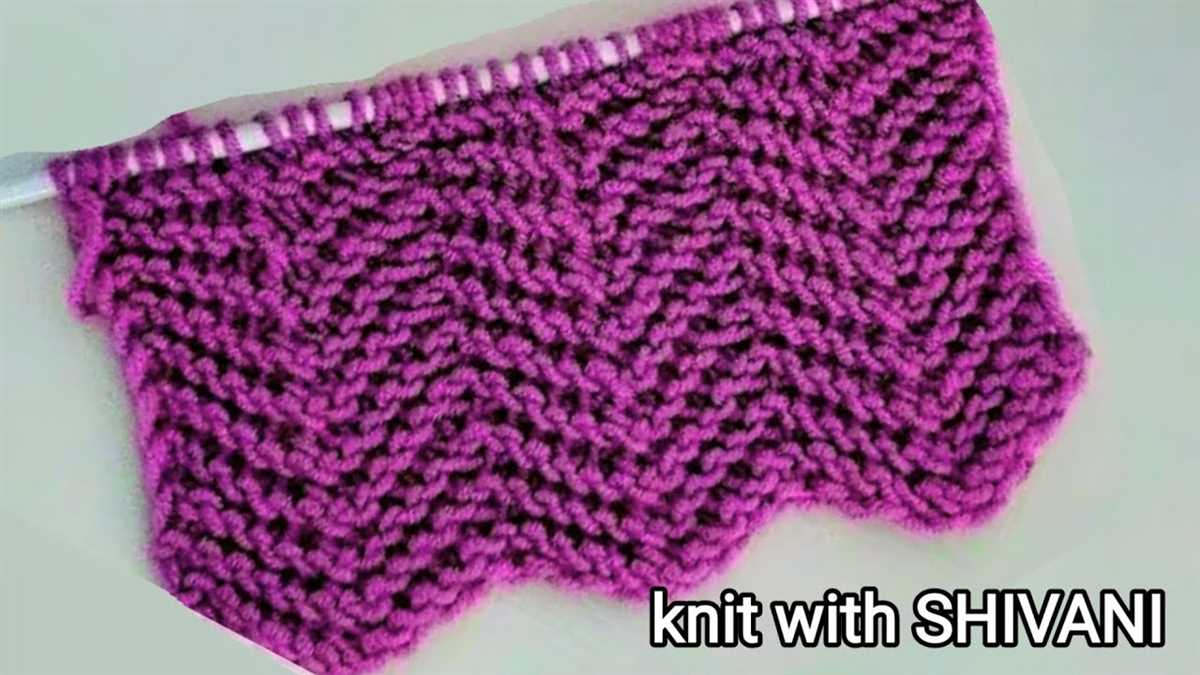
One popular stitch combination that creates a textured effect is the zig zag pattern. This pattern is achieved by alternating between knit and purl stitches in a specific sequence. The resulting fabric has a diagonal pattern that resembles a zig zag. This stitch combination adds depth and dimension to the fabric, making it visually appealing.
Another stitch combination that creates texture is the seed stitch. This stitch is created by alternating between knit and purl stitches in a specific pattern. The result is a fabric with a bumpy texture that resembles seeds. The seed stitch is often used to create borders, cuffs, and edgings, as it adds visual interest and depth to the fabric.
Bobble stitches are another popular choice for adding texture to knitting projects. A bobble is created by increasing several stitches in one stitch and then decreasing them back down. This creates a small, raised bump on the fabric, adding texture and visual interest.
- The cable stitch is another stitch combination that creates texture. It involves crossing stitches over each other, creating a twisted, rope-like effect. This stitch is often used to create intricate and visually striking patterns.
- The moss stitch is another stitch combination that creates texture. It is created by alternating between knit and purl stitches, similar to the seed stitch. However, the moss stitch has a more subtle texture, with small bumps evenly distributed throughout the fabric.
- The rib stitch is a classic stitch combination that creates a textured effect. It is created by alternating between knit and purl stitches in a specific pattern. This stitch combination creates a fabric with vertical ribs, adding both texture and stretch to the fabric.
By experimenting with different stitch combinations, knitters can create unique and visually appealing textures in their projects. Whether using the zig zag pattern, seed stitch, bobbles, cables, moss stitch, or rib stitch, these stitch combinations offer endless possibilities for adding depth and dimension to knitted fabrics.
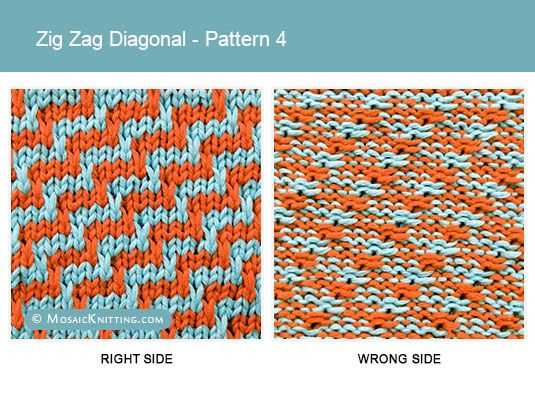
Working with charts and written instructions for a zig zag pattern
When working with a zig zag knitting pattern, you may encounter both charts and written instructions to guide you through the pattern. These two forms of instructions provide different ways to visualize the pattern and make it easier to follow along.
Charts are visual representations of the stitches and rows in the pattern. They typically consist of symbols or grids that indicate each stitch and its placement. Each row is represented as a horizontal line on the chart, and the symbols or grids indicate the types of stitches to be worked. By following the symbols or grids on the chart, you can easily see how the stitches and rows are intertwined to create the zig zag pattern.
Written instructions, on the other hand, provide a step-by-step breakdown of the pattern in plain text. These instructions typically include the type of stitch to be worked, the number of stitches and rows to knit or purl, and any special techniques or stitches required for the pattern. Written instructions can be helpful for those who prefer a more detailed explanation or for those who may struggle with reading charts.
Whether you prefer using charts or written instructions, it’s important to familiarize yourself with the key symbols or abbreviations used in the pattern. Common symbols may include squares for knit stitches, circles for purl stitches, and diagonal lines for decreases or increases. By understanding the symbols and following the instructions, you’ll be able to create the beautiful zig zag pattern with ease.
In conclusion, working with charts and written instructions for a zig zag knitting pattern allows you to visualize the pattern in different ways. Whether you rely on the visual aid of a chart or prefer the detailed instructions in written form, both methods can help you create stunning zig zag designs. Take your time to understand the symbols and abbreviations used in the pattern, and enjoy the process of knitting the unique and eye-catching zig zag pattern.
Common mistakes to avoid when knitting a zig zag pattern

Knitting a zig zag pattern can be a fun and challenging project, but it’s important to avoid common mistakes to ensure a successful outcome. Here are some tips to help you avoid frustration and achieve beautiful results:
1. Miscounting stitches

One of the most common mistakes knitters make when working on a zig zag pattern is miscounting stitches. This can lead to an uneven pattern and throw off the entire design. To avoid this, it’s important to carefully count your stitches at the beginning of each row and double-check your work periodically. Using stitch markers can also help you keep track of your stitches and prevent miscounts.
2. Wrong color placement
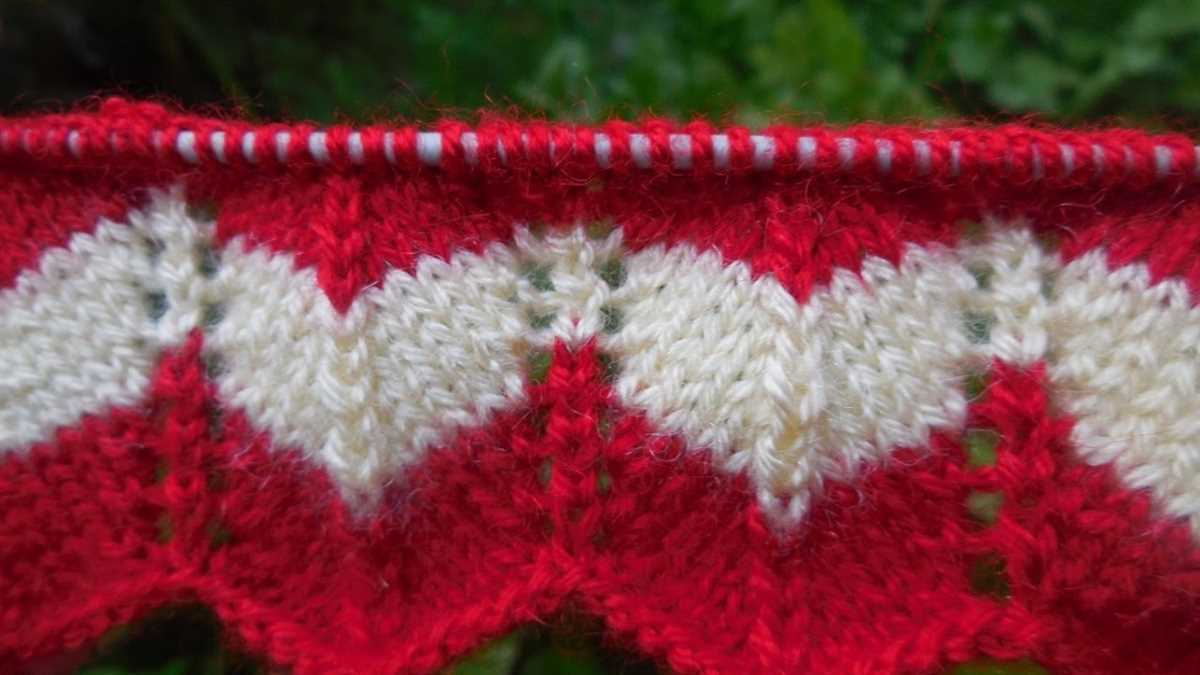
In a zig zag pattern, the color placement is crucial to achieving the desired effect. It’s important to carefully follow the pattern instructions and pay attention to the color changes. Using a color chart or legend can help you visualize the correct color placement and prevent any mistakes. Make sure to double-check your work as you go to ensure the colors are placed correctly.
3. Tension inconsistencies
Another common mistake in zig zag knitting is having inconsistencies in your tension. Uneven tension can result in an uneven pattern and affect the overall appearance of your project. It’s important to maintain a consistent tension throughout your knitting, paying attention to your gauge and adjusting your tension as needed. Practice can help improve your tension and create a more even and professional-looking zig zag pattern.
4. Missing or adding stitches

Missing or adding stitches can easily throw off the pattern and create a ripple effect that is difficult to correct. To avoid this mistake, make sure to carefully count your stitches at the end of each row and follow the pattern instructions precisely. If you do notice a mistake, it’s best to go back and fix it as soon as possible to maintain the integrity of the zig zag pattern.
Avoiding these common mistakes can help you successfully knit a beautiful zig zag pattern. Take your time, pay attention to detail, and don’t hesitate to go back and fix any mistakes. With practice and patience, you’ll be able to create stunning zig zag designs.
Adding borders and edging to your zig zag design

When it comes to knitting, adding borders and edging to your zig zag design can enhance the overall look and make your project stand out even more. Whether you’re knitting a scarf, a blanket, or a sweater, adding a border or edging can give it a finished and polished appearance.
1. Garter stitch border: One simple option for adding a border is to use garter stitch. This involves knitting every row on both the right and wrong sides. It creates a sturdy and textured border that complements the zig zag pattern. You can choose to knit the garter stitch border in a contrasting color to make it really pop.
2. Ribbed border: Another option is to add a ribbed border to your zig zag design. Knitting in rib stitch (alternating knit and purl stitches) creates a stretchy and decorative edge. You can experiment with different rib stitch patterns, such as 1×1 rib or 2×2 rib, to find the one that best complements your zig zag pattern.
When adding a border or edging to your zig zag design, it’s important to consider the overall size and proportions. You want the border to be proportional to the main pattern, neither too narrow nor too wide. You can use a swatch or calculate the number of stitches and rows needed to achieve the desired border size.
Remember, the border or edging you choose should complement the zig zag design and enhance its appearance. It’s a great opportunity to get creative and add your personal touch to your knitting project!
Creating garments and accessories with the zig zag pattern

The zig zag knitting pattern is a versatile and eye-catching design that can be used to create beautiful garments and accessories. Whether you’re a beginner or an experienced knitter, incorporating this pattern into your projects can add a fun and playful element to your finished piece.
One popular way to use the zig zag pattern is to create a cozy and stylish sweater. The jagged lines of the pattern can be worked into the body or sleeves of the sweater, adding visual interest and depth to the design. You can play with different color combinations to make the zig zags stand out even more, or keep it monochromatic for a more subtle look. Regardless of your choice, a zig zag sweater is sure to become a statement piece in your wardrobe.
- Scarves and shawls are another great way to showcase the zig zag knitting pattern. The repeating pattern creates a sense of movement and adds texture to the fabric. You can experiment with different yarn weights and fibers to achieve different results. A lightweight shawl in a delicate yarn can create an elegant and feminine look, while a chunky scarf in a warm and cozy yarn is perfect for staying warm on colder days.
- The zig zag pattern can also be used to create eye-catching accessories such as hats and bags. Knitting a hat with a zig zag design can add a fun and playful touch to your winter wardrobe. You can choose to incorporate the pattern into the brim or create an all-over design. Knitting a bag with the zig zag pattern can add a pop of color and pattern to any outfit. Whether you’re going for a bold and vibrant look or something more subtle and understated, the zig zag pattern can be adapted to suit your personal style.
Overall, the zig zag knitting pattern is a versatile and fun design that can be used to create a wide range of garments and accessories. Whether you’re looking to add some visual interest to a simple sweater or create a statement piece with bold colors and patterns, the zig zag pattern is sure to be a hit. So grab your knitting needles and start experimenting with this timeless and playful design!
Inspiring examples of zig zag knitting patterns
By now, you’ve learned about the history and technique behind zig zag knitting patterns. Now, let’s take a look at some inspiring examples that showcase the versatility and beauty of this pattern.
1. Zig Zag Sweater: This bold and eye-catching sweater features a zig zag pattern in vibrant colors. It’s perfect for adding a pop of pattern to your wardrobe and will definitely make a statement.
2. Zig Zag Scarf: A zig zag pattern can also be incorporated into accessories like scarves. This scarf adds visual interest and dimension to any outfit, while keeping you warm and cozy.
3. Zig Zag Baby Blanket: Zig zag knitting patterns are not just for adults! This adorable baby blanket combines soft pastel colors with a zig zag design, making it a perfect gift for a little one.
4. Zig Zag Pillow: Add some flair to your living space with a zig zag pillow. Whether you choose a subtle or bold color scheme, a zig zag pattern can instantly transform a plain pillow into a stylish statement piece.
5. Zig Zag Hat: Keep your head warm and stylish with a zig zag hat. This pattern adds a playful and unique touch to an everyday accessory.
These are just a few examples of the endless possibilities that can be achieved with zig zag knitting patterns. Whether you’re looking to add a touch of pattern to your wardrobe or decorate your home with a unique design, zig zag patterns are sure to inspire your next knitting project.