
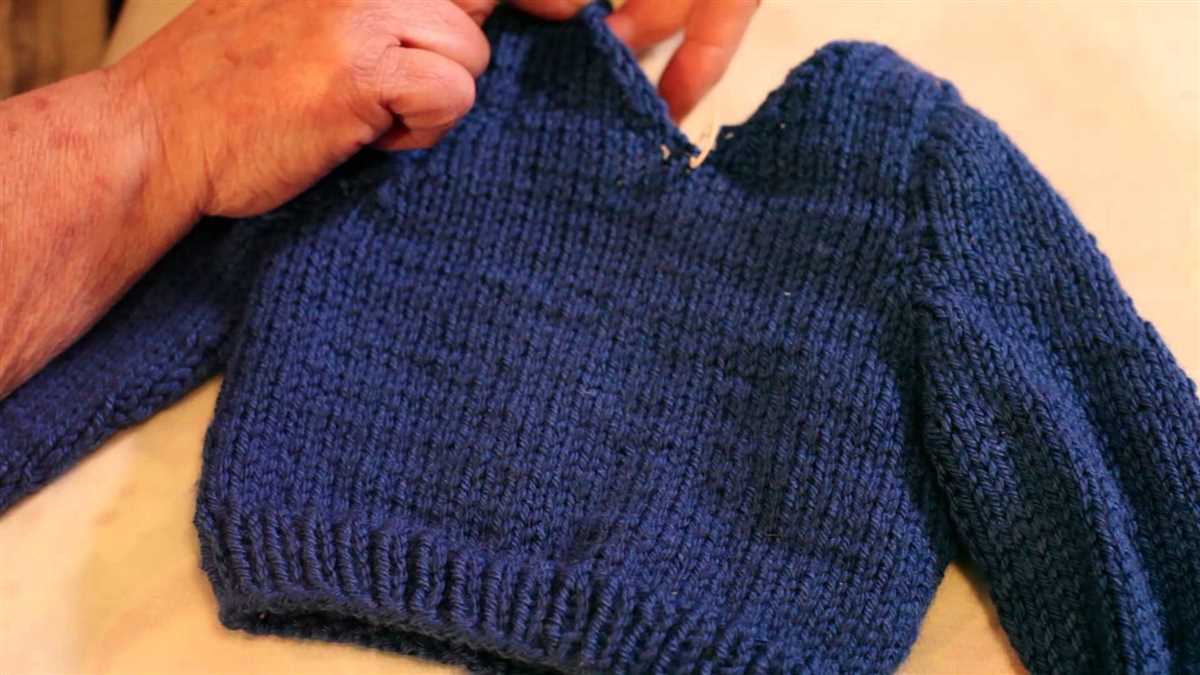
Knitting is a popular craft that allows you to create beautiful and functional pieces of clothing and accessories. Whether you’re a beginner or an experienced knitting enthusiast, following a pattern is crucial to ensure your project turns out exactly as you envision it. Knitting pattern instructions are a set of step-by-step guidelines that assist knitters in creating their desired item, be it a sweater, hat, or even a blanket.
Knitting patterns typically include a list of materials needed, such as the type and amount of yarn, as well as the size of knitting needles required. The instructions also outline the different stitches and techniques to be used, guiding the knitter through the process. Depending on the complexity of the pattern, it may include charts or diagrams to illustrate specific stitch patterns or shaping details.
Clear and concise knitting pattern instructions are essential for successfully completing a project. They provide knitters with the necessary information to cast on, knit, purl, increase, decrease, and bind off stitches in the correct order and in accordance with the desired design. An understanding of basic knitting terminology is necessary to decipher the instructions, but once you become familiar with common abbreviations and symbols, following patterns becomes much easier.
Understanding knitting patterns
Knitting patterns can sometimes be intimidating for beginners, but with a little practice and understanding, they can become an invaluable tool for creating beautiful and intricate designs. By following the instructions provided in a knitting pattern, you can transform a simple thread of yarn into a cozy sweater or a delicate lace shawl.
When first looking at a knitting pattern, it’s important to familiarize yourself with the abbreviations and symbols used. These abbreviations help to condense the instructions and make them easier to read and follow. For example, “k” stands for knit, “p” stands for purl, and “yo” stands for yarn over. By understanding these basic abbreviations, you can easily decipher the instructions and quickly get started on your knitting project.
Knitting patterns often include a list of materials needed for the project, including the type and weight of yarn, the size of knitting needles, and any additional notions required. It’s important to gather all the necessary materials before starting a project, as using the correct yarn and needle size will ensure that your finished piece matches the measurements and gauge specified in the pattern.
The instructions in a knitting pattern typically include a stitch pattern or stitch sequence, which repeats throughout the project to create the desired design. It’s important to carefully follow these stitch patterns and count your stitches as you go to ensure that your project turns out as intended. Stitch markers can also be useful in marking specific points in the pattern, such as the beginning and end of a round or a particular increase or decrease.
Additionally, knitting patterns often include sizing and measurement information, allowing you to customize the fit and length of your project. By taking accurate measurements of your body or the intended recipient, you can choose the appropriate size to knit and make any necessary adjustments to ensure a perfect fit.
Understanding knitting patterns is a skill that develops with practice, and the more you work with different patterns, the more familiar you will become with the terminology and techniques. Don’t be afraid to start with simpler patterns and gradually build up to more complex designs. With patience and perseverance, you’ll soon be creating beautiful knitted pieces with confidence and ease.
Essential knitting techniques
Knitting is a popular craft that allows you to create beautiful and functional items using just a pair of needles and some yarn. Whether you’re a beginner or an experienced knitter, there are a few essential techniques that you’ll need to know in order to successfully complete any knitting project. Here are some of the most important techniques to master:
Casting on
Casting on is the first step in any knitting project. It involves creating the initial row of stitches on your needle. There are several methods for casting on, including the long-tail cast on, the knit cast on, and the cable cast on. Each method creates a different edge and has its own advantages, so it’s important to learn and practice a few different casting on techniques.
Knit stitch
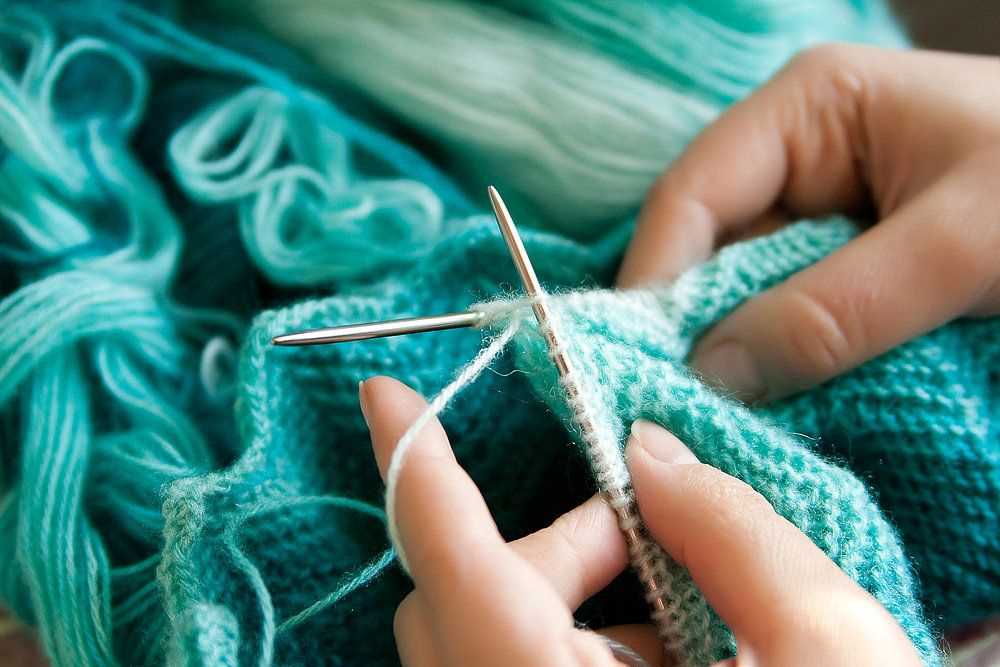
The knit stitch is the most basic and commonly used stitch in knitting. It creates a smooth, v-shaped stitch on the right side of your work. To knit, insert your needle into the first stitch on your left needle, from front to back. Wrap your yarn around the right needle counterclockwise, then pull the right needle through the stitch, slipping the old stitch off the left needle. Repeat this process for each stitch across the row.
Purl stitch

The purl stitch is another fundamental stitch in knitting. It creates a bumpy, horizontal stitch on the right side of your work, which creates a different texture and appearance compared to the knit stitch. To purl, insert your needle into the first stitch on your left needle, from back to front. Wrap your yarn around the right needle clockwise, then pull the right needle through the stitch, slipping the old stitch off the left needle. Repeat this process for each stitch across the row.
Increasing and decreasing
Increasing and decreasing are techniques used to change the number of stitches in your knitting. Increasing involves adding stitches to your work, and there are several methods for doing this, including yarn overs and making one stitches. Decreasing involves removing stitches from your work, and there are also various methods for this, such as knit two together and slip, slip, knit. These techniques are essential for shaping your knitting and creating more complex patterns.
Binding off
Binding off is the final step in knitting, and it secures your stitches so they don’t unravel. To bind off, knit the first two stitches on your left needle. Insert the left needle into the first stitch on your right needle, from left to right, and lift the stitch over the second stitch and off the needle. Knit one more stitch, then lift the previous stitch over the new stitch and off the needle. Repeat this process until you have one stitch remaining, then cut your yarn and pull it through the last stitch to secure it.
These are just a few of the essential knitting techniques to get you started. As you continue to knit and explore more advanced patterns, you’ll learn additional techniques that will enhance your knitting skills and allow you to create more intricate and beautiful projects.
Understanding knitting gauge

In knitting, gauge refers to the number of stitches and rows per square inch that is achieved when a specific yarn and needle size are used. It is an important element to consider when following knitting pattern instructions, as it determines the overall size of the final project and how the stitches will look.
To measure gauge, knitters typically create a swatch by knitting a small square of stitches using the recommended yarn and needle size. The swatch is then measured with a ruler or gauge tool to determine the number of stitches and rows per inch. This measurement is compared to the gauge specified in the pattern to ensure that the correct size is achieved.
Why is knitting gauge important?
Gauge is crucial in knitting because it affects the overall fit and size of the finished project. If a knitter’s gauge is looser than the pattern’s gauge, the final project will be larger than intended. Conversely, if the knitter’s gauge is tighter, the project will be smaller. Achieving the correct gauge ensures that the finished garment or item will fit properly and have the desired dimensions.
How to adjust gauge?
If a knitter’s gauge is not matching the required gauge in the pattern, adjustments can be made by changing the needle size or yarn weight. Using a smaller needle size will create more stitches per inch, while using a larger needle size will result in fewer stitches per inch. Similarly, using a lighter weight yarn will create more stitches per inch, while a heavier weight yarn will create fewer stitches per inch. It may take a few swatches and adjustments to achieve the desired gauge, but it is worth the effort to ensure a well-fitting and visually pleasing final project.
Choosing the right yarn
When it comes to knitting, choosing the right yarn is essential for the success of your project. The yarn you select can greatly affect the texture, drape, and overall appearance of your finished piece. Here are a few important factors to consider when choosing your yarn:
Fiber Content

One of the first things to consider when selecting yarn is the fiber content. Different fibers have different properties and will create different effects in your knitting. For example, wool is a popular choice for its warmth and elasticity, while cotton is breathable and great for lightweight summer garments. Decide what qualities you want in your finished project, and choose a fiber that suits those needs.
Yarn Weight

The weight of the yarn is another important consideration. Yarn weight refers to how thick or thin the yarn is. Different patterns will specify the appropriate yarn weight to use, and it’s important to follow these guidelines to ensure your project turns out as intended. Common yarn weights include lace, fingering, sport, worsted, and bulky. Each weight has its own recommended needle size and gauge, so pay attention to these details when selecting your yarn.
Color and Texture
Color and texture are also important factors to consider when choosing yarn. The color of the yarn can greatly impact the overall look of your project, so think about whether you want a solid color, variegated, or self-striping yarn. Additionally, consider the texture of the yarn – smooth, fluffy, or textured – and how it will affect the stitch definition and appearance of your knitting.
Budget and Availability
Lastly, consider your budget and the availability of the yarn. Some yarns can be quite expensive, so make sure you choose a yarn that fits within your budget. Additionally, consider where you can purchase the yarn – local yarn stores, online retailers, or even from other knitters. It’s important to choose a yarn that you can easily access and replenish if needed.
By considering factors such as fiber content, yarn weight, color and texture, and budget and availability, you can choose the perfect yarn for your knitting project. Make sure to read the pattern instructions carefully and choose a yarn that meets the requirements to ensure the best results.
Getting started: Casting on
Before you can begin knitting, you need to cast on your stitches. Casting on is the process of creating the foundation row of stitches on your knitting needle. There are several methods you can use to cast on, and the choice of method depends on the pattern and your personal preference.
To start casting on, hold the knitting needle in your dominant hand and leave a tail of about 6 inches. Make a slipknot by creating a loop with the yarn, passing the working end of the yarn through the loop, and tightening the knot. Slide the slipknot onto the needle and tighten it, making sure it’s not too tight or too loose.
Long-Tail Cast On
One of the most commonly used cast on methods is the long-tail cast on. To do this, hold the yarn between your thumb and index finger, with the tail end (the end attached to the ball of yarn) over your thumb and the working end (the end attached to the slipknot) over your index finger. Insert the needle under the strand of yarn between your fingers, and bring the needle over the top of the tail end and under the working end. Then, bring the needle back through the loop on your thumb and slip it off your thumb, creating a new stitch on the needle.
Repeat this process for the desired number of stitches, maintaining tension on the yarn to keep the stitches even. Once you have cast on all your stitches, you can begin working your knitting pattern. The long-tail cast on creates a neat and flexible edge, making it a popular choice for many knitting projects.
Note: The number of stitches you need to cast on will vary depending on your pattern and desired finished size. Be sure to follow the pattern instructions for the correct number of stitches.
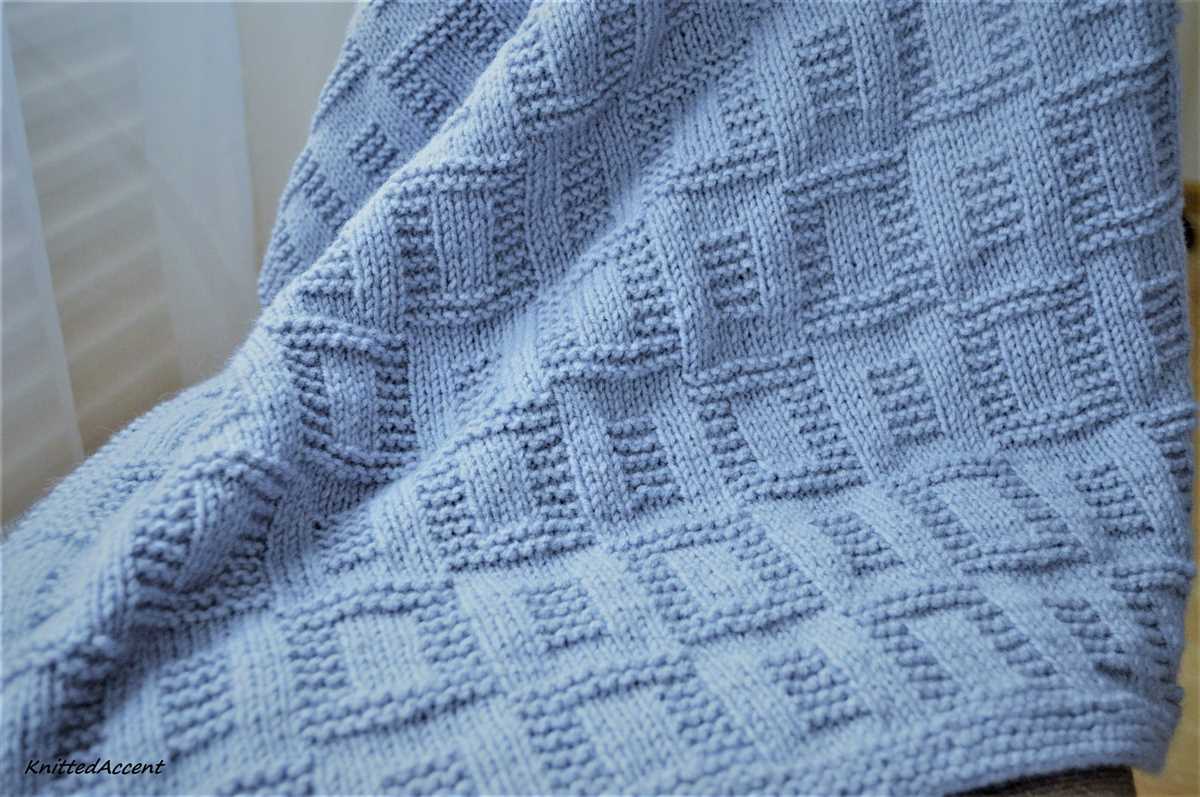
Knitting Stitches: Basic and Advanced
In the world of knitting, there are countless stitches that can be used to create beautiful patterns and designs. Whether you are a beginner or an experienced knitter, it is important to have a solid understanding of the basic stitches before attempting more advanced techniques. These basic stitches form the foundation of most knitting projects and are essential to creating a clean and even fabric.
1. Knit Stitch: The knit stitch is the most fundamental stitch in knitting. It creates a flat, smooth surface and is often used for the right side of a garment. To knit, insert the right needle from left to right into the first stitch on the left needle. Wrap the yarn around the right needle counterclockwise and pull it through the stitch to create a new loop on the right needle. Slide the old stitch off the left needle, and you have completed one knit stitch.
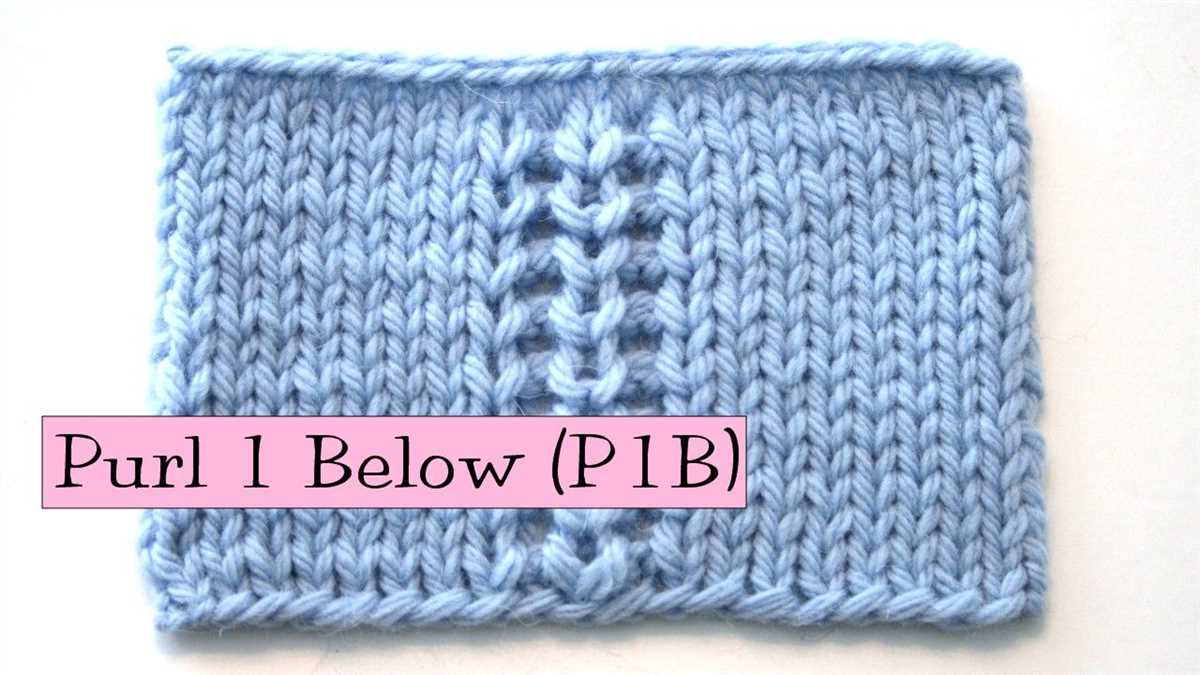
2. Purl Stitch: The purl stitch is the reverse of the knit stitch and creates a bumpy texture. It is often used for the wrong side of a garment or to create ribbing. To purl, insert the right needle from right to left into the first stitch on the left needle. Wrap the yarn around the right needle clockwise and pull it through the stitch to create a new loop on the right needle. Slide the old stitch off the left needle, and you have completed one purl stitch.
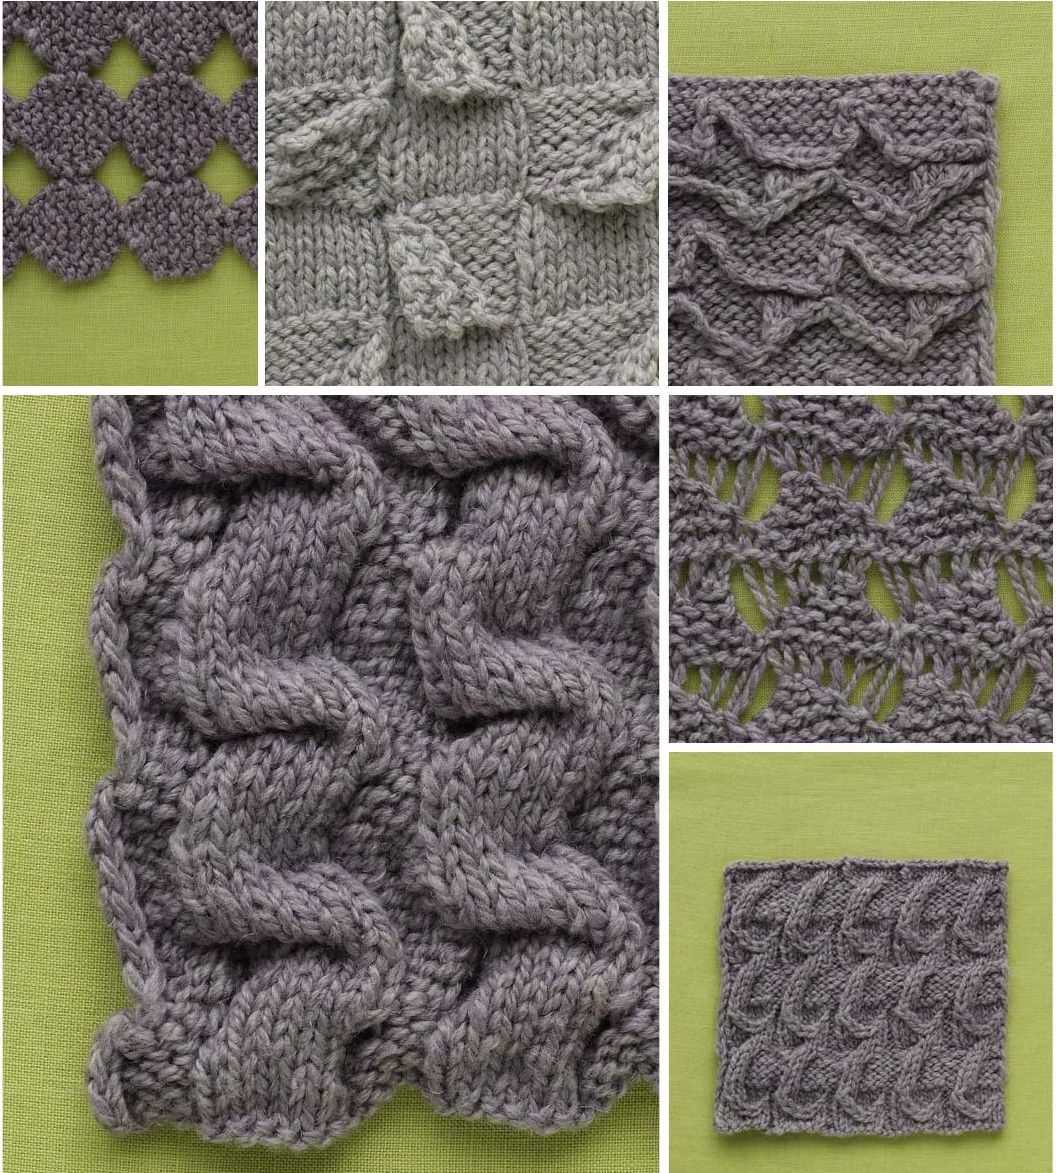
Once you have mastered the basic knit and purl stitches, you can move on to more advanced techniques such as cables, lace, and colorwork. These stitches add texture, interest, and complexity to your knitting projects. While they may require more attention and practice, the results are well worth the effort.
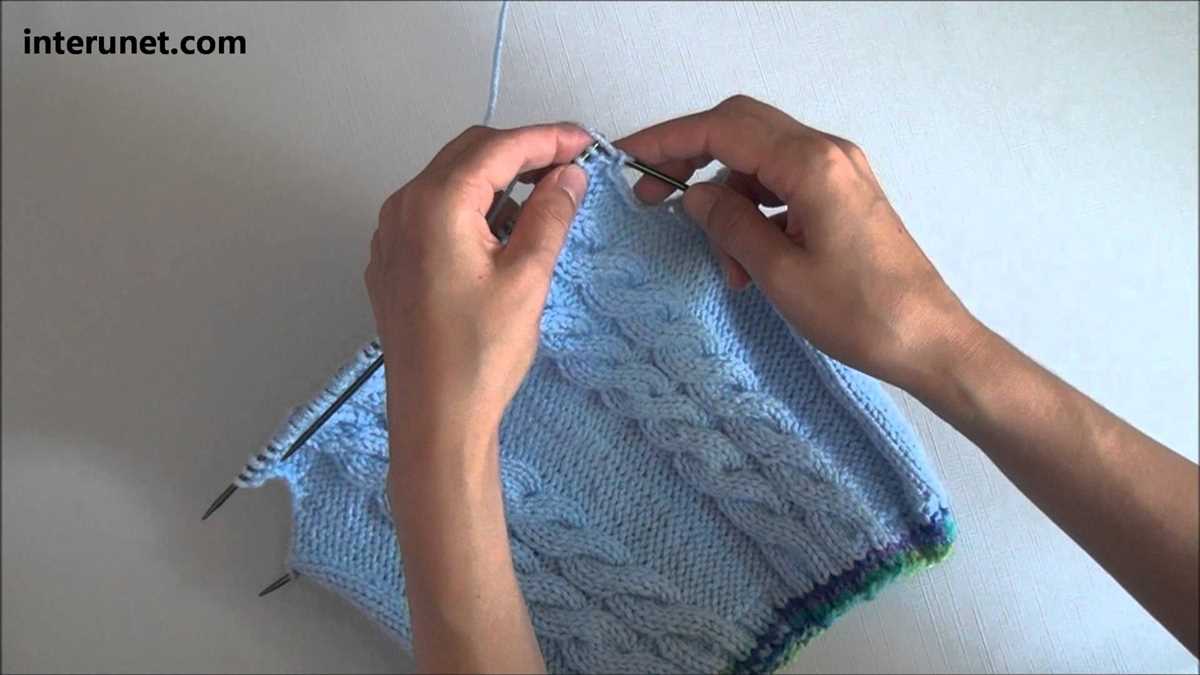
3. Cable Stitch: Cable stitches create twisted rope-like designs in your knitting. They involve crossing stitches over each other to create a cable. Cable stitches can be simple or complex, depending on the number and order of the stitches involved. The key to creating a cable stitch is using a cable needle to hold the stitches in the correct order while you work the others.
4. Lace Stitch: Lace stitches create delicate, openwork patterns in your knitting. They typically involve yarn overs and decreases to create holes and intricate designs. Lace stitches require attention to detail and counting, as the pattern may change from row to row. Knitting lace can be challenging for beginners, but with practice, it becomes easier to read and execute lace patterns.
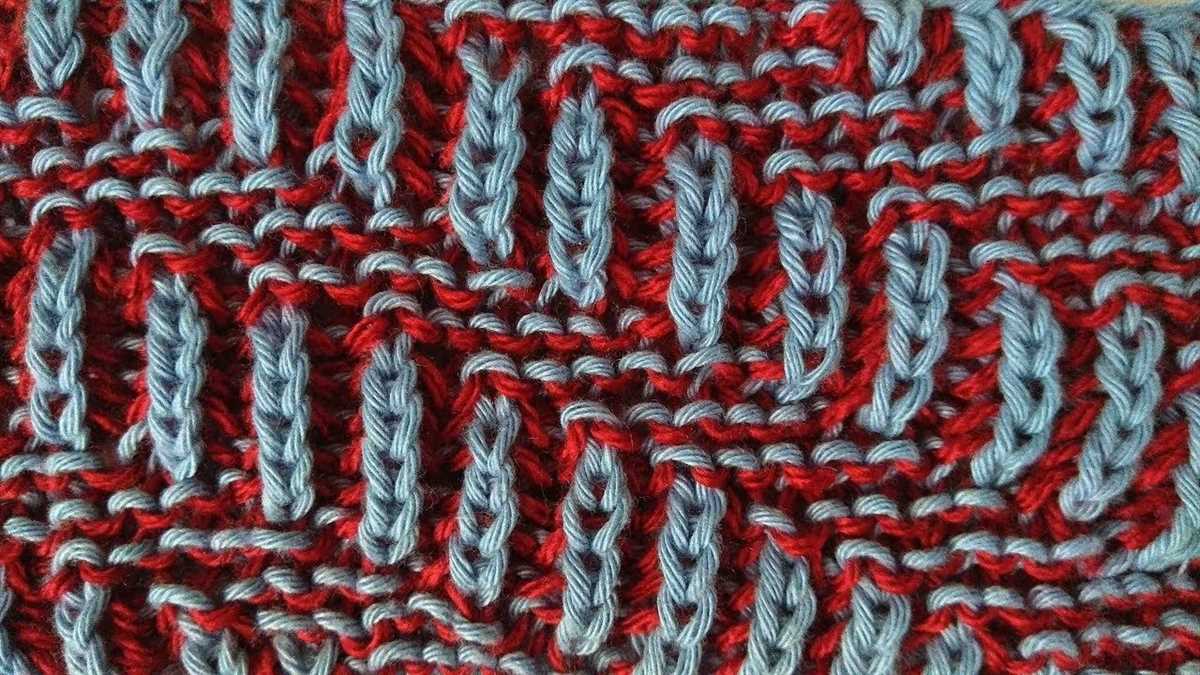
5. Colorwork: Colorwork involves knitting with multiple colors to create patterns and designs. There are different techniques for colorwork, including stranded knitting, intarsia, and fair isle. Stranded knitting involves carrying two or more colors across the back of the work, while intarsia involves knitting separate sections of color. Fair isle knitting combines both techniques to create intricate color patterns.
Exploring and mastering different knitting stitches can open up a world of possibilities for your projects. Whether you stick to the basics or challenge yourself with advanced techniques, knitting stitches allow you to express your creativity and create unique and beautiful pieces.
Increasing and decreasing stitches
When knitting, it is essential to know how to increase and decrease stitches to create the desired shape and size of your project. Increases and decreases are used to add or subtract stitches from your work, allowing you to shape your knitting in various ways.
Increasing stitches:
- Make One (M1): This increase is commonly used and creates a new stitch between two existing stitches. To make an M1, insert the left needle from front to back into the horizontal strand between the two stitches. Then, knit or purl into the back loop of this strand, depending on the direction of your knitting.
- Knit Front and Back (KFB): This increase is achieved by knitting into the front and back loops of the same stitch. To make a KFB, insert the right needle into the front loop of the stitch as if to knit, then wrap the yarn around the needle and pull through, but do not drop the stitch off the left needle. Instead, bring the right needle to the back and insert it into the back loop of the same stitch, then wrap the yarn and pull through, creating two new stitches.
- Yarn Over (YO): This increase is created by simply wrapping the yarn over the right needle. To make a YO, bring the yarn from the back to the front, then continue with the next stitch as instructed in the pattern. On the following row, the YO will create an eyelet and increase the stitch count.
Decreasing stitches:
- Knit Two Together (K2TOG): This decrease is commonly used and reduces two stitches into one. To make a K2TOG, insert the right needle into the front loops of the next two stitches from left to right, then wrap the yarn and pull through, creating one new stitch.
- Slip, Slip, Knit (SSK): This decrease creates a left-leaning decrease. To make an SSK, slip the next two stitches onto the right needle as if to knit, then insert the left needle into the front loops of the slipped stitches from left to right. Finally, wrap the yarn around the left needle and knit the two slipped stitches together through the back loop.
- Purl Two Together (P2TOG): This decrease is similar to K2TOG but is used when working in purl stitches. To make a P2TOG, insert the right needle into the front loops of the next two stitches from right to left, then wrap the yarn and pull through, creating one new stitch.
By mastering these basic increases and decreases, you’ll have the skills needed to create beautifully shaped knitted garments and accessories.
Knitting in the round
Knitting in the round is a technique that allows you to create seamless projects, such as hats, socks, and sweaters, without having to sew seams. Instead of working back and forth in rows, you knit in a continuous circle, creating a tubular structure. This method is commonly used with circular knitting needles or double-pointed needles.
Benefits of knitting in the round:
- No seams: The lack of seams makes the finished project look more polished and professional.
- Efficient knitting: Knitting in the round is faster than knitting back and forth in rows, as you don’t have to constantly switch the direction of your work.
- No purling on the wrong side: When knitting in the round, you only need to knit stitches, avoiding the need to purl on the wrong side.
- Easy to try on: Since there are no seams, you can easily try on your project as you go, ensuring a perfect fit.
When knitting in the round, it’s important to keep track of your rounds, especially if you’re working on a pattern with different stitch patterns or shaping. You can use a stitch marker to mark the beginning of each round and move it up as you progress. It’s also important to make sure your tension is consistent, as any inconsistencies may be more noticeable in a seamless project.
Overall, knitting in the round is a versatile technique that opens up a world of possibilities for your knitting projects. Whether you’re a beginner or an experienced knitter, mastering this technique will allow you to create beautiful, seamless garments and accessories.
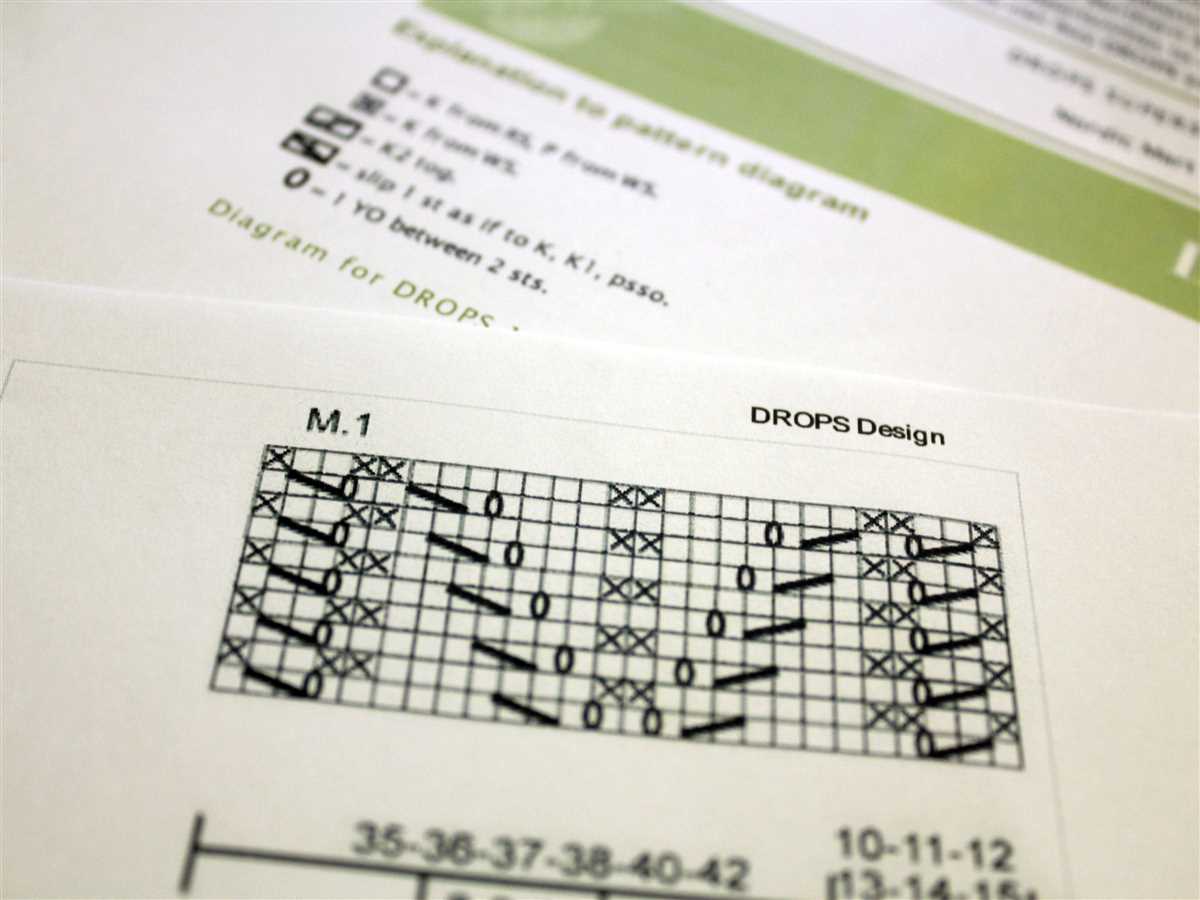
Reading and Interpreting Pattern Charts
Pattern charts can be a valuable tool for knitters, as they provide a visual representation of the knitting pattern. While written instructions are commonly used, charts offer a different approach by displaying the pattern in a grid format. Understanding how to read and interpret these charts is essential for successfully knitting the desired design.
Chart Symbols and Legend: The first step in reading a pattern chart is to familiarize yourself with the symbols used. Each stitch or action in the pattern is represented by a unique symbol on the chart. The legend, typically included alongside the chart, provides a key to decipher these symbols. By referring to the legend, knitters can easily identify which stitch or technique is required at each point in the pattern.
Row and Stitch Numbers:
Alongside the chart, you will find row numbers and stitch numbers. Row numbers indicate the order in which the rows should be worked, while stitch numbers indicate the number of stitches in a row. Pay close attention to these numbers to ensure accurate execution of the pattern.
Chart Direction: When working with a pattern chart, it’s important to determine the direction in which to read the chart. Some charts are read from right to left for odd rows and left to right for even rows, while others are read in the opposite direction. Understanding the chart’s intended direction will prevent confusion and mistakes during knitting.
Tracking Progress:
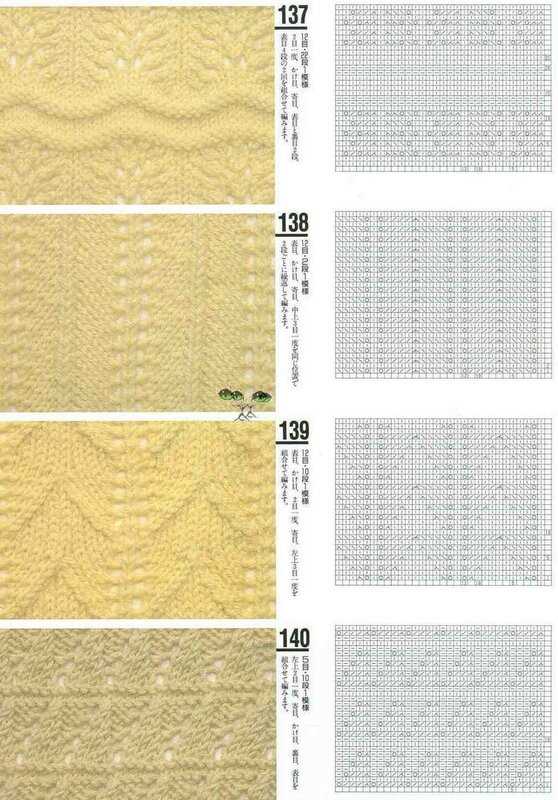
As you knit, it’s helpful to track your progress on the chart. This can be done by using a highlighter or ruler to mark the row you are currently working on. By visually following along with the chart, you can ensure that you are staying on track and not missing any stitches or pattern changes.
Additional Notes: In addition to symbols and directions, pattern charts often include additional notes or instructions. These notes may provide explanations for pattern repeats, shaping, or any special techniques required. Be sure to read and understand these notes before starting the project to ensure a successful knitting experience.
Finishing techniques: Binding off and weaving in ends
Once you have completed your knitting project, it’s important to finish it off properly to ensure that it looks polished and professional. Two important finishing techniques to master are binding off and weaving in ends.
Binding off:

Binding off is the process of creating a neat and secure edge on your knitting. To bind off, begin by knitting two stitches. Then, using your left needle, lift the first stitch over the second stitch and off the right needle, leaving only one stitch on the right needle. Next, knit one stitch, and repeat the process of lifting the first stitch over the second stitch and off the needle. Continue in this manner until you have bound off all the stitches. Finally, cut the yarn, leaving a long tail, and pull it through the last stitch to secure it.
Weaving in ends:
Weaving in ends is the process of securing and hiding the loose ends of yarn that are leftover after completing your knitting. To do this, thread the end of the yarn onto a tapestry needle. Insert the needle through the stitches on the wrong side of the fabric, following the path of the yarn. Avoid pulling the yarn too tight, as this can distort the knitted fabric. Weave the yarn in for a few inches, then trim any excess. Repeat this process for any other loose ends, making sure to weave them in securely.
By mastering these two finishing techniques, you can ensure that your knitting projects have a clean and professional-looking finish. Take the time to practice and perfect these skills, and you will be rewarded with beautifully finished knitted items.
Common Knitting Pattern Abbreviations and Terms
Knitting patterns can sometimes be confusing, especially for beginners. They often include a variety of abbreviations and terms that may be unfamiliar to those who are new to knitting. In this section, we will provide a list of the most commonly used knitting pattern abbreviations and terms, along with their meanings, to help make understanding patterns easier.
Abbreviations
When reading knitting patterns, you will often come across abbreviations. These abbreviations are used to save space and make the patterns easier to read. Here are some of the most common knitting abbreviations you may encounter:
- K: Knit
- P: Purl
- K2tog: Knit two stitches together
- P2tog: Purl two stitches together
- YO: Yarn over
- SSK: Slip, slip, knit
- PSSO: Pass slipped stitch over
- PM: Place marker
- SM: Slip marker
- RS: Right side
- WS: Wrong side
Terms
In addition to abbreviations, knitting patterns also use specific terms to describe techniques and instructions. Here are some common terms you may encounter:
- Gauge: The number of stitches and rows per inch
- Increase: Adding stitches to your work
- Decrease: Removing stitches from your work
- Bind off: Finishing the edge of your work
- Row: A horizontal line of stitches
- Repeat: Doing a specific sequence of stitches multiple times
- Right side: The “front” side of your work
- Wrong side: The “back” side of your work
By familiarizing yourself with these common knitting pattern abbreviations and terms, you will be better equipped to understand and follow knitting patterns. Remember to always refer back to the pattern’s key or glossary if you come across any unfamiliar abbreviations or terms. Happy knitting!