
If you’re looking for a stylish and cozy hat to keep your head warm during the colder months, then look no further than a knit pilot cap. This classic style is perfect for both men and women and can be customized to suit your personal taste.
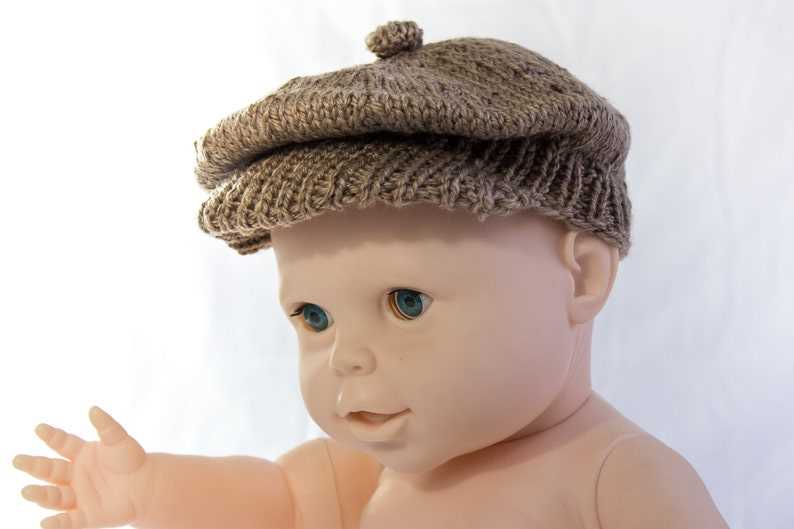
Knit pilot caps are known for their unique and timeless design. They feature a snug fit around the head with a rounded top and a brim that extends over the forehead. This style is reminiscent of the caps worn by pilots and aviators, giving it its name.
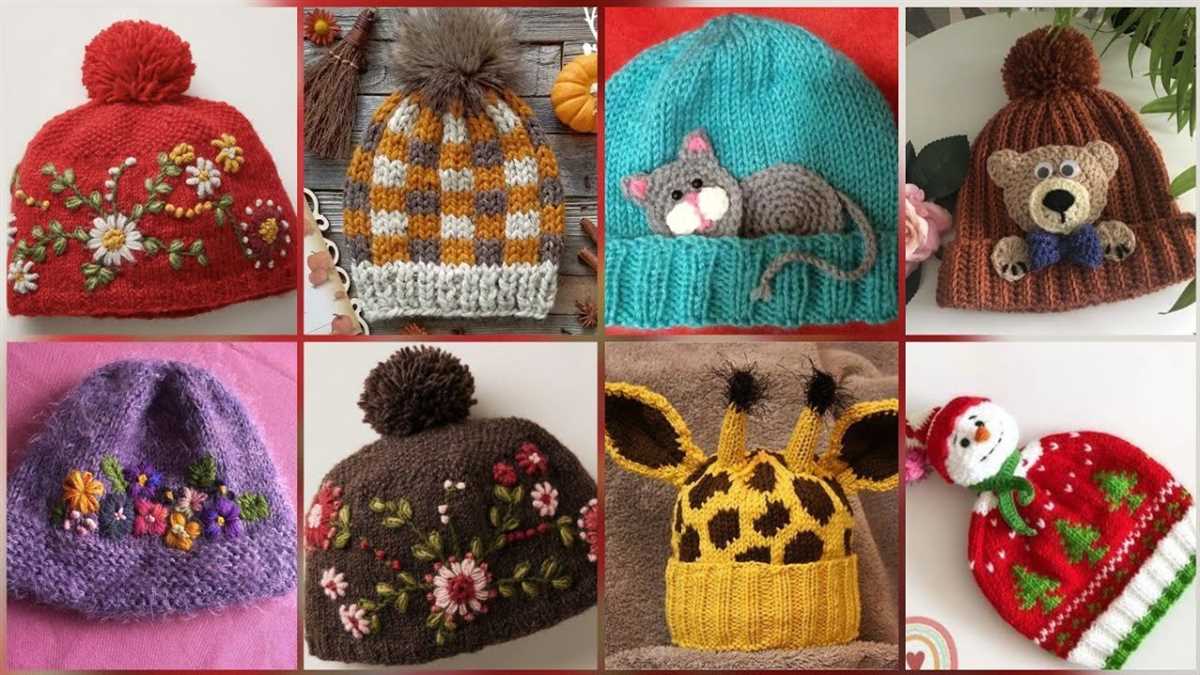
Making your own knit pilot cap is a fun and rewarding project. Whether you’re a beginner or an experienced knitter, there are patterns available for all skill levels. You can choose different yarns and colors to create a cap that matches your style and wardrobe.
So, if you’re ready to take on a new knitting challenge and create a fashionable accessory, check out our collection of knit pilot cap patterns. From basic designs to more intricate patterns, you’re sure to find the perfect cap to add to your winter wardrobe.
Materials needed
Before you start knitting your pilot cap, make sure you have all the necessary materials at hand to ensure a smooth and enjoyable knitting experience. Here is a list of items you will need:
- Yarn: Choose a soft and warm yarn that is suitable for knitting hats. You can opt for a wool or acrylic blend in a color of your choice. It is recommended to use medium weight yarn (worsted weight) for this project.
- Knitting needles: You will need a set of double-pointed knitting needles or a circular needle, depending on your preferred knitting method. Make sure to choose the appropriate size needles to match the gauge of your yarn.
- Tape measure: A tape measure or ruler will be handy to measure your gauge and adjust your knitting accordingly.
- Stitch markers: Stitch markers are useful for marking the beginning of rounds or specific stitch patterns.
- Tapestry needle: A tapestry needle with a large eye is essential for weaving in ends and finishing your project.
- Scissors: A pair of sharp scissors will be needed for cutting the yarn.
Once you have gathered all these materials, you are ready to dive into the exciting world of knitting and create your own cozy pilot cap!
Knitting Basics

Knitting is a popular craft that involves creating fabric by interlocking loops of yarn with knitting needles. It is a versatile and creative hobby that allows knitters to make a wide range of items, including clothing, accessories, and home decor. To get started with knitting, it’s important to have the necessary supplies and understand the basic techniques.
Supplies: To begin knitting, you will need a set of knitting needles and some yarn. Knitting needles come in different sizes and materials, such as metal, bamboo, or plastic. The size of the needles determines the gauge or tension of the stitches. Yarns vary in thickness, texture, and composition, so choose one that suits your project. You may also need other tools like stitch markers, a tapestry needle for sewing, and scissors.
Basic Techniques: The first step in knitting is to cast on, which is creating the first row of stitches on the needle. This is done by making a slip knot and placing it on one needle. Then, hold the other needle in your right hand and use it to knit or purl stitches into the slip knot. Knitting involves pulling the yarn through the stitch from front to back, while purling involves pulling the yarn through the stitch from back to front. These two stitches create different textures in the fabric.
Continued below…
Choosing the Right Yarn
When it comes to knitting a pilot cap, choosing the right yarn is essential for a successful outcome. The yarn you select will determine the texture, warmth, and overall look of the finished cap. Here are a few considerations to keep in mind when choosing the perfect yarn for your project.
1. Weight and Thickness
The weight and thickness of the yarn will influence how the cap feels and fits. A bulky yarn will create a chunkier and warmer cap, whereas a lighter weight yarn will result in a more delicate and breathable cap. Consider the season and intended use of the cap when selecting the yarn weight, and also keep in mind your knitting skills and preference for working with different thicknesses.
2. Fiber Content

The fiber content of the yarn will determine its properties in terms of softness, warmth, and durability. Natural fibers such as wool, alpaca, and cashmere offer excellent insulation and softness, making them ideal for winter caps. Synthetic fibers like acrylic and nylon are often more affordable and easy to care for, making them a practical choice for everyday wear. Consider your desired level of warmth and comfort when considering different fiber options for your pilot cap.
3. Color and Pattern
The color and pattern of the yarn will greatly impact the overall look of the pilot cap. Solid colors can create a classic and timeless cap, while variegated or self-striping yarns can add visual interest and personality. Consider the recipient’s style and preferences, and also think about how the chosen color or pattern will complement or contrast with the wearer’s wardrobe.
- Conclusion: By taking into account the weight and thickness, fiber content, and color and pattern of the yarn, you can select the perfect yarn for your knit pilot cap project. Remember to also consider your own knitting skills and preferences to ensure an enjoyable knitting experience and a beautifully crafted cap.
Getting started with the pattern
Before you begin knitting the pilot cap, it is important to gather all the necessary materials. You will need a set of knitting needles, preferably size 7 or 8, and a ball of soft and warm yarn in the color of your choice. Make sure you have a pair of scissors and a tapestry needle for finishing touches.
Once you have your materials ready, you can start casting on the stitches. The pattern usually calls for about 70 stitches, but this may vary depending on the size of the cap you want to knit. Use the long-tail cast-on method or any other method you prefer, making sure to leave a long tail for sewing later.
Next, you will begin the main part of the pattern, which usually consists of alternating rows of knit and purl stitches. Create the ribbing section by knitting two stitches and purling two stitches in a regular pattern. Repeat this pattern for about 1-2 inches to create a stretchy and comfortable fit.
After completing the ribbing, you can move on to the body of the cap. This part is where you can get creative with different stitch patterns or add stripes if desired. Follow the pattern instructions for the desired length, usually around 4-5 inches for an adult-sized cap.
Finally, you will shape the crown of the cap by decreasing stitches gradually. This can be done by knitting two stitches together at regular intervals throughout each row. Continue decreasing until you have a small enough number of stitches to close the top of the cap.
Once you have finished knitting the cap, bind off the stitches and use the long tail left from casting on to sew the sides together. Sew in any loose ends and trim off excess yarn. Your pilot cap is now ready to be worn or given as a cozy and stylish gift!
Knitting the brim

In order to knit the brim of the pilot cap, you will need to have a basic understanding of knitting techniques such as casting on, knitting stitches, and decreasing stitches.
Materials needed:
- Knitting needles (circular or double-pointed) appropriate for the yarn weight
- Worsted weight yarn in the color of your choice
- Tapestry needle
Instructions:
- Start by casting on the desired number of stitches, usually around 80-100 stitches, using the long-tail cast-on method.
- Join the round by knitting the first stitch of the cast-on row together with the last stitch, being careful not to twist the stitches.
- Continue knitting in rounds, using the knit stitch, until the brim reaches the desired length. This can vary depending on personal preference, but typically around 2-3 inches.
- To create the ribbed pattern for the brim, switch to the purl stitch. Knit two stitches, then purl two stitches, repeating this pattern until the end of the round. Continue this ribbing pattern for the desired length of the brim.
- Once the brim is long enough, you can choose to bind off all the stitches, or continue knitting the rest of the cap.
Tips:
- Make sure to keep your tension consistent throughout the knitting process to ensure an even and tidy brim.
- You can experiment with different stitch patterns for the brim, such as seed stitch or twisted ribbing, to add some variation to your pilot cap.
- If using circular needles, make sure they are long enough to comfortably hold all the stitches for the brim. If using double-pointed needles, distribute the stitches evenly among the needles to avoid overcrowding.
By following these instructions and using your creativity, you can knit a beautiful and cozy brim for your pilot cap. Happy knitting!
Creating the body of the cap
Now that you have successfully completed the brim of the pilot cap, it’s time to move on to the body. The body of the cap is where the bulk of the knitting will take place.
To start, you will need to cast on a certain number of stitches, depending on the desired size of the cap. You can refer to the pattern for the specific number of stitches required. Once you have cast on the stitches, make sure to join them in the round by working the first stitch of the cast-on row with the last stitch.
Now you can begin knitting in the round, following the pattern’s instructions. This may involve knitting a certain number of rounds in a specific stitch pattern, or increasing or decreasing the number of stitches to shape the cap. Pay close attention to the pattern and make any necessary adjustments as you go along.
As you continue working on the body of the cap, be sure to frequently check your gauge to ensure that the cap will fit properly. Use a measuring tape or ruler to measure your stitches and compare them to the gauge given in the pattern. If your stitch count is off, you may need to adjust your needle size or tension.
The body of the cap is the part where you can add your personal touch. You can experiment with different stitch patterns, colorwork, or even add some decorative elements like pom-poms or cables. Be creative and make the cap truly your own.
Continue knitting the body of the cap according to the pattern instructions until you reach the desired length. Once you have finished knitting, you can bind off the stitches to complete the body of the cap. Congratulations, you are one step closer to completing your pilot cap!
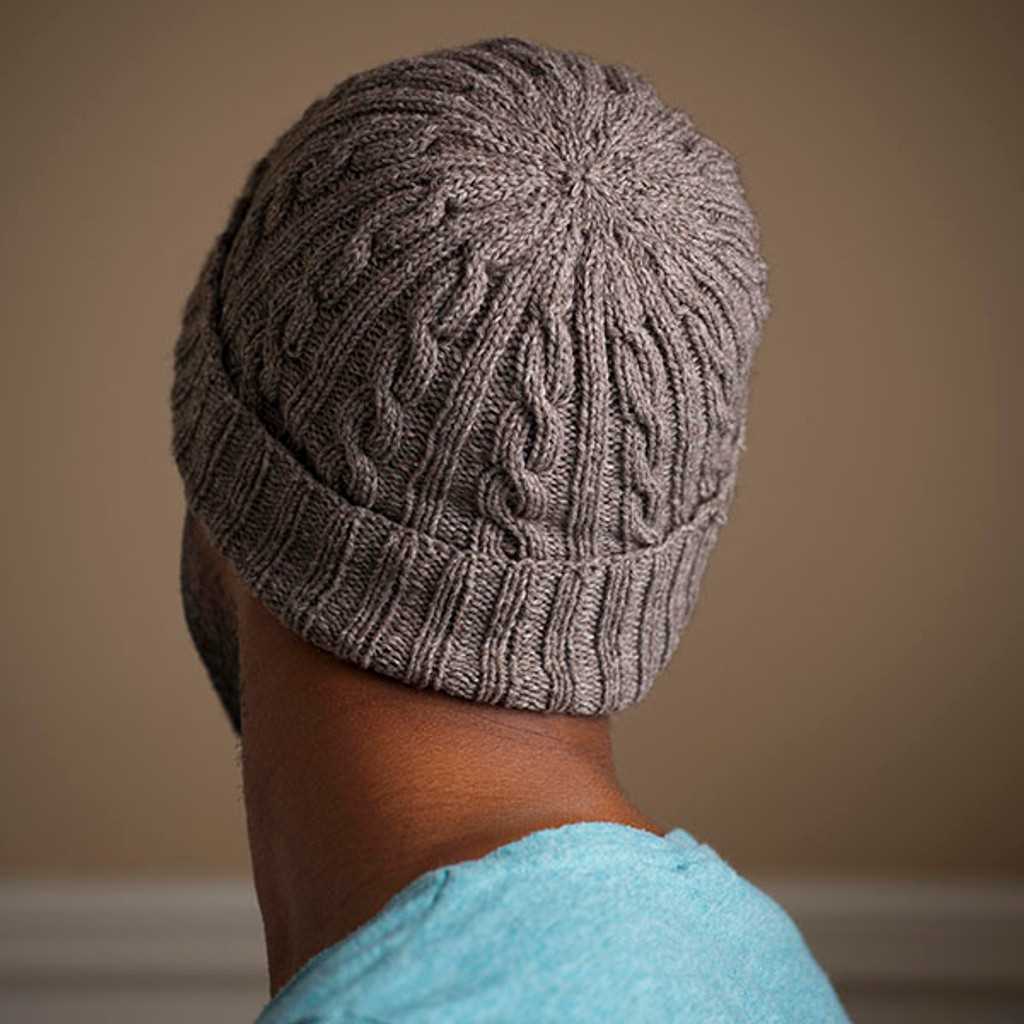
Shaping the crown

Shaping the crown of a knit pilot cap is an important step in creating the perfect fit and style. The crown refers to the top part of the hat, where it curves to fit the shape of the head. There are several techniques you can use to shape the crown, depending on the desired style and the type of knit pattern you are following.
One common method is to decrease stitches gradually as you reach the top of the crown. This creates a rounded shape that fits snugly on the head. To achieve this, you can use techniques such as knitting two stitches together, or purling two stitches together, at regular intervals. This reduces the number of stitches and creates a curved effect.
- Decreasing stitches: One method to shape the crown is by decreasing stitches gradually as you approach the top. This can be done by knitting or purling two stitches together at regular intervals.
- Using short rows: Another technique is using short rows to shape the crown. This involves knitting or purling a certain number of stitches and then turning the work to continue in the opposite direction. This creates a layered effect and can add volume to the crown.
- Adjusting stitch pattern: The stitch pattern you choose can also affect the shaping of the crown. If you’re using a pattern with cables or lace, you may need to modify the shaping to ensure the pattern remains intact.
Overall, shaping the crown of a knit pilot cap allows you to customize the fit and style of the hat. It is important to follow the instructions of the knit pattern you are using and make any necessary adjustments to achieve the desired shape. With the right techniques and attention to detail, you can create a beautiful and well-fitting pilot cap for yourself or as a gift.
Finishing touches

Once you have completed knitting the pilot cap, it’s time to add the finishing touches to make it look polished and professional. These final steps will ensure that your cap is both comfortable to wear and visually appealing.
1. Blocking: Before adding any embellishments or finishing touches, it’s important to block your knitted cap. Blocking helps to even out stitches, smooth any lumps or bumps, and bring out the true shape of the cap. To block your cap, gently wet it and then shape it using pins or a blocking mat. Allow it to dry completely before continuing.
2. Seam the edges: To give your pilot cap a neat and seamless finish, you will need to seam the edges together. Using a tapestry needle and matching yarn, carefully sew the edges of the cap together. Make sure to hide your yarn tails and create an invisible seam. This will make the cap more comfortable to wear and prevent any irritation or discomfort.
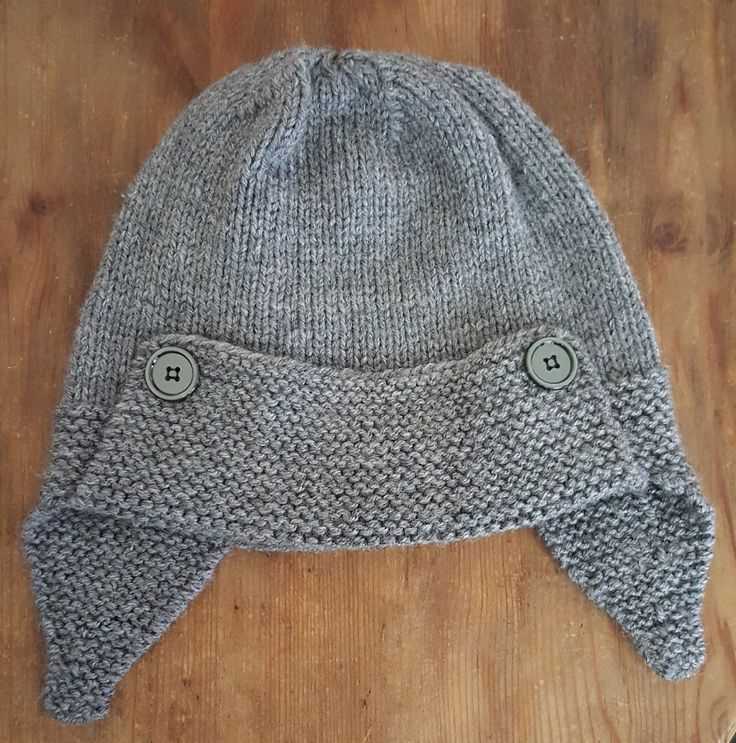
3. Embellishments: Now it’s time to add any desired embellishments to personalize your pilot cap. You can use buttons, pom-poms, or other decorative elements to enhance the cap’s appearance. Sew them securely in place, making sure they are evenly spaced and complement the overall design of the cap.
4. Finishing touches: Finally, give your cap a professional touch by tidying up any loose ends or stray threads. Trim any excess yarn and make sure the cap looks clean and tidy. Pay attention to the details, such as ensuring all stitches are secure and evenly tensioned, for a truly polished look.
By following these finishing touches, you can transform your knitted pilot cap into a stylish and comfortable accessory. Take your time and pay attention to the details to create a cap that will be the envy of everyone who sees it.
Customization Ideas

Once you have mastered the basic pilot cap pattern, the possibilities for customization are endless. Here are some ideas to help you make your knit pilot cap truly unique:
1. Color combinations:
Experiment with different color combinations to create a personalized look. Mix and match different shades to create stripes, or use contrasting colors for a bold and eye-catching design.
2. Embellishments:
Add some flair to your pilot cap by incorporating embellishments such as buttons, bows, or pom-poms. Sew them onto the cap to add a touch of whimsy and personality.
3. Embroidery:
Consider adding embroidery to your pilot cap to create intricate designs or personalize it with a name or initials. Embroidered patterns can add a unique and artistic touch to your cap.
4. Appliques:
Cut out shapes or characters from fabric or felt and sew them onto your pilot cap. This allows you to create fun and playful designs, such as animals or favorite cartoon characters.
5. Patchwork:
Use different knit or fabric patches to create a patchwork effect on your pilot cap. This technique adds texture and visual interest to the hat and allows you to incorporate various colors and patterns.
6. Cables and patterns:
If you want to take your knitting skills to the next level, consider incorporating cables or more intricate knitting patterns into your pilot cap. This adds depth and complexity to the design.
In conclusion, a knit pilot cap is a versatile and stylish accessory that can be customized to reflect your personal style. Whether you choose to experiment with colors, add embellishments, or incorporate different knitting techniques, the possibilities for customization are endless. So, let your creativity soar and create a one-of-a-kind knit pilot cap that is as unique as you are!
Q&A:
Where can I find a knit pilot cap pattern?
You can find a knit pilot cap pattern on various knitting websites, such as Ravelry, Knitting Pattern Central, and LoveKnitting. You can also find patterns in knitting books or magazines.
What level of knitting skills do I need to have to knit a pilot cap?
A knit pilot cap pattern can range from beginner to advanced level, so it depends on the specific pattern you choose. Some patterns may require basic knitting skills, while others may involve more complex techniques such as colorwork or cables. It’s important to choose a pattern that matches your skill level or be prepared to learn new techniques.
What materials do I need to knit a pilot cap?
The materials you need to knit a pilot cap will depend on the specific pattern you choose. However, common materials include yarn (usually a medium-weight or worsted yarn), knitting needles (usually a size appropriate for the yarn), and any additional materials specified in the pattern, such as buttons or a pom-pom maker. Be sure to check the pattern for the recommended materials and gauge before starting your project.
Can I customize a knit pilot cap pattern?
Yes, you can customize a knit pilot cap pattern to suit your preferences. You can adjust the size of the cap by adding or subtracting stitches or rows, change the color scheme by using different shades of yarn, or even modify the design by adding your own embellishments. Just make sure to keep track of any changes you make and test them as you go to ensure that the final product turns out as desired.
Are there any free knit pilot cap patterns available?
Yes, there are free knit pilot cap patterns available online. Websites such as Ravelry, Knitting Pattern Central, and LoveKnitting offer a wide range of free patterns for various projects, including pilot caps. Just search for “knit pilot cap pattern” on these websites, and you should be able to find several options to choose from. You can also find free patterns on knitting blogs or by searching online knitting communities.
What is a knit pilot cap pattern?
A knit pilot cap pattern is a set of instructions that guide you in knitting a pilot cap. It includes the materials needed, the stitches and techniques to use, and step-by-step instructions for creating the cap.
How can I find a knit pilot cap pattern?
You can find knit pilot cap patterns in various places. You can search online on websites and platforms that offer knitting patterns, such as Ravelry or knitting blogs. You can also find patterns in knitting books or ask fellow knitters for recommendations.