
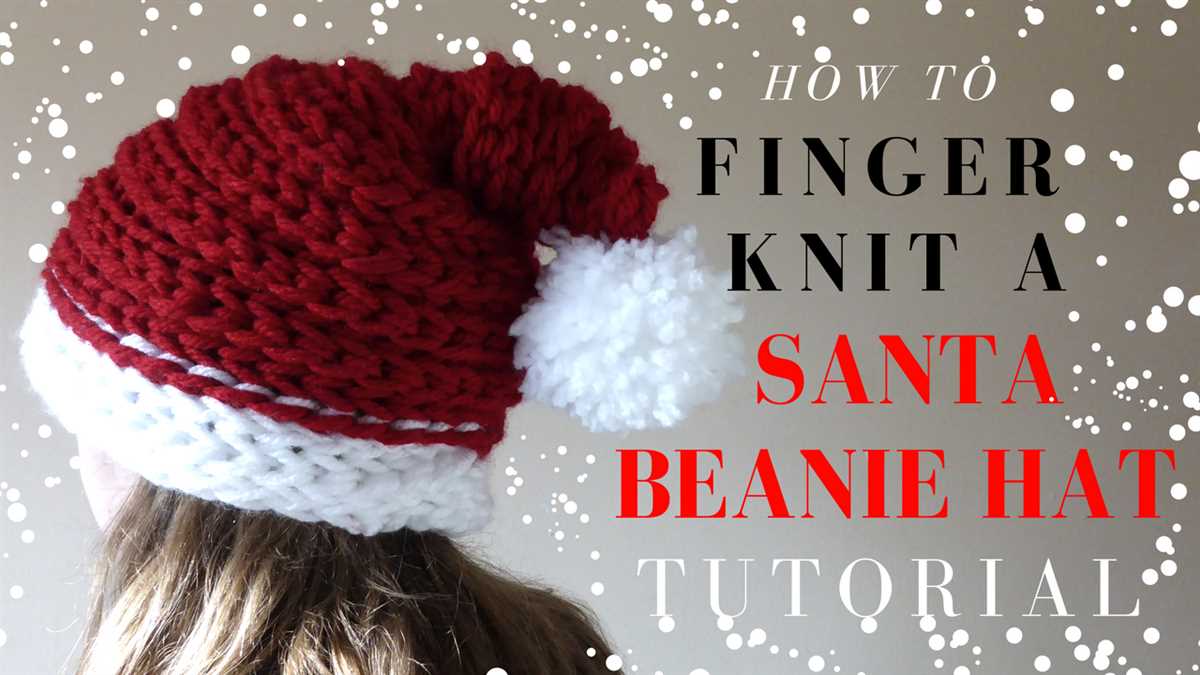
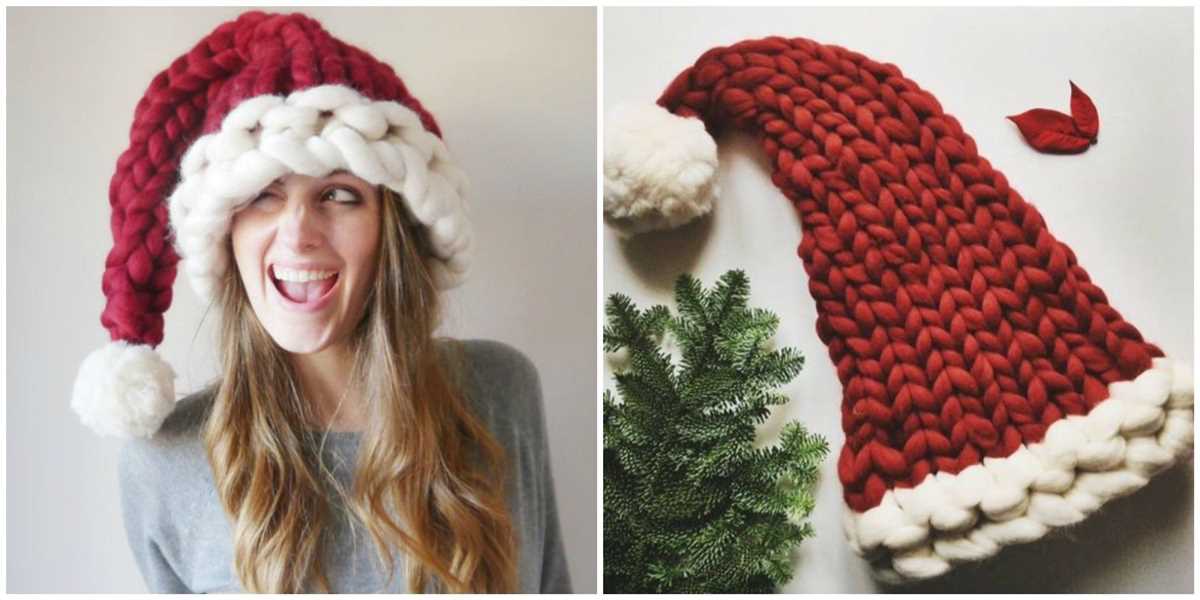
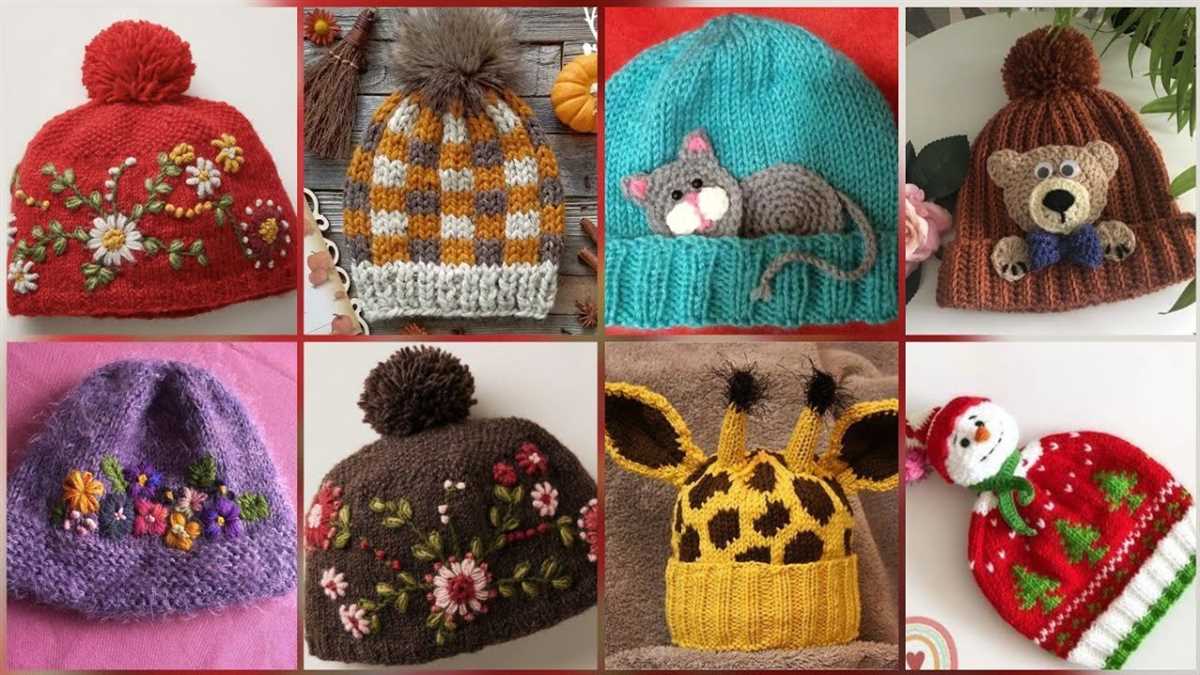
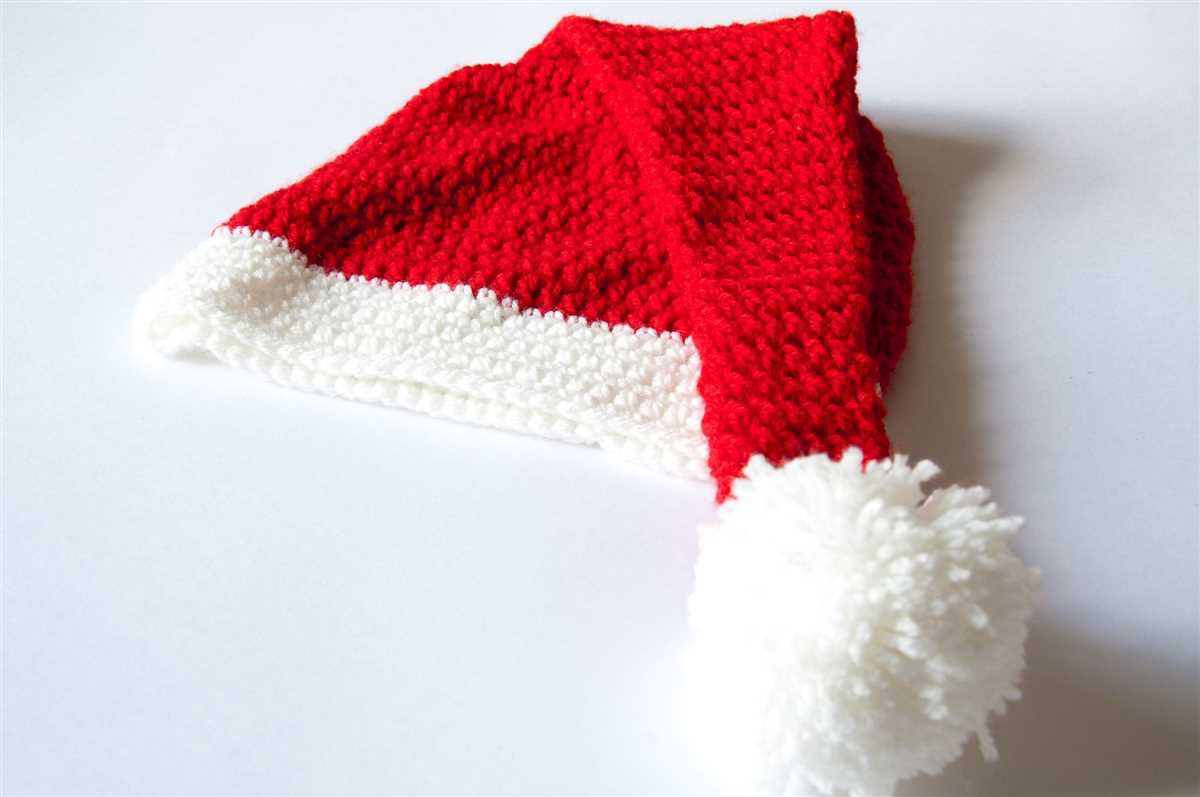
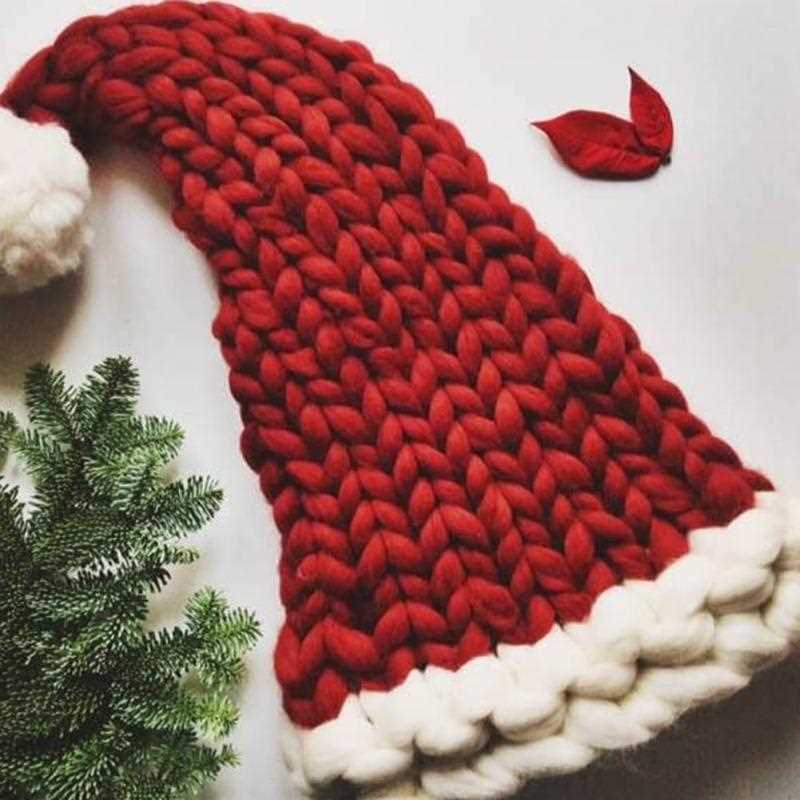
If you’re looking for a fun and festive knitting project, look no further than this easy Santa hat pattern. Whether you want to wear it yourself or give it as a gift, this pattern is perfect for beginners and experienced knitters alike. With just a few simple stitches, you’ll have a cute and cozy Santa hat in no time.
Knitting your own Santa hat allows you to customize the design to your liking. You can choose any color and add your own personal touches, such as pom-poms or embroidery. Plus, knitting is a relaxing and rewarding hobby that can help you destress during the busy holiday season.
Even if you’re new to knitting, don’t be intimidated by this project. This easy Santa hat pattern walks you through each step, from casting on to shaping the top. With clear instructions and helpful tips, you’ll be able to create a beautiful hat that looks like it came straight from Santa’s workshop.
How to Knit an Easy Santa Hat
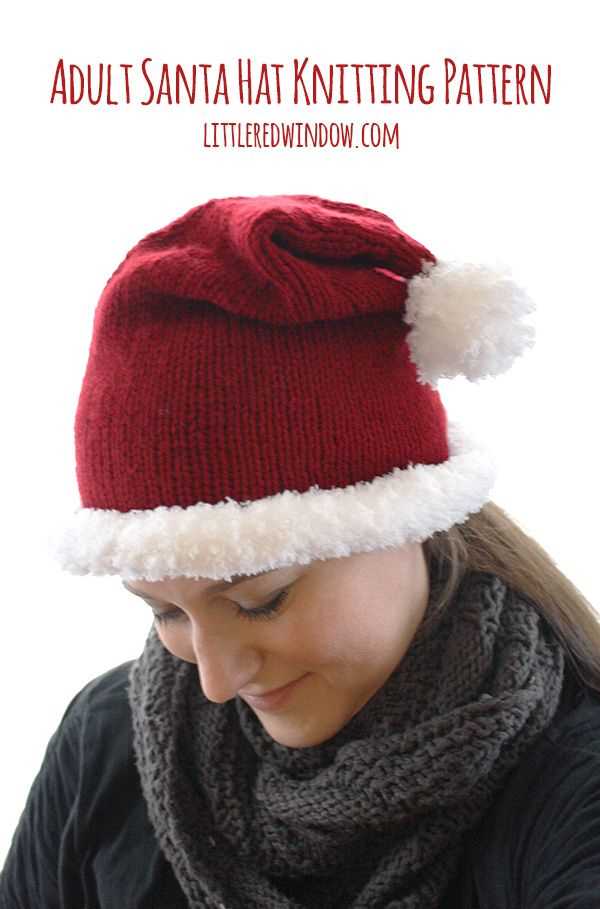
If you’re looking for a festive and fun knitting project, why not try your hand at knitting an easy Santa hat? With just a few simple steps, you can create a cozy and adorable hat that is perfect for the holiday season. Whether you’re knitting a hat for yourself or as a gift for a loved one, this easy pattern is sure to bring some holiday cheer.
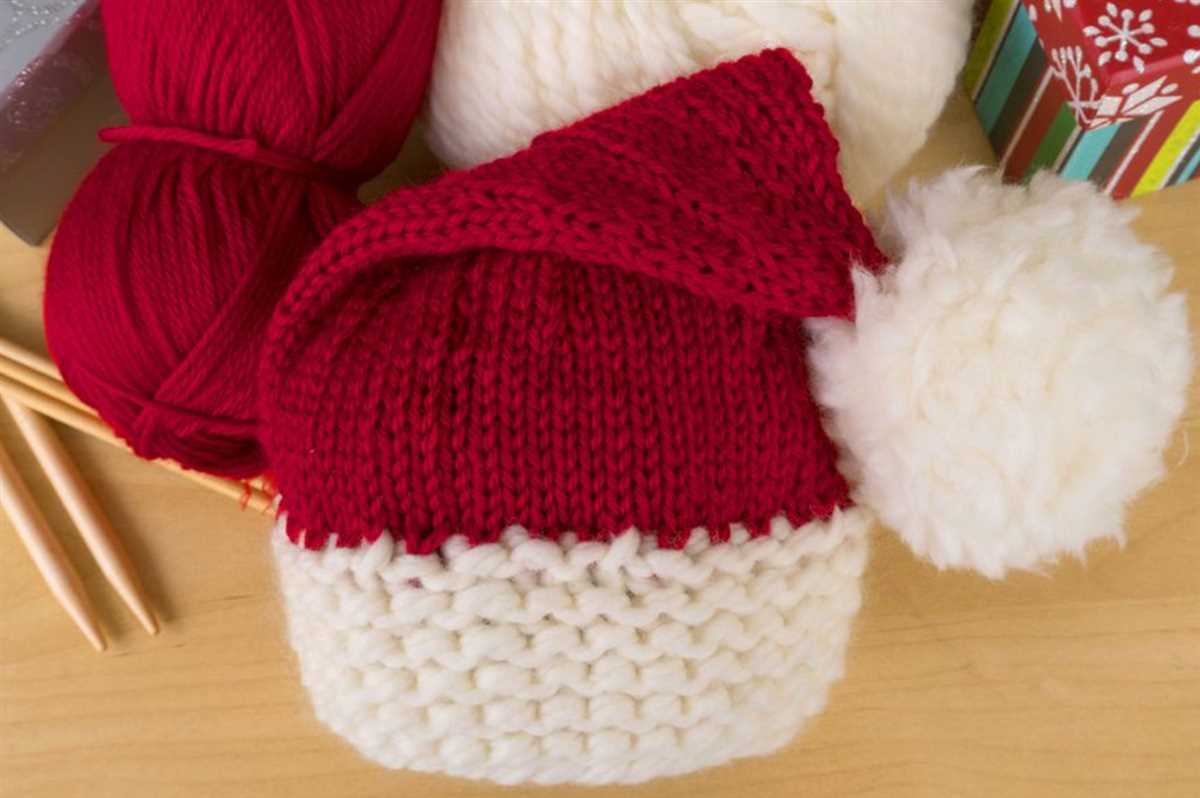
To start knitting your Santa hat, you’ll need some basic knitting supplies. You’ll need a pair of size 8 knitting needles, some red and white worsted weight yarn, and a yarn needle for finishing. Once you have your supplies ready, you’re ready to begin.
Step 1: Cast On
To start your Santa hat, cast on 80 stitches using the red yarn. This will create the brim of the hat. Make sure to leave a long tail of yarn for sewing up the brim later.
Step 2: Knit in the Round

Once you have cast on your stitches, join the round by knitting the first stitch and slipping the last stitch purlwise. Continue knitting in the round until the hat measures approximately 7 inches from the cast on edge.
Step 3: Begin Decreasing
To shape the top of the hat, you’ll need to decrease the number of stitches. Start by knitting 6 stitches, then knitting 2 stitches together. Repeat this pattern until you reach the end of the round. Continue decreasing in this way on every round until you have 8 stitches left on your needles.
Step 4: Finishing

Once you have only 8 stitches left, cut the yarn, leaving a long tail. Thread the tail through the yarn needle, and slip the needle through the remaining stitches. Pull tight to close the top of the hat. Finally, use the yarn needle to sew up the brim, using the long tail of yarn you left when casting on.
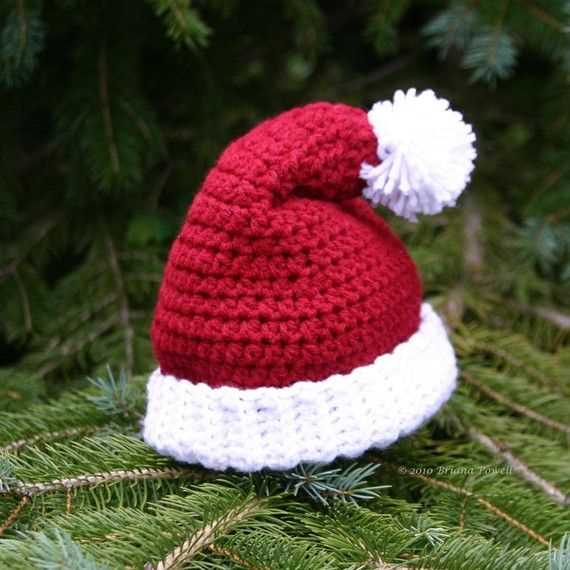
And there you have it – a cozy and cute Santa hat that you can proudly wear during the holiday season. This easy knitting pattern is perfect for both beginners and experienced knitters alike, and it’s a great way to add some festive flair to your winter wardrobe. So grab your yarn and needles and get ready to spread some holiday cheer with your own handmade Santa hat!
Materials Needed

In order to make this easy Santa hat knitting pattern, you will need the following materials:
- Yarn: You will need a red yarn for the main body of the hat and a white yarn for the cuff and pom-pom. Make sure to choose a yarn that is soft and cozy.
- Knitting Needles: You will need a set of knitting needles in a suitable size for your chosen yarn. It is recommended to use circular needles for this pattern, but you can also use double-pointed needles if you prefer.
- Tapestry Needle: This needle will be used for weaving in the ends of your yarn and sewing up any seams.
- Scissors: You will need a pair of scissors to cut the yarn.
Optional materials that you may want to use for this project include:
- Stitch Markers: These markers can be used to mark the beginning of each round or any important stitches.
- Row Counter: If you have trouble keeping track of your rows, a row counter can be very helpful.
- Pom-pom Maker: If you don’t want to make the pom-pom by hand, you can use a pom-pom maker to create a perfectly round pom-pom.
Step-by-Step Instructions
Knitting a Santa hat is a fun and easy project that can be completed in just a few hours. Whether you’re a beginner or an experienced knitter, this pattern will guide you through the process from start to finish.
Materials needed:
- Set of knitting needles (size 8)
- Red yarn (worsted weight)
- White yarn (worsted weight)
- Tapestry needle
- Pom-pom maker or cardboard
- Scissors
Step 1: Cast on stitches
Using the red yarn, cast on 80 stitches onto your knitting needles. This will be the base of the hat.
Step 2: Knit the brim
Knit in a rib stitch pattern (alternating between knit and purl stitches) for the first 2 inches of the hat. This will create a stretchy and comfortable brim.
Step 3: Knit the body of the hat
Switch to knitting in stockinette stitch (knit one row, purl one row) for the next 6 inches. This will give the hat a smooth and even texture.
Step 4: Decrease for the crown
Begin decreasing stitches by knitting 2 stitches together every 8 stitches. Continue this pattern until you have 10 stitches remaining.
Step 5: Finishing touches

Cut the red yarn, leaving a long tail. Thread the tail through a tapestry needle and slip the needle through the remaining stitches. Pull tight to close the top of the hat.
To create the pom-pom, use a pom-pom maker or cut two cardboard circles and wrap white yarn around them. Tie the yarn tightly in the center, remove the cardboard, and trim the yarn to create a fluffy pom-pom. Attach the pom-pom to the top of the hat using the tapestry needle and white yarn.
Your Santa hat is now complete! Wear it with pride or give it as a festive gift.
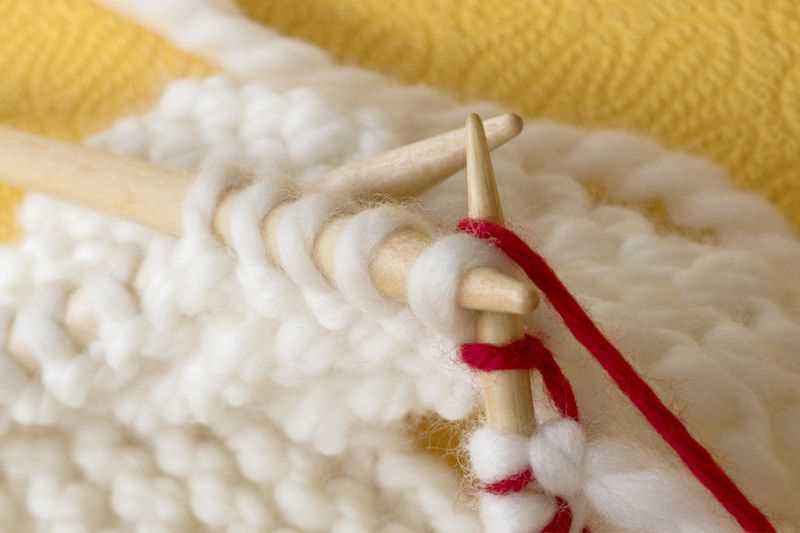
Casting On
When starting to knit a Santa hat, one of the first steps is casting on. Casting on is the process of creating the first row of stitches on the knitting needle. There are several different methods for casting on, but one of the easiest and most common methods is the long tail cast on.
To begin the long tail cast on, the first step is to measure a piece of yarn that is about three times the length of the project. This extra length is needed to create the initial row of stitches. Once the yarn is measured, a slipknot is created by inserting the needle through the loop and pulling the working end of the yarn through. The slipknot is then placed onto the needle, creating the first stitch.
The long tail cast on involves alternating between the thumb and index finger to create new stitches. To create the second stitch, the thumb is placed over the yarn, forming a loop. The needle is then inserted through the loop from front to back, and the working end of the yarn is pulled through, creating a new stitch.
As each stitch is created, it is important to maintain an even tension. The stitches should be snug, but not too tight. After the desired number of stitches have been cast on, the tail of the yarn can be cut, leaving a short tail to weave in later.
The long tail cast on is a versatile method that can be used for a variety of knitting projects, including Santa hats. Once the stitches are cast on, the next step is to begin knitting the hat in the desired pattern. With the right cast on method and a little practice, anyone can easily create a Santa hat and spread holiday cheer.
Knitting the Body

Once you have completed the initial steps of casting on and knitting the ribbing for the brim of the Santa hat, it’s time to move on to knitting the body of the hat. This is where the main part of the hat will be created, and it’s where you can get creative with your pattern and design choices.
Row 1: Start by knitting all stitches in the first row. This will create a smooth base for the body of the hat.
Row 2 and onwards: Repeat the knit stitch for each row until you reach the desired length for your Santa hat. You can use a tape measure or try the hat on as you go to ensure the perfect fit.
Tip: If you want to add some texture or design elements to the body of the hat, you can experiment with different knitting stitches. For example, you could try a seed stitch, which alternates between knit and purl stitches in a pattern, or a simple rib stitch for a striped effect.
Keep in mind that the body of the Santa hat will typically be longer than the ribbing, as you want it to come to a point on top of the head. Make sure to take this into account when determining the length of your hat.
- Continue knitting the rows until the body of the hat is at the desired length.
- Remember to periodically try on the hat to ensure the fit is just right.
- Consider adding a pom-pom or tassel on top of the hat for an extra festive touch.
Shaping the Crown
Once you have completed the ribbing section of the Easy Santa Hat knitting pattern, it’s time to start shaping the crown of the hat. This is where you will create the pointed top that is characteristic of a traditional Santa hat.
To begin shaping the crown, you will need to decrease the number of stitches in each row. This is done by knitting two stitches together, also known as a knit two together (k2tog) decrease. The exact number of decreases and the rate at which they are made will depend on the size of the hat you are knitting and the pattern instructions.
One common method for shaping the crown is to start with a certain number of stitches and then decrease on every other row until you have just a few stitches remaining. For example, you might start with 80 stitches and decrease by 10 stitches every other row until you have 10 stitches left.
To keep track of the decreases, you can use stitch markers to mark the places where you need to make the decreases. This can be especially helpful if you are new to knitting or if you are working with a complex pattern.
Once you have completed the crown shaping, you can finish off the hat by cutting the yarn and pulling it through the remaining stitches to secure them. You can then weave in any loose ends and add any additional embellishments, such as a pom-pom or a decorative band.
Adding the Pom-Pom
Materials:
- Yarn in a contrasting color
- Pom-pom maker or cardboard
- Sharp scissors
- Tapestry needle
Instructions:
- Start by selecting a yarn color for the pom-pom. You can either choose a color that matches the hat or go for a contrasting color for added visual interest.
- If you have a pom-pom maker, follow the instructions to create the pom-pom. If you don’t have a pom-pom maker, you can easily make one from cardboard. Cut two identical circles from the cardboard and cut a smaller circle in the center of each. Place the circles together and wrap the yarn around them until the center hole is filled.
- Once you have wrapped the yarn around the pom-pom maker or cardboard, carefully cut the yarn along the outer edge, making sure not to cut the securing yarn in the center.
- Take a separate piece of yarn and thread it through the center of the pom-pom maker or cardboard. Tie it tightly around the wrapped yarn and secure it with a double knot.
- Remove the pom-pom maker or cardboard and fluff the pom-pom to shape it.
- Attach the pom-pom to the top of the hat by threading the tapestry needle with the yarn tail from the pom-pom. Insert the needle through the top of the hat and pull the yarn through, leaving a long tail inside the hat.
- Tie the yarn tail from the pom-pom to the long tail inside the hat, making sure the pom-pom is securely attached.
- Trim any excess yarn from the pom-pom and weave in any loose ends inside the hat.
- Once the pom-pom is attached, your Santa hat is complete and ready to be worn!
Finishing Touches
Once you have completed knitting your santa hat, it’s time to add the finishing touches to make it truly festive and charming. Here are some ideas on how to make your hat stand out:
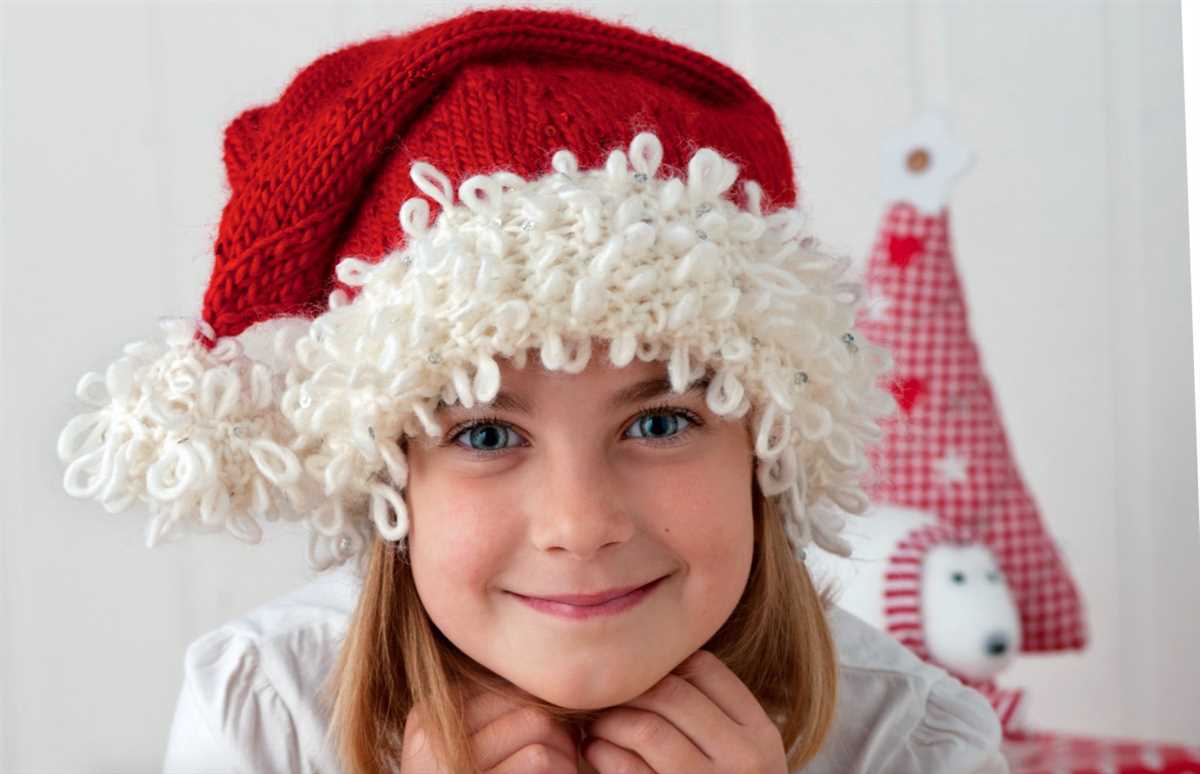
Pom-Pom: Attach a fluffy pom-pom to the top of your hat to give it a fun and playful look. You can use a contrasting color yarn to make the pom-pom, or use the same yarn as the rest of the hat for a seamless finish.
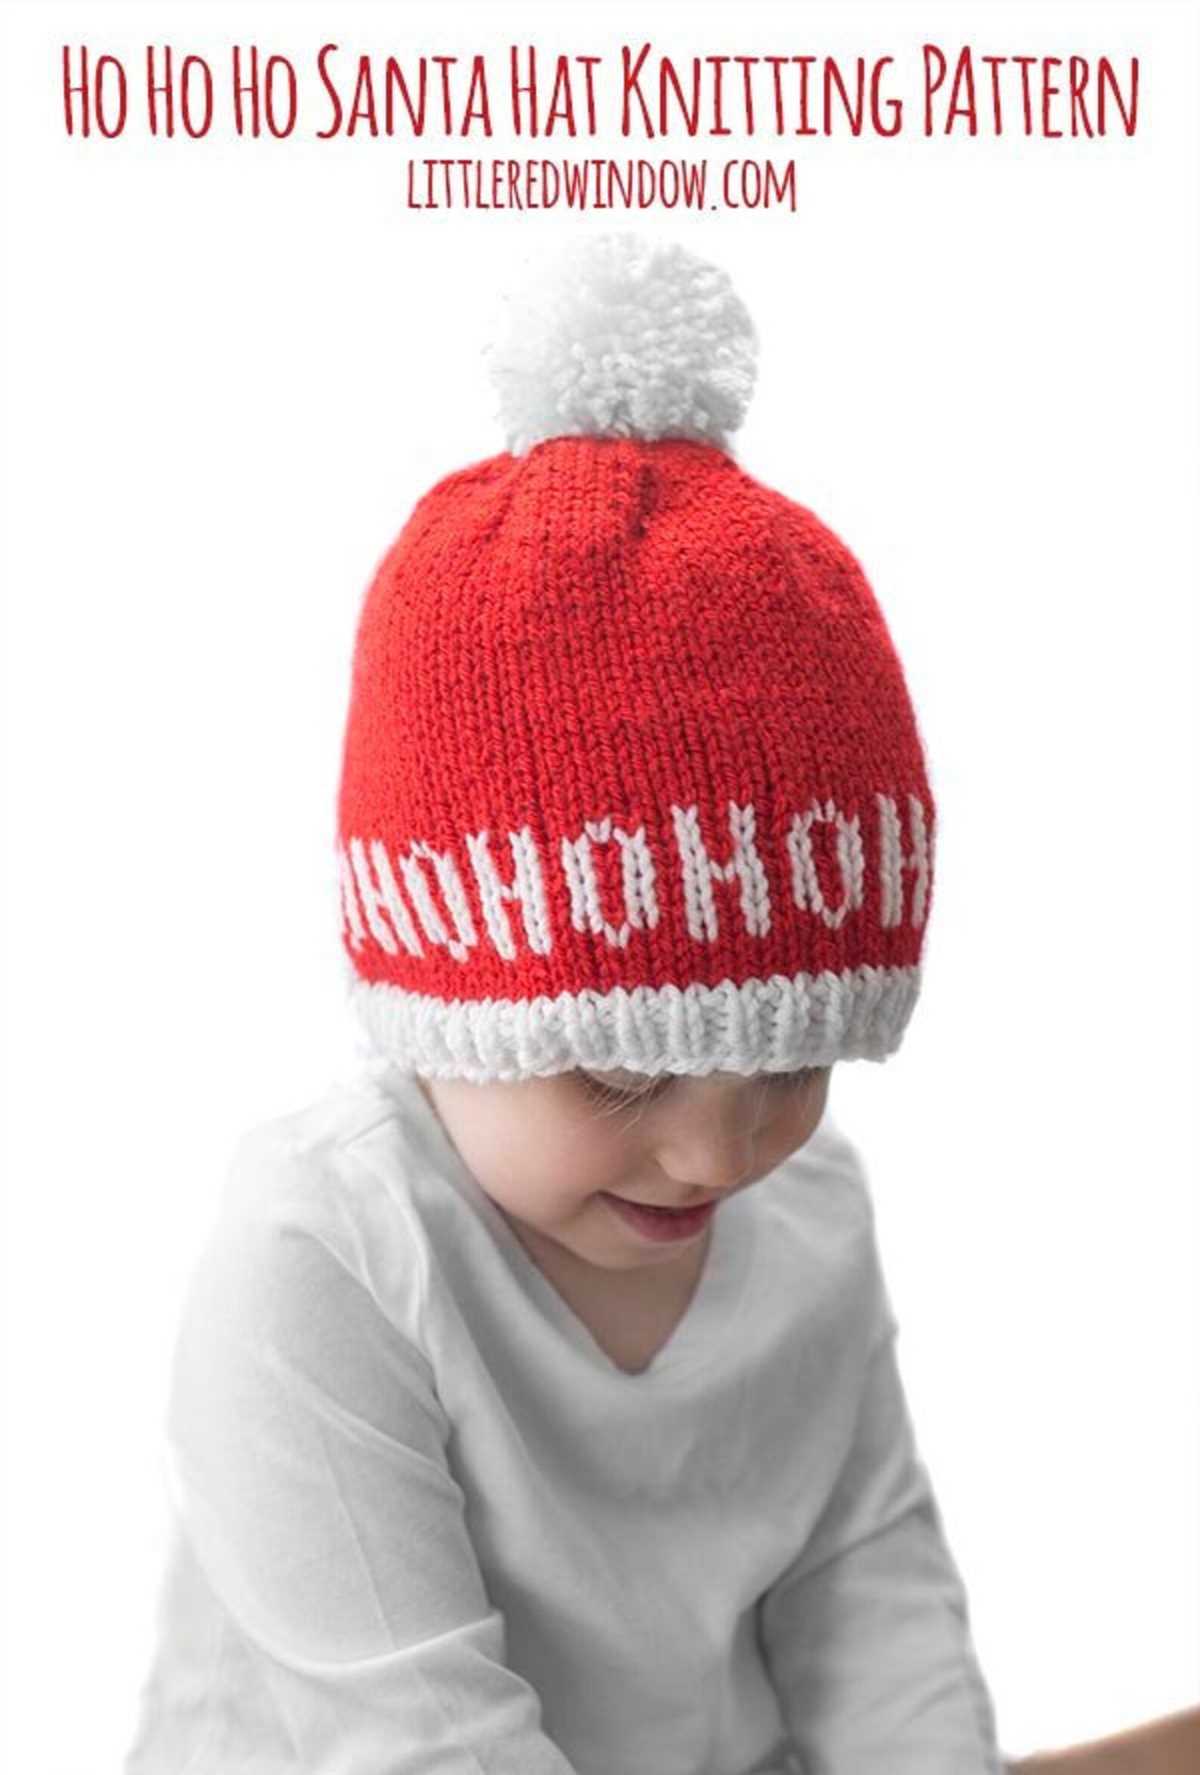
Embroidery: Add some festive designs or patterns to the body of the hat using embroidery techniques. You can create simple stars, snowflakes, or even write “Ho ho ho” on the hat to bring out the Christmas spirit. Embroidery can be done using a different color yarn or even metallic thread for an extra special touch.
Ribbon: Attach a ribbon bow or tie around the base of the hat for a touch of elegance. You can use a satin or velvet ribbon in a complementary color to add a pop of texture and shine. This simple addition can make your hat look more polished and ready for the holiday season.
Sequins or beads: If you want to add some sparkle to your santa hat, consider sewing on sequins or beads. You can create a pattern or randomly scatter them across the hat for a dazzling effect. This touch of glitter will make your hat truly eye-catching and perfect for any festive occasion.
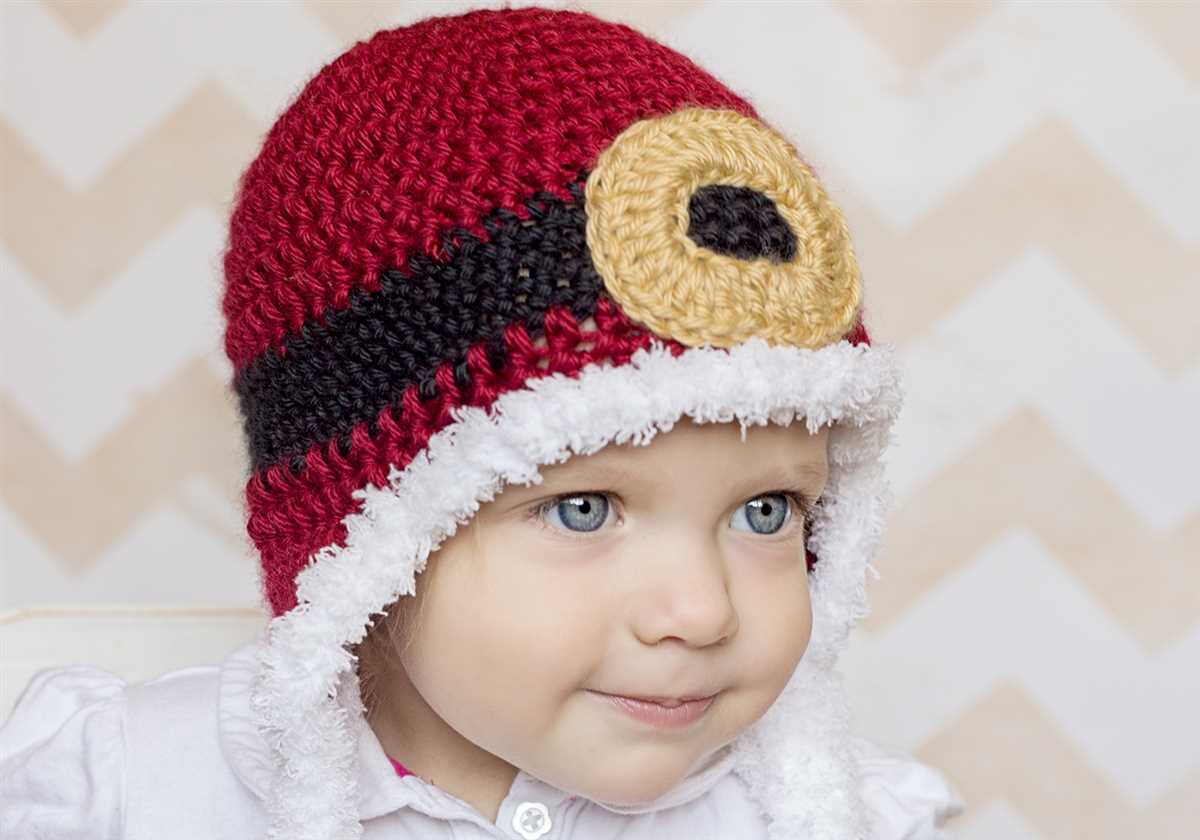
Faux fur trim: For an extra cozy and luxurious look, add a faux fur trim to the brim of your santa hat. This will give it a more traditional and wintery feel. Faux fur can be easily attached using a sewing machine or hand stitching. It’s a stylish addition that will make your hat look like it came straight from Santa’s workshop.
When knitting a Santa hat, there are a few tips and troubleshooting strategies that can help you create a successful finished product.
1. Gauge: It’s important to check your gauge before starting the project to ensure that your stitches match the recommended gauge for the pattern. This will help ensure that your hat turns out the correct size.
2. Yarn choice: Choose a yarn that is appropriate for the project. For a Santa hat, consider using a soft, fluffy yarn in the traditional red and white colors. This will give your hat a cozy, festive look.
3. Knitting techniques: Make sure you are familiar with the knitting techniques required for the pattern before you start. If you are new to knitting, it may be helpful to review basic stitches and techniques before beginning.
4. Stitch markers: Use stitch markers to help keep track of your progress and to mark important sections of the pattern, such as decreases or increases. This can prevent mistakes and make it easier to follow the pattern instructions.
5. Troubleshooting: If you encounter any issues while knitting your Santa hat, such as dropped stitches or uneven tension, there are a few troubleshooting strategies that can help. Firstly, carefully examine your work to identify any mistakes. You can then use a crochet hook or similar tool to fix dropped stitches. If your tension is uneven, try adjusting the tightness of your stitches as you go.
6. Finishing touches: Once you have completed the main body of the hat, don’t forget to add the finishing touches. This may include sewing on a pom-pom or adding a decorative trim. These details can really bring your Santa hat to life and make it look extra festive.
Variations and Customizations
Once you have mastered the basic Santa hat knitting pattern, you can start experimenting with variations and customizations to make your hats unique. Here are a few ideas to inspire you:
- Color variations: Instead of using the traditional red and white colors for the hat, try using different color combinations. You can use different shades of the same color or mix and match contrasting colors for a fun look.
- Pattern variations: Explore different stitch patterns to create interesting textures on the hat. You can try ribbing, cables, or lace patterns to add a unique touch.
- Embroidery and embellishments: Personalize your hat by adding embroidered designs or embellishments such as sequins, beads, or pom-poms. This will give your hat a festive and playful look.
- Size adjustments: You can easily adjust the size of the hat by changing the number of stitches or rows. This allows you to make hats for people of different ages or head sizes.
Remember to have fun and get creative with your Santa hat knitting. The possibilities are endless, and you can make each hat truly unique. Whether you stick to the traditional design or experiment with different variations, your handmade Santa hats are sure to bring joy and warmth to whoever wears them.