
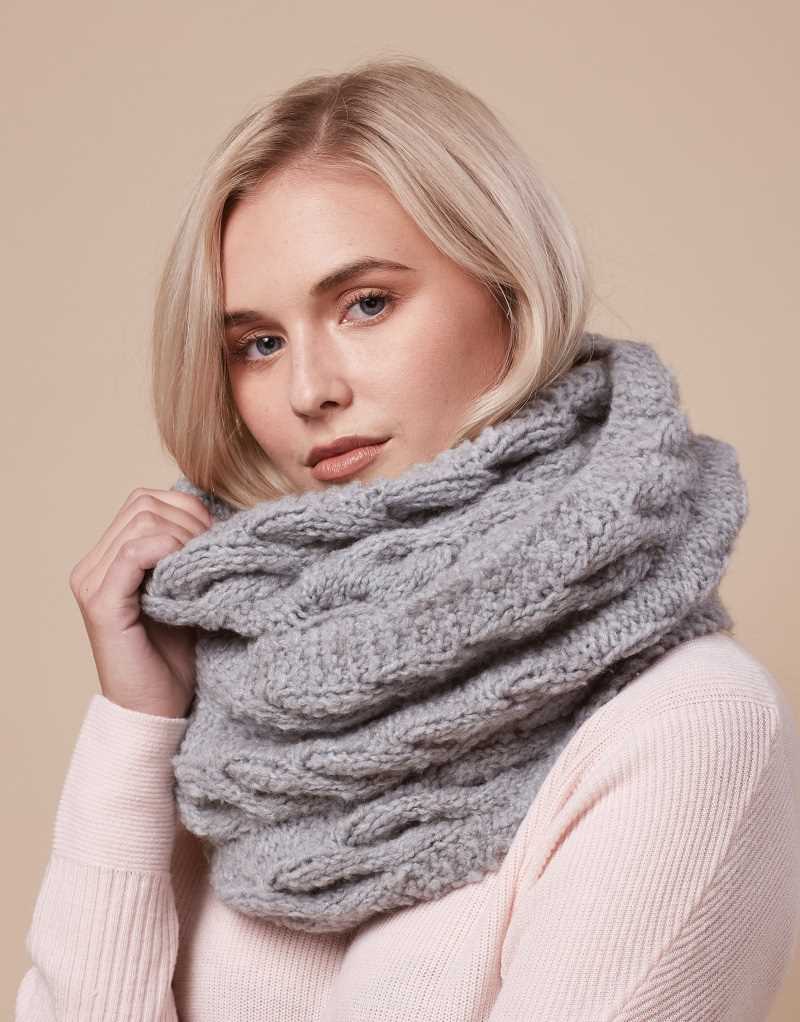
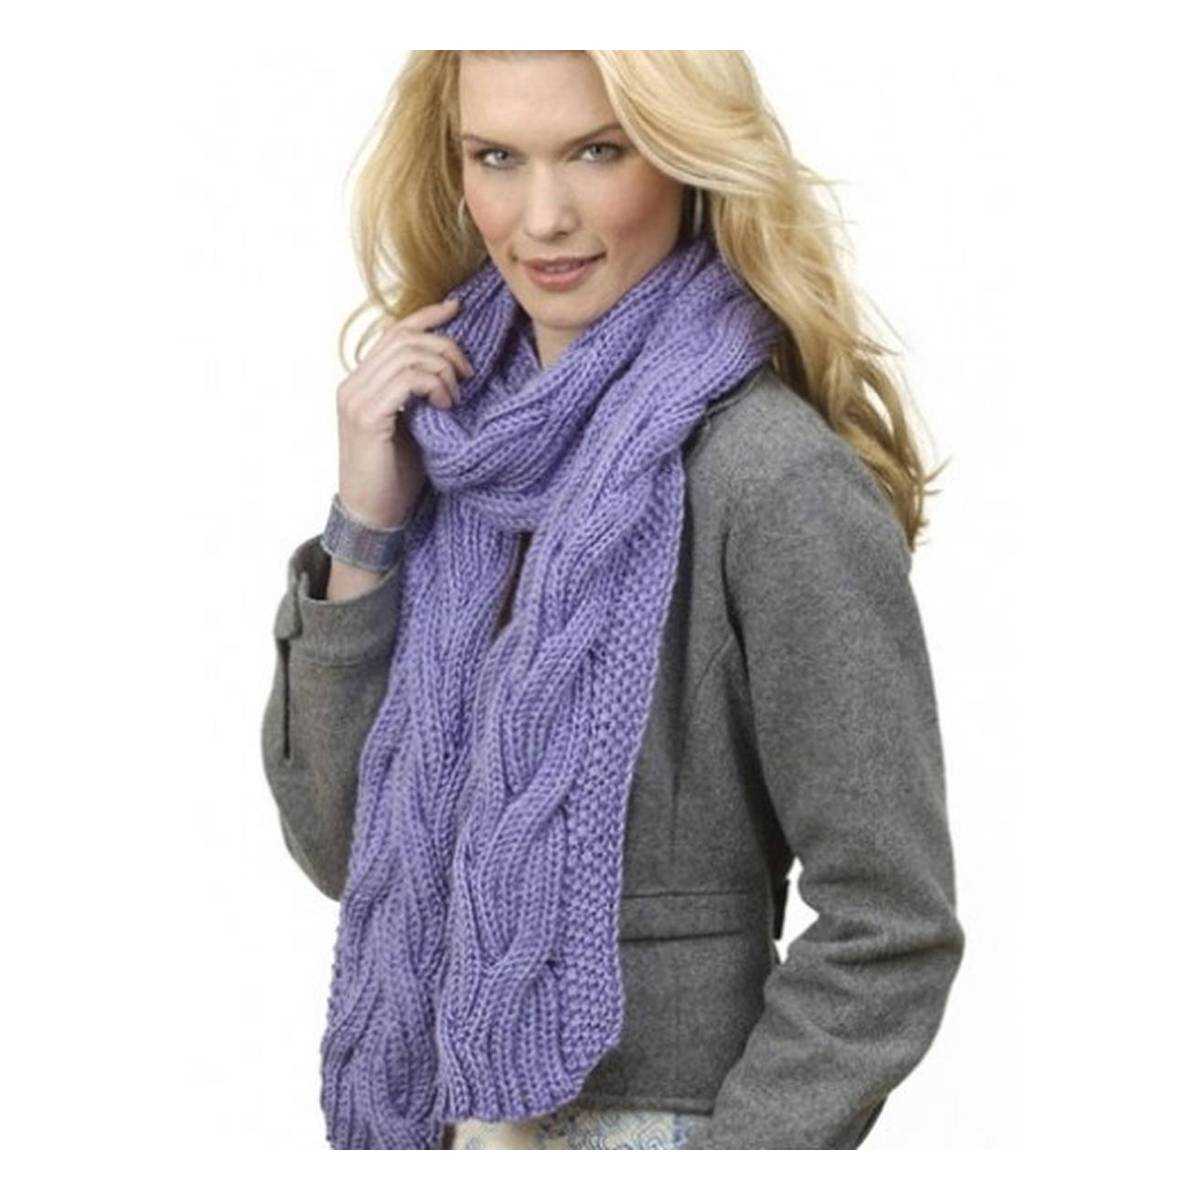
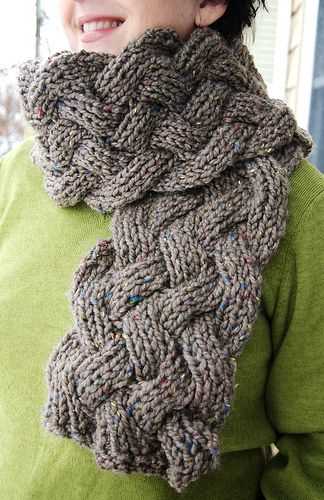
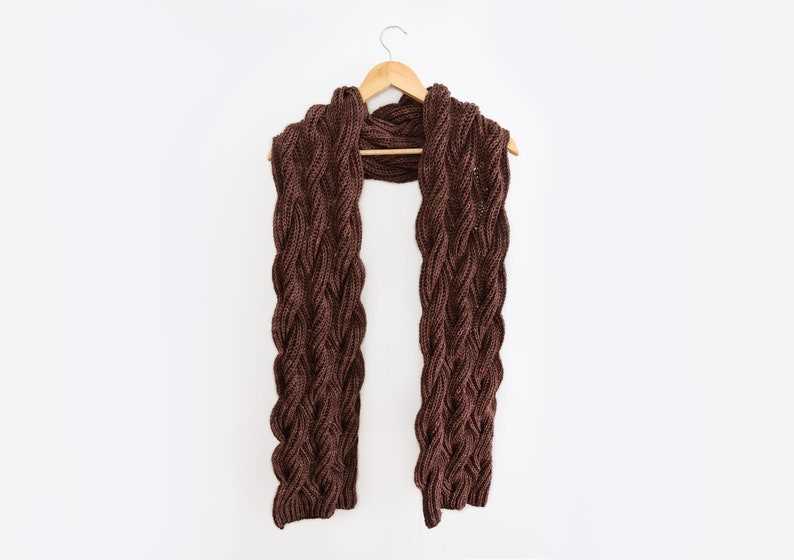
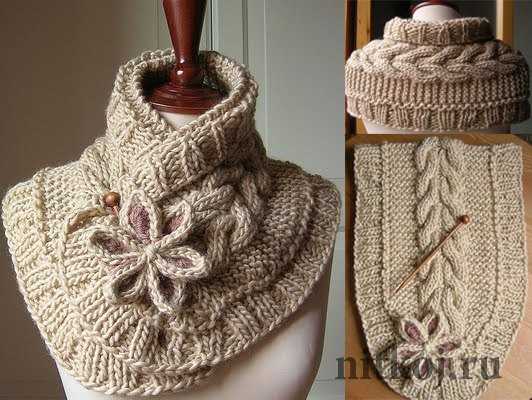
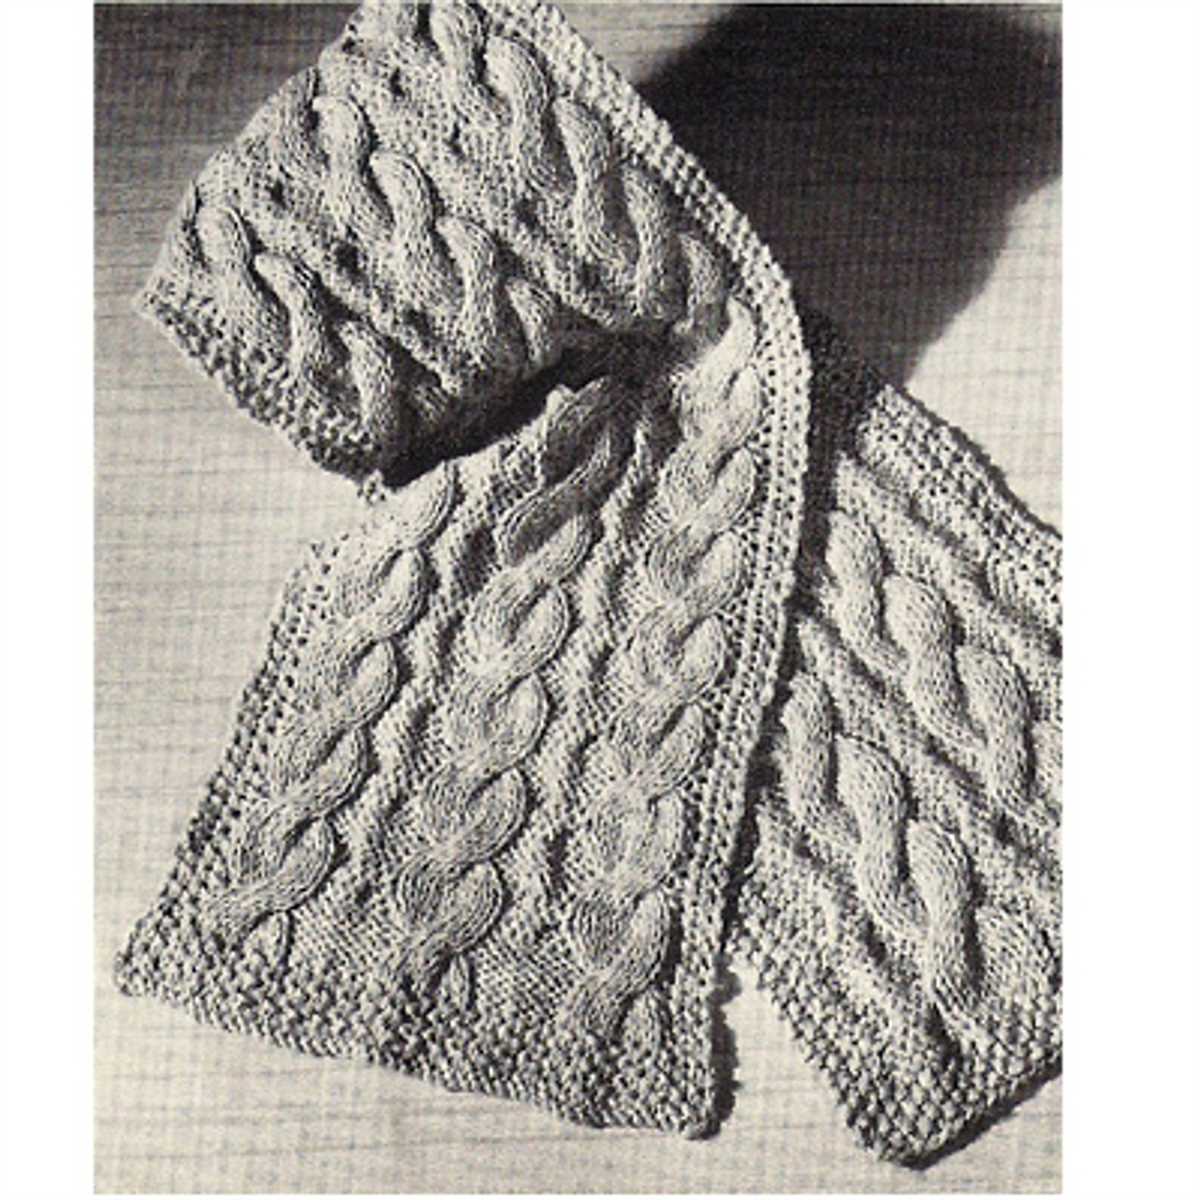
If you’re looking for a cozy and stylish scarf to knit, look no further than our free cable scarf knitting pattern. This pattern is perfect for both beginner and advanced knitters, and it’s a great way to practice your cable knitting skills. The finished scarf features a beautiful and intricate cable design that will keep you warm and fashionable all winter long.
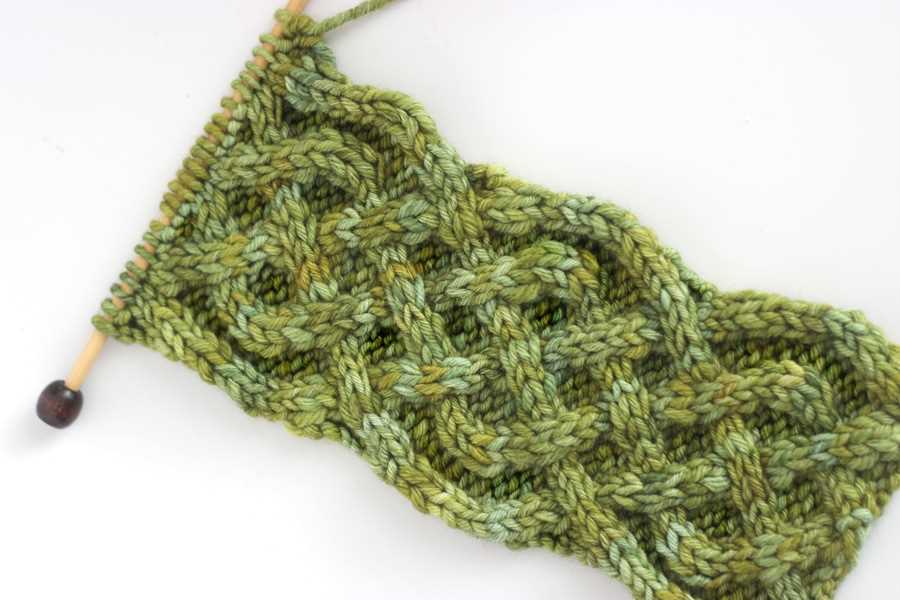
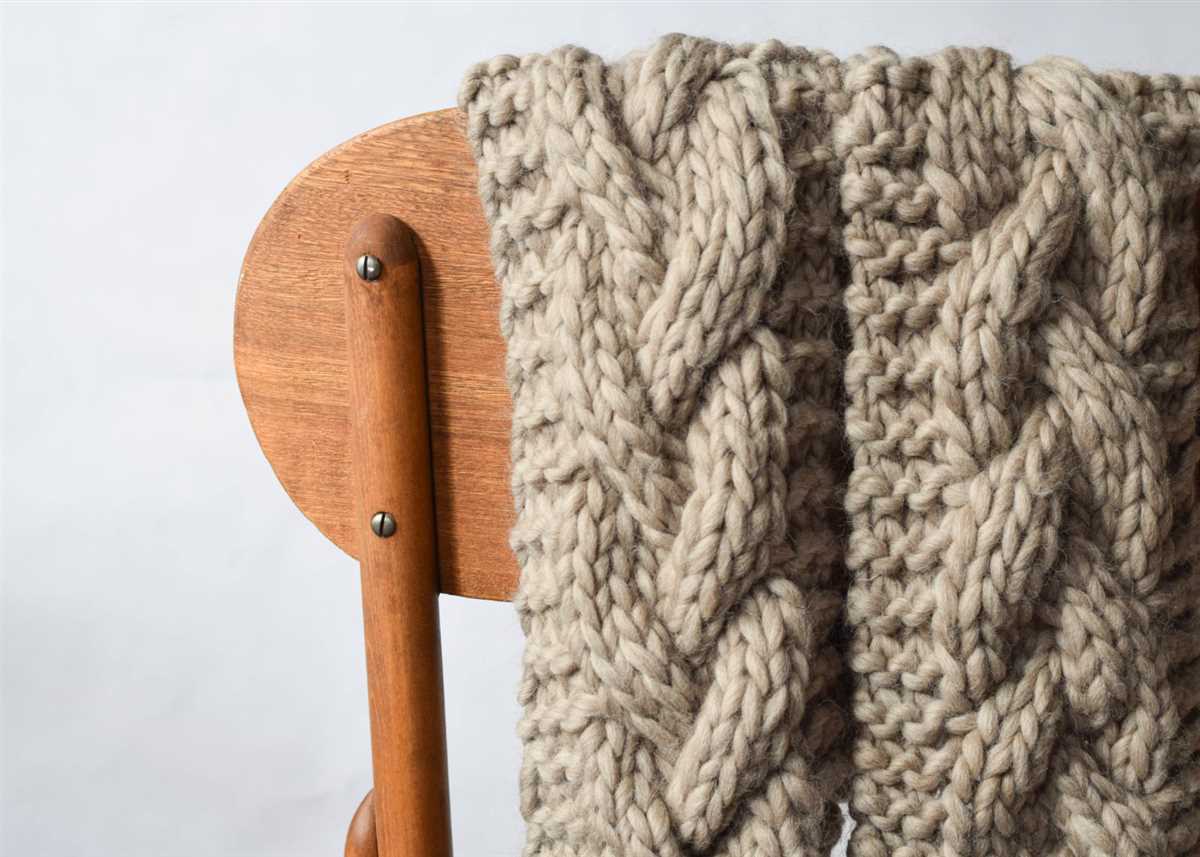
This cable scarf knitting pattern is worked up using a chunky yarn, which means it’s a quick and satisfying project to knit. The pattern includes both written instructions and a chart, so you can choose which method you prefer. The cables are made by crossing stitches over each other, creating a textured and eye-catching design.
Whether you knit this cable scarf for yourself or as a gift for a loved one, it’s sure to be a cherished accessory for years to come. The pattern is versatile and can be customized to suit your style, whether you prefer a long and chunky scarf or a shorter and more delicate version. So grab your knitting needles and get started on this cable scarf knitting pattern today!
Choosing the right yarn for your cable scarf
When it comes to knitting a cable scarf, choosing the right yarn is crucial to ensure that your finished product looks and feels great. Here are some factors to consider when selecting the perfect yarn for your cable scarf.
1. Fiber content
The fiber content of the yarn will determine the overall feel, drape, and warmth of your cable scarf. Natural fibers like wool, alpaca, and cashmere are excellent choices as they provide warmth and softness. If you prefer a more lightweight option, you can opt for yarns with a blend of natural and synthetic fibers.
2. Weight and thickness
Consider the weight and thickness of the yarn, as it will determine the size and thickness of your cable scarf. If you want a chunky and cozy scarf, go for a bulky or super bulky weight yarn. For a finer and more delicate scarf, choose a lighter weight yarn, such as fingering or sport weight.
3. Color and texture
Think about the color and texture of the yarn, as it can significantly impact the overall look of your cable scarf. Solid colors will emphasize the intricate cable patterns, while variegated or self-striping yarns can add visual interest. Additionally, yarns with a textured or boucle finish can create a unique and eye-catching scarf.
4. Durability and care instructions
Consider the durability and care instructions of the yarn, especially if you plan to wear your cable scarf frequently. Yarns with a high percentage of natural fibers may require more delicate handling and specific cleaning methods. If you prefer a yarn that is easy to care for, look for options that are machine washable and durable.
By considering these factors and experimenting with different yarns, you’ll be able to find the perfect match for your cable scarf project. Whether you prefer a cozy wool blend or a lightweight cotton yarn, the right choice of yarn will enhance the beauty and comfort of your finished scarf.
Essential Knitting Tools and Equipment
When it comes to knitting, having the right tools and equipment is essential to successfully complete your projects. Whether you are a beginner or an experienced knitter, having a well-stocked knitting bag will make your knitting experience more enjoyable and efficient.
A set of high-quality knitting needles is the most basic tool you will need. Knitting needles come in various materials such as metal, wood, or plastic, and different sizes to accommodate the thickness of your yarn. It is recommended to have a range of needle sizes on hand to cater to different projects.
A good pair of scissors is another must-have tool. Scissors with sharp blades will help you easily cut yarn or remove mistakes. Make sure to choose a pair of scissors that is small enough to fit in your knitting bag and has a protective cap to keep them safe.
Other essential tools include stitch markers, tapestry needles, and a row counter. Stitch markers are used to mark specific stitches or sections in your work, while tapestry needles are used to weave in loose ends or sew pieces together. A row counter is helpful to keep track of the number of rows you have knitted, especially for patterns with complex stitch patterns.
Having a knitting gauge or a ruler is also important to ensure that your knitting measures up to the required size. This tool allows you to check your gauge and make adjustments if necessary.
Finally, a knitting bag or organizer is necessary to keep all your tools and materials organized and easily accessible. Look for a bag with compartments or pockets to store your needles, scissors, and other accessories.
- Knitting needles of various sizes and materials
- A pair of sharp scissors with a protective cap
- Stitch markers
- Tapestry needles
- A row counter
- A knitting gauge or ruler
- A knitting bag or organizer
In conclusion, having the right knitting tools and equipment is crucial for a successful knitting experience. Investing in high-quality tools will not only make your projects easier to complete but also ensure that the final result is of the highest quality.
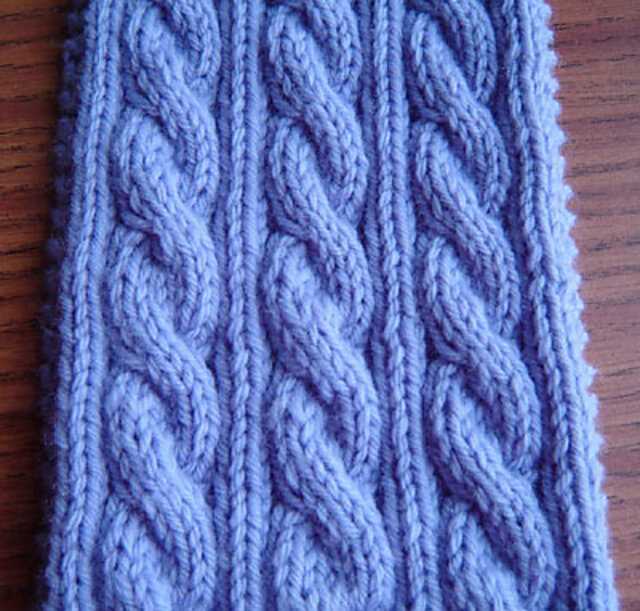
Understanding the basic cable stitch
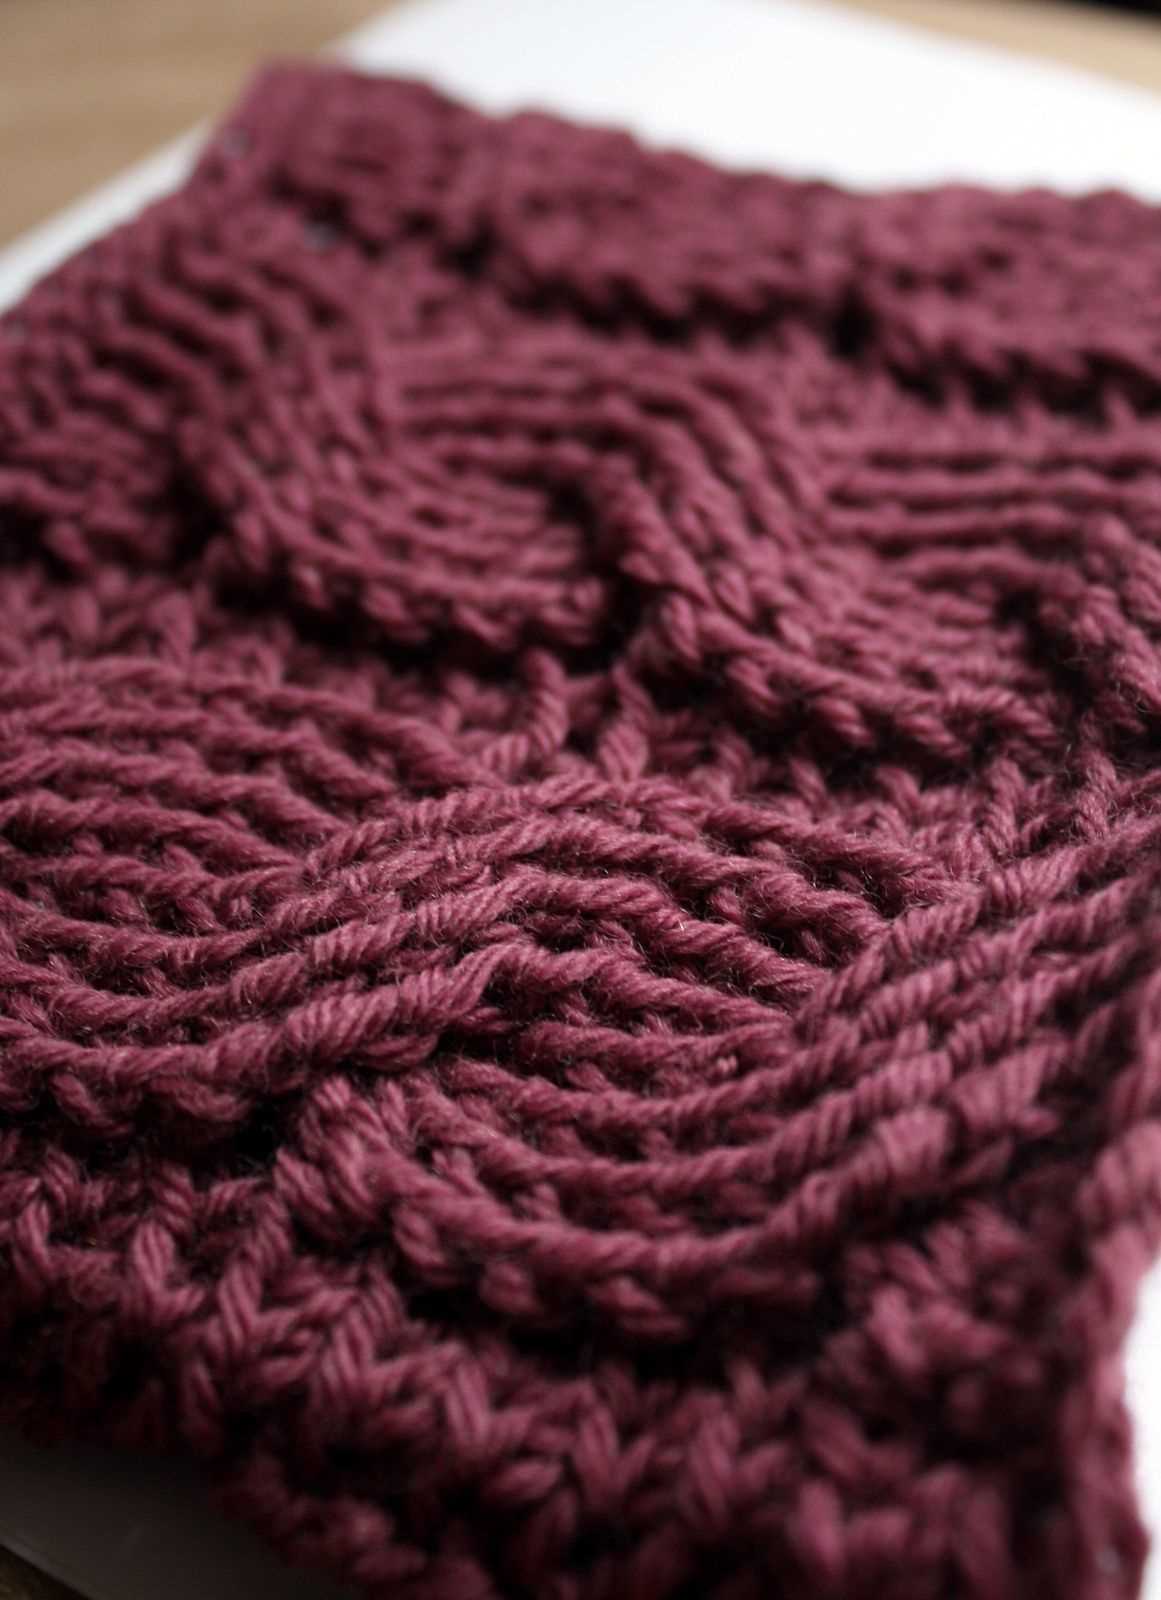
The cable stitch is a popular knitting technique that adds texture and interest to any knitting project, including scarves. It creates a twisted, braided effect that can be simple or complex, depending on the pattern. With cable knitting, stitches are moved out of order and held either in front or back of the work to create the desired effect.
To create a basic cable stitch, you will need a cable needle, which is a short, double-pointed needle used to temporarily hold the stitches out of the way. The cable needle is used to transfer stitches from the main knitting needle onto the cable needle, and then back onto the main needle in a different order.
To create a simple cable stitch:
- 1. Knit the required number of stitches before beginning the cable.
- 2. Slip the next however many stitches (typically 2 or 4) onto the cable needle and hold it either in front or back of the work, depending on the pattern.
- 3. Knit the next however many stitches on the main needle.
- 4. Transfer the stitches from the cable needle back onto the main needle in the desired order.
- 5. Continue knitting the remaining stitches in the row as usual.
The cable stitch pattern is typically written out row by row, indicating when and how many stitches are to be transferred onto the cable needle. It’s important to carefully follow the pattern instructions to achieve the desired cable effect.
Cable knitting can be challenging for beginners, but with practice and patience, it can become a rewarding technique to master. By understanding the basics of the cable stitch and following a pattern, you can create beautiful cable scarves and other knitted items. Experimenting with different cable stitch patterns and combinations can also add variety and creativity to your knitting projects.
Step-by-step guide to knitting a cable scarf
Are you ready to take your knitting skills to the next level? Then it’s time to try knitting a cable scarf! Cable knitting is a technique that creates beautiful and intricate patterns, making it perfect for scarves and other accessories. In this step-by-step guide, we will walk you through the process of knitting a cable scarf from start to finish.
Materials you will need:
- Yarn: Choose a soft and thick yarn in your preferred color. Merino wool or alpaca yarn are great options.
- Knitting needles: You will need a pair of US size 8 (5mm) knitting needles for this project.
- Cable needle: This special needle is used to hold stitches while you work the cable pattern.
- Scissors
- Tapestry needle: This needle will be used for weaving in loose ends.
- Measuring tape
Step 1: Casting on
Start by casting on an even number of stitches using the long-tail cast-on method. For a standard cable scarf, you can cast on about 40 stitches. Make sure not to cast on too tightly, as this will make it difficult to knit the cables.
Step 2: Knitting the base rows
Knit the first few rows (about 4-6 rows) in a basic garter stitch pattern, which means knitting every row. This will create a nice border for your cable pattern.
Step 3: Working the cable pattern
Now it’s time to start the cable pattern! Follow the cable pattern instructions for your desired design. Typically, a cable pattern will consist of a certain number of stitches crossed over each other. You will need to use the cable needle to hold the stitches in front or back while you knit the others.
Step 4: Repeating the cable pattern
Continue working the cable pattern for the desired length of your scarf. You can repeat the pattern as many times as you like, depending on the width and length you prefer.
Step 5: Finishing the scarf
Once you have reached your desired length, finish the scarf by knitting a few more rows in garter stitch pattern. This will create another border to match the one at the beginning. Finally, bind off all stitches and weave in any loose ends using the tapestry needle.
And that’s it! You have successfully completed your cable scarf. Now you can proudly wear or gift this cozy and stylish accessory. Experiment with different cable patterns and yarns to create unique and personalized scarves that will keep you warm during the colder months.
Common Mistakes to Avoid When Knitting a Cable Scarf
Knitting a cable scarf can be a challenging but rewarding project. However, there are several common mistakes that knitters often make when attempting this pattern. By being aware of these mistakes, you can avoid them and create a beautifully crafted cable scarf.
1. Not using a cable needle: One of the most important tools when knitting cables is a cable needle. This specialized needle is used to hold live stitches while you cross them over each other to create the cable pattern. If you don’t use a cable needle, it can be difficult to maintain the correct stitch order and the cables may not look as tidy or well-defined.
2. Skipping a row or stitch: Knitting cables involves following a specific pattern, and any skipped rows or stitches can throw off the entire design. It’s important to carefully read and understand the pattern instructions before starting and make sure to count your stitches regularly to ensure you’re on track.
3. Pulling too tightly: When knitting cables, it’s common for the stitches to become tighter as you cross them. However, if you pull the stitches too tightly, it can distort the cable pattern and make the scarf less flexible and comfortable to wear. It’s important to maintain an even tension while knitting to ensure the cables are clearly defined without being overly tight.
4. Not checking gauge: Gauge is the measurement of how many stitches and rows you have per inch in your knitting. Not checking gauge before starting a cable scarf can lead to a finished project that is either too small or too large. Take the time to knit a gauge swatch and measure it accurately to ensure your scarf turns out the right size.
5. Ignoring blocking: Blocking is the final step in finishing a knitting project, and it can greatly enhance the appearance of your cable scarf. Blocking involves wetting the finished scarf and gently shaping it to the desired dimensions, then allowing it to dry. This helps to even out the stitches, open up the cable pattern, and give the scarf a polished look.
By avoiding these common mistakes, you can confidently knit a cable scarf that showcases your skills and creativity. With attention to detail and a careful approach, you’ll create a stunning accessory that will keep you warm and stylish throughout the colder months.
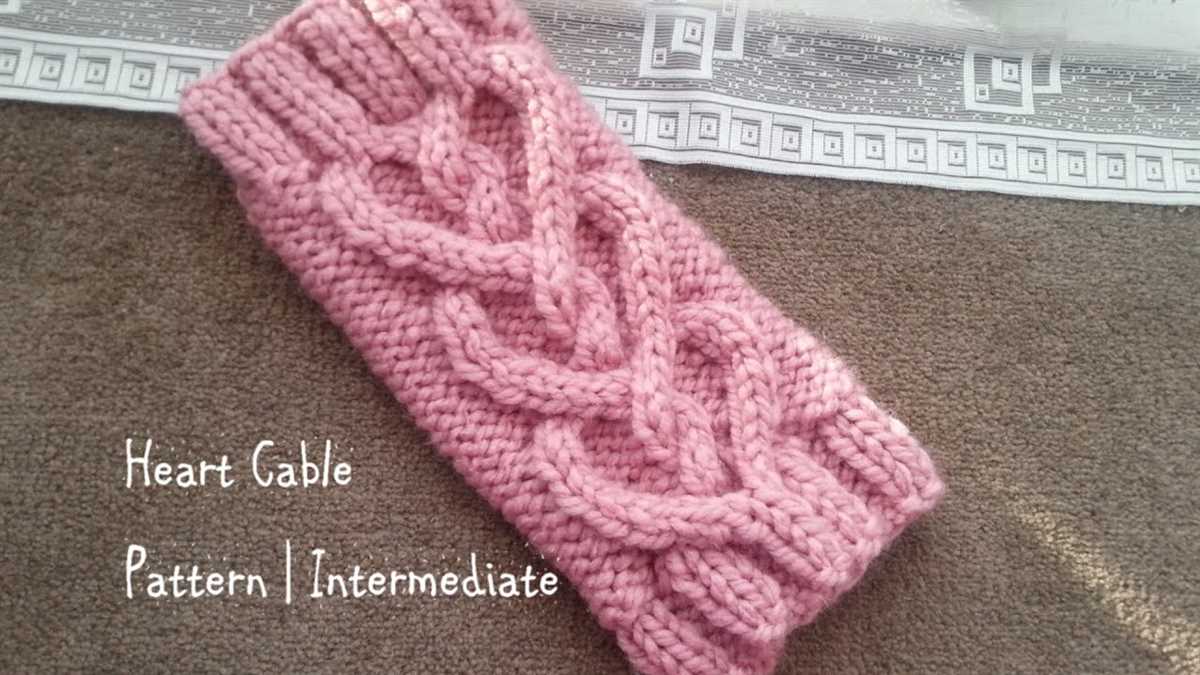
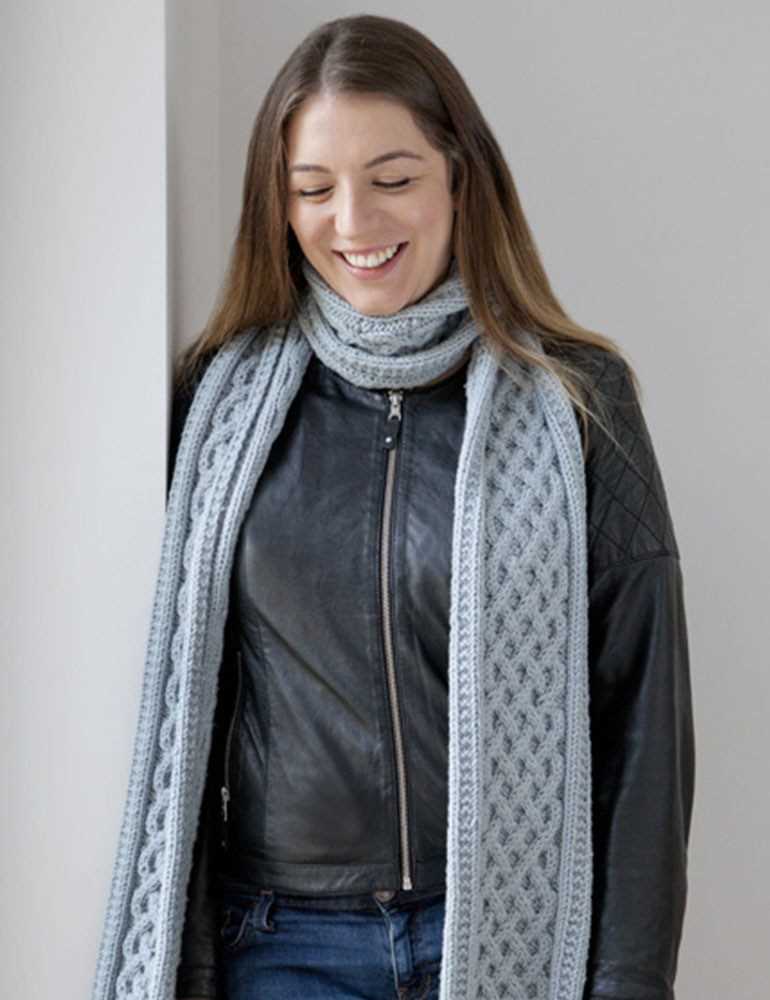
Exploring different cable stitch patterns
Cable stitch patterns are a popular choice among knitters for creating beautiful and intricate designs in their projects. These patterns involve twisting the stitches to create a textured and raised effect, resembling the twists and turns of a cable. By using different combinations of cables, knitters can create unique and eye-catching designs.
One common cable stitch pattern is the classic six-stitch cable. This pattern involves crossing three stitches over three other stitches, either to the left or to the right. This simple yet elegant cable pattern can be used in a variety of knitting projects, such as scarves, hats, and sweaters. With its timeless appeal, the six-stitch cable is a great choice for both beginners and experienced knitters.
Types of Cable Stitch Patterns
There are several types of cable stitch patterns that knitters can experiment with to create different looks. One popular type is the braided cable, which involves crossing two adjacent cables in opposite directions to create the appearance of intertwined braids. This intricate pattern adds a touch of elegance to any knitting project.
Another type of cable stitch pattern is the honeycomb cable. This pattern features interlocking rows of twisted stitches that resemble a honeycomb pattern. The honeycomb cable is a versatile choice that can be used to create both delicate and bold designs, depending on the yarn and needle size used. This pattern is often used in sweaters and blankets for a cozy and textured look.
- Classic six-stitch cable
- Braided cable
- Honeycomb cable
Adding personal touches to your cable scarf
Cable scarves are not only fashionable and cozy, but they also provide an opportunity to add your own personal touches and make them truly unique. Whether you are knitting a cable scarf for yourself or as a gift, here are some ideas to help you customize your creation.
1. Yarn choice
The yarn you choose can greatly affect the look and feel of your cable scarf. Consider using a yarn with an interesting texture or unique color. Mohair or alpaca yarns can add a luxurious touch, while variegated or self-striping yarns can create eye-catching patterns. Don’t be afraid to mix and match different yarns to create a one-of-a-kind piece.
2. Cable pattern variations
While cable scarves often follow a traditional cable pattern, you can experiment with different variations to make your scarf stand out. Try incorporating different types of cables, such as braided cables, horseshoe cables, or twisted cables. You can also play with the size and placement of the cables to create a unique design.
3. Embellishments
Add some extra flair to your cable scarf by incorporating embellishments. You can sew on buttons, attach a decorative brooch, or even knit a small pocket to hold small items like lip balm or hand warmers. These small details can make your scarf truly special.
4. Length and width
Customize the length and width of your cable scarf to suit your preferences. If you prefer a longer scarf, you can add more repeats of the cable pattern. Similarly, if you want a wider scarf, you can cast on more stitches. Don’t be afraid to make adjustments to the pattern to create a scarf that fits you perfectly.
5. Personalized tags or labels
Add a personal touch to your cable scarf by attaching a personalized tag or label. You can use fabric markers to write your name or initials, or even stitch in a small fabric label with your name or a special message. This can make your scarf feel extra special and also help to distinguish it from others.
By adding personal touches to your cable scarf, you can create a unique and individualized accessory that reflects your style and personality. Whether it’s through yarn choice, cable pattern variations, embellishments, adjusting the length and width, or adding personalized tags or labels, the possibilities are endless. Let your creativity shine and enjoy the process of customizing your cable scarf.
Tips for blocking and finishing your cable scarf
Blocking is an important step in finishing your cable scarf that can give it a polished and professional appearance. It involves gently reshaping and stretching the knitted fabric to even out any irregularities and improve the drape and texture of the scarf. Here are some tips to help you achieve the best results:
1. Prepare your materials
Before blocking your cable scarf, make sure you have all the necessary materials. This includes blocking mats or towels, rust-resistant pins, a spray bottle filled with water, and a tape measure. Set up a clean and flat area where you can pin the scarf to dry.
2. Soak your scarf
Fill a sink or basin with lukewarm water and add a small amount of wool wash or gentle detergent. Gently agitate the water to distribute the soap. Submerge your cable scarf in the water and let it soak for 10 to 15 minutes. Avoid rubbing or wringing the fabric, as this can cause stretching or damage to the fibers.
3. Rinse and squeeze
After the soaking period, drain the sink and refill it with clean lukewarm water. Rinse the scarf thoroughly to remove any soap residue. Gently squeeze out excess water by pressing the fabric against the side of the sink, avoiding twisting or wringing motions.
4. Block your scarf

Spread out your blocking mats or towels on a flat surface. Lay the damp cable scarf on top and gently stretch it to its desired dimensions. Use rust-resistant pins to secure the edges and corners, making sure to space them evenly. Smooth out any wrinkles or folds in the fabric as you go.
5. Allow to dry
Leave your cable scarf pinned and stretched on the blocking mats until it is completely dry. This can take anywhere from 24 to 48 hours, depending on the humidity level in your home. Avoid moving or disturbing the scarf while it’s drying to ensure the blocked shape sets properly.
Following these tips and taking the time to block your cable scarf will help enhance the cable pattern and create a professional finish. Enjoy wearing your cozy and stylish creation!
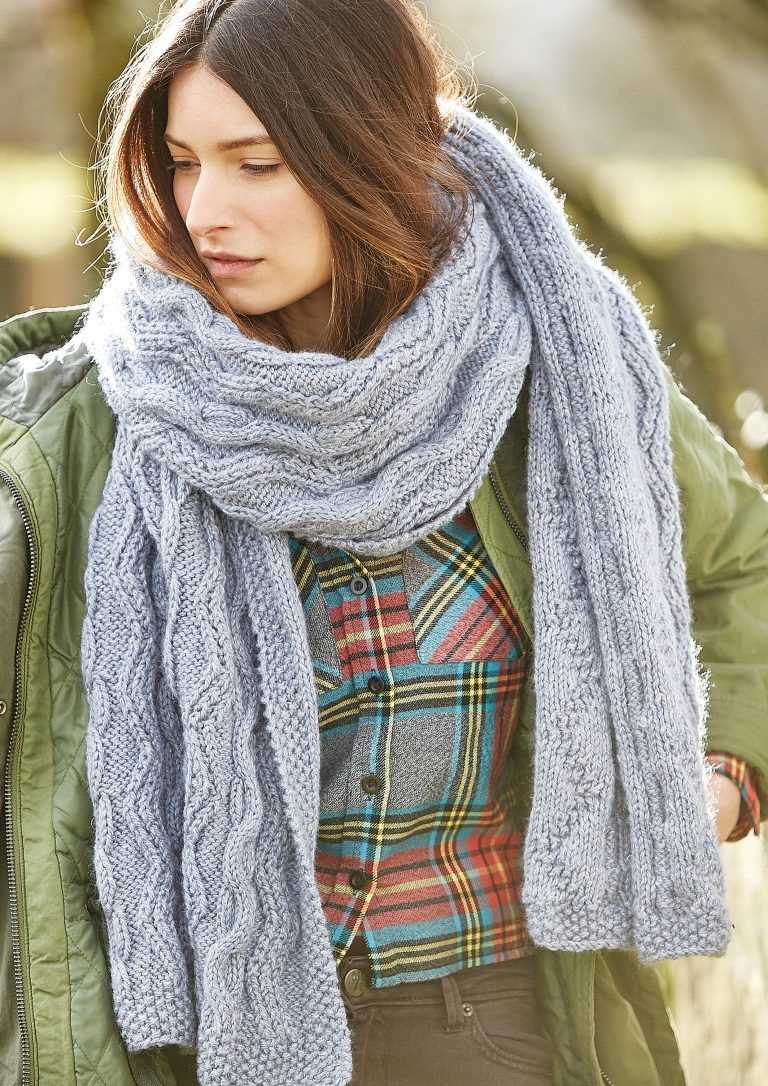
Matching your cable scarf with different outfits
When it comes to accessorizing, a cable scarf can be a versatile addition to your wardrobe. With its cozy and stylish design, it can easily complement various outfits and add a touch of sophistication. Whether you’re dressing up for a formal event or going for a casual look, here are some tips on how to match your cable scarf with different outfits:
Elevate your office attire
For a professional look, pair your cable scarf with a tailored blazer, a crisp white shirt, and slim-fit trousers. The cable texture will add visual interest to your outfit, while the neutral color of the scarf will create a cohesive and polished look. Complete the ensemble with a pair of ankle boots or loafers for a sophisticated finish.
Stay cozy and casual
On a chilly day, opt for a relaxed and casual outfit by pairing your cable scarf with a chunky knit sweater, jeans, and ankle boots. This combination will create a cozy and effortless look, perfect for running errands or meeting friends for a brunch. You can also add a beanie or a beret to keep your head warm and tie the whole look together.
Add a touch of elegance
For a more elegant and formal look, style your cable scarf with a long wool coat, a tailored dress, and knee-high boots. The cable design will add texture to your outfit, while the scarf’s length can be draped over your shoulders for a chic and sophisticated touch. Choose a contrasting color for your scarf to make it stand out and create a focal point.
Experiment with patterns and textures
If you’re feeling adventurous, don’t be afraid to mix and match different patterns and textures. Pair your cable scarf with a printed dress or a patterned coat to create a bold and eye-catching look. Just make sure to choose complementary colors and balance the overall outfit by keeping the rest of your accessories minimal and simple.
Remember, the key to styling your cable scarf is to experiment and have fun with it. Whether you’re going for a minimalist or a statement look, your cable scarf can be a versatile piece that adds warmth and style to any outfit.
Other accessories you can knit using cable stitch
Once you have mastered the cable stitch, there are numerous accessories you can create using this beautiful and intricate technique. From hats to gloves, here are some ideas to inspire your next knitting project:
- Hats: Cable stitch can add a touch of elegance and texture to any hat design. Whether you prefer a simple beanie or a more elaborate slouchy hat, incorporating cable stitches can elevate your knitted hat to a whole new level.
- Gloves: Cable stitch gloves can be both stylish and functional. Knitting gloves with cables not only add visual interest but also provide extra warmth and durability. You can choose to make full-fingered gloves or fingerless gloves, depending on your preference.
- Headbands: Cable stitch headbands are a fashionable and practical accessory. They can keep your ears warm during chilly weather while adding a stylish touch to any outfit. You can experiment with different cable patterns to create a unique and personalized headband.
- Scarves: Cable stitch scarves are classic and timeless. The intricate cable patterns can create a stunning focal point and add dimension to an otherwise basic scarf. Whether you opt for a chunky or lightweight yarn, a cable stitch scarf is sure to become a staple in your winter wardrobe.
- Leg warmers: Cable stitch leg warmers can be a cozy and stylish addition to your winter wardrobe. These knitted accessories can be worn over leggings or tights to keep your legs warm during cold weather. The cable stitches can create a textured and visually appealing design.
These are just a few examples of the many accessories you can create using cable stitch. With its versatility and intricate detailing, the cable stitch can take your knitting projects to the next level and help you create beautifully textured accessories.
Where to find more cable scarf knitting patterns
If you’re looking to expand your collection of cable scarf knitting patterns, there are several great resources you can turn to. Whether you’re a beginner or an experienced knitter, these sources offer a wide variety of patterns to suit your skill level and style preferences.
1. Online knitting communities: Websites and forums dedicated to knitting often have sections or groups specifically for sharing and discussing knitting patterns. These communities are a great place to find cable scarf knitting patterns that have been tried and tested by fellow knitters. You can also seek advice or assistance if you run into any difficulties while working on a pattern.
2. Knitting blogs: Many knitting enthusiasts share their favorite patterns and designs on their personal blogs. You can find a wealth of cable scarf knitting patterns by exploring different knitting blogs. One advantage of using blogs is that the patterns are often accompanied by detailed instructions and photos, making it easier for you to follow along.
3. Knitting pattern websites: There are numerous websites that specialize in hosting and selling knitting patterns. Some of these websites offer a selection of cable scarf knitting patterns, both free and for purchase. These websites often allow you to filter patterns by difficulty level, design style, and other criteria, making it easier for you to find exactly what you’re looking for.
4. Knitting pattern books: If you prefer a physical copy of knitting patterns, you can explore knitting pattern books. Many knitting pattern books include a section dedicated to cable scarf designs. These books often offer a wide range of patterns, from simple and classic designs to more intricate and unique styles. You can find knitting pattern books at local bookstores, libraries, or online retailers.
5. Knitting workshops or classes: Attending knitting workshops or classes is not only a great way to improve your knitting skills but also an opportunity to learn new patterns. In these workshops, instructors often share their own patterns and techniques, including cable scarf designs. You can also meet other knitters and exchange ideas and patterns with them.
No matter where you choose to search for cable scarf knitting patterns, make sure to take your time and explore different options. Each source offers its own unique patterns and styles, so you’re sure to find something that suits your taste and knitting abilities.
Share your cable scarf creations with the knitting community
Now that you have mastered the cable scarf knitting pattern, it’s time to show off your beautiful creations to the knitting community! Sharing your work can be a great way to inspire others, get feedback, and connect with fellow knitters who share your passion.
Here are a few ways you can showcase your cable scarf:
- Online communities and forums: Join knitting forums or social media groups dedicated to knitting. Share pictures of your finished cable scarf and describe your experience knitting it. You can also ask for advice or share any modifications you made to the pattern.
- Ravelry: Ravelry is a popular online platform for knitters and crocheters. Create a project page for your cable scarf, including details about the yarn you used, the pattern, and any alterations you made. Upload photos and share your thoughts on the pattern.
- Local knitting groups: Check if there are any knitting groups in your area. Attend a meeting and show off your cable scarf. You can exchange tips and ideas with other knitters, and perhaps even collaborate on future projects.
- Gifts for loved ones: Knitting a cable scarf for a friend or family member is not only a heartfelt gift but also an opportunity to showcase your skills. When they receive the scarf, you can also point them to the pattern so they can appreciate the effort and craftsmanship that went into creating their unique accessory.
- Your own knitting blog or website: If you have a knitting blog or personal website, create a dedicated post showcasing your cable scarf. Include detailed photos, information about the pattern, and your thoughts on the knitting process. This can help inspire and guide other knitters who come across your blog or website.
Remember, sharing your cable scarf creations not only brings joy to the knitting community but also allows you to connect with other like-minded individuals who appreciate the art of knitting. So don’t be shy and show the world the stunning cable scarves you’ve created!