
Christening blankets are a cherished tradition in many families. These beautifully crafted blankets are often passed down through generations, becoming treasured heirlooms. If you want to create a special and unique christening blanket for a loved one, why not try your hand at knitting?
Knitting a christening blanket can be a rewarding project that allows you to create something truly special and personal. With a vast array of patterns available, you can choose a design that suits your style and the occasion. Whether you prefer a classic lace pattern or a more modern and simple design, there is a knitting pattern out there for you.
When searching for a christening blanket knitting pattern, consider the level of skill required. Some patterns may be more suitable for experienced knitters, while others are beginner-friendly. It’s important to choose a pattern that matches your skill level, so you can enjoy the process and produce a beautiful blanket.
In this article, we will explore different christening blanket knitting patterns, from delicate lace designs to cozy cable knits. We will also provide tips and tricks to help you navigate the knitting process and create a masterpiece for your loved one’s special day. So grab your knitting needles and let’s get started!
How to Knit a Beautiful Christening Blanket
Christening blankets are a special and cherished item, often passed down through generations. Hand-knitting a christening blanket adds an extra touch of love and care to this timeless tradition. Whether you are making it for your own child or as a gift, here is a step-by-step guide on how to knit a beautiful christening blanket.
Choose the Perfect Yarn: Begin by selecting a high-quality yarn that is soft, delicate, and suitable for babies. Opt for natural fibers like cotton or bamboo, ensuring that they are hypoallergenic and gentle on a baby’s sensitive skin. Consider the color and texture of the yarn, keeping in mind the theme, style, and personal preferences.
Select a Pattern: Next, choose a christening blanket knitting pattern that reflects the desired aesthetic and skill level. There are various patterns available, ranging from simple to intricate lace designs. It’s essential to select a pattern that matches your knitting abilities and the time you can dedicate to the project.
Gauge and Swatch: Before starting the blanket, knit a swatch using the selected yarn and pattern to ensure that your gauge matches the pattern’s requirements. This step is crucial for achieving the correct size and stitch count. Adjust the needle size if needed to match the gauge stated in the pattern.
Start Knitting: Once you have chosen the yarn, pattern, and determined the gauge, it’s time to start knitting the christening blanket. Follow the pattern instructions carefully, taking note of any stitch variations, repeat sequences, and border details. Use stitch markers to keep track of pattern repeats and to prevent mistakes.
Add Personal Touches: Consider adding personal touches to make the christening blanket even more special. You can incorporate the baby’s initials or date of birth with intarsia or duplicate stitch. Adding delicate lace edging or a picot edging can also enhance the overall beauty of the blanket.
Blocking and Finishing: Once you have completed knitting the blanket, block it to give it a polished and professional finish. Wet-blocking or steam-blocking can help even out the stitches, soften the fabric, and ensure the blanket maintains its shape. Finally, weave in any loose ends and embellish the finished blanket with ribbons, bows, or other decorative elements as desired.
Care Instructions: Make sure to include care instructions when presenting the christening blanket. Mention whether it can be machine washed or needs to be hand washed, as well as any specific precautions to take while washing or storing the blanket. This will help ensure that the blanket stays beautiful and intact for years to come.
Choosing the Right Yarn for Your Christening Blanket
When it comes to knitting a christening blanket, selecting the right yarn is crucial. Your choice of yarn will not only determine the overall look and feel of the blanket but also its durability and practicality. There are several factors to consider when choosing the yarn for your project, including the fiber, weight, and texture.
Fiber: One of the first decisions to make is the type of fiber you want for your christening blanket. The most common options are wool, cotton, and acrylic. Wool is known for its warmth and softness, making it a popular choice for blankets. Cotton is cool and breathable, perfect for warmer climates or sensitive skin. Acrylic is a synthetic fiber that is often budget-friendly and easy to care for.
Weight: The weight of the yarn determines how thick or thin the blanket will be. For a christening blanket, you may want to choose a lightweight yarn that is soft and delicate, creating a gentle and airy feel for the baby. Lace or fingering weight yarns are ideal for this purpose.
Texture: The texture of the yarn can add visual interest and create a unique look for your christening blanket. You can choose from smooth and sleek yarns or opt for ones with more texture, such as boucle or mohair. Consider the design and pattern of your blanket when selecting the texture of the yarn.
Additionally, it’s important to consider practicality when choosing the yarn for your christening blanket. Make sure the yarn is washable and easy to care for, as the blanket may need frequent cleaning. Take into account the preferences of the recipient and the climate they live in. By carefully considering these factors, you can select the perfect yarn for your christening blanket that will not only look beautiful but also provide comfort and warmth for years to come.
Essential Knitting Supplies for Your Christening Blanket Project

When embarking on a Christening blanket knitting project, it is important to gather all the essential knitting supplies beforehand. Having the right tools and materials will not only make your knitting experience more enjoyable, but it will also ensure that your final product turns out beautifully and of high quality.
Here are some essential knitting supplies you will need:
- Knitting Needles: Choose the appropriate size of knitting needles for your Christening blanket project. This will depend on the yarn weight you are using and the desired final result. Make sure to have a pair of straight or circular needles that are comfortable for you to work with.
- Yarn: Select a high-quality yarn suitable for a Christening blanket. Opt for soft, delicate yarn made of natural fibers, such as cotton or merino wool. Consider the color and texture of the yarn to create a beautiful and timeless blanket.
- Tapestry Needle: A tapestry needle with a large eye is essential for weaving in loose ends and finishing touches on your blanket. Look for a needle that is sturdy and easy to handle.
- Stitch Markers: Stitch markers are useful for marking specific stitches or sections in your knitting pattern. They can help keep track of pattern repeats or highlight important points in your project.
- Scissors: A good pair of sharp scissors is necessary for cutting yarn and trimming any excess. Make sure they are easily accessible while you knit.
- Measuring Tape: A measuring tape is crucial for checking your gauge and ensuring the correct size of your blanket. It will also come in handy when measuring specific sections or adding decorative elements.
- Pattern or Design: Have a clear pattern or design in mind for your Christening blanket. This will guide your knitting process and ensure a cohesive and beautiful final product.
By gathering these essential knitting supplies, you will be well-prepared to start your Christening blanket project. With dedication, attention to detail, and the right tools, you can create a cherished keepsake that will be treasured for years to come.
Understanding Knitting Patterns: A Guide for Beginners
Knitting is a popular craft that allows you to create beautiful and cozy items with just a few needles and some yarn. However, for beginners, understanding knitting patterns can be daunting. These patterns are like a roadmap that guides you through the process of creating a specific item, such as a scarf or a sweater. In this guide, we will break down the different elements of knitting patterns and provide tips for deciphering them.
1. Reading the instructions: When you first look at a knitting pattern, it may seem like a foreign language. However, with a little practice, you’ll become familiar with the abbreviations and symbols commonly used in knitting patterns. Take your time to read through the instructions and make sure you understand each step before you begin.
2. Understanding the stitch patterns: Knitting patterns often include different stitch patterns, such as knit, purl, and various combinations. These stitch patterns create the texture and design of the finished item. The pattern will specify how many stitches to knit and purl in each row, as well as any additional instructions, such as increases or decreases.
3. Paying attention to the gauge: Gauge is an important factor in knitting patterns, as it determines the size and fit of the finished item. The pattern will provide a gauge measurement, which is the number of stitches and rows that should be achieved over a certain measurement, usually 4 inches. It’s essential to match the gauge by using the recommended yarn and needle size, as it can significantly affect the final result.
4. Following the pattern repeats: Many knitting patterns have a repeat section, where a specific set of stitches is repeated multiple times across a row or rows. Pay close attention to these repeat sections, as they can impact the overall design and symmetry of the item. Markers can be used to help keep track of these repeats.
5. Making modifications: Once you become comfortable with reading and understanding knitting patterns, you can start getting creative and making modifications. You may want to change the colors, add embellishments, or adjust the size of the item. Just remember to always check how these modifications affect the stitch counts and overall construction to ensure a successful outcome.
Knitting patterns may initially seem overwhelming, but with practice and patience, you can start creating beautiful knitted items. Take the time to familiarize yourself with the different elements of knitting patterns and don’t be afraid to ask for help or consult online resources. With each new project, you’ll become more confident in your knitting skills and enjoy the process of bringing your creations to life.
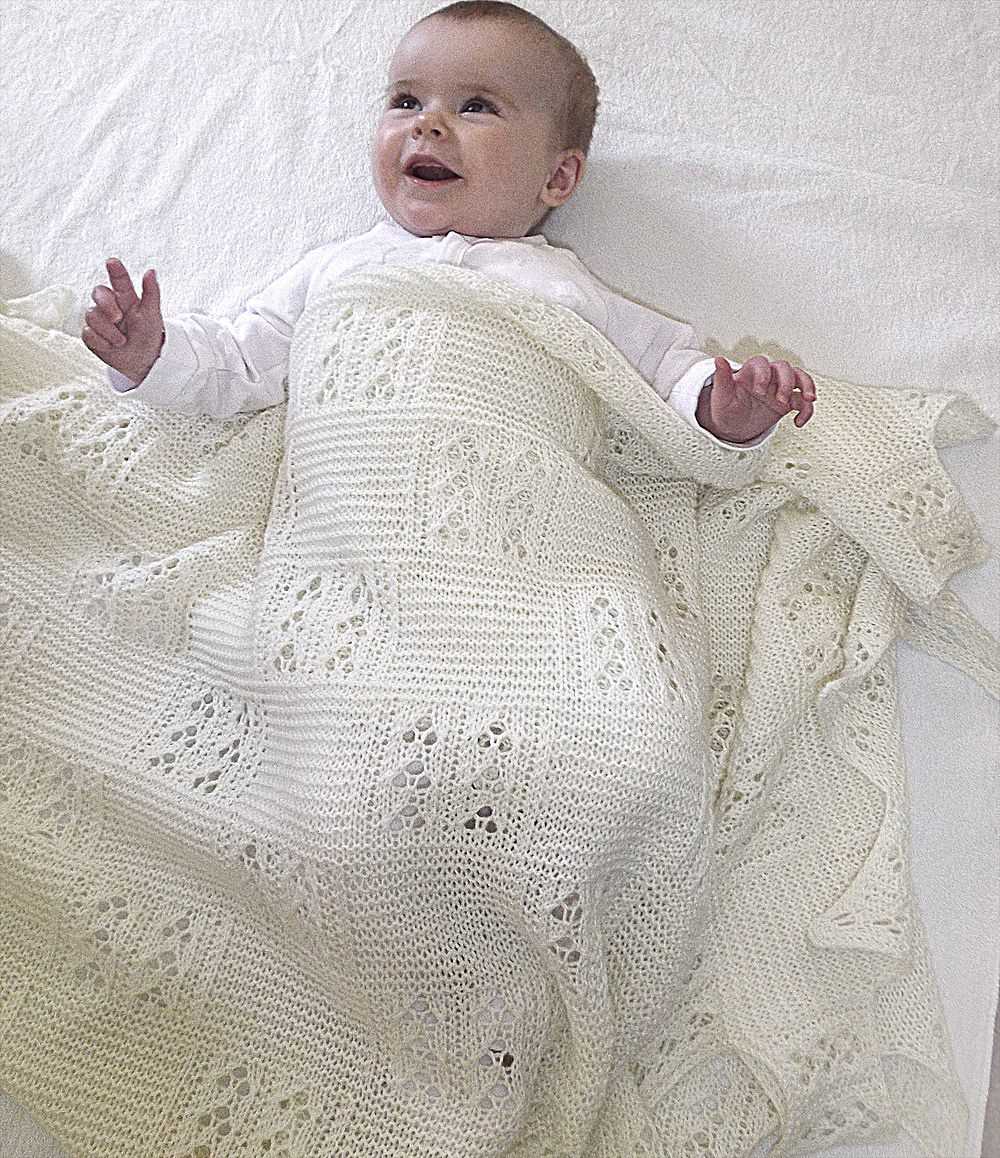
Step-by-Step Instructions for Knitting a Christening Blanket
Knitting your own Christening blanket is a special way to create a personalized and meaningful gift for a loved one. Whether you are an experienced knitter or just starting out, this step-by-step guide will help you create a beautiful and heirloom-quality blanket.
Materials Needed:
- Soft and lightweight yarn
- Knitting needles in the appropriate size for your chosen yarn
- Tapestry needle for weaving in ends
- Scissors
1. Choose your Pattern

Begin by selecting a Christening blanket knitting pattern that appeals to you. Look for a pattern that includes instructions for the desired size of blanket and any special stitch patterns or details you may want to incorporate. Make sure to check the gauge of the pattern to ensure your finished blanket will be the correct size.
2. Gather your Materials
Once you have chosen your pattern, gather all the materials you will need. Choose a soft and lightweight yarn in a color that suits the occasion. Make sure you have the correct size of knitting needles for your chosen yarn. You may also want to gather any additional embellishments or accessories you plan to include in your blanket.
3. Cast On

Following the instructions in your pattern, cast on the required number of stitches onto your knitting needles. Make sure your cast on edge is not too tight or too loose, as this can affect the overall drape and appearance of your finished blanket.
4. Knit the Body
Continue knitting according to the pattern instructions to create the main body of the blanket. This may involve working a specific stitch pattern or simply knitting in a basic stockinette stitch. Take your time and enjoy the meditative process of knitting as you create each row.
5. Add Special Details
If desired, you can choose to add special details to your Christening blanket such as lace motifs, colorwork, or decorative edging. Follow the pattern instructions carefully and take your time to ensure each detail is knitted accurately.
6. Finish off
Once you have completed the desired length of your blanket, carefully bind off the stitches following the pattern instructions. Use a tapestry needle to weave in any loose ends and trim them neatly. Give your blanket a gentle block to ensure the stitches lay flat and evenly.
By following these step-by-step instructions, you can knit a beautiful and personalized Christening blanket that will be treasured for years to come. Remember to take your time, enjoy the process, and infuse your love and care into every stitch.
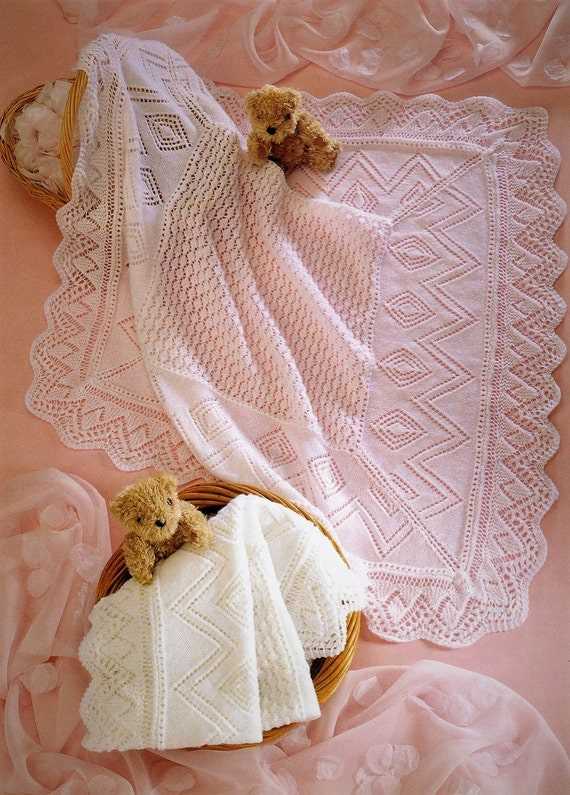
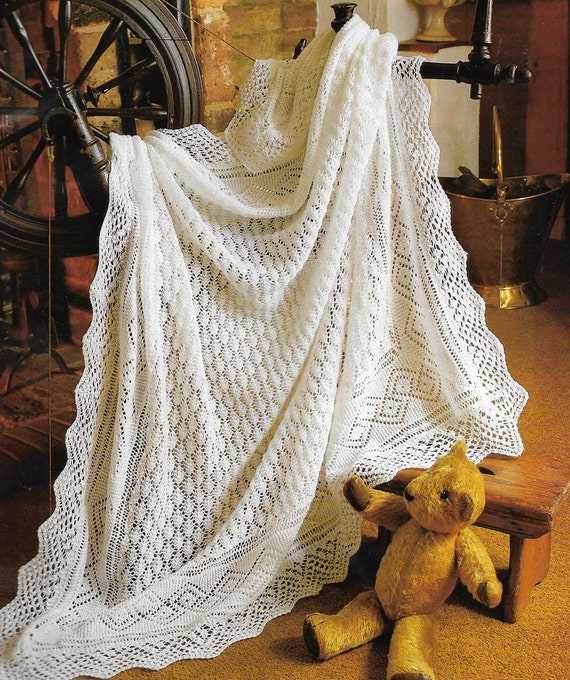
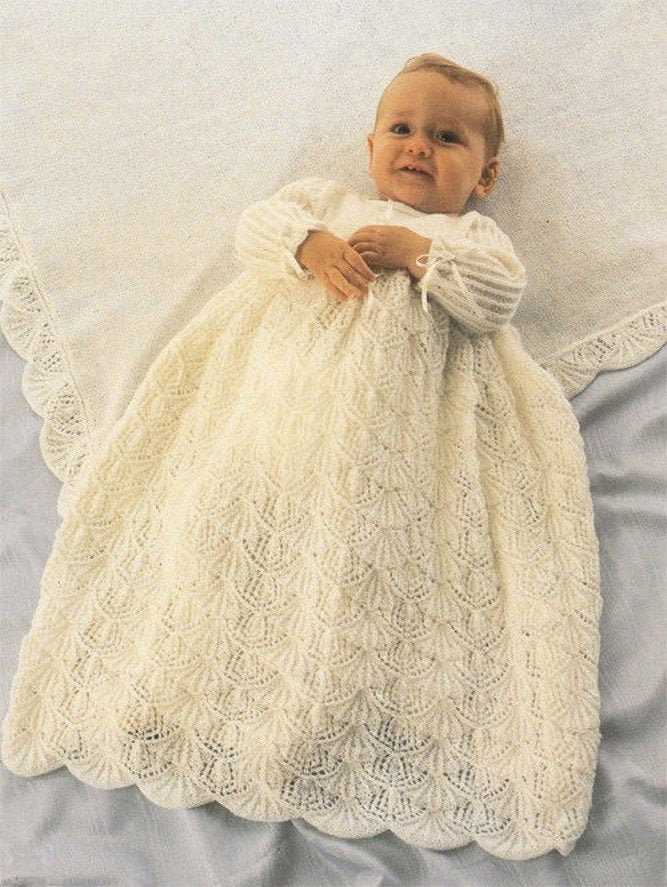
Tips and Tricks for Knitting a Christening Blanket with Lace Patterns
Knitting a christening blanket with lace patterns can be a beautiful and intricate project. Here are some tips and tricks to help you create a stunning and heirloom-quality blanket:
1. Choose the Right Yarn
When knitting a christening blanket, it’s important to choose a yarn that is soft, delicate, and appropriate for a special occasion. Opt for a baby-friendly yarn such as cotton or a soft blend of natural fibers. Consider the weight and drape of the yarn to ensure that the lace patterns will be showcased beautifully.
2. Practice Your Lace Stitches
Lace patterns can be challenging, especially for beginners. Before starting your christening blanket, take the time to practice the lace stitches on a smaller swatch. This will help you become familiar with the stitch patterns and gain confidence in your knitting skills.
3. Use Lifelines

Lace knitting can be unforgiving when it comes to mistakes. To prevent having to rip out rows and potentially lose hours of work, use lifelines. A lifeline is a piece of contrasting yarn threaded through a row of stitches. If you make a mistake, you can easily rip back to the lifeline and start again without fear of losing your progress.
4. Block Your Blanket
A key step in finishing your christening blanket is blocking. Blocking involves wetting the knitted piece and shaping it to the desired dimensions. This process helps to even out stitches, open up lace patterns, and give the blanket a polished look. Follow the yarn manufacturer’s recommendations for blocking the specific yarn you are using.
5. Embellish with Edgings

To add a special touch to your christening blanket, consider adding a delicate and intricate edging. There are many lace edging patterns available that can complement the main lace pattern of the blanket. Whether it’s a simple picot edge or a more elaborate scalloped design, an edging can elevate the overall look of your blanket.
With these tips and tricks in mind, you can create a stunning christening blanket that will be cherished and passed down through generations.
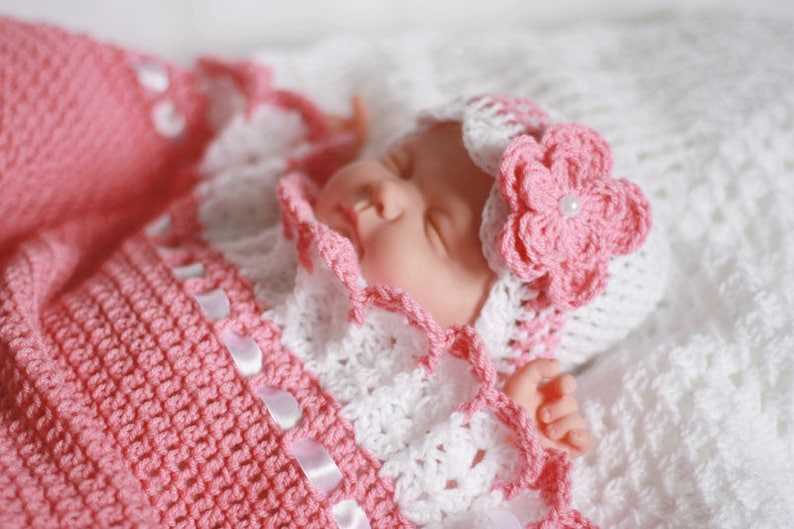
Adding Personal Touches: Embellishments for Your Christening Blanket

When knitting a christening blanket, you have the opportunity to add personal touches and embellishments that make it truly special. These additional details can lend an extra layer of meaning and create a beautiful heirloom that will be treasured for years to come.
A popular way to personalize a christening blanket is by incorporating the baby’s initials or name into the design. This can be done through intarsia or duplicate stitch, where the letters are knitted or embroidered onto the fabric. Using a contrasting color yarn or thread can make the initials or name stand out and add a touch of elegance to the blanket.
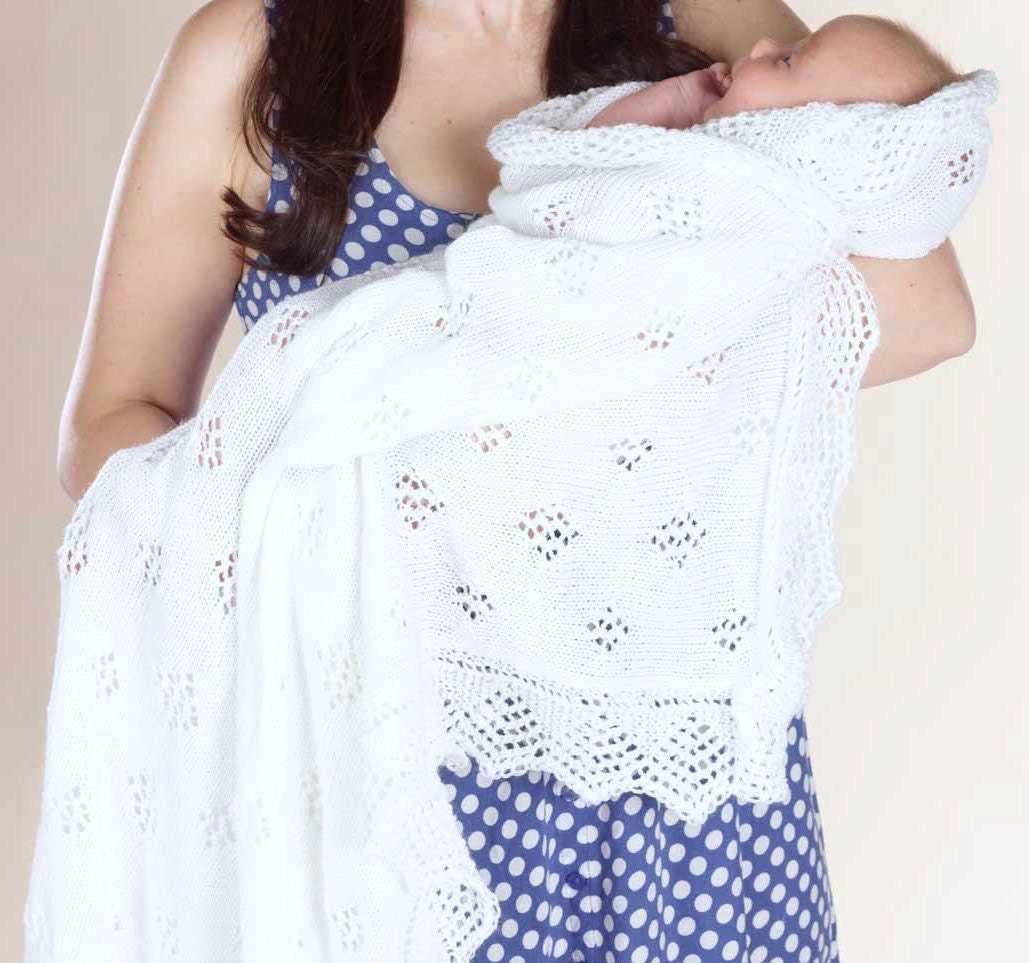
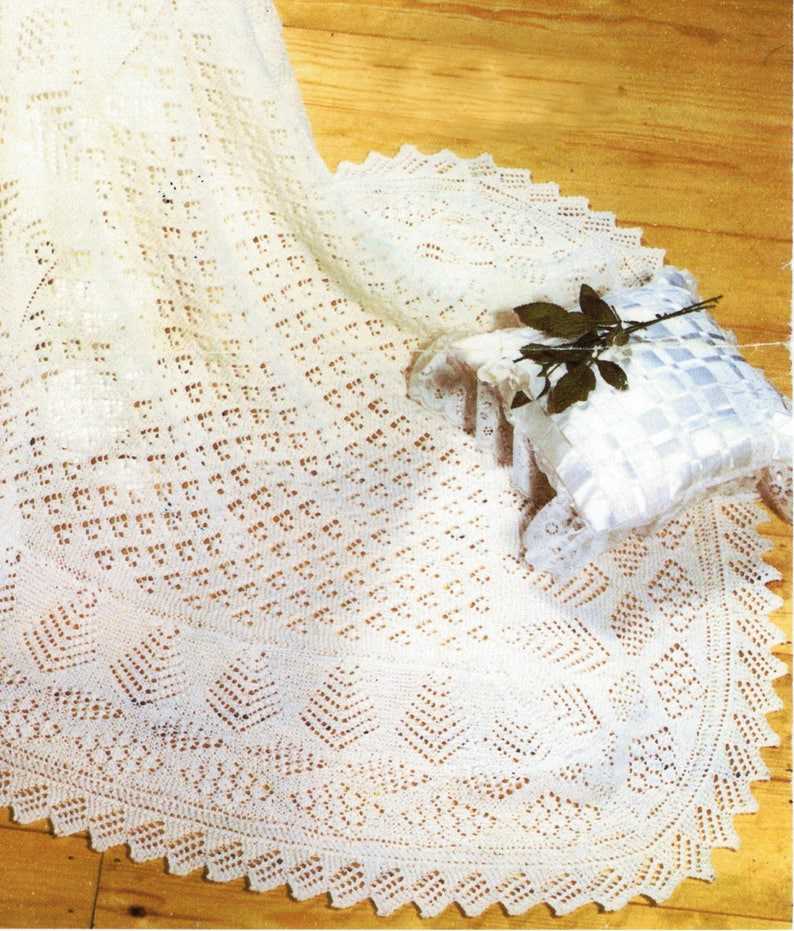
Another lovely embellishment for a christening blanket is lace. Knitting lace patterns can create a delicate and intricate look that is perfect for such a special occasion. You can choose from a variety of lace stitch patterns, such as feather and fan or diamond lace, to add a touch of elegance to the blanket. Lace can be used to create borders, panels, or even an all-over lace design, depending on your preference.
If you’re looking to add a touch of sparkle to the blanket, consider incorporating beads or sequins into the design. These embellishments can be sewn onto the fabric using a thread that matches the color of the beads or sequins. Beads and sequins can be used to create intricate patterns or simple accents, adding a touch of glamour to the blanket.
Adding ribbon or satin trim can give your christening blanket a finished and polished look. You can sew the ribbon or trim along the edges of the blanket or use it to create bows or other decorative elements. Satin trim can also be used as an accent on the border of the blanket, adding a touch of luxury.
Remember, when adding embellishments to your christening blanket, it’s important to consider the safety and comfort of the baby. Make sure any beads or sequins are securely attached and won’t easily come off, and be mindful of any choking hazards. With these considerations in mind, you can create a beautifully embellished christening blanket that will be cherished for generations.
Blocking and Finishing Your Christening Blanket
Once you have completed knitting your Christening blanket, the next step is to block and finish it. Blocking is the process of shaping and stretching the knitted fabric to achieve the desired dimensions and appearance. It helps to even out the stitches, open up lace patterns, and give the blanket a polished look.
To block your Christening blanket, you will need a flat surface, such as a blocking board or a clean towel on a flat table. Lay the blanket on the surface and gently smooth out any wrinkles or creases. Pin the edges of the blanket to hold it in place and maintain the desired shape.
Fill a spray bottle with lukewarm water and lightly mist the blanket. Avoid saturating the fabric; a light misting is sufficient. Allow the blanket to dry completely, either by air drying or by using a fan to speed up the process.
Once the blanket is dry, carefully remove the pins and admire your finished work. The blocking process will have created a professional-looking finish with smooth stitches and a flat appearance.
If desired, you can add a decorative border or edging to the blanket to further enhance its beauty. You can choose to crochet a border or use a special stitch pattern to create a unique and personalized touch. This is also an opportunity to add any additional embellishments, such as ribbons or small decorative buttons.
When your Christening blanket is complete, it is ready to be used or gifted. The lovingly crafted blanket will provide warmth and comfort, while also serving as a cherished keepsake for years to come.
Caring for Your Hand-Knit Christening Blanket
Hand-knit christening blankets are treasured heirlooms that require special care to ensure their longevity and beauty. Here are some tips for caring for your hand-knit christening blanket:
Washing
It is important to wash your christening blanket with care to avoid damaging the delicate fibers. Fill a sink or basin with lukewarm water and add a mild detergent specifically designed for delicate fabrics. Gently submerge the blanket in the water and let it soak for a few minutes. Avoid twisting or wringing the blanket, as this can cause stretching or damage. Rinse the blanket thoroughly with clean water and gently press out excess water.
Drying
After washing, it is best to lay the christening blanket flat on a clean towel to dry. Avoid hanging the blanket, as this can cause it to stretch or lose its shape. You can gently reshape the blanket by patting it into the desired shape with your hands. Allow the blanket to air dry in a well-ventilated area, away from direct sunlight. Avoid using a dryer or exposing the blanket to heat sources, as this can damage the delicate fibers.
Storage

When storing your hand-knit christening blanket, it is important to protect it from moths and other pests. Before storing, ensure that the blanket is completely dry to prevent the growth of mildew or mold. Fold the blanket carefully, avoiding any sharp creases that could weaken the fibers. Place the folded blanket in a clean, dry storage container, such as a cotton or linen bag. You can also add lavender sachets or cedar chips to help deter pests.
By following these simple care instructions, you can ensure that your hand-knit christening blanket remains beautiful and cherished for generations to come.
Alternative Christening Blanket Designs to Inspire You

If you’re looking for a unique and memorable Christening blanket for your little one, why not consider these alternative designs? They offer a fresh twist on the traditional patterns and are sure to be cherished for years to come.
1. Lace and Ribbon
Add an elegant touch to your Christening blanket by incorporating delicate lace and satin ribbons. Choose a light and airy lace pattern for the main body of the blanket, and attach satin ribbons along the edges for a beautiful finishing touch. This design creates a sophisticated and timeless look that will surely be treasured for generations.
2. Embroidered Heirloom
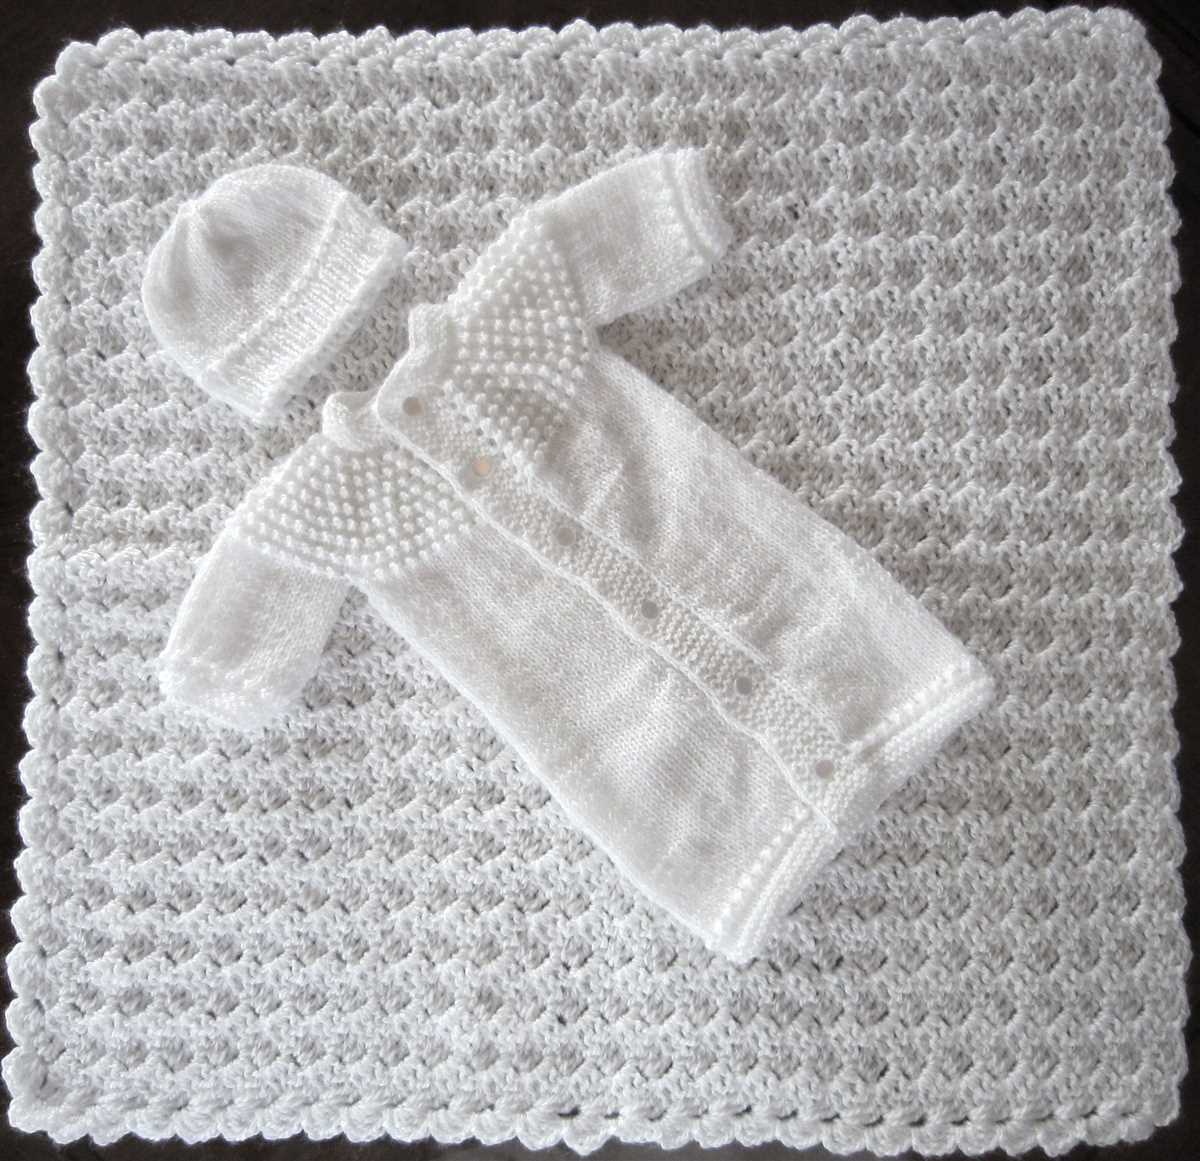
Create a one-of-a-kind Christening blanket by adding intricate embroidery. Choose a simple knit pattern for the blanket and then personalize it by embroidering your child’s name, initials, or a special symbol like a cross or dove. This personalized touch will make the blanket a cherished heirloom that can be passed down through the family.
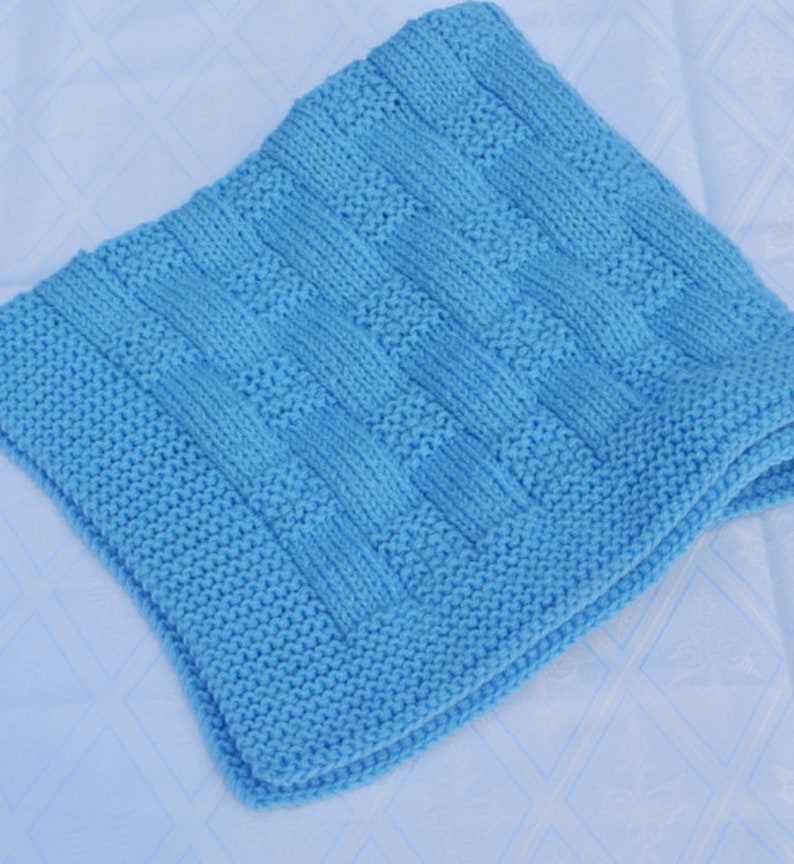
3. Cable and Seed Stitch Combination
If you’re looking for a more textured and cozy design, consider combining cable and seed stitches. Knit a cable pattern in the center of the blanket and surround it with a border of seed stitches. This combination creates a visually interesting design and adds extra warmth to the blanket, making it perfect for colder climates or winter Christenings.
4. Colorblock Chevron
Add a modern twist to the traditional Christening blanket by incorporating a colorblock chevron pattern. Choose two or three complementary colors and alternate them in a chevron pattern throughout the blanket. This design adds a fun and contemporary look to the blanket while still maintaining a sense of elegance and tradition.
5. Vintage-Inspired

If you love the charm of vintage styles, consider knitting a Christening blanket with a vintage-inspired design. Look for patterns that feature lace, eyelet stitches, and delicate picot edges. You can also choose a vintage color palette such as pastel shades or soft neutrals to complete the nostalgic look.
No matter which alternative design you choose, knitting a Christening blanket is a heartfelt and special project that will be treasured for years to come. So take your time, choose a design that speaks to you, and enjoy the process of creating a beautiful blanket for your little one’s special day.
Showcasing Your Finished Christening Blanket: Photography Tips
After spending hours knitting your beautiful christening blanket, it’s time to showcase your hard work and capture its elegance in photographs. A well-taken photo of your finished blanket can not only preserve the memories but also serve as inspiration for other knitting enthusiasts. Follow these simple photography tips to make your christening blanket shine in all its glory.
1. Find the Perfect Background
The background of your photo can greatly influence the overall look and feel of your christening blanket. Opt for a simple and clean background, such as a solid-colored wall or a neutral tabletop. Avoid busy patterns or cluttered backgrounds that might distract from the main focus.
2. Utilize Natural Lighting
Natural lighting is the best option for capturing the true colors and textures of your christening blanket. Choose a well-lit location near a window or go outdoors on a bright day. Avoid direct sunlight, as it can create harsh shadows. If necessary, use a white sheet or a light diffuser to soften the light.
3. Experiment with Angles
Instead of simply photographing your blanket from above, try different angles to find the most flattering perspective. Take close-up shots to capture intricate details and textures. You can also try a top-down flat lay or hang the blanket to create a more dynamic composition.
4. Incorporate Props
Add some props to enhance the overall aesthetic of your photo. Consider including baby shoes, a christening gown, or even a small bouquet of flowers to create a sense of occasion and context. However, ensure that the props do not overshadow the main focus, which is your beautiful christening blanket.
5. Edit and Enhance
Once you’ve taken your photos, it’s time to edit and enhance them to bring out the best in your christening blanket. Use photo editing software or apps to adjust the brightness, contrast, and color saturation. Crop the image if needed, and consider adding a subtle filter or vignette to enhance the overall mood.
Conclusion
By following these photography tips, you can capture stunning images of your christening blanket that truly showcase your knitting skills. Remember to experiment, have fun, and let your creativity shine through. Whether you share your photos on social media, create a scrapbook, or simply keep them for yourself, these images will be a lasting testament to your dedication and talent.