
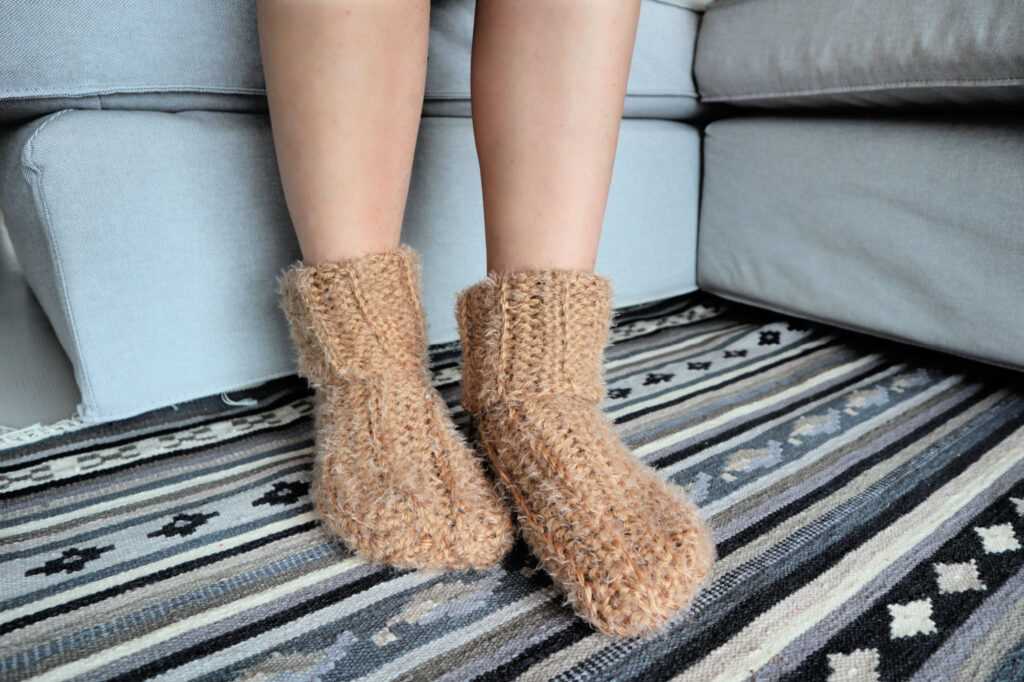
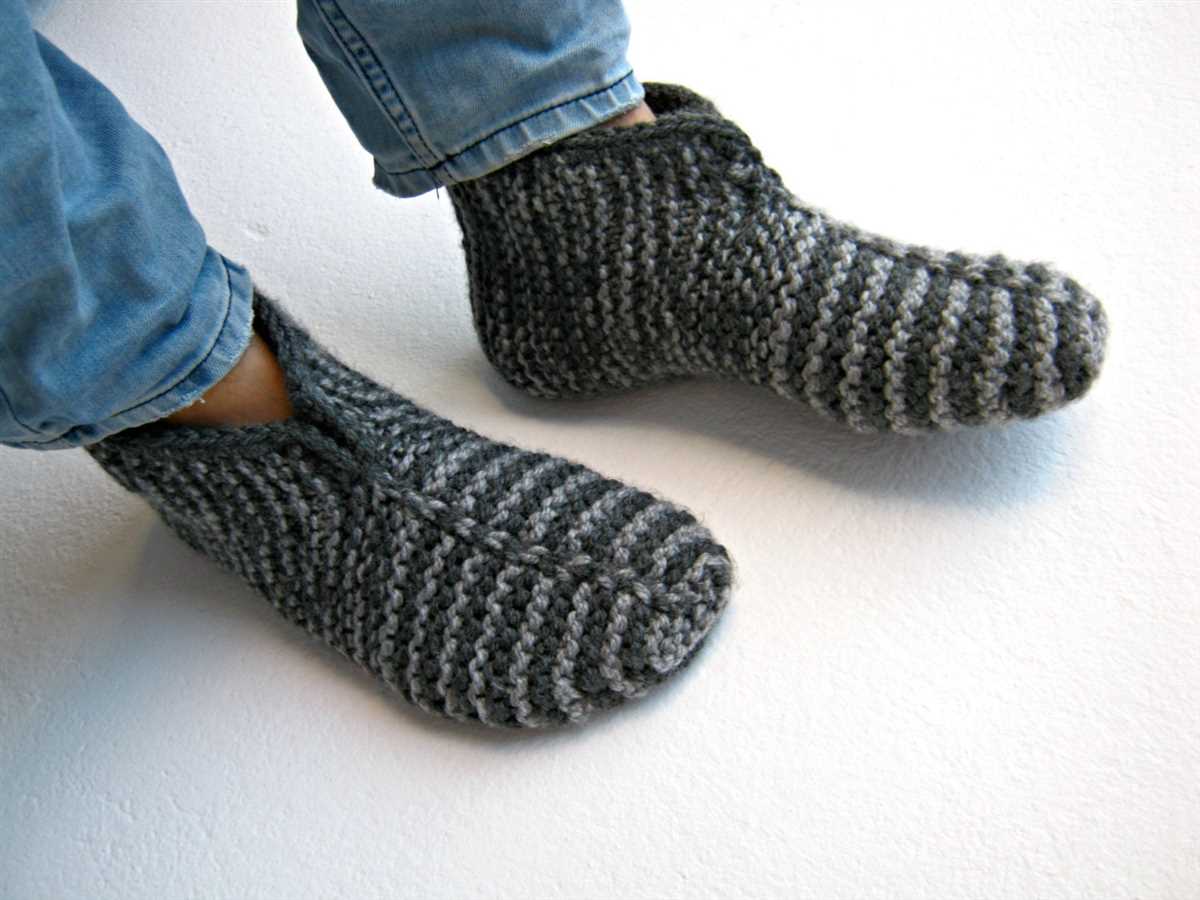
Nothing beats the feeling of slipping your feet into a cozy pair of homemade chunky slipper socks, especially on a cold winter’s day. With their thick yarn and snug fit, these socks are perfect for keeping your feet warm and toasty. And best of all, you can knit them yourself with this easy-to-follow pattern.
Designed for those who are familiar with basic knitting techniques, this chunky slipper sock pattern offers a fun and rewarding project for knitters of all skill levels. The pattern uses chunky weight yarn and large needles, making it a quick and satisfying knit. You’ll love watching your new pair of slipper socks take shape as you work through the pattern.
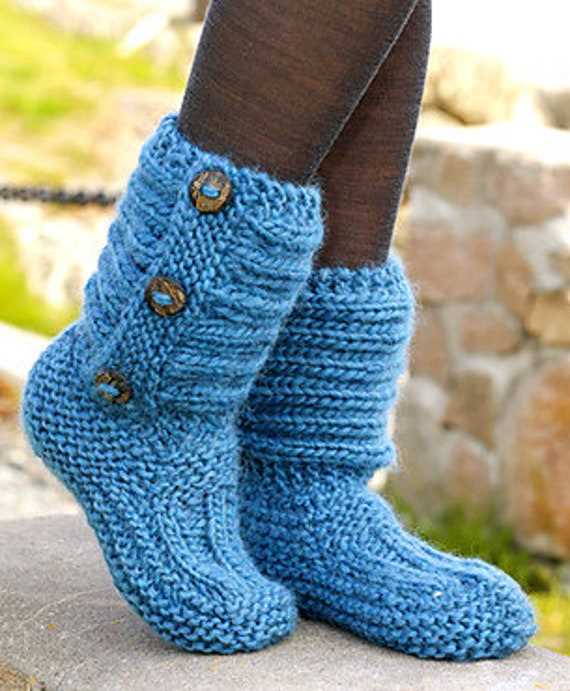
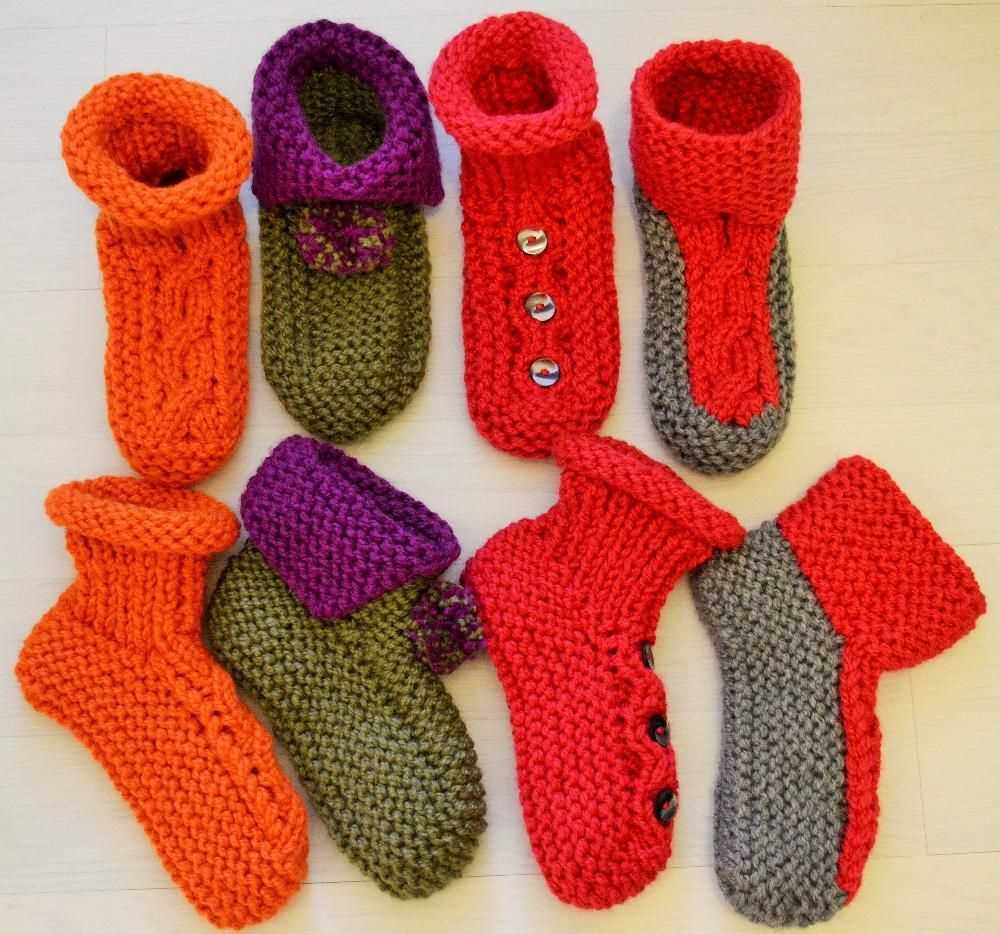
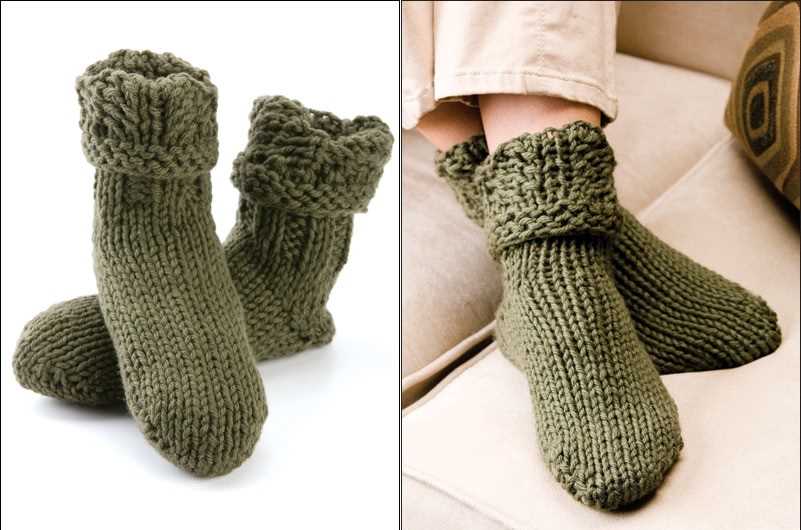
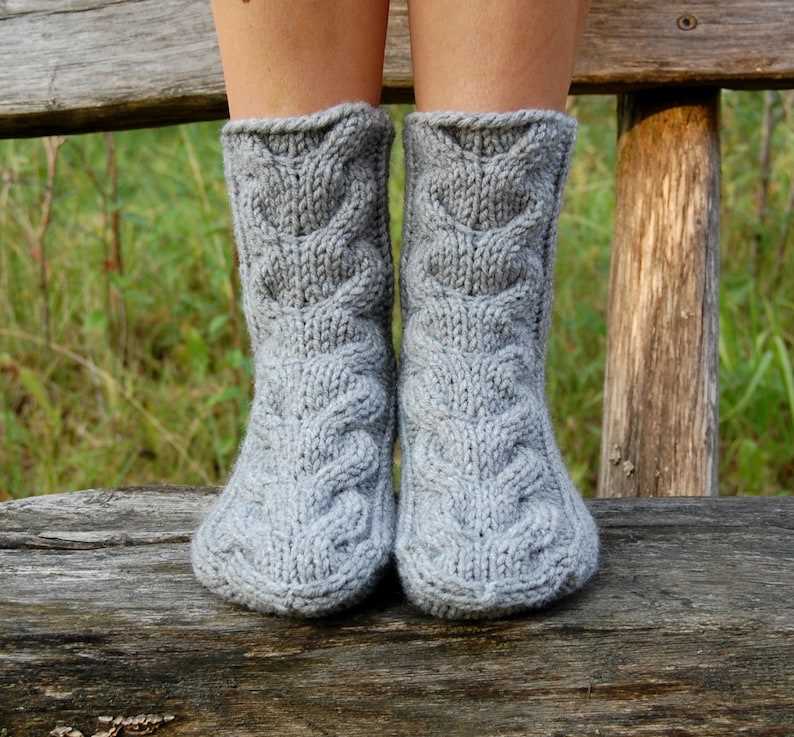
These slipper socks feature a cozy ribbed cuff and a classic slipper sock shape, complete with a gusset heel for added comfort and durability. The pattern also includes instructions for customizing the fit and length of the socks to ensure the perfect fit. Whether you prefer ankle-length slipper socks or ones that come up to your mid-calf, this pattern has you covered.
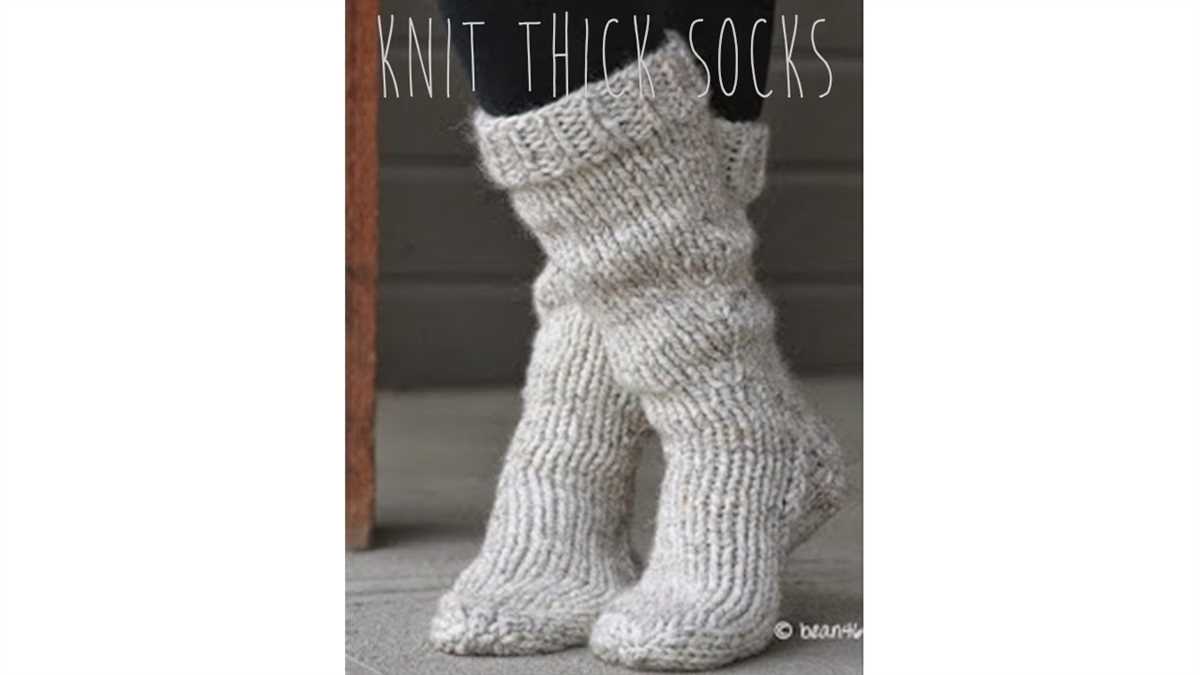
Chunky Slipper Sock Knitting Pattern
Knitting is a popular hobby that allows people to create unique and cozy items, such as slipper socks. If you’re looking for a chunky slipper sock knitting pattern, you’re in the right place. This pattern is perfect for those who love thick and warm socks that will keep their feet comfortable during the colder months.
Materials:
- Super bulky yarn
- Size 10 knitting needles
- Tapestry needle
Instructions:
- Begin by casting on 24 stitches.
- Knit in a rib stitch for the first 2 inches.
- Switch to stockinette stitch and continue knitting until the piece measures 10 inches.
- Next, start shaping the heel by knitting 4 stitches, then knitting 2 stitches together. Repeat this pattern until you have 20 stitches remaining on your needle.
- Continue knitting in stockinette stitch until the piece measures 12 inches.
- Next, shape the toe by knitting 2 stitches together, then knitting 3 stitches. Repeat this pattern until you have 5 stitches remaining.
- Bind off the stitches and weave in any loose ends.
- Repeat the steps above to create the second slipper sock.
Once you’ve finished knitting both slipper socks, you can seam them together using a tapestry needle and the mattress stitch. This stitch creates an invisible seam that will make your slipper socks look professionally made.
With this chunky slipper sock knitting pattern, you’ll be able to create cozy and stylish socks that you’ll love wearing around the house. Whether you’re an experienced knitter or just starting out, this pattern is perfect for anyone looking to make their own slipper socks.
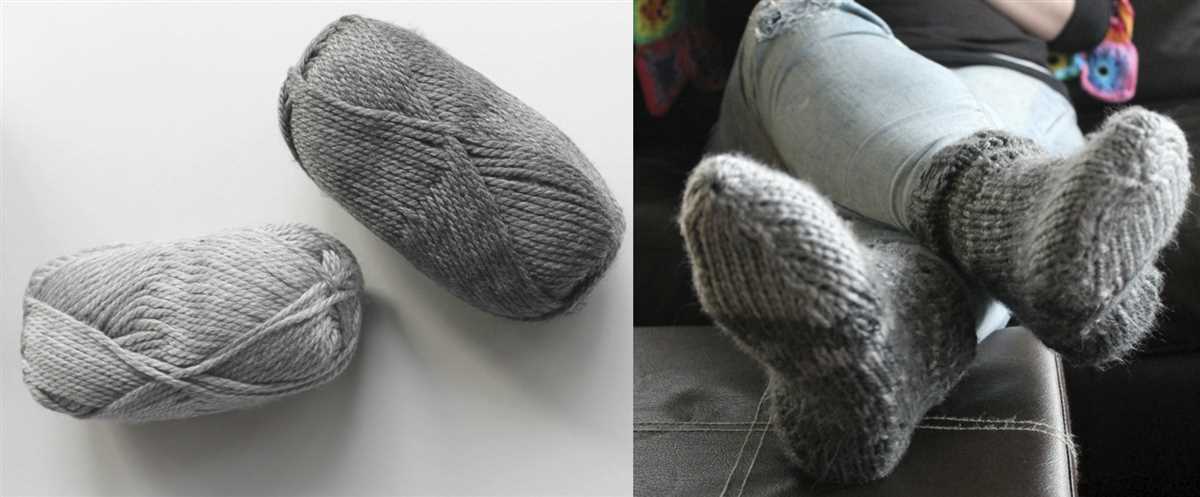
Choosing the right yarn for your slipper socks
When knitting slipper socks, it is important to choose the right yarn to ensure a comfortable and durable finished product. The yarn you select will determine the warmth, softness, and overall feel of your slippers.
1. Weight: Consider the weight of the yarn you will be using. Chunky or bulky weight yarn is often a popular choice for slipper socks as it creates a thick and cozy fabric, perfect for keeping your feet warm during colder months. However, you can also use other weights such as worsted or DK, depending on your preference.
2. Fiber: Different fibers have different properties, so it’s important to consider what you want from your slipper socks. Wool is a popular choice as it is warm, breathable, and has natural moisture-wicking properties. Acrylic yarns are also a good option as they are often softer and more affordable. You can also consider other natural fibers like cotton or bamboo for a more lightweight and breathable option.
3. Durability: Since slipper socks are meant to be worn around the house, it’s important to choose a yarn that is durable enough to withstand constant use. Look for yarns with a high twist or plies, as they tend to be more sturdy and less likely to pill or wear out quickly. Additionally, considering a yarn with a bit of nylon or polyester content can also add extra strength and durability to your slipper socks.
4. Care instructions: Consider the care instructions for the yarn you choose. Some yarns may require special care, such as hand-washing or air-drying, which may not be convenient for slippers that will be regularly worn. Opt for machine-washable yarns if you prefer easy care and maintenance.
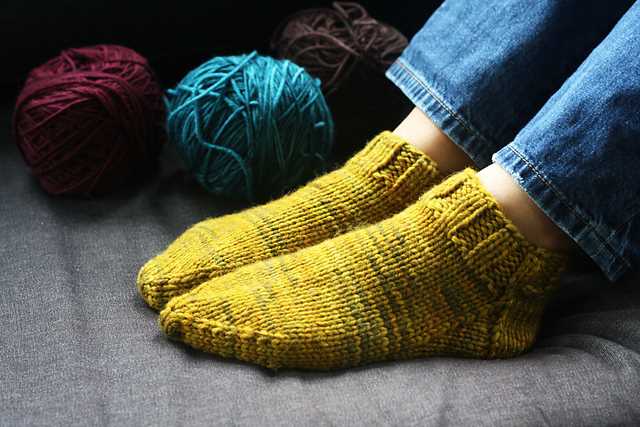
5. Color and pattern: Lastly, consider the color and pattern options available in the yarn you choose. Slipper socks are a great opportunity to get creative and play with different colors and patterns. Choose a yarn that offers a wide range of options that suit your personal style and preferences.
By considering these factors, you can choose the perfect yarn for your slipper socks, ensuring a comfortable, warm, and long-lasting finished product.
Getting started: Casting on and joining in the round
When knitting a pair of chunky slipper socks, one of the first things you need to do is cast on and join in the round. This creates a seamless tube which is perfect for knitting socks. To get started, make sure you have your yarn, knitting needles, and a stitch marker handy.
To cast on, you can use any method you prefer, but for slipper socks, the long tail cast on is a popular choice. This cast on method creates a stretchy and sturdy edge. Make sure to leave a long tail when casting on, as you will need to use it later to close up any gaps.
Once you have cast on the required number of stitches, it’s time to join in the round. Take your working yarn and place a stitch marker on the right-hand needle to mark the beginning of the round. This will help you keep track of your progress and ensure that your sock is knitting in a continuous spiral.
Now that you have joined in the round, begin knitting your desired stitch pattern for the body of the slipper sock. You can choose simple stockinette stitch, a ribbed pattern, or even a cable design. Follow the instructions for your chosen pattern, making sure to knit all the stitches in the round until the sock reaches the desired length.
By casting on and joining in the round, you are setting the foundation for your chunky slipper socks. This method creates a seamless and comfortable fit, and with the right stitch pattern, your finished socks will not only keep your feet warm but also be a stylish addition to your winter wardrobe.
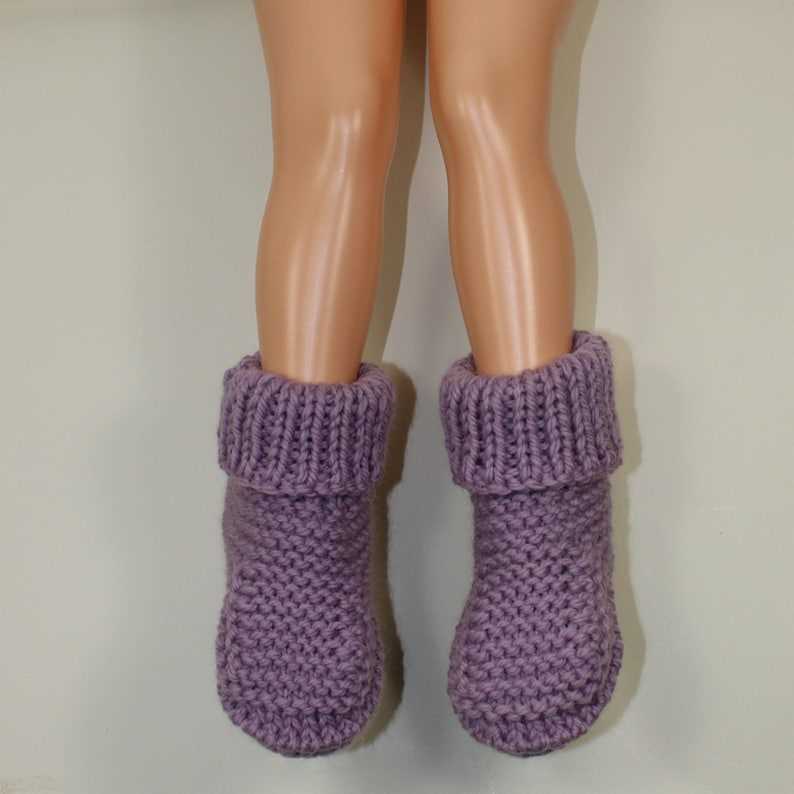
Working the ribbed cuff
Before you start working on the main body of the slipper sock, you need to create the ribbed cuff. The cuff is the part that will sit snugly around your ankle, providing a comfortable and secure fit.
To begin, cast on the required number of stitches onto your knitting needle. It’s important to use a stretchy cast-on method for the cuff, such as the long-tail cast-on or the twisted German cast-on. This will ensure that the cuff has enough elasticity to fit comfortably around your ankle.
Row 1: Once you have cast on the stitches, begin by knitting the first row. This row will establish the ribbing pattern for the cuff. If the pattern specifies a particular stitch pattern for the ribbing, such as a 2×2 rib or a 1×1 rib, make sure to follow it accordingly.
Rows 2-4: Continue knitting in the established ribbing pattern for the specified number of rows. This will create the desired texture and stretchiness for the cuff. Make sure to maintain the correct stitch pattern throughout these rows to achieve a uniform and professional-looking result.
Row 5: On this row, you will need to switch to a smaller needle size. This will create a tighter tension for the cuff, ensuring that it securely hugs your ankle. Follow the pattern instructions to switch to the smaller needles and continue knitting in the established ribbing pattern.
Repeat rows 2-5: Continue repeating rows 2-5 until the cuff has reached the desired length. The pattern should specify the recommended length for the cuff, but you can adjust it according to your preference. Remember to end on a row that allows you to maintain the ribbing pattern.
Once you have completed the ribbed cuff, you can move on to the main body of the slipper sock. The ribbed cuff will not only provide a stylish and polished look to your slipper sock but also ensure a comfortable and secure fit that will stay in place as you wear it.
Knitting the leg of the slipper sock
Once you have completed the ribbing for the cuff of the slipper sock, it’s time to move on to knitting the leg. This is the portion of the sock that will cover your ankle and part of your calf. To start, you will continue using the same size needles and yarn that you used for the ribbing.
Begin by knitting all stitches in the round, using the stockinette stitch pattern. This means you will knit every round until the leg reaches your desired length. If you would like a shorter sock, you can stop knitting the leg earlier. If you prefer a longer sock, simply continue knitting until you reach your desired length.
Shaping the leg
As you knit the leg of the slipper sock, you may want to consider adding some shaping for a better fit. One option is to gradually decrease the number of stitches as you work your way up the leg. This can help create a snugger fit around the calf. To do this, simply knit two stitches together every few rounds until you have decreased the desired number of stitches.
Another option for shaping the leg is to add increases. This can create a slouchier fit or accommodate larger calves. To do this, you can make yarn overs every few rounds and then knit into the back loop of these yarn overs on the next round to create new stitches.
Remember to try on the slipper sock as you go to ensure the leg is the desired length and fit. Once you are satisfied with the length, you can move on to shaping the heel and foot of the slipper sock.
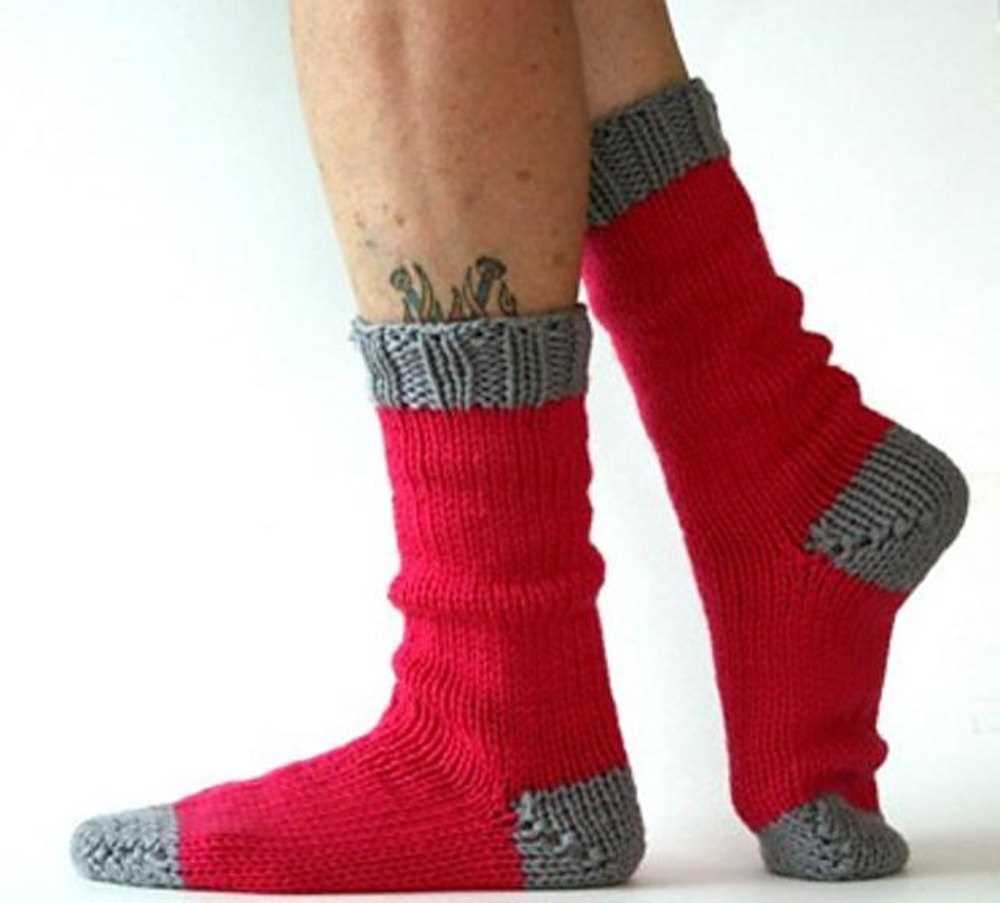
Shaping the heel
When knitting chunky slipper socks, shaping the heel is an important step to ensure a comfortable fit. The heel is typically worked separately from the rest of the sock, using short rows to create a curved shape that hugs the back of the foot.
There are several methods for shaping the heel, but one common approach is to use the wrap and turn technique. This involves knitting partway across the row, then wrapping the yarn around the next stitch before turning the work. This creates extra stitches that will be worked later to create the shaping.
To begin shaping the heel, you will first knit a certain number of stitches, depending on the size of the sock. Then, you will begin working the short rows by knitting a specified number of stitches and then wrapping and turning the next stitch. This process is repeated until the desired number of short rows and wraps have been completed.
After all the short rows have been worked, you will then begin to work the wrapped stitches. This involves knitting or purling the wrapped stitch together with its wrap to create a smooth transition between the wrapped and unwrapped stitches. This process is repeated until all the wrapped stitches have been worked.
Once the heel shaping is complete, you can continue knitting the rest of the slipper sock, connecting the heel to the instep and working in the round. The result is a cozy and comfortable slipper sock with a well-fitted heel that is sure to keep your feet warm and snug.
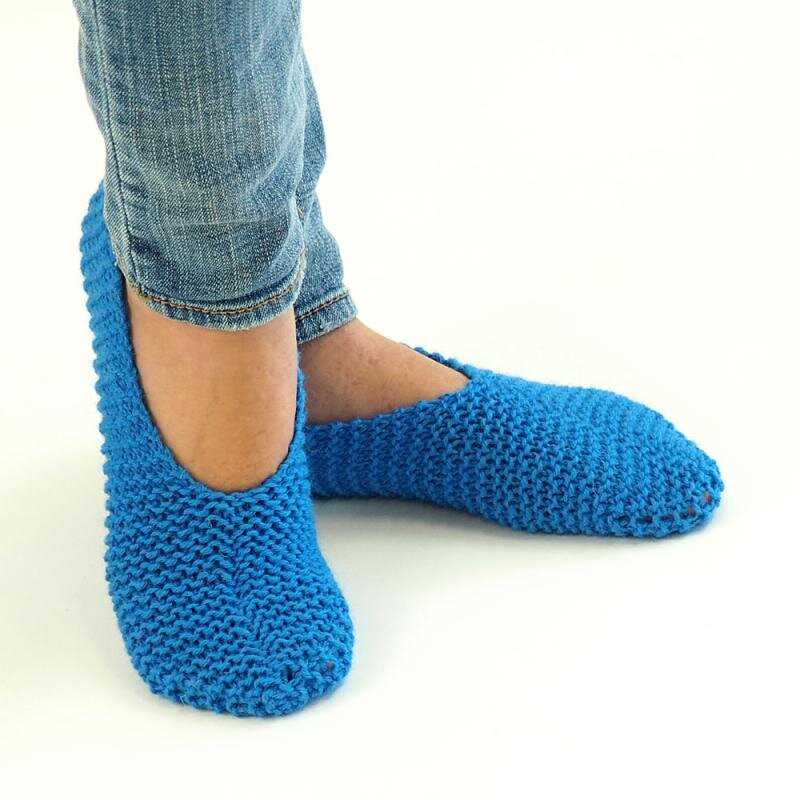
Knitting the foot of the slipper sock
After completing the cuff of the slipper sock, it’s time to move on to knitting the foot. This is where the slipper starts taking shape and begins to provide warmth and comfort to the wearer. The foot of the slipper sock is knitted in a combination of knit and purl stitches, creating a textured pattern that adds both style and functionality.
To start knitting the foot, you will continue working in the round, just as you did for the cuff. Begin by knitting the first stitch, and then follow the pattern instructions for the stitch pattern. This may involve knitting a set number of stitches, purling a set number of stitches, or working a specific stitch pattern, such as a rib or cable.
As you knit the foot, it’s important to check your gauge regularly to ensure that the slipper sock will fit properly. If your gauge is too tight, the slipper may be too small and uncomfortable to wear. If your gauge is too loose, the slipper may be too large and may not stay securely on the foot. Adjust your needle size as necessary to achieve the correct gauge.
Continue knitting the foot of the slipper sock until it reaches the desired length, as indicated in the pattern. Be mindful of any shaping instructions, such as decreasing or increasing stitches for the toe area. These instructions will help the slipper fit more snugly and comfortably on the foot. Once the foot is complete, you can move on to knitting the toe and finishing the slipper sock.
Creating the toe shaping
To create the toe shaping of the slipper sock, follow these steps:
Step 1: Decrease the stitches
Start by decreasing the number of stitches on the needle. This can be done by knitting two stitches together (K2tog) at regular intervals. The specific interval will depend on the pattern and the desired shape of the toe. For example, you may choose to decrease every other row or every row until a certain number of stitches remain on the needle.
Step 2: Continue the toe decreases
Once you have decreased the stitches to the desired number, continue working the toe decreases. This can involve knitting two stitches together on every row, or following a specific pattern for the toe shaping. The goal is to gradually decrease the width of the toe and create a rounded or pointed shape, depending on the design.
Step 3: Shape the toe
As you continue working the toe decreases, you will begin to see the shape of the toe taking form. Pay attention to the pattern instructions and any shaping techniques recommended. This may involve transitioning from decreasing on every row to decreasing on every other row, or using specific stitch patterns to create a decorative toe shape.
Step 4: Bind off
Once you have completed the desired toe shaping, bind off the remaining stitches. This can be done in a regular bind off method, or you may choose to use a stretchy bind off technique to ensure a comfortable fit for the slipper sock.
Finishing the slipper sock: binding off and securing ends
Once you have completed knitting the slipper sock, it is time to bind off and secure the loose ends. Binding off is the process of creating a finished edge by knitting the stitches off the needle. This ensures that the sock doesn’t unravel and gives it a neat and clean look.
To bind off, start by knitting the first two stitches as usual. Then, using your left-hand needle, lift the first stitch over the second stitch and off the right-hand needle. Continue knitting one stitch and then lifting the previous stitch over it until you have reached the end of the row. Cut the yarn, leaving a tail of about 6 inches.
Next, it is important to secure the loose ends to prevent them from unraveling. One way to do this is by using a yarn needle to weave the tail into the stitches on the wrong side of the slipper sock. Start by threading the tail onto the yarn needle and then insert the needle under several stitches on the wrong side, moving in a zigzag pattern. Pull the tail through and trim any excess yarn.
Another option for securing the ends is to tie them in a knot. This can be done by taking the two loose ends and tying them together in a double knot. Be sure to trim any excess yarn after tying the knot to keep the slipper sock looking tidy.
Once you have bound off and secured the ends, your slipper sock is complete and ready to be worn or gifted. Remember to repeat the process for the second slipper sock to have a matching pair.
Adding non-slip soles to your slipper socks
Slipper socks are cozy and comfortable, but they can sometimes be slippery on smooth floors. Adding non-slip soles to your slipper socks can help prevent accidents and provide better traction. There are a few different methods you can try to make your slipper socks safer to wear.
Sewn-on felt soles: One option is to sew on felt soles to the bottom of your slipper socks. Cut out two pieces of felt the same size and shape as the sole of your slipper sock. Sew the felt pieces onto the bottom using a blanket stitch or a strong thread. The felt will provide grip and help prevent slipping.
Slipper sock grips: Another option is to use slipper sock grips. These are small adhesive pads with textured surfaces that can be stuck onto the bottom of your slipper socks. Make sure to clean the bottom of your slipper socks before applying the grips to ensure a strong bond. These grips are often washable and can be easily replaced if they wear out.
- Non-slip fabric paint: If you prefer a more DIY approach, you can use non-slip fabric paint to create traction on the bottom of your slipper socks. Simply apply the paint in a pattern or design on the sole of the slipper sock and let it dry. The paint will create a textured surface that helps prevent slipping.
- Attach rubber ballet shoe soles: Another option is to attach rubber ballet shoe soles to the bottom of your slipper socks. These soles are usually made of thin rubber and can be sewn onto the bottom of your slipper socks using a strong thread or adhesive. The rubber provides excellent grip and traction.
- Use silicone or hot glue: For a quick and easy fix, you can apply silicone or hot glue to the bottom of your slipper socks. Simply squeeze the silicone or hot glue onto the sole of the slipper sock in a pattern or design and let it dry. The dried silicone or hot glue will create a non-slip surface.
With these methods, you can make your slipper socks safer and more secure to wear on smooth floors. Choose the method that works best for you and enjoy walking around in your cozy slipper socks without worrying about slipping!
Additional tips and variations for your slipper sock knitting project
As you continue to work on your slipper sock knitting project, here are some additional tips and variations to consider:
Tips:
- Always make sure to check your gauge before starting the project to ensure the proper fit of your slipper socks.
- When choosing yarn for your slipper socks, consider using a blend that includes wool or acrylic for warmth and durability.
- If you want your slipper socks to have more grip, consider adding non-slip soles to the bottom. You can find pre-made soles or use a non-slip fabric and sew it onto the bottom of your finished socks.
- When it comes to the heel, you can experiment with different techniques such as short rows or a heel flap and gusset, depending on your skill level and preferences.
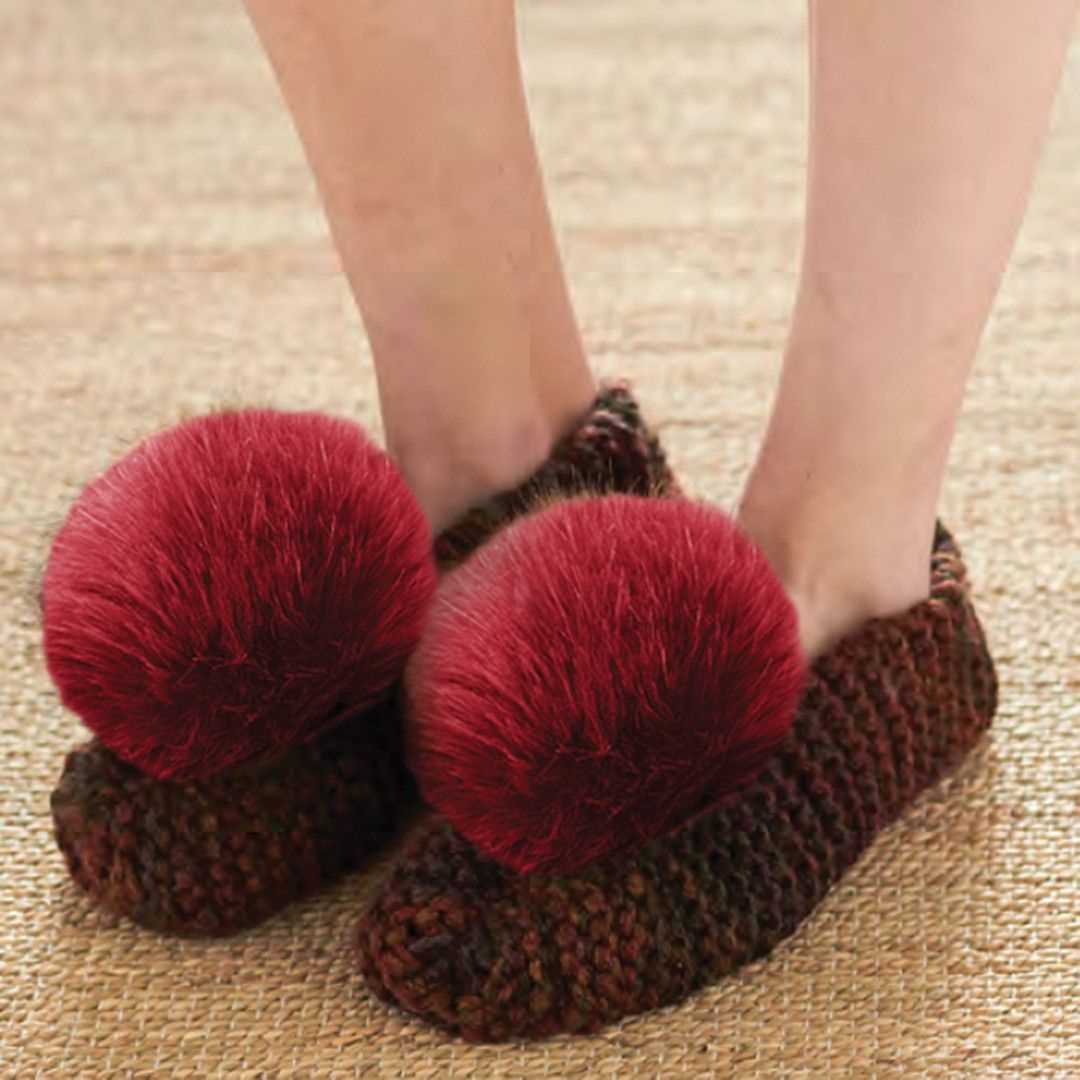
- To personalize your slipper socks, you can add embellishments such as pom-poms, tassels, or even embroidery.
- If you prefer a tighter or looser fit, adjust the number of stitches or needle size accordingly.
Variations:

Once you’re comfortable with the basic slipper sock pattern, you can try out different variations to add variety to your collection:
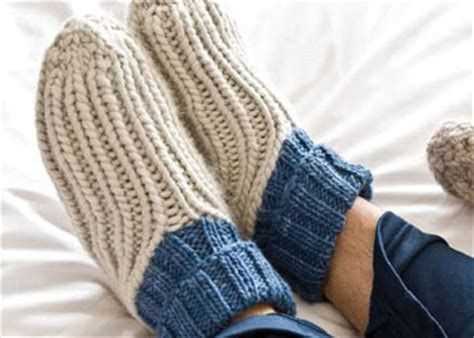
- Ribbed Cuff: Instead of a plain garter stitch cuff, try knitting a ribbed cuff using a combination of knit and purl stitches. This will give your slipper socks a stretchy and snug fit.
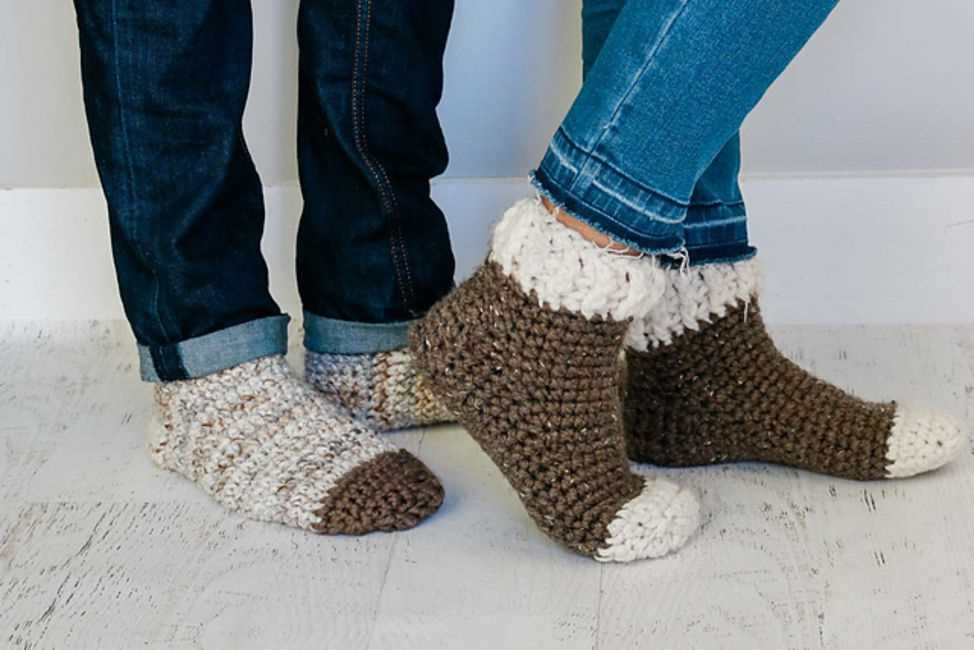
- Colorful Stripes: Add stripes to your slipper socks by incorporating different colors of yarn. You can alternate colors for each section or create a striped pattern.
- Lace Detail: For a feminine touch, incorporate lace stitches into the leg or cuff of your slipper socks. This will add an elegant and delicate look to your project.
- Fair Isle or Intarsia: Experiment with colorwork techniques like Fair Isle or Intarsia to create intricate patterns on your slipper socks. This is a great way to showcase your knitting skills and create unique designs.
With these tips and variations, you can customize your slipper sock knitting project to suit your preferences and create a cozy and stylish pair of socks. Get creative and have fun with your knitting!