
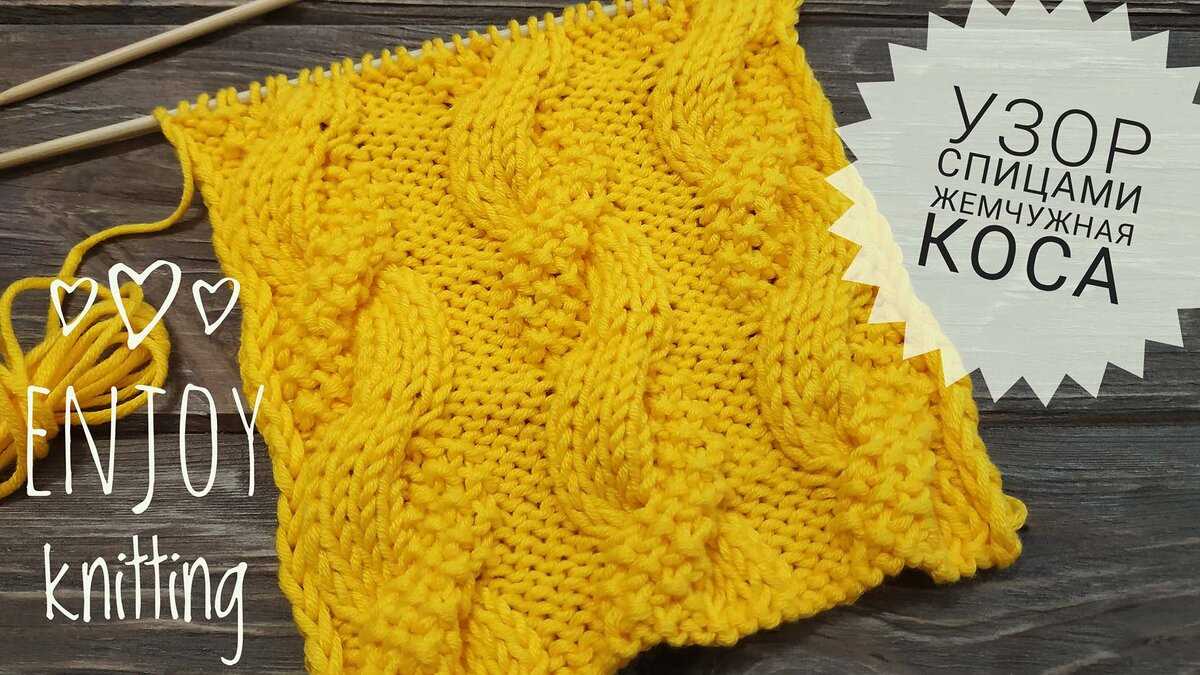
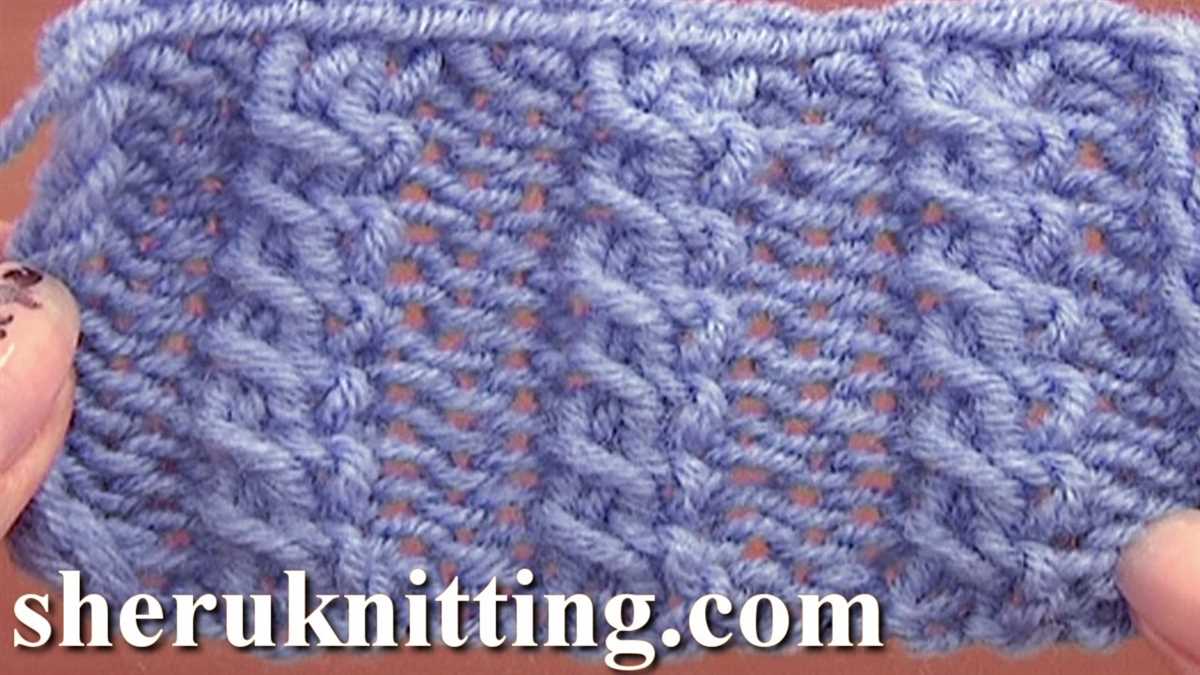
If you’re looking for a knitting pattern that adds texture and depth to your project, then the cross cable pattern is for you. This classic pattern creates a beautiful interwoven design that resembles crossing cables. It’s a great way to add visual interest to your knitting and showcase your skills.
The cross cable pattern involves crossing stitches over each other to create the cable effect. It’s a technique that has been used for centuries and is loved by knitters for its timeless appeal. The pattern usually uses a combination of knit and purl stitches to create the cable effect, and sometimes even involves working stitches out of order to achieve the desired look.
One of the great things about the cross cable pattern is its versatility. It can be used in a variety of projects, from scarves and hats to sweaters and blankets. The pattern can be worked on any number of stitches, making it easy to customize the size of your project. Whether you’re a beginner or an experienced knitter, the cross cable pattern is a fun and rewarding challenge to take on.
Cross Cable Knitting Pattern: Master the Art of Creating Beautiful Cables

Knitting is not just a hobby, it’s an art that allows you to create beautiful and intricate designs. If you’re looking to take your knitting skills to the next level, mastering the cross cable knitting pattern is a must. This pattern adds depth and texture to your projects, making them stand out from the crowd. Whether you’re knitting a cozy sweater, a warm scarf, or even a decorative blanket, the cross cable pattern will elevate your creations to a whole new level.
The cross cable knitting pattern involves crossing stitches over each other, creating a stunning intertwined effect. The pattern is achieved by knitting stitches out of order and then crossing them over each other, either to the right or to the left. This technique requires a bit of practice and concentration, but once you get the hang of it, the possibilities are endless.
If you’re new to the world of cable knitting, it’s best to start with a simple cross cable pattern. Begin with a small project, like a dishcloth or a hat, before tackling larger and more complex designs. As you become more comfortable with the technique, you can experiment with different cable patterns, such as the horseshoe cable or the honeycomb cable.
When working with the cross cable knitting pattern, it’s important to use the right tools and materials. Choose a high-quality yarn that has good stitch definition, as this will enhance the beauty of your cables. Additionally, using cable needles or stitch holders will make it easier to keep track of your stitches and create clean and even cables.
Whether you’re an experienced knitter or just starting out, the cross cable knitting pattern is a skill worth mastering. It allows you to create stunning designs that will impress friends and family alike. So grab your knitting needles, choose a beautiful yarn, and get ready to create your own masterpiece with the cross cable knitting pattern.
Understanding Cross Cable Knitting

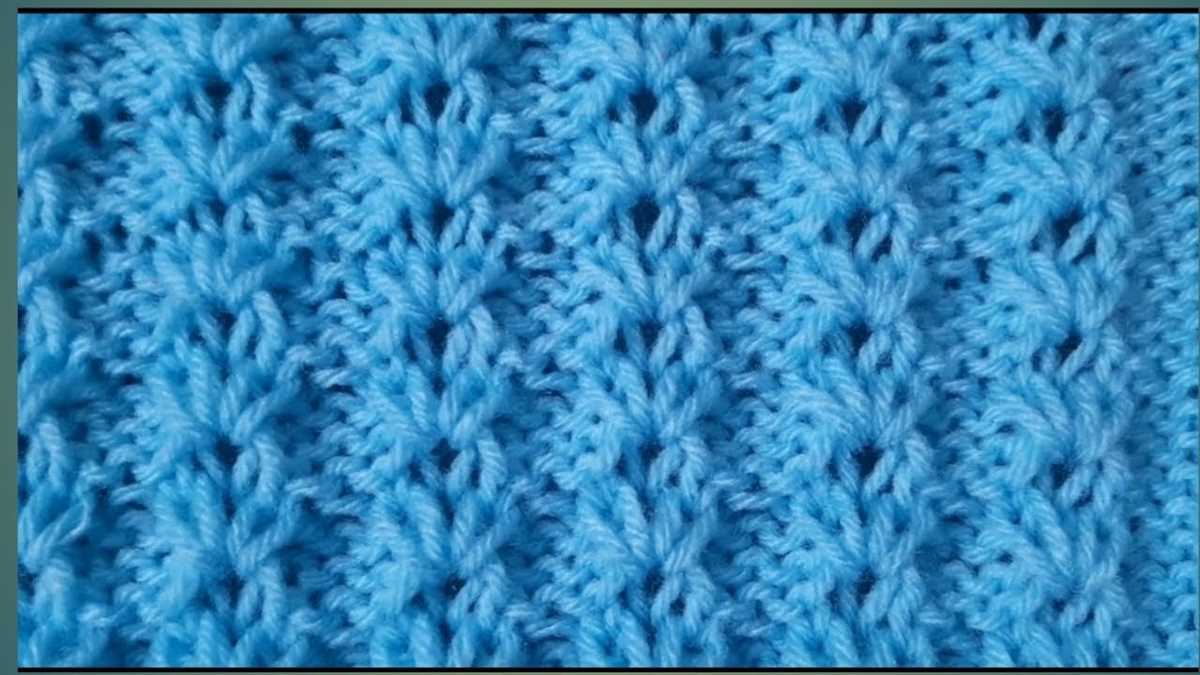
When it comes to knitting patterns, one of the most popular and visually stunning techniques is cross cabling. Cross cable knitting creates intricate designs by twisting stitches over each other, producing a three-dimensional effect on the fabric. It adds texture and depth to any knitting project, making it an excellent choice for scarves, sweaters, and even blankets.
But how exactly does cross cable knitting work? To create a cross cable, you will need to work with a cable needle or simply use your knitting needle to manipulate the stitches. The basic principle is to cross stitches from one side of the fabric to the other, either in front or behind the neighboring stitches. This crossing creates the distinctive twisted effect that is characteristic of cross cable knitting.
When reading a pattern for cross cable knitting, you will often come across terms such as “C4F” or “C6B.” These abbreviations indicate the type of cable and the number of stitches involved. For example, C4F means crossing four stitches to the front, while C6B means crossing six stitches to the back.
It’s important to note that cross cable knitting requires a certain level of skill and attention to detail. The crossing of stitches can be a bit tricky at first, but with practice, it becomes easier to master. To help you get started, here are some essential tips to keep in mind:
- Always use a cable needle or knitting needle to hold the stitches you are crossing.
- Pay close attention to the placement of the stitches and follow the pattern instructions carefully.
- Keep your tension consistent to ensure an even and professional-looking finish.
- Experiment with different cable patterns and combinations to create unique designs.
With a bit of practice and creativity, you can create beautiful cross cable knitting projects that are sure to impress. So grab your knitting needles and start exploring the world of cross cable knitting!
Essential Tools and Materials for Cross Cable Knitting
If you are interested in creating beautiful cross cable knitting patterns, there are a few essential tools and materials that you will need. These items will help you create intricate and unique designs that will impress everyone who sees your finished projects.
Knitting Needles:
- Cable Needles: Cable needles are short, double-pointed needles that help you hold stitches to create cable patterns. They come in different sizes, so make sure to choose one that matches the thickness of your yarn.
- Regular Needles: While cable needles are necessary for creating the actual cables, you will also need regular knitting needles to work on the rest of the project. Make sure to choose a size that is appropriate for your yarn weight and the desired tension of your work.
Yarn:
The choice of yarn is crucial for achieving the desired look and texture of your cross cable knitting patterns. For cables to stand out and be well-defined, choose a yarn that is not too fuzzy or textured. Smooth and plied yarns are ideal for showcasing the intricate cable designs.
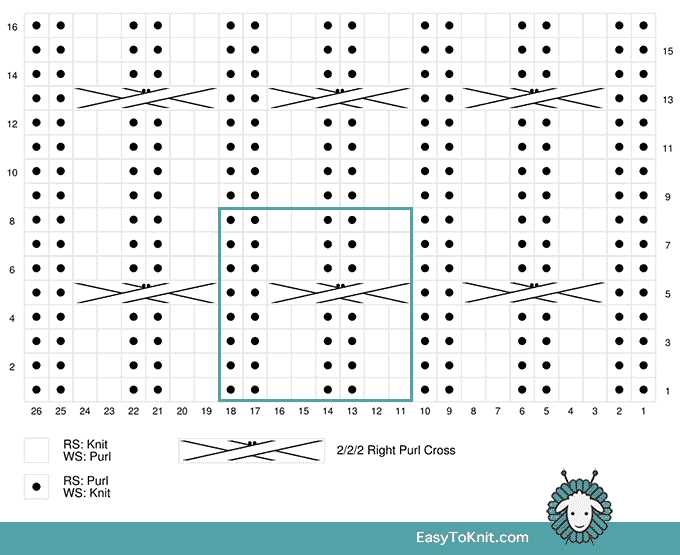
Cable Chart:
A cable chart is an essential tool for following and understanding the cable knitting patterns. It is a graphic representation of each cable stitch and its placement in the overall design. The chart helps you keep track of your progress and ensures that your cables line up correctly.
Tapestry Needle:
A tapestry needle is used for weaving in loose ends and finishing touches on your project. After you have completed your cross cable knitting, you will need to secure any loose yarn strands and tidy up the edges.
By having these essential tools and materials on hand, you will be well-equipped to tackle cross cable knitting projects with confidence. Once you master the technique, you can create stunning patterns and garments that showcase your skills and creativity.
Getting Started: Casting On for Cross Cable Knitting
To begin knitting a cross cable pattern, you first need to cast on your stitches. Casting on is the process of creating the foundation row of stitches that you will work with for your project. In a cross cable pattern, the cast-on row determines the number of stitches you will have to work with, so it’s important to choose an appropriate method.
There are various methods you can use to cast on for cross cable knitting, but one popular option is the long-tail cast on. To do this, you will need a long length of yarn to create the foundation stitches. Start by making a slipknot with the yarn, leaving a long tail. Place the slipknot on one of your knitting needles.
Next, hold the knitting needle with the slipknot in your right hand and the other knitting needle in your left hand. Use your left thumb and index finger to hold the tail of the yarn against the needle, creating tension. With your right hand, take the other end of the yarn and wrap it around your left thumb and index finger, forming a loop.
Now, insert the right knitting needle into the loop from front to back, making sure the needle goes under the yarn. With your right hand, catch the yarn that is coming from the ball and pull it through the loop, creating a new stitch on the right knitting needle. Repeat this process until you have the desired number of stitches on your needle.
Once you have finished casting on, you are ready to begin knitting your cross cable pattern. Remember to follow the pattern instructions carefully to create the desired cable design. Happy knitting!
Basic Cross Cable Stitch: Step-by-Step Instructions

Knitting cables can add an intricate and beautiful touch to any knitting project. One popular cable stitch pattern is the cross cable stitch. This stitch creates a twist or crossover effect, giving your project a textured and visually appealing look. If you’re new to cable knitting or want to learn how to do the cross cable stitch, follow these step-by-step instructions.
Materials and Tools:
- Yarn of your choice
- Knitting needles appropriate for your yarn
- Cable needle
- Tapestry needle
Step 1: Start by casting on the desired number of stitches for your project. Make sure the number of stitches is divisible by the number of stitches needed for the cable pattern.
Step 2: Work the desired number of rows in a basic knitting stitch, such as garter stitch or stockinette stitch, to create a base for your cable.
Step 3: Begin the cable pattern by working the first set of stitches. For a simple cross cable stitch, you will typically need to work a set number of knit stitches before crossing the cables. Follow the specific pattern instructions to determine the exact number of stitches needed.
Step 4: Once you reach the point where the cables will cross, slip the next set of stitches onto the cable needle, holding it in the front or back of the work, depending on the specific stitch pattern. The pattern will indicate whether to hold it in front or back.
Step 5: Knit the next set of stitches from the left needle without the cable needle, then knit the stitches from the cable needle.
Step 6: Continue working the cable pattern as instructed, crossing the cables at the designated intervals. Make sure to follow the pattern carefully to ensure correct placement of the cables and stitch counts.
Step 7: Complete the cable pattern for the desired length, then finish the knitting project according to your chosen pattern.
Remember, practice makes perfect when it comes to cable knitting. Don’t be discouraged if your first few attempts don’t turn out exactly as you envisioned. With time and practice, you’ll be able to master the cross cable stitch and create beautiful cable designs in your knitting projects.
Creating Different Cross Cable Patterns
If you’re a fan of knitted garments and love experimenting with different cable patterns, then creating unique and intricate cross cable designs can be a great way to express your creativity. Cross cable knitting patterns are not only visually appealing but also add texture and dimension to your knitted projects. With a bit of practice and understanding of the basic techniques, you can easily design and create your own cross cable patterns.
An essential aspect of creating different cross cable patterns is understanding the concept of crossing stitches. To create a cable, you need to rearrange the stitches on your needles. Depending on the design you want to achieve, you can cross stitches to the front or back of your work. The number of stitches you cross and the direction you cross them in will determine the final pattern.
One popular cross cable pattern is the “4-stitch left cross.” To create this pattern, you will take the first two stitches on the left-hand needle and hold them in front of your work. Then, knit the next two stitches from the left-hand needle. Finally, knit the two stitches from the cable needle. This will create a left-leaning cable that adds visual interest to your knitting.
Another cross cable pattern to explore is the “6-stitch right cross.” In this pattern, you will hold the first three stitches on the left-hand needle to the back of your work. Then, knit the next three stitches from the left-hand needle. Finally, knit the three stitches from the cable needle. This will create a right-leaning cable that adds a subtle twist to your knitting.
- Experiment with different cross cable patterns to create unique designs.
- Keep track of the number of stitches and the direction of crossing to achieve desired results.
- Don’t be afraid to try different combinations of crossing stitches to create more intricate patterns.
- Consider incorporating cross cable patterns into various knitting projects, such as sweaters, scarves, and hats.
Adding Texture with Cross Cable Knitting
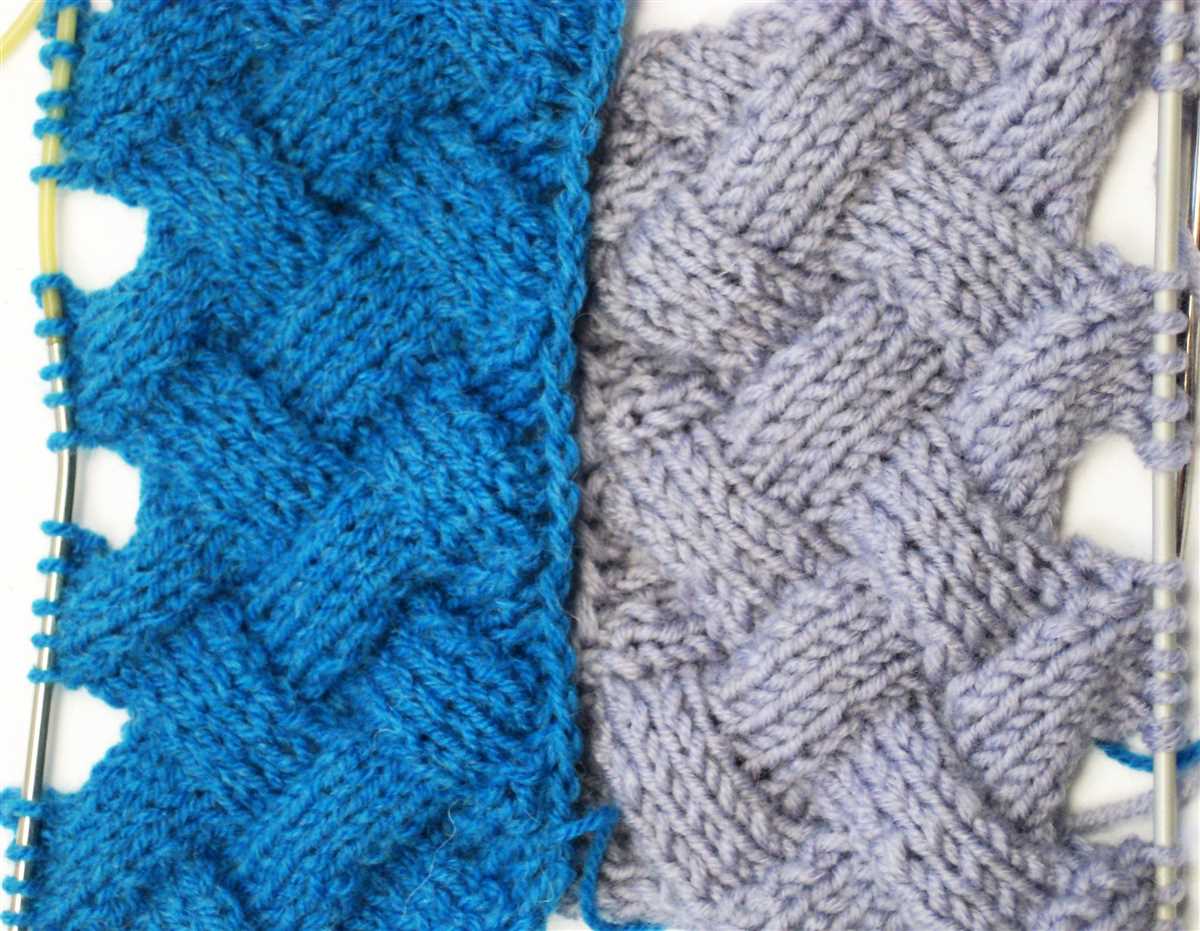
Knitting is an art form that allows us to create beautiful and unique pieces of clothing and accessories. One way to add texture and visual interest to our knitting projects is by incorporating cross cable knitting patterns. Cross cables are created by crossing stitches over each other, resulting in a raised, three-dimensional design.
Cross cables are created by twisting stitches to the left or right: To create a left-leaning cross cable, we slip a certain number of stitches onto a cable needle and hold it either in front or behind our work. Then, we knit the next set of stitches from our left-hand needle before knitting the stitches from the cable needle. This creates a cross effect as the stitches from the cable needle are brought in front of or behind the stitches from the left-hand needle. To create a right-leaning cross cable, we follow the same process but hold the cable needle on the opposite side of our work.
Using cross cable knitting patterns can add depth and texture to our projects: Whether we choose to incorporate simple cross cables or more complex combinations of twists and turns, these patterns can bring our knitting to life. The raised cables create visual interest and make our projects stand out. They also offer a tactile experience, as the raised texture can be felt when wearing or using the finished piece.
Examples of cross cable knitting patterns include:
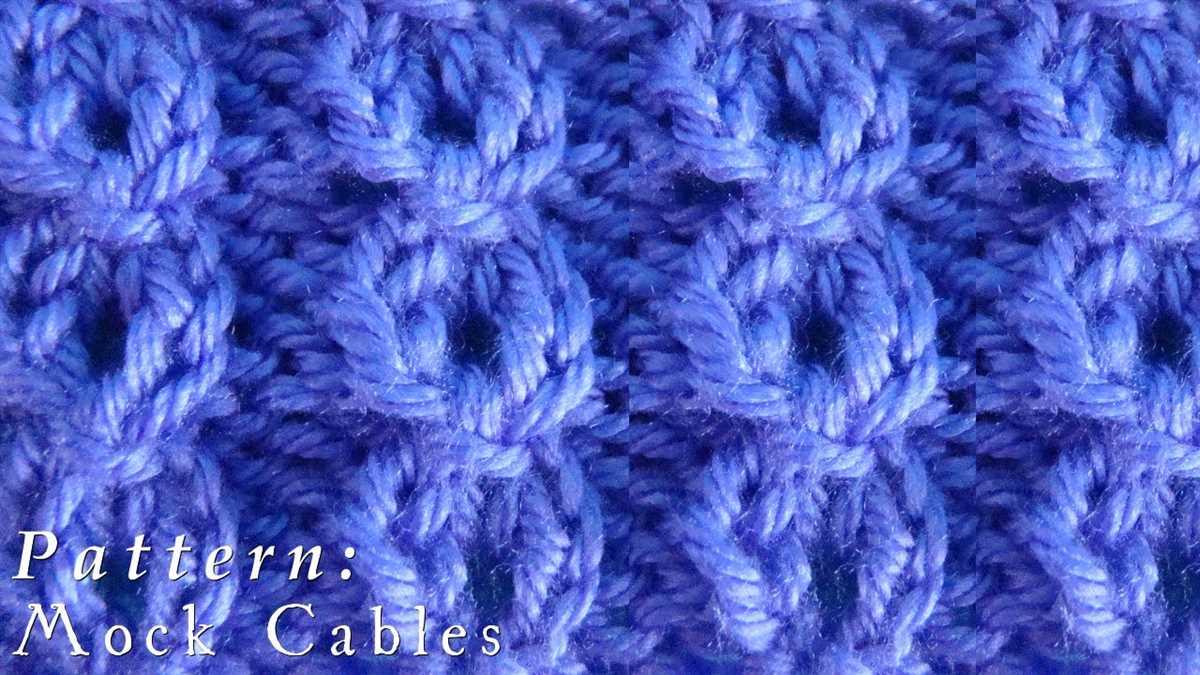
- The classic rope cable: This pattern consists of a series of intertwining cables that resemble a rope. It adds a timeless and sophisticated touch to any project, from scarves to sweaters.
- The honeycomb cable: This pattern features a combination of crosses and twists that resemble a honeycomb. It creates a dense and textured fabric that is perfect for cozy blankets or pillows.
- The lattice cable: This pattern creates a grid-like design that is perfect for adding visual interest to any project. It can be combined with other stitch patterns, such as ribbing or seed stitch, to create unique and versatile designs.
By incorporating cross cable knitting patterns into our projects, we can elevate our knitting skills and create visually stunning and textured pieces. Whether we choose to add a simple rope cable or experiment with more complex designs, cross cables offer endless possibilities for creating unique and eye-catching projects.
Troubleshooting Common Issues in Cross Cable Knitting

Cross cable knitting is a beautiful technique that creates intricate patterns and adds texture to your knitted fabric. However, like any knitting technique, it can sometimes present challenges or issues. Here are some common issues you may encounter when working on cross cable knitting and how to troubleshoot them:
1. Misaligned or Twisted Stitches

One common issue in cross cable knitting is misaligned or twisted stitches. This can happen when you don’t cross the cables correctly or when you accidentally twist the stitches as you work. To fix this issue, carefully examine your stitches and identify any misalignments or twists. You can then use a crochet hook or a knitting needle to correct the stitches by gently untwisting them and aligning them properly.
2. Uneven Tension
Another common issue in cross cable knitting is uneven tension. This can happen when you pull the stitches too tight or too loose when crossing the cables. To fix this issue, pay close attention to your tension as you work and make sure to consistently maintain an even tension throughout. You can also try using a different size knitting needle or adjusting your grip to achieve a more even tension.
3. Knitting Too Tight
Some knitters tend to knit too tight when working on cross cable knitting. This can result in a stiff and less flexible fabric. To avoid this, make sure to keep your knitting loose and relaxed. You can try using a larger knitting needle or consciously reminding yourself to relax your grip while working. Taking breaks and stretching your hands and wrists can also help prevent knitting too tight.
4. Difficulty in Reading Cable Patterns
Reading cable patterns can sometimes be challenging, especially if you’re new to cross cable knitting. It can be easy to get confused and make mistakes in the pattern. To troubleshoot this issue, make sure to carefully read and understand the pattern instructions before you start. Take your time and double-check each step as you go. Using stitch markers can also help you keep track of the cable pattern and prevent errors.
5. Untwisting Crossed Stitches
When crossing cables, it’s important to keep the twists in the stitches intact to maintain the pattern. However, sometimes the stitches can untwist as you work, resulting in a less defined cable. To troubleshoot this issue, make sure to tighten the stitches well as you cross them and avoid pulling the yarn too loosely. If the stitches still untwist, you can use a cable needle or a crochet hook to manually twist the stitches back into place.
By being aware of these common issues and knowing how to troubleshoot them, you can overcome any challenges that may arise during your cross cable knitting projects. With practice and patience, you’ll be able to create beautiful and perfectly executed cable patterns.
Tips and Tricks for Achieving Perfect Cross Cable Knitting

Knitting cables can add beautiful texture and depth to your projects. If you’re new to cross cable knitting or looking to perfect your technique, here are some tips and tricks to help you achieve a flawless result.
1. Use a cable needle or stitch markers
When crossing your stitches, it’s important to keep track of where you are in the pattern. Using a cable needle or stitch markers can help you visually see which stitches need to be crossed and prevent any confusion.
2. Watch your tension
Tension is crucial in cable knitting. Maintaining an even tension will ensure that your cables appear neat and defined. Avoid pulling too tightly or loosely when knitting the crossed stitches to maintain a consistent look.
3. Read the cable chart carefully

Cable patterns are often presented in chart form, with symbols indicating which stitches need to be crossed. Take the time to study the chart and understand how the cables are formed before starting your project. This will help you avoid mistakes and ensure that your cables are executed correctly.
4. Practice with a smaller swatch

If you’re new to cable knitting or trying out a complex cable pattern, it can be helpful to practice with a smaller swatch before diving into a larger project. This allows you to familiarize yourself with the cable pattern and make any adjustments needed before committing to the full project.
5. Block your finished work

Blocking is an essential step in achieving a polished look for your cables. After completing your project, gently wet block or steam block your work to even out any uneven stitches and bring out the cable pattern’s full definition.
By following these tips and practicing your cable knitting skills, you’ll be able to create stunning cross cable designs with confidence and precision.
Incorporating Cross Cable Knitting into Your Projects
The cross cable knitting pattern is a beautiful and intricate technique that can add depth and texture to your knitting projects. By crossing stitches over each other, you create a twisted and intertwined design that is both visually stunning and cozy to wear.
One popular way to incorporate cross cable knitting into your projects is by adding it to accessories such as hats, scarves, or mittens. These small items are perfect for experimenting with different cable patterns and can be completed relatively quickly. You can choose to create a simple cable pattern that runs straight up the length of the item, or incorporate multiple cable designs for a more complex look.
For example, you could knit a chunky cable-knit beanie using a cross cable pattern on the brim or all over the hat. The twisted cables will add dimension and interest to the design, making it stand out from plain knitted hats. This technique is also well-suited for knitting scarves, as the long and narrow shape provides ample opportunity to showcase intricate cable patterns.
If you’re feeling more adventurous, you can incorporate cross cable knitting into larger projects such as sweaters or blankets. These items allow for even more creativity and can feature cross cables as a central design element or as subtle accents throughout. Consider knitting a cozy cardigan with a cross cable pattern down the front and along the sleeves, or a blanket with a large, stunning cable motif as a focal point.
Incorporating cross cable knitting into your projects not only adds visual interest but also provides a sense of accomplishment and pride. By mastering the technique and experimenting with different cable designs, you can create unique and personalized items that showcase your knitting skills. So why not give cross cable knitting a try and add a touch of elegance and complexity to your next project?
Cross Cable Knitting for Beginners: Simplified Techniques

Knitting cables can seem intimidating, especially for beginners. However, with some simplified techniques, even those new to knitting can create beautiful cross cable patterns. Cross cable knitting involves crossing stitches over each other to create intricate designs and textures.
One key technique in cross cable knitting is understanding the basic concept of crossing stitches. To create a cross cable, you will need a cable needle or a smaller double-pointed needle. Begin by slipping a certain number of stitches onto the cable needle, holding it in front or in the back of your work. Then, knit the next set of stitches before returning to the stitches on the cable needle and knitting them. This simple technique creates the crossed effect.
Here are some simplified steps to get started with cross cable knitting:
- Choose your desired cable pattern: There are countless cable patterns available, ranging from simple to complex. Start with a basic pattern that only involves a few stitches crossing over each other.
- Use a cable needle or double-pointed needle that is of a smaller size than your main knitting needles. This will make it easier to manipulate the cable stitches.
- Work the setup rows: Most cable patterns begin with setup rows to establish the foundation for the pattern. Follow the instructions provided in your chosen pattern to complete these setup rows.
- Start crossing the stitches: Once the setup rows are complete, you can begin crossing the stitches. Follow the specific instructions in your pattern for the order and direction of the crosses.
- Continue knitting the pattern: After crossing the stitches, continue knitting the remaining rows of the pattern. Pay attention to any changes in stitch counts or additional instructions provided in the pattern.
Remember, practice makes perfect when it comes to cross cable knitting. Start with simpler patterns and gradually work your way up to more complex designs. With time and patience, you will become more comfortable with crossing stitches and creating beautiful cable patterns.
Advanced Cross Cable Knitting Techniques: Taking it to the Next Level
Once you have mastered the basics of cross cable knitting, it’s time to take your skills to the next level. There are several advanced techniques that can help you create even more intricate and stunning designs. These techniques involve combining multiple cables, working with different cable sizes, and experimenting with unique stitch patterns.
1. Combining Multiple Cables: One way to elevate your cross cable knitting is by combining multiple cables in a single project. This technique allows you to create complex and visually stunning patterns. You can experiment with different cable types, sizes, and directions to achieve the desired effect. By strategically placing these cables, you can create unique textures and designs that will truly make your knitting stand out.
2. Working with Different Cable Sizes: Another approach to advanced cross cable knitting is to work with different cable sizes. By using cables of varying thickness, you can add depth and dimension to your projects. This technique allows you to create intricate designs with a combination of bold and delicate cables. You can experiment with using thicker cables for the main pattern and thinner cables for the supporting details, or vice versa.
3. Experimenting with Unique Stitch Patterns: To truly take your cross cable knitting to the next level, consider experimenting with unique stitch patterns. Instead of sticking to traditional cable designs, try incorporating other stitches such as lace, bobbles, or even colorwork. This will allow you to create one-of-a-kind pieces that truly showcase your creativity and knitting skills. Don’t be afraid to push the boundaries and try new things!
By combining multiple cables, working with different cable sizes, and experimenting with unique stitch patterns, you can elevate your cross cable knitting to a whole new level. These advanced techniques will not only challenge you as a knitter but also allow you to create truly unique and impressive pieces. So don’t be afraid to step outside your comfort zone and take your cross cable knitting skills to new heights!
Inspiring Cross Cable Knitting Patterns and Designs
In conclusion, cross cable knitting patterns are a versatile and visually striking technique that can elevate any knitting project. Whether you are a beginner or an experienced knitter, there is a cross cable pattern out there to suit your skill level and personal style. The intricate braided designs created by cross cables can add a touch of elegance and sophistication to garments, accessories, and home decor items.
With countless variations and combinations, you can create unique and personalized cross cable designs. Explore different stitch patterns, experiment with different yarns and colors, and let your creativity shine. Cross cable knitting is a wonderful way to challenge yourself, expand your knitting repertoire, and create beautiful, one-of-a-kind pieces that you can cherish or gift to loved ones.
If you’re looking for some inspiration, try out some of the patterns featured in this article. From classic Aran sweaters to cozy cable hats and scarves, there is a pattern for everyone. Whether you prefer simple, symmetrical cables or more complex, intertwining designs, cross cable knitting allows you to create stunning textures and elevate your knitting projects to new heights.