
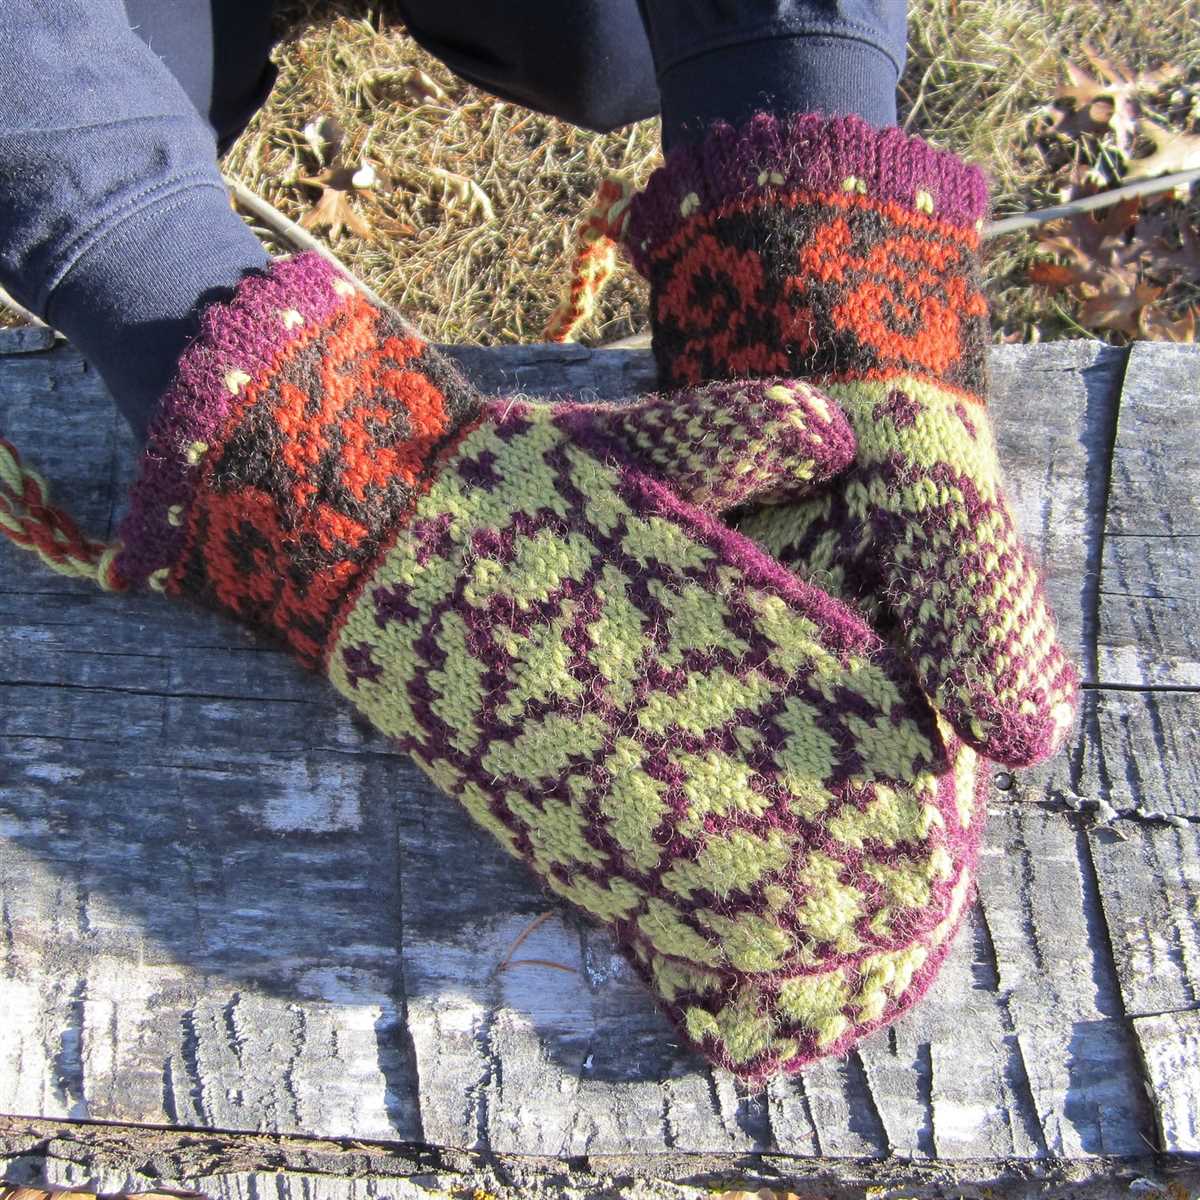
As winter approaches, it’s time to start thinking about staying warm and stylish at the same time. And what better way to do that than with a pair of fair isle wrist warmers? These beautiful and functional accessories are perfect for those chilly mornings when your hands need a little extra warmth, but you don’t want to sacrifice style. Plus, knitting your own fair isle wrist warmers allows you to customize the color and pattern to suit your personal style.
Fair isle knitting is a popular technique that involves using multiple colors in a pattern. The result is a beautiful design that looks more complicated than it actually is. With a little practice, you’ll be able to create intricate fair isle patterns that will wow your friends and family. Plus, knitting fair isle wrist warmers is a great way to use up smaller amounts of yarn leftover from other projects.
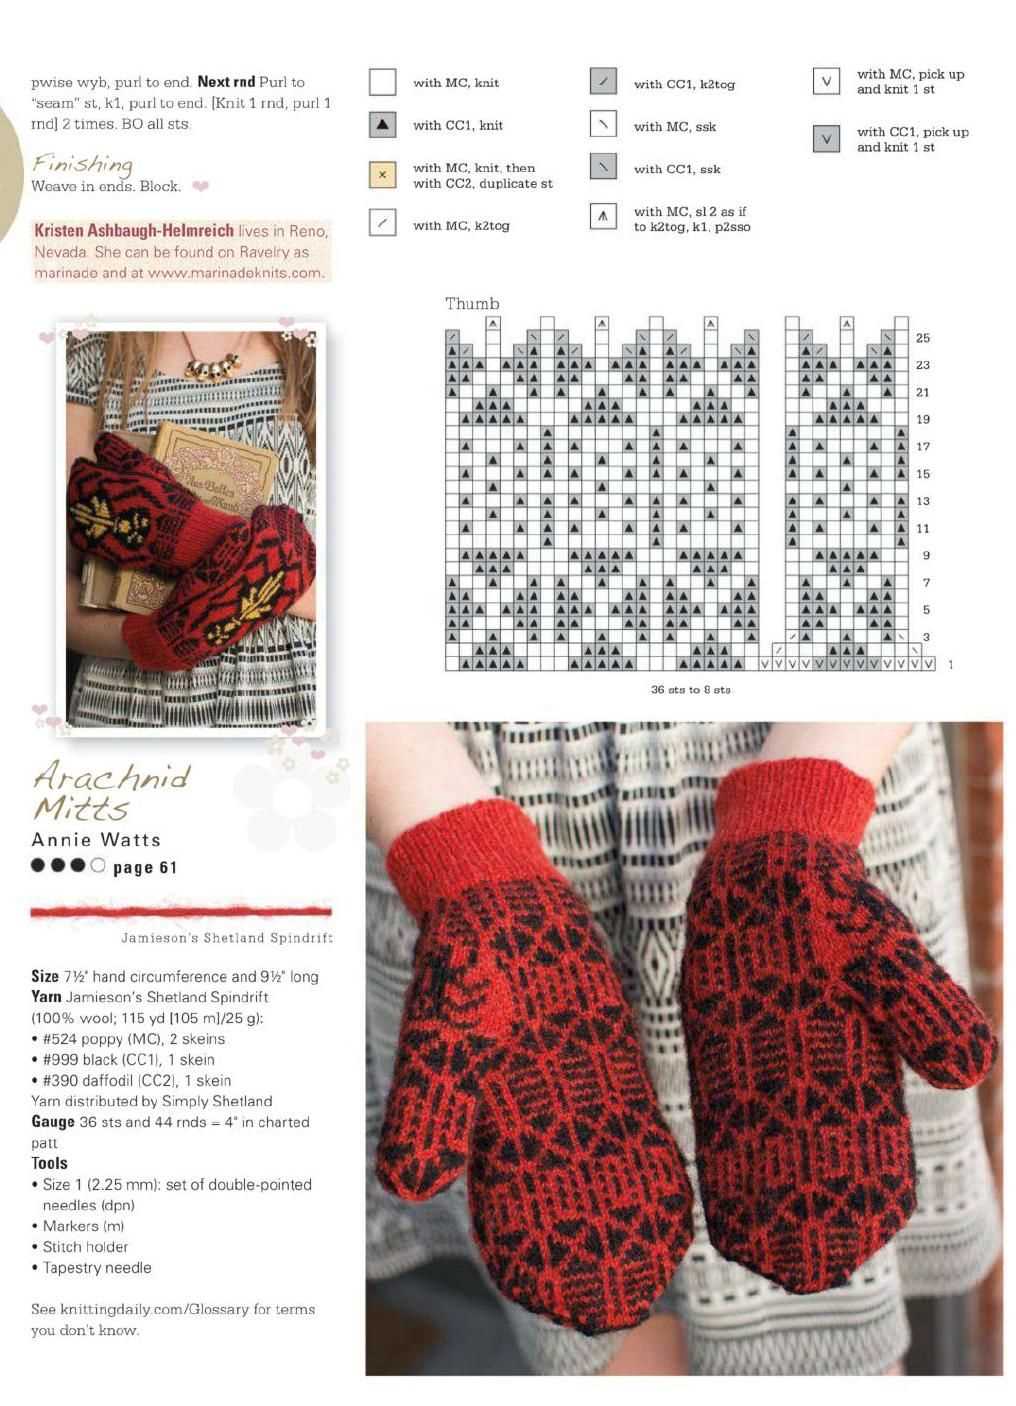
This knitting pattern is perfect for knitters of all skill levels. Whether you’re a beginner looking to try fair isle knitting for the first time, or an experienced knitter looking for a quick and satisfying project, these wrist warmers are sure to fit the bill. The pattern includes detailed instructions and a chart for the fair isle pattern, so you’ll be able to follow along easily. And with a few basic knitting skills, you’ll have a pair of stylish and cozy fair isle wrist warmers in no time.
Fair Isle Wrist Warmers Knitting Pattern
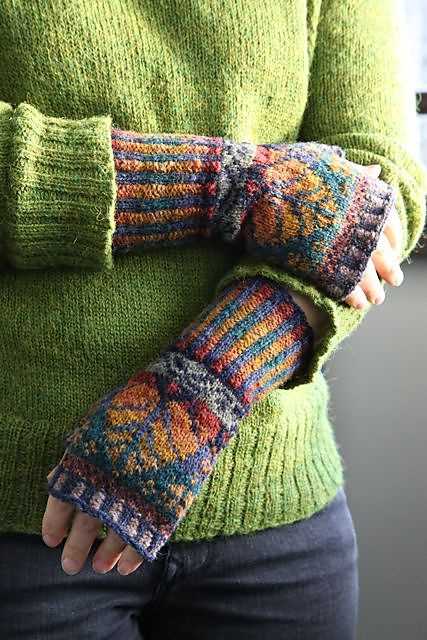
If you’re looking to add a touch of style and warmth to your outfits during the colder months, then Fair Isle wrist warmers are the perfect accessory. These cozy and fashionable wrist warmers are not only practical but also fun to knit. With their intricate Fair Isle pattern, they add a pop of color and texture to any outfit.
To create your own Fair Isle wrist warmers, you’ll need a few supplies. Start with a set of double-pointed knitting needles in the appropriate size for your yarn. You’ll also need two contrasting colors of yarn, one for the background and one for the pattern. The pattern can be as intricate or simple as you like, with traditional Fair Isle designs or a modern twist.
Begin by casting on the desired number of stitches, usually around 40-50 stitches, depending on the size of your wrists. Then, work in the chosen Fair Isle pattern, alternating between the background and pattern colors. Remember to carry the yarn not in use along the back of your work to keep the inside neat and tidy.
Continue knitting in the pattern until the wrist warmers reach your desired length. This could be just past your wrists or longer to cover part of your forearm. Once you reach the desired length, bind off your stitches and weave in any loose ends.
With your Fair Isle wrist warmers complete, you’ll have a stylish and cozy accessory to keep your hands warm during the chilly months. These wrist warmers can be paired with your favorite winter coat or worn on their own for a trendy touch. Whether you’re an experienced knitter or just starting out, these Fair Isle wrist warmers are a fun and rewarding project to try!
Overview
In this knitting pattern, you will learn how to create beautiful Fair Isle wrist warmers. Fair Isle knitting is a traditional technique that involves using multiple colors of yarn to create intricate patterns. These wrist warmers feature a classic Fair Isle design that is both stylish and functional.
To create these wrist warmers, you will need basic knitting skills, including casting on, knitting, purling, and decreasing. The pattern provides clear instructions and step-by-step illustrations to guide you through each step of the process. By following the pattern, you will be able to create a pair of cozy and stylish wrist warmers in no time.
The pattern includes a materials list, which outlines the specific yarns and knitting needles you will need for the project. It also includes a gauge swatch section, where you can check your tension before starting the pattern. This is important for ensuring that your wrist warmers fit properly.
Once you have completed the wrist warmers, you can use them to keep your hands warm and cozy during the colder months. They are also a great project for gift-giving, as they can be customized with different colors to suit the recipient’s style. Whether you are new to Fair Isle knitting or an experienced knitter looking for a new project, these wrist warmers are a fun and rewarding pattern to try.
Features:
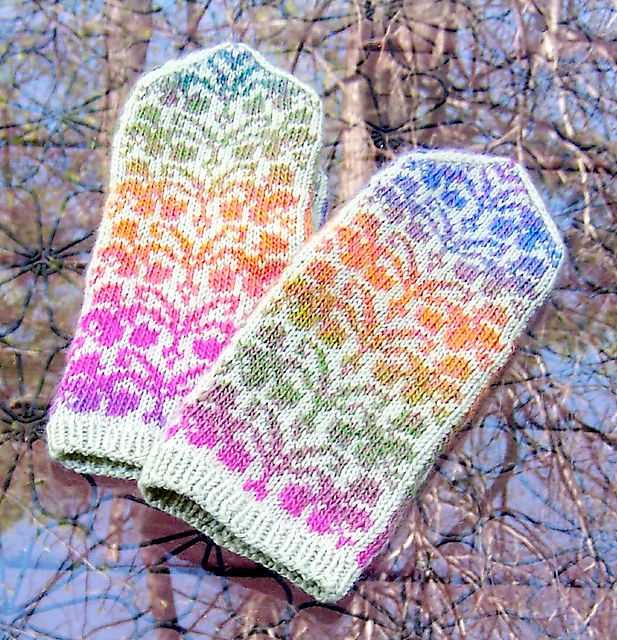
- Classic Fair Isle design
- Step-by-step instructions and illustrations
- Materials list and gauge swatch section
- Cozy and stylish
- Great for gift-giving
Materials Needed
In order to knit the fair isle wrist warmers, you will need the following materials:
- Yarn: You will need two different colors of yarn, one for the main color and one for the contrasting color. Make sure the yarn you choose is suitable for knitting.
- Needles: You will need a set of double-pointed needles in the appropriate size for your yarn. Check the yarn label to determine the recommended needle size.
- Tapestry needle: This needle will be used for weaving in the loose ends of yarn.
- Stitch markers: These markers will be helpful for keeping track of your stitches and rows.
- Scissors: You will need a pair of scissors to cut the yarn when necessary.
Make sure you have all of these materials before starting the project. Having everything ready will help ensure a smooth knitting process and allow you to complete the fair isle wrist warmers in a timely manner.
Choosing Yarn
When it comes to knitting Fair Isle wrist warmers, choosing the right yarn is essential. The yarn you select will not only determine the look and feel of the final product, but also impact its durability and warmth.
Fiber content: Consider the desired qualities and properties of your wrist warmers. If you want a soft and cozy finish, opt for yarns containing natural fibers like merino wool or alpaca. These fibers have excellent insulating properties and will keep your hands warm during colder months. For a more durable and hardwearing option, you can choose yarns that blend natural fibers with synthetic materials like acrylic or nylon.
Weight: The weight of the yarn will affect the overall appearance and texture of the wrist warmers. Fine weight yarns (also known as fingering or sock weight) create delicate and lightweight garments, while bulkier yarns (such as worsted or chunky weight) produce thick and cozy wrist warmers. Consider the desired aesthetic and level of warmth when selecting the yarn weight for your project.
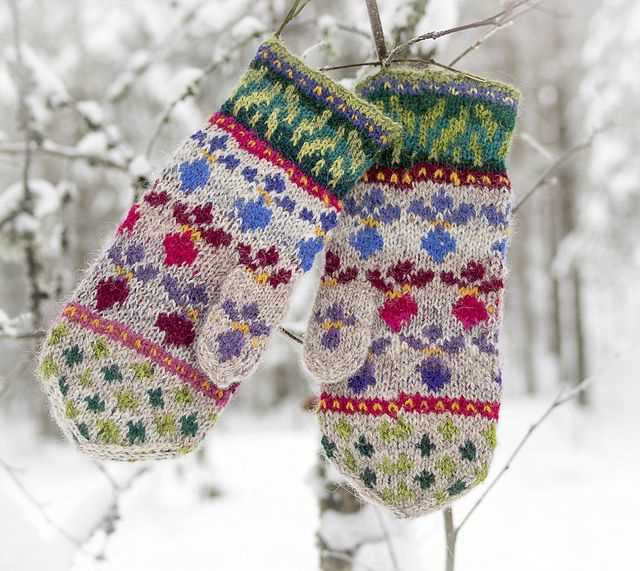
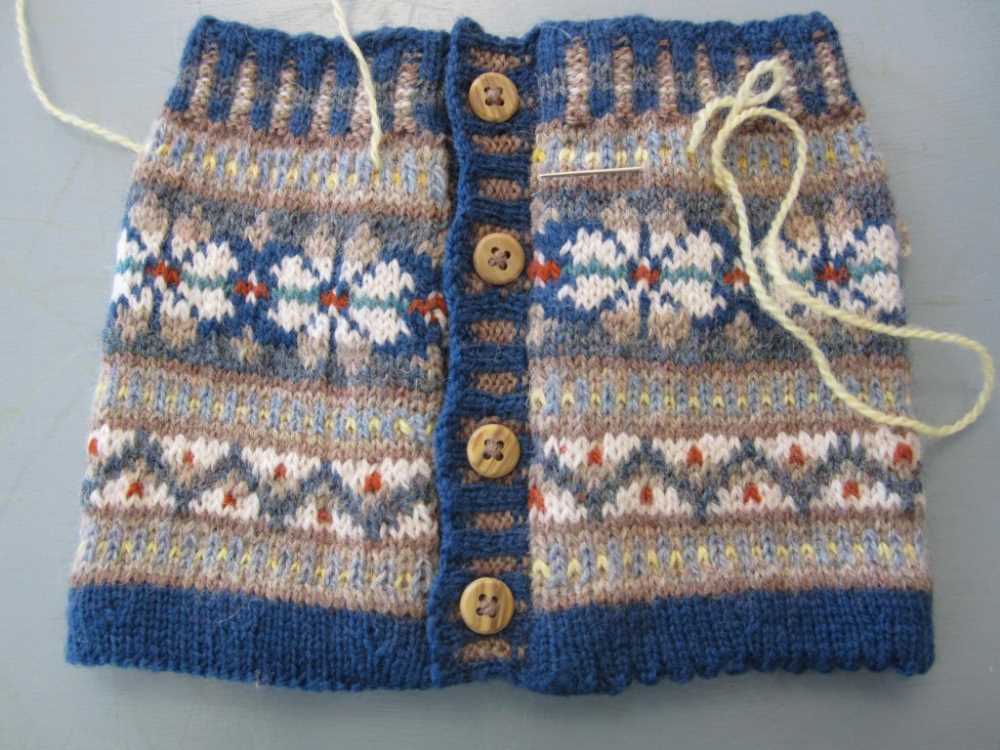
Color: Fair Isle knitting is known for its intricate colorwork patterns. When selecting yarn for your wrist warmers, choose colors that complement each other and create a harmonious design. It’s often helpful to choose one main color and several contrasting colors to add depth and visual interest to your project. Be sure to also consider your own personal style and the colors that you enjoy wearing.
Quantity: Before purchasing yarn, calculate the required yardage or meterage needed for your project. This will depend on the pattern you are using as well as the size of your wrist warmers. Naively purchasing too little yarn can result in a frustrating shortage, while too much yarn can leave you with unnecessary leftovers. Check the pattern and consult the yarn label for guidance on how much yarn to purchase.
Overall, picking the right yarn for your Fair Isle wrist warmers is a crucial step in ensuring a successful and enjoyable knitting project. Take the time to consider the fiber content, weight, color, and quantity of yarn before making your final selection, and you’ll be on your way to creating beautiful and cozy wrist warmers.
Gauge and Tension
When knitting wrist warmers, it’s important to pay attention to gauge and tension. Gauge refers to the number of stitches and rows per inch that you achieve with a given yarn and needle size. Tension refers to how tightly or loosely you knit.
Before starting your project, it’s crucial to make a gauge swatch. This involves knitting a small square using the same yarn and needles you plan to use for your wrist warmers. Measure the number of stitches and rows in your swatch and compare it to the recommended gauge in the pattern. Adjust your needle size if necessary to achieve the correct gauge.
To ensure accurate gauge and tension, it’s also important to consider your knitting style. Some knitters naturally have a looser or tighter tension, which can affect the final size and fit of your wrist warmers. If you find that your tension is consistently off, you can try adjusting your knitting style or using different needles to achieve the desired gauge.
Understanding the Importance of Gauge and Tension
- Gauge determines the overall size of your wrist warmers. If your gauge is too tight, your wrist warmers will be smaller than intended; if your gauge is too loose, they will be larger.
- Tension affects the drape and stretchiness of your knitting. If you knit too tightly, your wrist warmers may be stiff and less comfortable to wear. If you knit too loosely, they may be too loose and not provide enough warmth.
- Following the pattern’s recommended gauge is important for achieving the intended fit and look of your wrist warmers. Adjusting your gauge may alter the finished measurements and proportions.
In conclusion, gauge and tension are crucial factors to consider when knitting wrist warmers. By making a gauge swatch, paying attention to your knitting style, and adjusting your needle size if necessary, you can ensure that your wrist warmers turn out the right size and have the desired drape and comfort.
Cast On and Ribbing
When starting your Fair Isle wrist warmers, the first step is to cast on your stitches. For this pattern, you will need to cast on 40 stitches using the long tail cast on method. Make sure to leave a long tail so that you have enough yarn to work with.
Once you have cast on your stitches, you will begin the ribbing section of the wrist warmers. The ribbing pattern used in this pattern is a simple knit 2, purl 2 ribbing. This creates a stretchy and snug cuff for the wrist warmers. To start the ribbing, knit the first two stitches, then purl the next two stitches. Repeat this pattern until you have reached the end of the row.
Needle Size: For the ribbing section, you will use a set of US size 1 (2.25mm) double-pointed needles to create a tight and defined ribbing pattern. This smaller needle size helps to keep the cuff in place and prevents it from stretching out.
Yarn Choice: When choosing your yarn for the Fair Isle wrist warmers, it’s important to select a yarn that is suitable for both warmth and durability. A wool or wool blend yarn is recommended as it provides excellent insulation and has good elasticity. Additionally, consider choosing yarns in contrasting colors to create the traditional Fair Isle colorwork pattern.
Remember to carefully follow the pattern instructions for the cast on and ribbing sections to ensure that your wrist warmers turn out just right. This initial step sets the foundation for the rest of the project, so take your time and enjoy the process of creating your own cozy and stylish Fair Isle wrist warmers.
Creating the Fair Isle Pattern
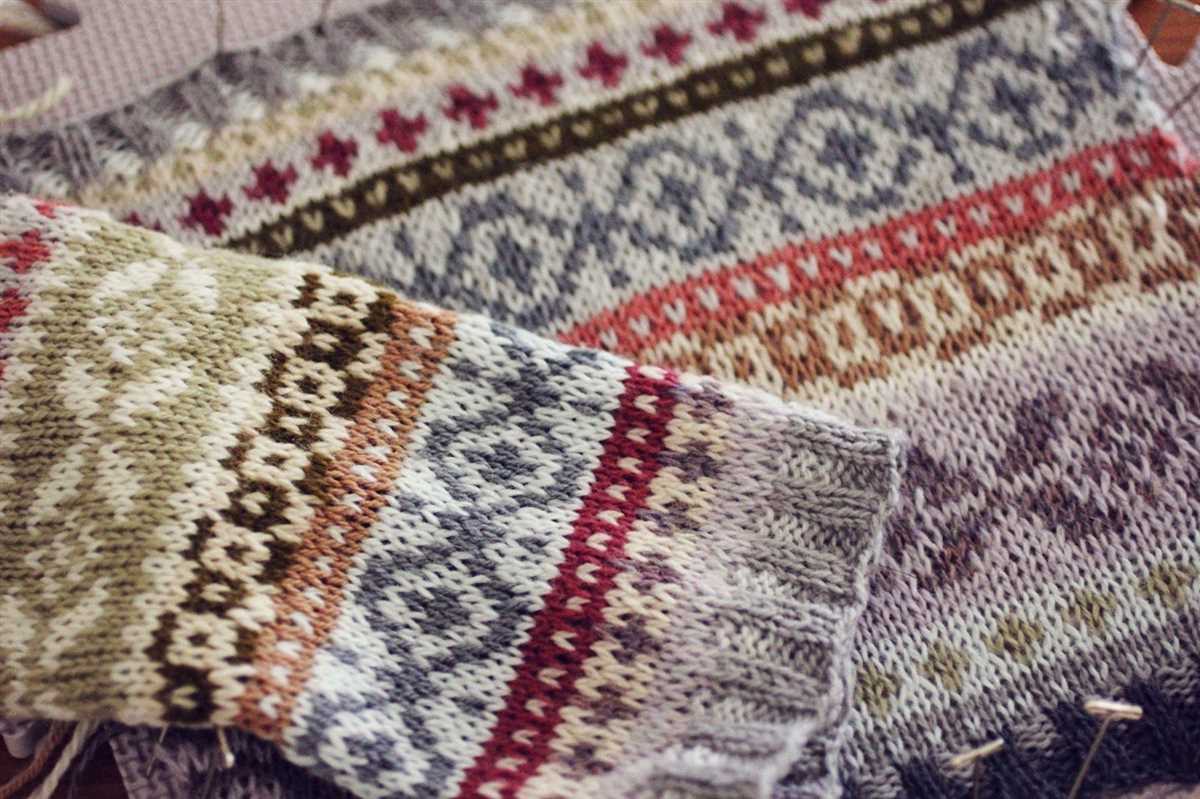
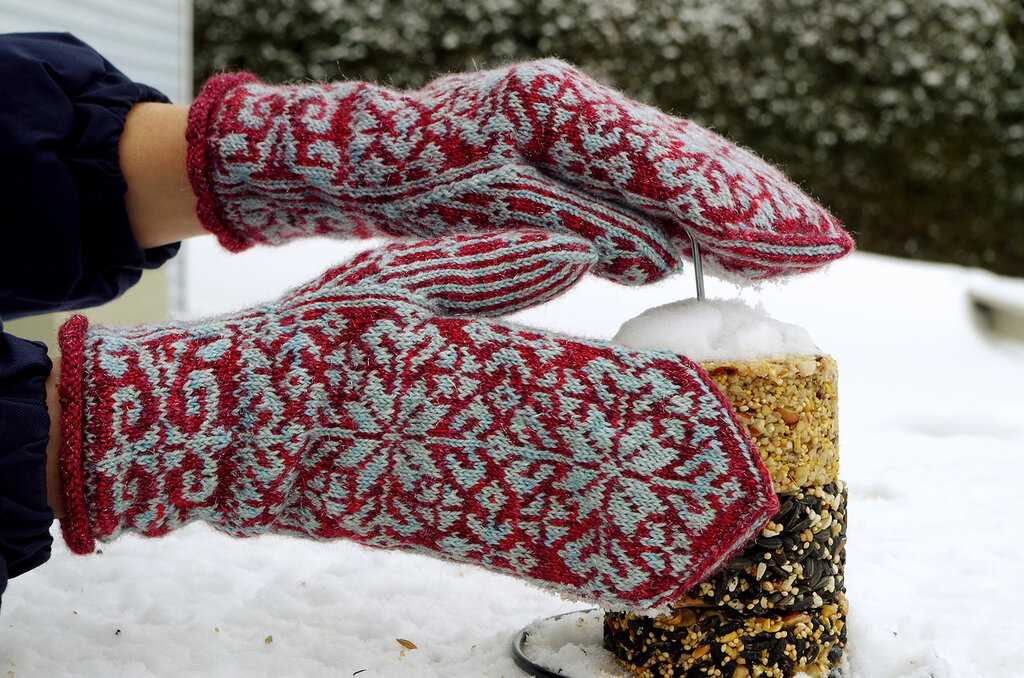
Creating the Fair Isle pattern involves a technique of stranded knitting where two or more colors of yarn are carried along the back of the work. This traditional knitting style originated in the Shetland Islands of Scotland and is known for its intricate and colorful designs.
To start, choose your desired colors of yarn for the pattern. Typically, Fair Isle patterns use a combination of a main color and several contrasting colors to create the distinctive look. You can choose to follow a specific pattern or create your own design by selecting different color combinations.
When working the Fair Isle pattern, it’s important to maintain an even tension and not allow the strands of yarn to pull too tightly or become too loose. This ensures that the pattern is clear and defined. To help with tension, it can be helpful to use a different color in each hand when carrying the yarn, keeping one color in each hand for the entire pattern.
One technique often used in Fair Isle knitting is the “catch and twist” method. This involves catching the unused color yarn in the back of the work every few stitches, which helps prevent long floats and keeps the back of the work neat. This technique also helps with tension management and creates a more professional finish.
As you work through the pattern, be mindful of carrying the yarn along the back of the work. Avoid carrying the yarn for too many stitches without using it, as this can result in long floats that may snag or become visible on the finished piece. Instead, try to weave the unused color yarn every few stitches to keep the back of the work tidy.
Once you have completed the Fair Isle pattern, you can continue knitting the wrist warmers using a single color or a simpler stitch pattern. This allows the Fair Isle design to be the focal point of the project. Finish off the wrist warmers by binding off and sewing up the sides, and you will have a beautiful and cozy accessory to keep your hands warm in style.
Shaping the Thumb
In the Fair Isle wrist warmers knitting pattern, shaping the thumb is an important step to ensure a comfortable and well-fitted end result.
1. Placement:
Start by placing a stitch marker at the center of where you want the thumb to be located. This will serve as a reference point for shaping the thumb.
2. Deciding the Thumb Opening:
Decide on the desired size of the thumb opening. This will depend on the size of the wrist warmers and the wearer’s hand. Measure the circumference of the thumb at its widest point and add a few extra stitches to allow for ease of movement.
3. Shaping the Thumb:
To shape the thumb, begin by knitting a few stitches before the stitch marker. Then, on the next row, decrease the number of stitches between the marker and the beginning of the row. This can be done by simply knitting two stitches together or using another decrease method of your choice.
4. Creating a Thumb Gusset:
To create a thumb gusset for added comfort and flexibility, continue decreasing along the edge of the thumb opening on every other row. The number of decreases will depend on the size of the wrist warmers and the desired thumb size. Be sure to maintain a consistent and even decrease pattern for a neat finish.
5. Thumb Length:
Decide on the desired length of the thumb. This can vary depending on personal preference and the style of the wrist warmers. Once the desired length is reached, simply continue knitting in the established pattern for the rest of the wrist warmer.
By following these steps, you can successfully shape the thumb of your Fair Isle wrist warmers, ensuring a comfortable and stylish fit for the wearer.
Knitting the Hand
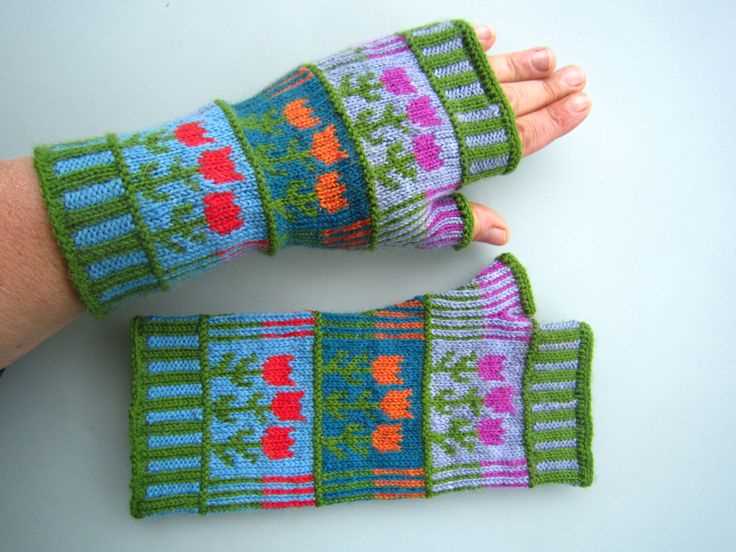
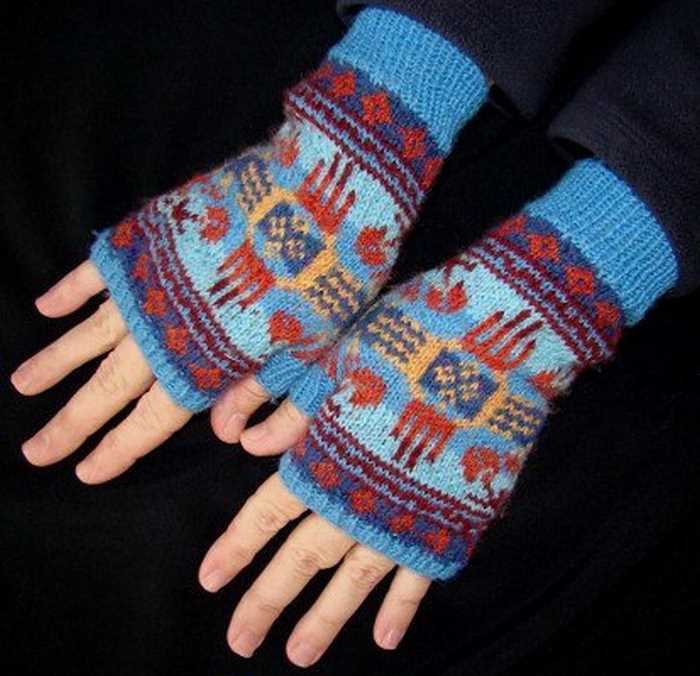
In the world of knitting, there are so many different projects to choose from. From cozy scarves to intricate blankets, there is something for everyone. One unique and practical item to knit is a pair of hand warmers. These wrist warmers are perfect for keeping your hands warm while still allowing your fingers to be free. They are great for outdoor activities like hiking or running, or simply for keeping warm in a chilly office. Knitting these hand warmers can be a fun and rewarding project, and with a fair isle pattern, they can be even more stylish.
When knitting the hand warmers, the first step is to choose your yarn and needles. For this project, a soft and warm yarn like merino wool is a great choice. You will also need a set of double-pointed needles in the appropriate size for the yarn you have chosen. Once you have your supplies, you are ready to cast on and begin knitting. The hand warmers are knit in the round, so you will need to be comfortable with using double-pointed needles. If you are new to knitting in the round, there are many tutorials available online that can help you get started.
Choosing a Fair Isle Pattern
One of the most fun aspects of knitting hand warmers is choosing a fair isle pattern. Fair isle is a style of knitting that involves two or more colors in a single row of stitches. This creates a beautiful and intricate design that is perfect for hand warmers. There are many different fair isle patterns to choose from, ranging from simple geometric designs to more complex motifs like flowers or animals. When selecting a pattern, consider the colors you want to use and how they will look together. It can also be helpful to choose a pattern that is on the shorter side, as hand warmers have limited space for a design. Once you have chosen your pattern, you are ready to begin knitting.
Knitting the fair isle pattern requires some extra attention to detail. As you work each row, you will need to carry the unused color of yarn along the back of your work. This is called stranding, and it ensures that the design stays intact. It is important to not pull the yarn too tightly, as this can cause the hand warmers to become too tight and uncomfortable. You will also need to pay attention to your tension, as fair isle knitting can be a bit trickier than regular knitting. Making a gauge swatch before starting the hand warmers can help you get a feel for the correct tension. Once you have mastered these techniques, you will be able to create a beautiful pair of fair isle hand warmers that will keep your hands warm and stylish all winter long.
Finishing the Wrist Warmers

Once you have completed the knitting portion of the wrist warmers, it’s time to finish them off. This involves a few steps to ensure that your wrist warmers are both functional and visually appealing.
Weaving in the Ends: Start by weaving in any loose yarn ends left from changing colors or joining new yarn. Use a tapestry needle to guide the ends through the stitches on the wrong side of the wrist warmers. Weave in the ends for a few inches, making sure they are secure and won’t come undone with wear.
Blocking: Blocking is an important step to give your wrist warmers a polished look. Wet blocking is the most common method for wool and wool-blend yarns. Simply fill a basin with lukewarm water and a small amount of gentle wool wash. Submerge the wrist warmers and gently squeeze out any excess water. Lay them flat on a clean towel and shape them to the desired size and length. Allow them to dry completely before moving on to the next step.
Seaming: If your wrist warmers were knit in the round, you’ll need to seam them closed. With the right sides facing each other, use a tapestry needle and the same yarn used for the wrist warmers to whipstitch the two edges together. Take care to align the stitches and create an invisible seam. If you prefer, you can use a mattress stitch for a neater finish. Repeat this process for the second wrist warmer.
Adding Embellishments (optional): To personalize your wrist warmers, consider adding some embellishments. This could be embroidery, buttons, or even a crochet edging. Get creative and make your wrist warmers unique to you.
By following these steps, you’ll be able to finish your Fair Isle wrist warmers and enjoy the cozy warmth they provide during the cold winter months. Don’t forget to admire your beautiful handiwork!
Additional Tips and Variations
Here are some additional tips and variations to consider when knitting fair isle wrist warmers:
- Experiment with Color: Don’t be afraid to play around with different color combinations. Fair isle knitting allows for endless possibilities, so try out various color options to create unique and personalized wrist warmers.
- Add Embellishments: Once you’ve finished knitting the wrist warmers, you can further personalize them by adding embellishments. Consider adding small buttons, beads, or embroidery to enhance the visual appeal of your wrist warmers.
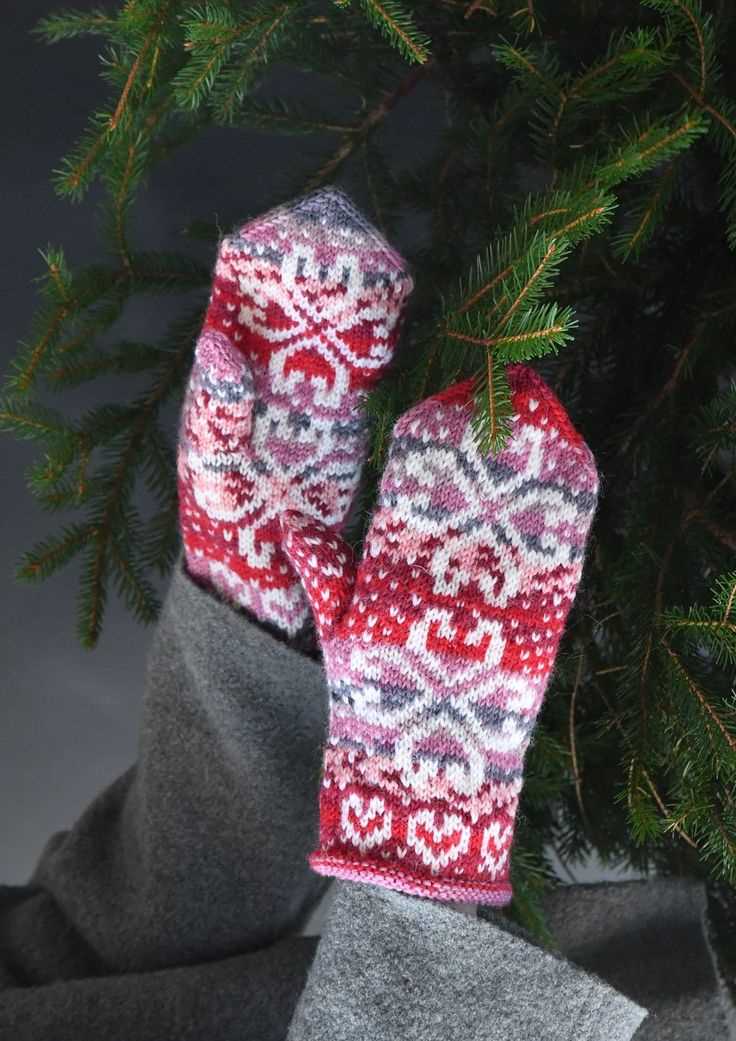
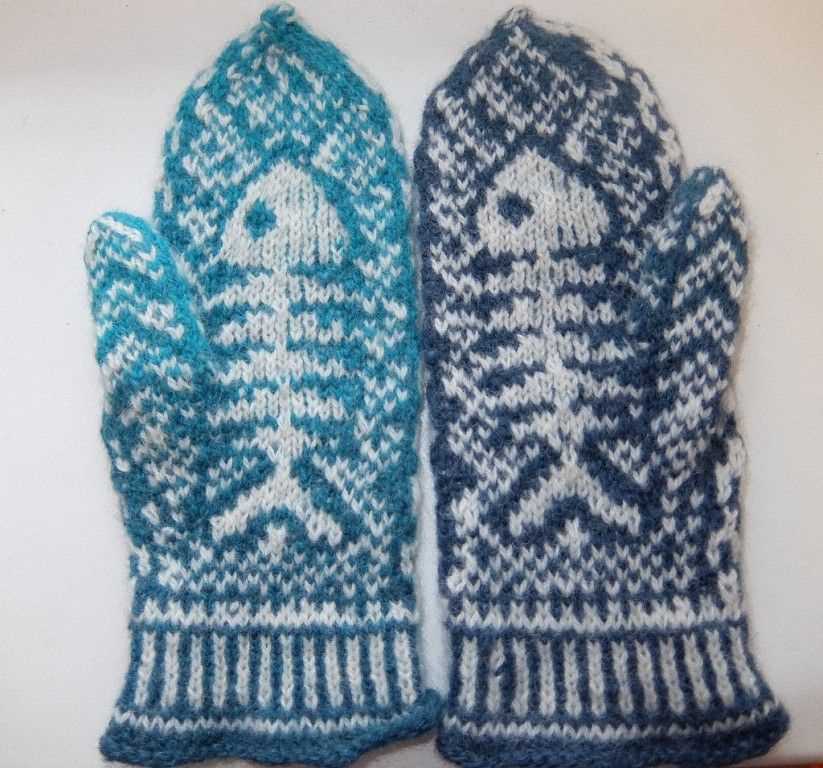
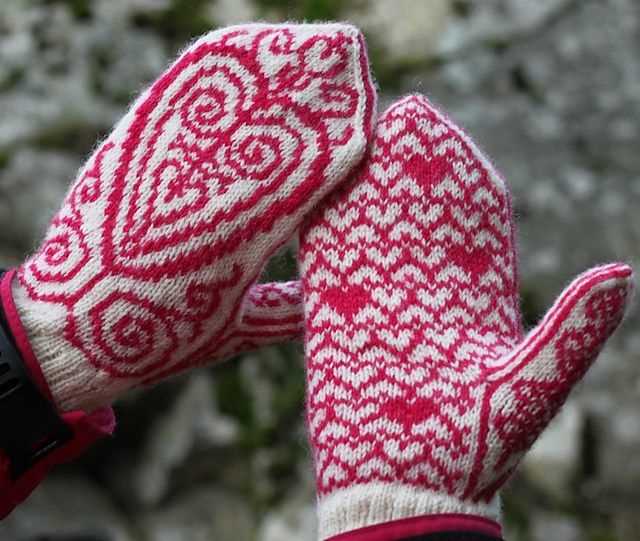
- Try Different Stitch Patterns: Fair isle knitting is not limited to the traditional diamond motifs. Explore other fair isle stitch patterns, such as hearts, snowflakes, or stripes, to create different looks and textures for your wrist warmers.
- Modify the Length: If you prefer wrist warmers that are longer or shorter than the traditional length, feel free to modify the pattern accordingly. Simply adjust the number of rows in the ribbing section and the fair isle section to achieve your desired length.
- Use Thicker Yarn: If you want to create warmer wrist warmers, consider using a thicker yarn. Simply adjust the needle size and number of stitches to accommodate the thicker yarn, ensuring that the finished wrist warmers are still the desired size.
- Swap Yarn Colors: Feel free to swap the main color and contrasting color in the fair isle pattern to create a different visual effect. This simple switch can completely transform the look of the wrist warmers.
By experimenting with different colors, stitch patterns, lengths, and yarn weights, you can create a variety of fair isle wrist warmers to suit your style and preferences. Have fun exploring the endless possibilities of fair isle knitting!